
Pastelblau 520/6


-
BertjeConti

- E21 Mad
- Posts: 3019
- Joined: Mon Nov 04, 2013 9:49 pm
- My E21(s): E12 520-6
- Location: nederland , Weert
Re: Pastelblau 520/6
So, its a long time since my last writeup here, which doesn't mean nothing happened. Most of the writeups are in the dutch part, but 'll catch up here coming months.
During spring we did some classic rally's which i'll report here later.
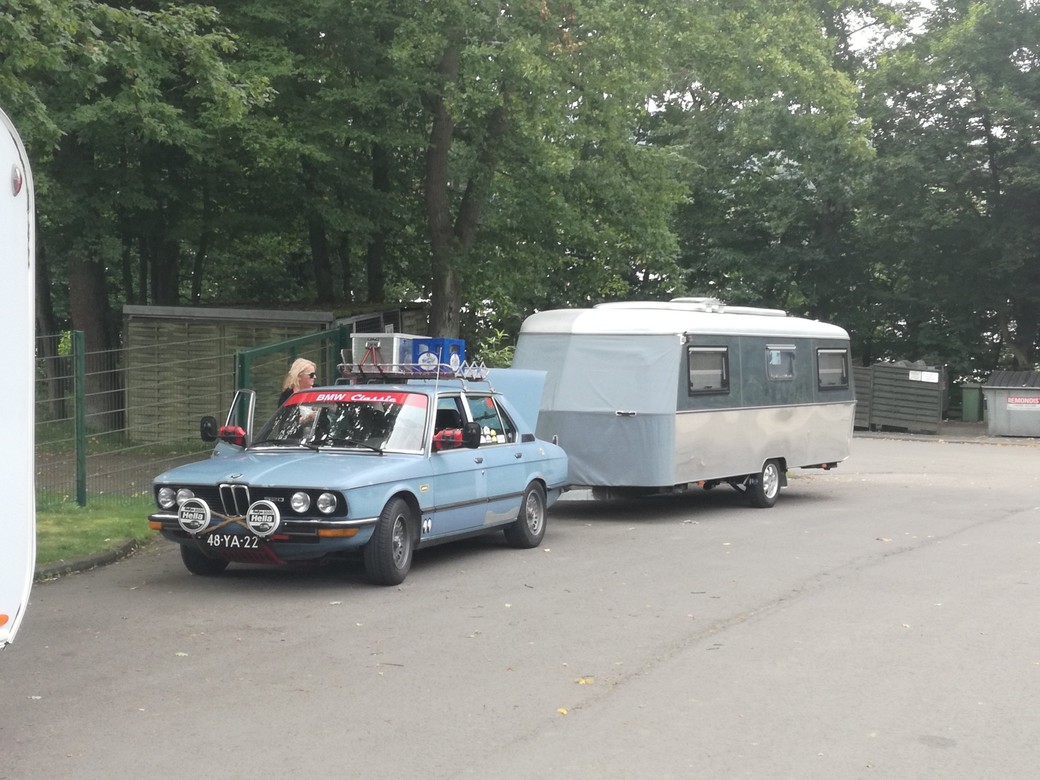
Last summer we did a few caravan meetings with our E12 and our very rare Eriba Titan, one international meeting in may in Holland and two Eriba meetings in Germany.
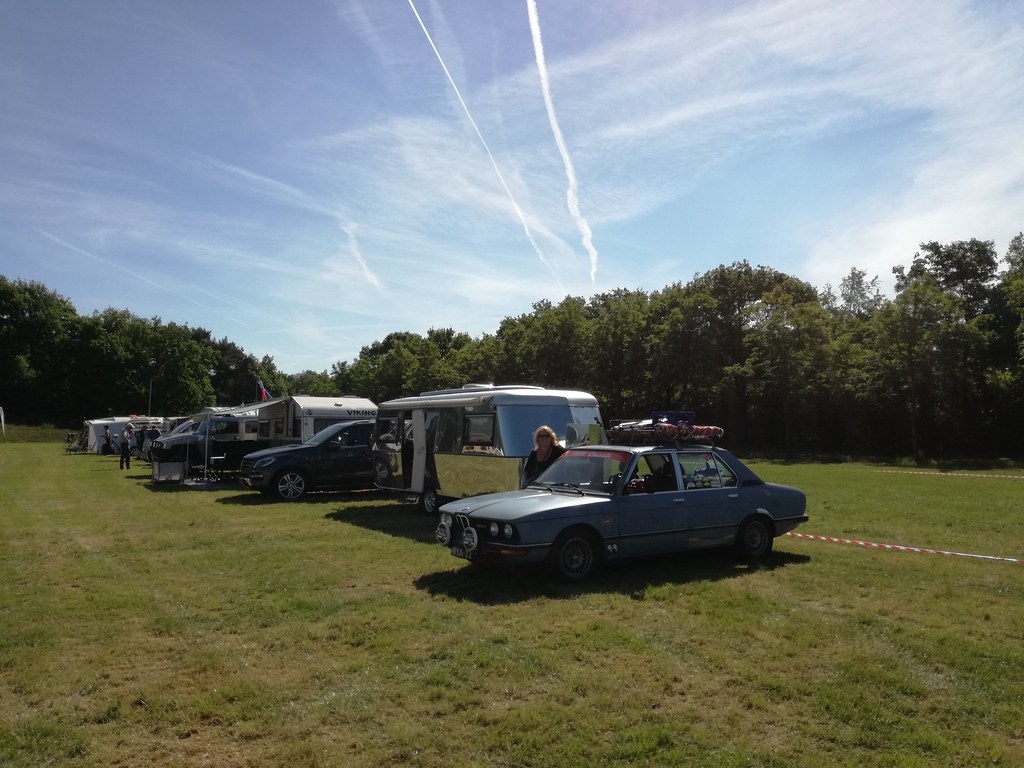
The international meeting was a 4 day festival in Wanroij (known by the famous International beetle event IKW).
For these caravan events the E12 gets a roofrack on her head and has to tow the 1200kg Titan:
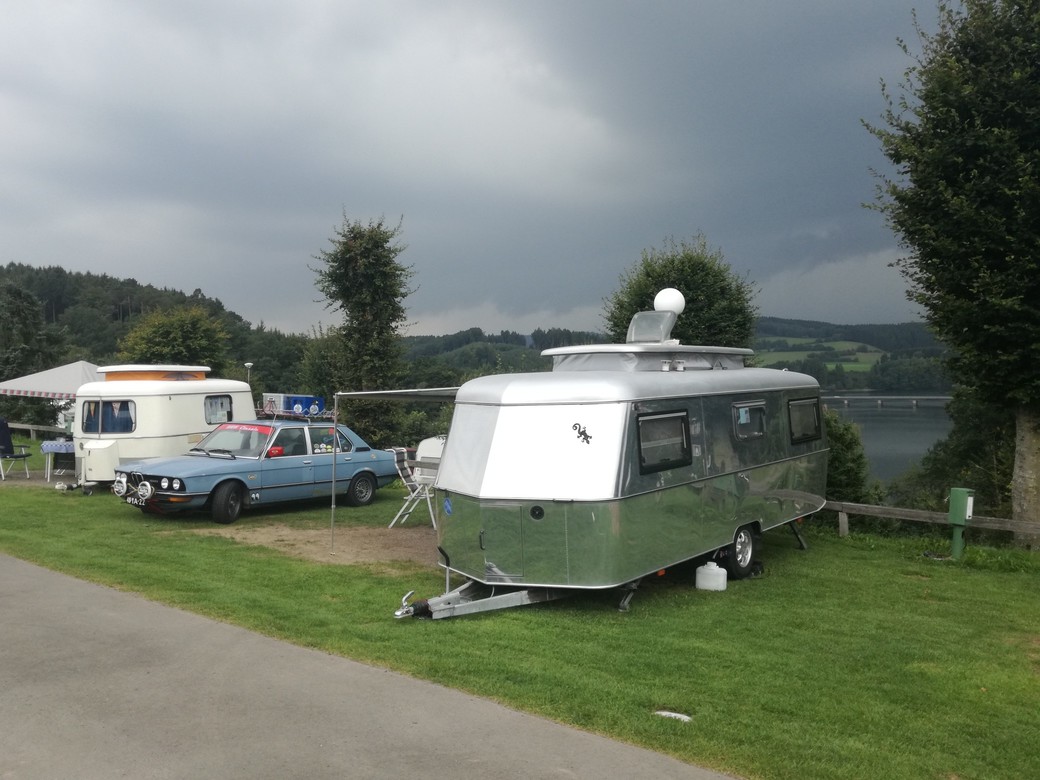
At the Bigge Listersee in Germany:
The ECCR festival:

click here for much more pictures
During spring we did some classic rally's which i'll report here later.
Last summer we did a few caravan meetings with our E12 and our very rare Eriba Titan, one international meeting in may in Holland and two Eriba meetings in Germany.
The international meeting was a 4 day festival in Wanroij (known by the famous International beetle event IKW).
For these caravan events the E12 gets a roofrack on her head and has to tow the 1200kg Titan:
At the Bigge Listersee in Germany:
The ECCR festival:
click here for much more pictures
Last edited by BertjeConti on Sun Nov 27, 2022 12:18 pm, edited 1 time in total.

Megasquirted '77 E12 520-6
Aspen Silver '96 E39 523i
-
BertjeConti
- E21 Mad
- Posts: 3019
- Joined: Mon Nov 04, 2013 9:49 pm
- My E21(s): E12 520-6
- Location: nederland , Weert
Re: Pastelblau 520/6
Some updates
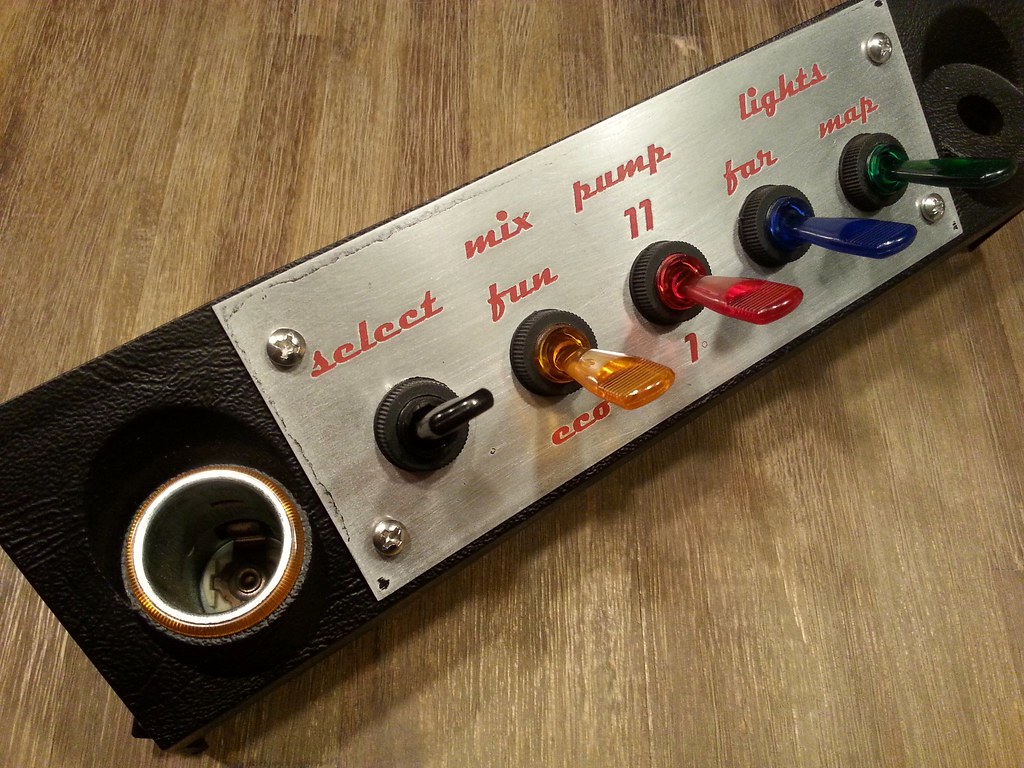
The middle switch in this switch panel still didn't have a working function, but that has changed now.
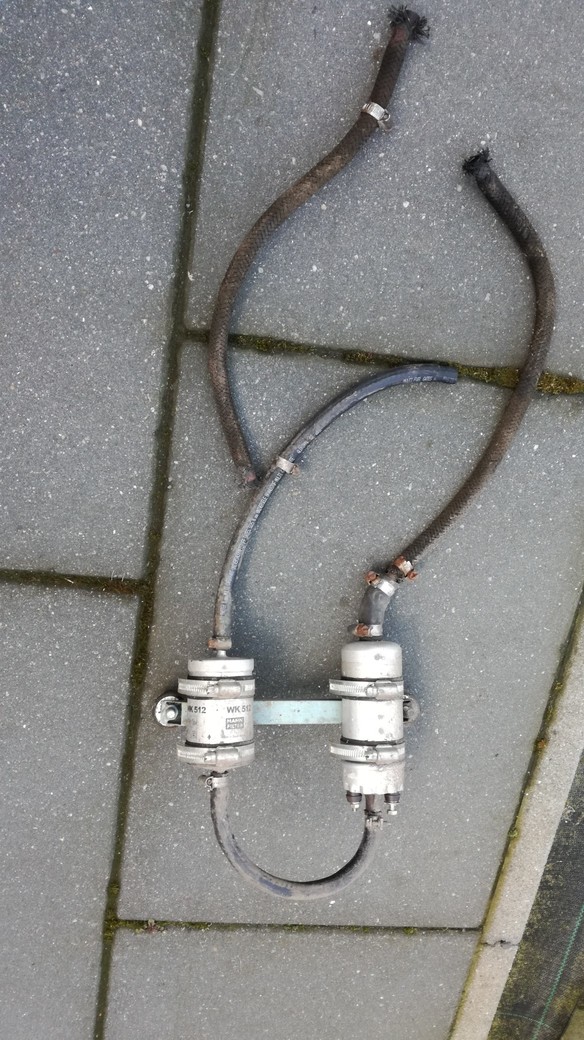
The original leaky fuel tank is gone and a "new" fueltank is installed in the boot of the car, also the fuelpump/filter assembly hanging under the car is gone and replaced by a dual in tank fuelpump setup and the fuelfilter is relocated to the engine compartiment.
Purpose of a dual fuelpump setup isn't more fuel delevery, but always having a spare pump ready when the other pump fails.
What seemed a fairly simple and small job turned out as a big job after all.
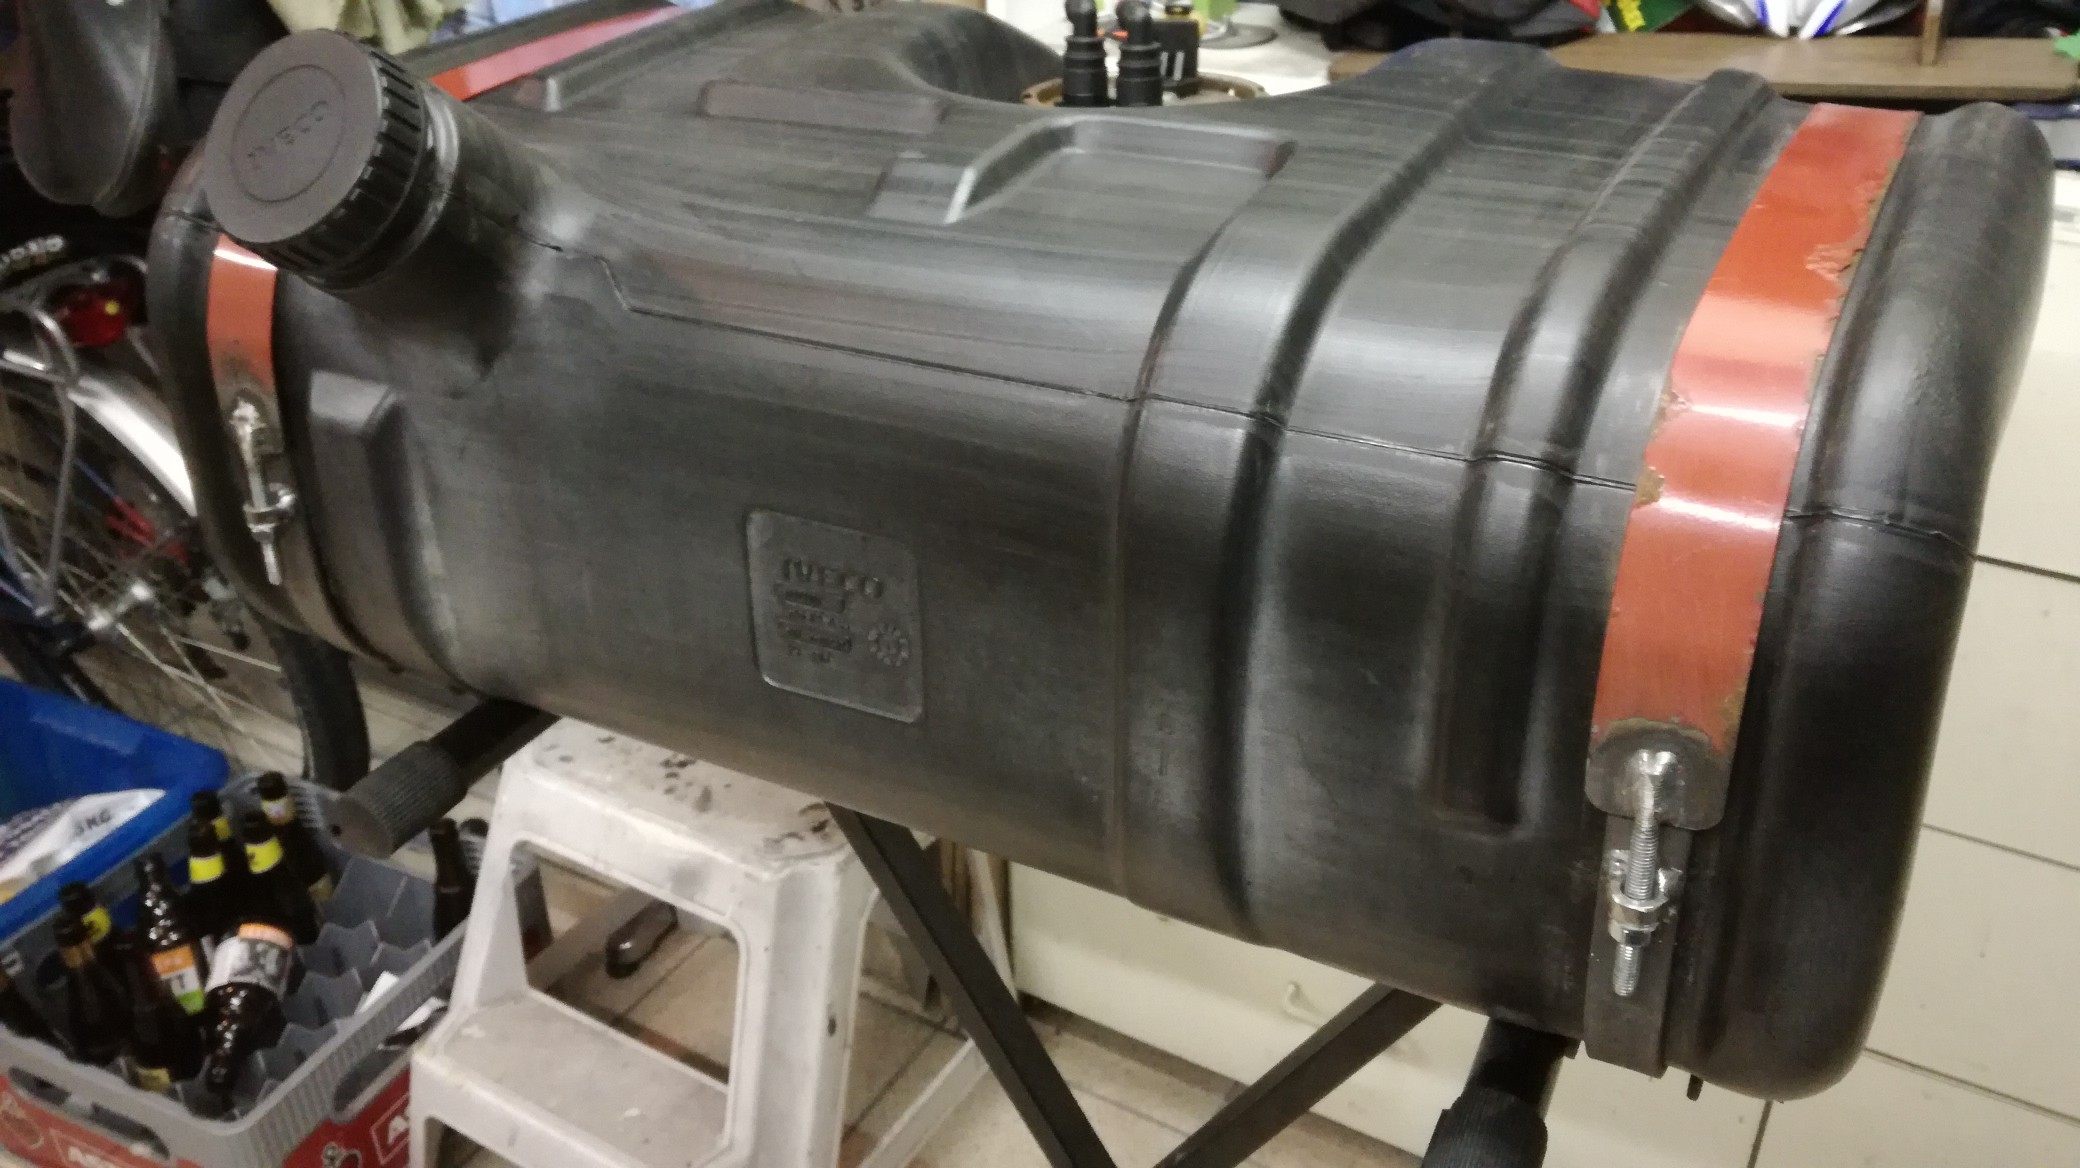
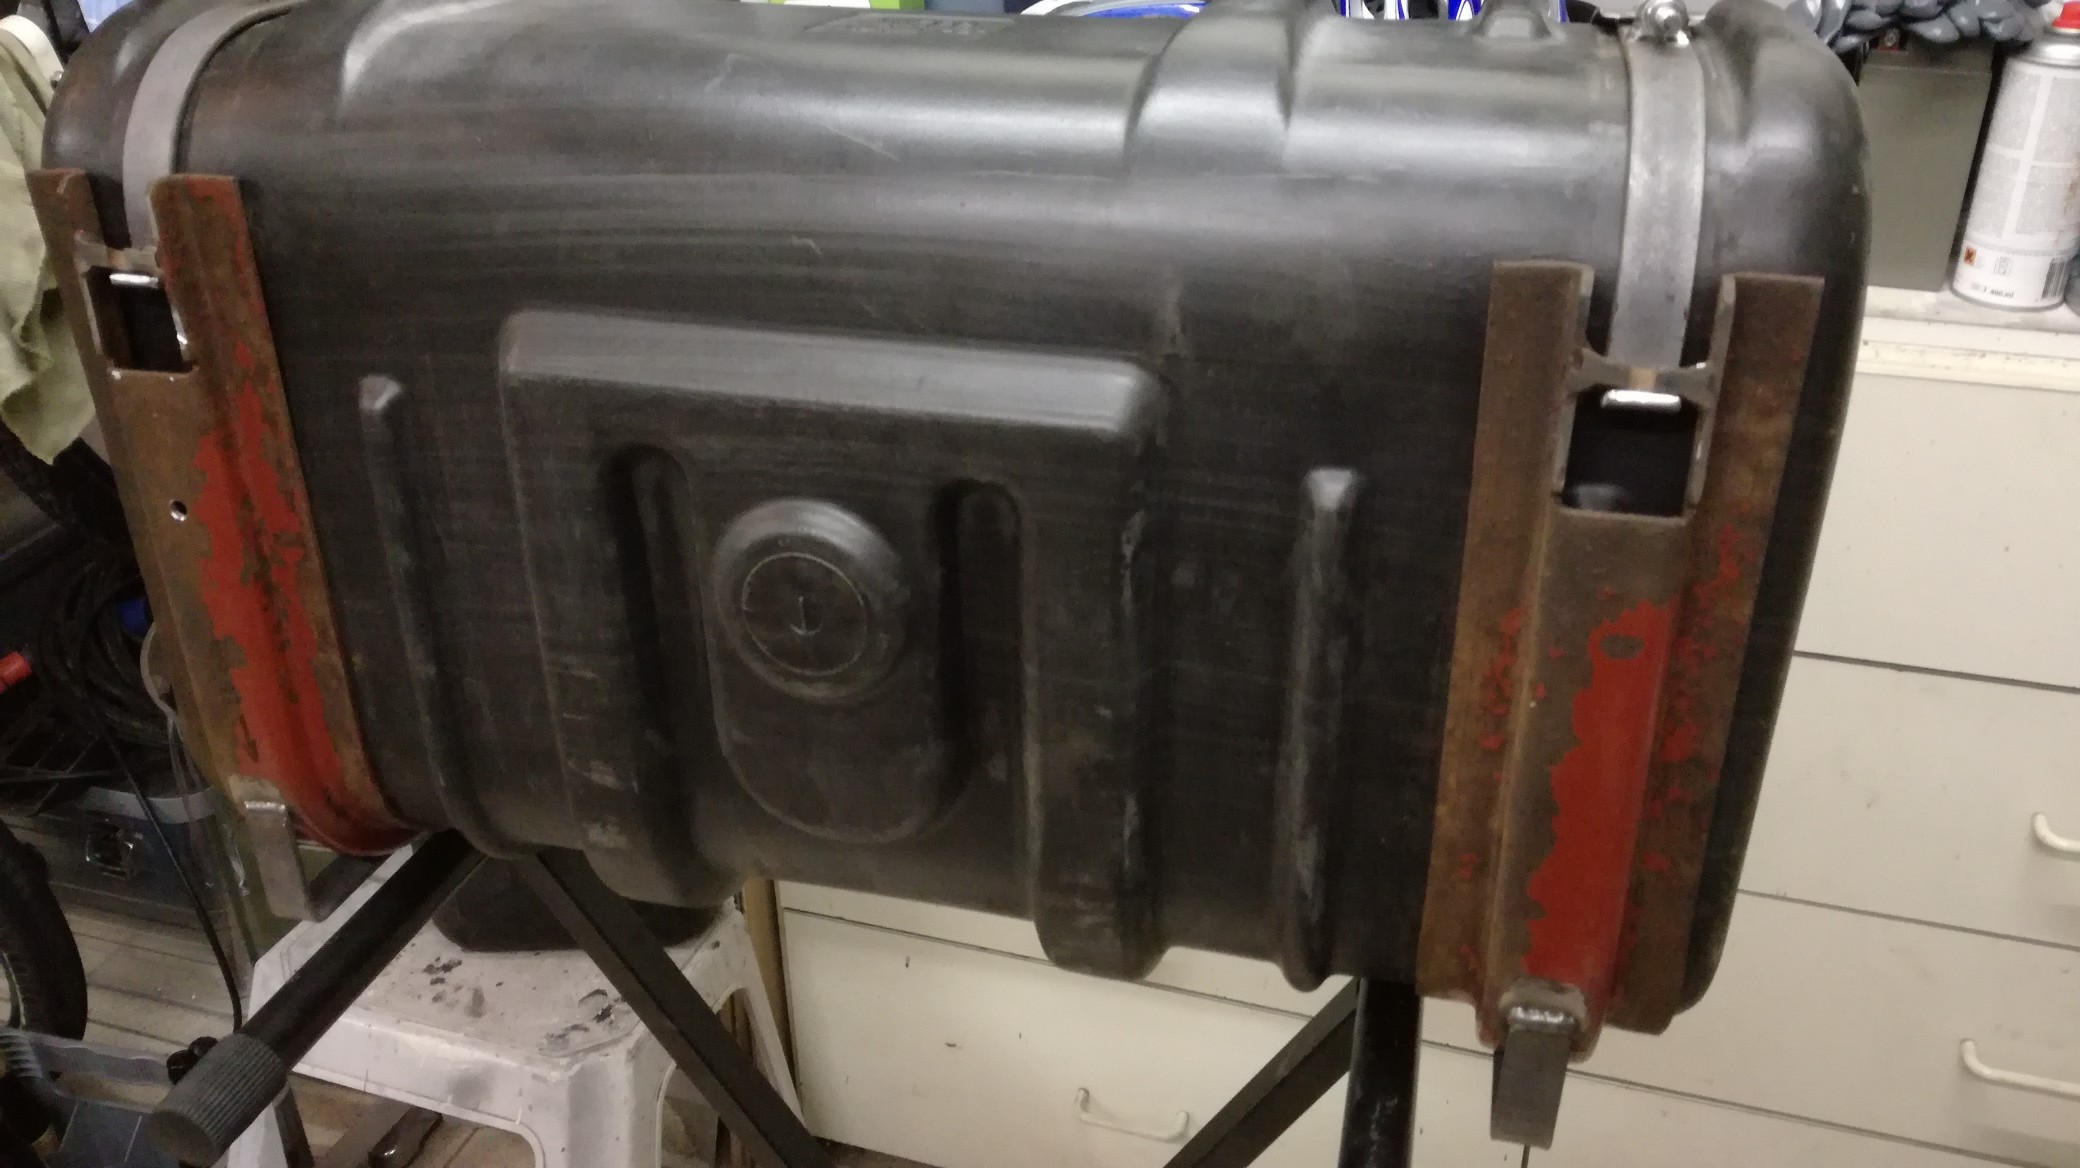
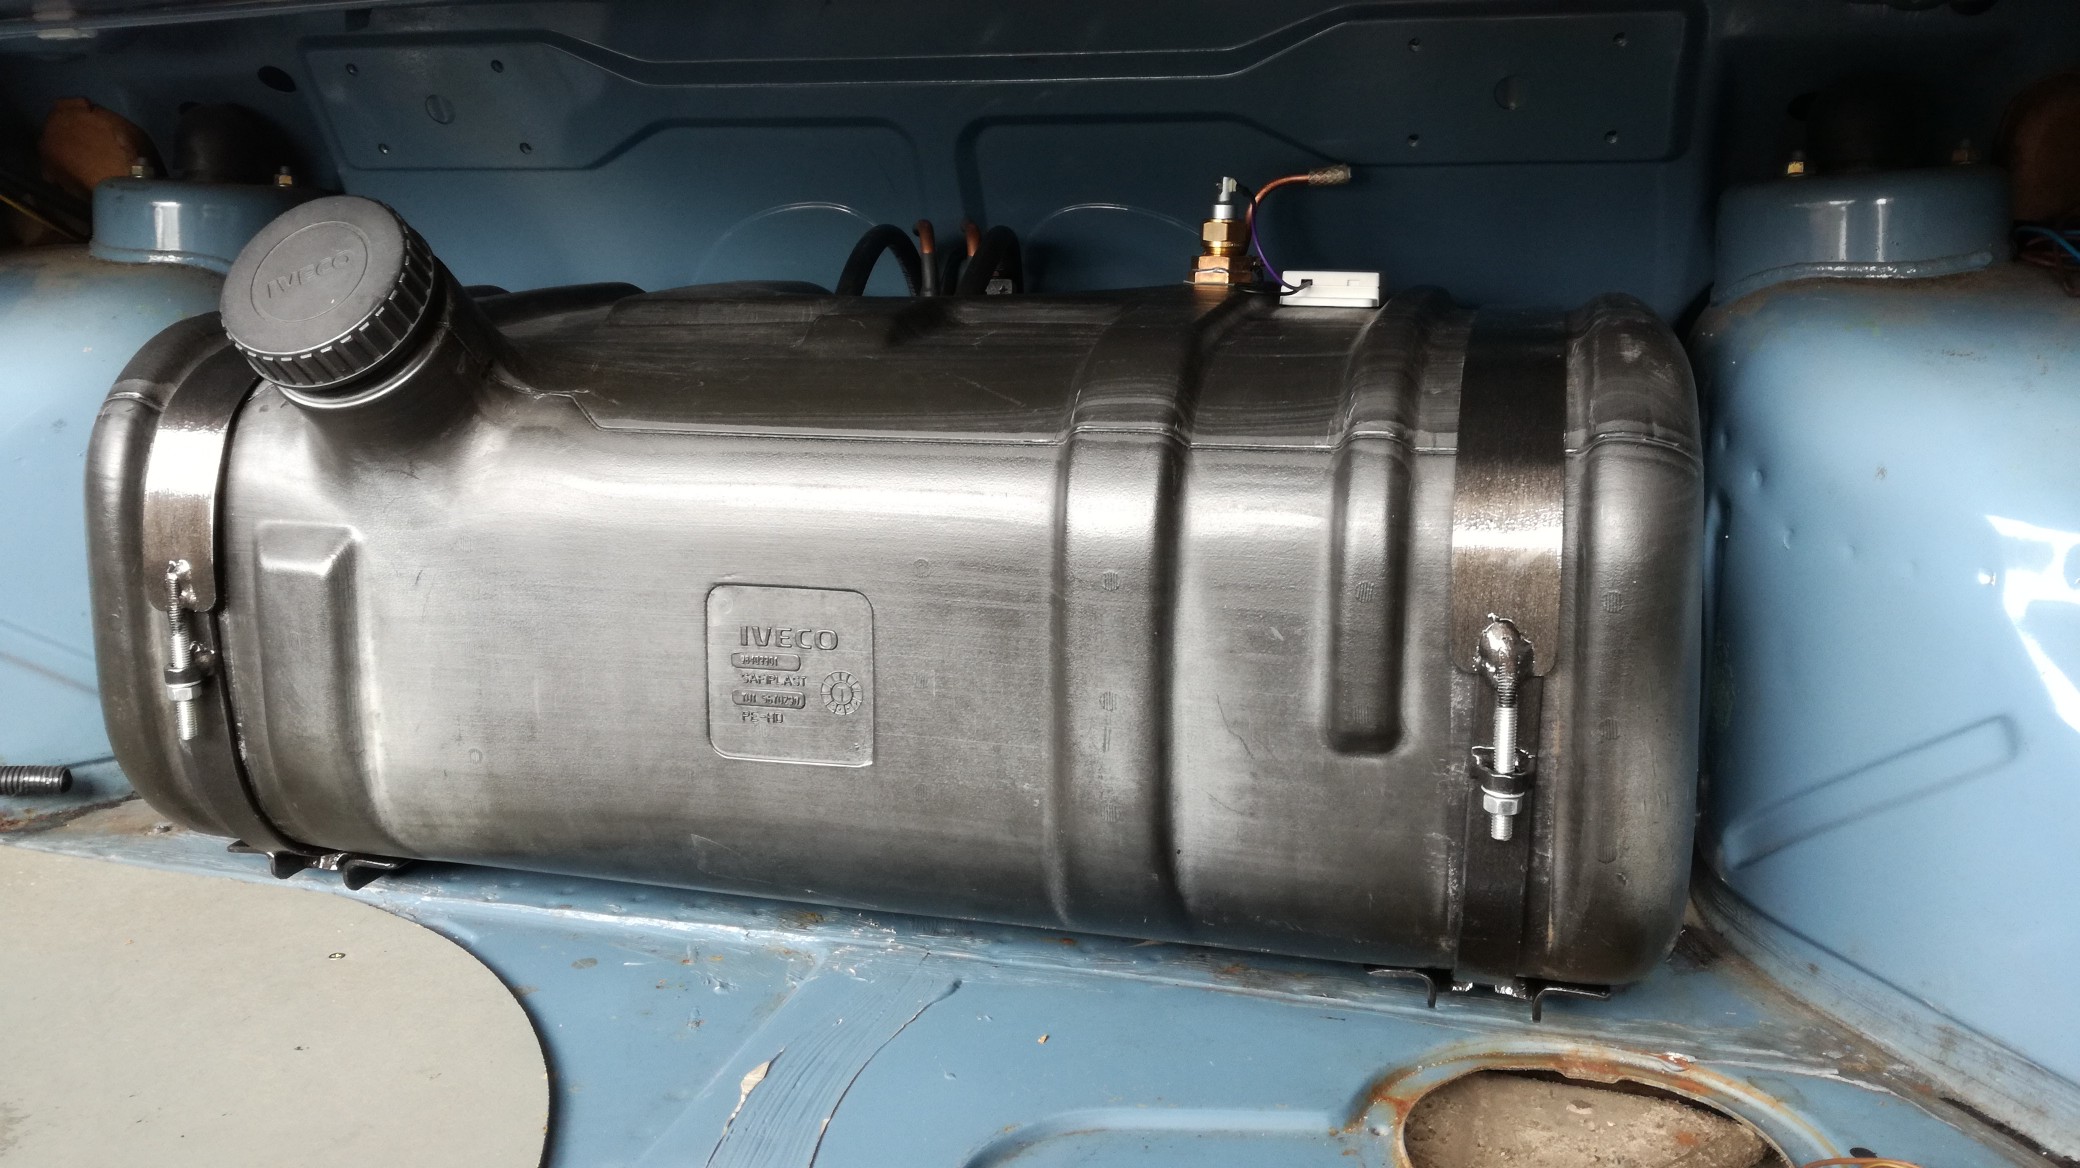
It all started with the purchase of this 70 liter light truck fueltank:

After a wash it looks much better and fits nicely between the rear wheelarches in the boot:
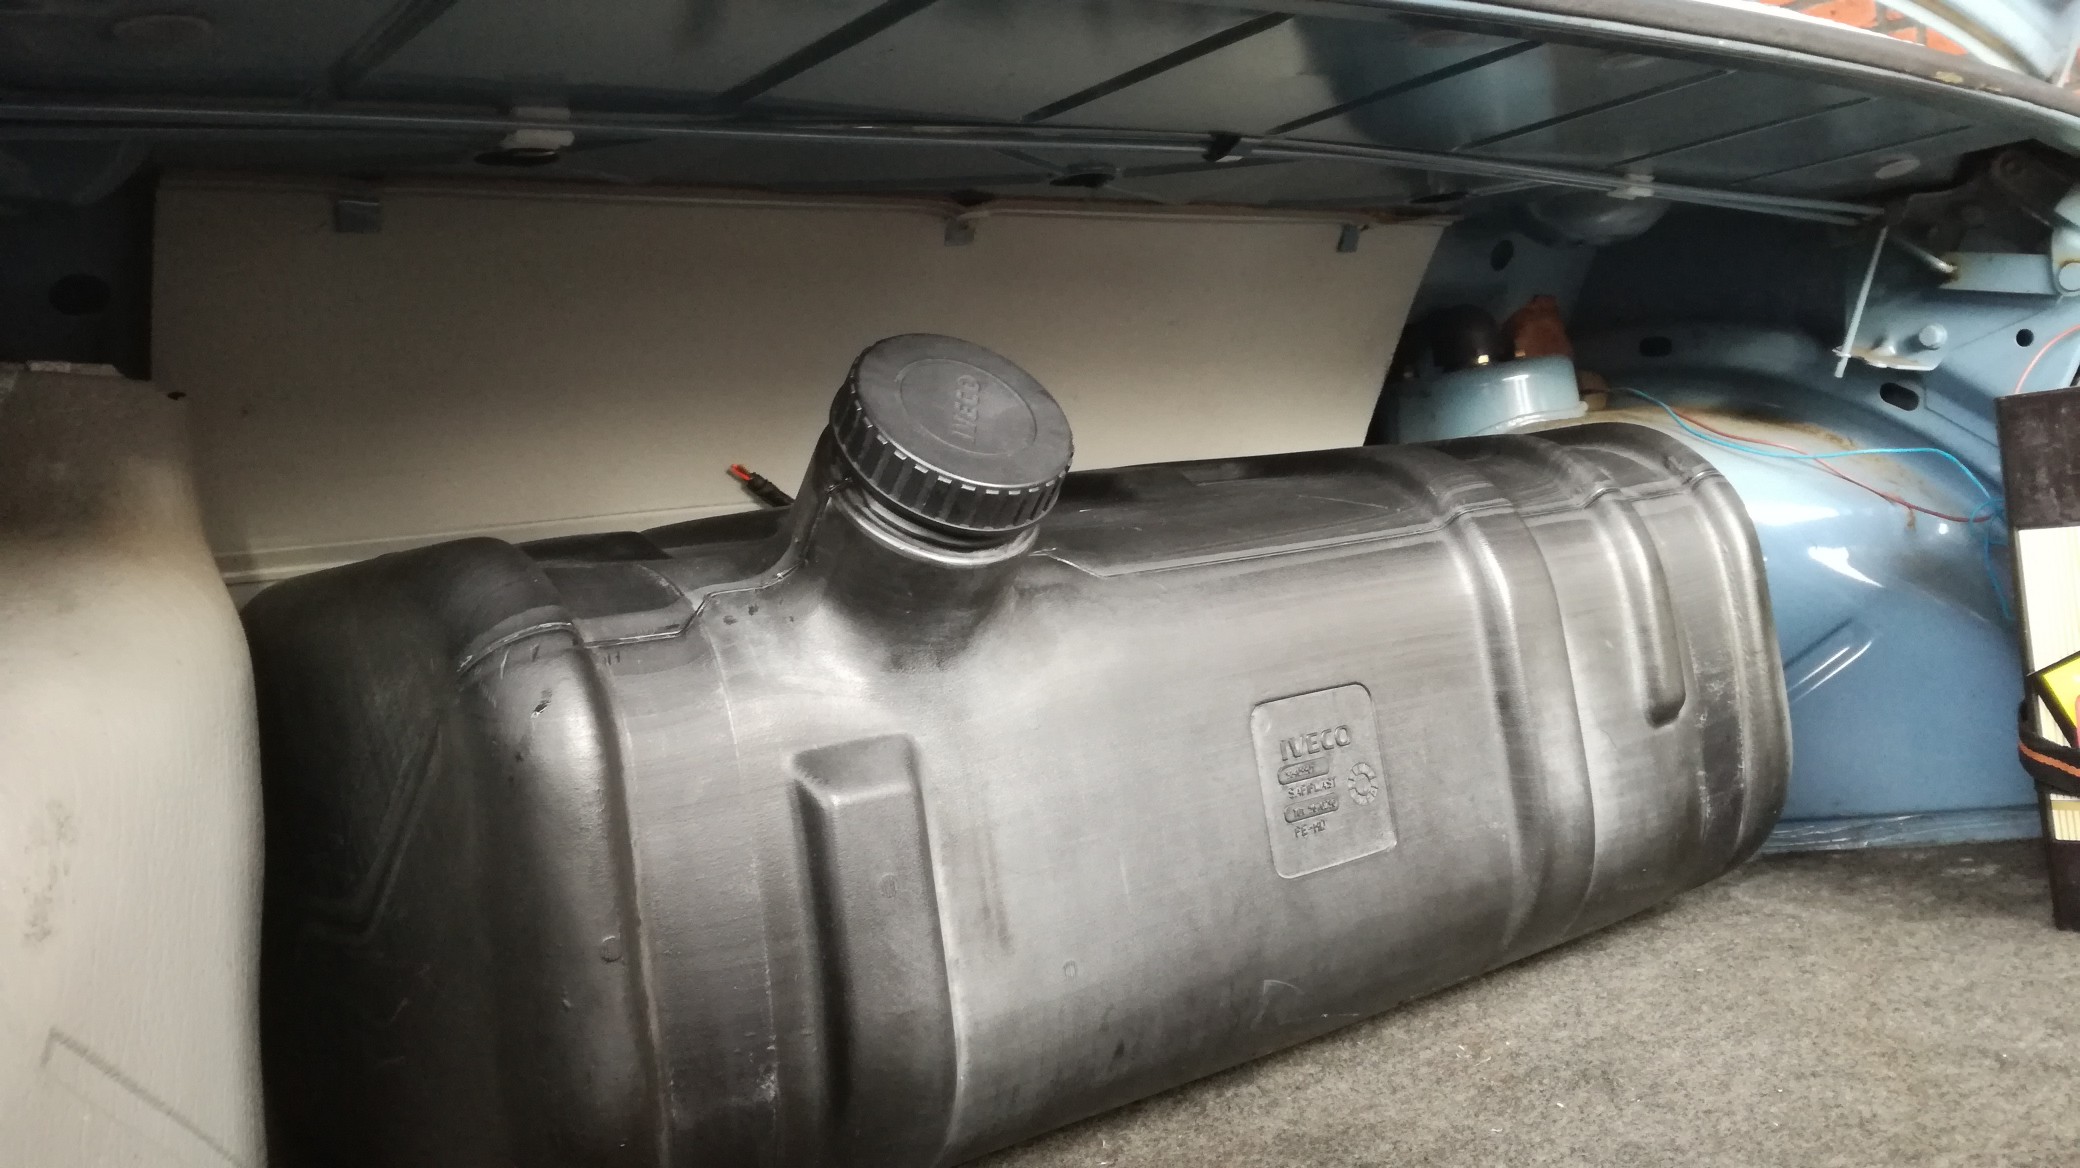
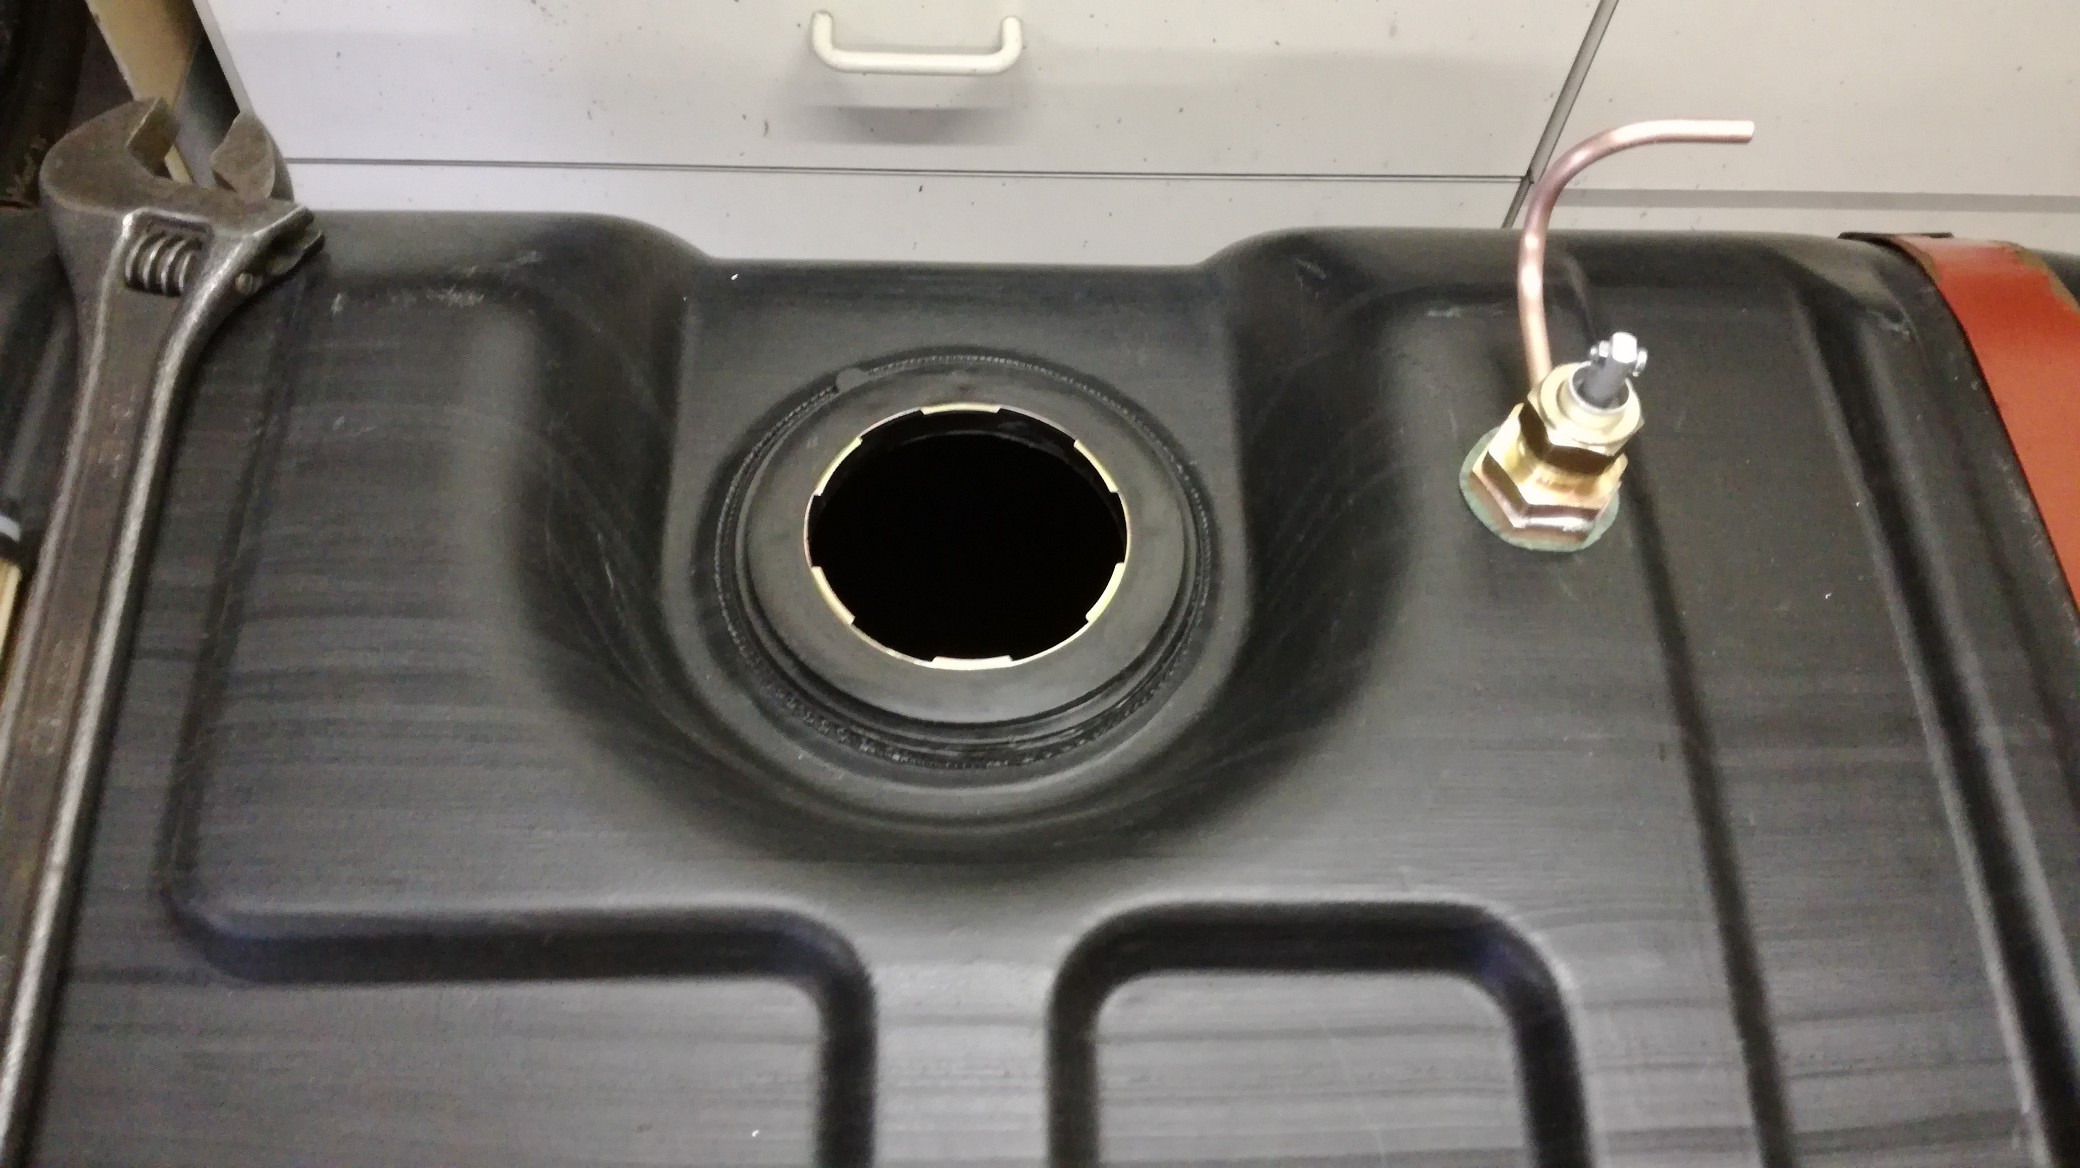
This thank doesn't have fuelpumps inside, a incompatible fuelgauge sender unit and misses a vapour vent connection because its intended use was for diesel and placed outside the vehicle. The fillercap has a over/under pressure valve for venting.
First thing to do was fabricating a bracket holding the fuelpumps and fuellines an sourcing 2 fuelpumps which would fit together through the apendages flange hole which is 85mm in diameter.
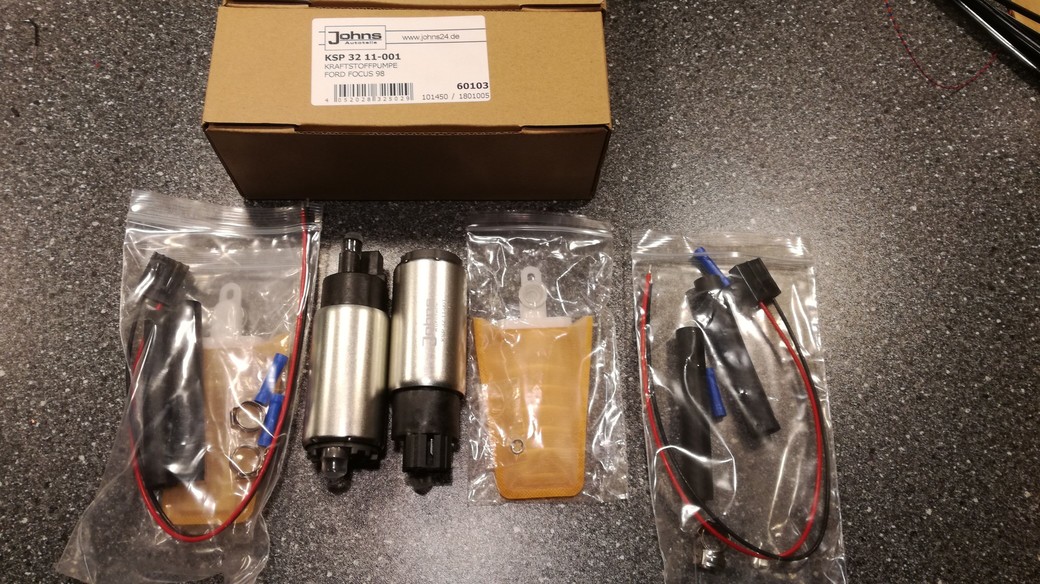
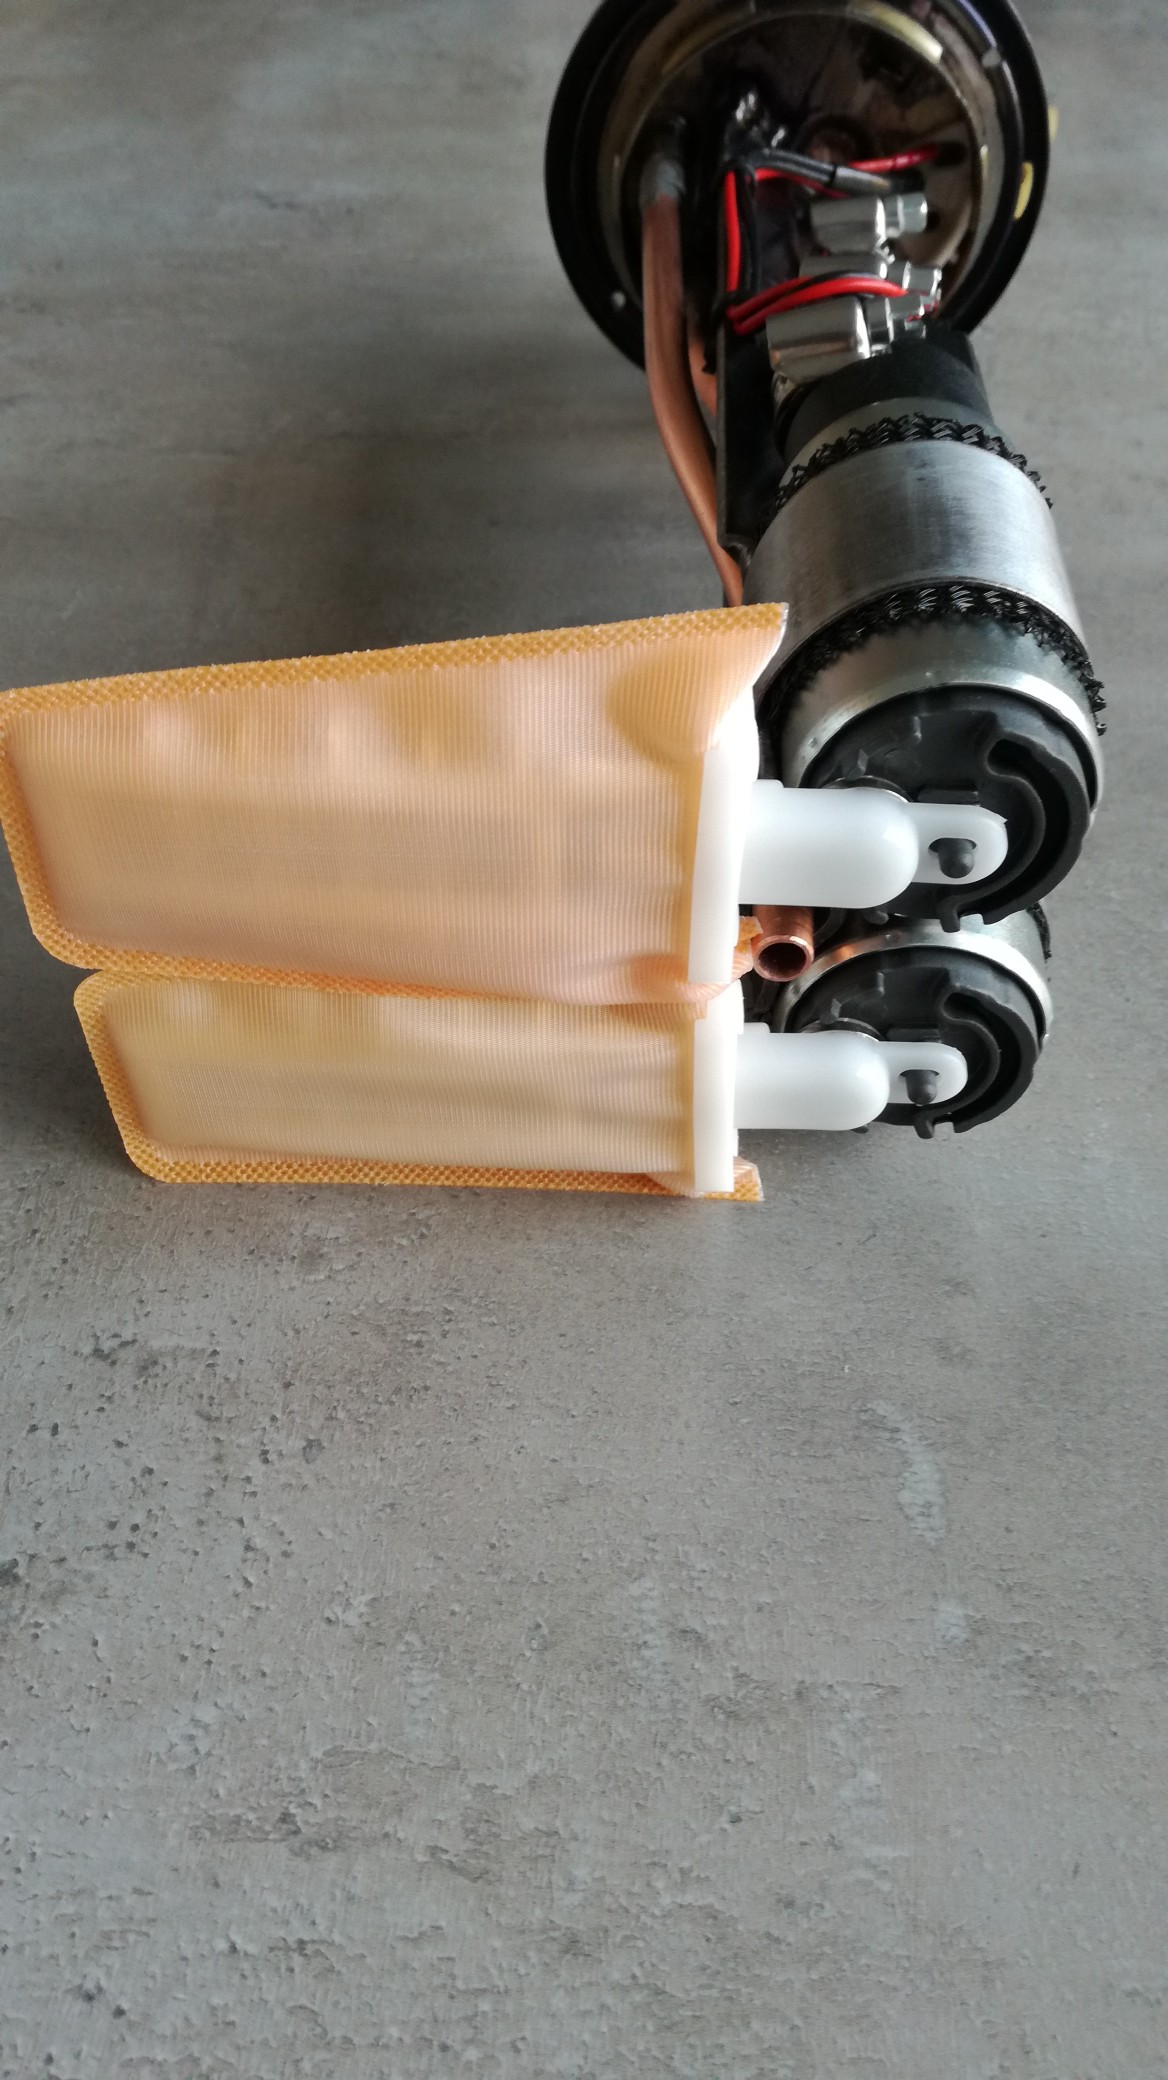
I found some johns fuelpumps with filters on ebay intended for ford focus for a nice offer.
When they arrived it turned out they had a 38mm diameter, so 2 pumps arranged nicely to eachother should fit.
These pumps also have a build in check valve, so fuel flows only in 1 direction, and when only 1 pump runs the fuel can't flow through the other pump back.
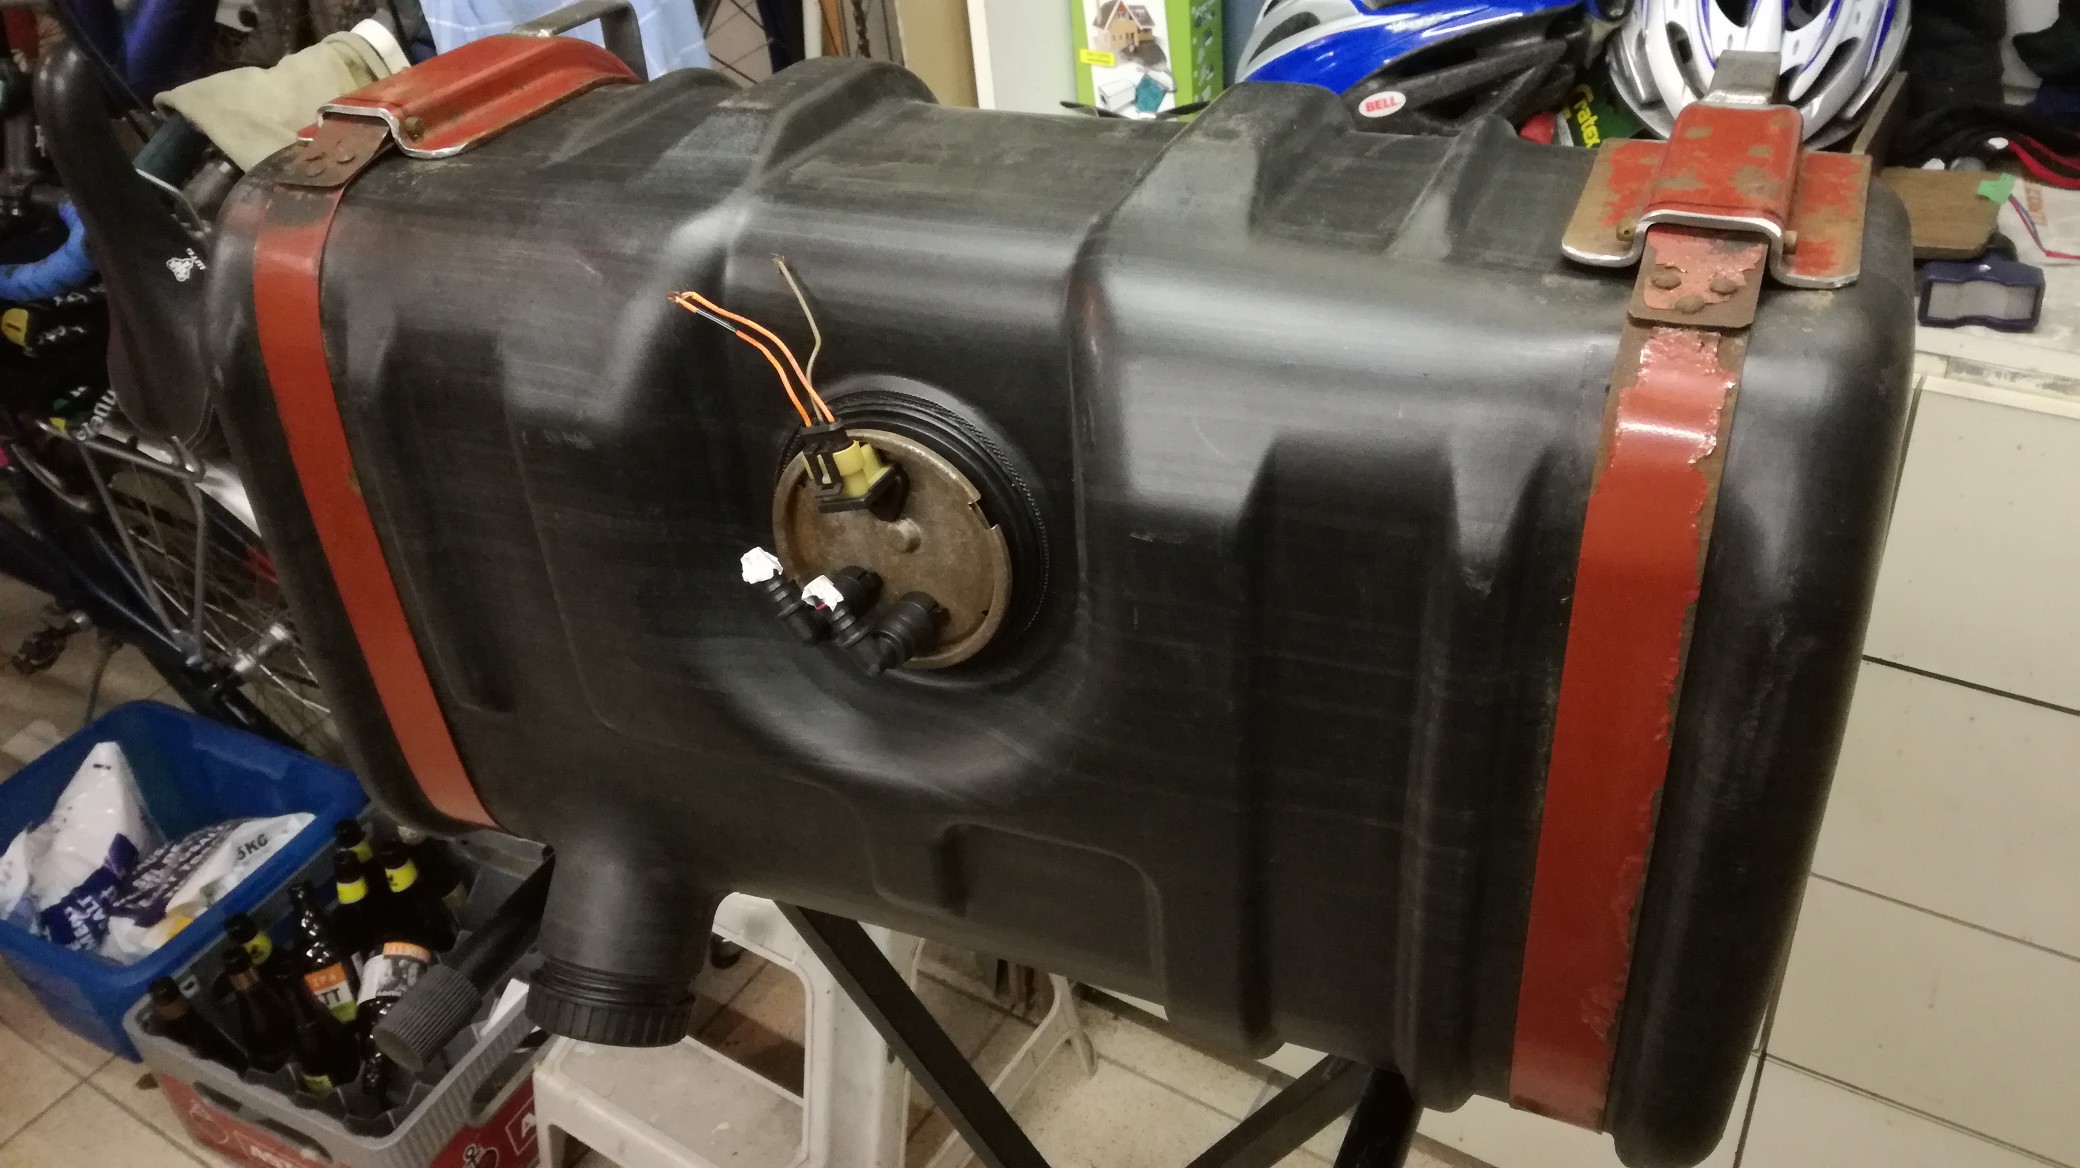
Because the fuelgauge senderunit wasn't usable i've decided to use the flange for the fuelpump setup, and fabricated a nice bracket and fuellines to the flange.
the new fuelpumps:
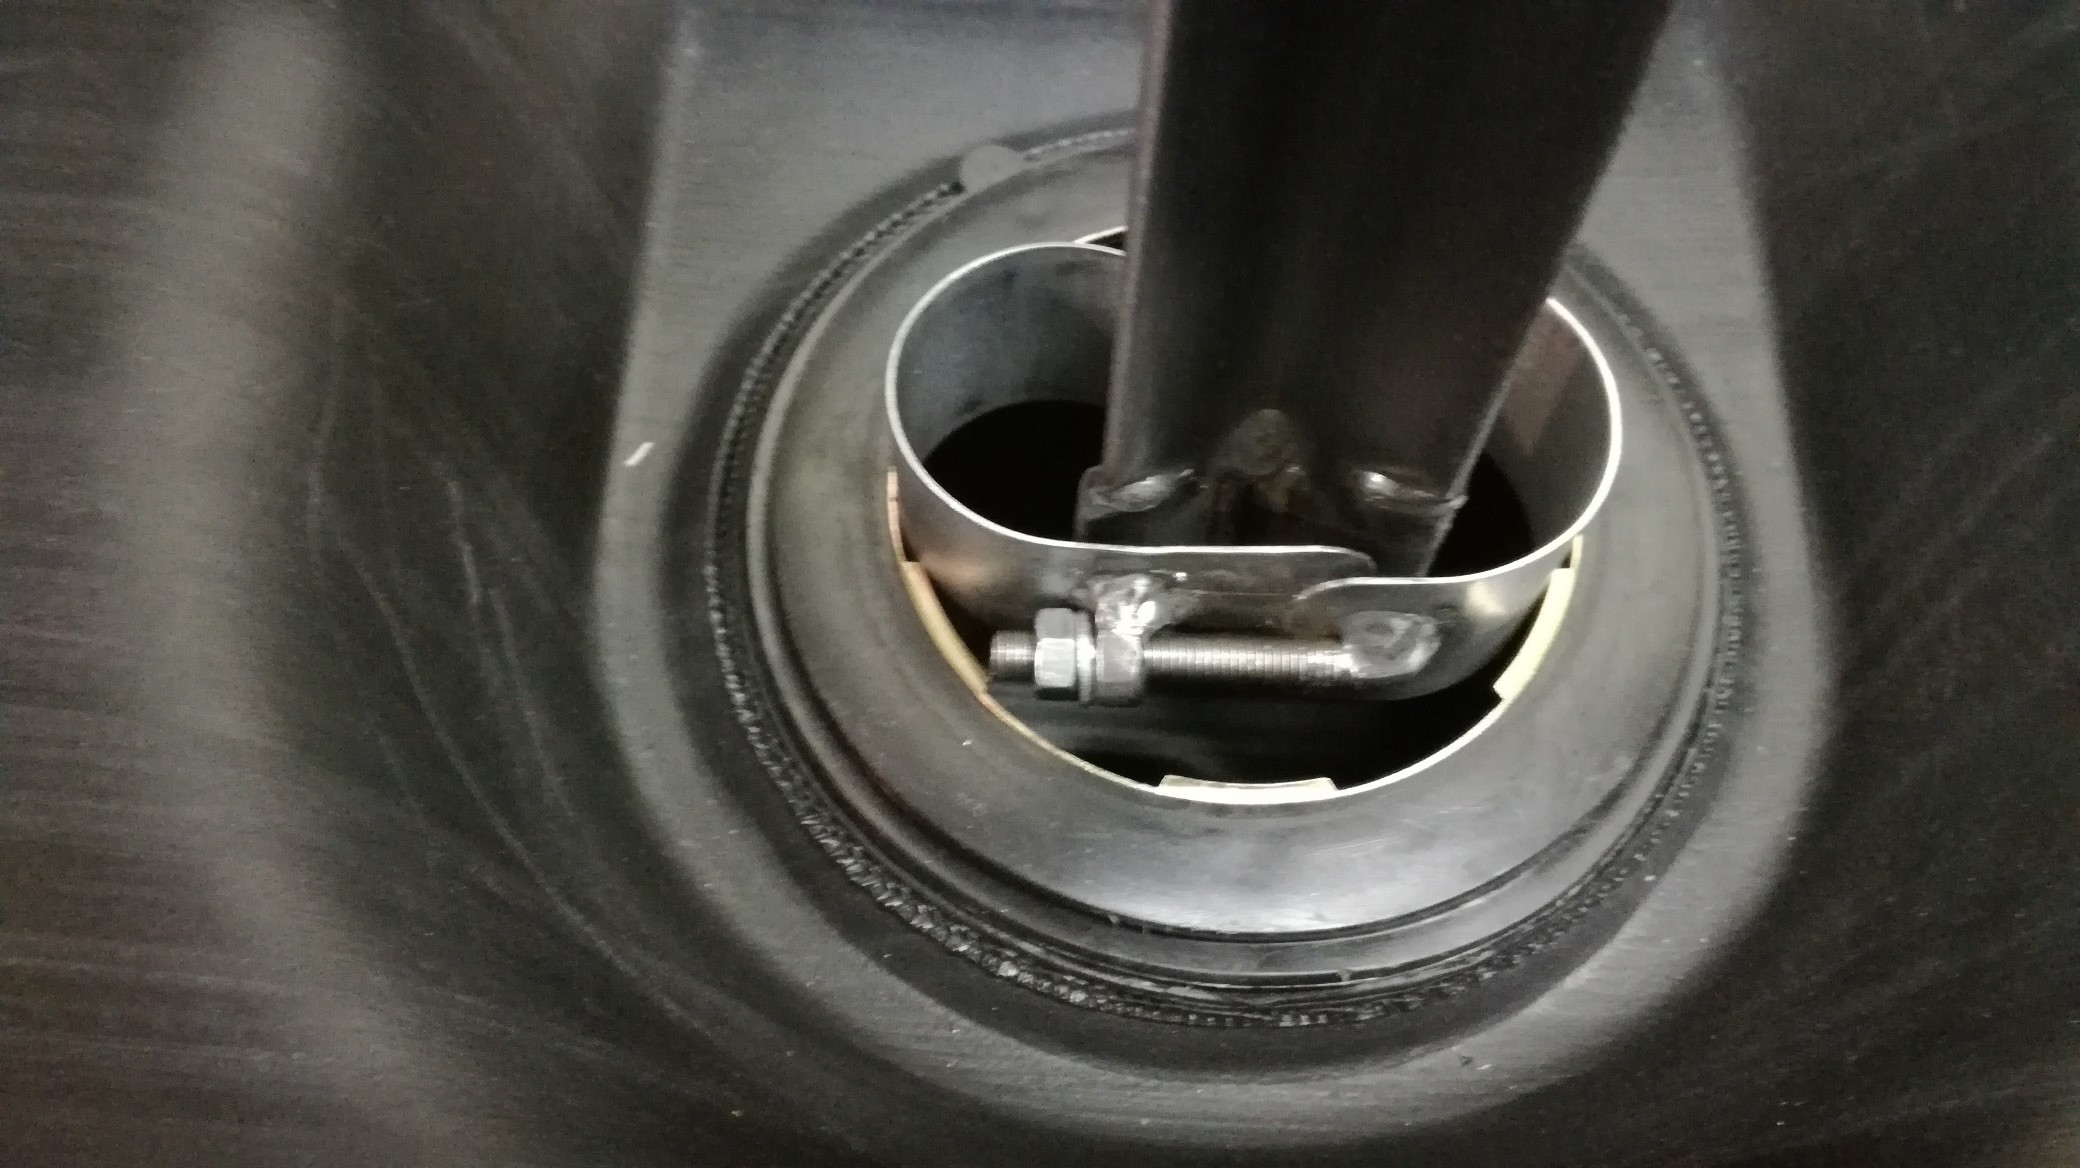
The fuelpumps bracket:

with a nice snug fit through the appendages hole:
test fitting the pumps in the bracket:
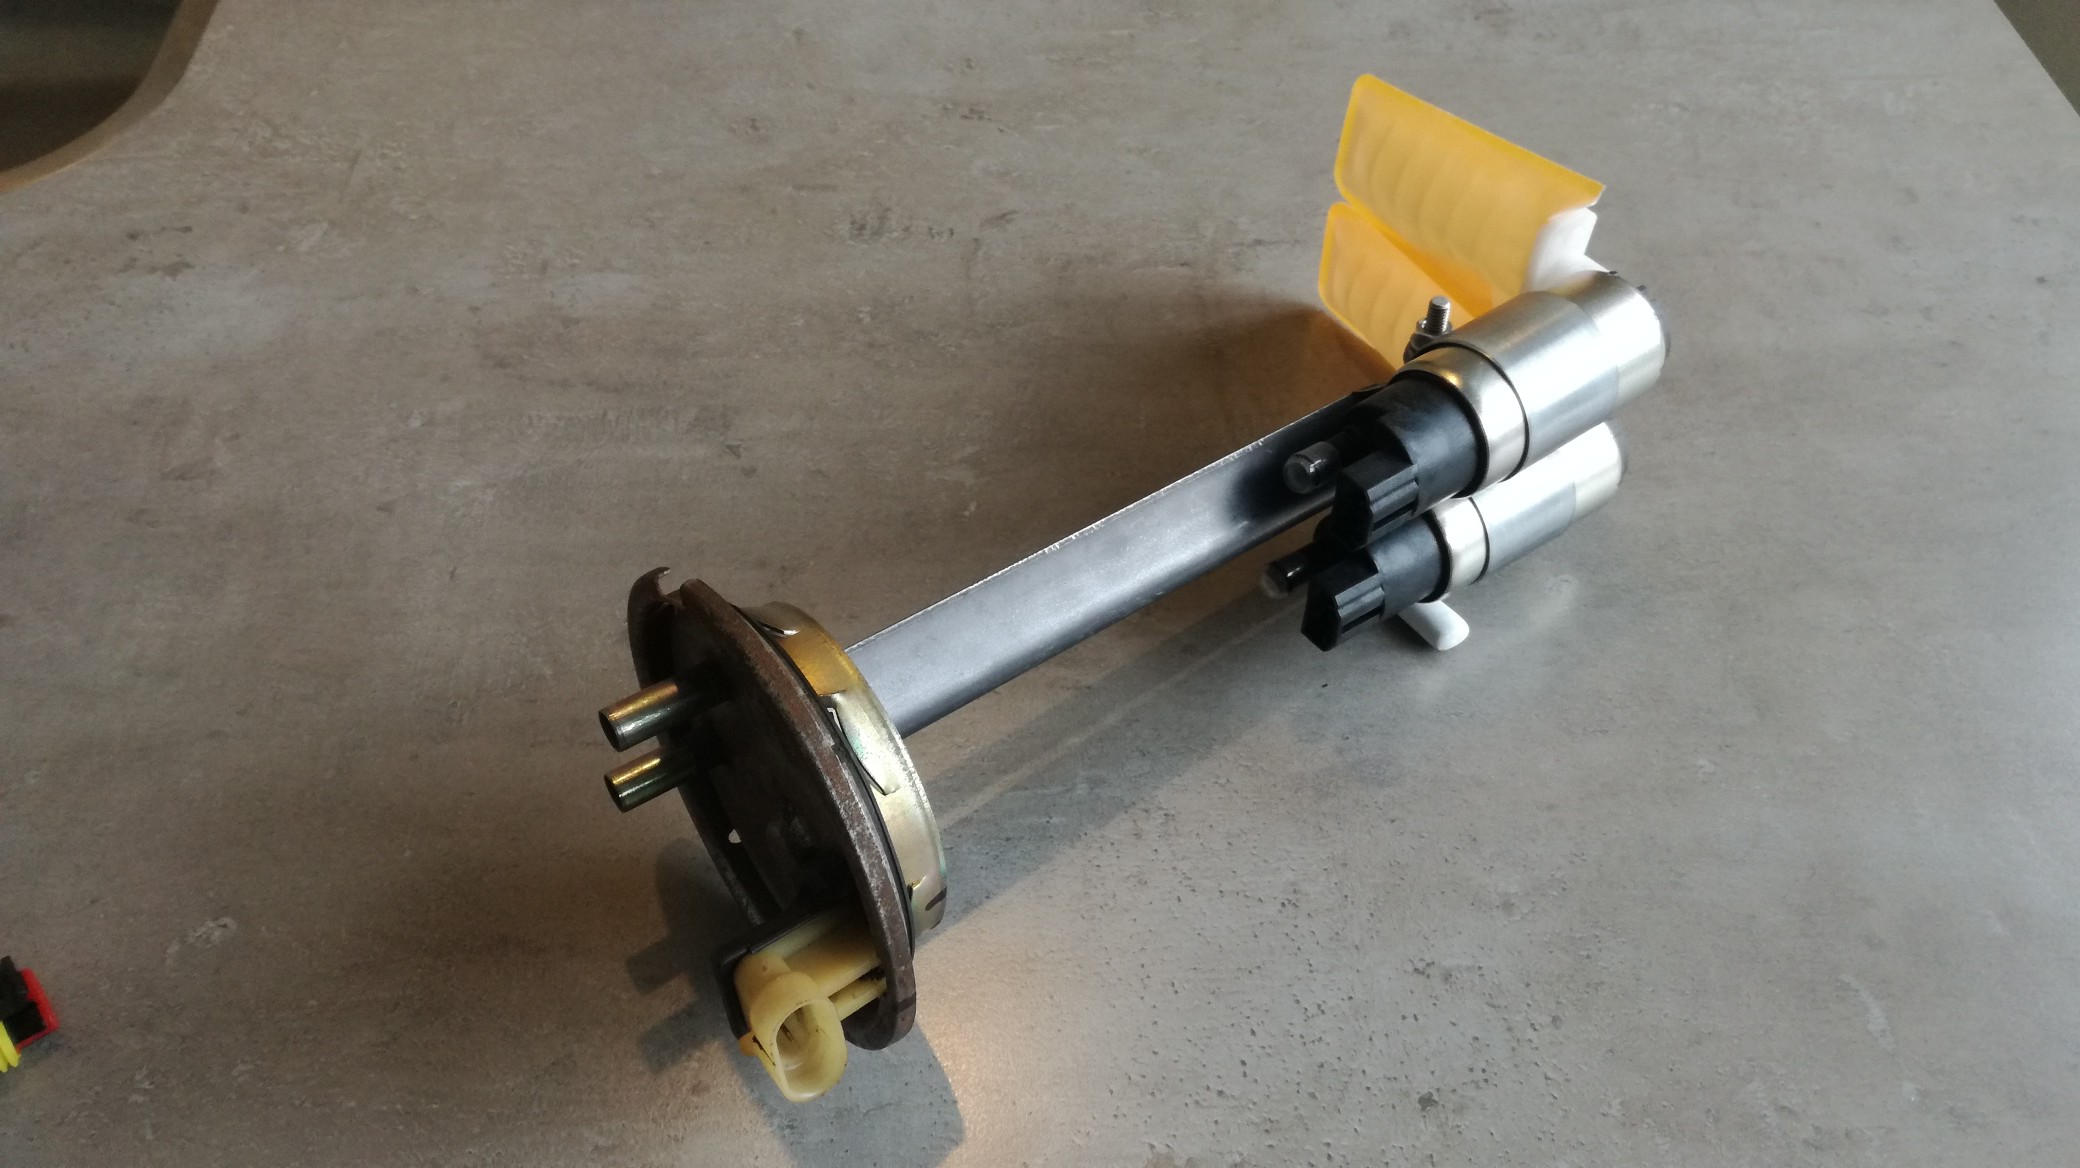
then added some hard fuel line and wiring:
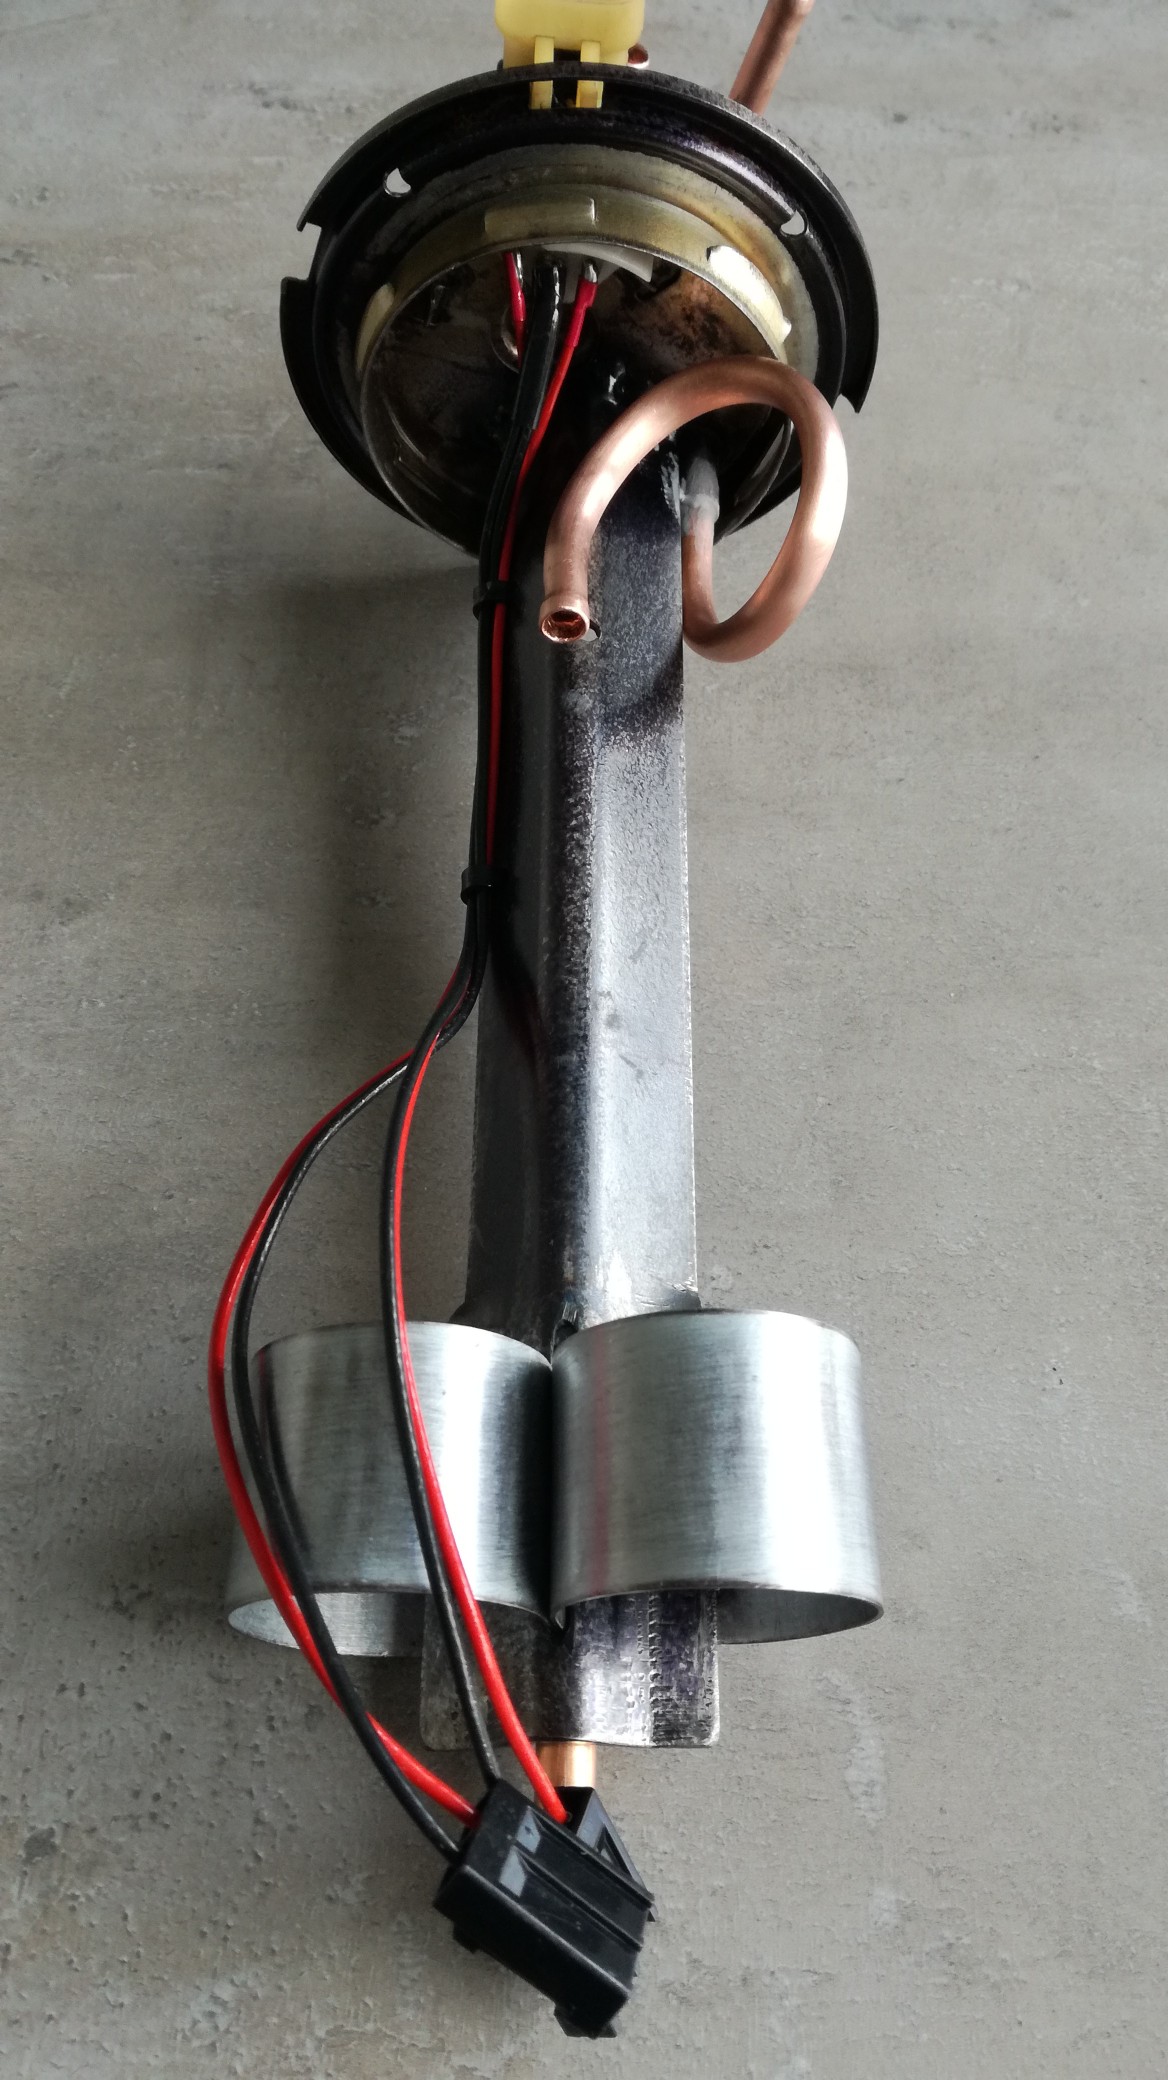

and mounted the pumps with some short hoses and a y piece
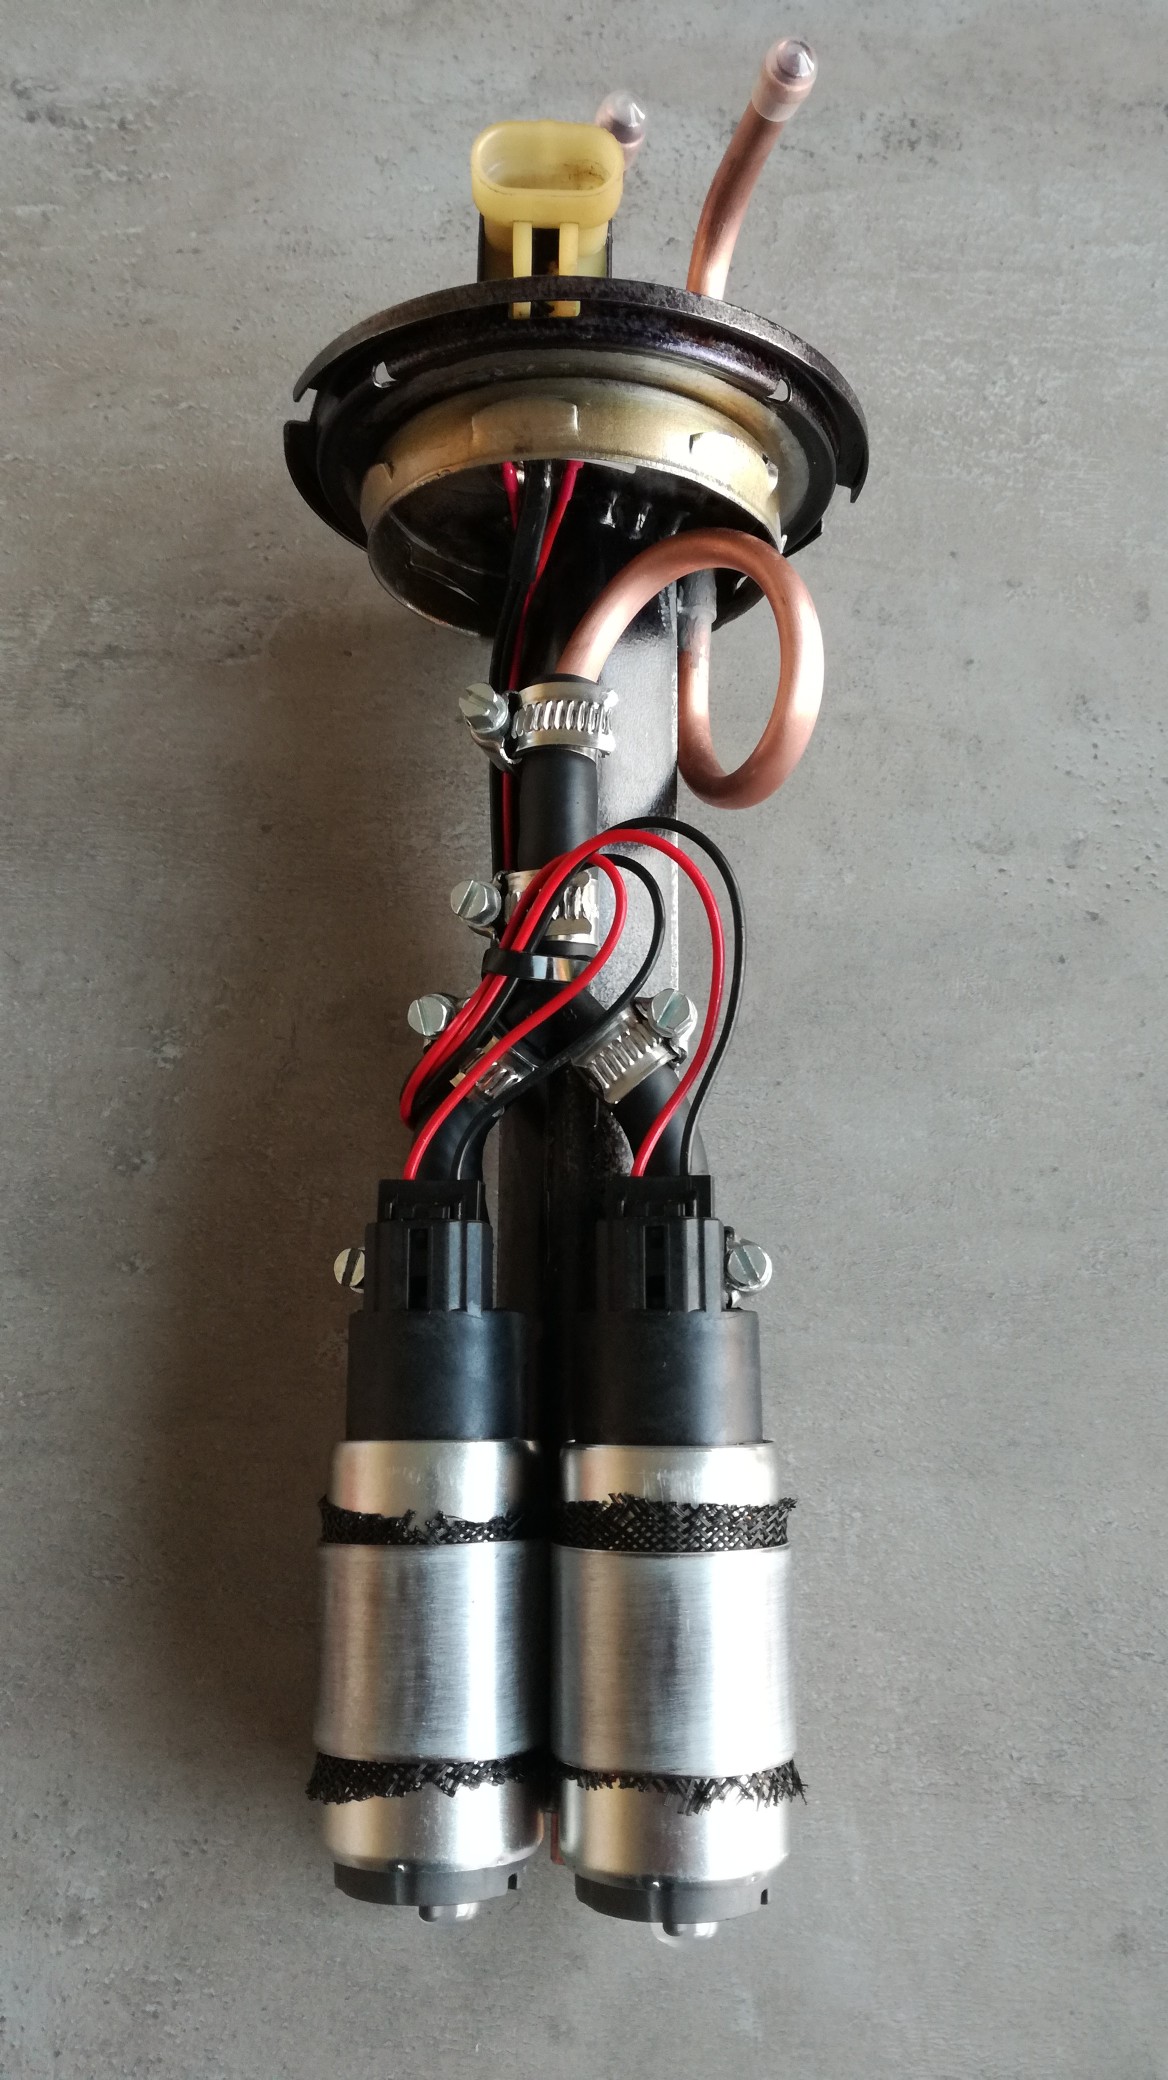
fits all nicely in the tank:
Next hurdle was a fuellevel sender. I took a totaly different route, almost all fuellevel senders have a variable resistor and some kind of floating device.
I would construct a fuellevel sender without any moving parts, and the idea was measuering capacitance, which is only possible in non conducting liquids like gas.
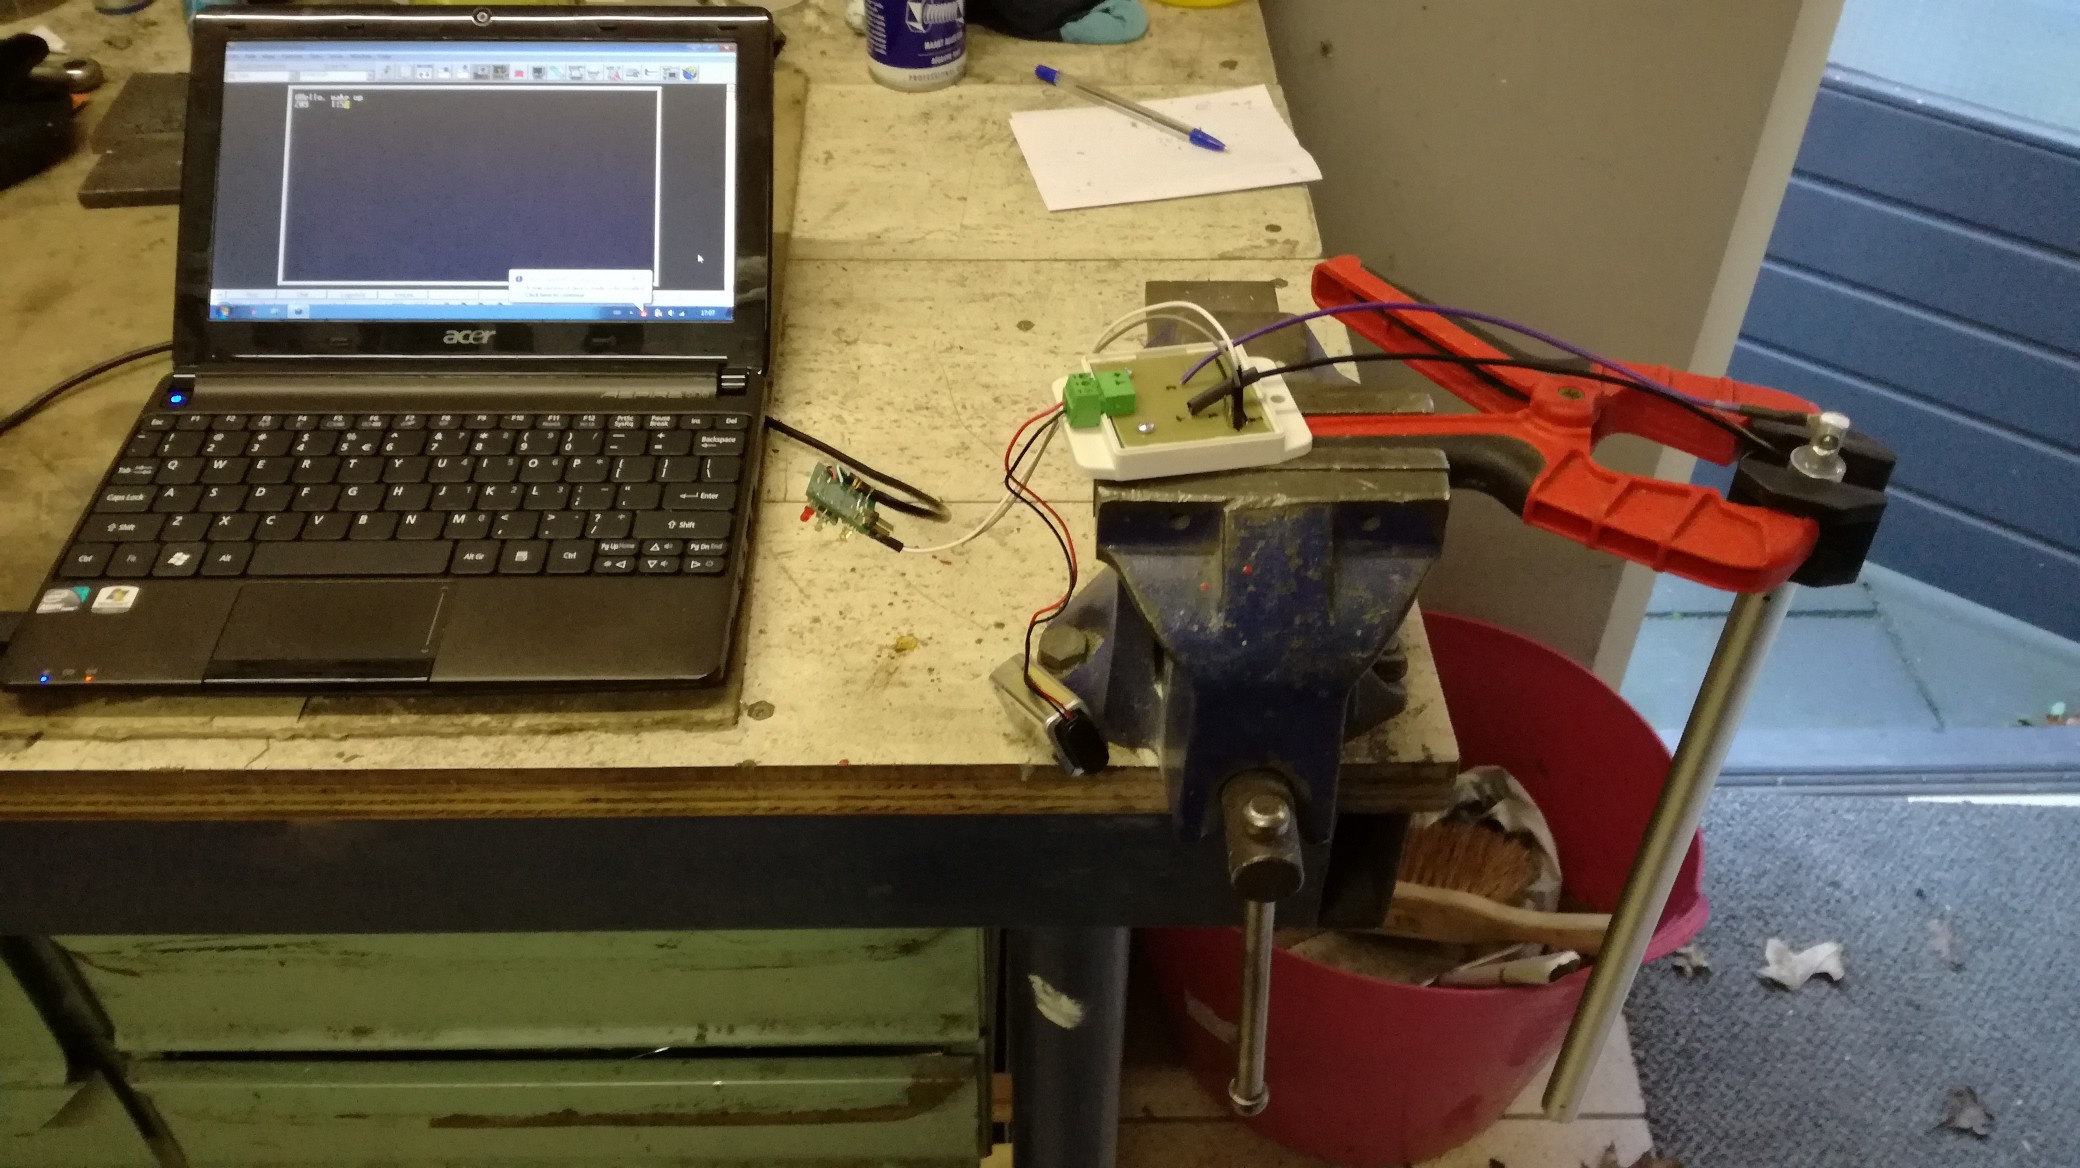
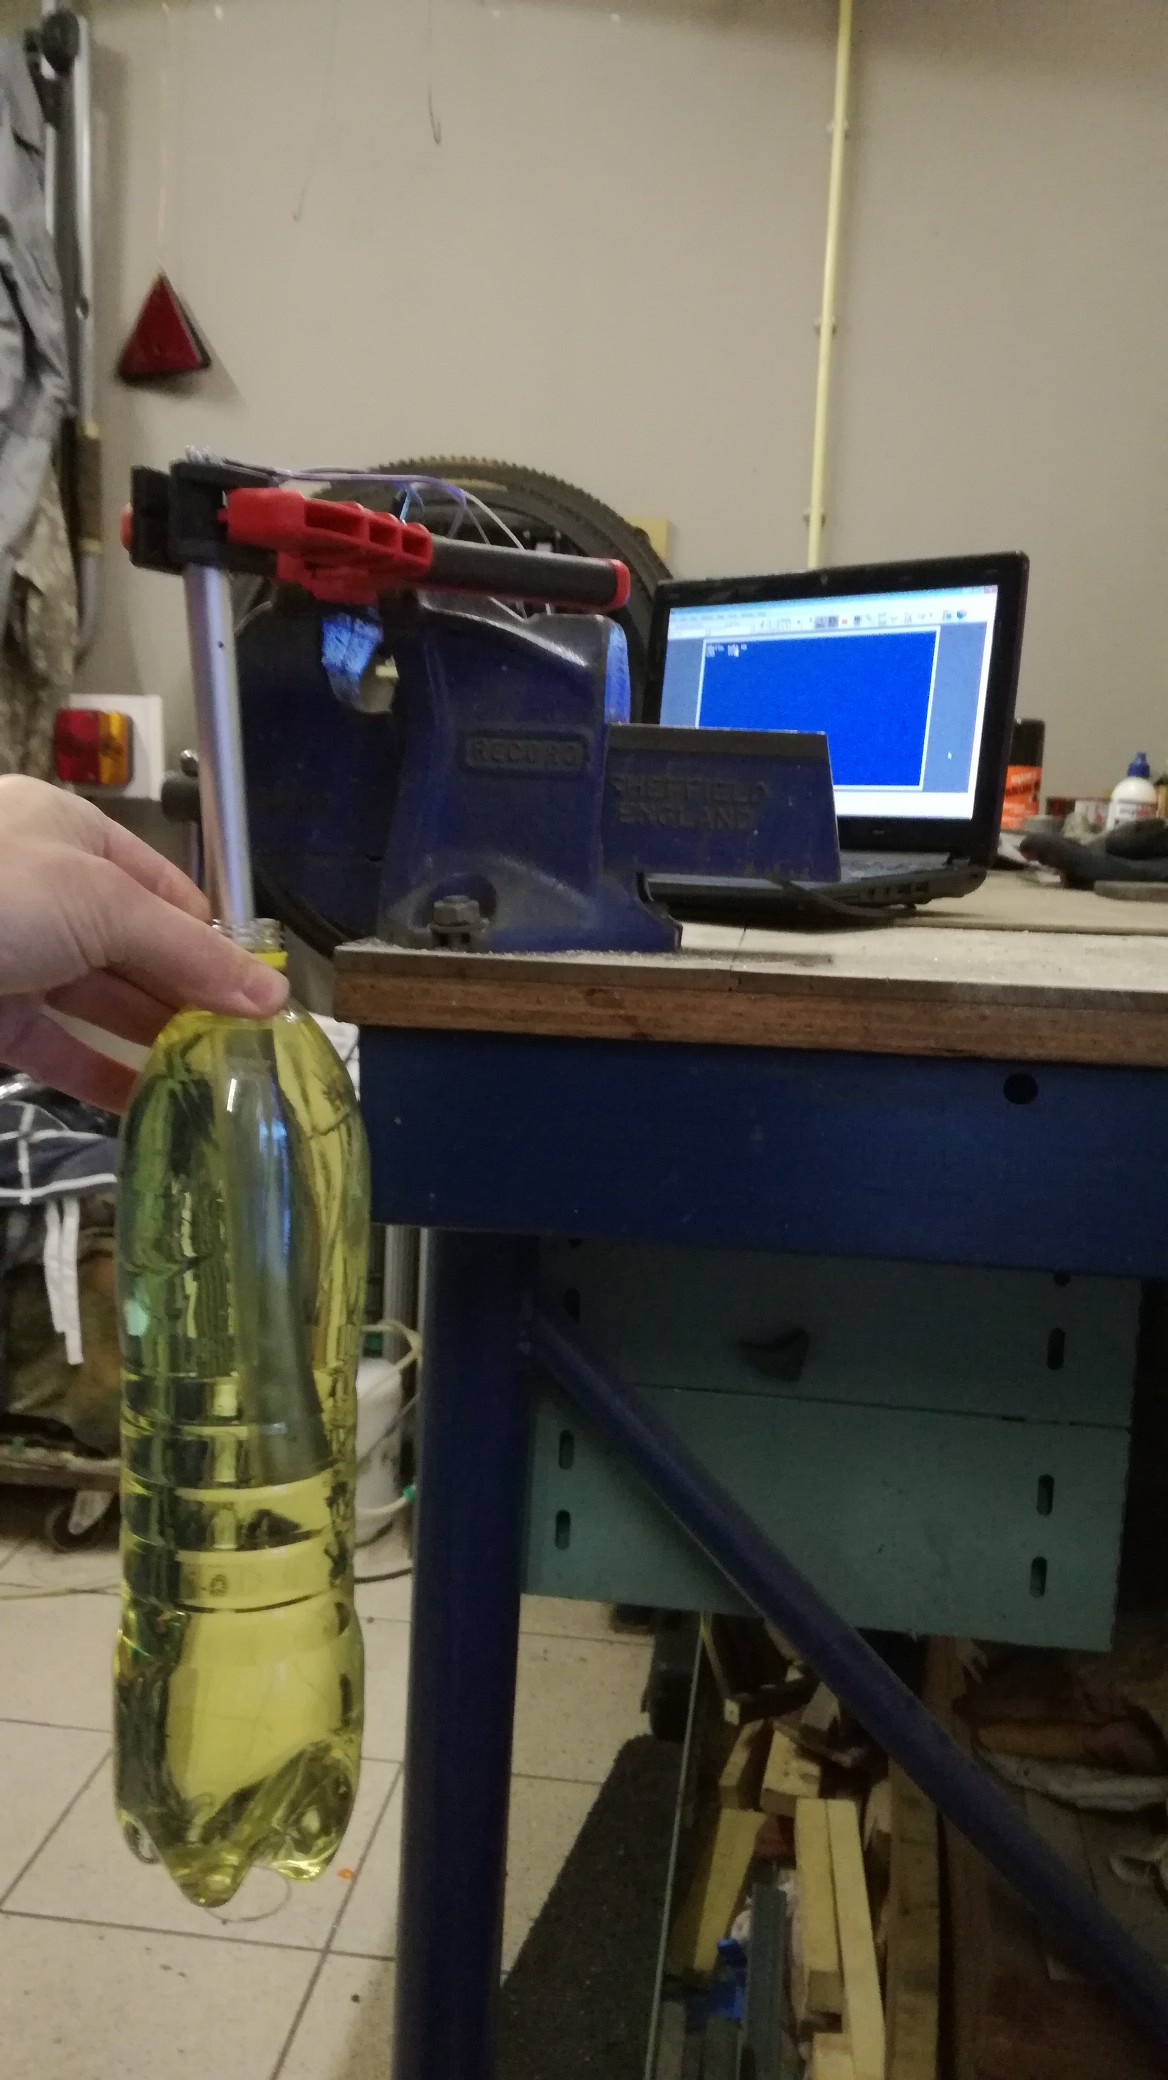
After some bench testing i was shure this project should succeed and started building a sensor unit and electronic control unit.
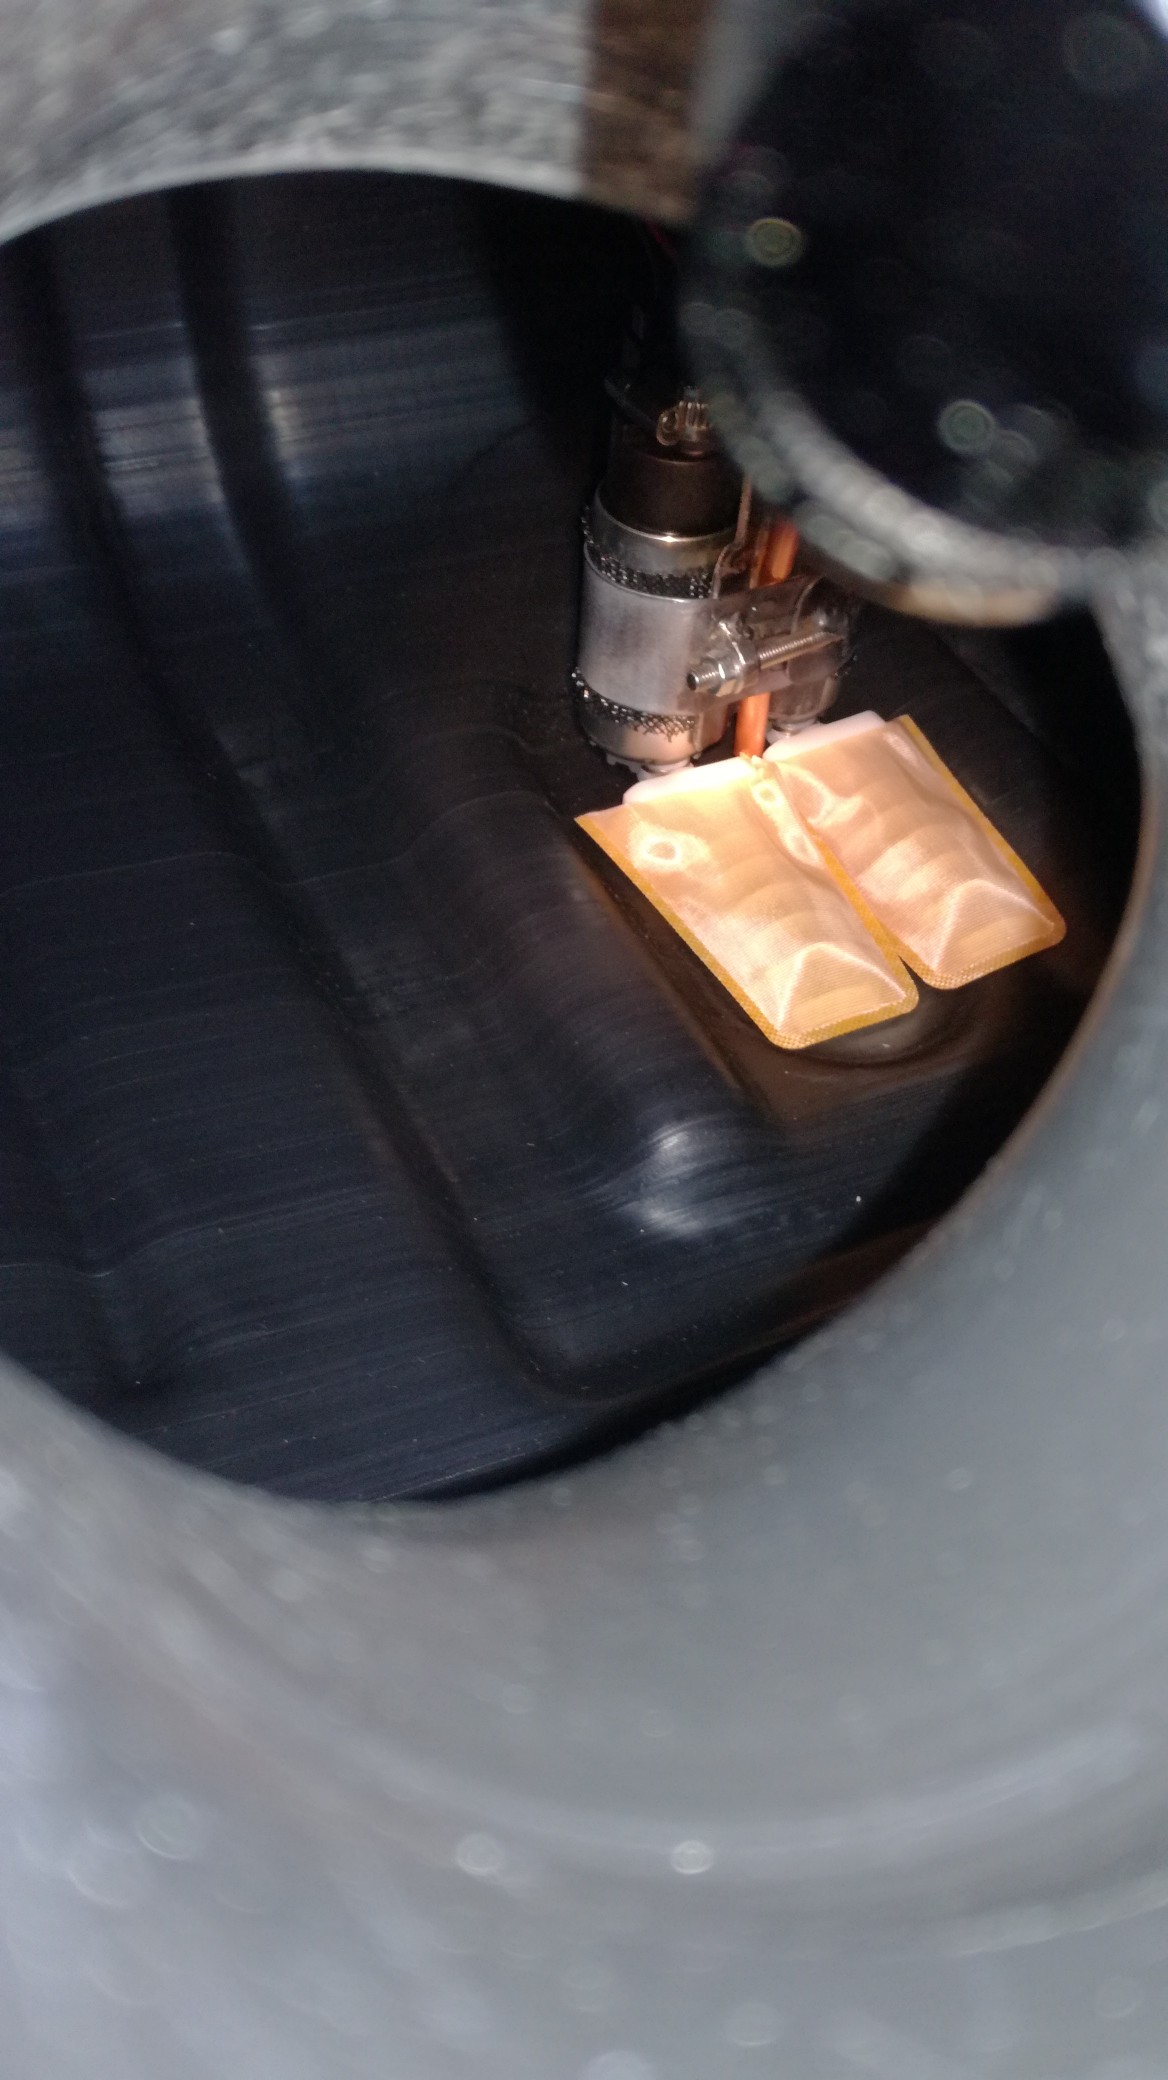
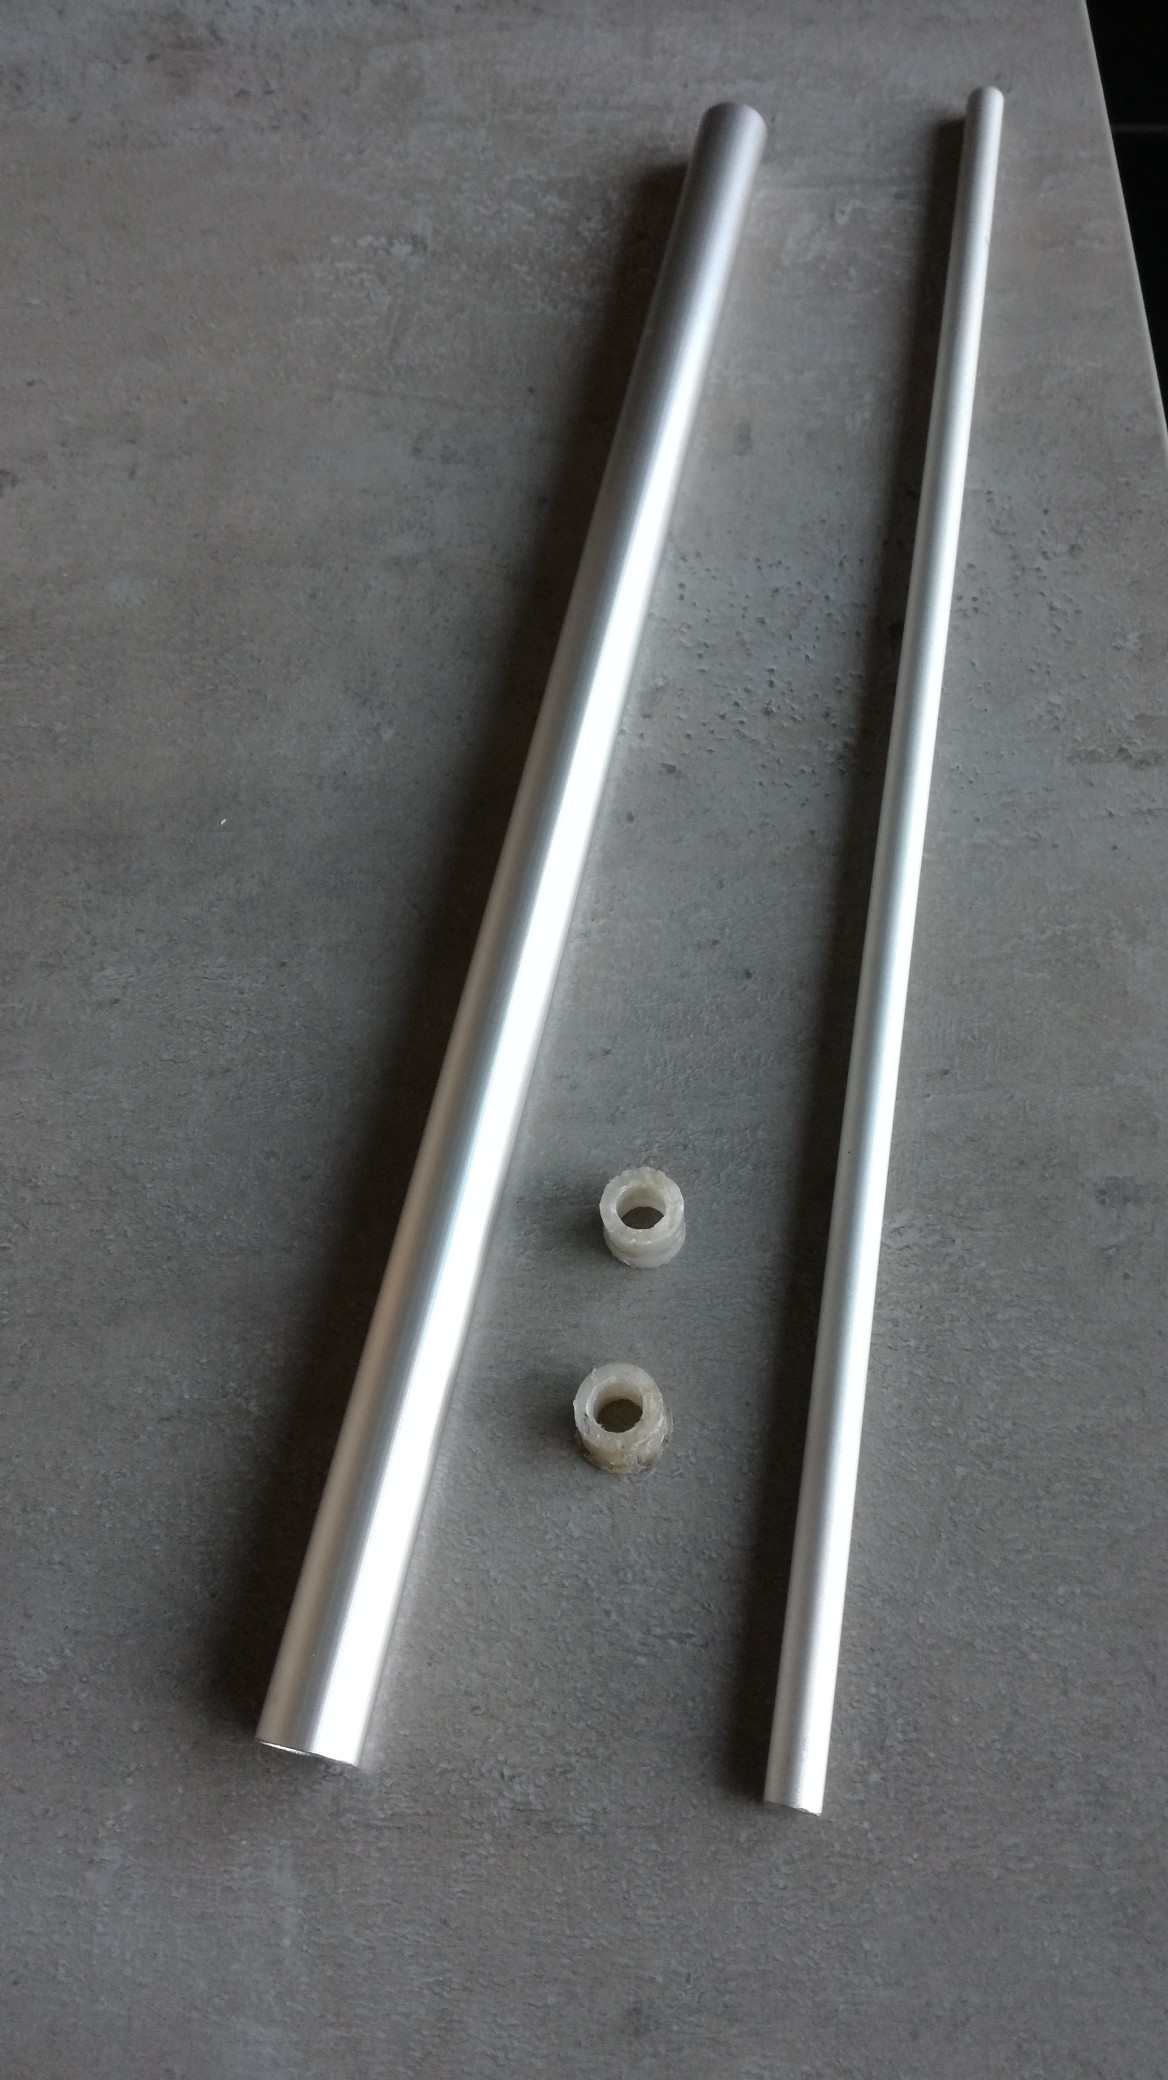
The sensor unit is made out of aluminium tubing. measurents learned that the capacitance from the sensor unit is around 80pF in air and 120pF when fully dimpled in gas.
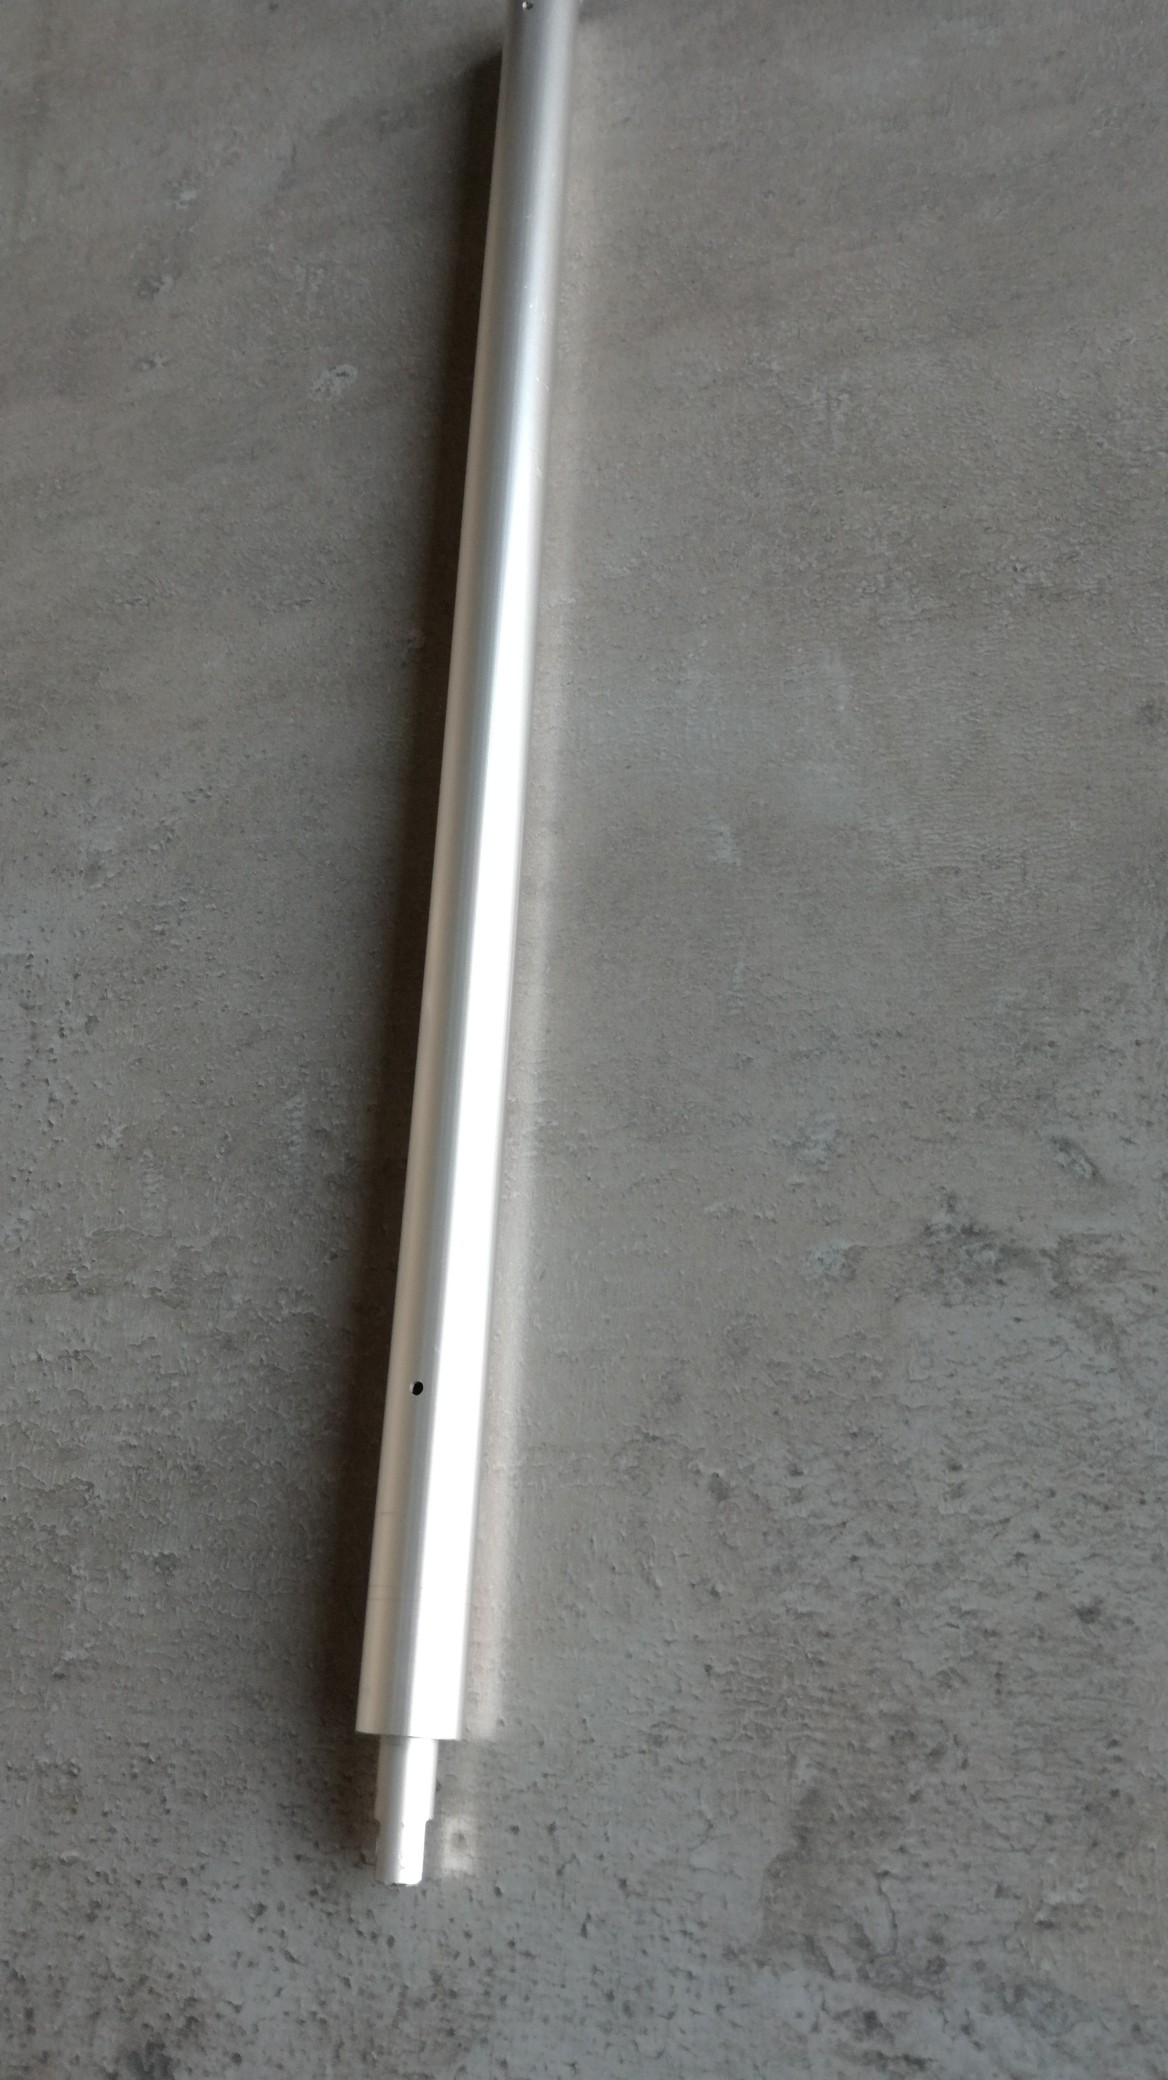
In the top of the sensorunit i've made the tank breather conection.
I'm measuring the capacitance with a ATTINY84 mircocontroller an translate the measuered capacitance (fuel level) to a suitable pwm signal which goes to the original fuelgauge in the dash cluster. This took a lot of late nights debugging but in the end i managed it.
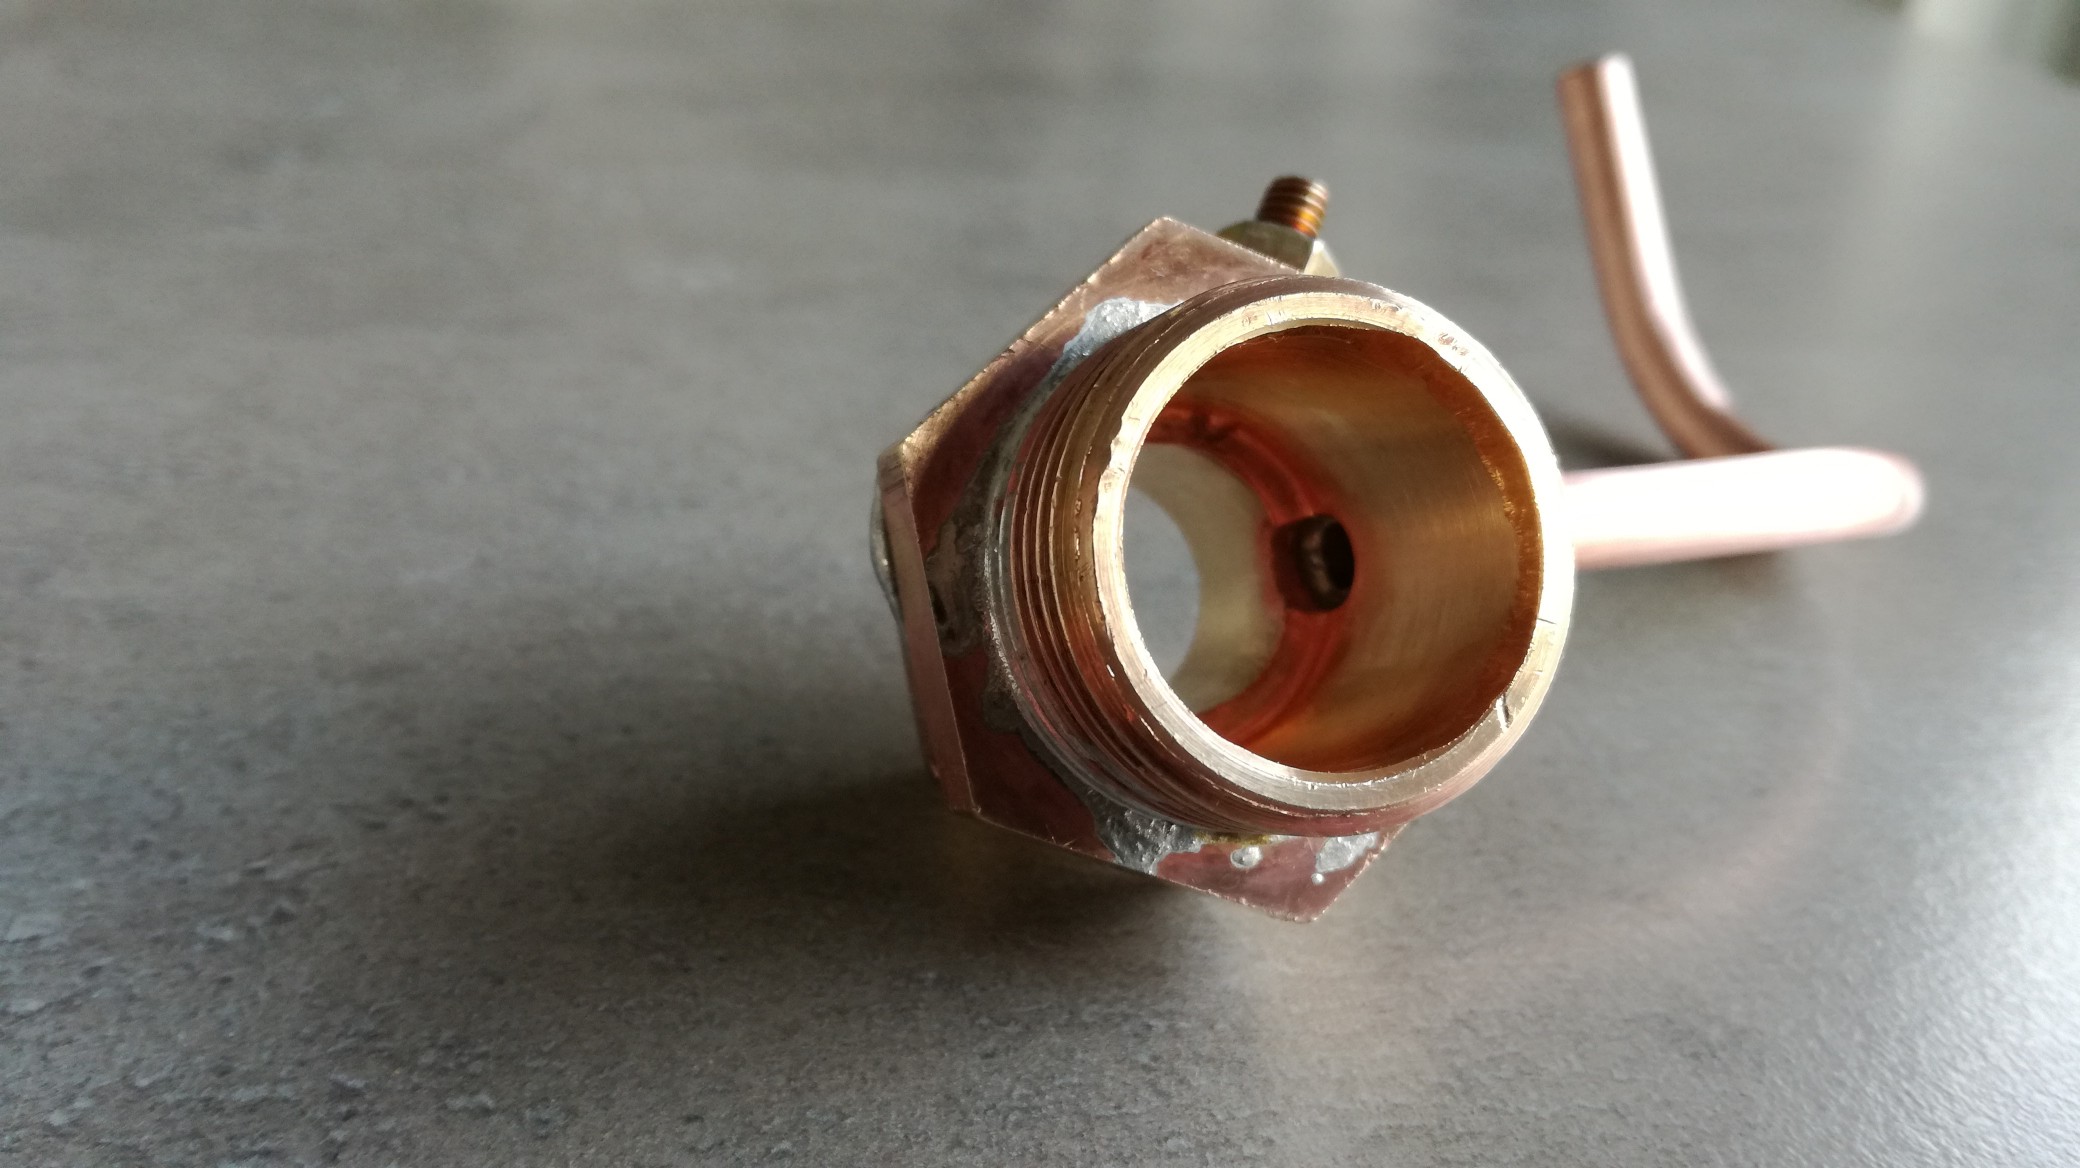
This is the sensor with breather pipe:
some very small hole in the bottom and top allow fuel entering the sensor assembly:
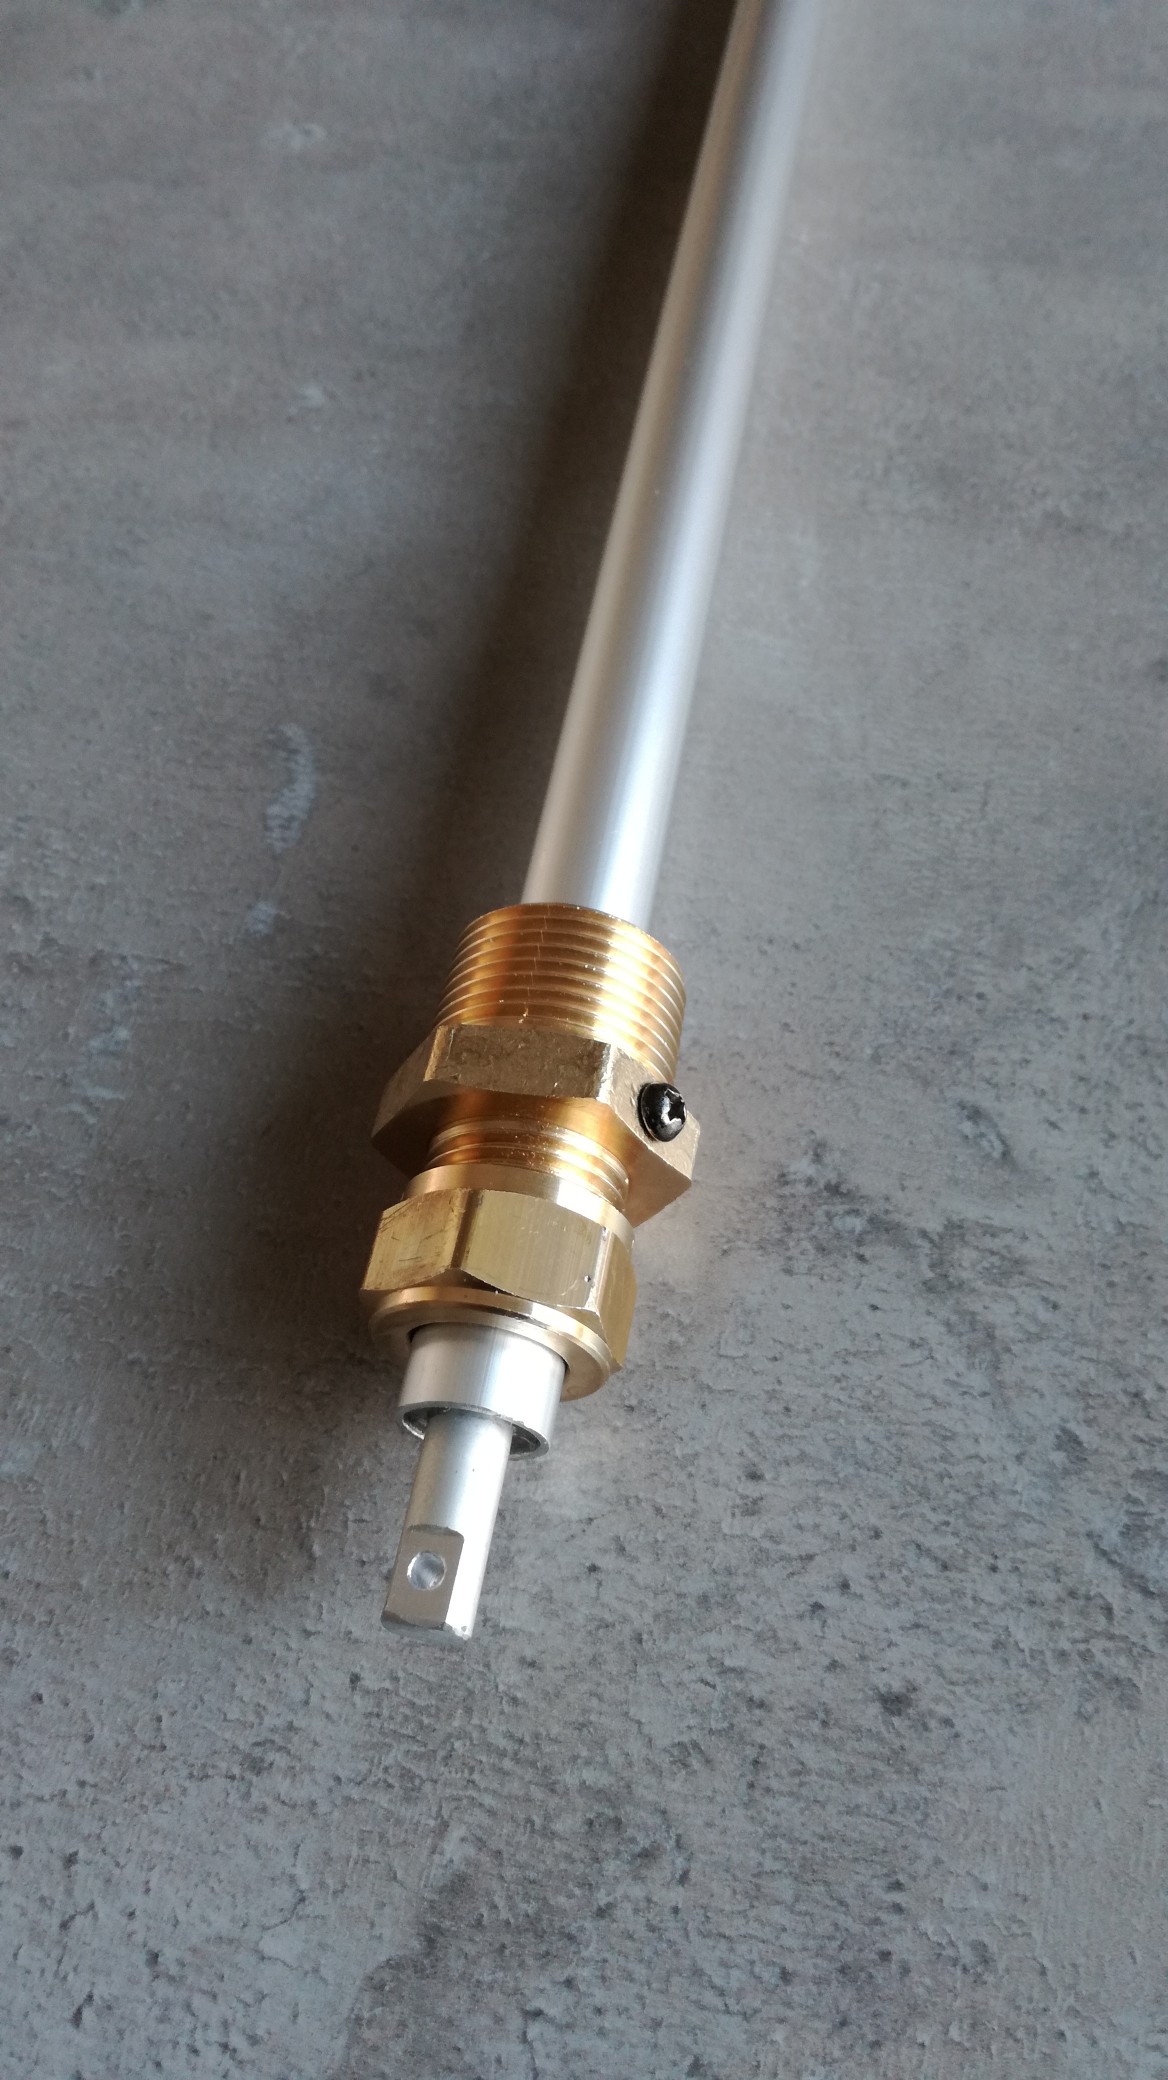
clamped the sensor in somesort of brass fitting:
Electronics ready for callibrating in real gas:
added the breather pipe:
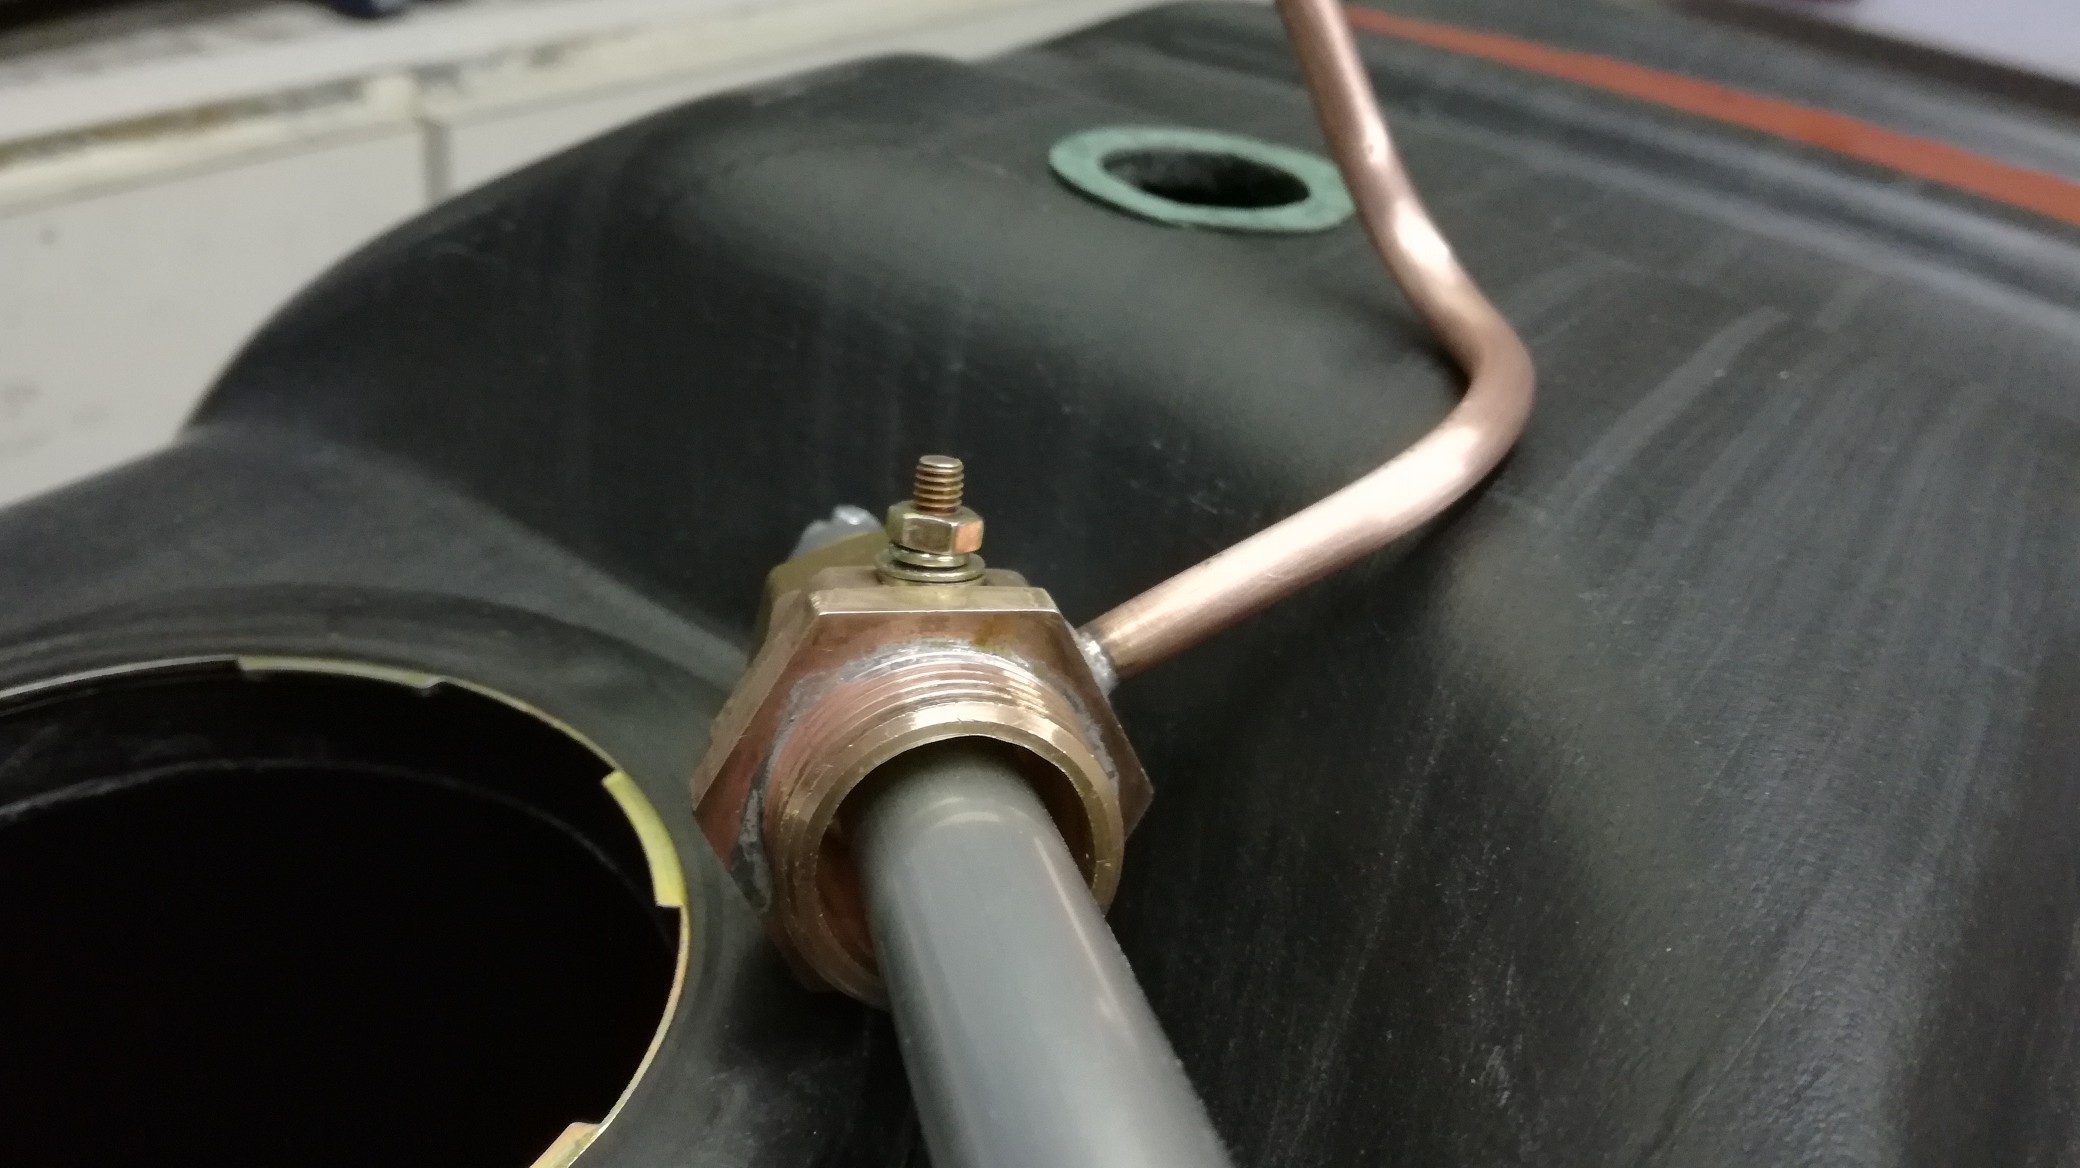
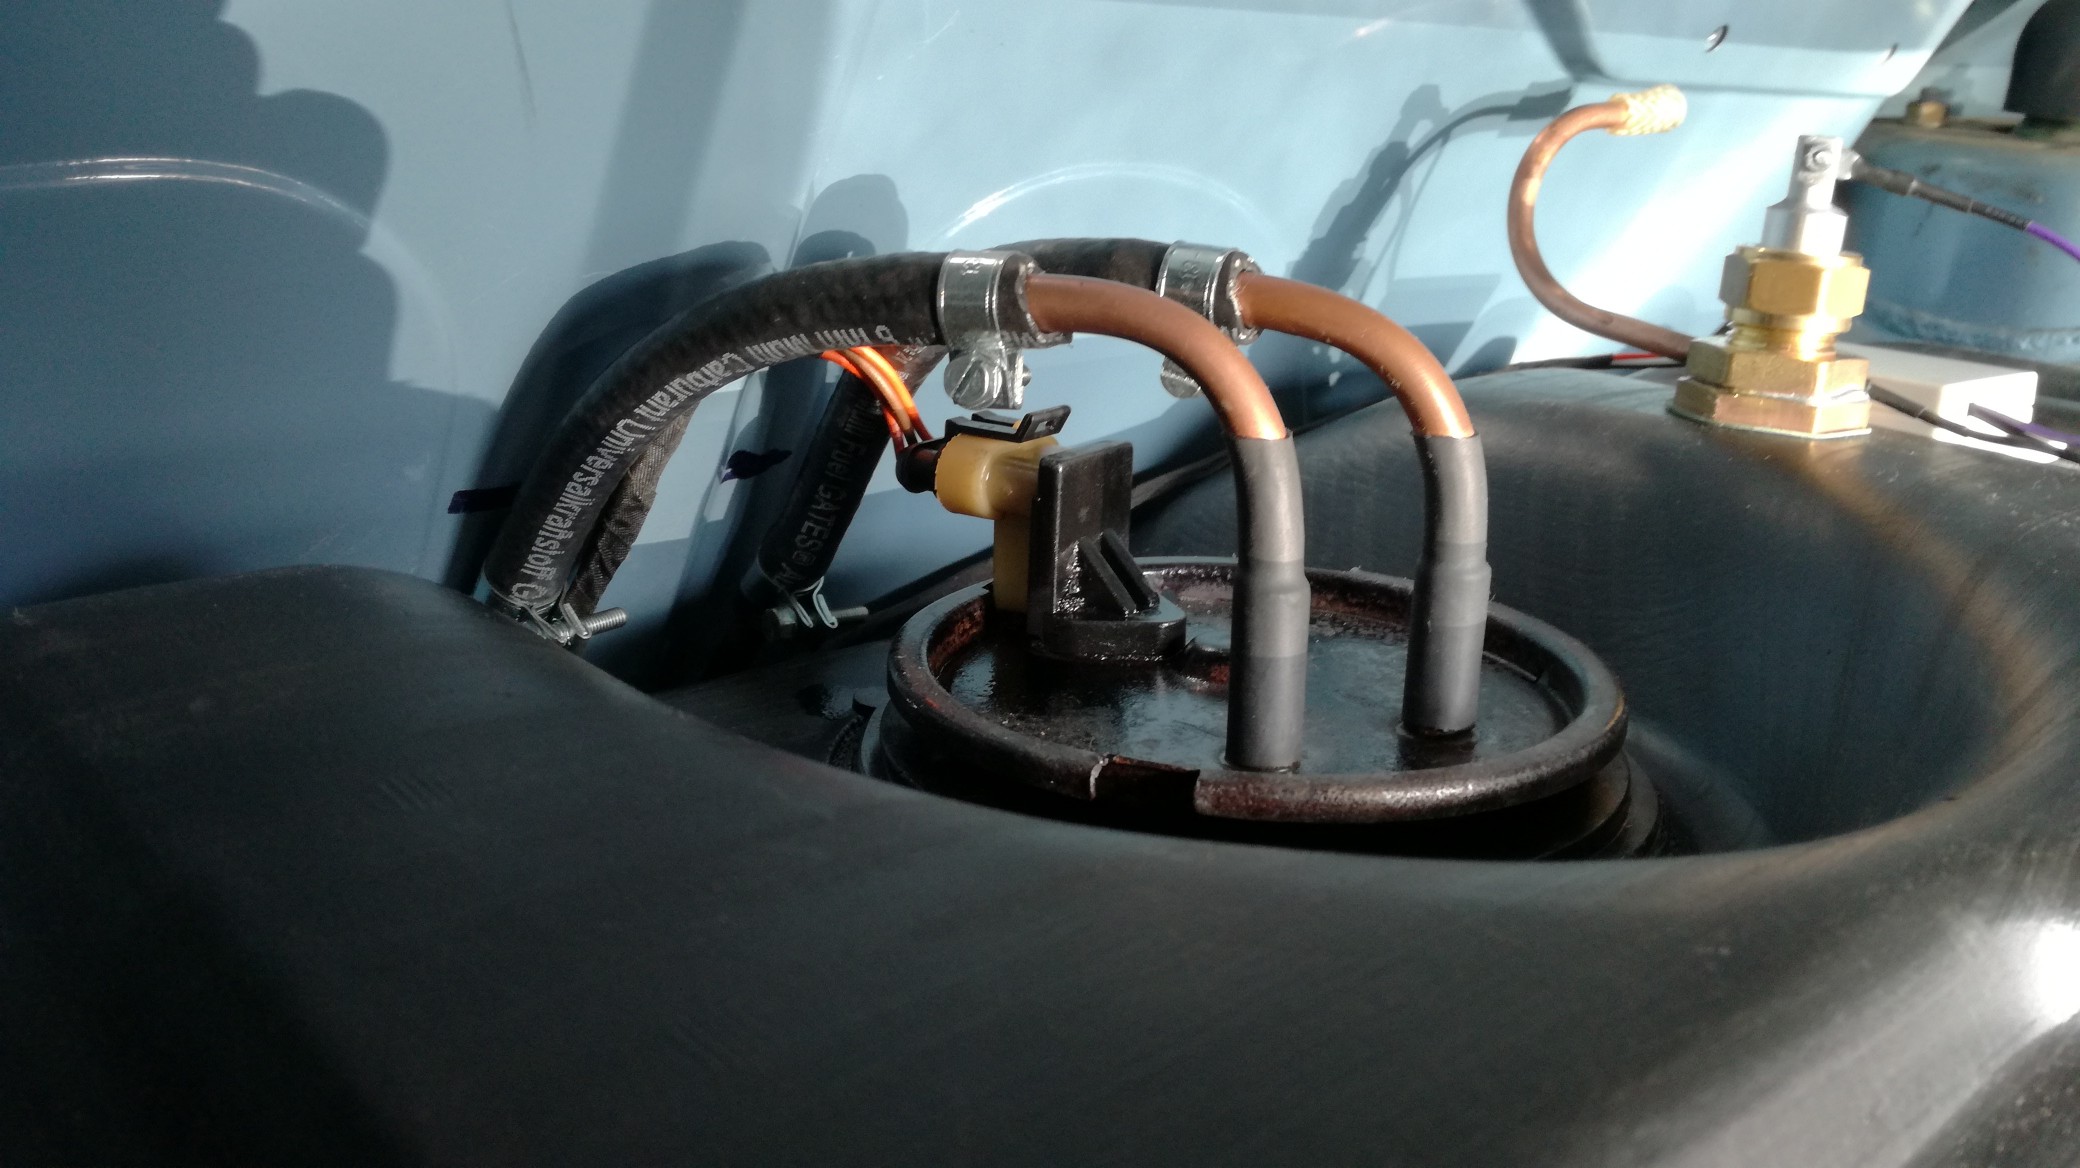
and mounted the sensor assembly into the tank:
next was altering the tank brackets so they would fit nice into the boot and adding some hard fuelline into the boot:
hard lines into the boot:
brackets mounted:

tank placed:
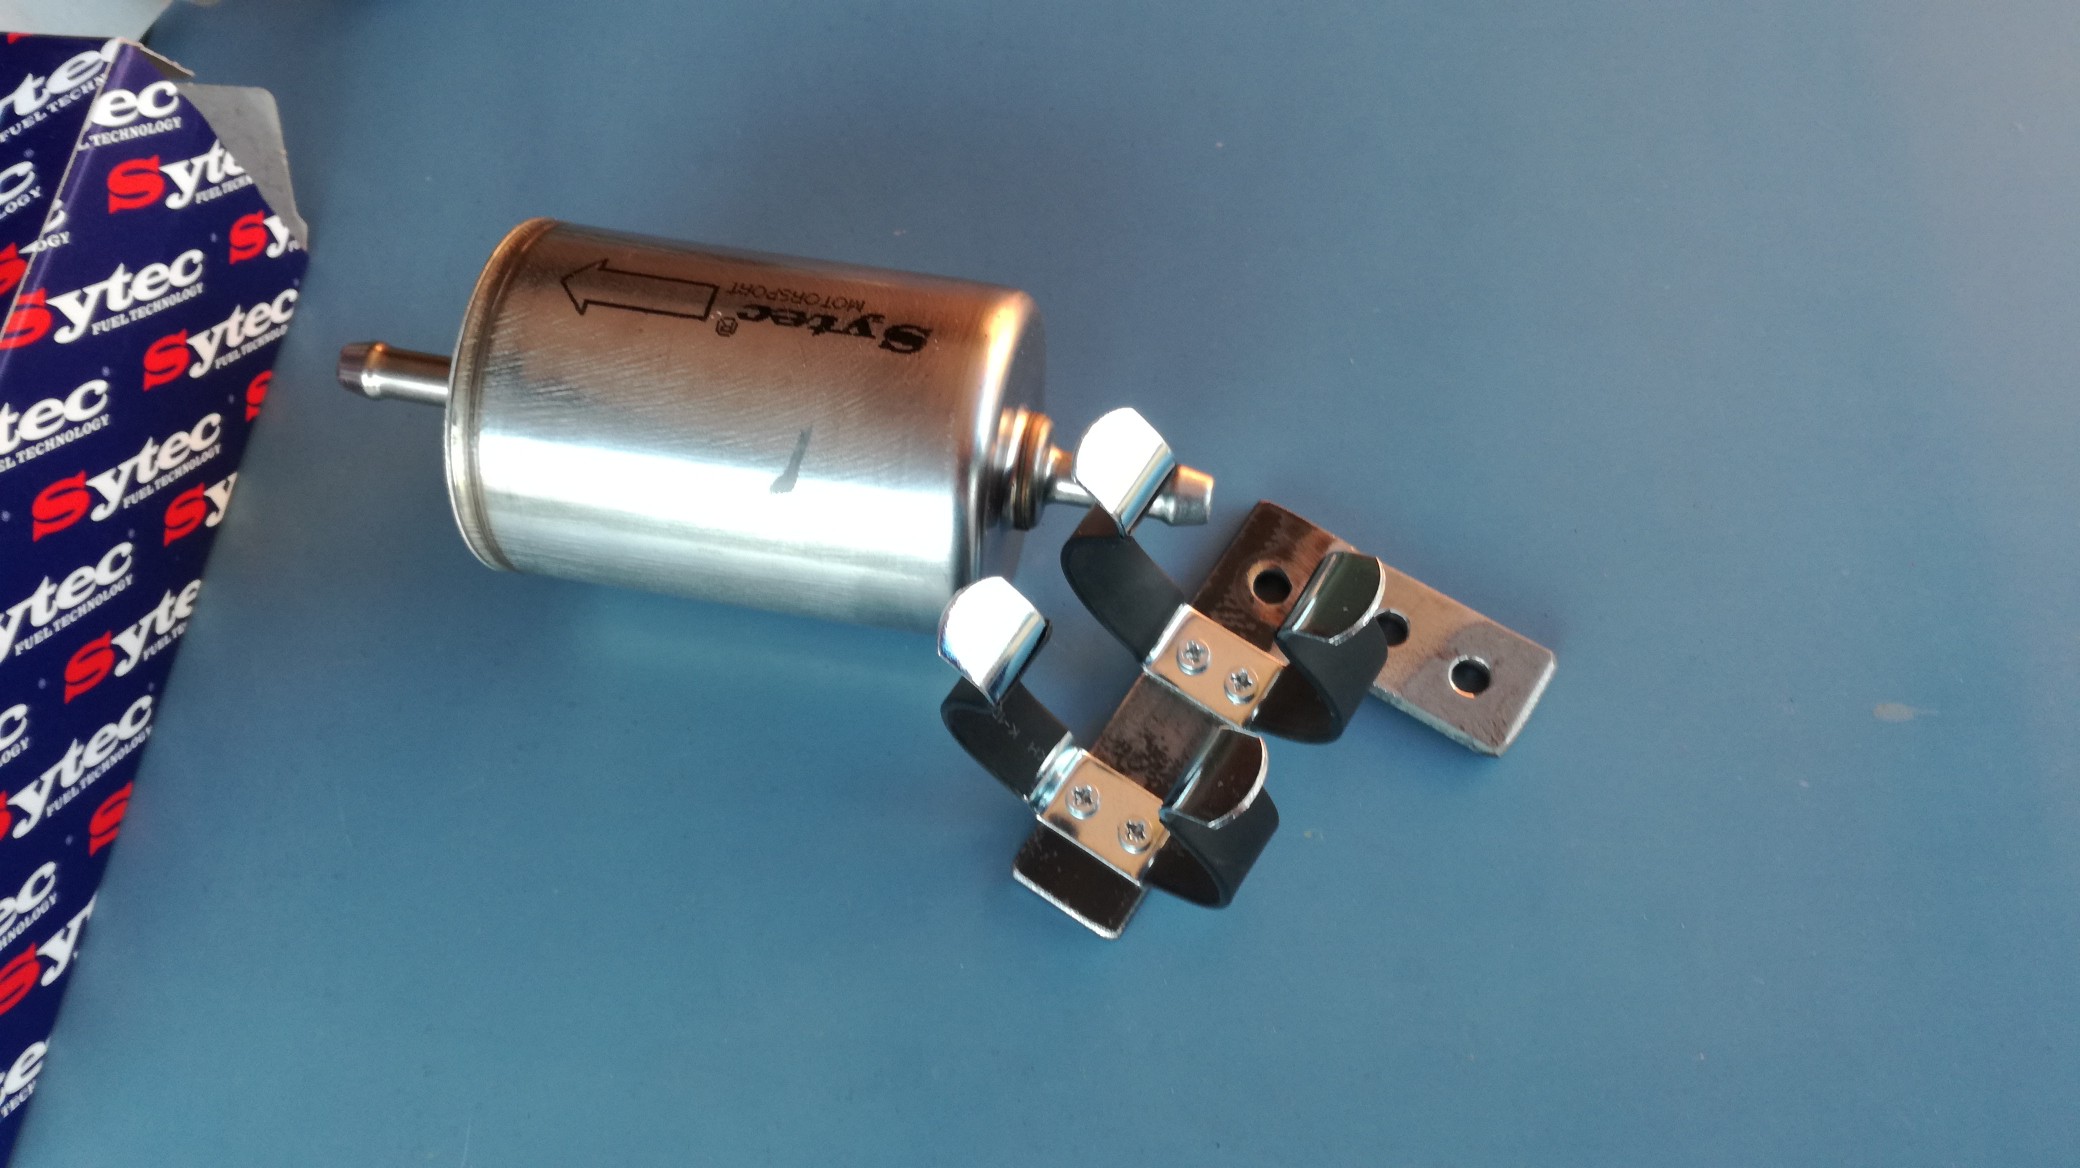
made a new fuel filter bracket:
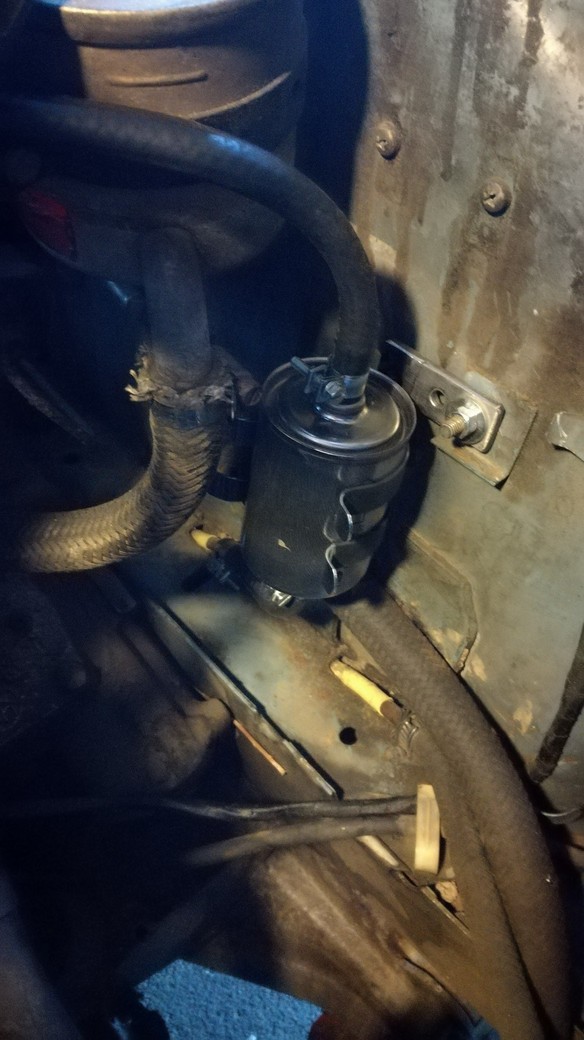
and placed it into the engine compartment:
then adding wiring, fuses and a relay for switching between the pumps:

With the old fuelpump still mounted i drained the old fueltank into the new tank and then it was time to take the old leaky fueltank underneath the car.
I've done some testing with both old and new fuelpump because i wanted to know how much fuel ech pump could deliver and the corresponding current.
old fuelpump/filter assemblty:
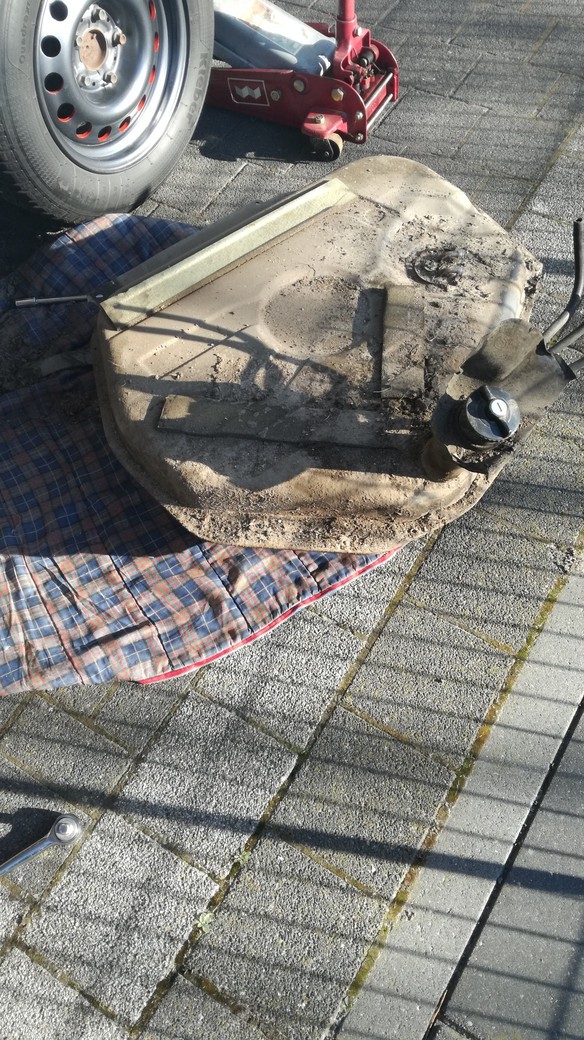
leaky tank is out !!!
The middle switch in this switch panel still didn't have a working function, but that has changed now.
The original leaky fuel tank is gone and a "new" fueltank is installed in the boot of the car, also the fuelpump/filter assembly hanging under the car is gone and replaced by a dual in tank fuelpump setup and the fuelfilter is relocated to the engine compartiment.
Purpose of a dual fuelpump setup isn't more fuel delevery, but always having a spare pump ready when the other pump fails.
What seemed a fairly simple and small job turned out as a big job after all.
It all started with the purchase of this 70 liter light truck fueltank:
After a wash it looks much better and fits nicely between the rear wheelarches in the boot:
This thank doesn't have fuelpumps inside, a incompatible fuelgauge sender unit and misses a vapour vent connection because its intended use was for diesel and placed outside the vehicle. The fillercap has a over/under pressure valve for venting.
First thing to do was fabricating a bracket holding the fuelpumps and fuellines an sourcing 2 fuelpumps which would fit together through the apendages flange hole which is 85mm in diameter.
I found some johns fuelpumps with filters on ebay intended for ford focus for a nice offer.
When they arrived it turned out they had a 38mm diameter, so 2 pumps arranged nicely to eachother should fit.
These pumps also have a build in check valve, so fuel flows only in 1 direction, and when only 1 pump runs the fuel can't flow through the other pump back.
Because the fuelgauge senderunit wasn't usable i've decided to use the flange for the fuelpump setup, and fabricated a nice bracket and fuellines to the flange.
the new fuelpumps:
The fuelpumps bracket:
with a nice snug fit through the appendages hole:
test fitting the pumps in the bracket:
then added some hard fuel line and wiring:
and mounted the pumps with some short hoses and a y piece
fits all nicely in the tank:
Next hurdle was a fuellevel sender. I took a totaly different route, almost all fuellevel senders have a variable resistor and some kind of floating device.
I would construct a fuellevel sender without any moving parts, and the idea was measuering capacitance, which is only possible in non conducting liquids like gas.
After some bench testing i was shure this project should succeed and started building a sensor unit and electronic control unit.
The sensor unit is made out of aluminium tubing. measurents learned that the capacitance from the sensor unit is around 80pF in air and 120pF when fully dimpled in gas.
In the top of the sensorunit i've made the tank breather conection.
I'm measuring the capacitance with a ATTINY84 mircocontroller an translate the measuered capacitance (fuel level) to a suitable pwm signal which goes to the original fuelgauge in the dash cluster. This took a lot of late nights debugging but in the end i managed it.
This is the sensor with breather pipe:
some very small hole in the bottom and top allow fuel entering the sensor assembly:
clamped the sensor in somesort of brass fitting:
Electronics ready for callibrating in real gas:
added the breather pipe:
and mounted the sensor assembly into the tank:
next was altering the tank brackets so they would fit nice into the boot and adding some hard fuelline into the boot:
hard lines into the boot:
brackets mounted:
tank placed:
made a new fuel filter bracket:
and placed it into the engine compartment:
then adding wiring, fuses and a relay for switching between the pumps:
With the old fuelpump still mounted i drained the old fueltank into the new tank and then it was time to take the old leaky fueltank underneath the car.
I've done some testing with both old and new fuelpump because i wanted to know how much fuel ech pump could deliver and the corresponding current.
old fuelpump/filter assemblty:
leaky tank is out !!!
Last edited by BertjeConti on Sun Nov 27, 2022 11:32 am, edited 1 time in total.
Megasquirted '77 E12 520-6
Aspen Silver '96 E39 523i
-
Jeroen

- Site Admin
- Posts: 29320
- Joined: Tue Sep 14, 2004 12:23 pm
- My E21(s): '81 323i Baur
- Location: The Netherlands
- Contact:
Re: Pastelblau 520/6
Ahhh working on some updates here, nice to see and thanks!
Regards/groeten, Jeroen
-
Mihajlo

- E21 Pro
- Posts: 549
- Joined: Thu Aug 23, 2007 11:07 am
- My E21(s): 1982 315swap323i
- Location: Croatia - Rijeka
- Contact:
Re: Pastelblau 520/6
nice write up! I like the part with fuellevel sender...
just to ask, are fuel lines big enough? I guess diameter should be a bit bigger because you have 2 pumps.
or will they work only separately?
just to ask, are fuel lines big enough? I guess diameter should be a bit bigger because you have 2 pumps.
or will they work only separately?
Understeer is when you hit the wall with the front of the car. Oversteer is when you hit the wall with the rear of the car.
Horsepower is how fast you hit the wall. Torque is how far you take the wall with you.
Horsepower is how fast you hit the wall. Torque is how far you take the wall with you.
-
BertjeConti
- E21 Mad
- Posts: 3019
- Joined: Mon Nov 04, 2013 9:49 pm
- My E21(s): E12 520-6
- Location: nederland , Weert
Re: Pastelblau 520/6
Fuelpumps work separetly, just one at a time. (In case one fails, i can switch to the other one)
Megasquirted '77 E12 520-6
Aspen Silver '96 E39 523i
-
BertjeConti
- E21 Mad
- Posts: 3019
- Joined: Mon Nov 04, 2013 9:49 pm
- My E21(s): E12 520-6
- Location: nederland , Weert
Re: Pastelblau 520/6
more updates
Last autunm it was time for a new set of tyres, the ones on the car were dried out completely and so slippery on wet, i lost the car almost while braking in a corner.
But there isn't much around anymore for my 14" wheels in 195/70R14. I want tyres with best performance on wet and they must also be aproved for winter conditions.
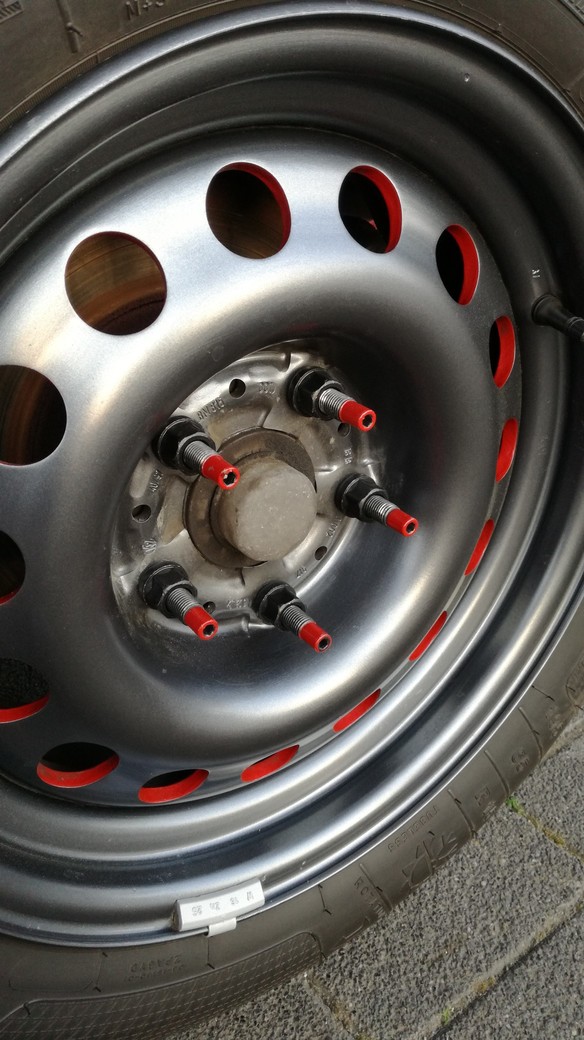
I had a set of 15" rims laying around with old winter tyres coming from a E39. These are aluminium rims lookalike steelies. In 15" (195/65R15) there much more available, so time to give these old rims a new life.
Cleaned them and painted them in dark grey metallic, and painted the holes red (like a cut throug model).
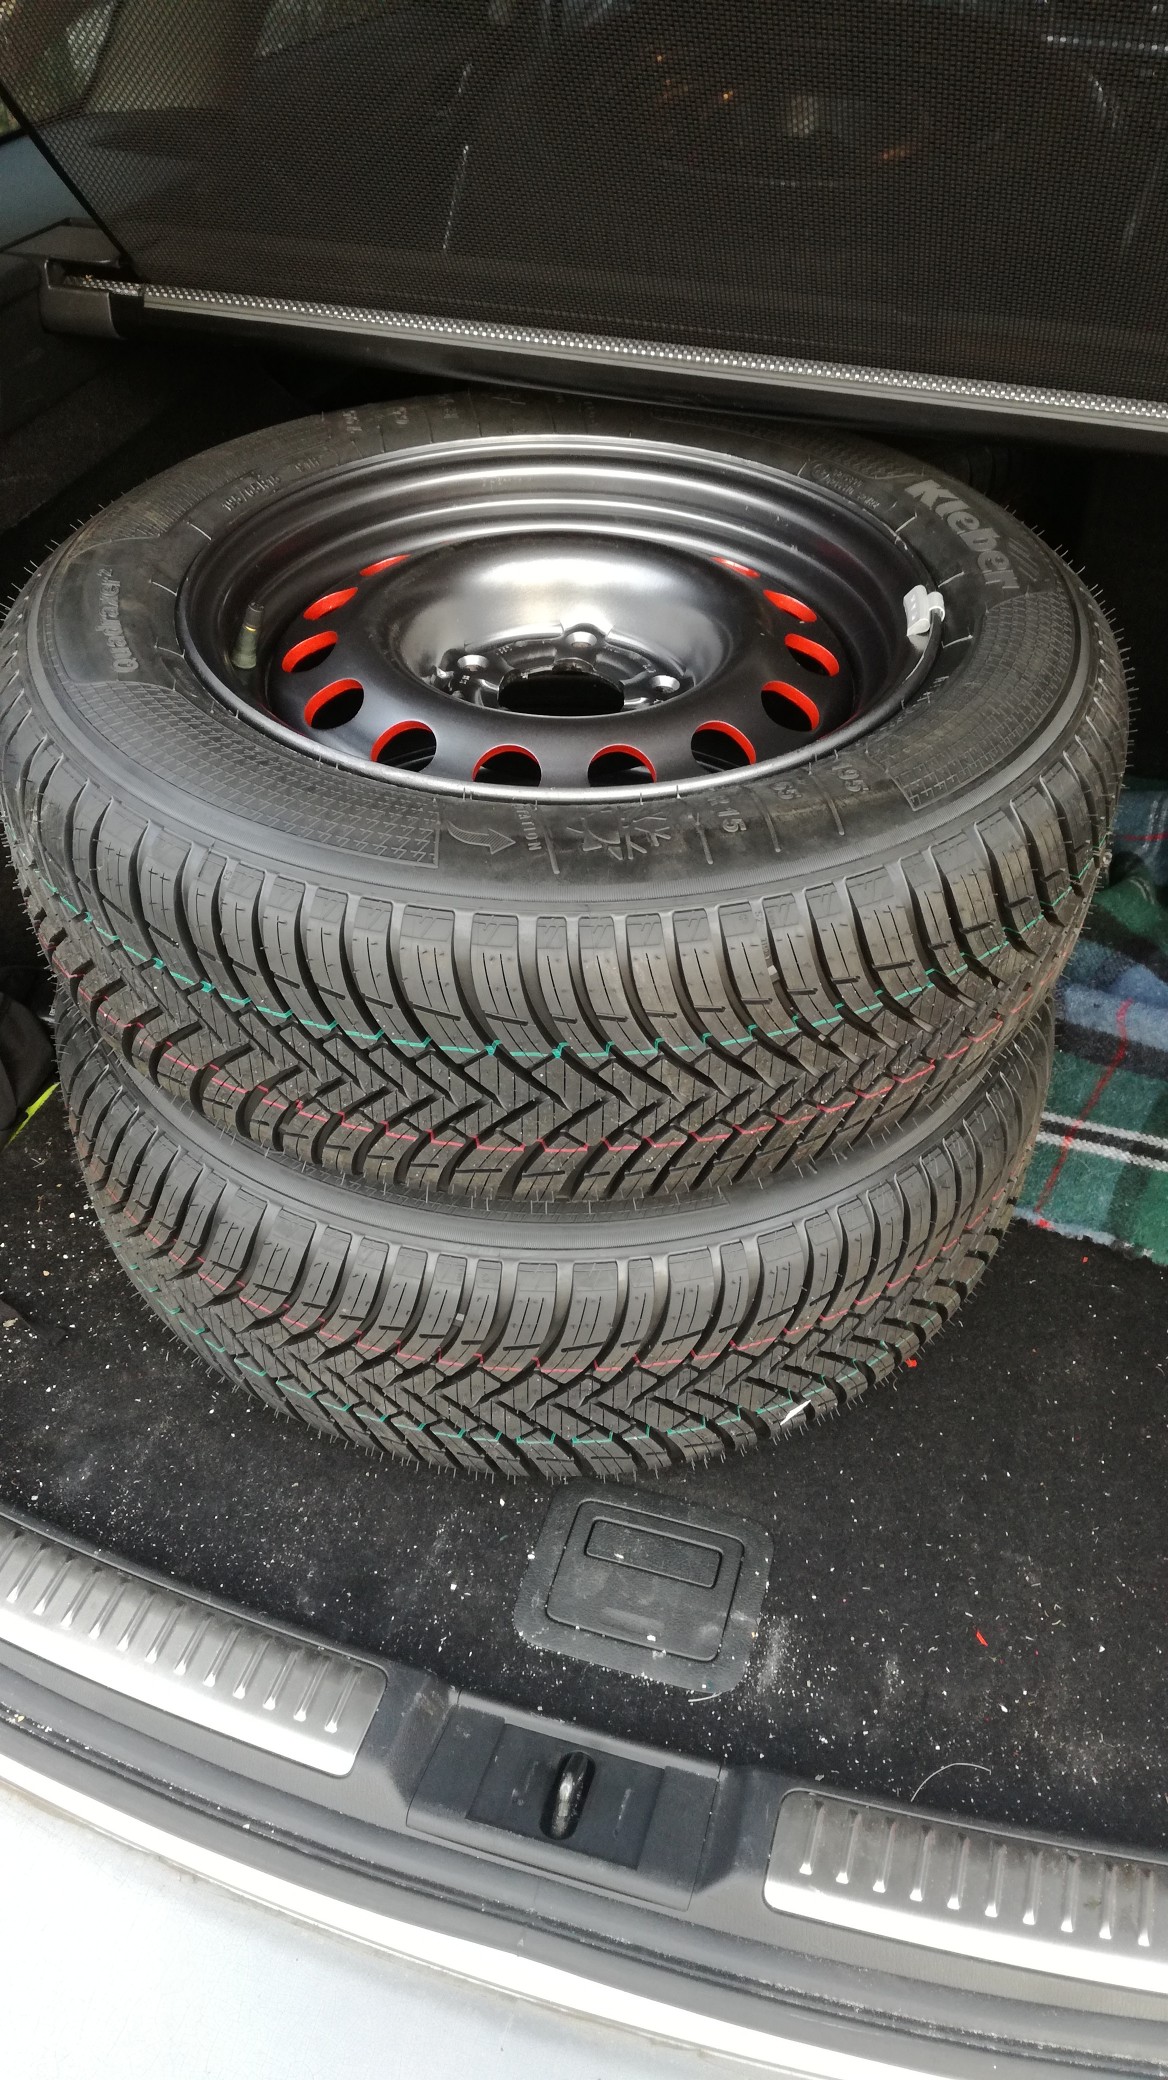
Got a set of Kleber Quadraxer all season tyres in 15/65R15 on them and a set of spigot rings because the E12 has 72,6mm hubs and the rims have a 74mm hub hole. With these spigot rings the rims fit nicely on the E12 hubs.
These new tyres are only 1% bigger, not a big deal.
rim cleaned:
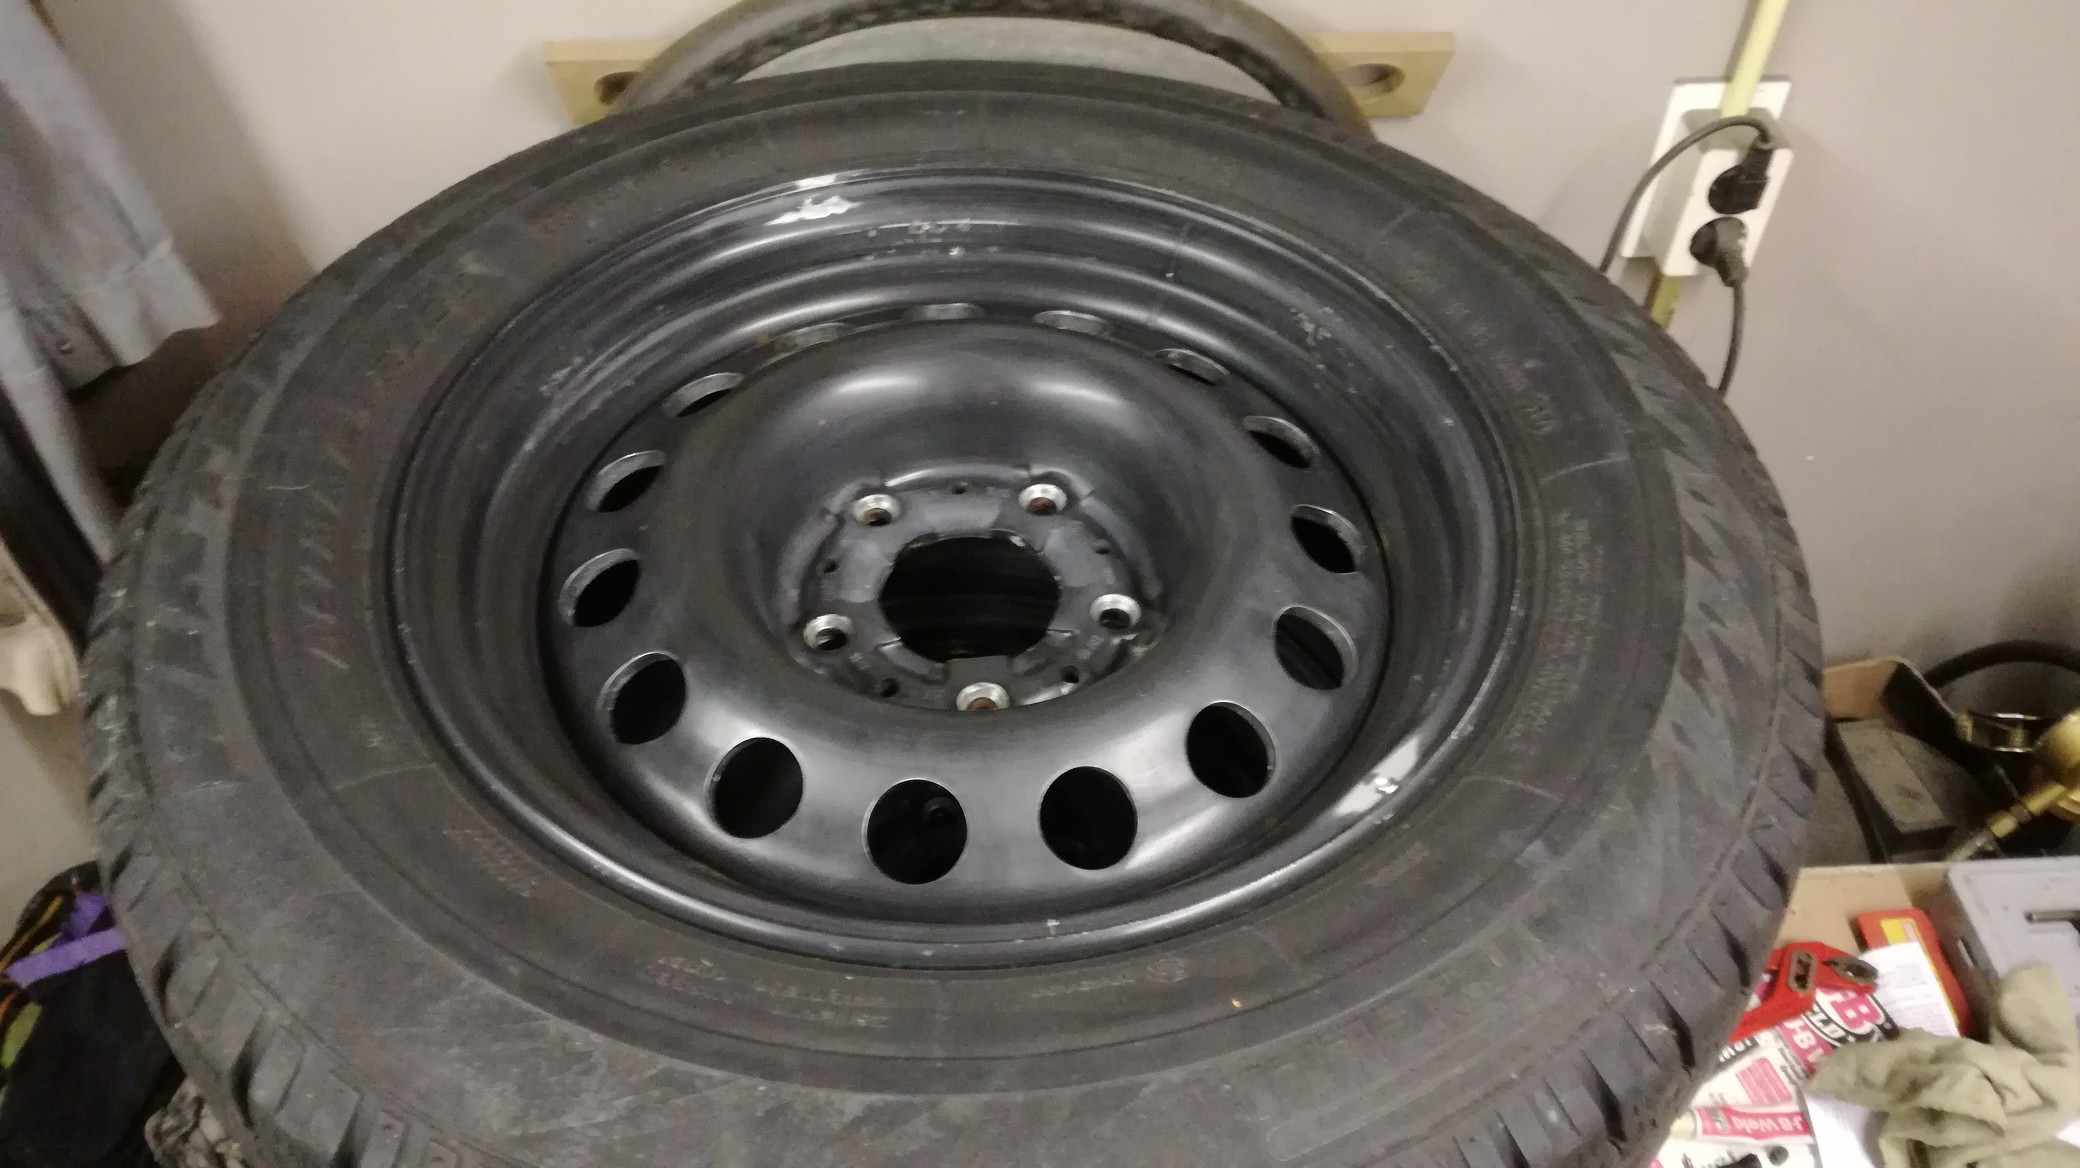
rim painted with a spraycan:

painted the holes red and mounted the new tyres:
Spigot rings:

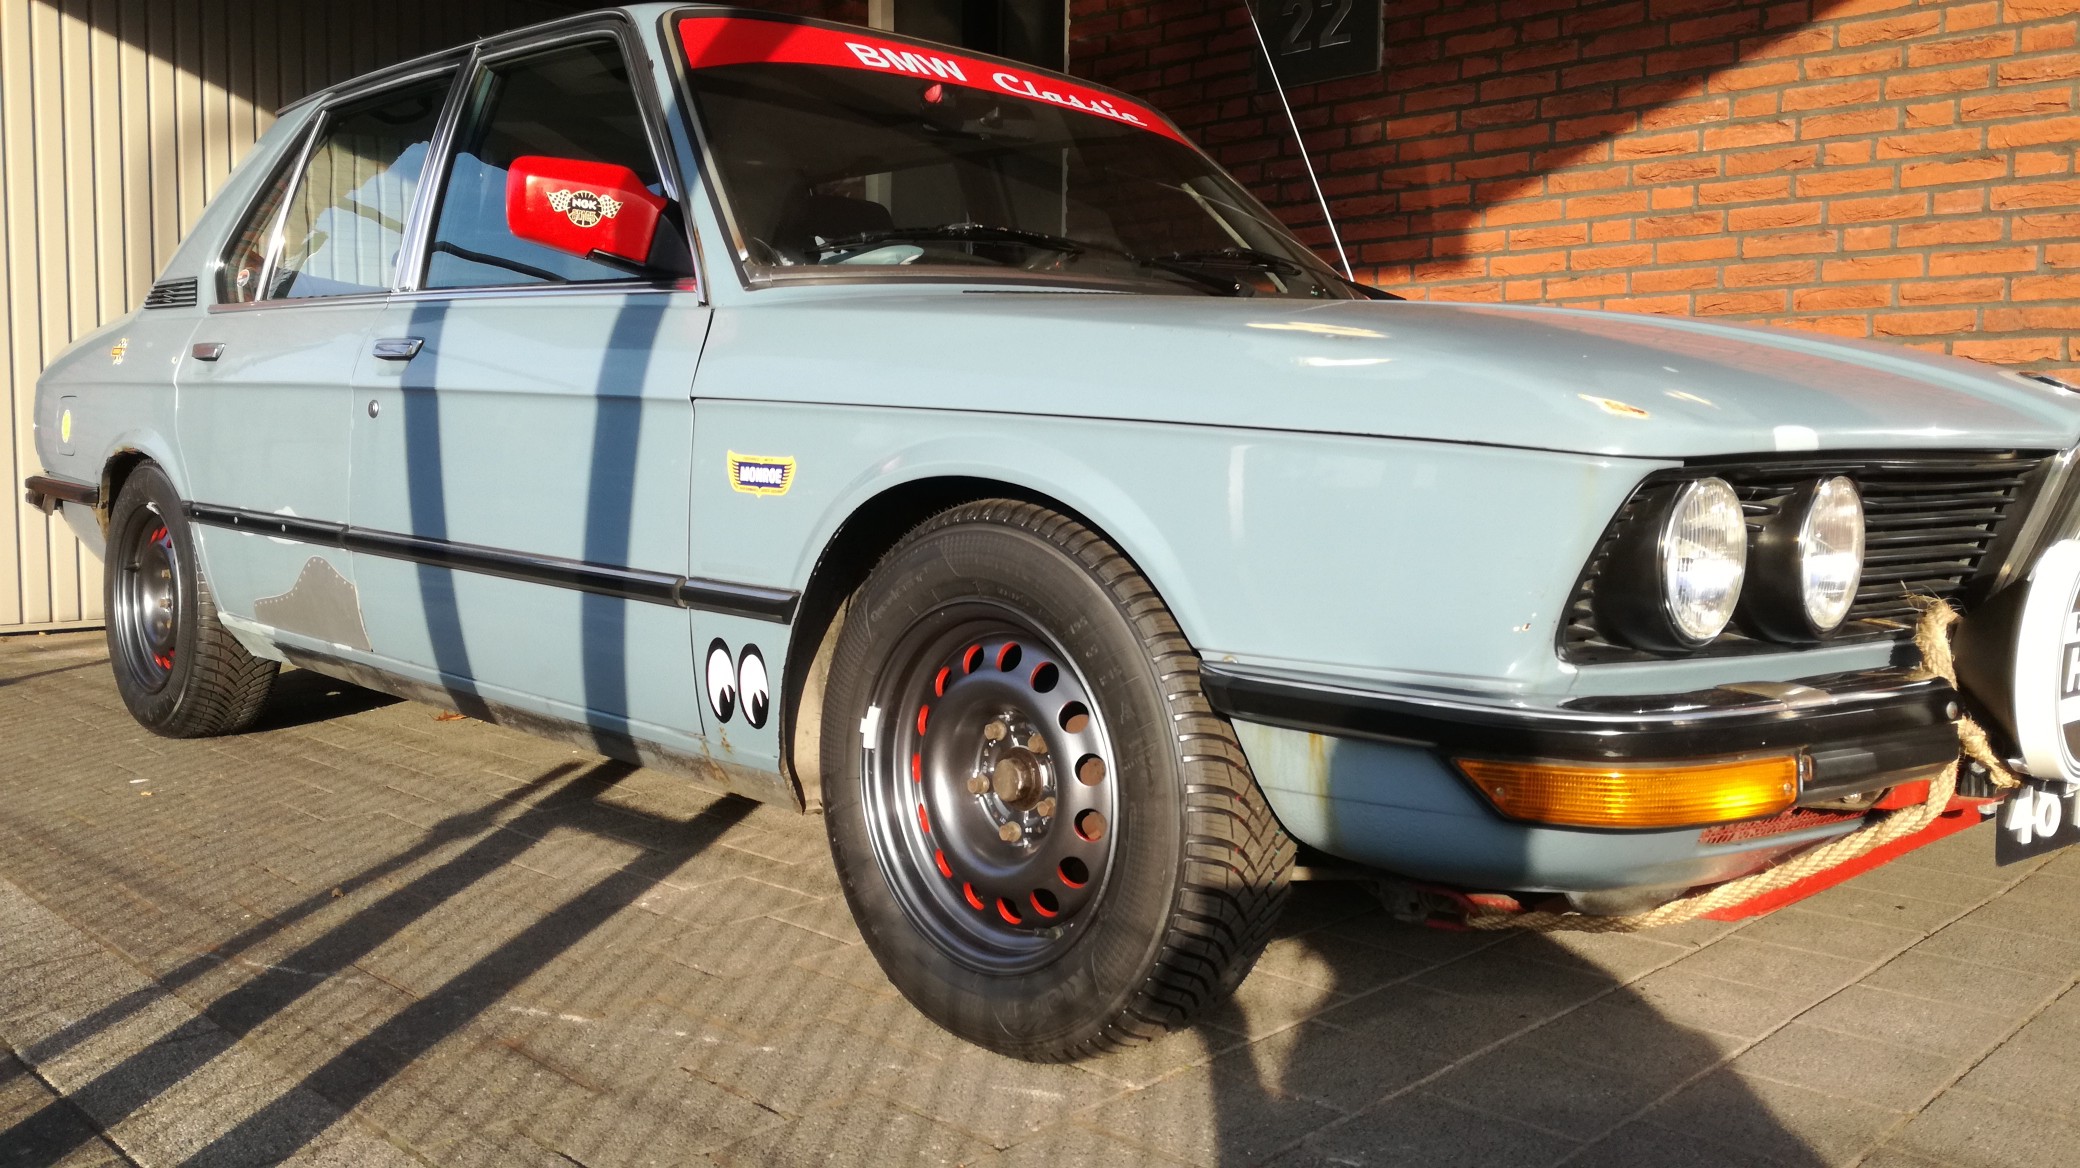
and put the new shoes on:
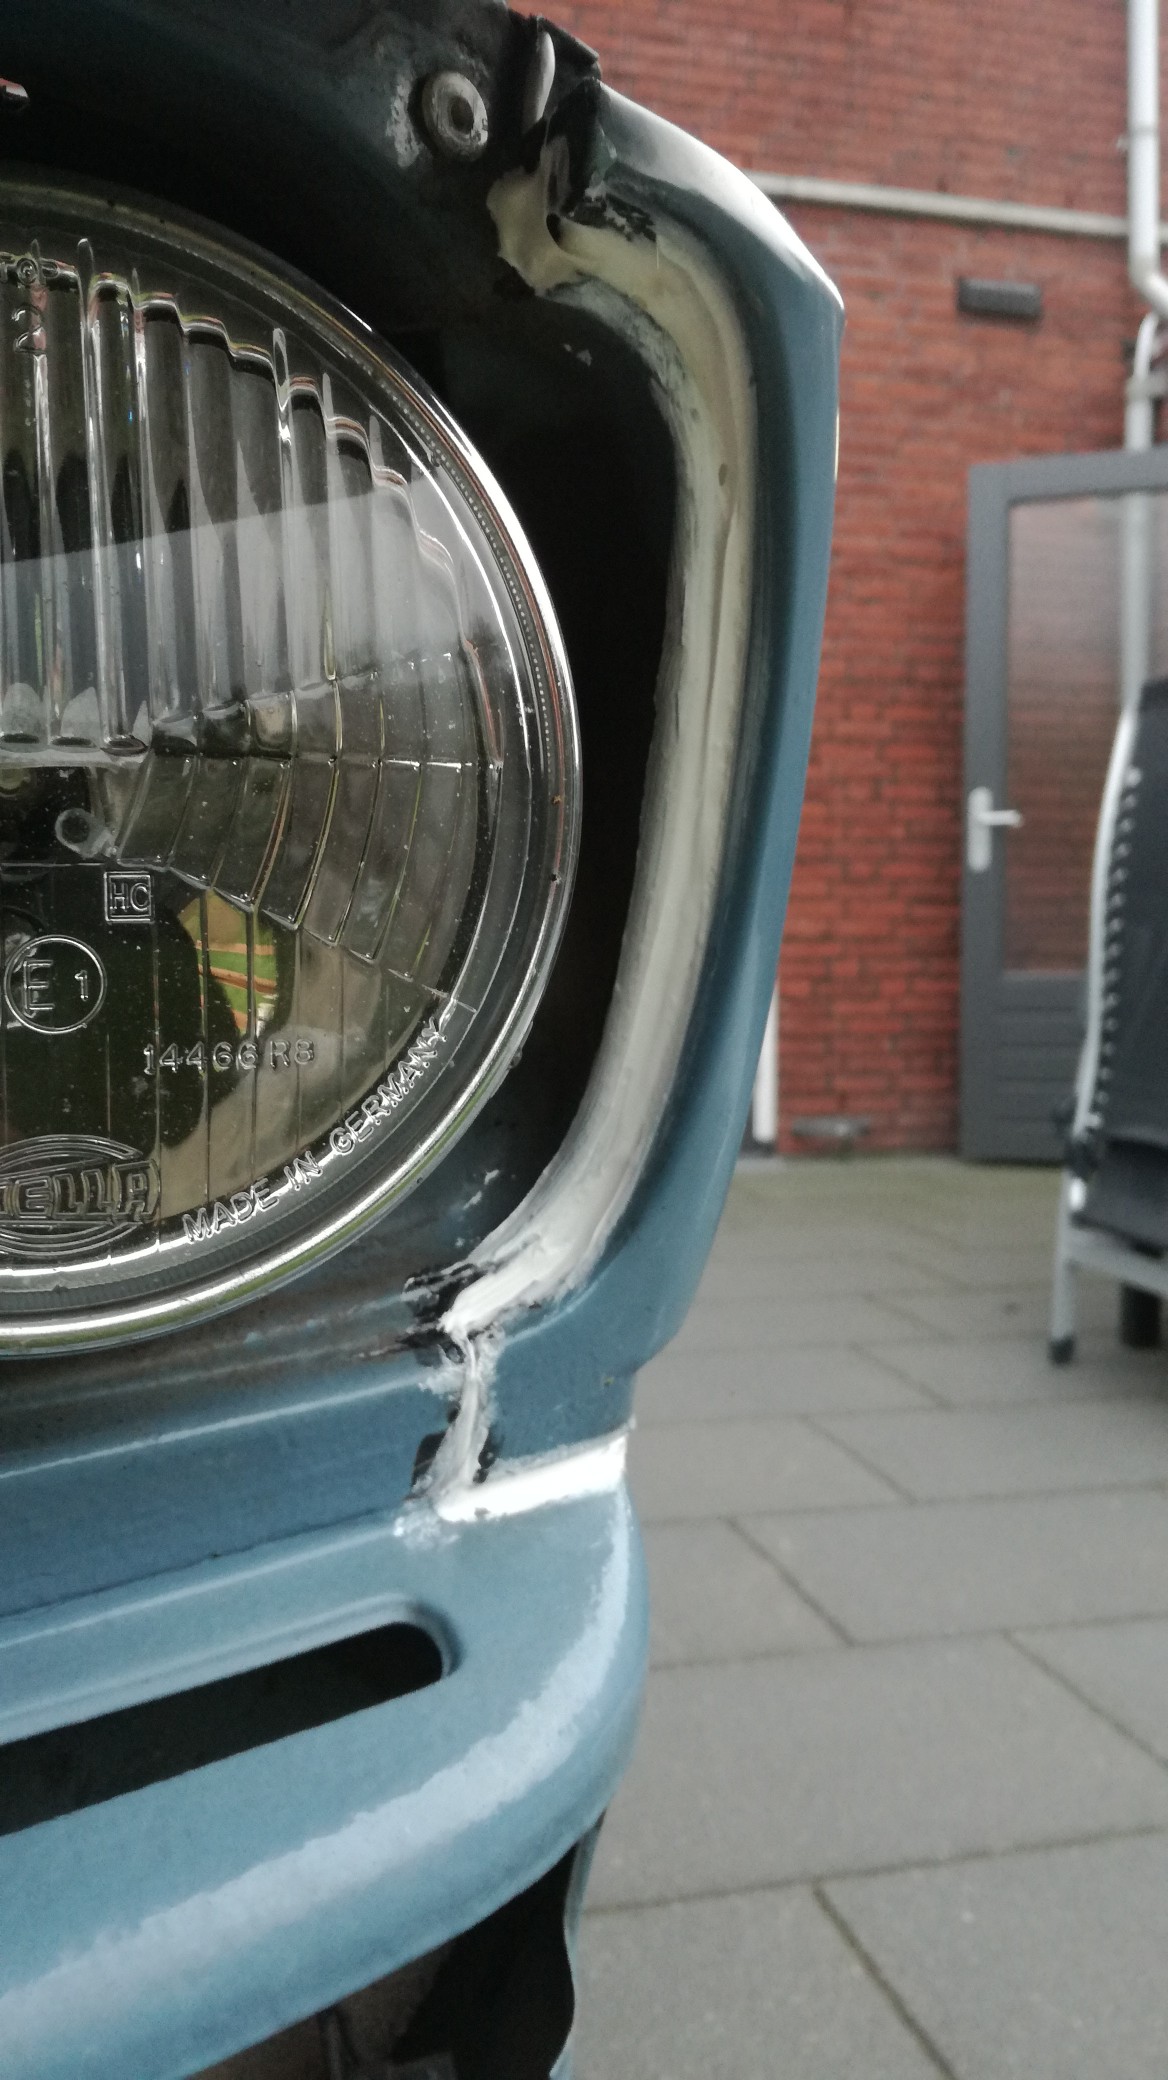
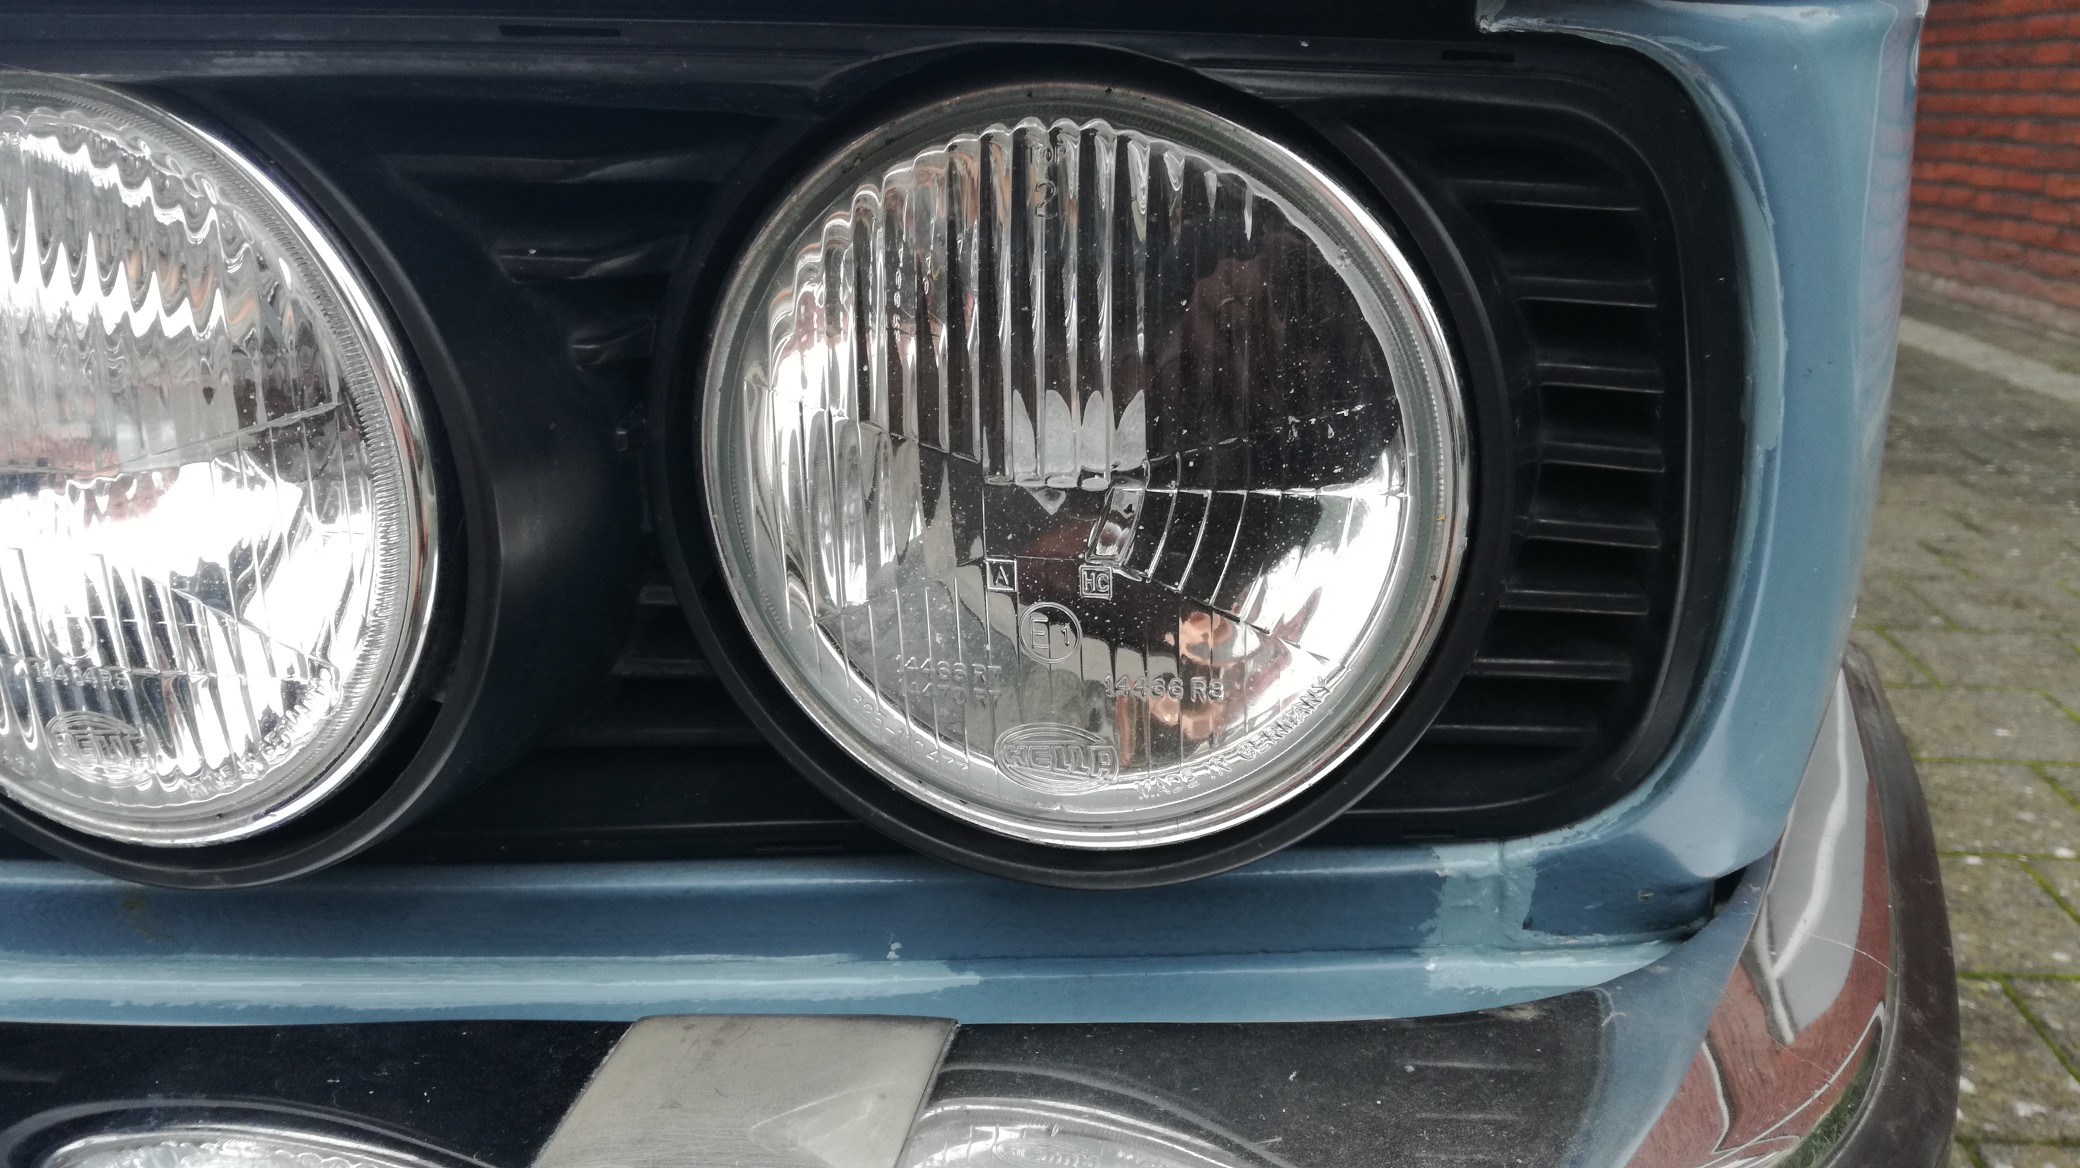
Another job done was cleaning the headlight lenses, after 40 years they were realy dull. Disasembling wasn't a problem, all screws came lose like new.
Washed the headlights with a strong waterbased detergend (Dasty) and then washed them out with deminiralized water, and dried in the headlights in the oven for 10 minutes at 75 degrees.
Now the lenses and glass are nice clear again, only the small pitting in the glass will stay forever.
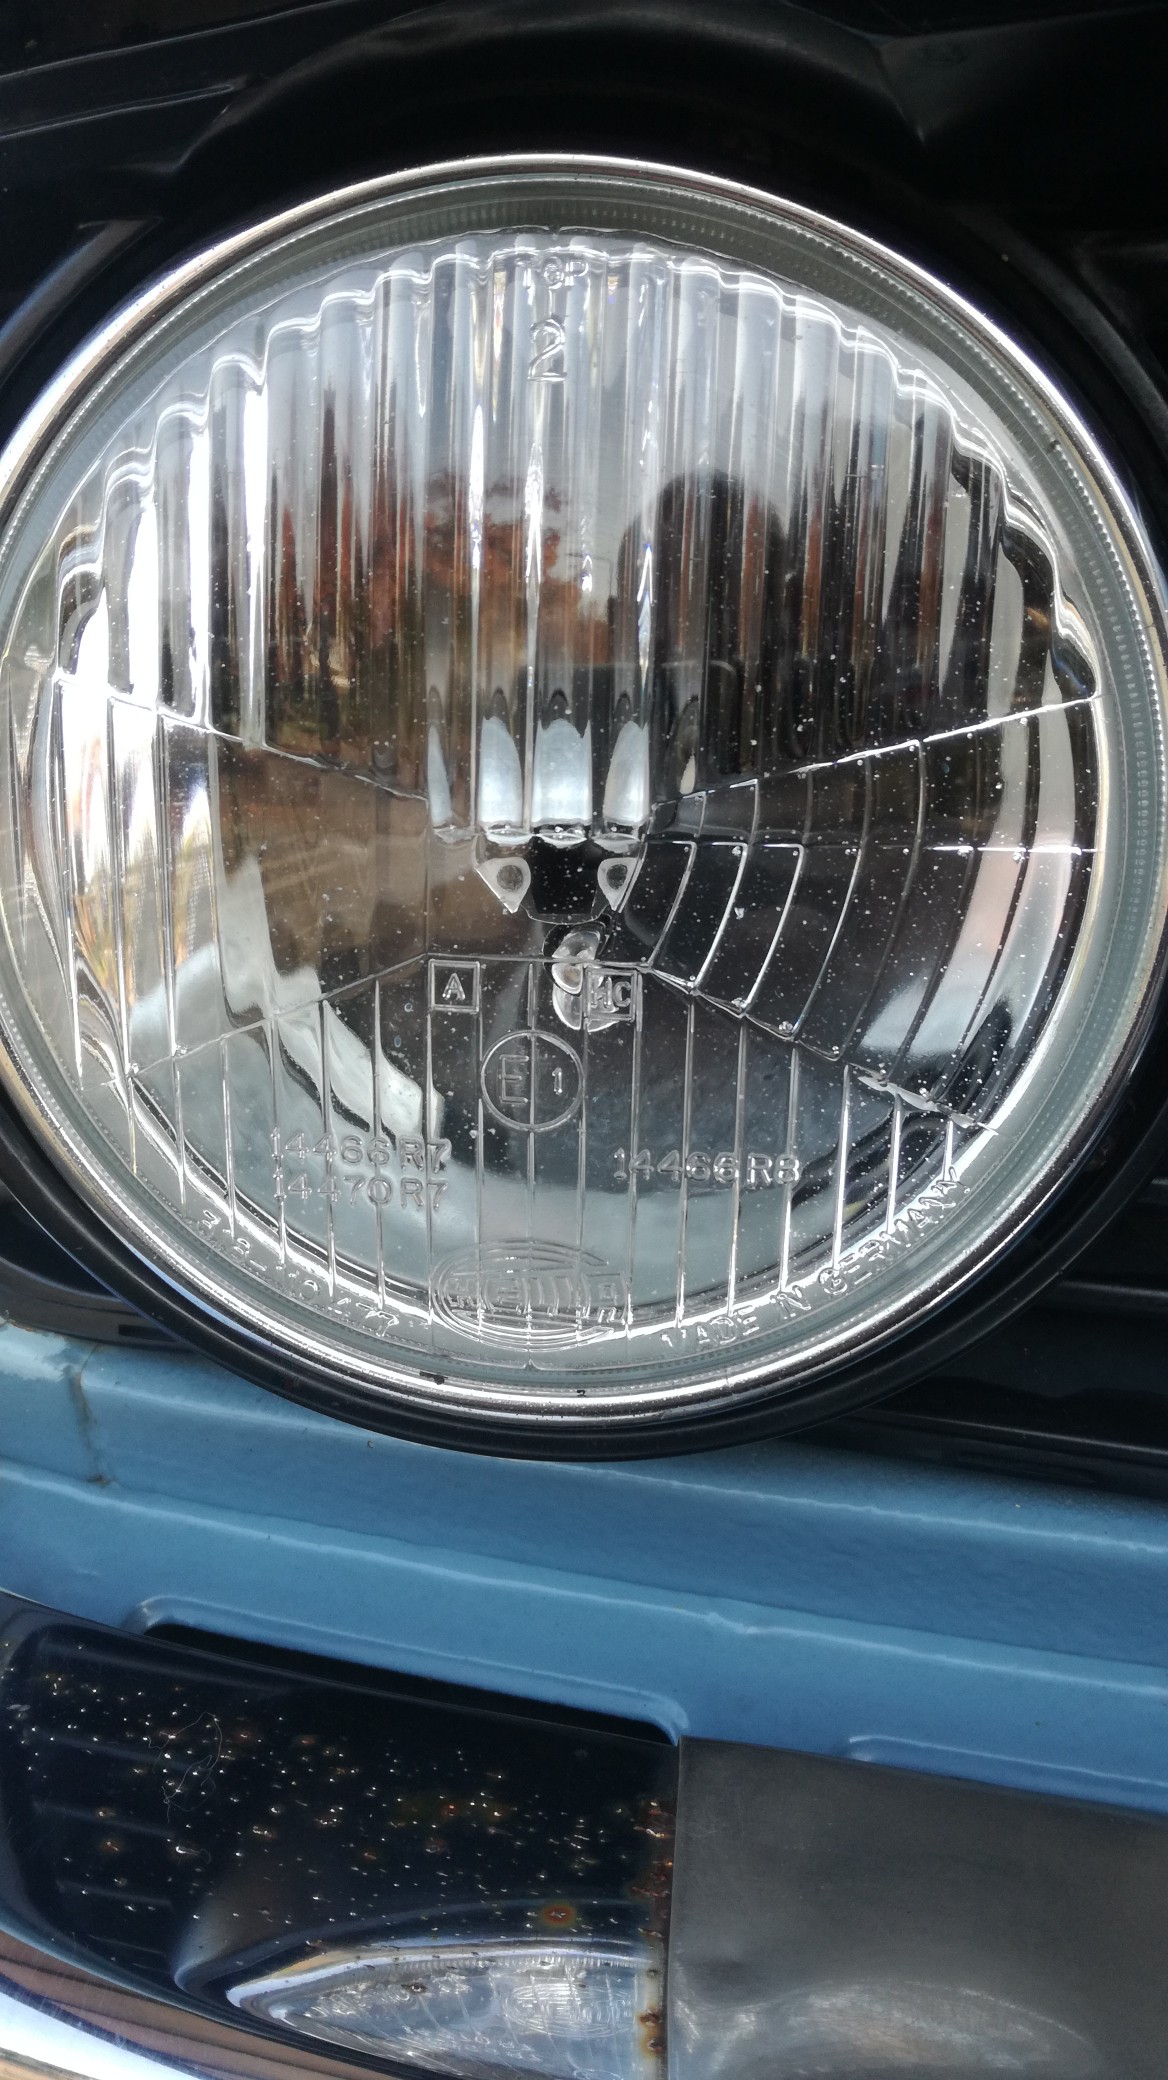
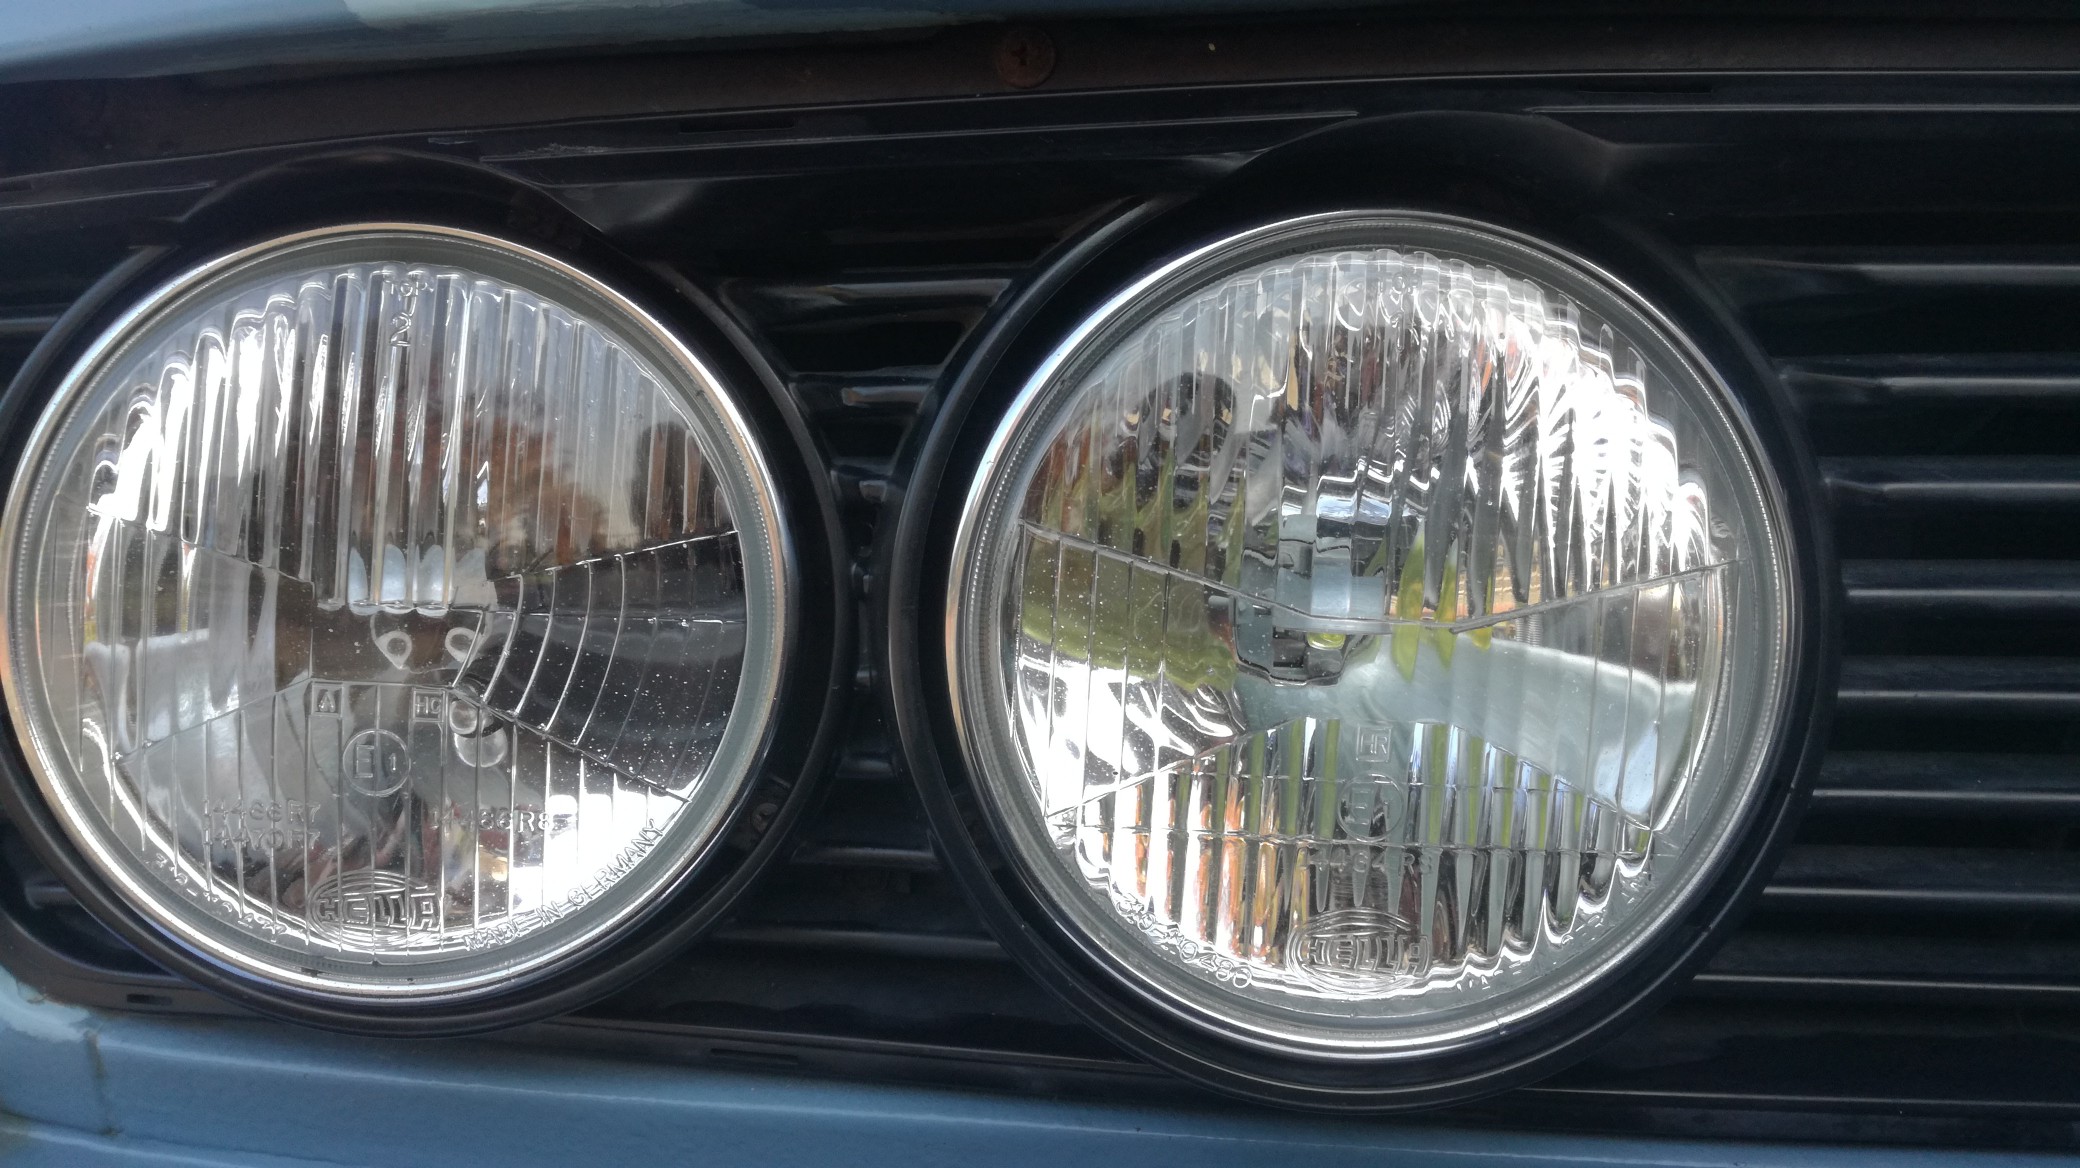
So now we have lots of light during our night rallies in the winter:

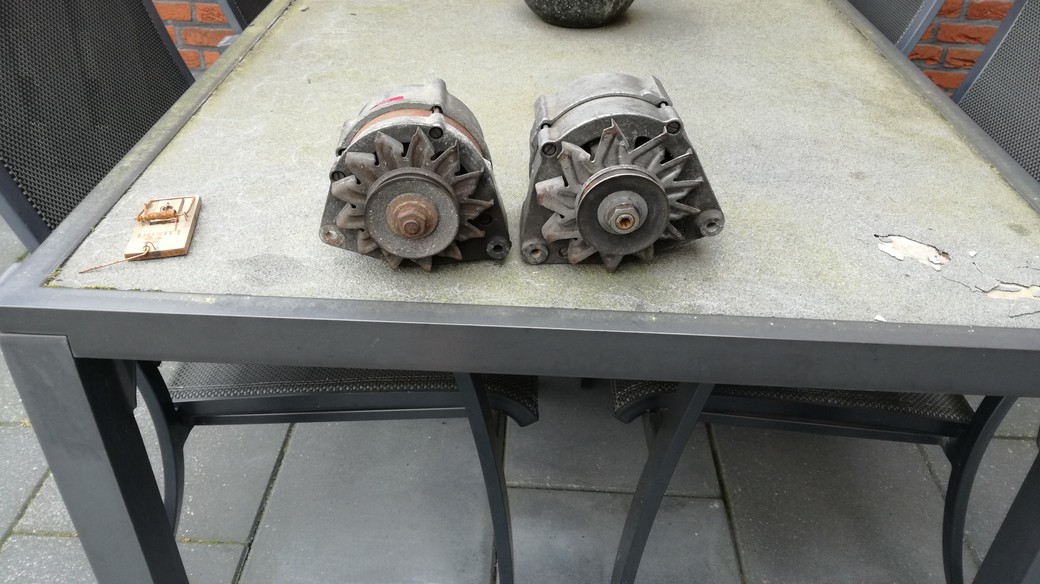
Drawback running so much headlights is that the alternater can't delever the requested current. checking the specs of my model E12 i schould have a 65A alternator in.
Megasquirt conversion draws about 10Amperes extra and the set of extra headlights with 100W bulbs do a 15Ampere, The far headlights in the car have also 100W bulbs instead of the factory 55Wats, no wonder we drained the battery.
So there was another update coming swapping the alternater for a heavier one, i found a alternator from a late E30 325 which should be a 90A one, but when it arived in my mailbox it was badged as a 80A alternator, but is was a Bosch and thats good.
Swapping the alternators wasn't a big deal only the main wire connection was M6 on the old and M8 on the new one, luckely i had a cable with the right ring terminal coming from a spare engine by hand.
When the old alternator was out it was badged as a 55A one. damn the specs.
55A versus 80A alternator:
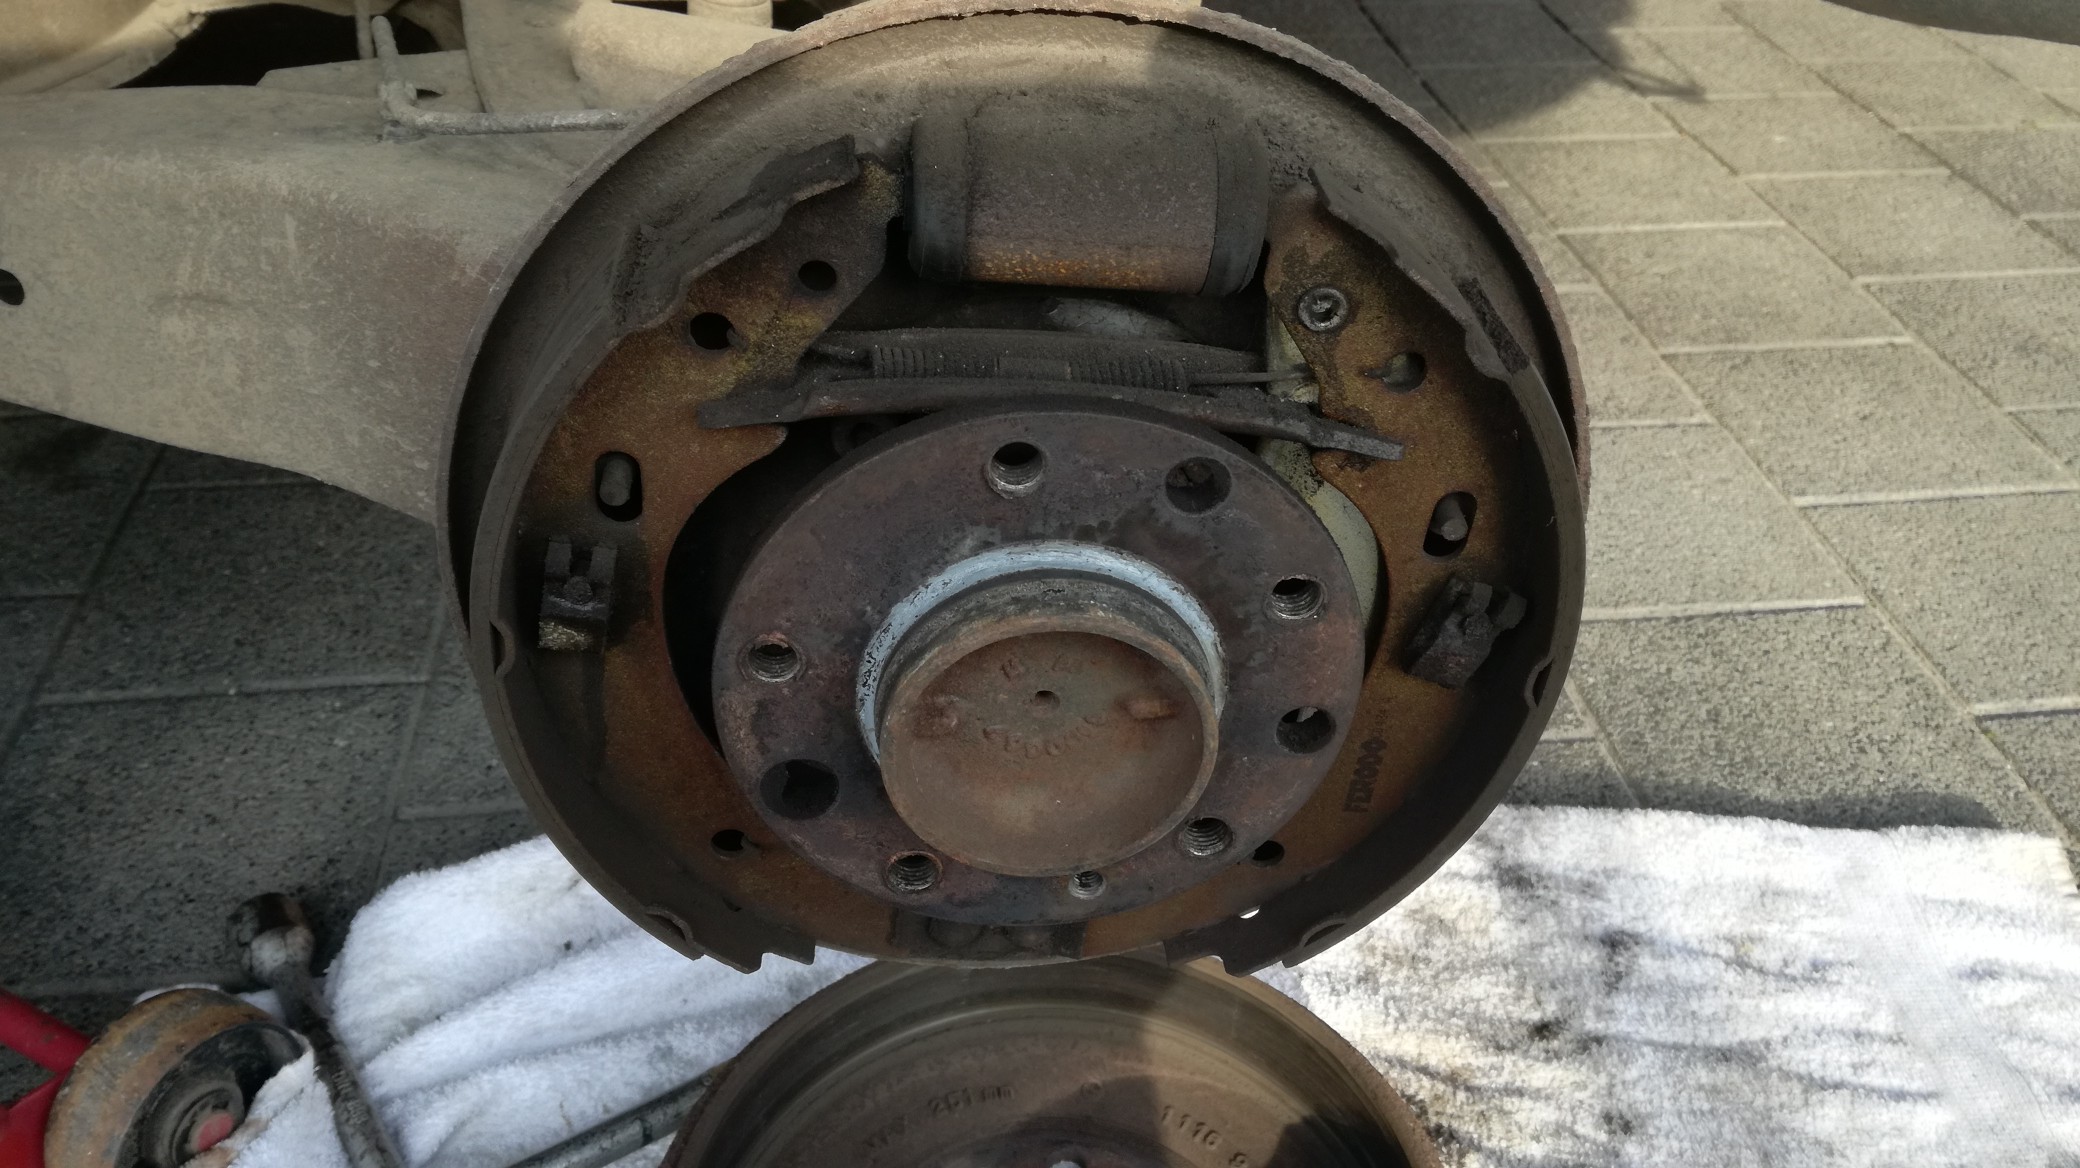
Another job done was renewing the rear brakes, no updates here only new drums and shoes.
Also did a bolt to stud conversion, because it looks good, saves thread in the hubs and make wheel changing easier.
old brakes, shoes weren't worn, but the drums were, cilinders are fairly new:
new shoes:
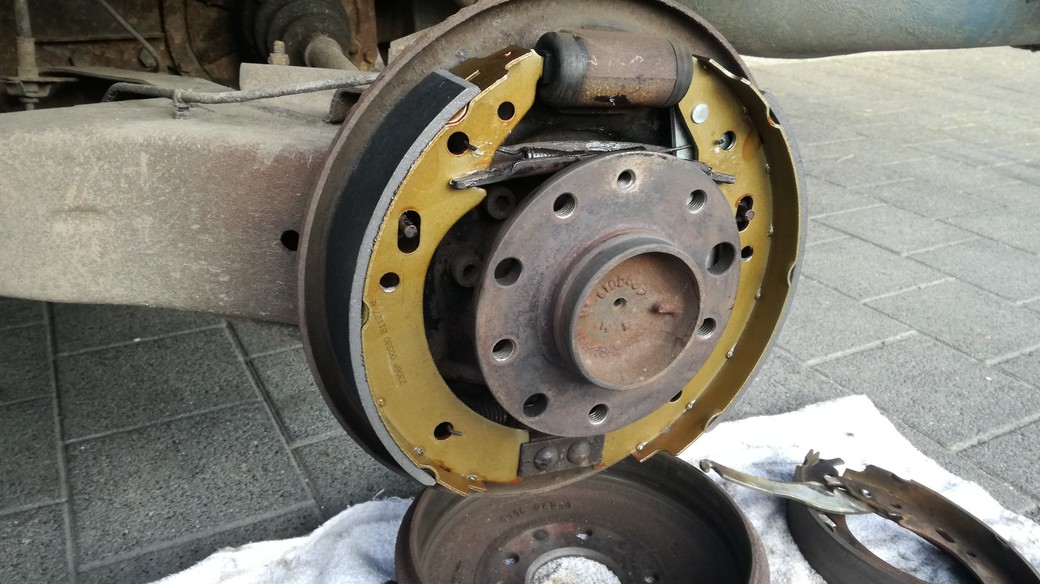
studs mounted
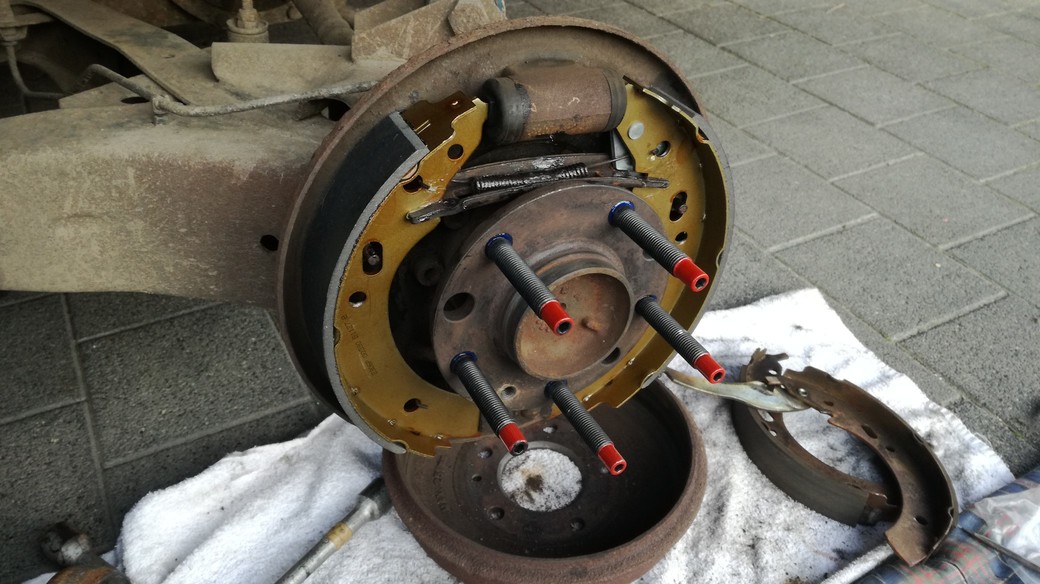
and new drum:
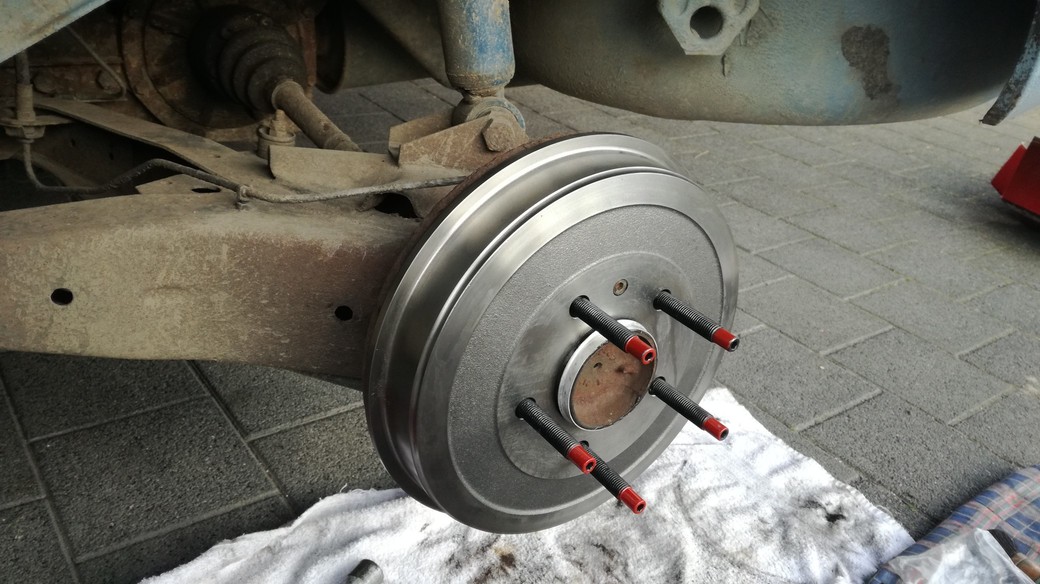
looks:
Last autunm it was time for a new set of tyres, the ones on the car were dried out completely and so slippery on wet, i lost the car almost while braking in a corner.
But there isn't much around anymore for my 14" wheels in 195/70R14. I want tyres with best performance on wet and they must also be aproved for winter conditions.
I had a set of 15" rims laying around with old winter tyres coming from a E39. These are aluminium rims lookalike steelies. In 15" (195/65R15) there much more available, so time to give these old rims a new life.
Cleaned them and painted them in dark grey metallic, and painted the holes red (like a cut throug model).
Got a set of Kleber Quadraxer all season tyres in 15/65R15 on them and a set of spigot rings because the E12 has 72,6mm hubs and the rims have a 74mm hub hole. With these spigot rings the rims fit nicely on the E12 hubs.
These new tyres are only 1% bigger, not a big deal.
rim cleaned:
rim painted with a spraycan:
painted the holes red and mounted the new tyres:
Spigot rings:
and put the new shoes on:
Another job done was cleaning the headlight lenses, after 40 years they were realy dull. Disasembling wasn't a problem, all screws came lose like new.
Washed the headlights with a strong waterbased detergend (Dasty) and then washed them out with deminiralized water, and dried in the headlights in the oven for 10 minutes at 75 degrees.
Now the lenses and glass are nice clear again, only the small pitting in the glass will stay forever.
So now we have lots of light during our night rallies in the winter:
Drawback running so much headlights is that the alternater can't delever the requested current. checking the specs of my model E12 i schould have a 65A alternator in.
Megasquirt conversion draws about 10Amperes extra and the set of extra headlights with 100W bulbs do a 15Ampere, The far headlights in the car have also 100W bulbs instead of the factory 55Wats, no wonder we drained the battery.
So there was another update coming swapping the alternater for a heavier one, i found a alternator from a late E30 325 which should be a 90A one, but when it arived in my mailbox it was badged as a 80A alternator, but is was a Bosch and thats good.
Swapping the alternators wasn't a big deal only the main wire connection was M6 on the old and M8 on the new one, luckely i had a cable with the right ring terminal coming from a spare engine by hand.
When the old alternator was out it was badged as a 55A one. damn the specs.
55A versus 80A alternator:
Another job done was renewing the rear brakes, no updates here only new drums and shoes.
Also did a bolt to stud conversion, because it looks good, saves thread in the hubs and make wheel changing easier.
old brakes, shoes weren't worn, but the drums were, cilinders are fairly new:
new shoes:
studs mounted
and new drum:
looks:
Last edited by BertjeConti on Sun Nov 27, 2022 11:29 am, edited 1 time in total.
Megasquirted '77 E12 520-6
Aspen Silver '96 E39 523i
-
BertjeConti
- E21 Mad
- Posts: 3019
- Joined: Mon Nov 04, 2013 9:49 pm
- My E21(s): E12 520-6
- Location: nederland , Weert
Re: Pastelblau 520/6
EVAP System installed
I've installed an EVAP system to my E12 to prevent fuel vapours escaping to the atmosphere. Why i did it?
WHY EVAP?
The EPA requires EVAP systems on cars because gasoline fuel vapors contain a variety of different hydrocarbons (HC). The lighter elements in gasoline evaporate easily, especially in warm weather. These include aldehydes, aromatics, olefins, and higher paraffins. These substances react with air and sunlight (called a photochemical reaction) to form smog. Aldehydes are often called instant smog because they can form smog without undergoing photochemical changes.
The bad thing about fuel vapors is that fuel evaporates any time there is fuel in the tank. That means if the fuel system is unsealed or open to the atmosphere, it can pollute 24 hours a day even if the vehicle is not being driven. Uncontrolled evaporative emissions like this can account for as much as 20 percent of the pollution produced by a motor vehicle.
The EVAP system totally eliminates fuel vapors as a source of air pollution by sealing off the fuel system from the atmosphere. Vent lines from the fuel tank and carburetor bowl route vapors to the EVAP storage canister, where they are trapped and stored until the engine is started. When the engine is warm and the vehicle is going down the road, the PCM then opens a purge valve allowing the vapors to be siphoned from the storage canister into the intake manifold. The fuel vapors are hen burned in the engine.
Evaporative emission controls were first required on cars sold in California in 1970. EVAP has been used on all cars and light trucks since the early 1970s.
Source: https://www.aa1car.com/library/evap_system.htm
In Europe we didn't have that kind of regulations until in the deep 90's. My car was venting it's fuel vapours directly into the atmosphere day in and out, polutting like hell
Fuel vapours escaping the carburettor is already solved by the fuel injection convertion i did a few years ago.
My EVAP system requeres the following components:
1) a liquid/vapour separator
2) a charcoal canister
3) a purge valve
4) a sealed or pressure/vacuum operated filler cap
5) a venting line underneath the car
6) a vacuum connection on the throttle housing.
7) ECU capable controlling the purge valve
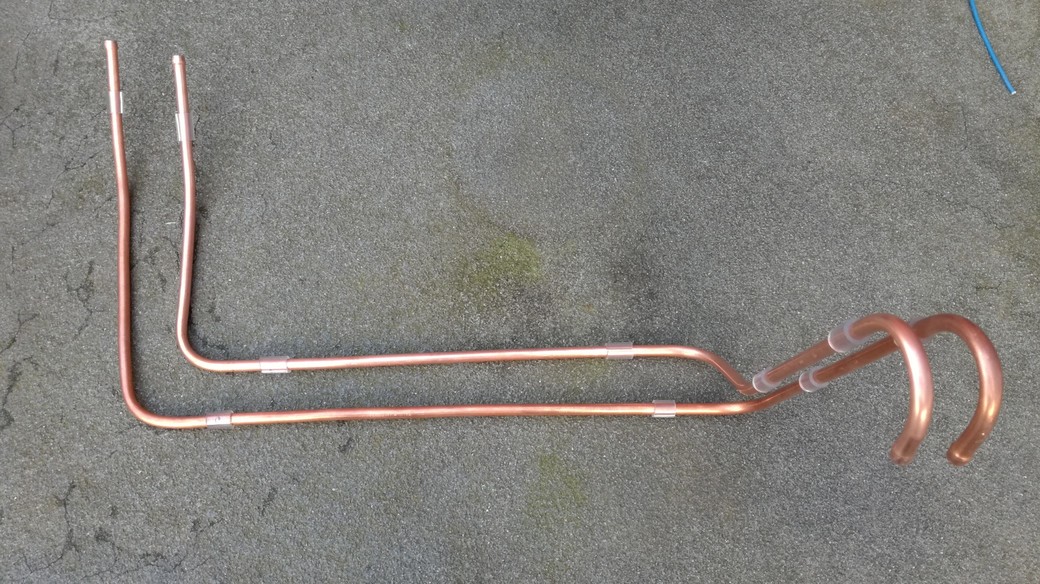
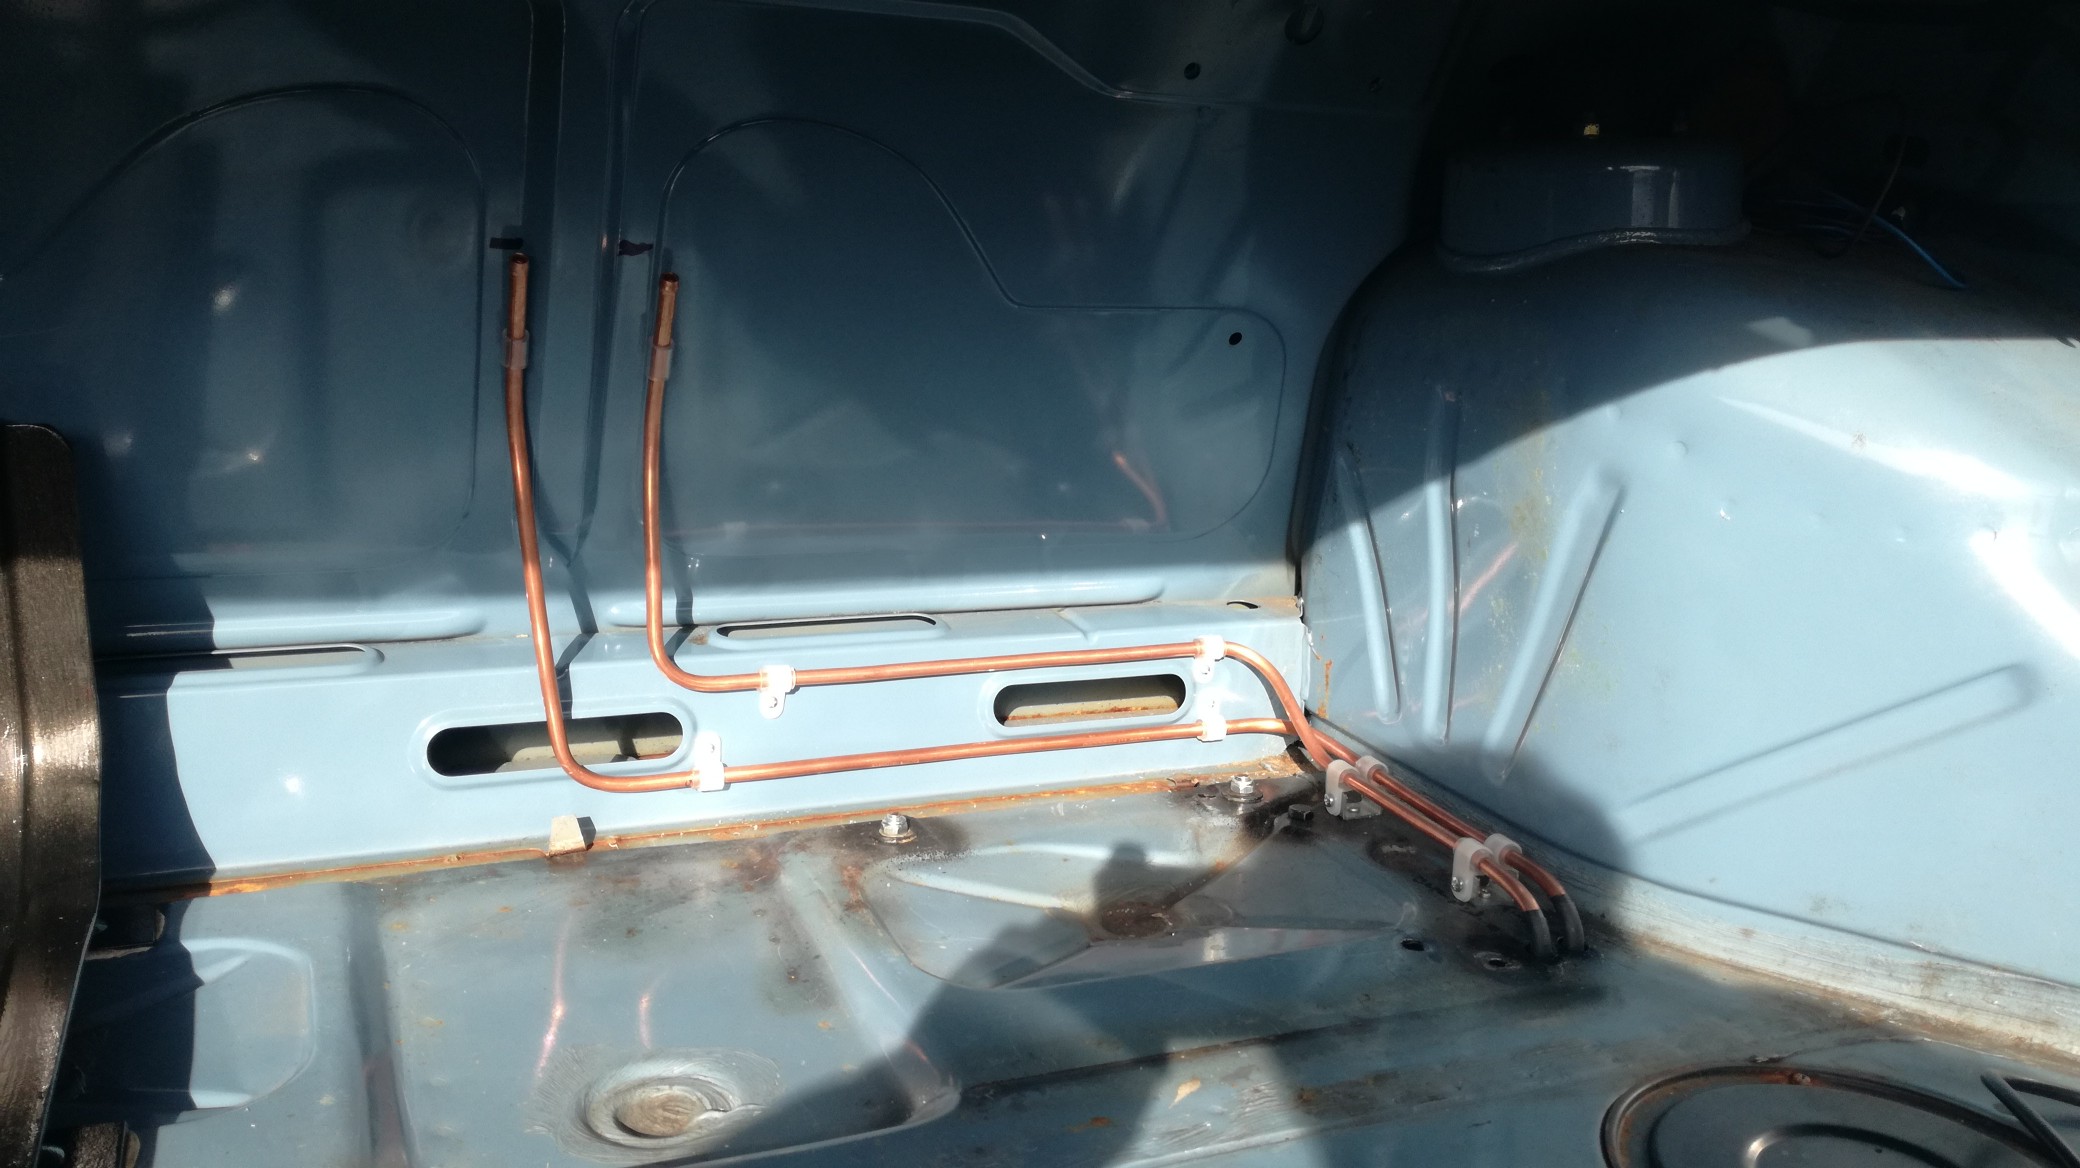
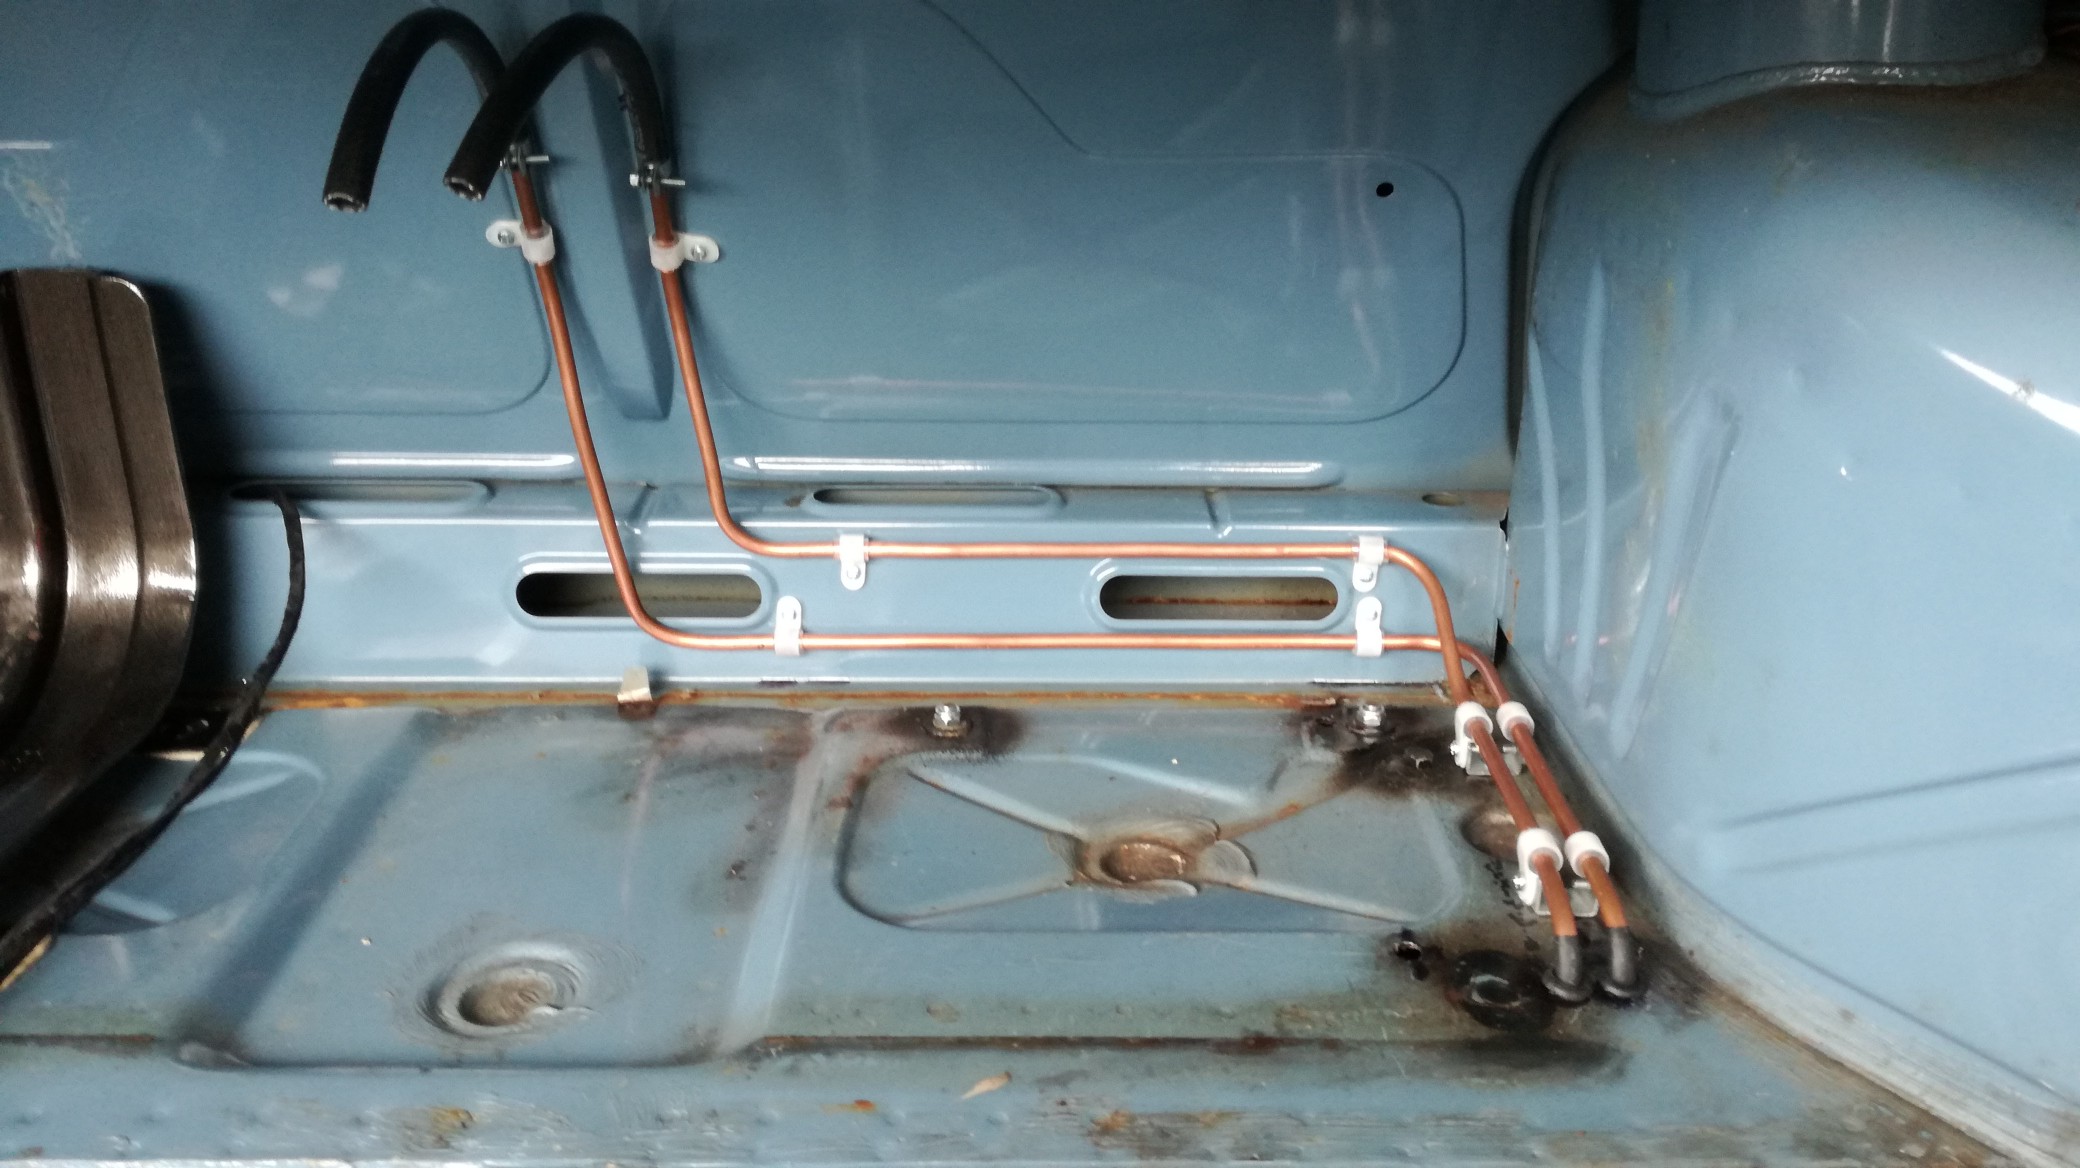
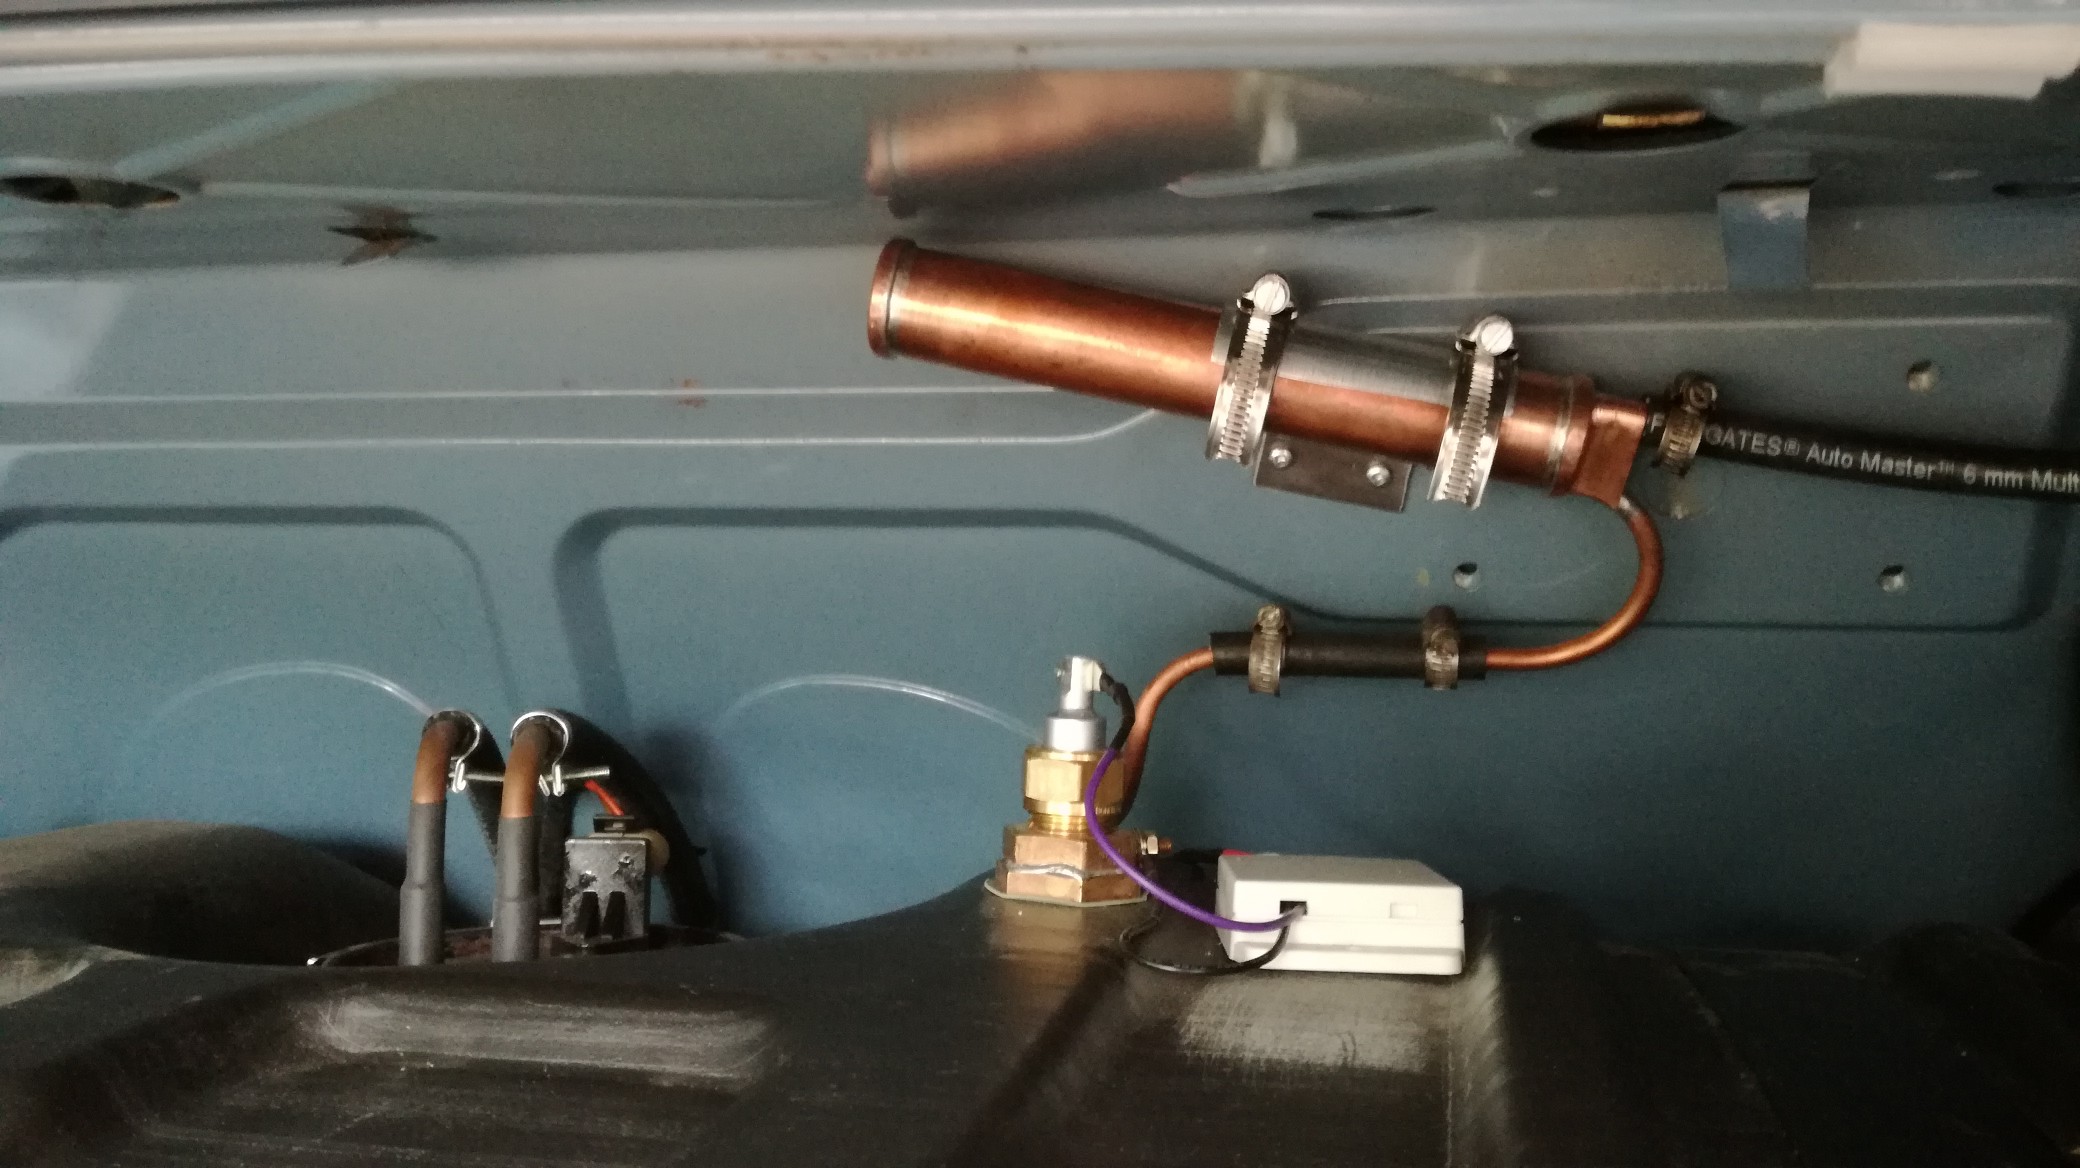
Liquid/vapour separator: i've made this part myself from some old copper tubing i had laying around, it's mounted direct above the fueltank:
mock-up:
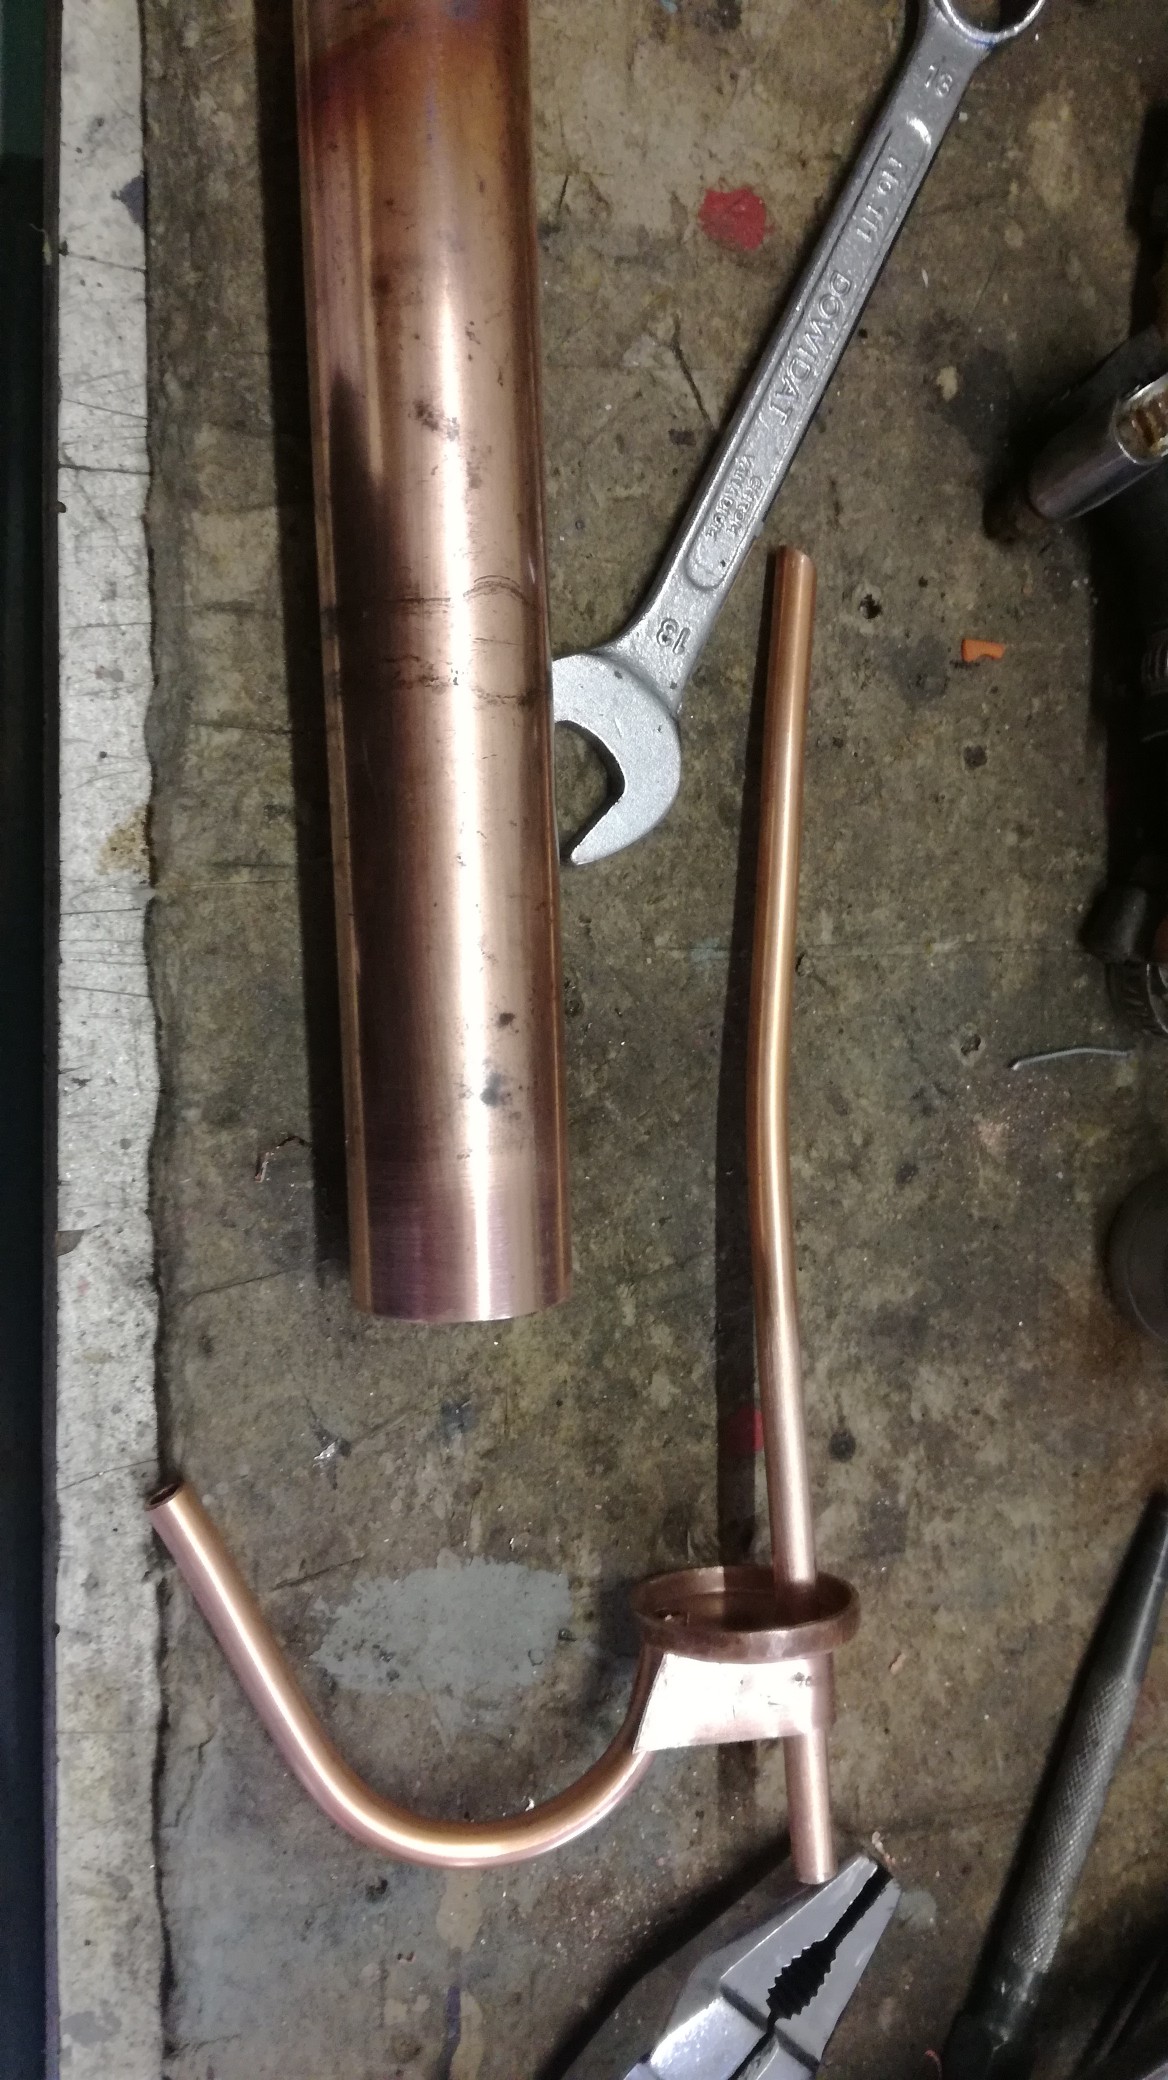
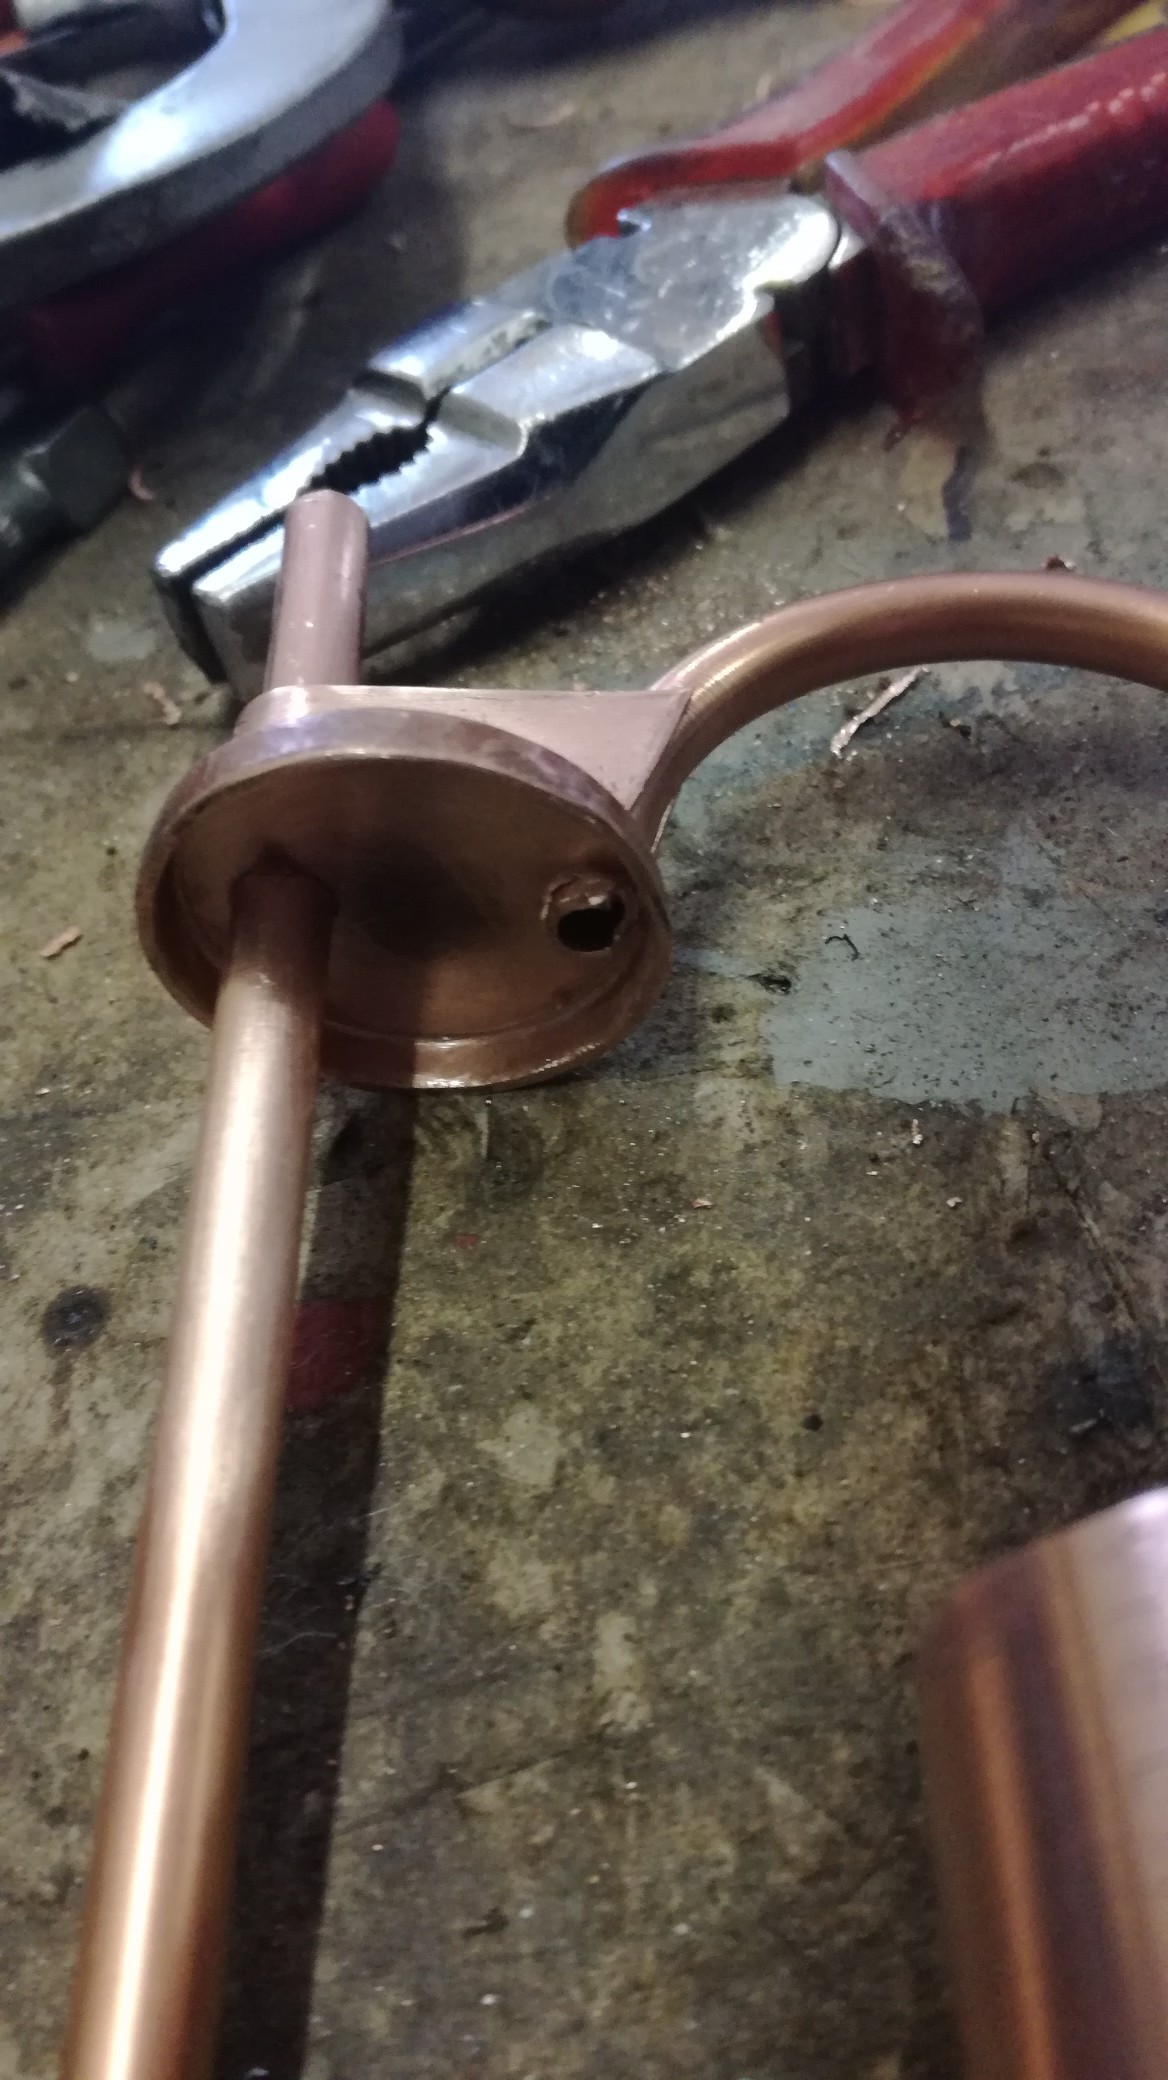
soldering the first parts together:
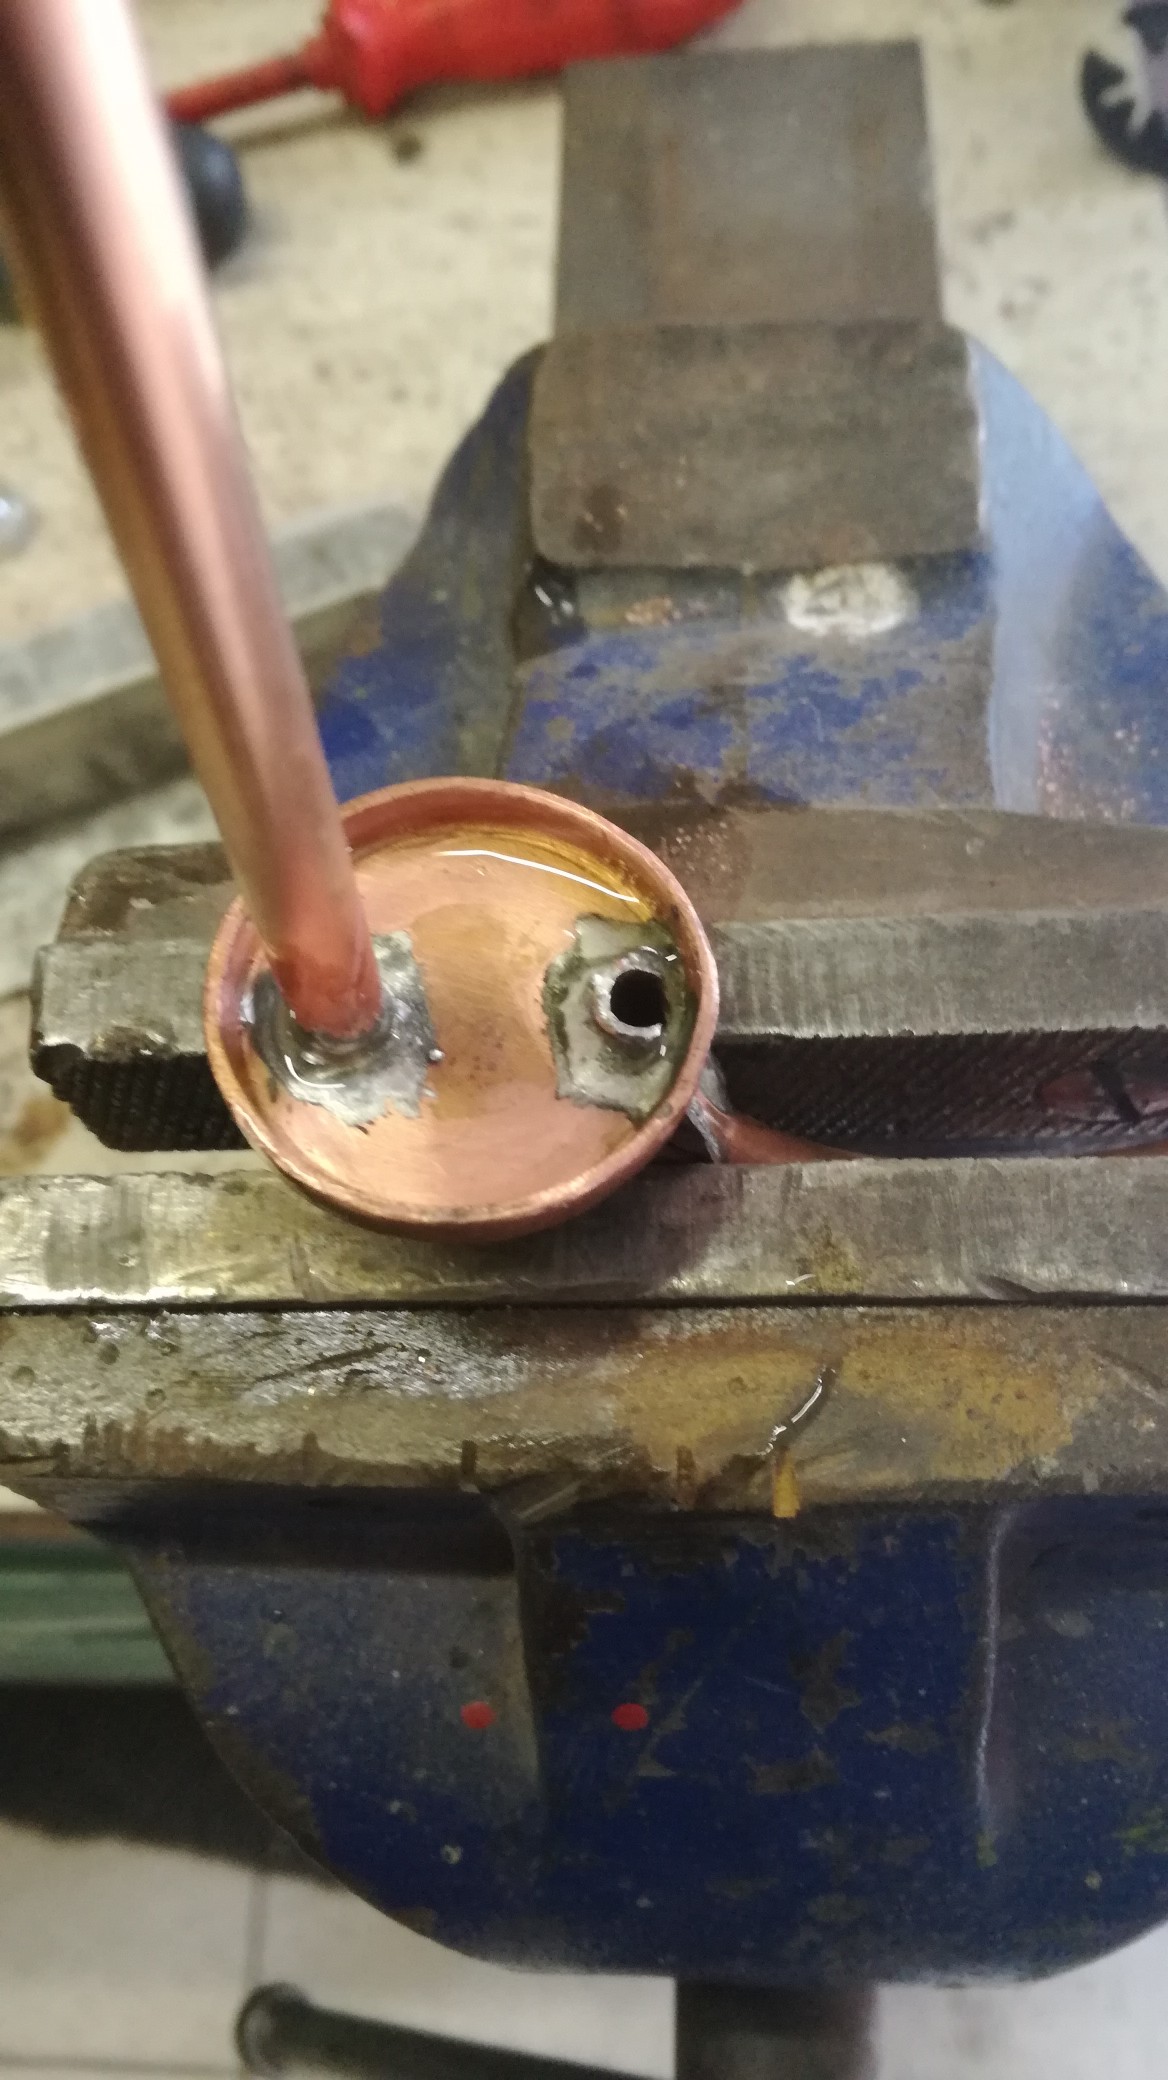
oops already ready:
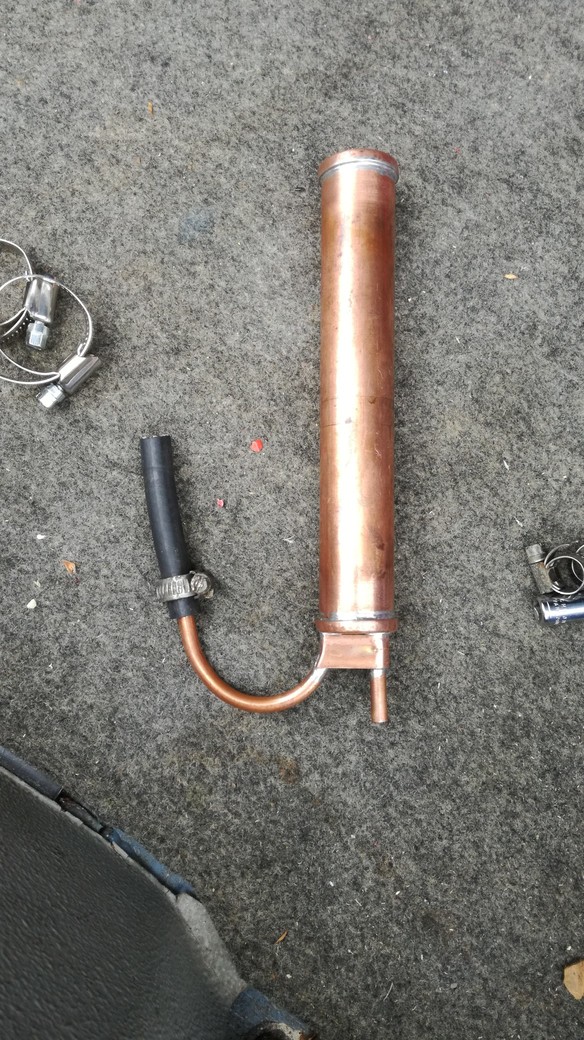
and mounted above the fueltank:
A charcoal canister was easy to get from a second hand parts dealer. I've bought a charcoal canister belonging to a Citroen C5, don't ask me why i took this one.
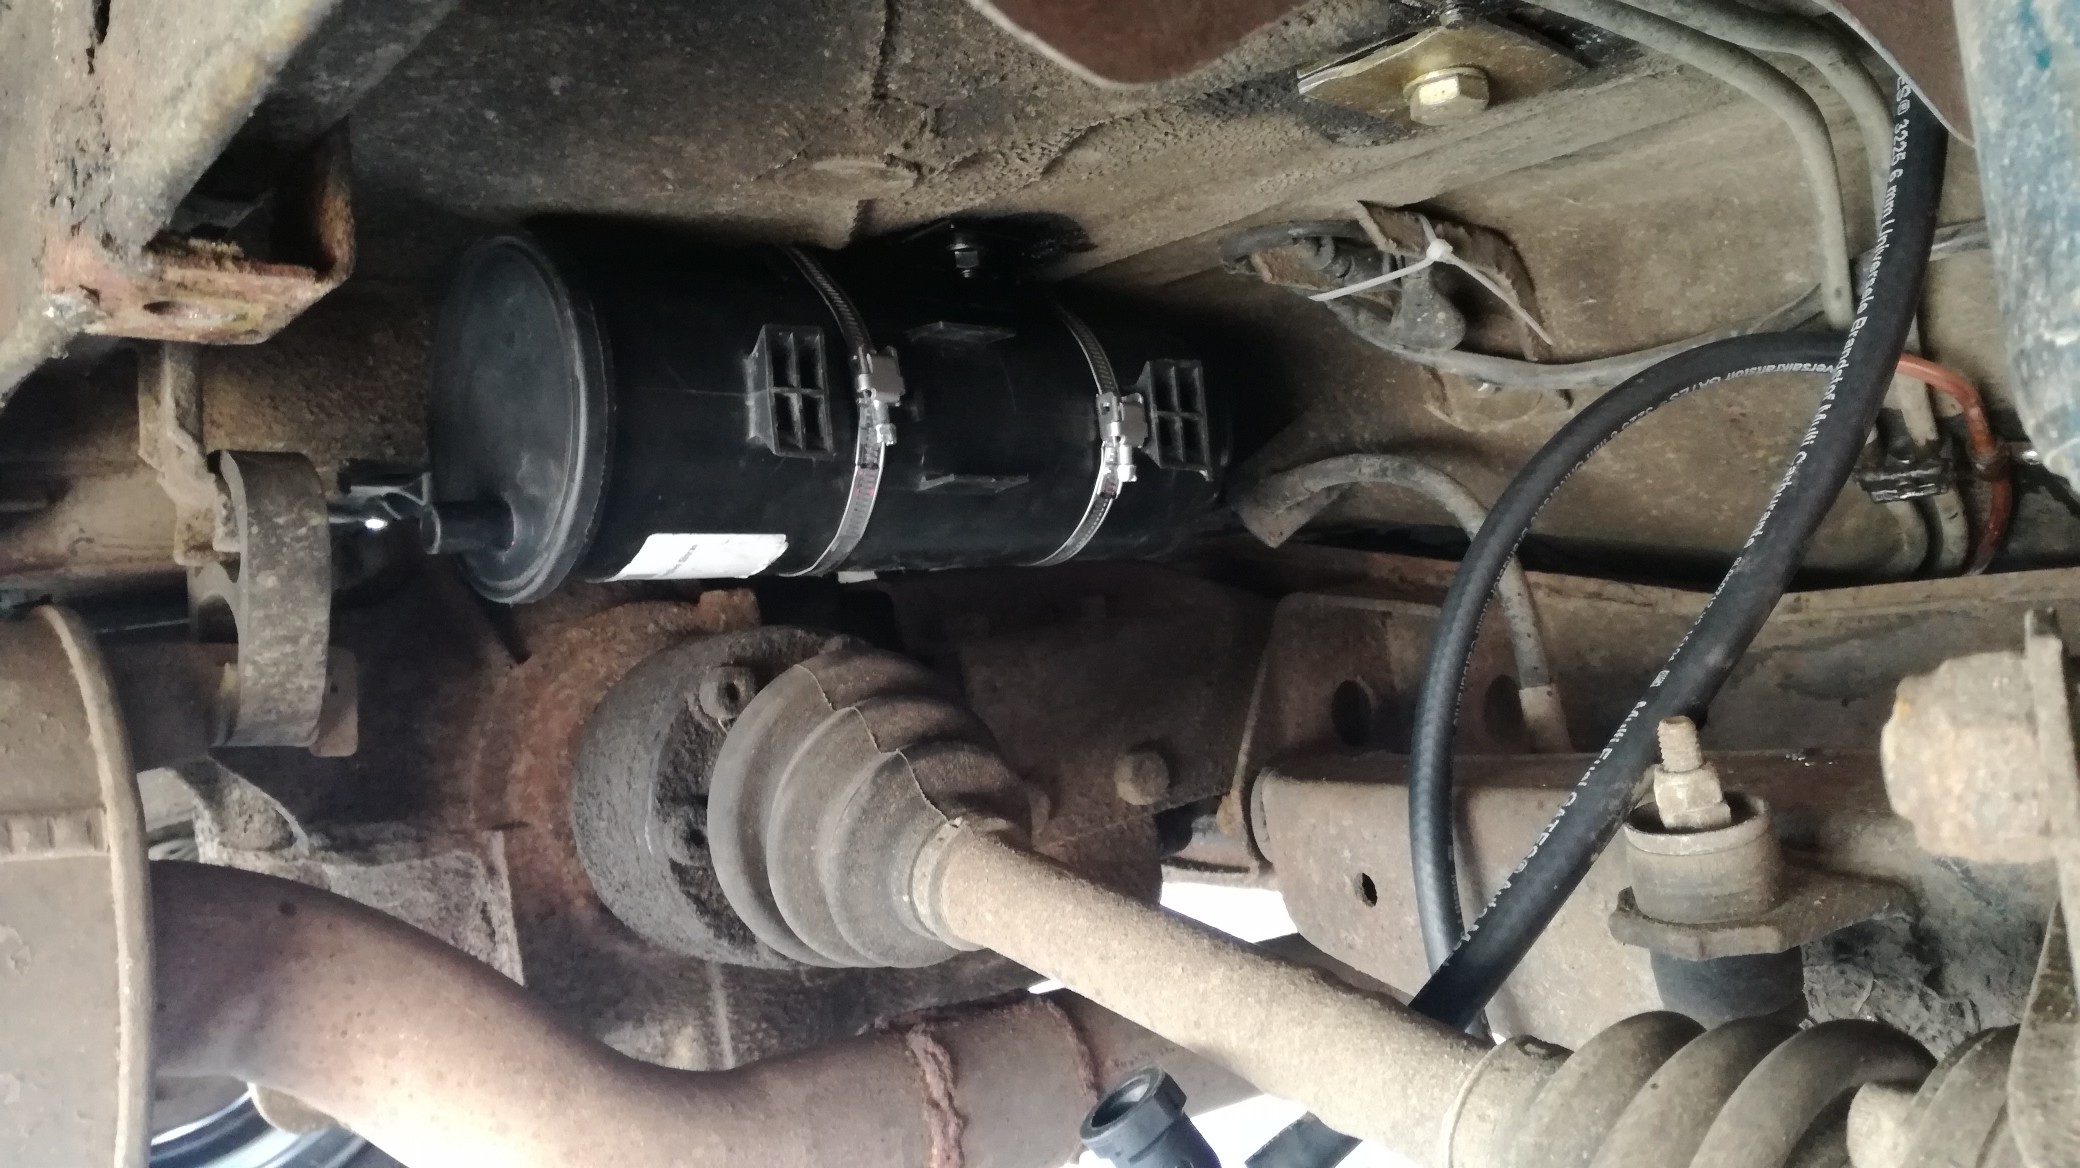
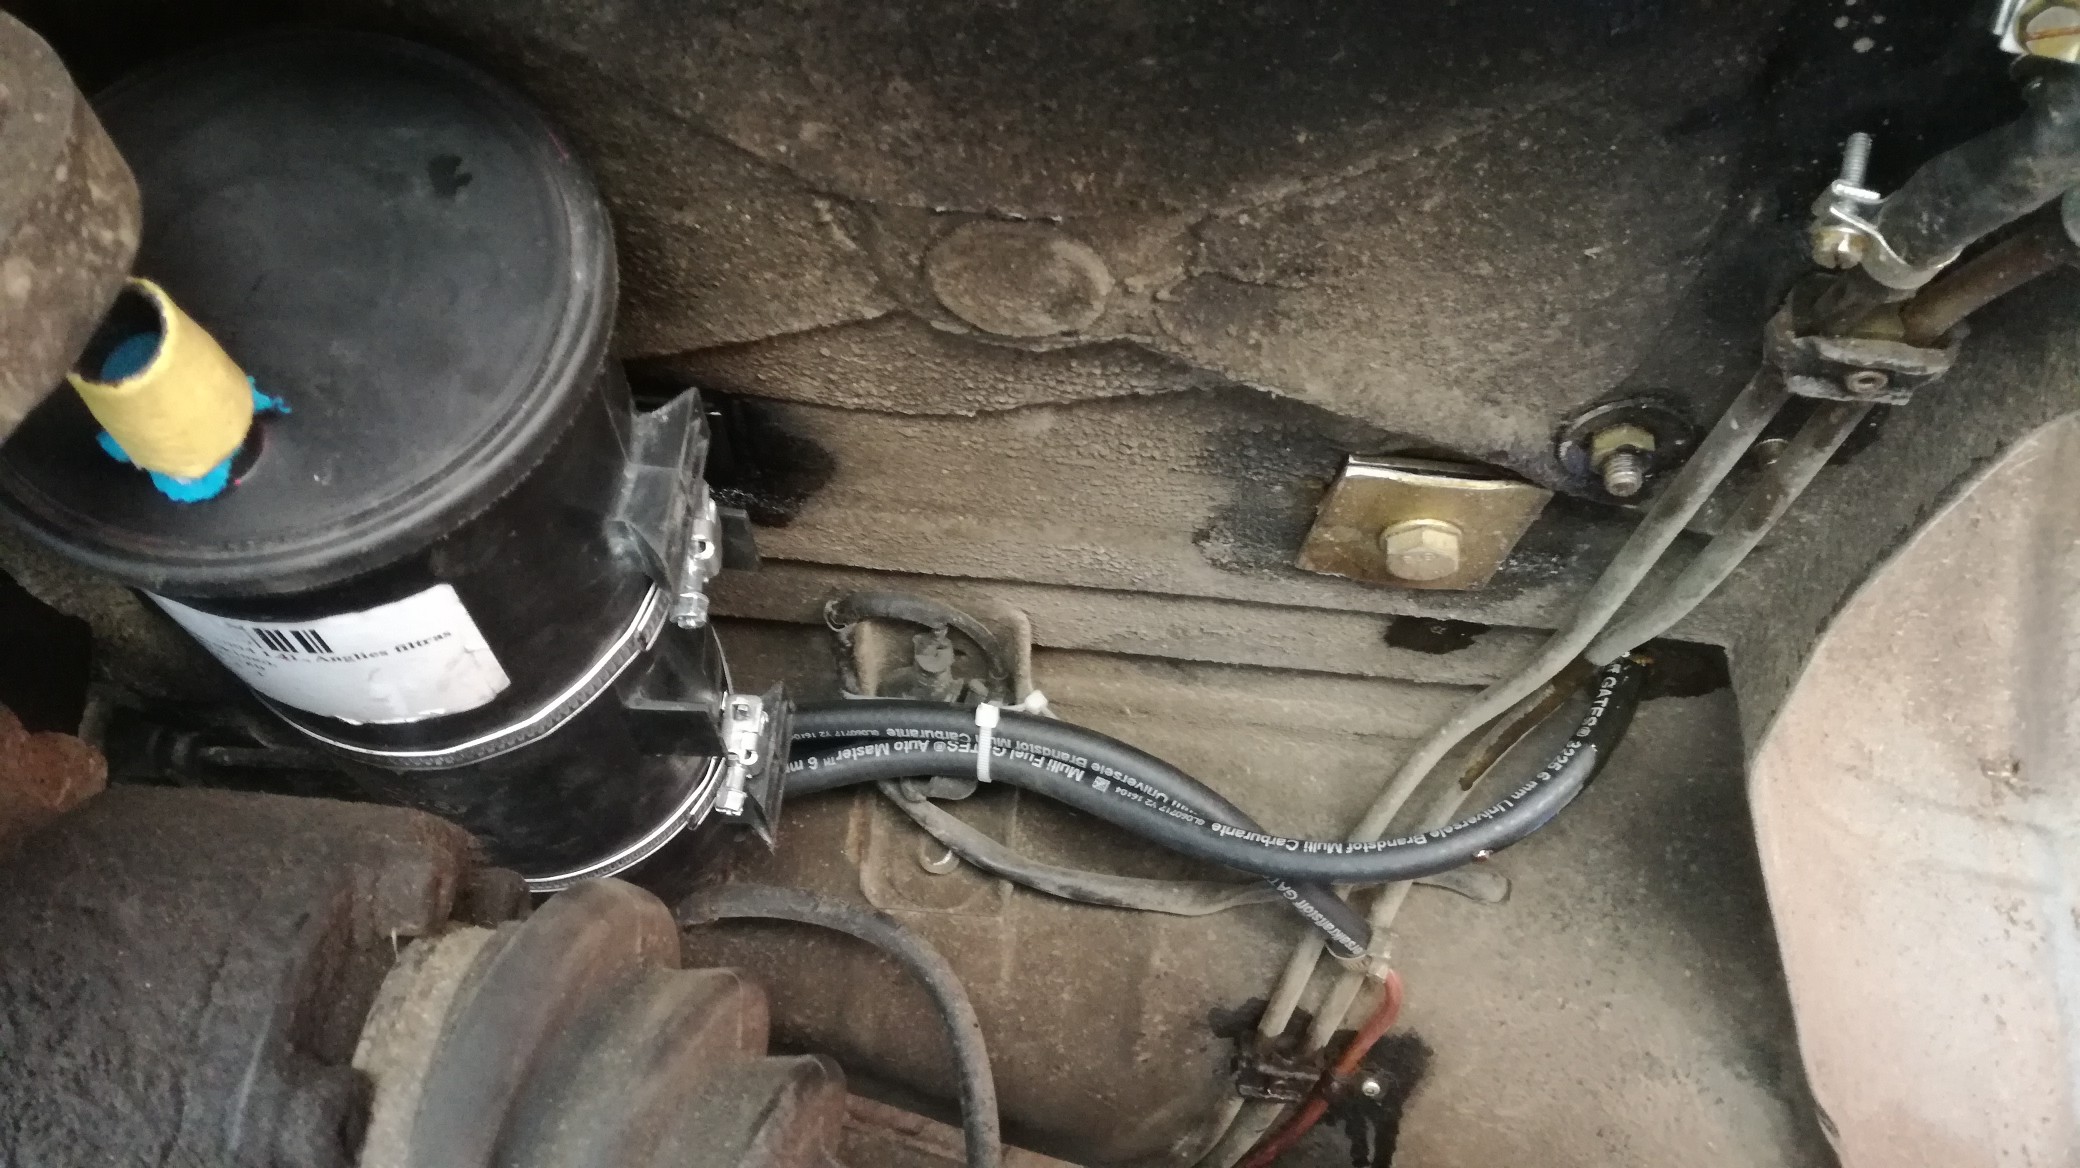
After a lot of thinking / trying i've decided the mounting place for the canister is underneath the car where the old fuelpump/filter was located. Once that was sorted out i made a suitable bracket holding the canister:
copper line, purge valve and charcoal canister:
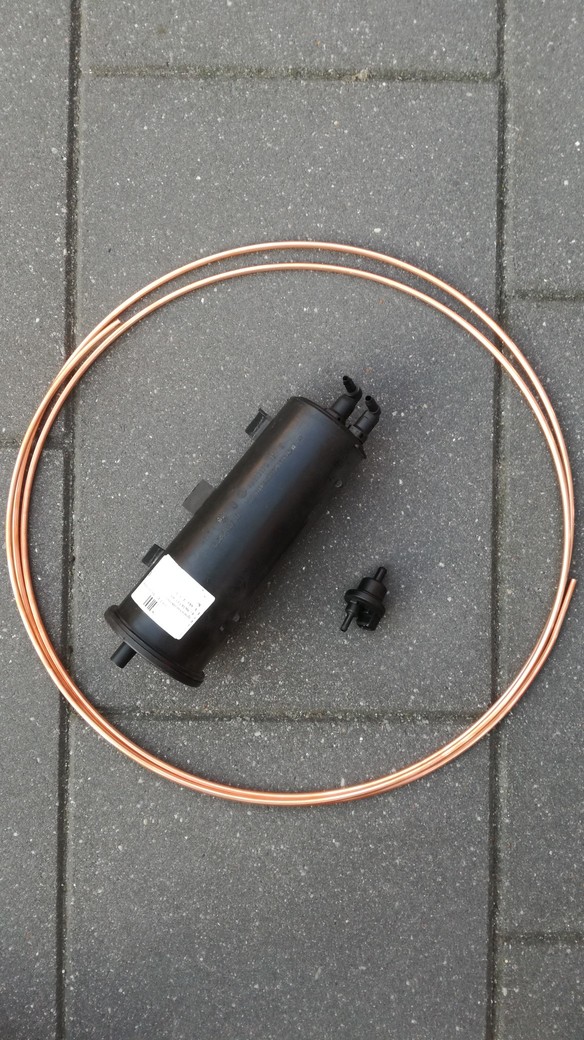
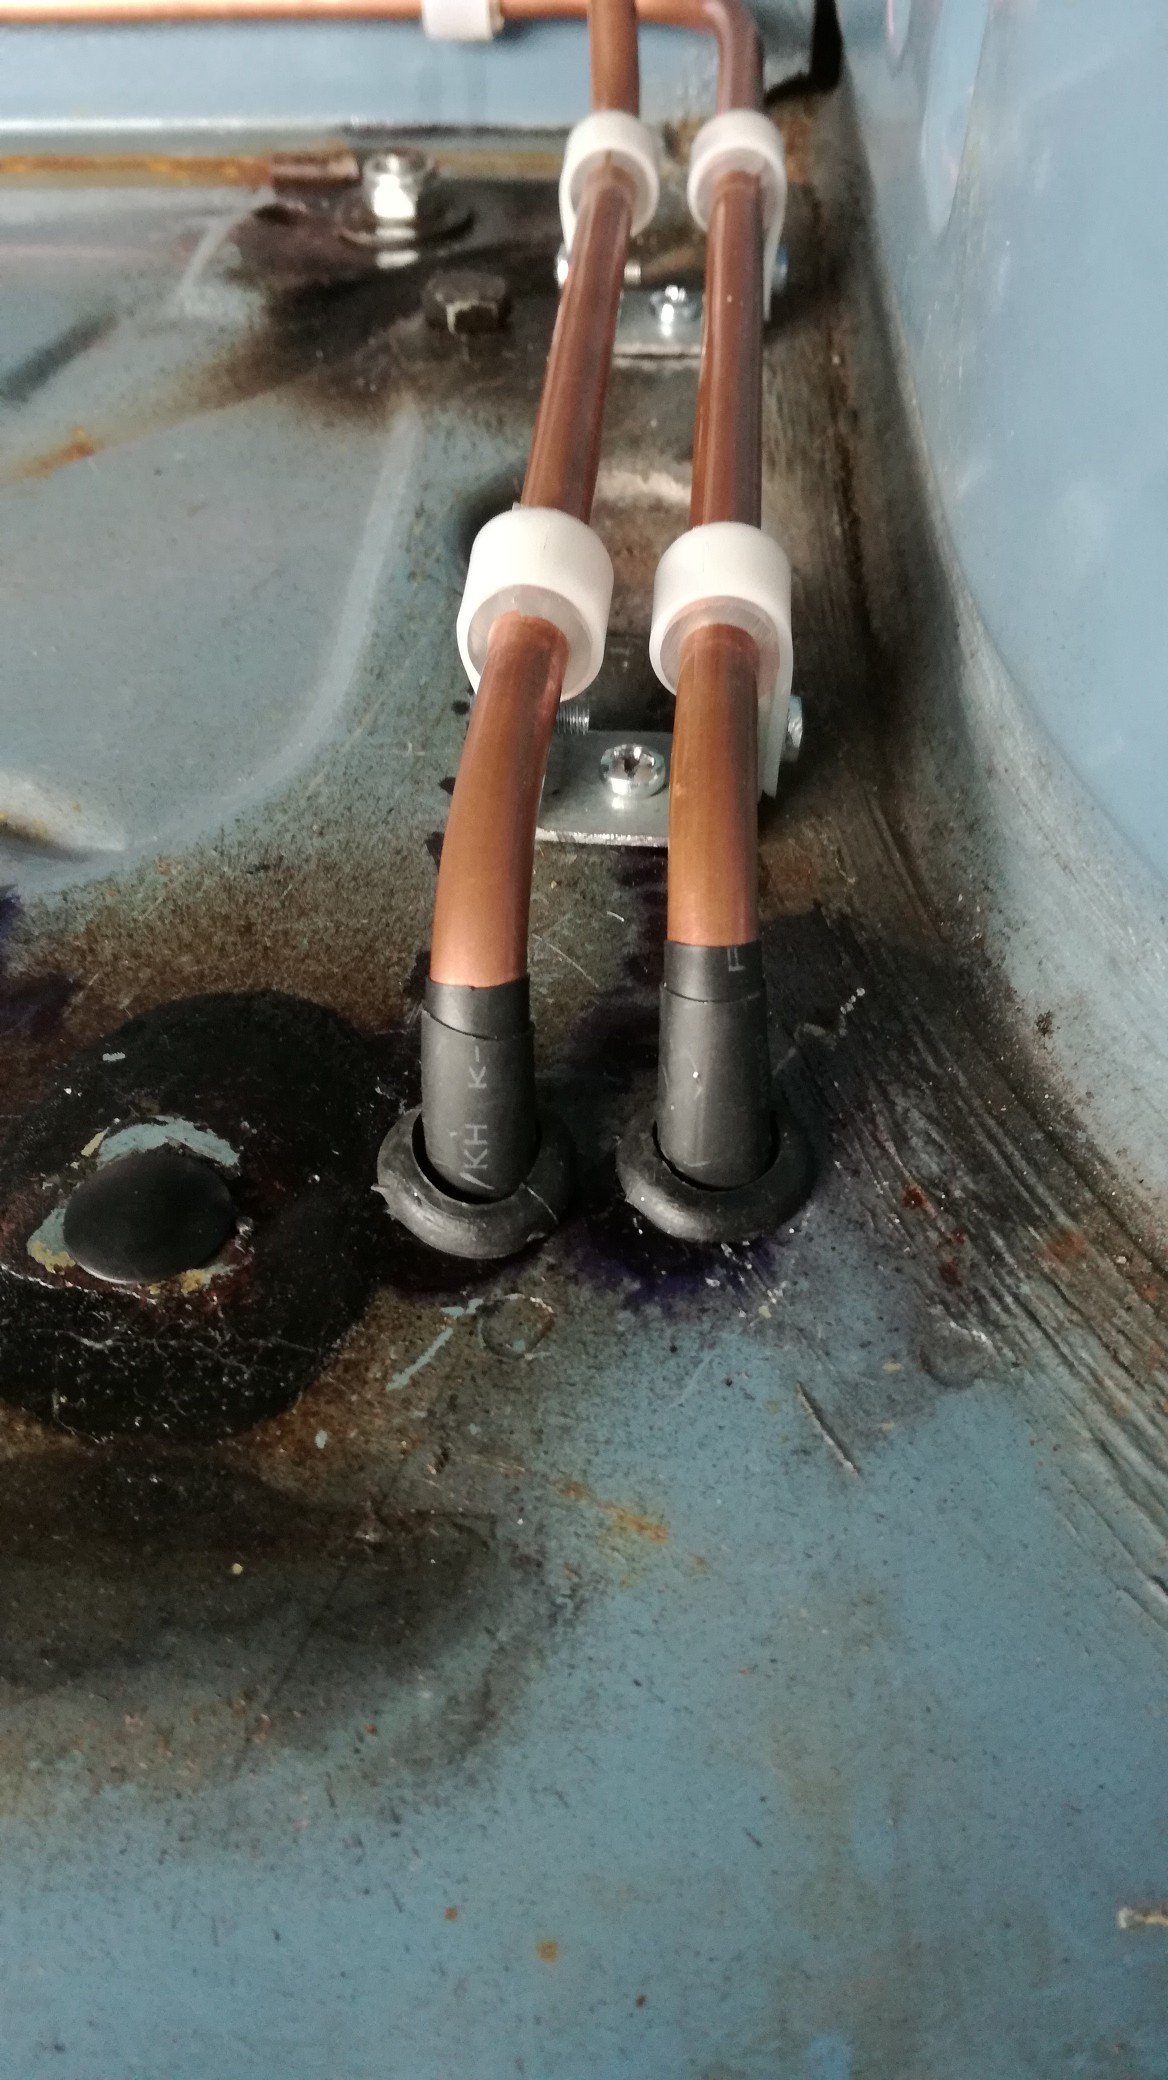
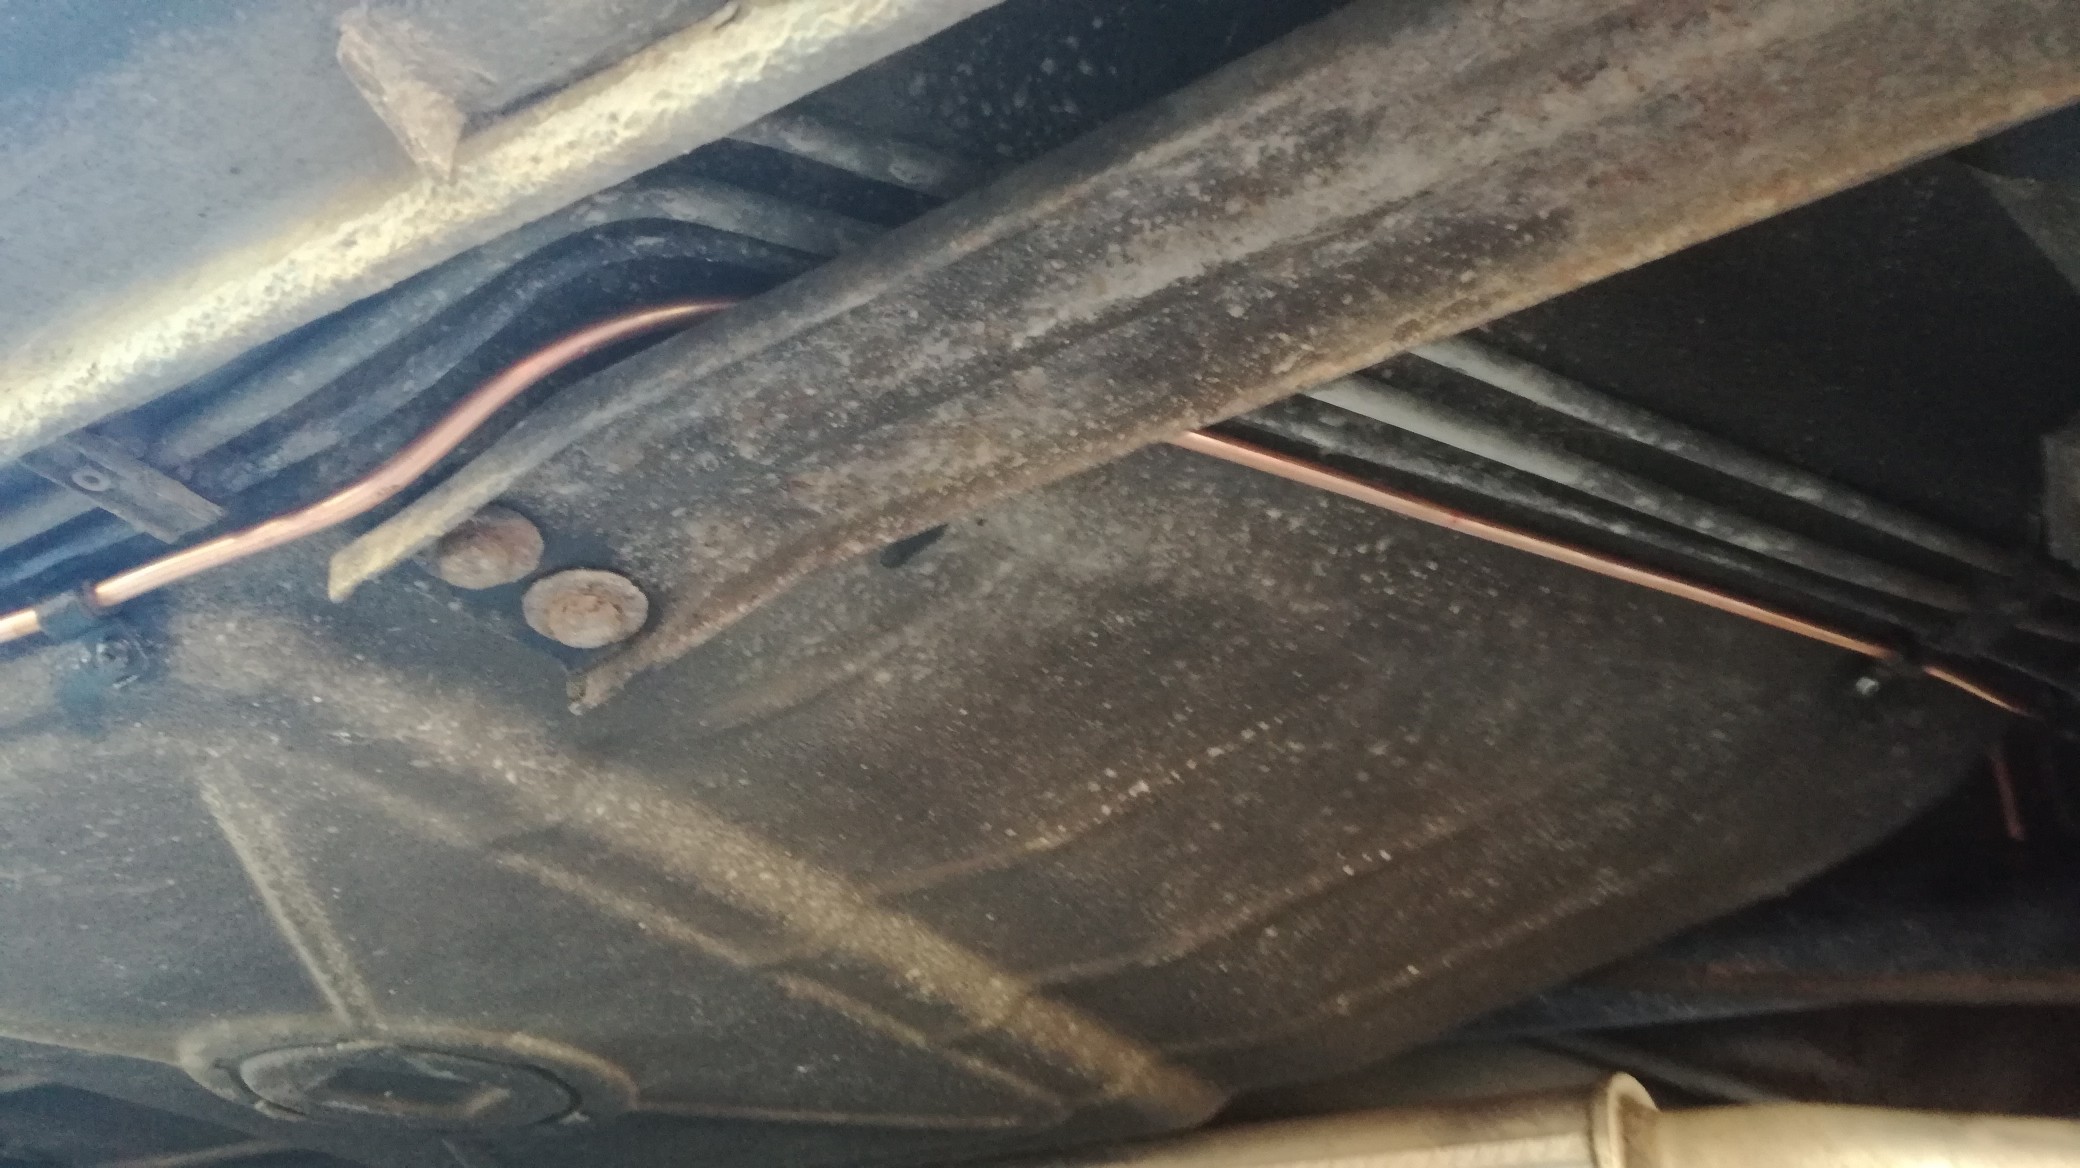
biggest challenge was a venting line underneath the car running from the engine compartment to the charcoal canister. Ive used 6mm copper line, which is easy to bend.
A few year ago i've dismantled the LPG installation which was mounted into the E12 due new government regulations. And now i couls re-use the clips screws which still we there from the old LPG fuel line.
Only a few new screws were needed:
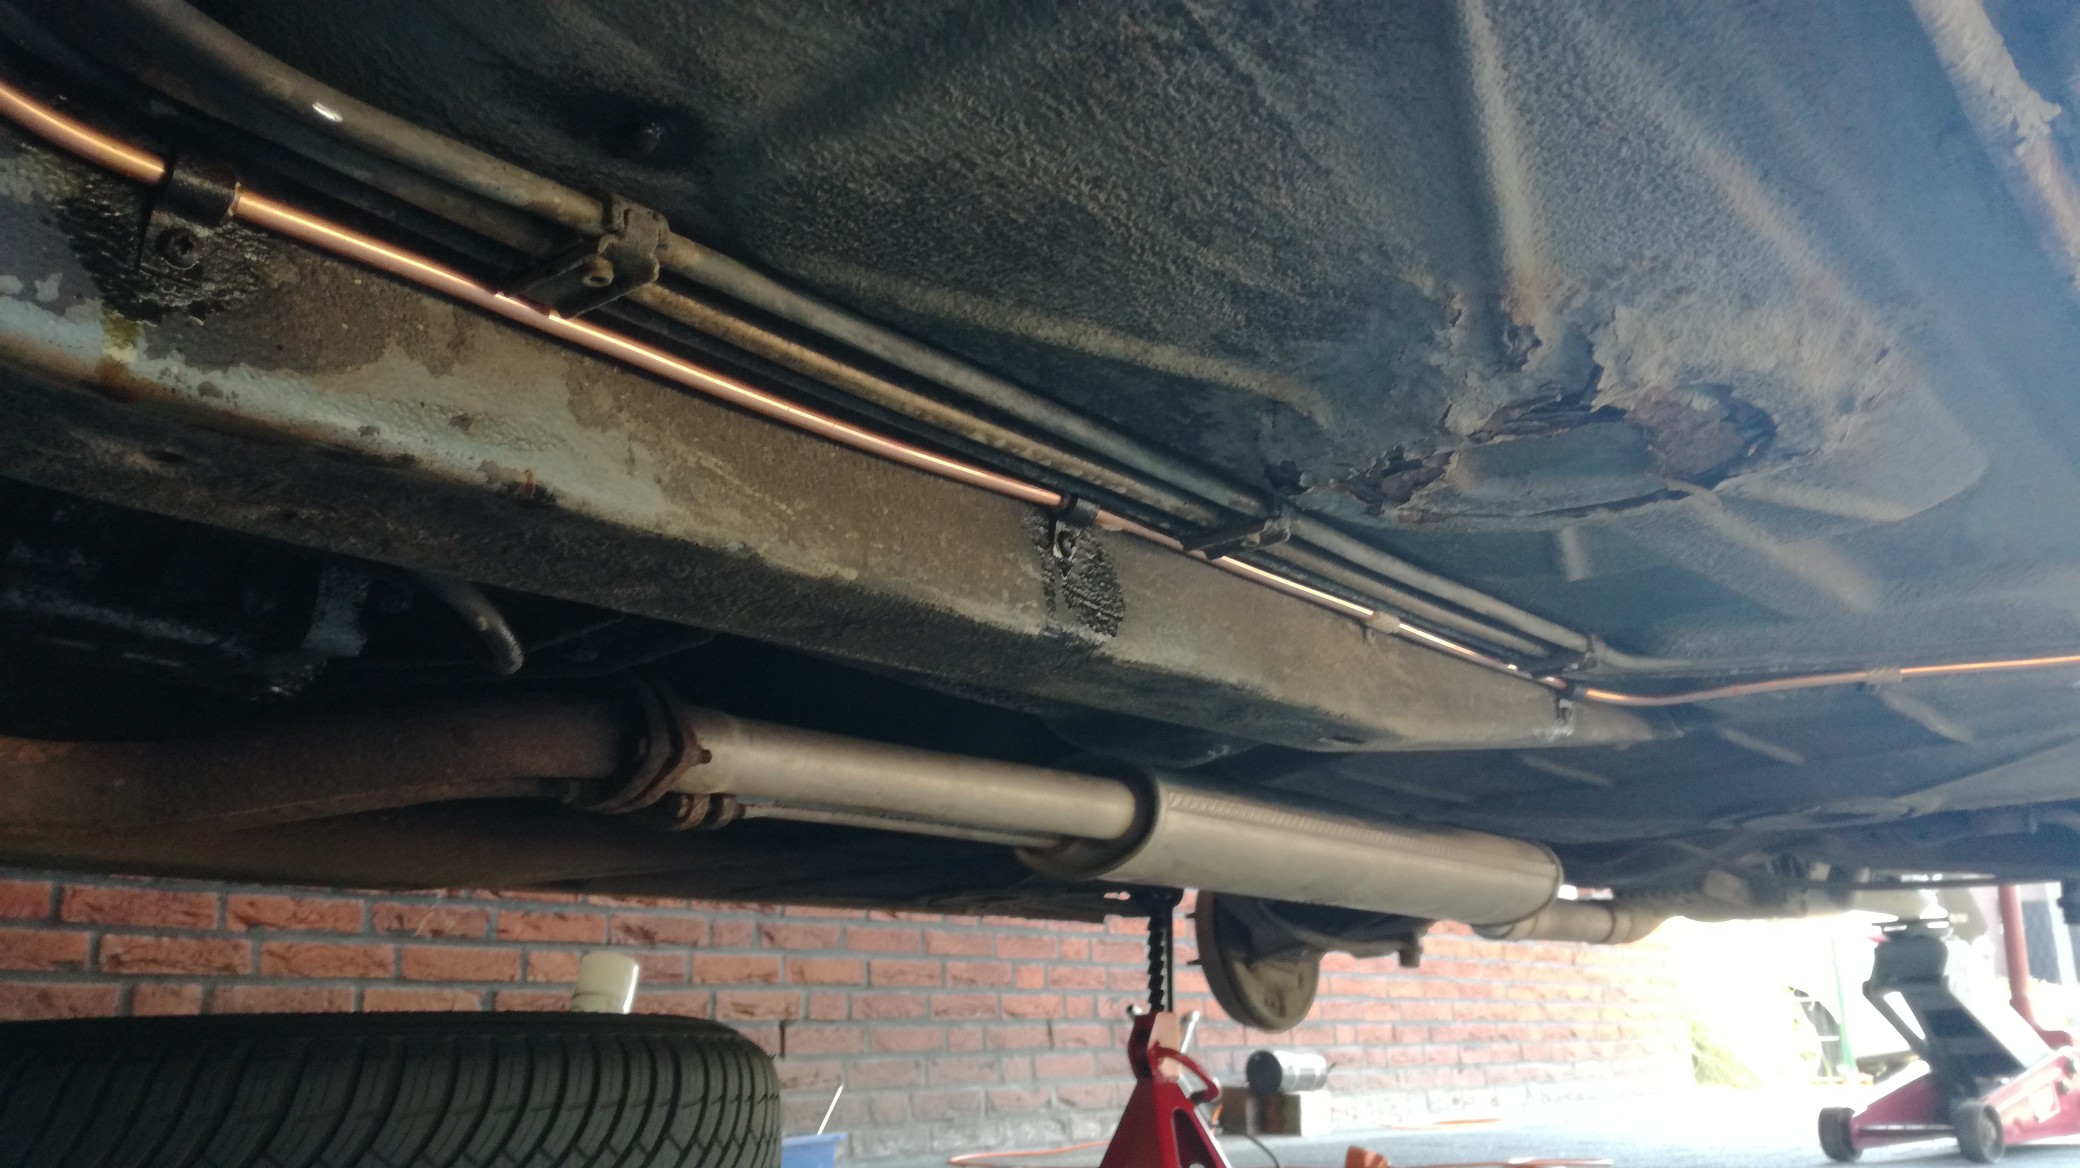

and then it was time mounting the canister and connect the lines and hoses:
My throttle body (from a '90 E30) has a purge valve vacuum connection, but i closed it at the time i build the Megasquirt conversion, because then i hadn't any plans using this vacuum connection.
here a pic from the throttle body with the connection closed with a M5 screw:
Trying to release the screw with the throttle body still in the car wasn't a succes, so getting the throttle body out was the only option, and when it was out i saw why the screw wouldn't release. I' mounted it then with some J-B Weld, so i had to drill the screw out:
After that placing the throttle body back and connected the purge valve, which is from a '90 E30 also, to the throttle body and evap line with some fuel hoses.

Last thing was controlling the purge valve. The valve i used is open when not energised, this means it opens when a little pressure is applied. This is a safety feature when the charcoal canister should clog, the fueltank could still vent through the purge valve.
When the purge valve is energised is closed completely, this is what you want when the engine is idling or over-runs. Adding a extra output controlling the purge valve wasn't a big deal, because i've build the megasquirt ECU's myself.
i'programmed the output it releases (opens) the purge valve when the engine revves above 1500RPM and the MAP is above 40 PSI, this is almost always true while driving the car.
So when driving the car the engine burns the fuel vapours stored into the charcoal canister, and because the megasquirt ECU is in almost all running conditions in closed loop (only not in overrun fuel cut condition) it adjusts the AFR to the target AFR automaticly
It's nice now there isn't any fuel smell around the car anymore when parked under my carport, even when the sun is baking it, i'm happy
I've installed an EVAP system to my E12 to prevent fuel vapours escaping to the atmosphere. Why i did it?
WHY EVAP?
The EPA requires EVAP systems on cars because gasoline fuel vapors contain a variety of different hydrocarbons (HC). The lighter elements in gasoline evaporate easily, especially in warm weather. These include aldehydes, aromatics, olefins, and higher paraffins. These substances react with air and sunlight (called a photochemical reaction) to form smog. Aldehydes are often called instant smog because they can form smog without undergoing photochemical changes.
The bad thing about fuel vapors is that fuel evaporates any time there is fuel in the tank. That means if the fuel system is unsealed or open to the atmosphere, it can pollute 24 hours a day even if the vehicle is not being driven. Uncontrolled evaporative emissions like this can account for as much as 20 percent of the pollution produced by a motor vehicle.
The EVAP system totally eliminates fuel vapors as a source of air pollution by sealing off the fuel system from the atmosphere. Vent lines from the fuel tank and carburetor bowl route vapors to the EVAP storage canister, where they are trapped and stored until the engine is started. When the engine is warm and the vehicle is going down the road, the PCM then opens a purge valve allowing the vapors to be siphoned from the storage canister into the intake manifold. The fuel vapors are hen burned in the engine.
Evaporative emission controls were first required on cars sold in California in 1970. EVAP has been used on all cars and light trucks since the early 1970s.
Source: https://www.aa1car.com/library/evap_system.htm
In Europe we didn't have that kind of regulations until in the deep 90's. My car was venting it's fuel vapours directly into the atmosphere day in and out, polutting like hell
Fuel vapours escaping the carburettor is already solved by the fuel injection convertion i did a few years ago.
My EVAP system requeres the following components:
1) a liquid/vapour separator
2) a charcoal canister
3) a purge valve
4) a sealed or pressure/vacuum operated filler cap
5) a venting line underneath the car
6) a vacuum connection on the throttle housing.
7) ECU capable controlling the purge valve
Liquid/vapour separator: i've made this part myself from some old copper tubing i had laying around, it's mounted direct above the fueltank:
mock-up:
soldering the first parts together:
oops already ready:
and mounted above the fueltank:
A charcoal canister was easy to get from a second hand parts dealer. I've bought a charcoal canister belonging to a Citroen C5, don't ask me why i took this one.
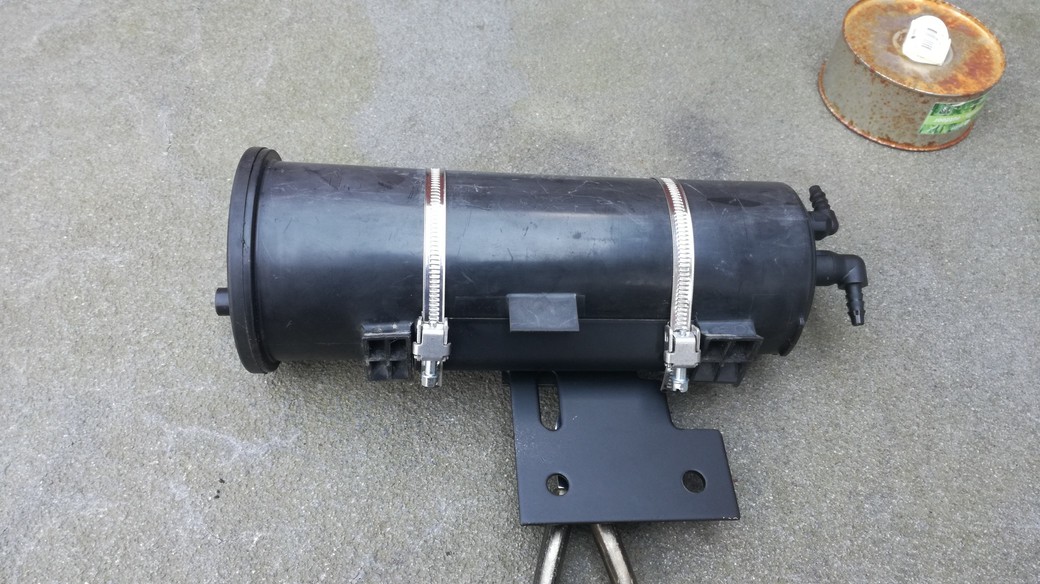
After a lot of thinking / trying i've decided the mounting place for the canister is underneath the car where the old fuelpump/filter was located. Once that was sorted out i made a suitable bracket holding the canister:
copper line, purge valve and charcoal canister:
biggest challenge was a venting line underneath the car running from the engine compartment to the charcoal canister. Ive used 6mm copper line, which is easy to bend.
A few year ago i've dismantled the LPG installation which was mounted into the E12 due new government regulations. And now i couls re-use the clips screws which still we there from the old LPG fuel line.
Only a few new screws were needed:
and then it was time mounting the canister and connect the lines and hoses:
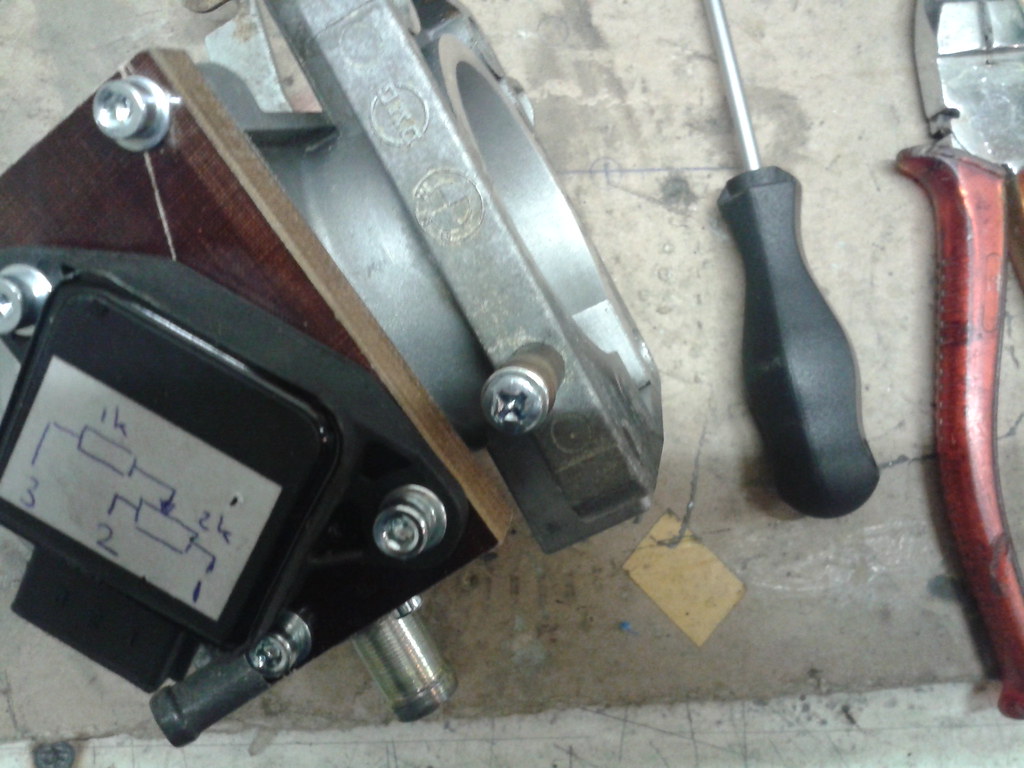
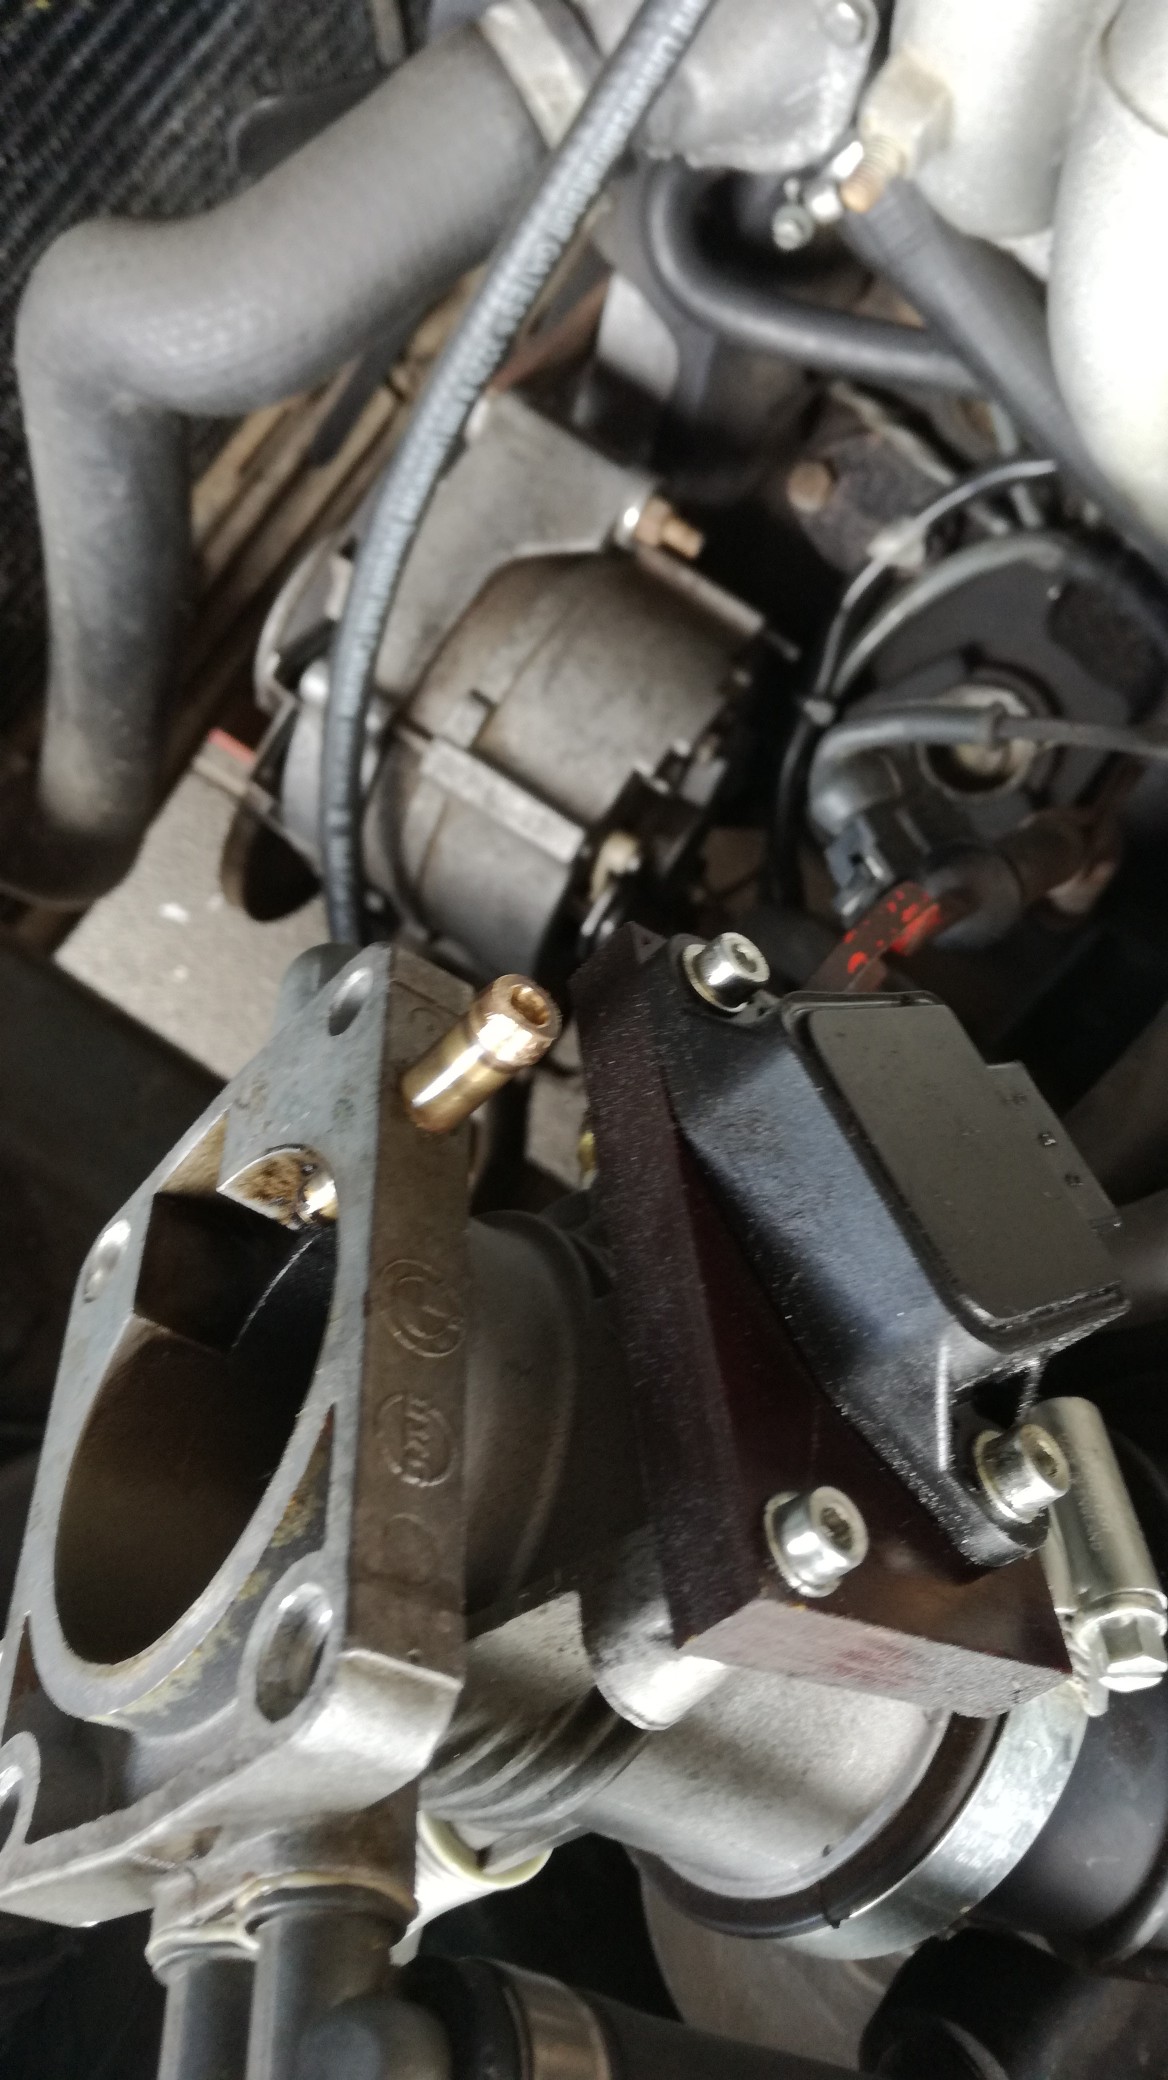
My throttle body (from a '90 E30) has a purge valve vacuum connection, but i closed it at the time i build the Megasquirt conversion, because then i hadn't any plans using this vacuum connection.
here a pic from the throttle body with the connection closed with a M5 screw:
Trying to release the screw with the throttle body still in the car wasn't a succes, so getting the throttle body out was the only option, and when it was out i saw why the screw wouldn't release. I' mounted it then with some J-B Weld, so i had to drill the screw out:
After that placing the throttle body back and connected the purge valve, which is from a '90 E30 also, to the throttle body and evap line with some fuel hoses.
Last thing was controlling the purge valve. The valve i used is open when not energised, this means it opens when a little pressure is applied. This is a safety feature when the charcoal canister should clog, the fueltank could still vent through the purge valve.
When the purge valve is energised is closed completely, this is what you want when the engine is idling or over-runs. Adding a extra output controlling the purge valve wasn't a big deal, because i've build the megasquirt ECU's myself.
i'programmed the output it releases (opens) the purge valve when the engine revves above 1500RPM and the MAP is above 40 PSI, this is almost always true while driving the car.
So when driving the car the engine burns the fuel vapours stored into the charcoal canister, and because the megasquirt ECU is in almost all running conditions in closed loop (only not in overrun fuel cut condition) it adjusts the AFR to the target AFR automaticly
It's nice now there isn't any fuel smell around the car anymore when parked under my carport, even when the sun is baking it, i'm happy
Last edited by BertjeConti on Sun Nov 27, 2022 11:41 am, edited 2 times in total.
Megasquirted '77 E12 520-6
Aspen Silver '96 E39 523i
-
BertjeConti
- E21 Mad
- Posts: 3019
- Joined: Mon Nov 04, 2013 9:49 pm
- My E21(s): E12 520-6
- Location: nederland , Weert
Re: Pastelblau 520/6
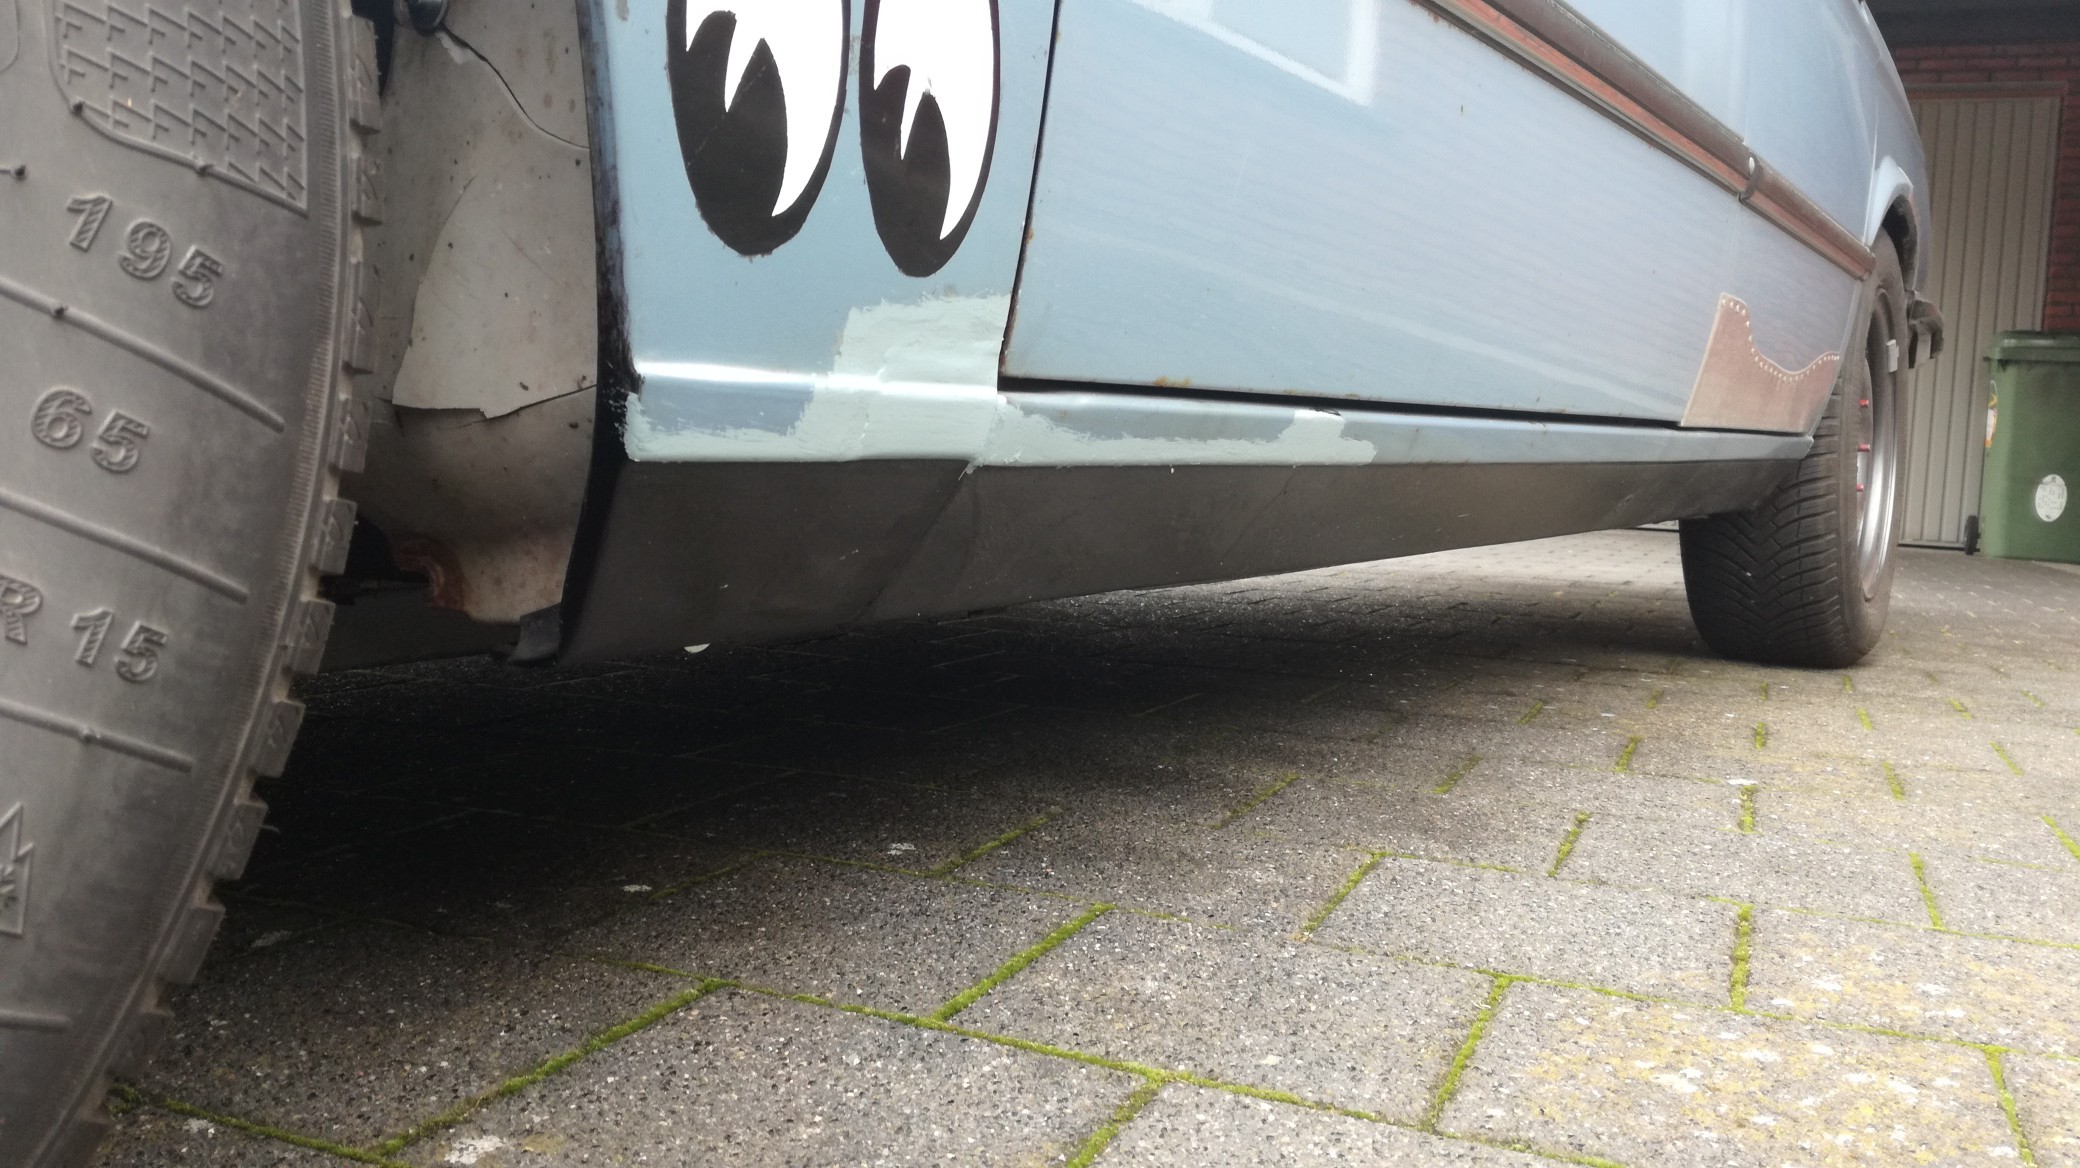
So time for a little update again, this summer the E12 got some TLC done to the bottom bodywork, and the front brakes are upgraded from solid to vented discs.
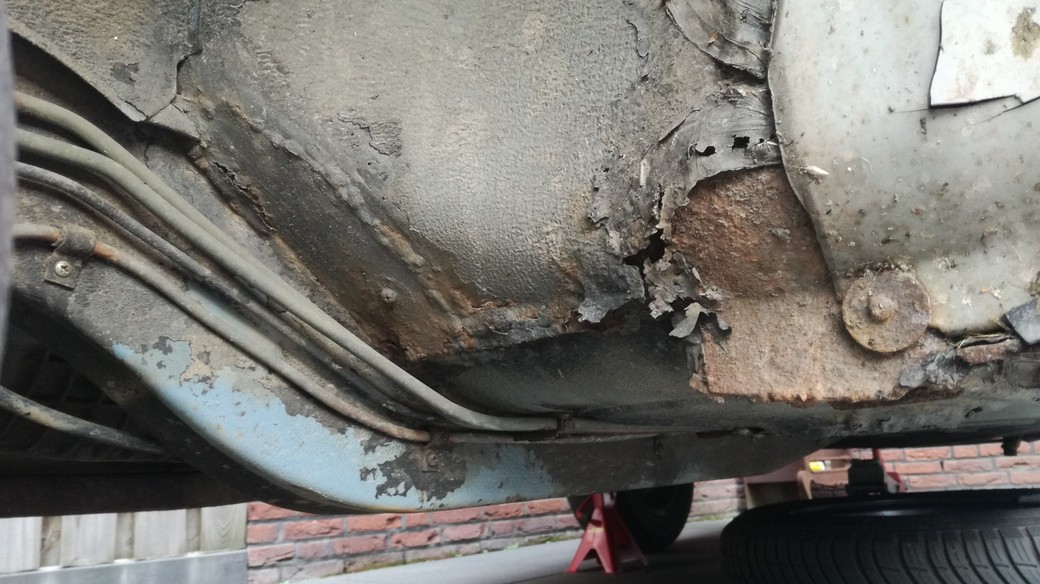
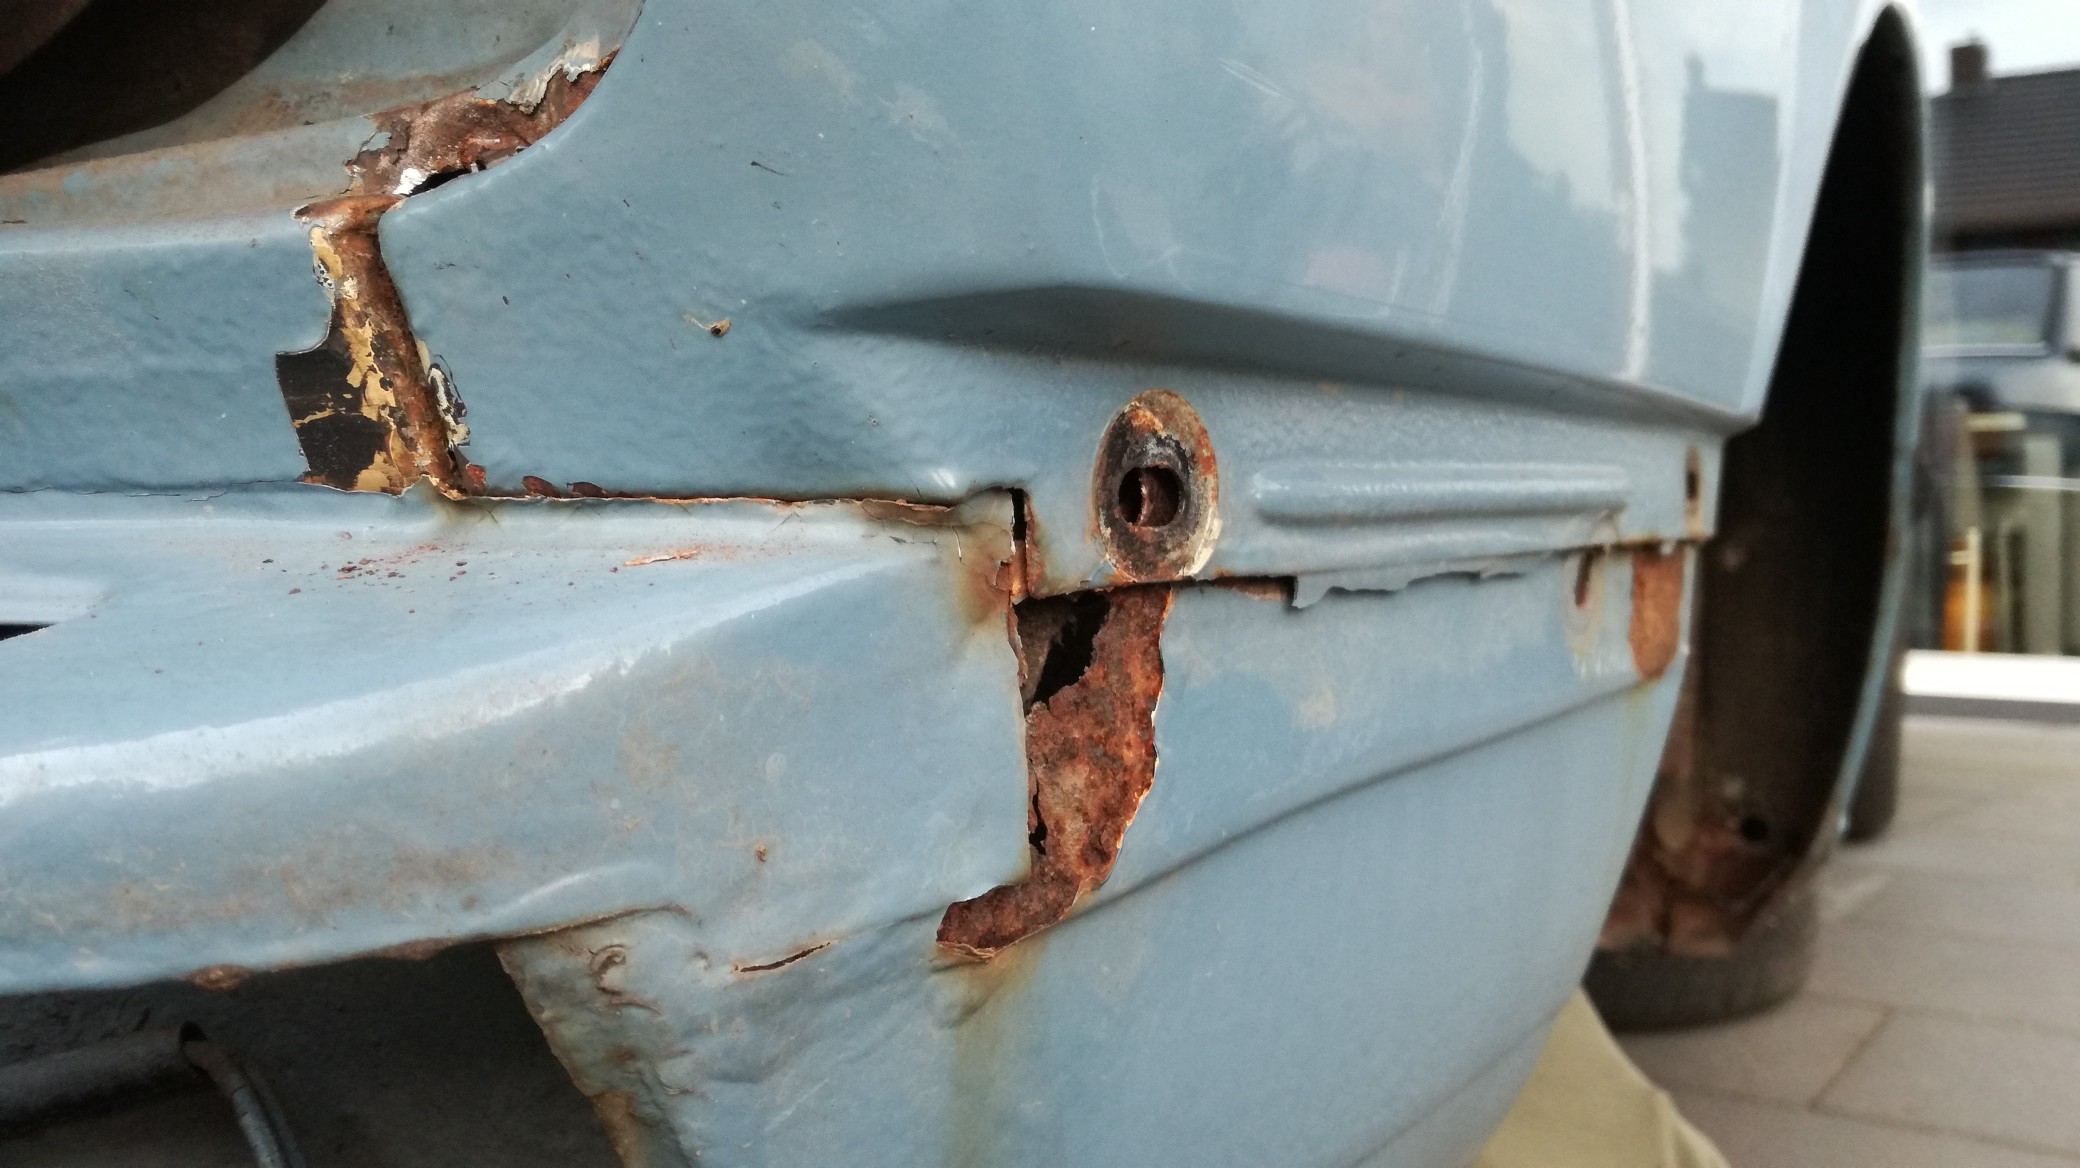
Some photo's above showing the EVAP return line underneath shows that the left side bottom was a little rusty crusty at some places.
The car got MOT last year, but the mechanic warned me that there was serious work coming up, so this last summer i started working on the left bottom area.
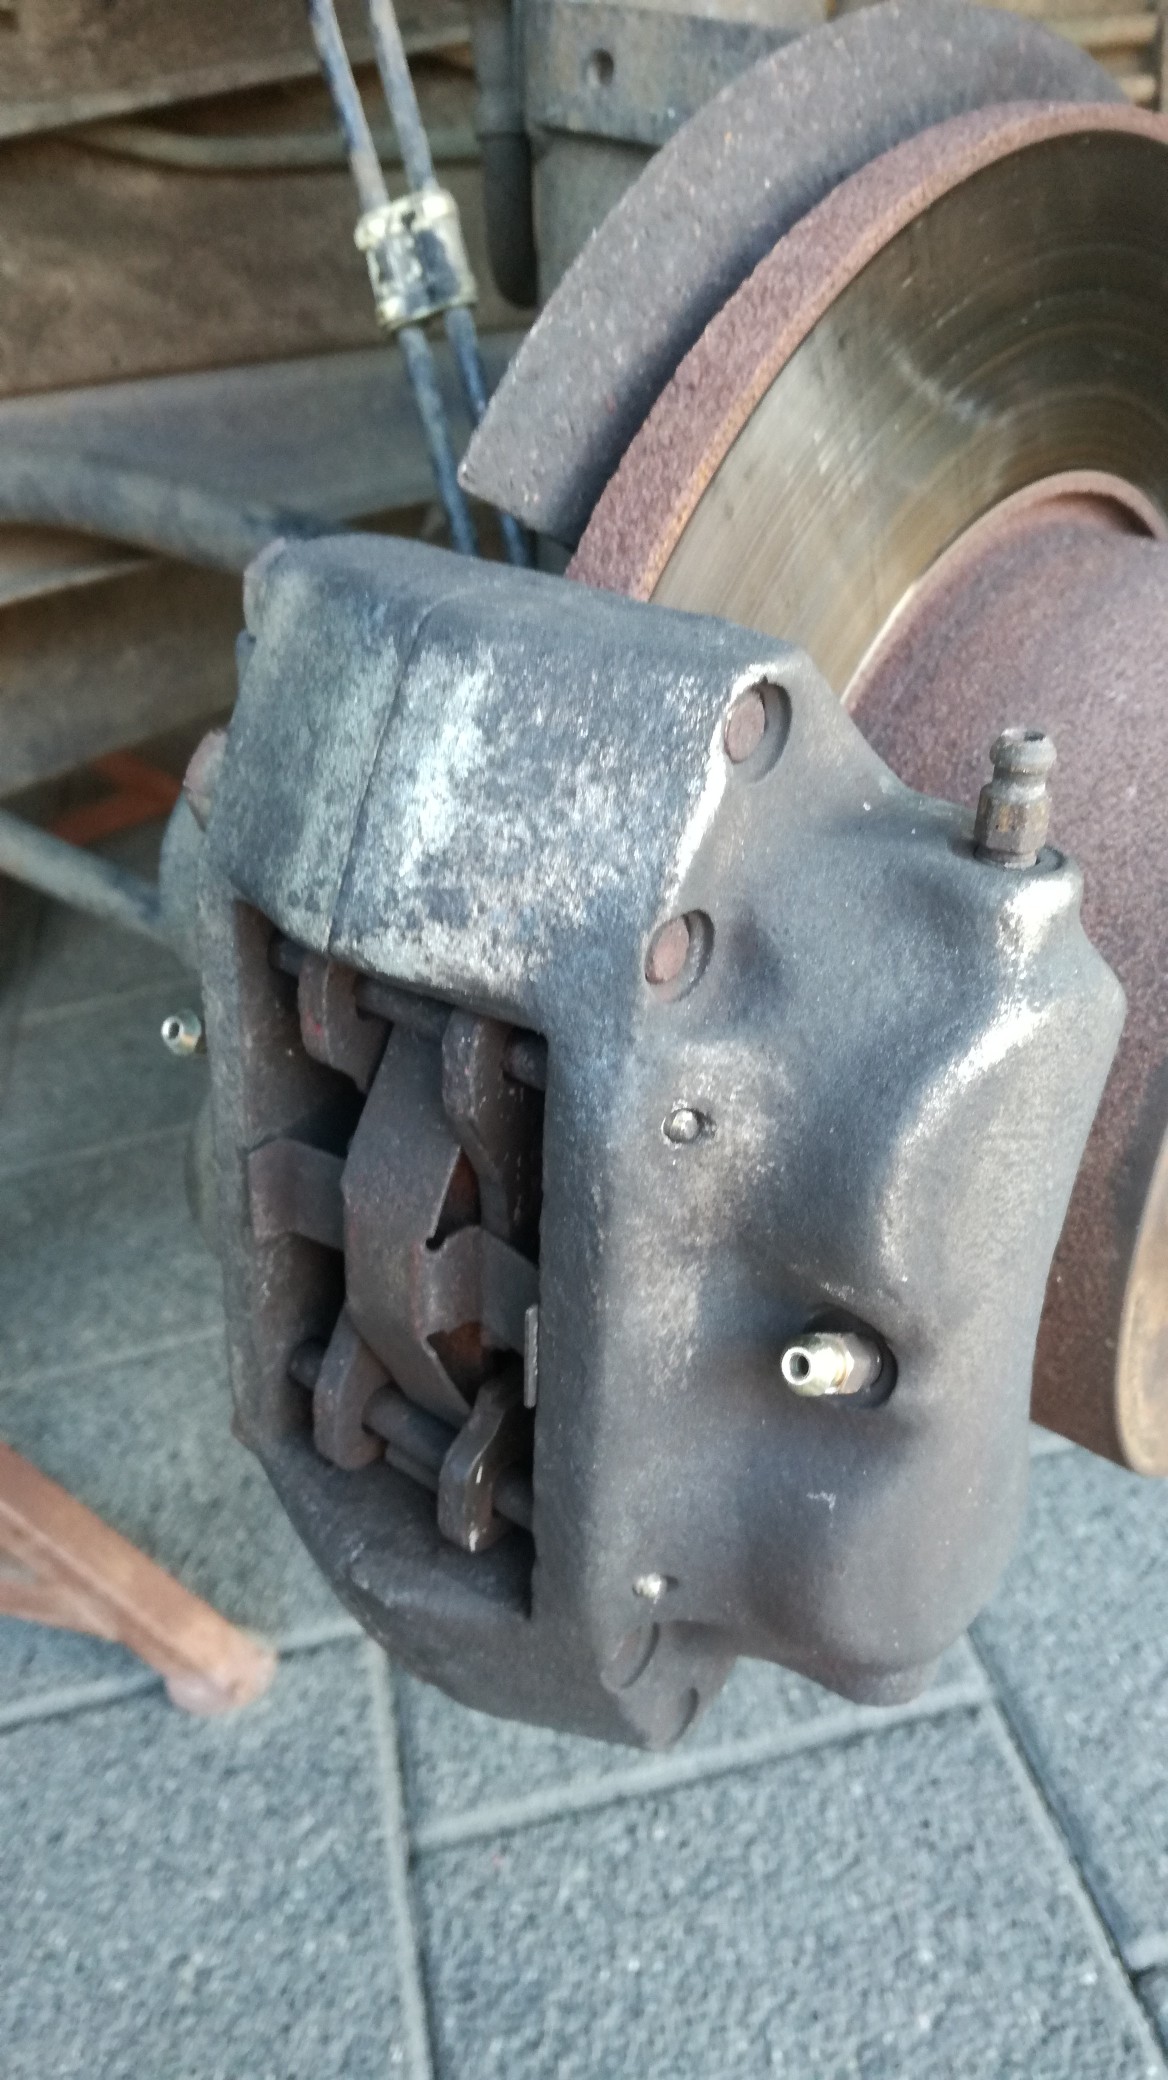
First the front brake upgrade, converting to vented discs only needs new vented discs ofcource and suitable calipers.
Old situation:
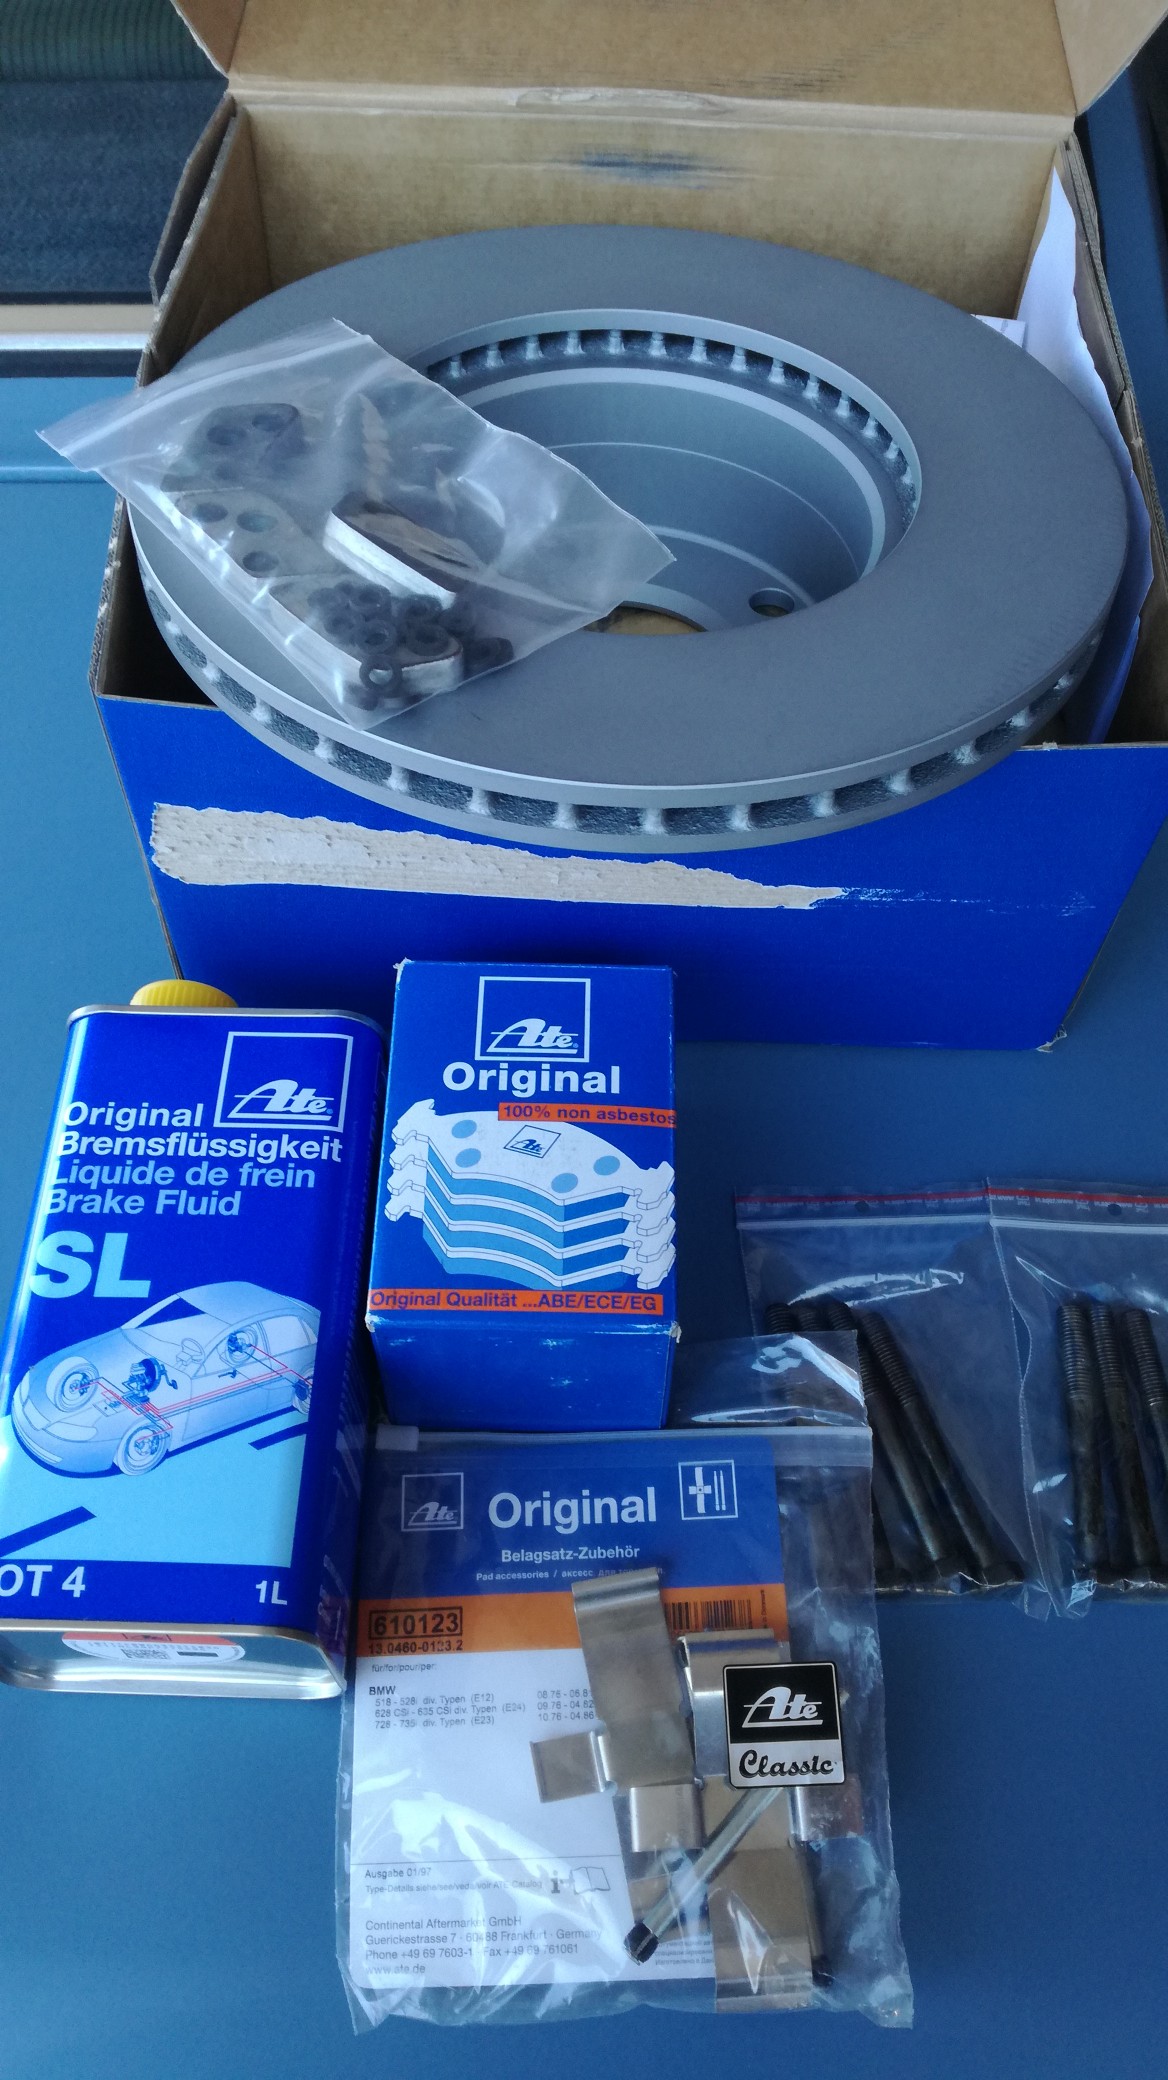
I got some rotten vented disc calipers as parts spender, they spended the needed spacers which make the calipers wider and longer bolts to clamp the 2 halves together.
Parts spenders:

I also got new seals for the caliper halves, all parts gathered:
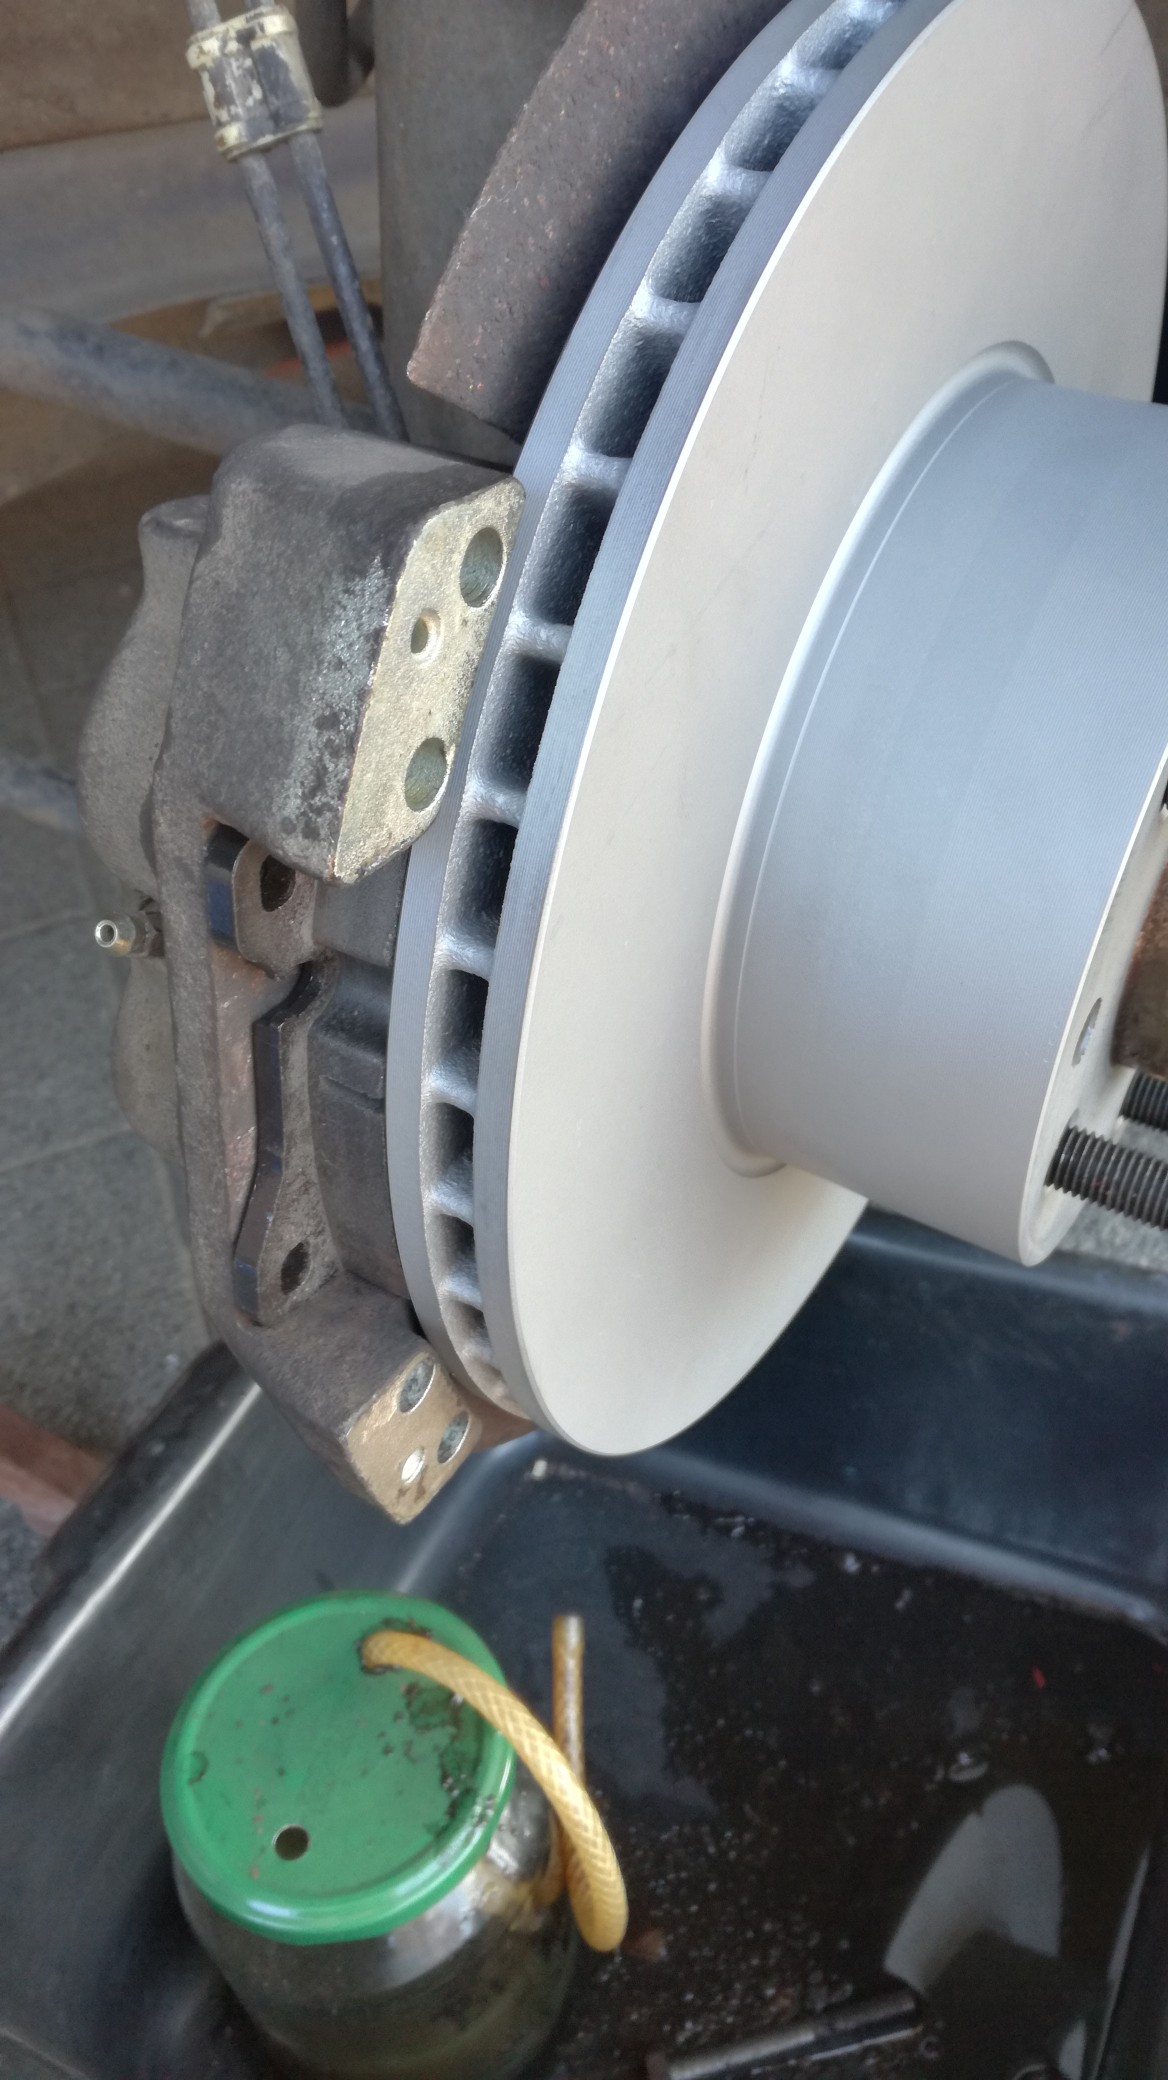
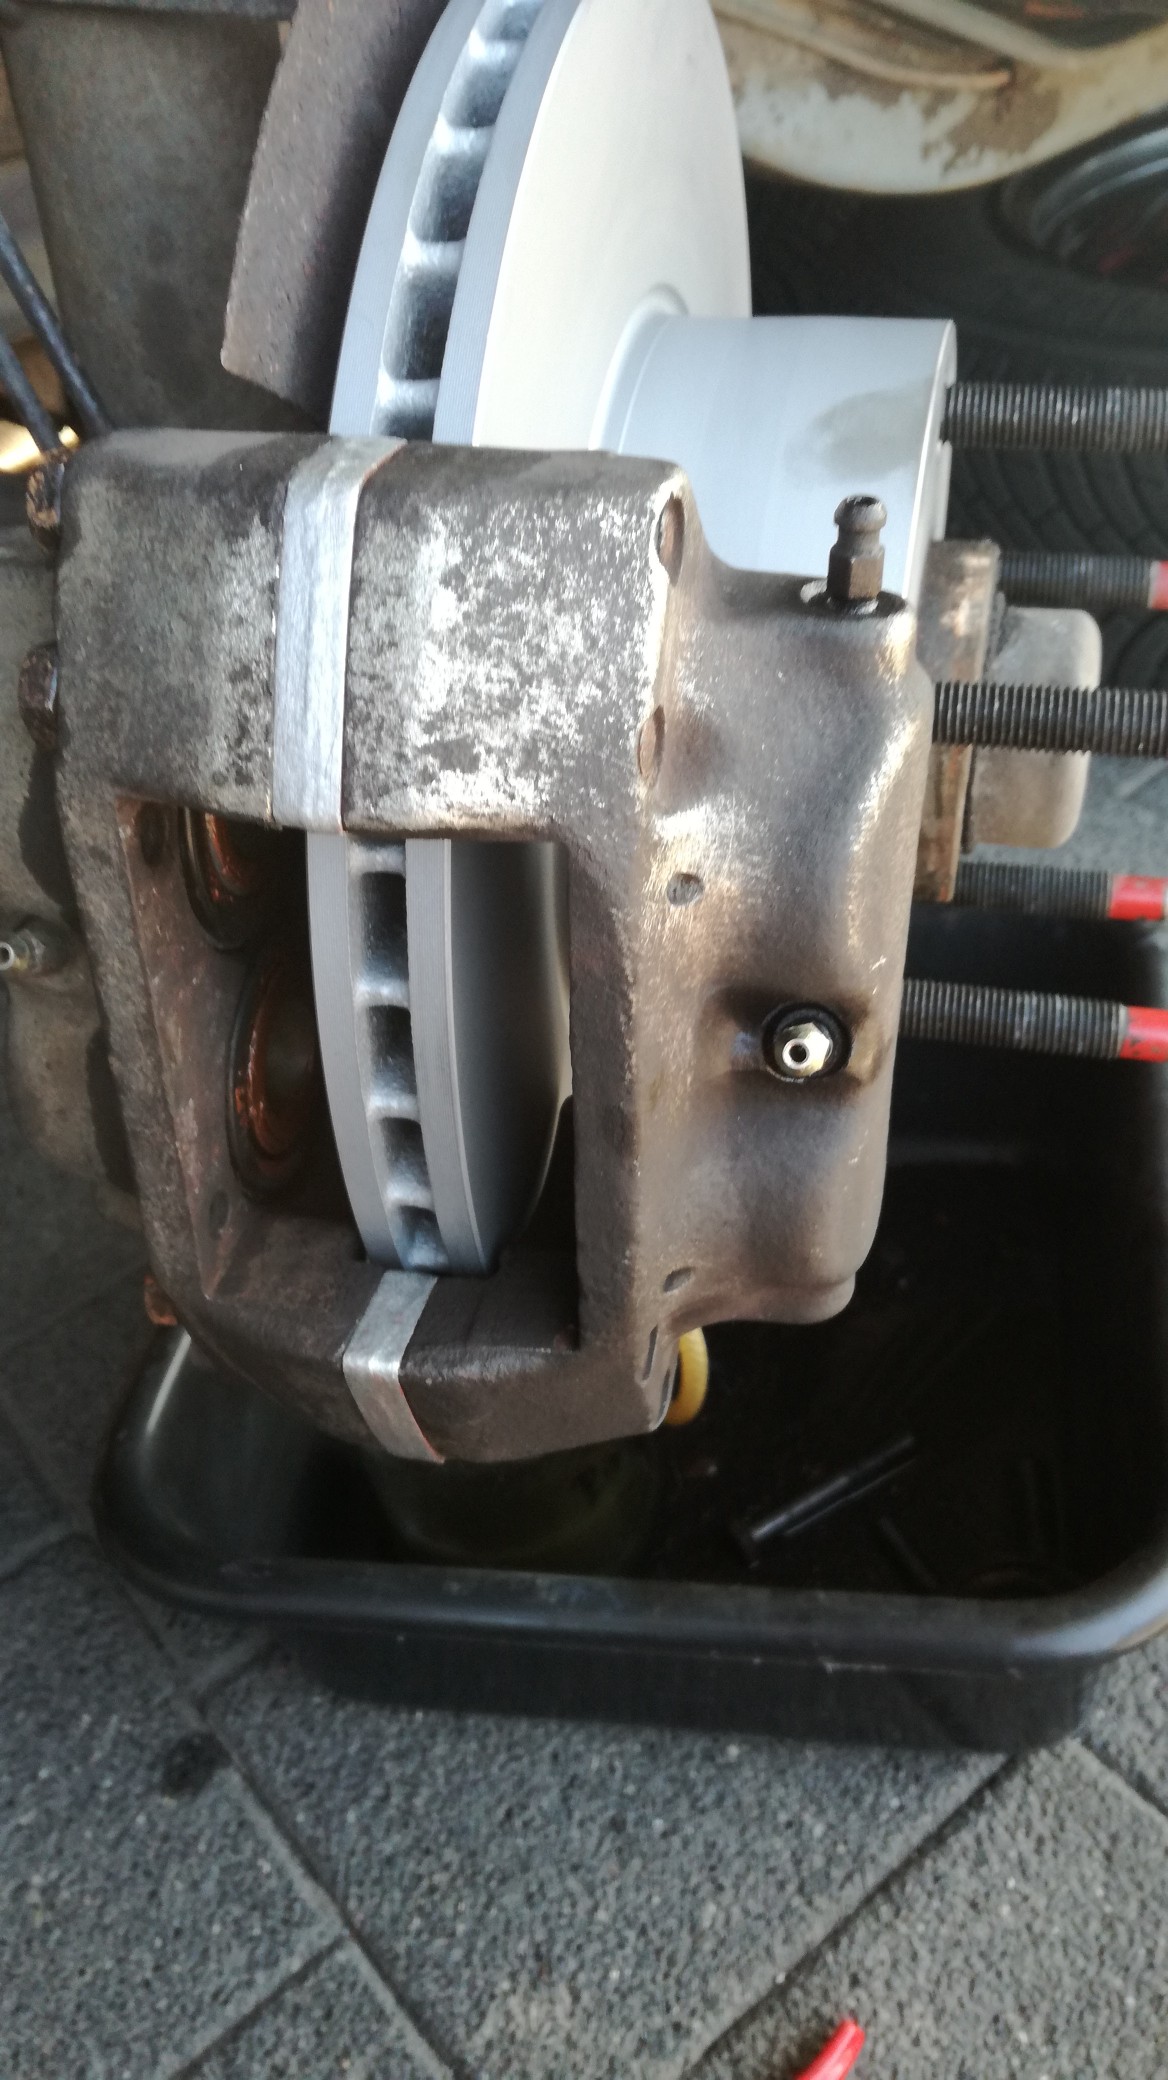
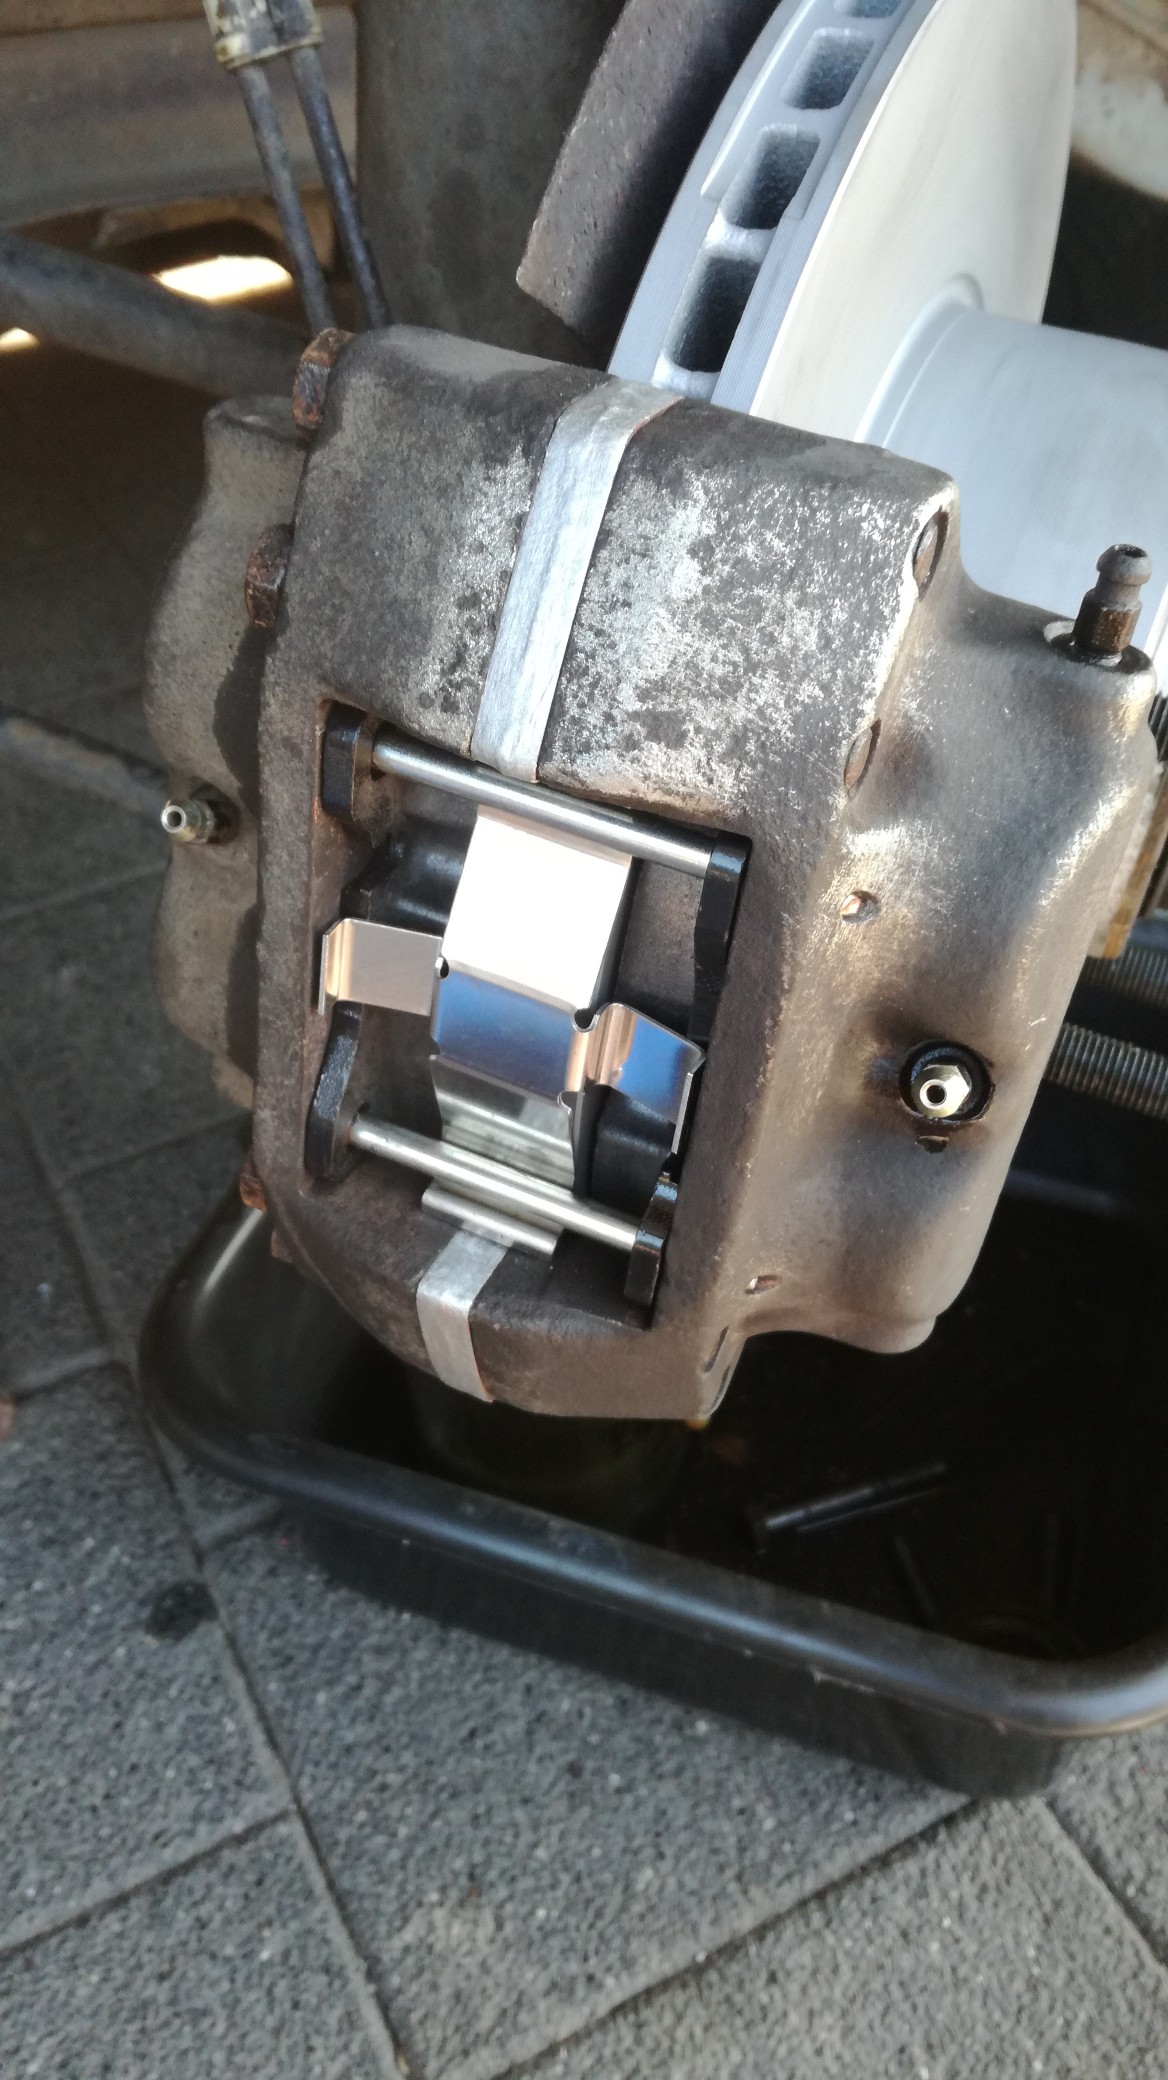
I drained the brake fluid and then splitted the calipers while still on the car, then changed the discs, and assembled the calipers with the spacers, longer bolts an new pads and ancillaries:
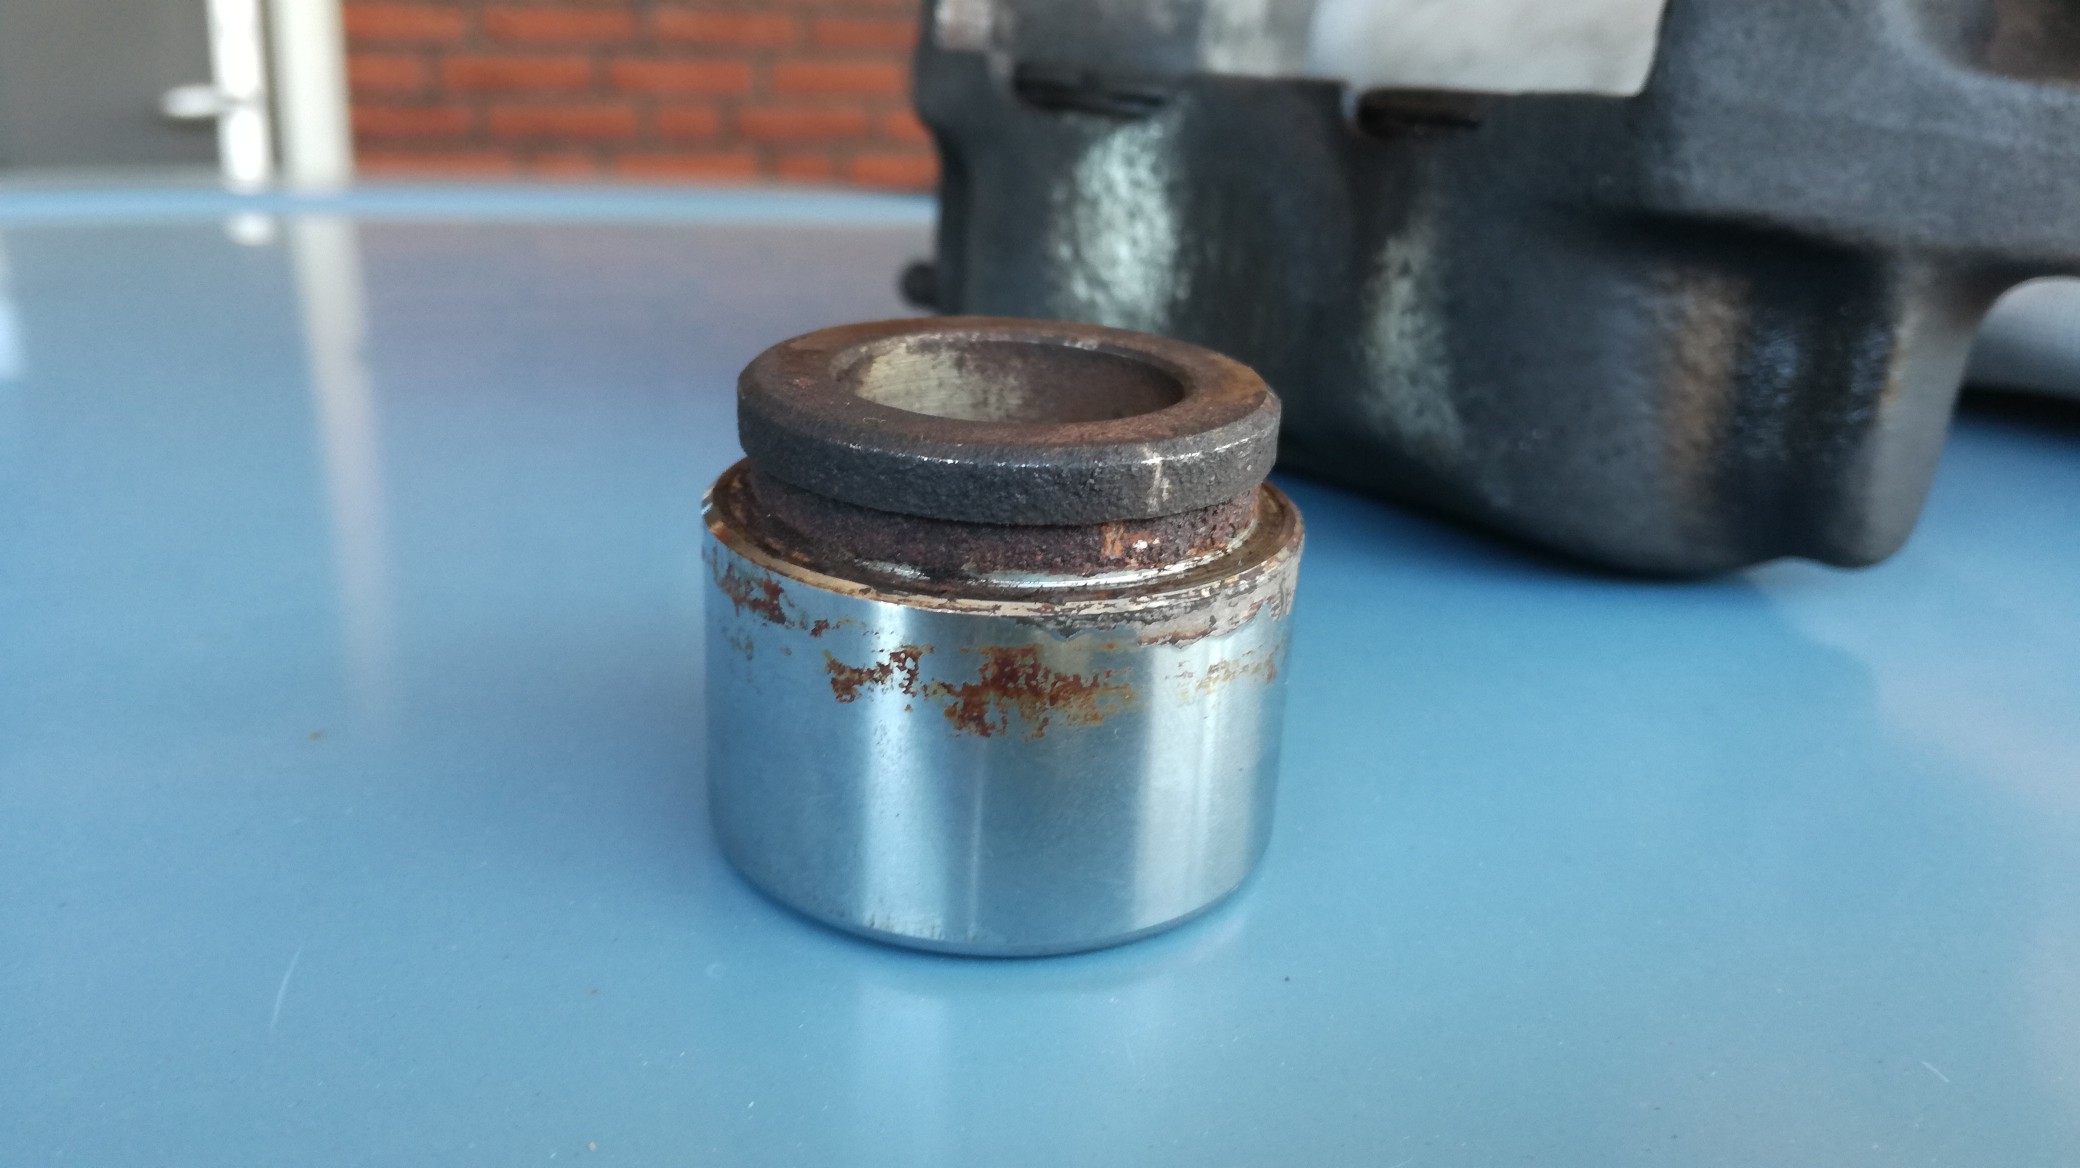
One dust boot and piston was damaged, and was changed for the best piston from the spare calipers and got a new dust boot:
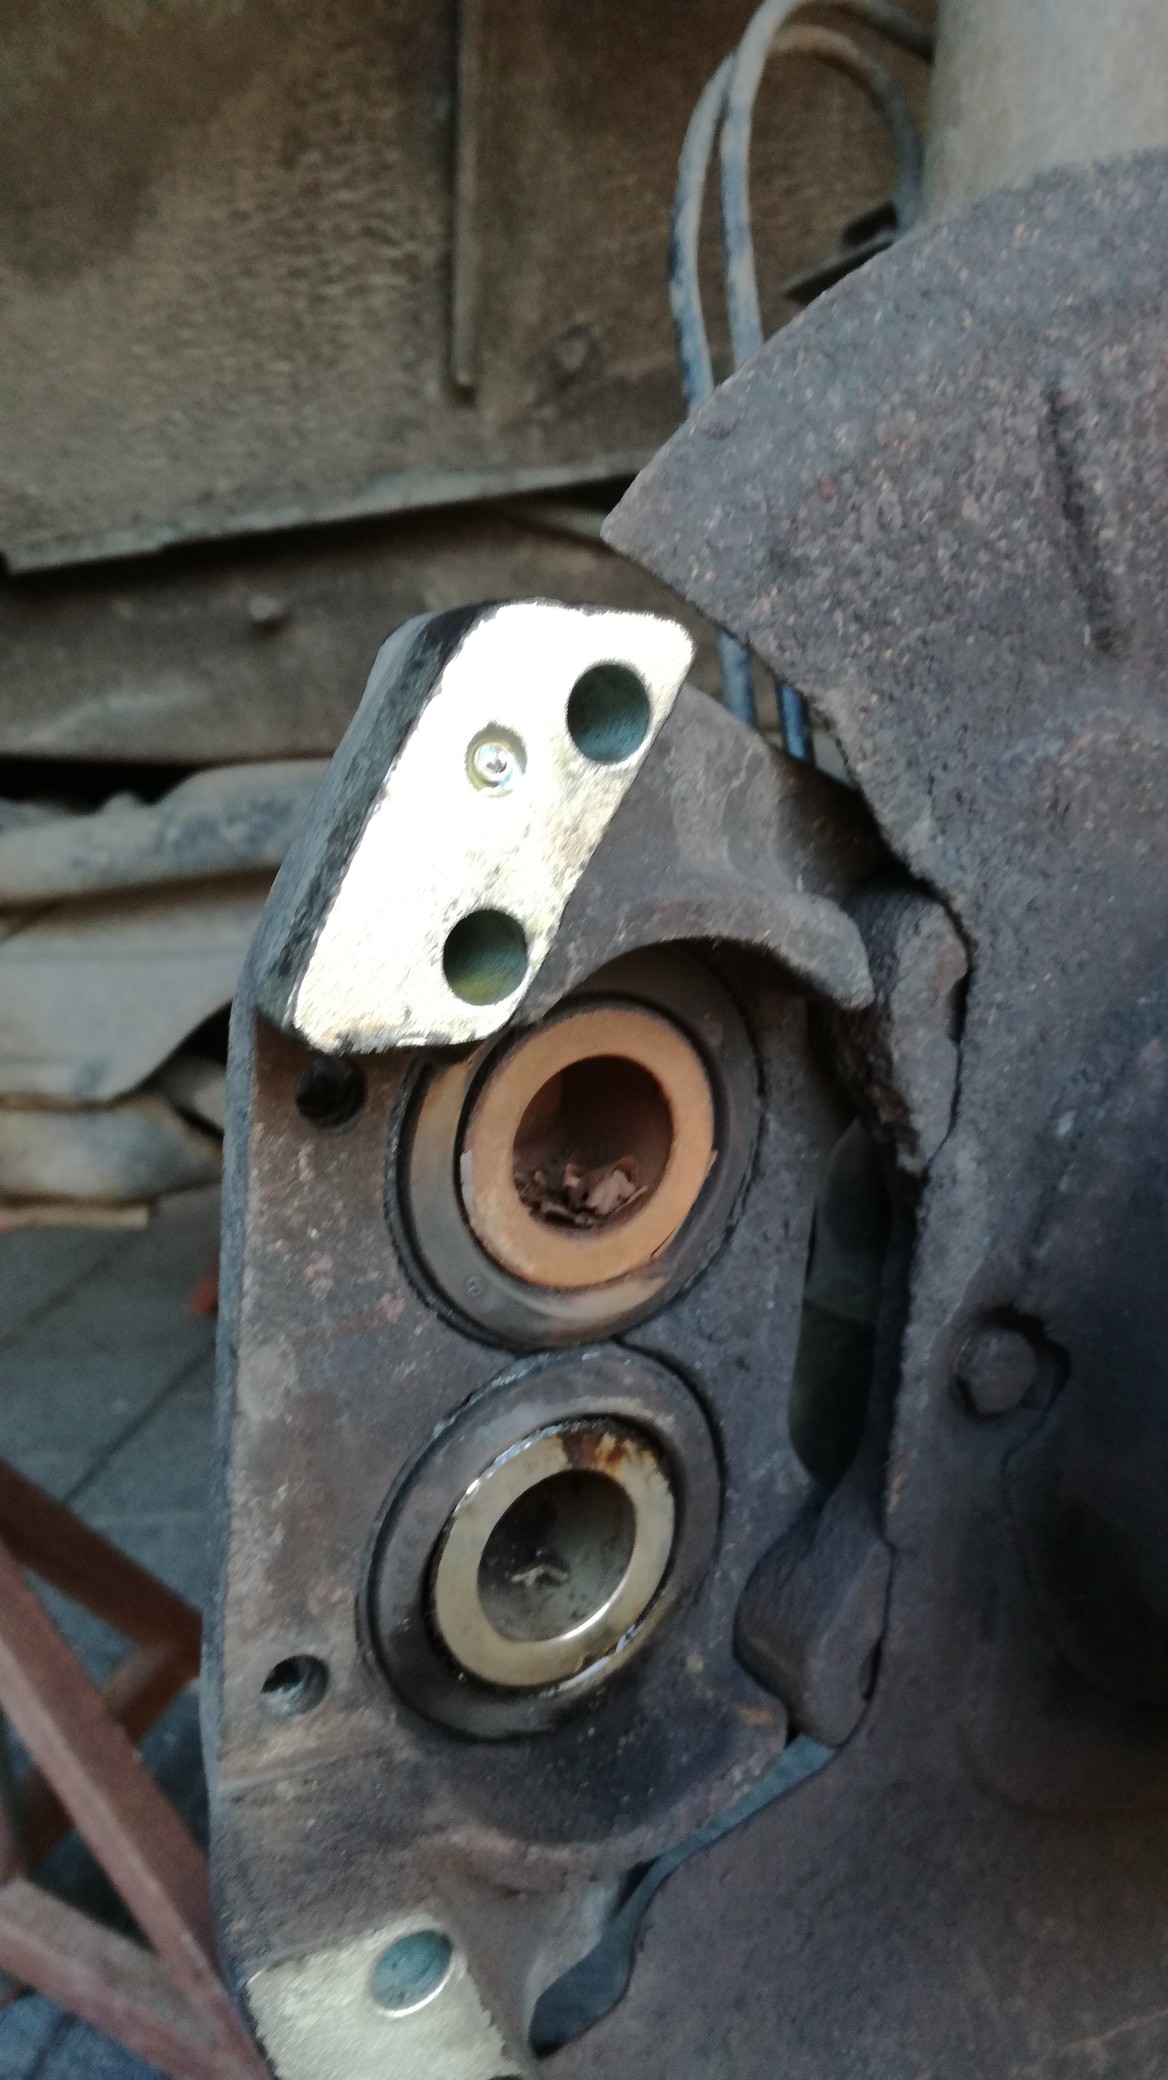
damaged (rust) piston
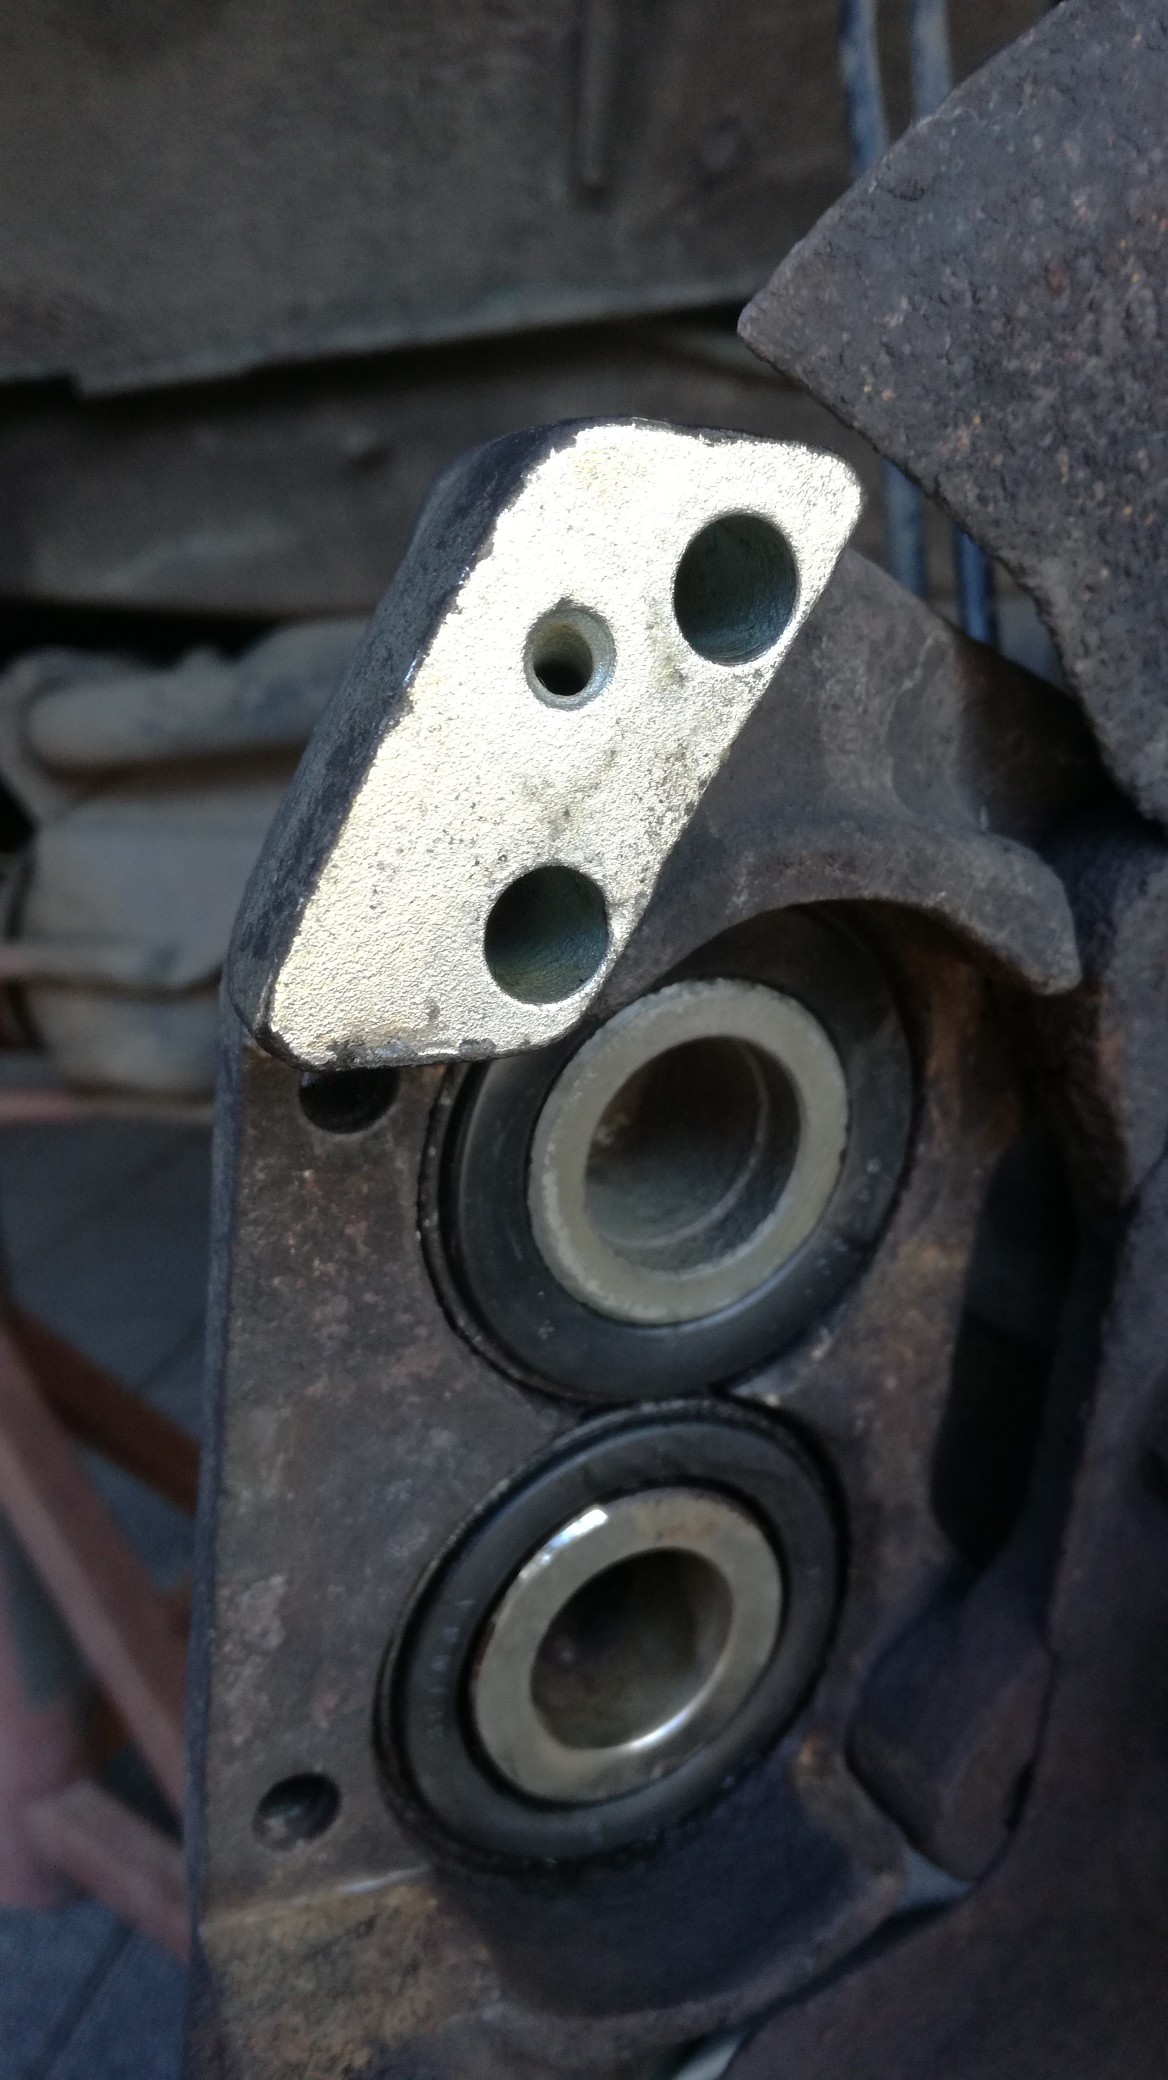
other piston and new dust boot placed:
Do vented discs brake better? No not really, but when hard and much braking is required they keep cooler !
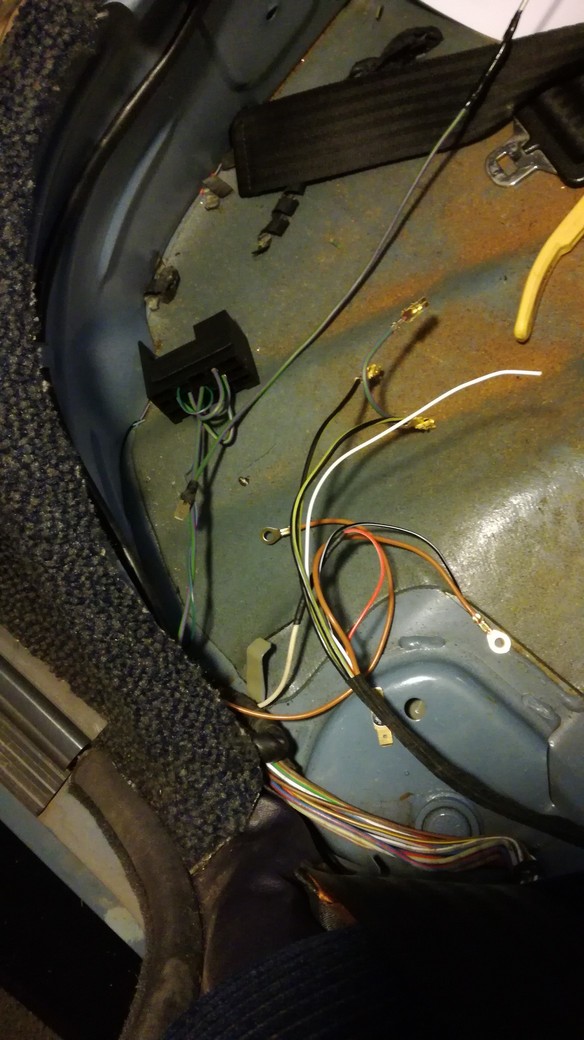
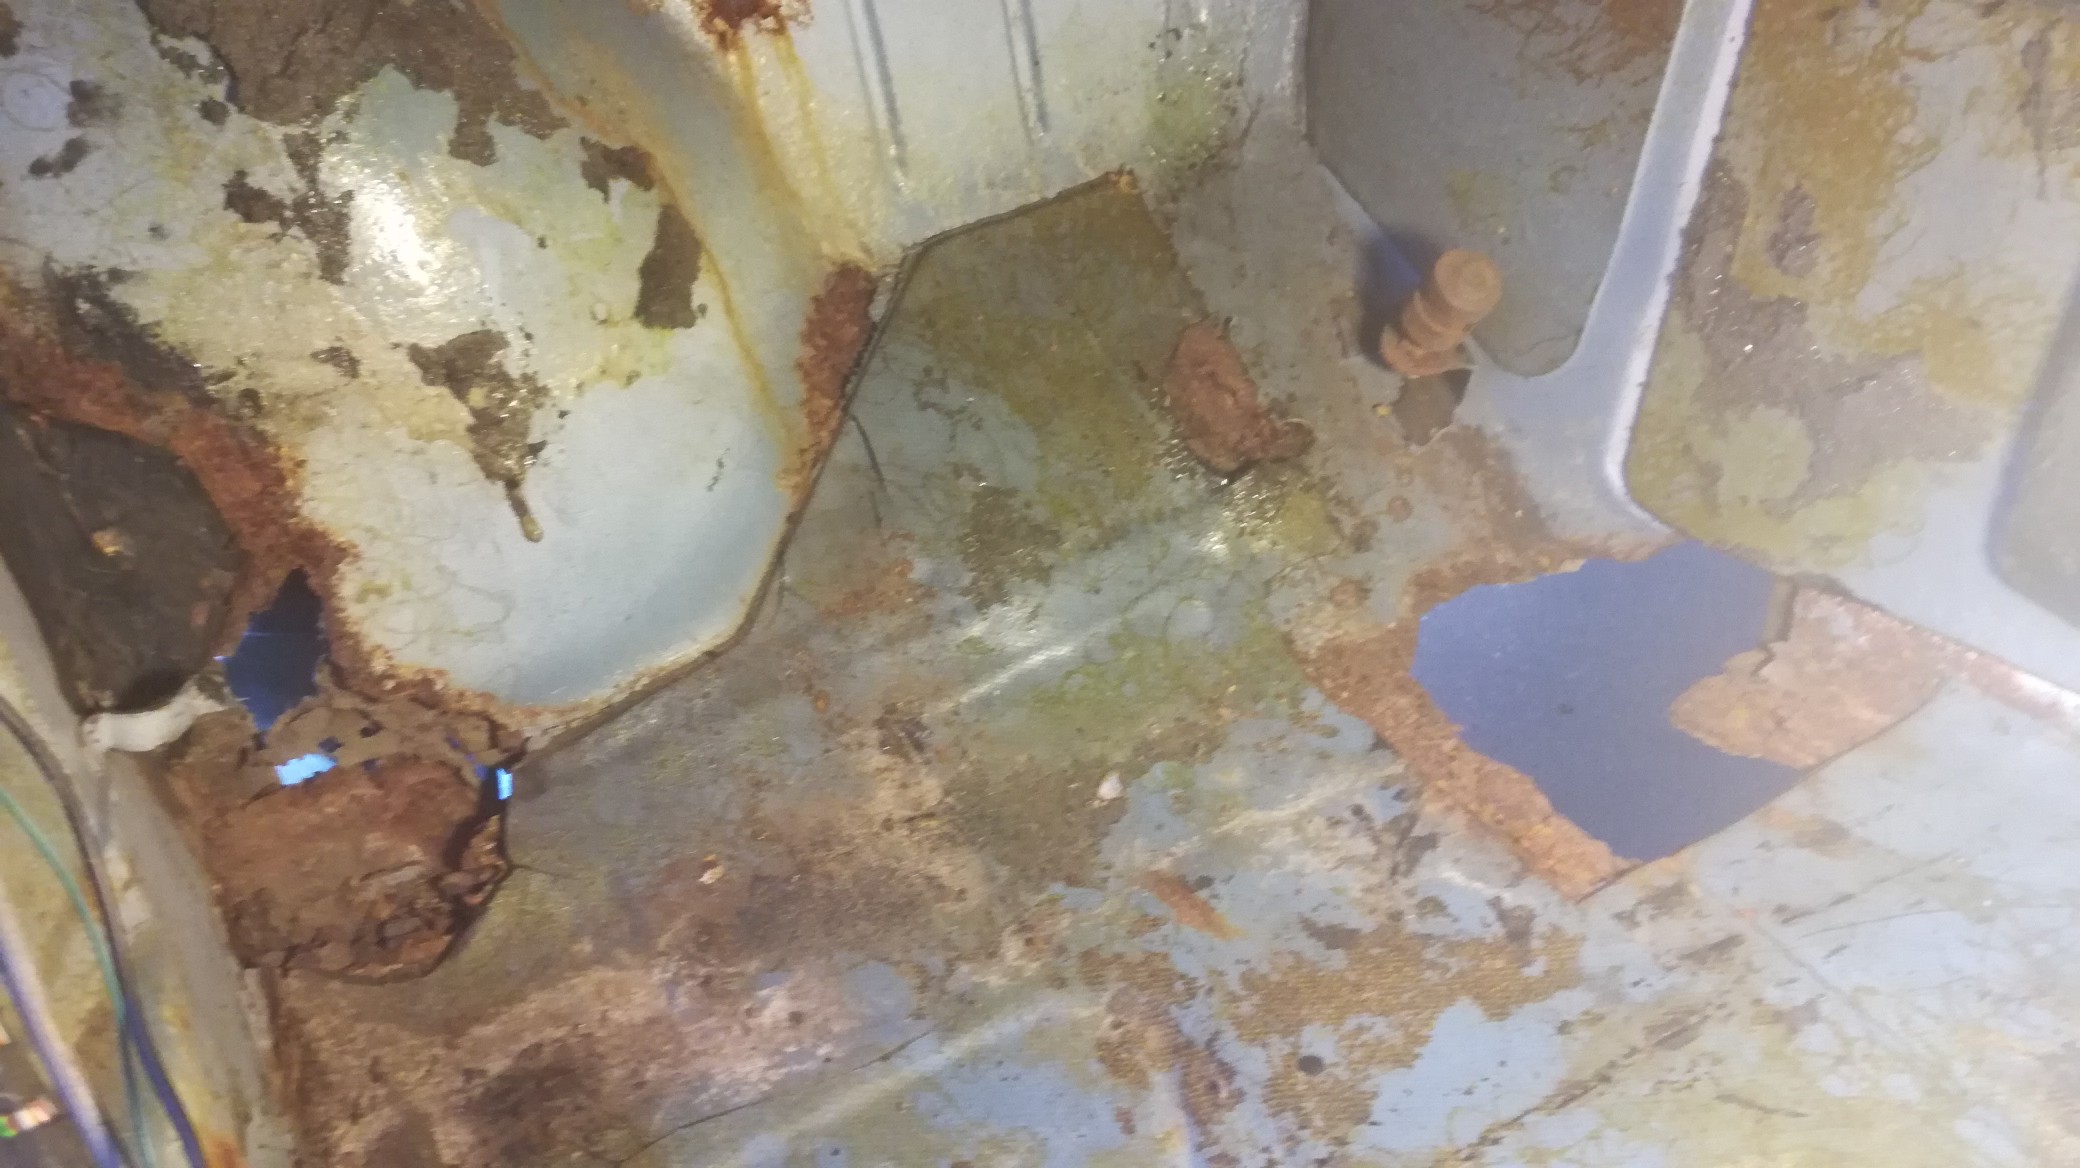
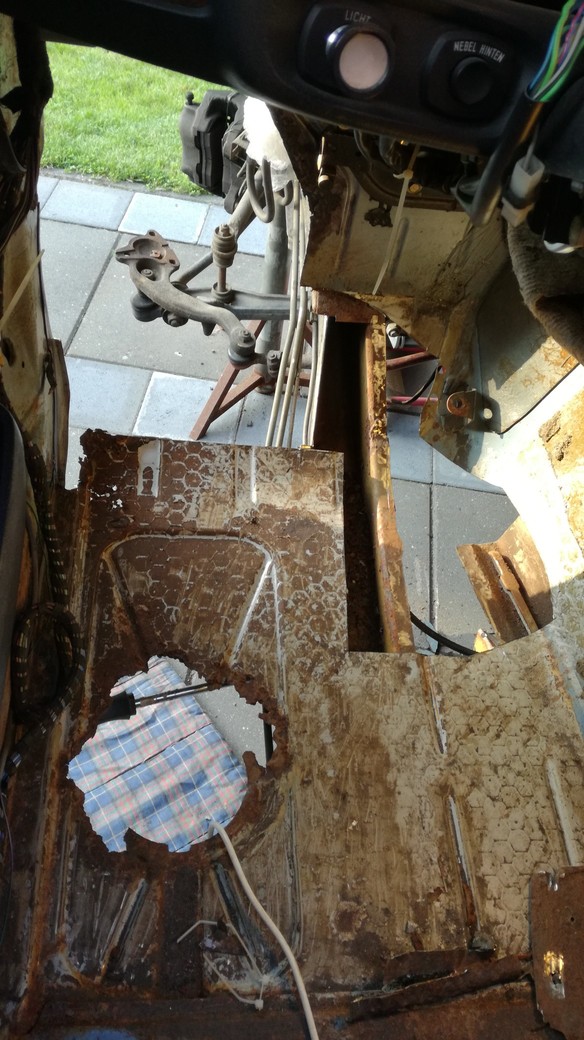
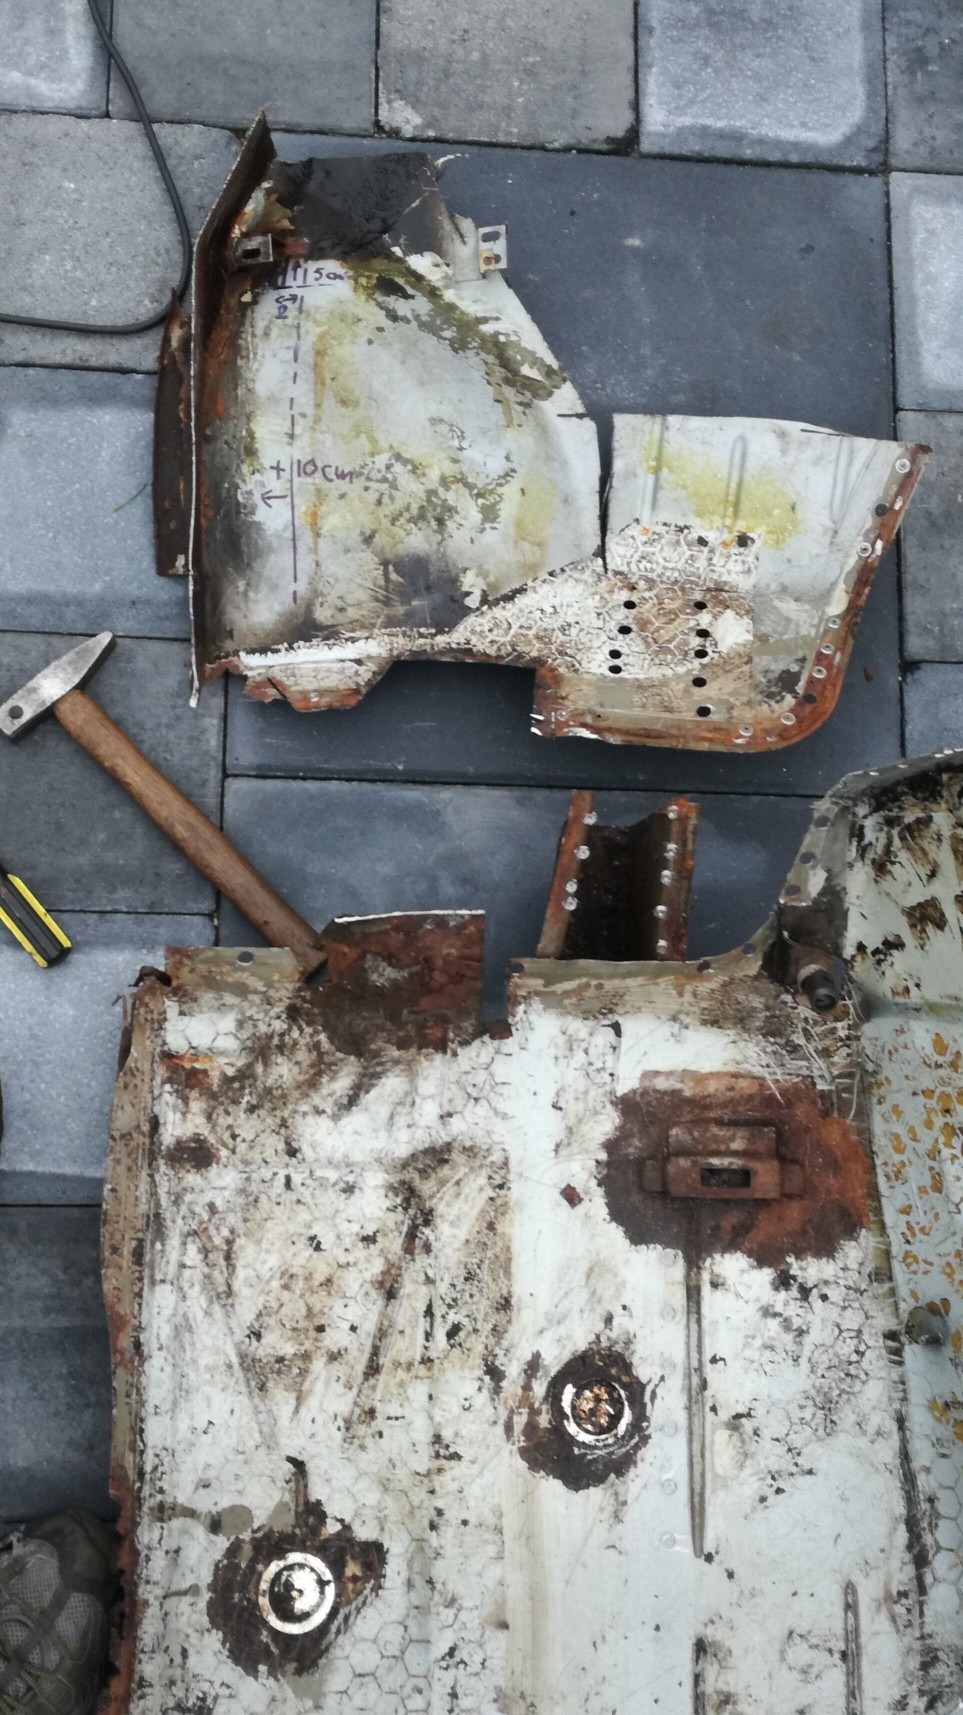
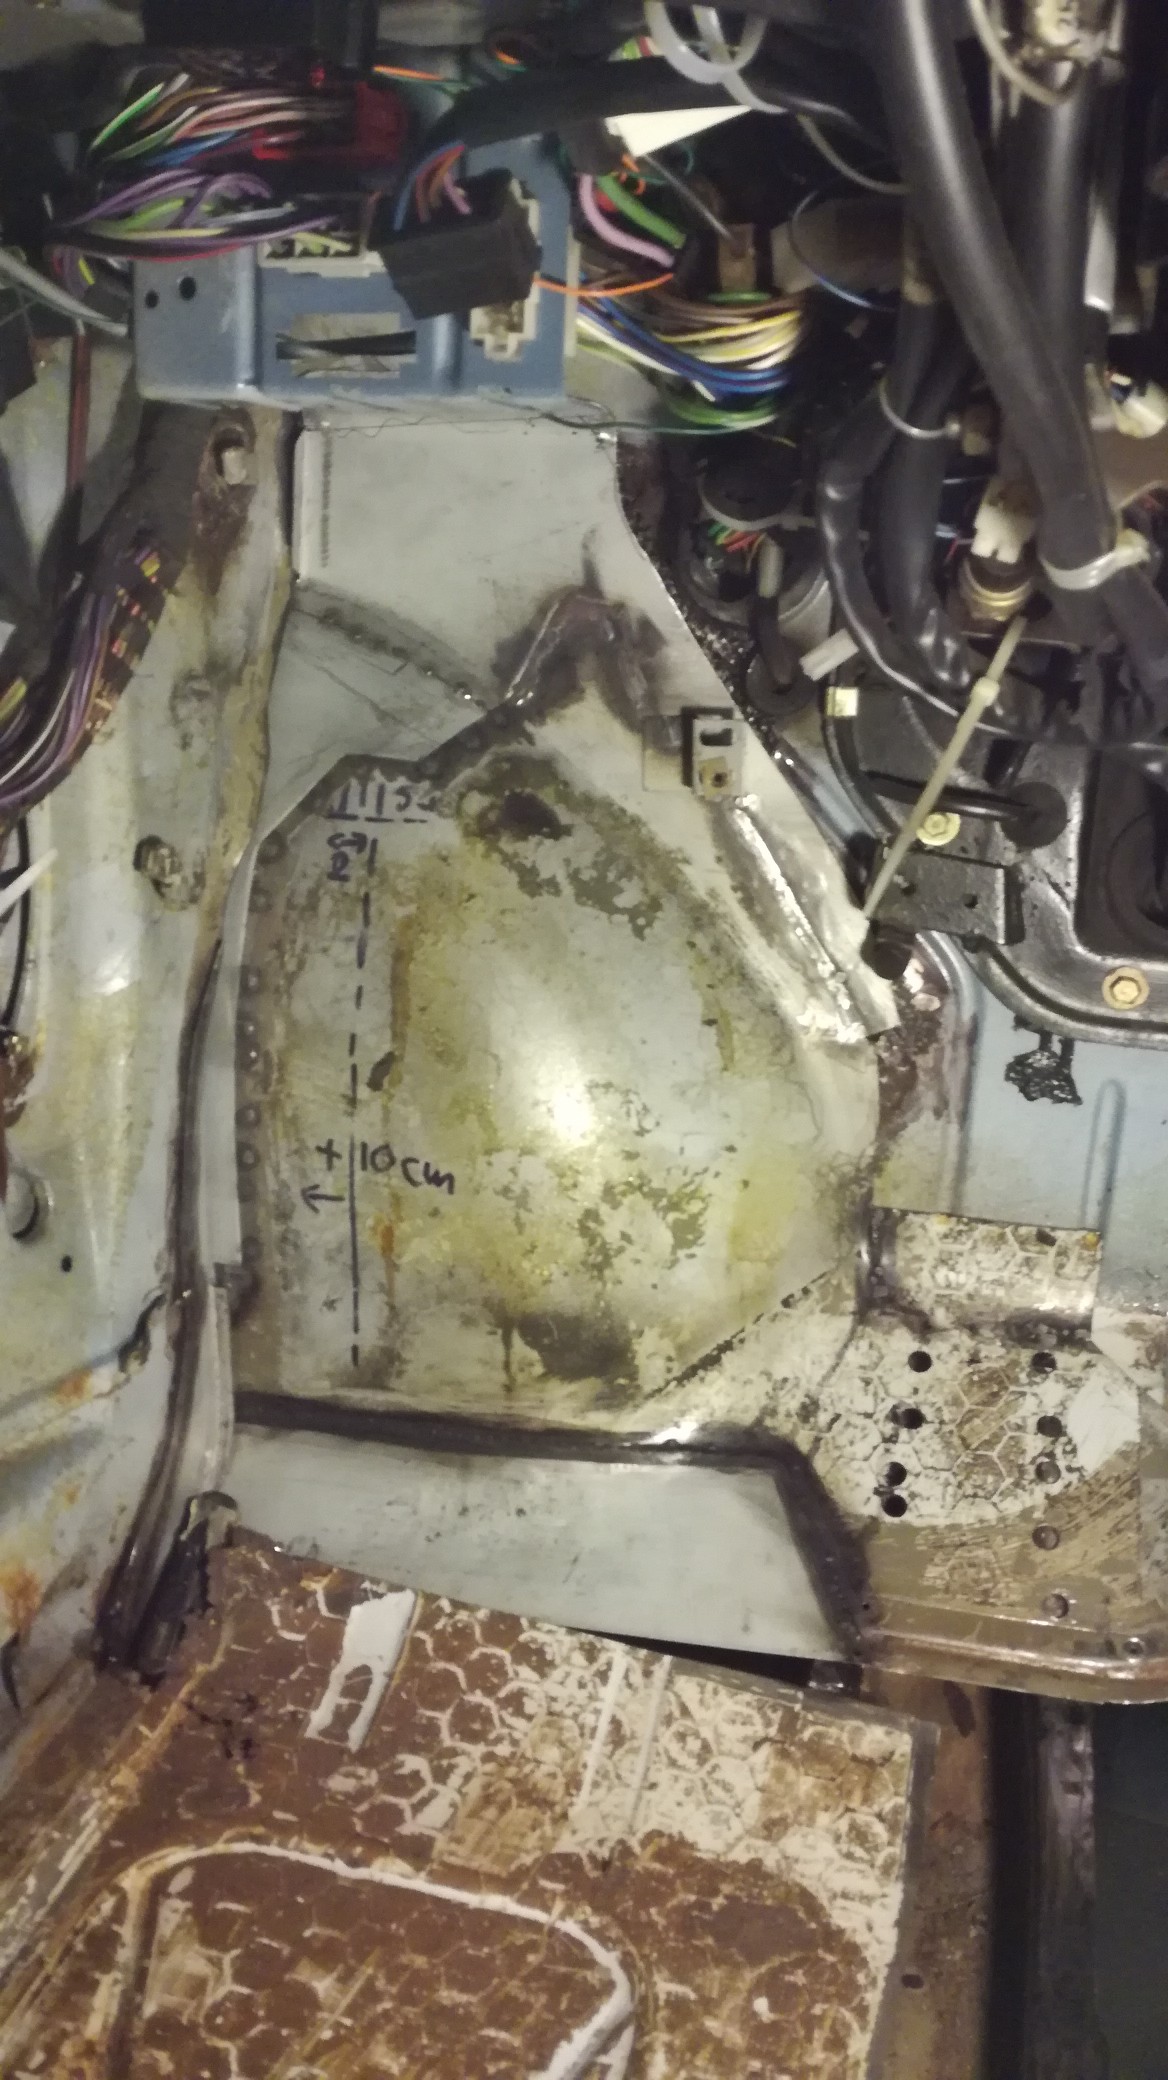
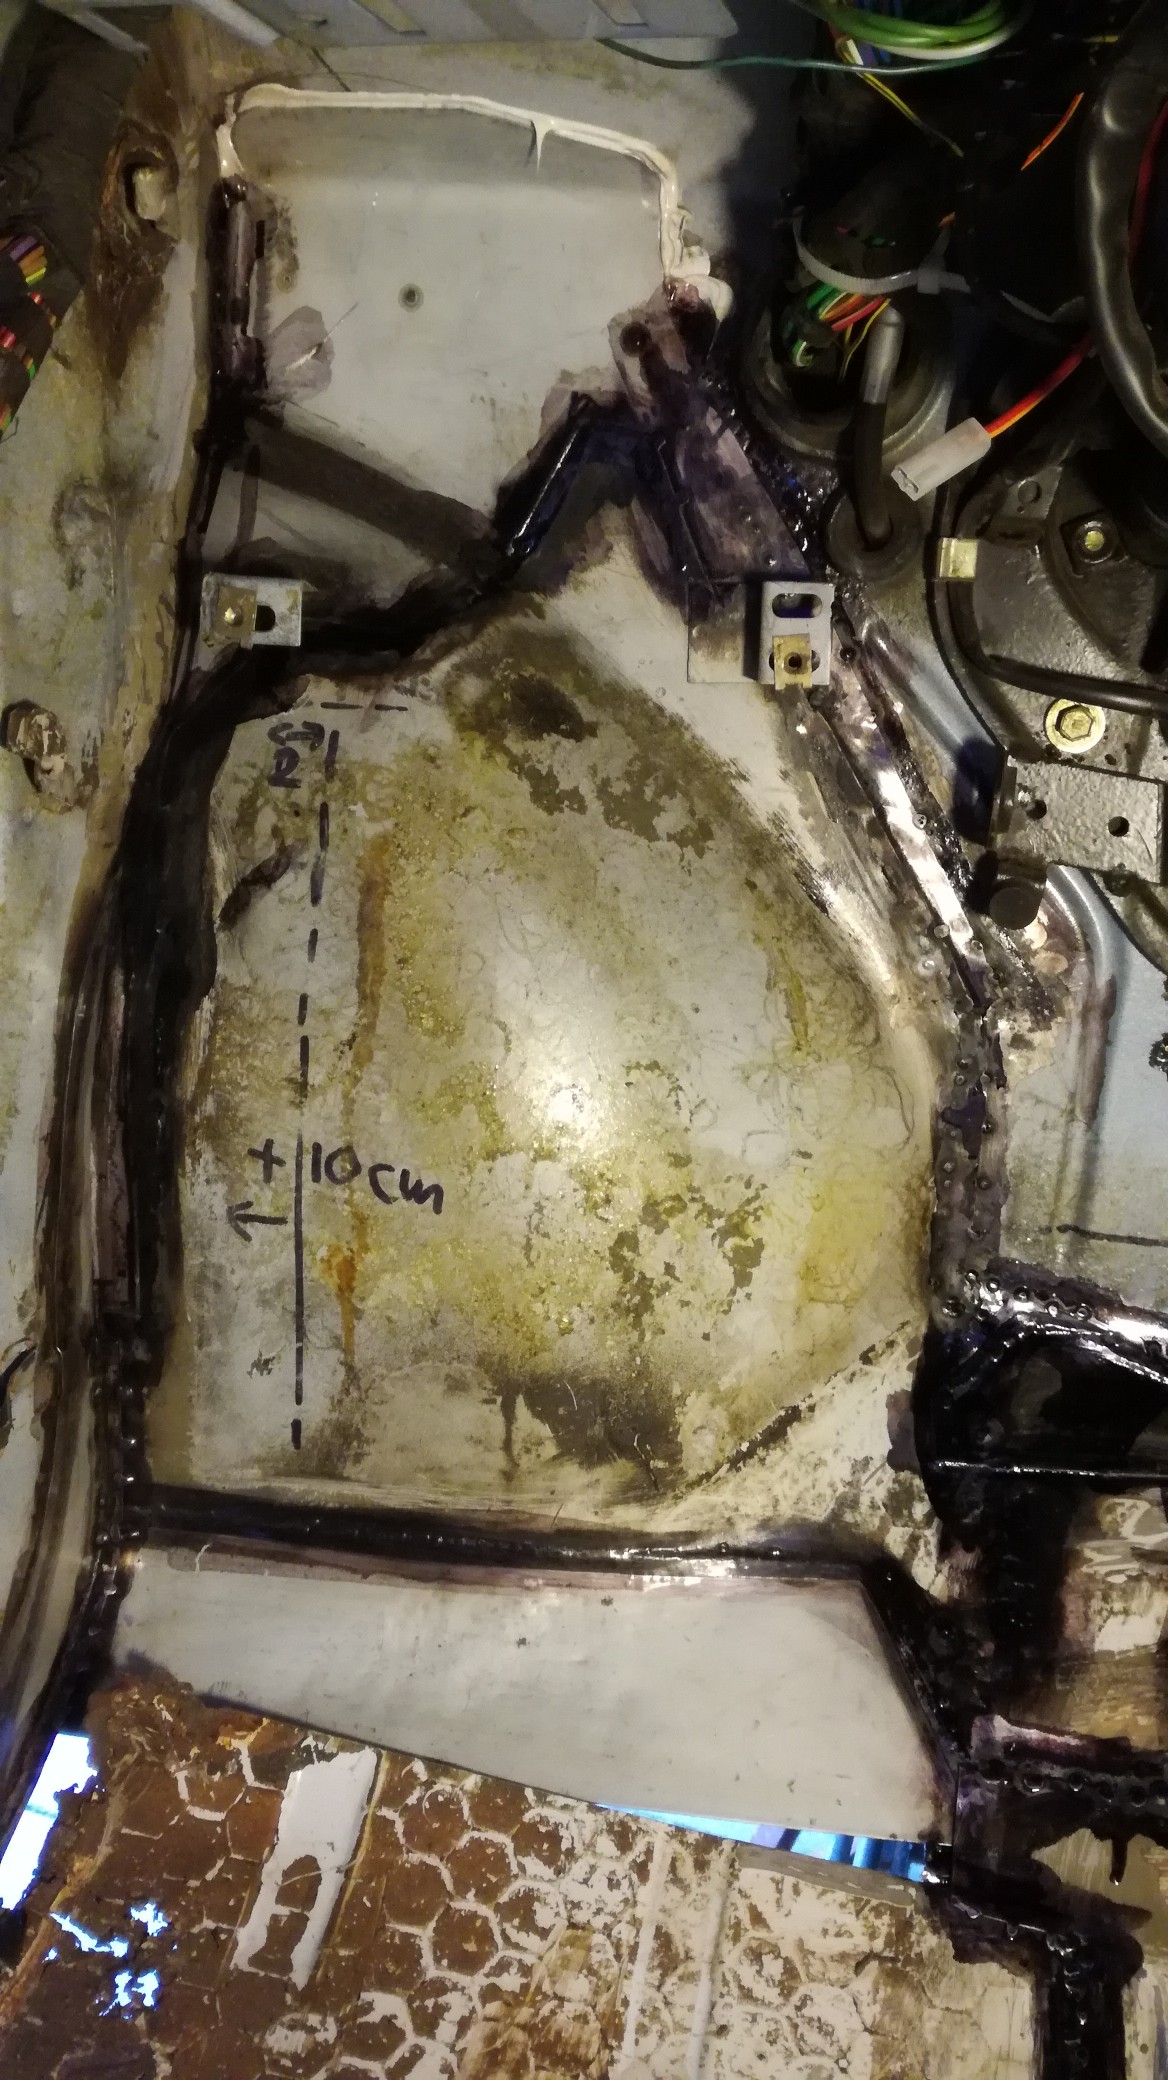
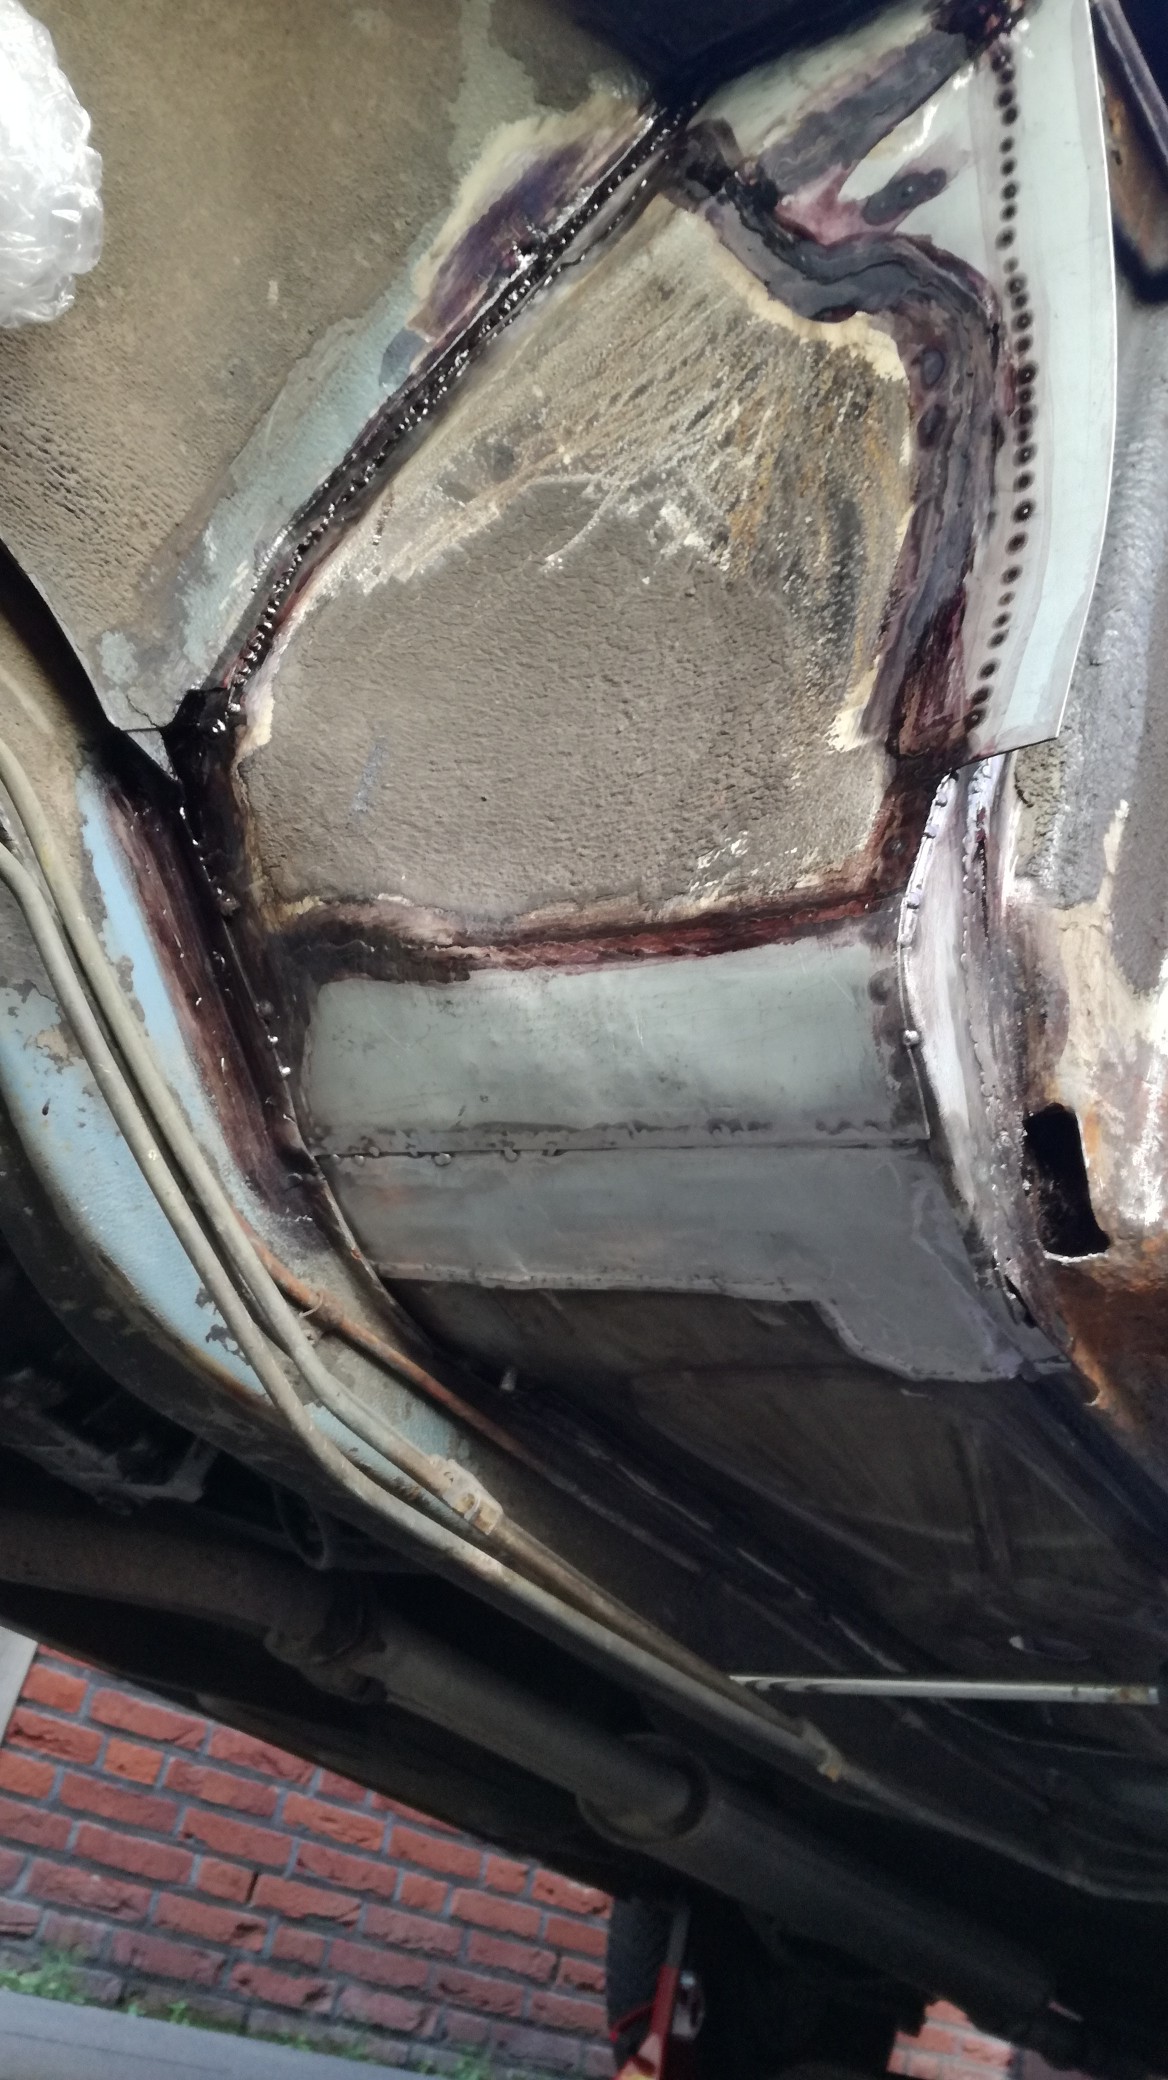
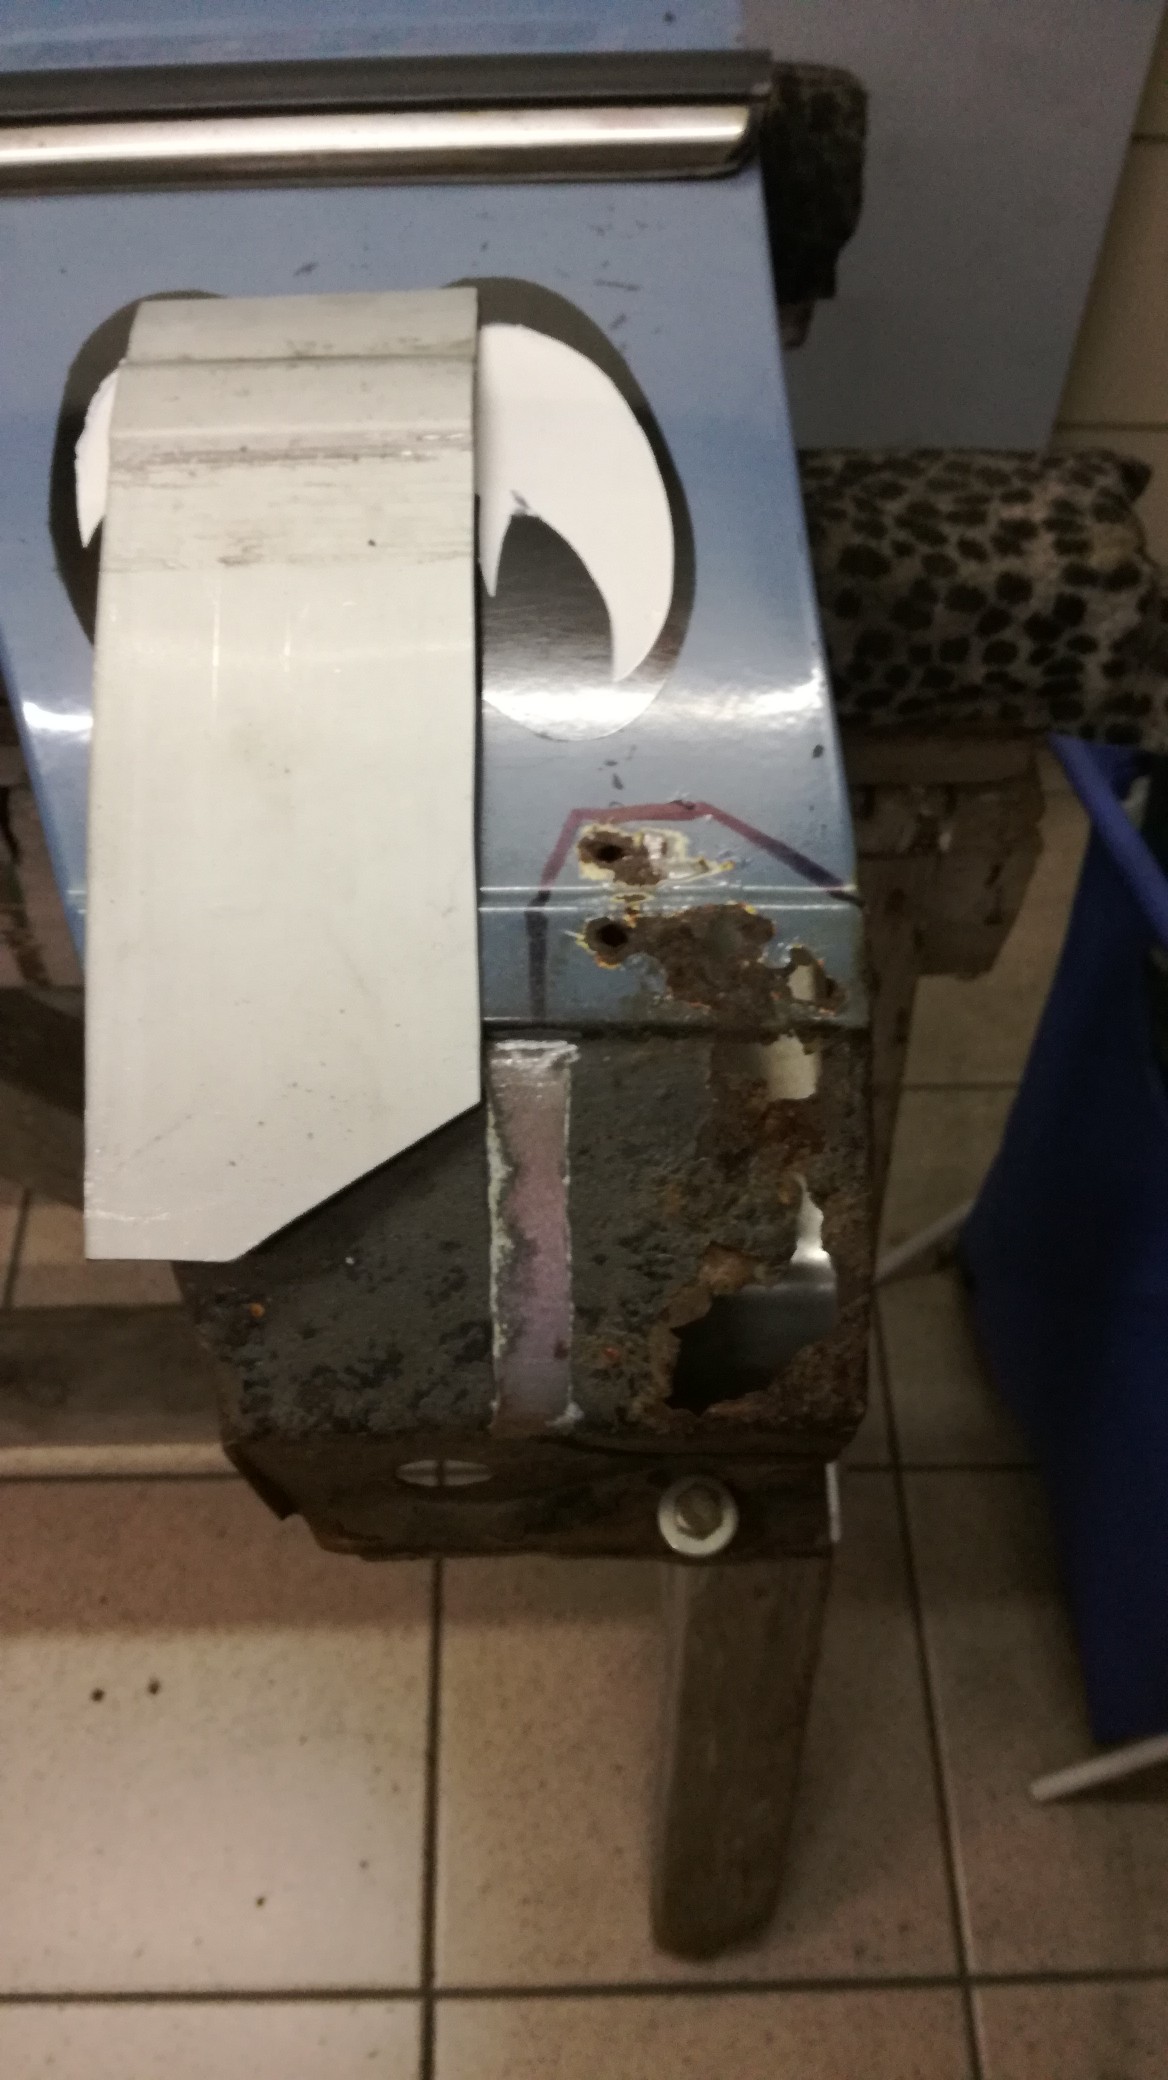
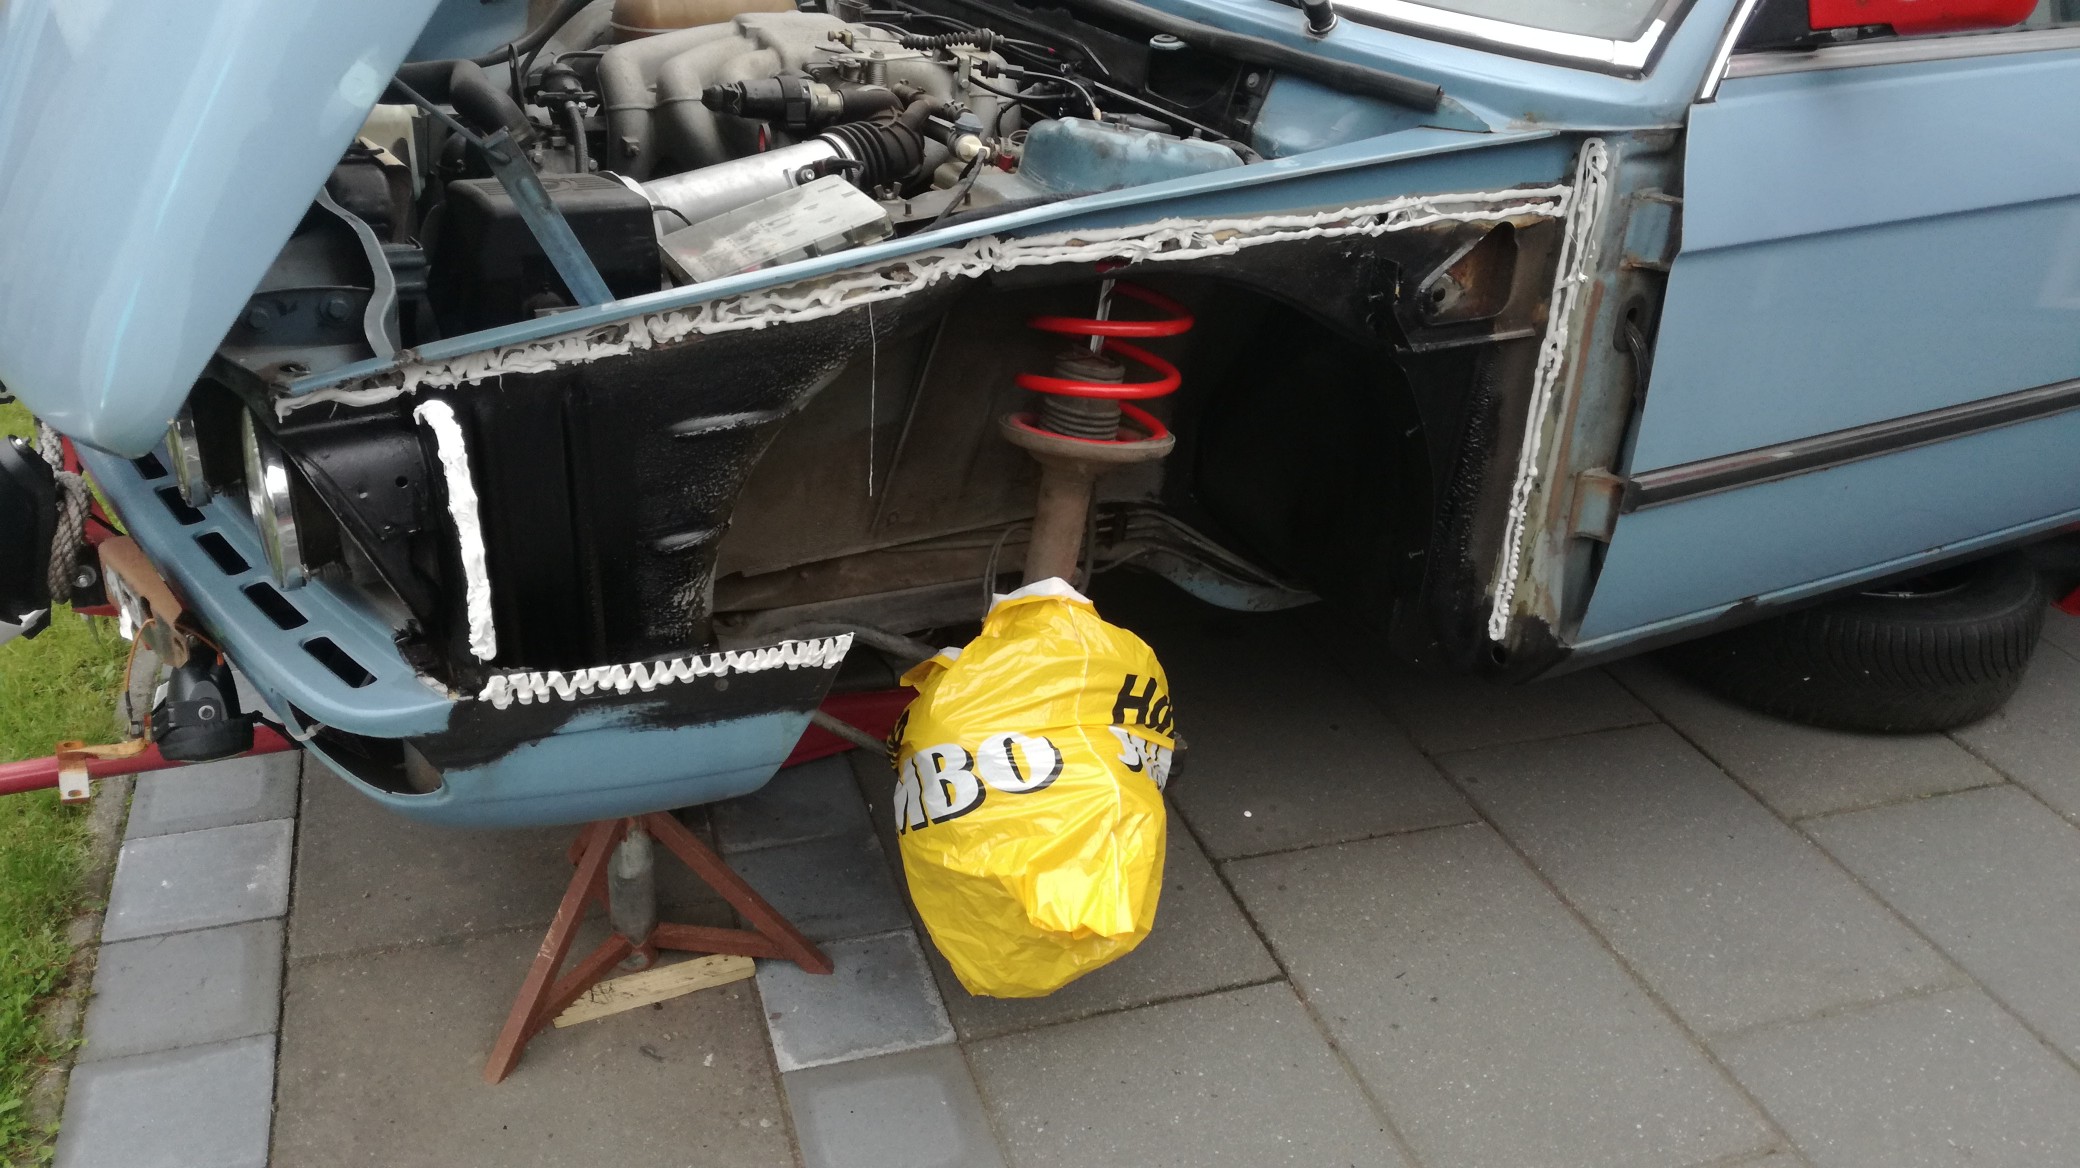
Next job was the rotten left floorpan:
brrr, old repairs are rotten again:
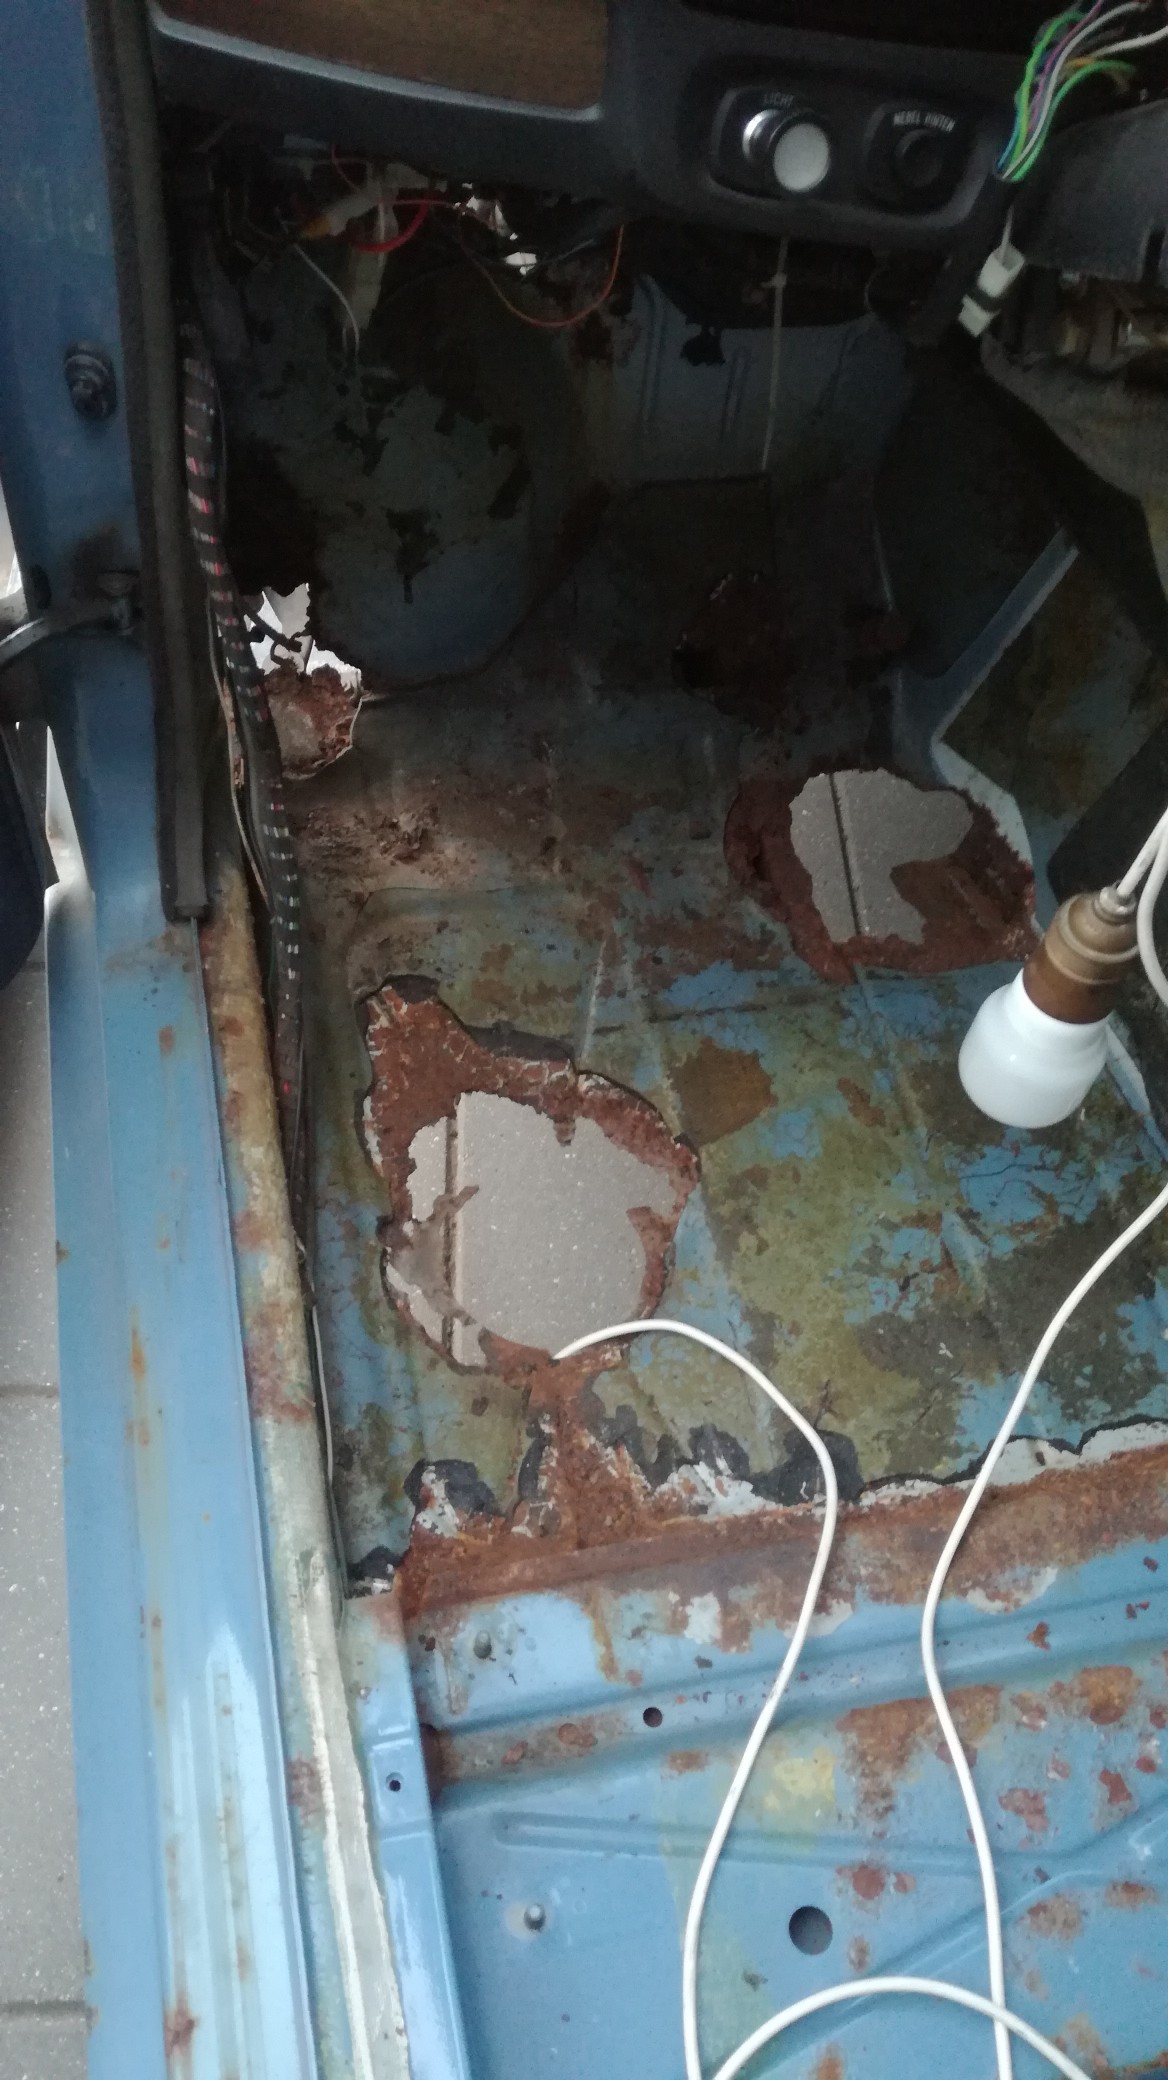
Throttle pedal wasn't attached to the floorpan anymore, clip totally gone:

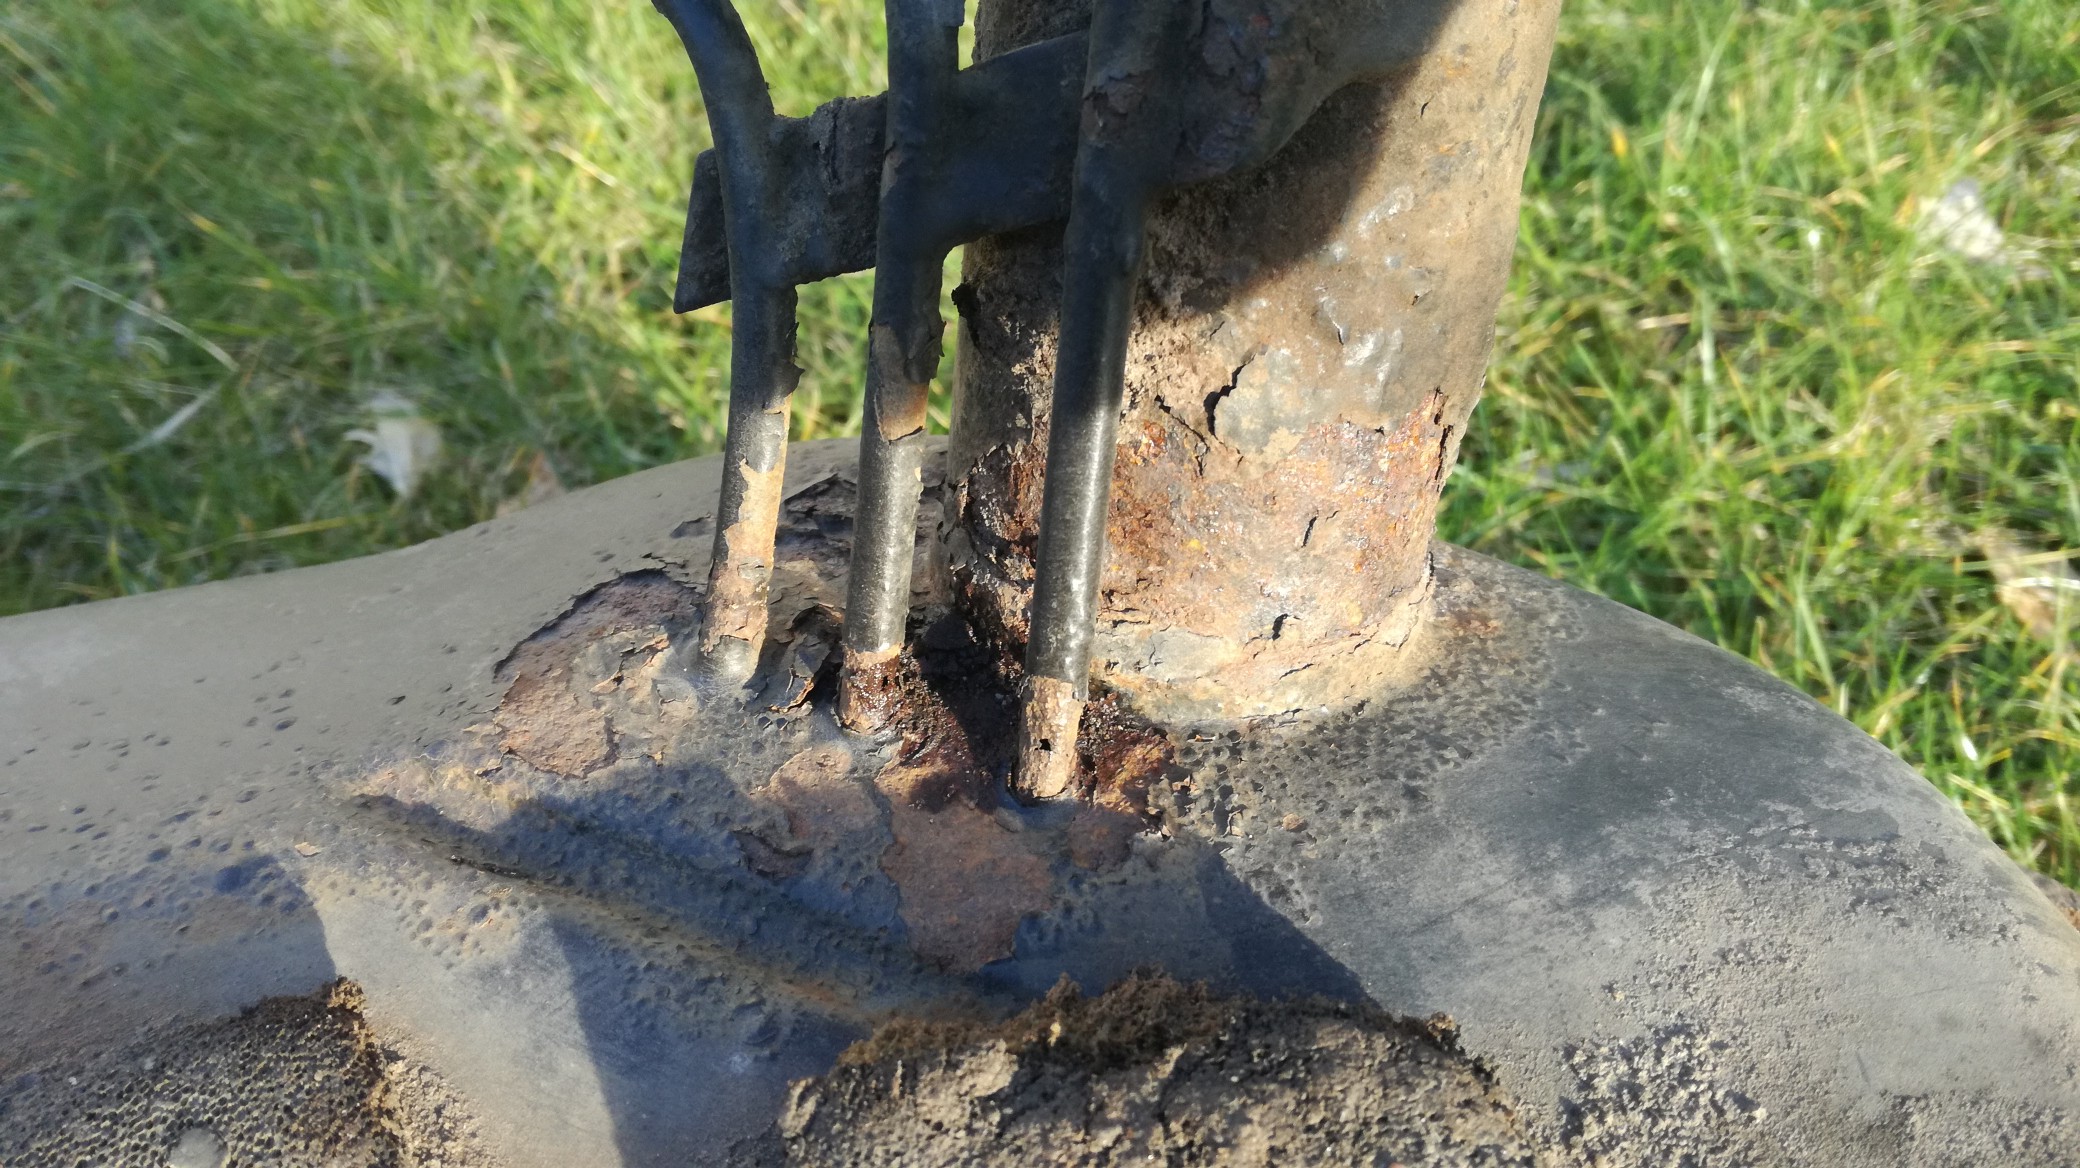
More digging reveals more rot:
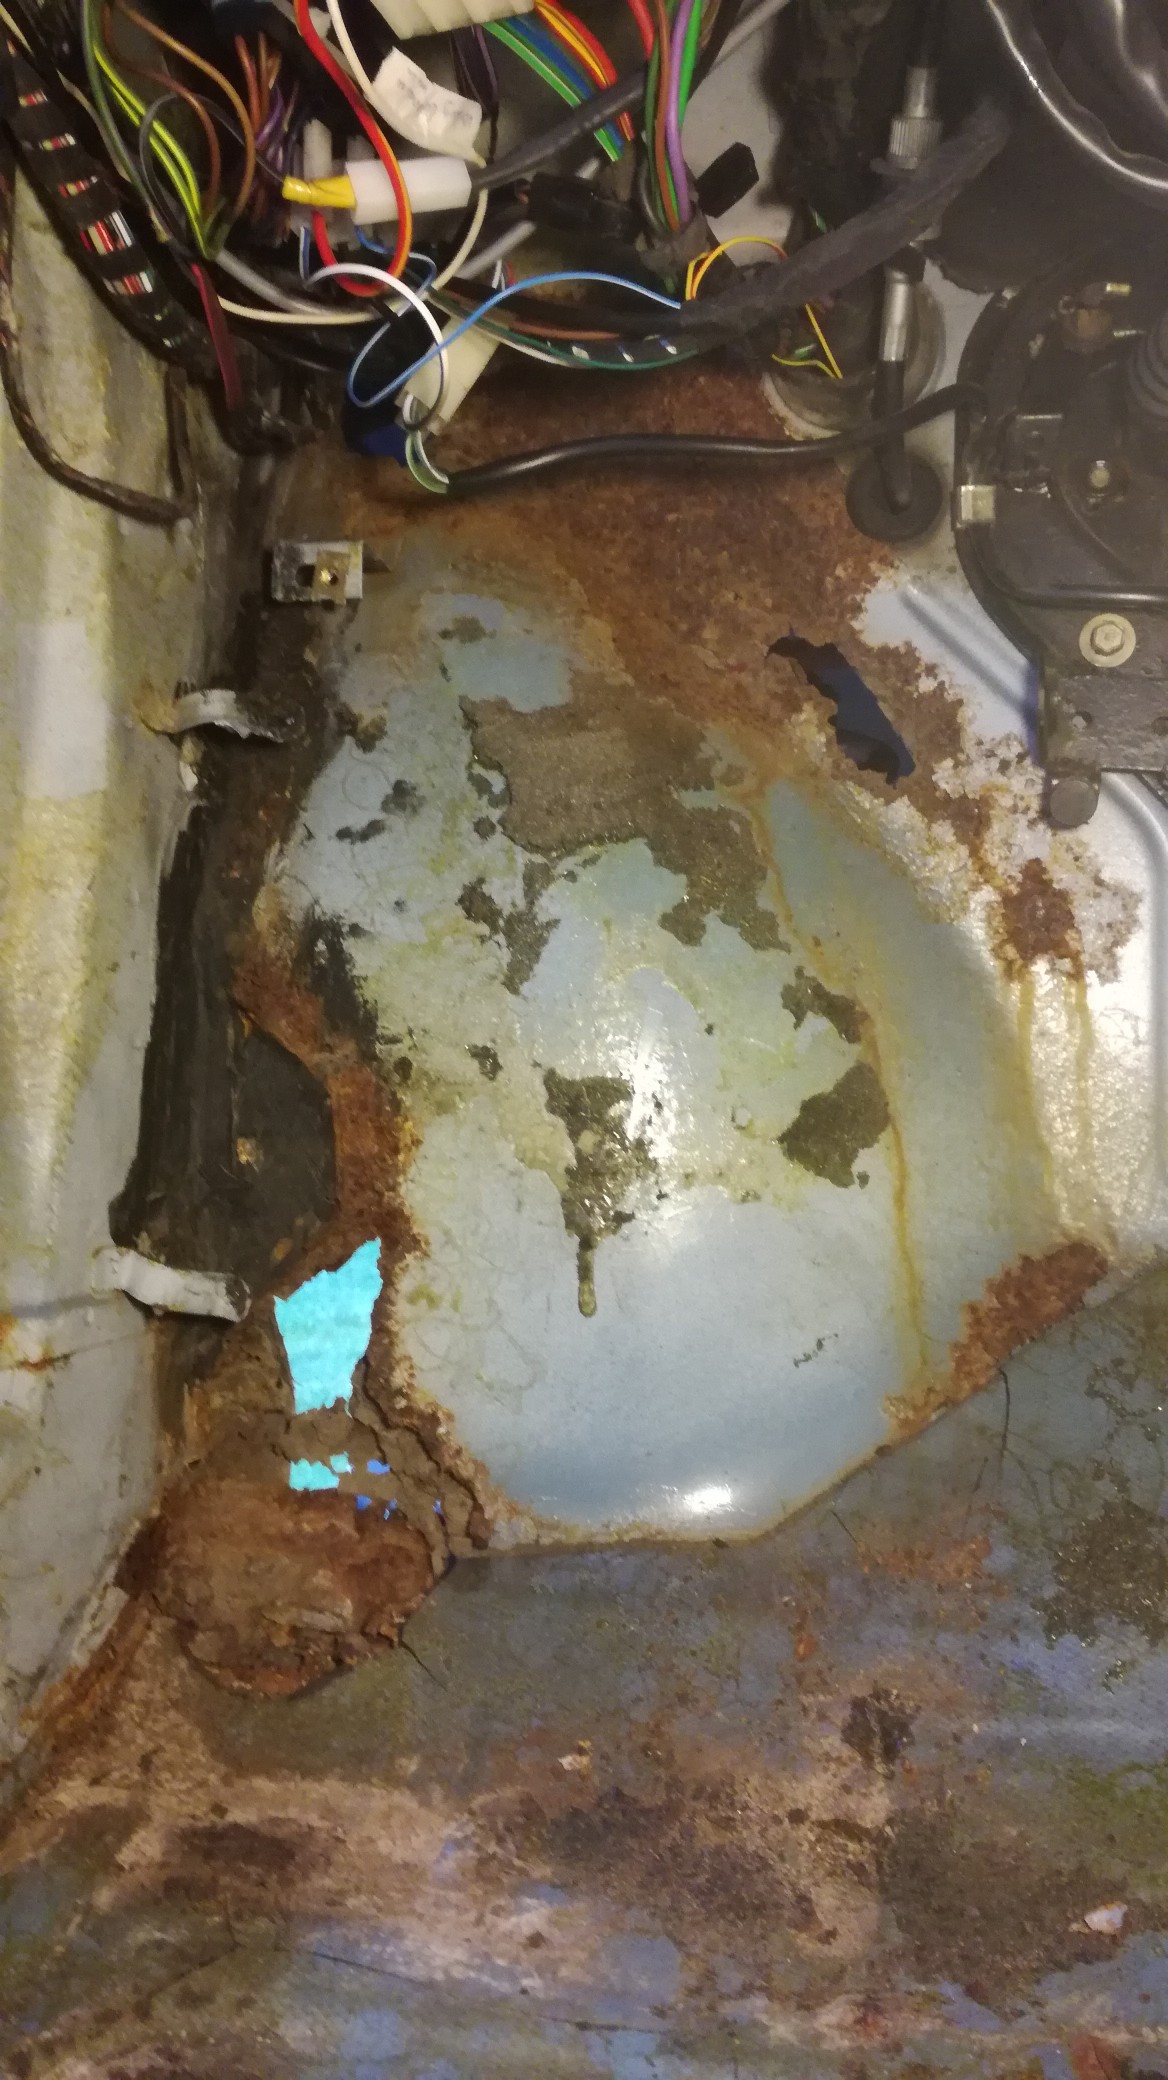
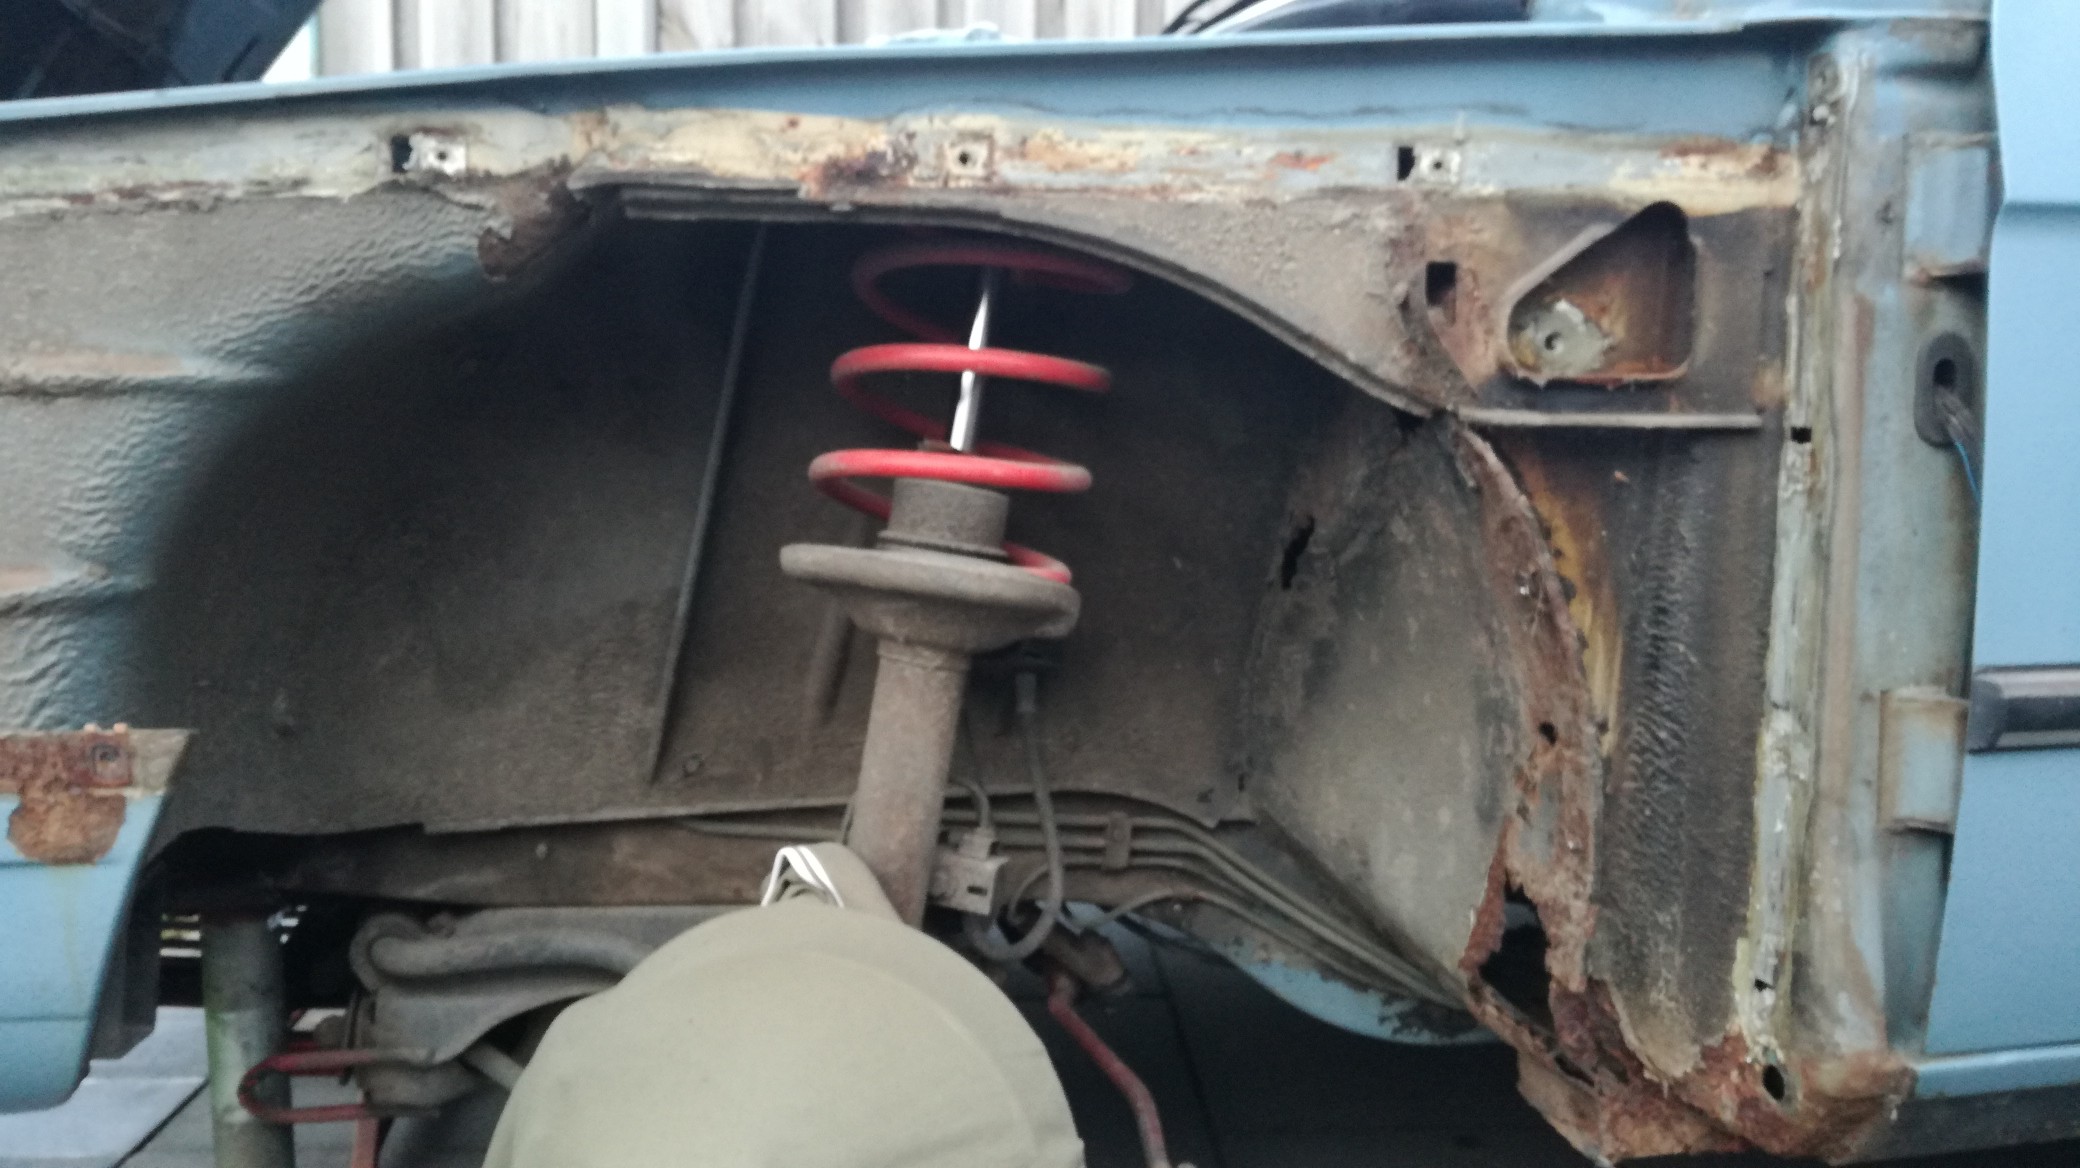
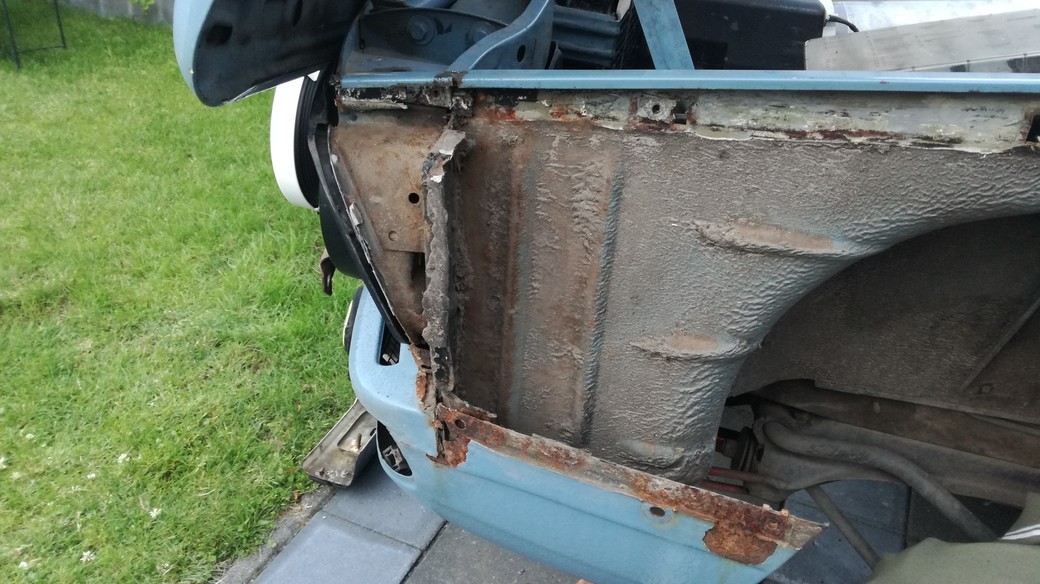
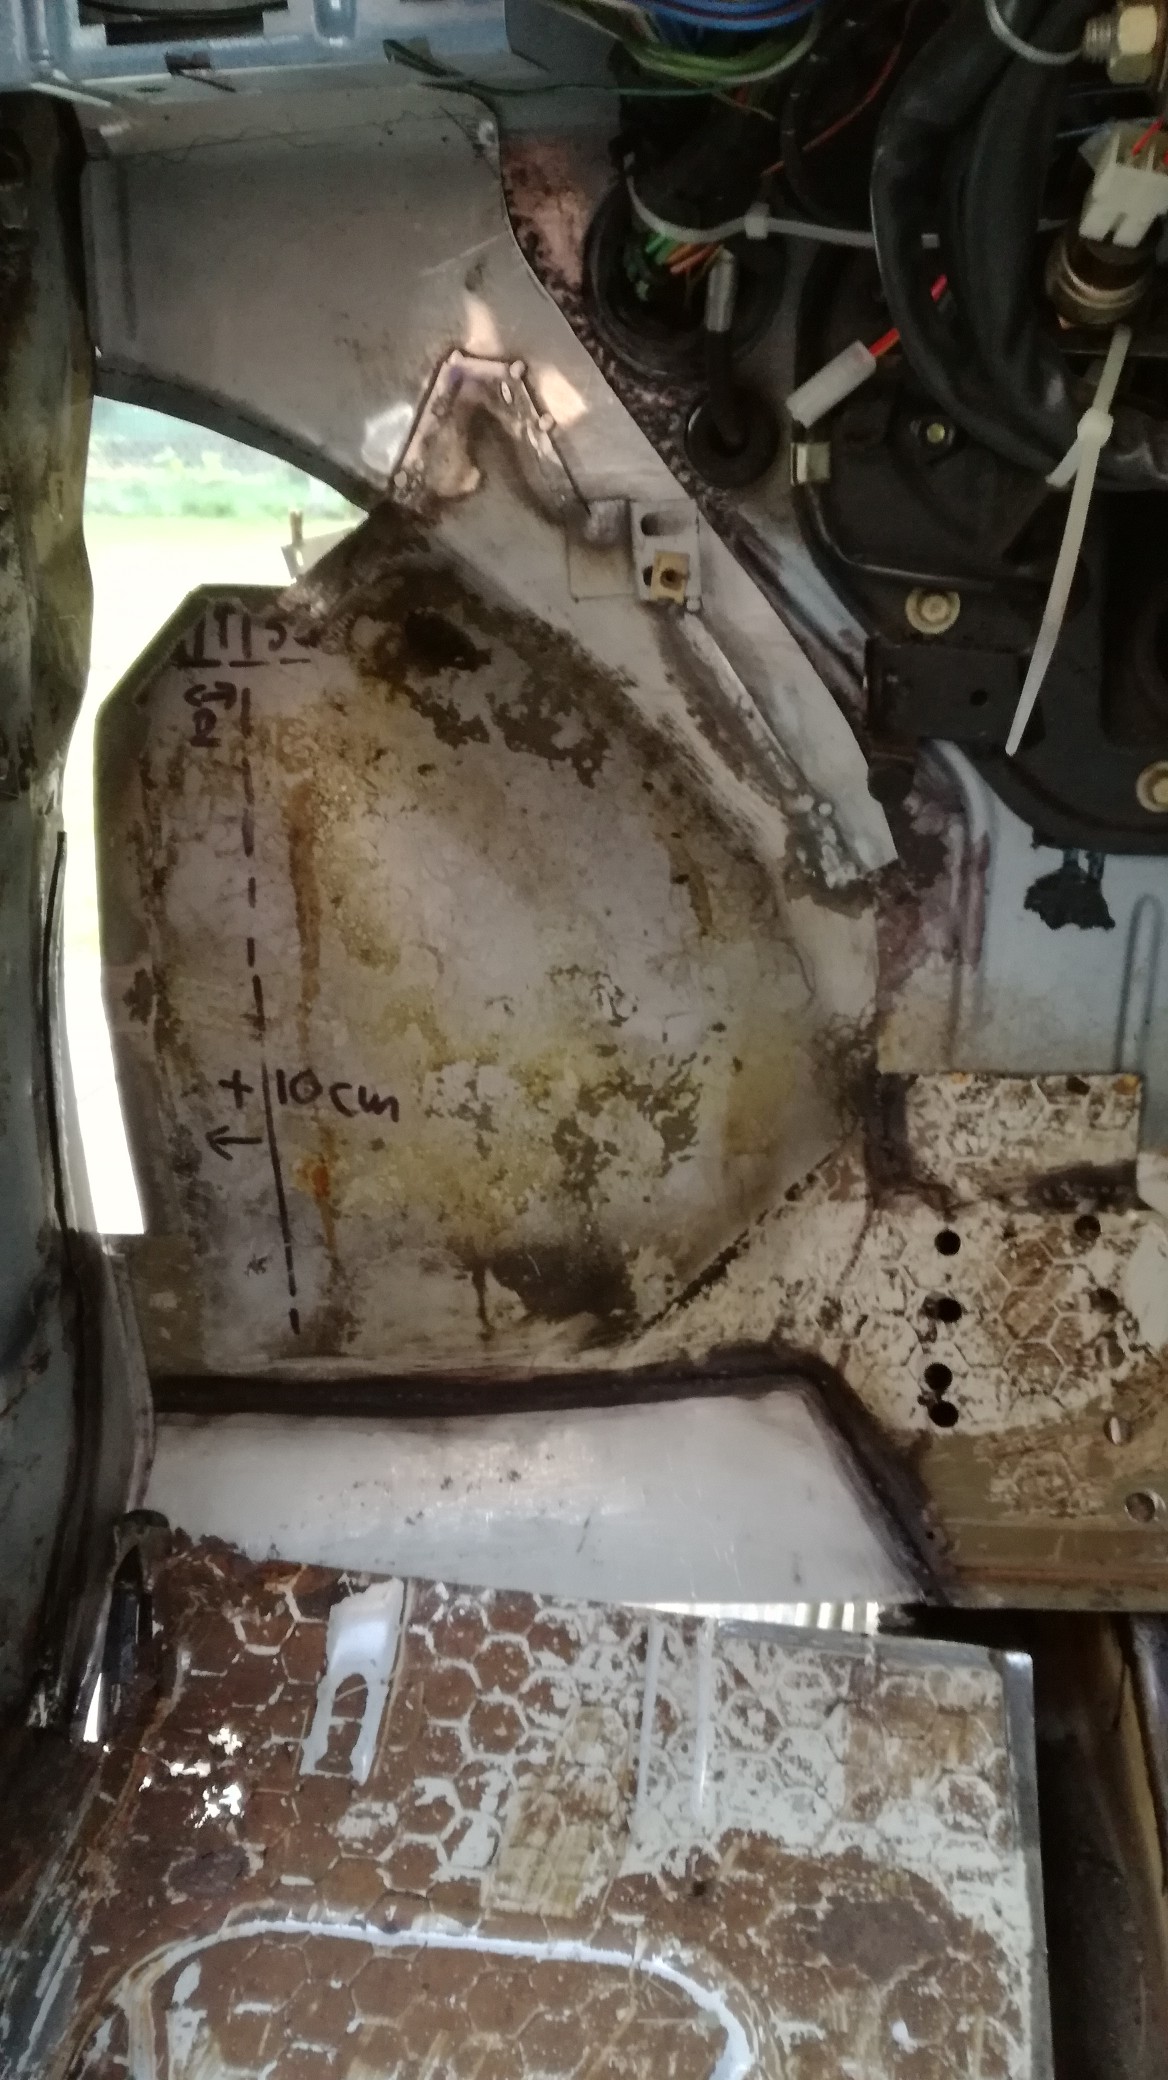
The whole floorpan from paravent till seat needs to be renewed, to make working space, the wing was removed and revealed more rot.
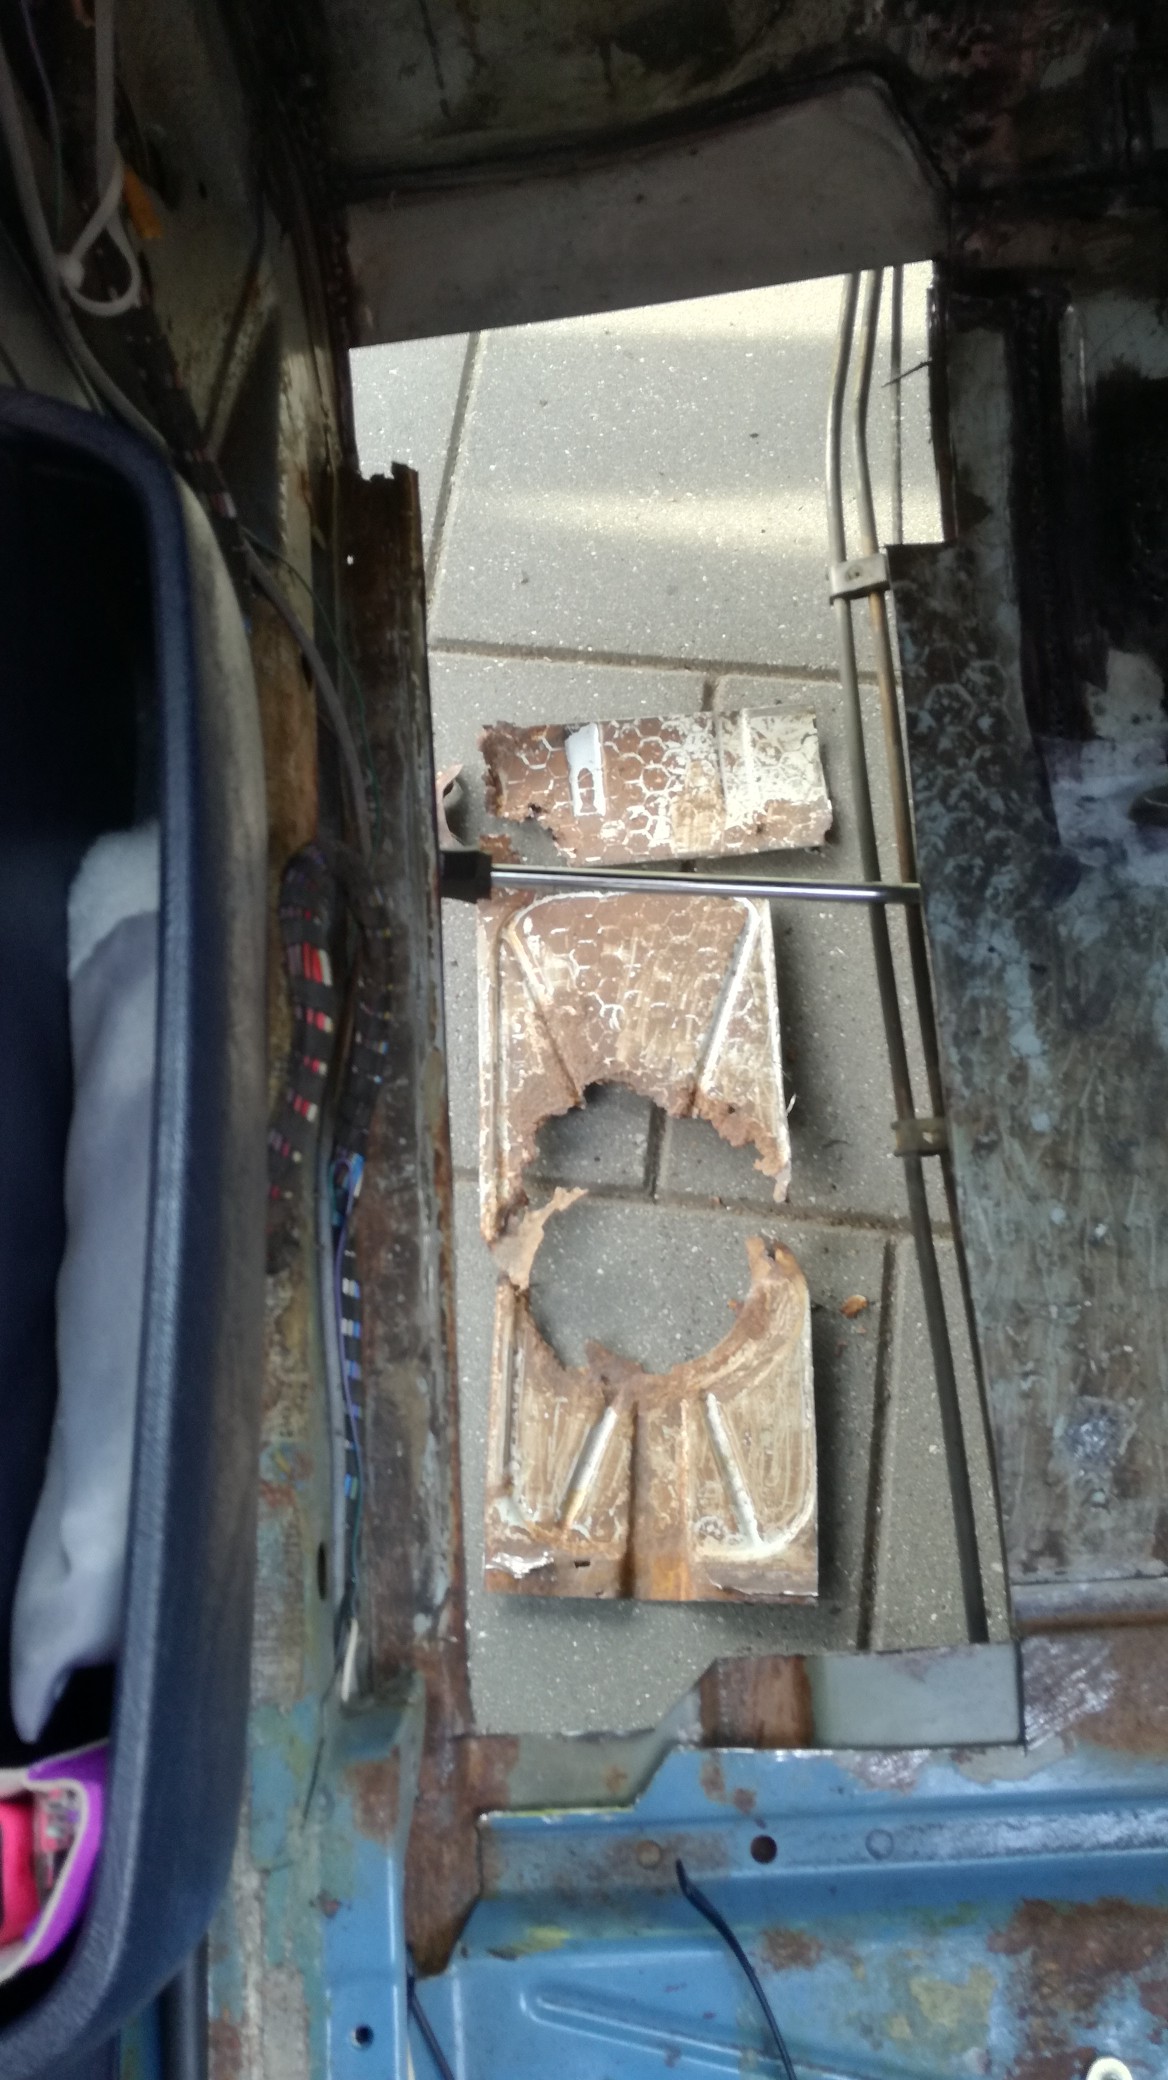
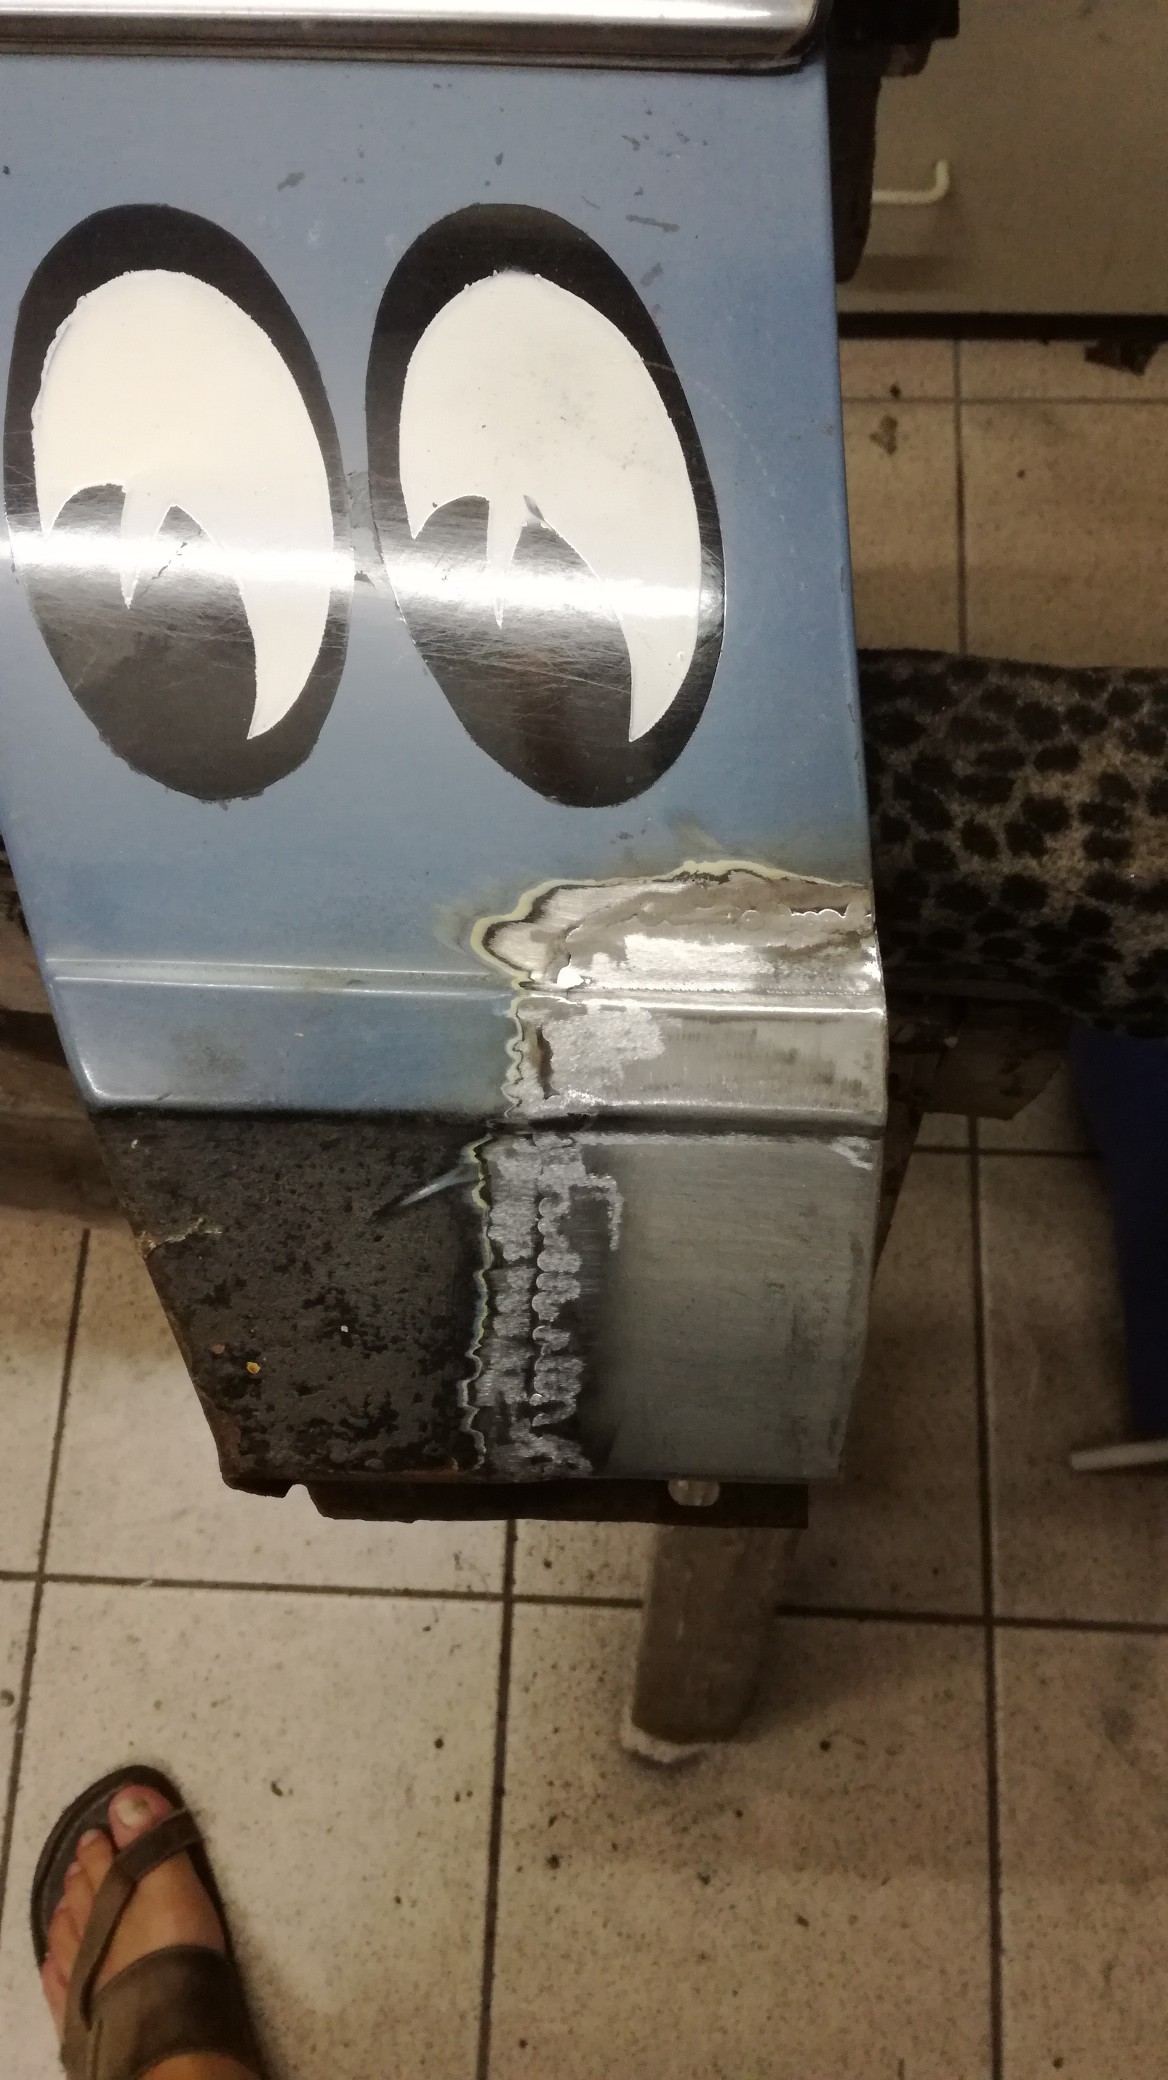
Repair is only possible when first all rot is cut away, a huge hole:
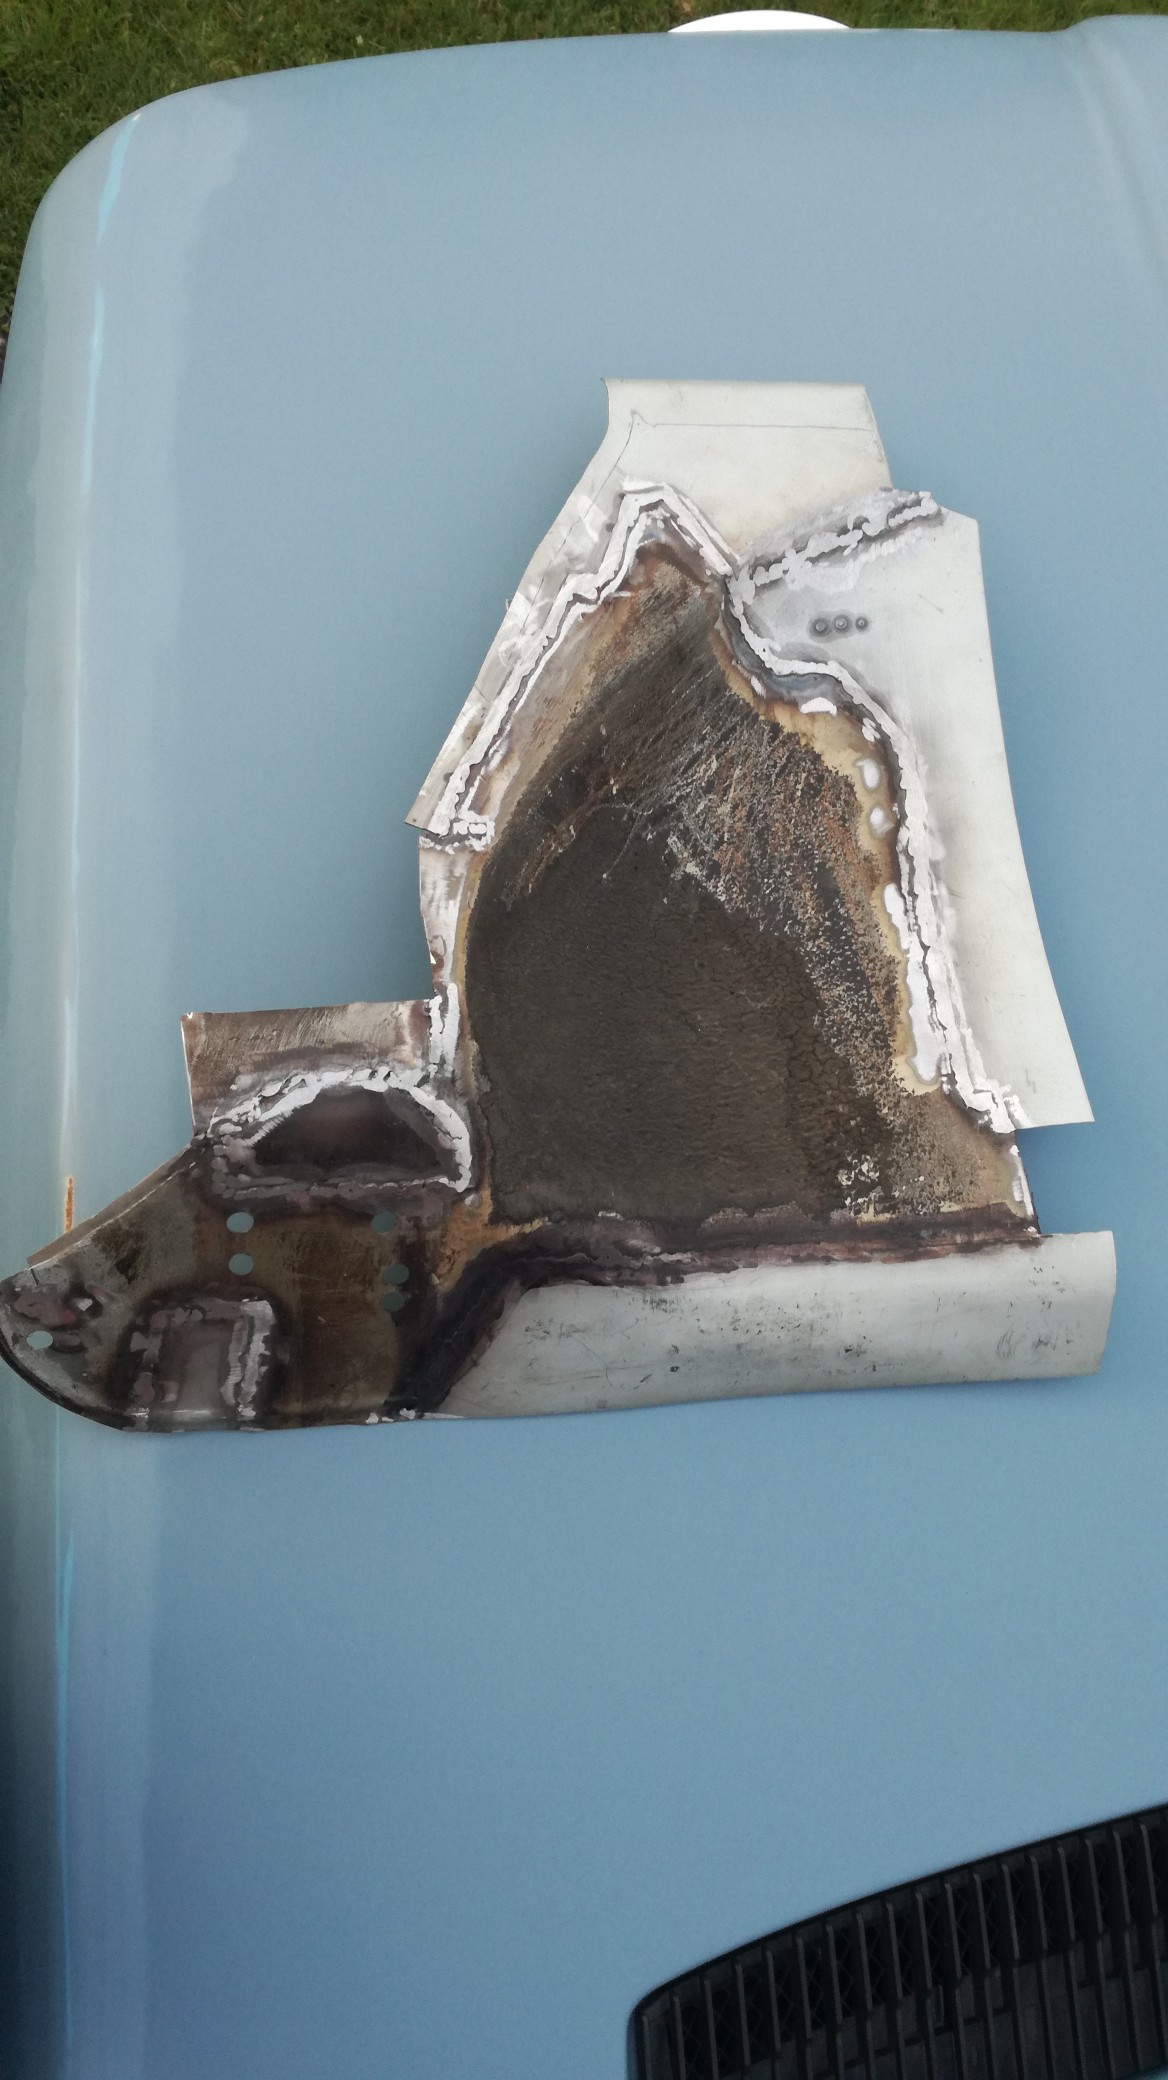
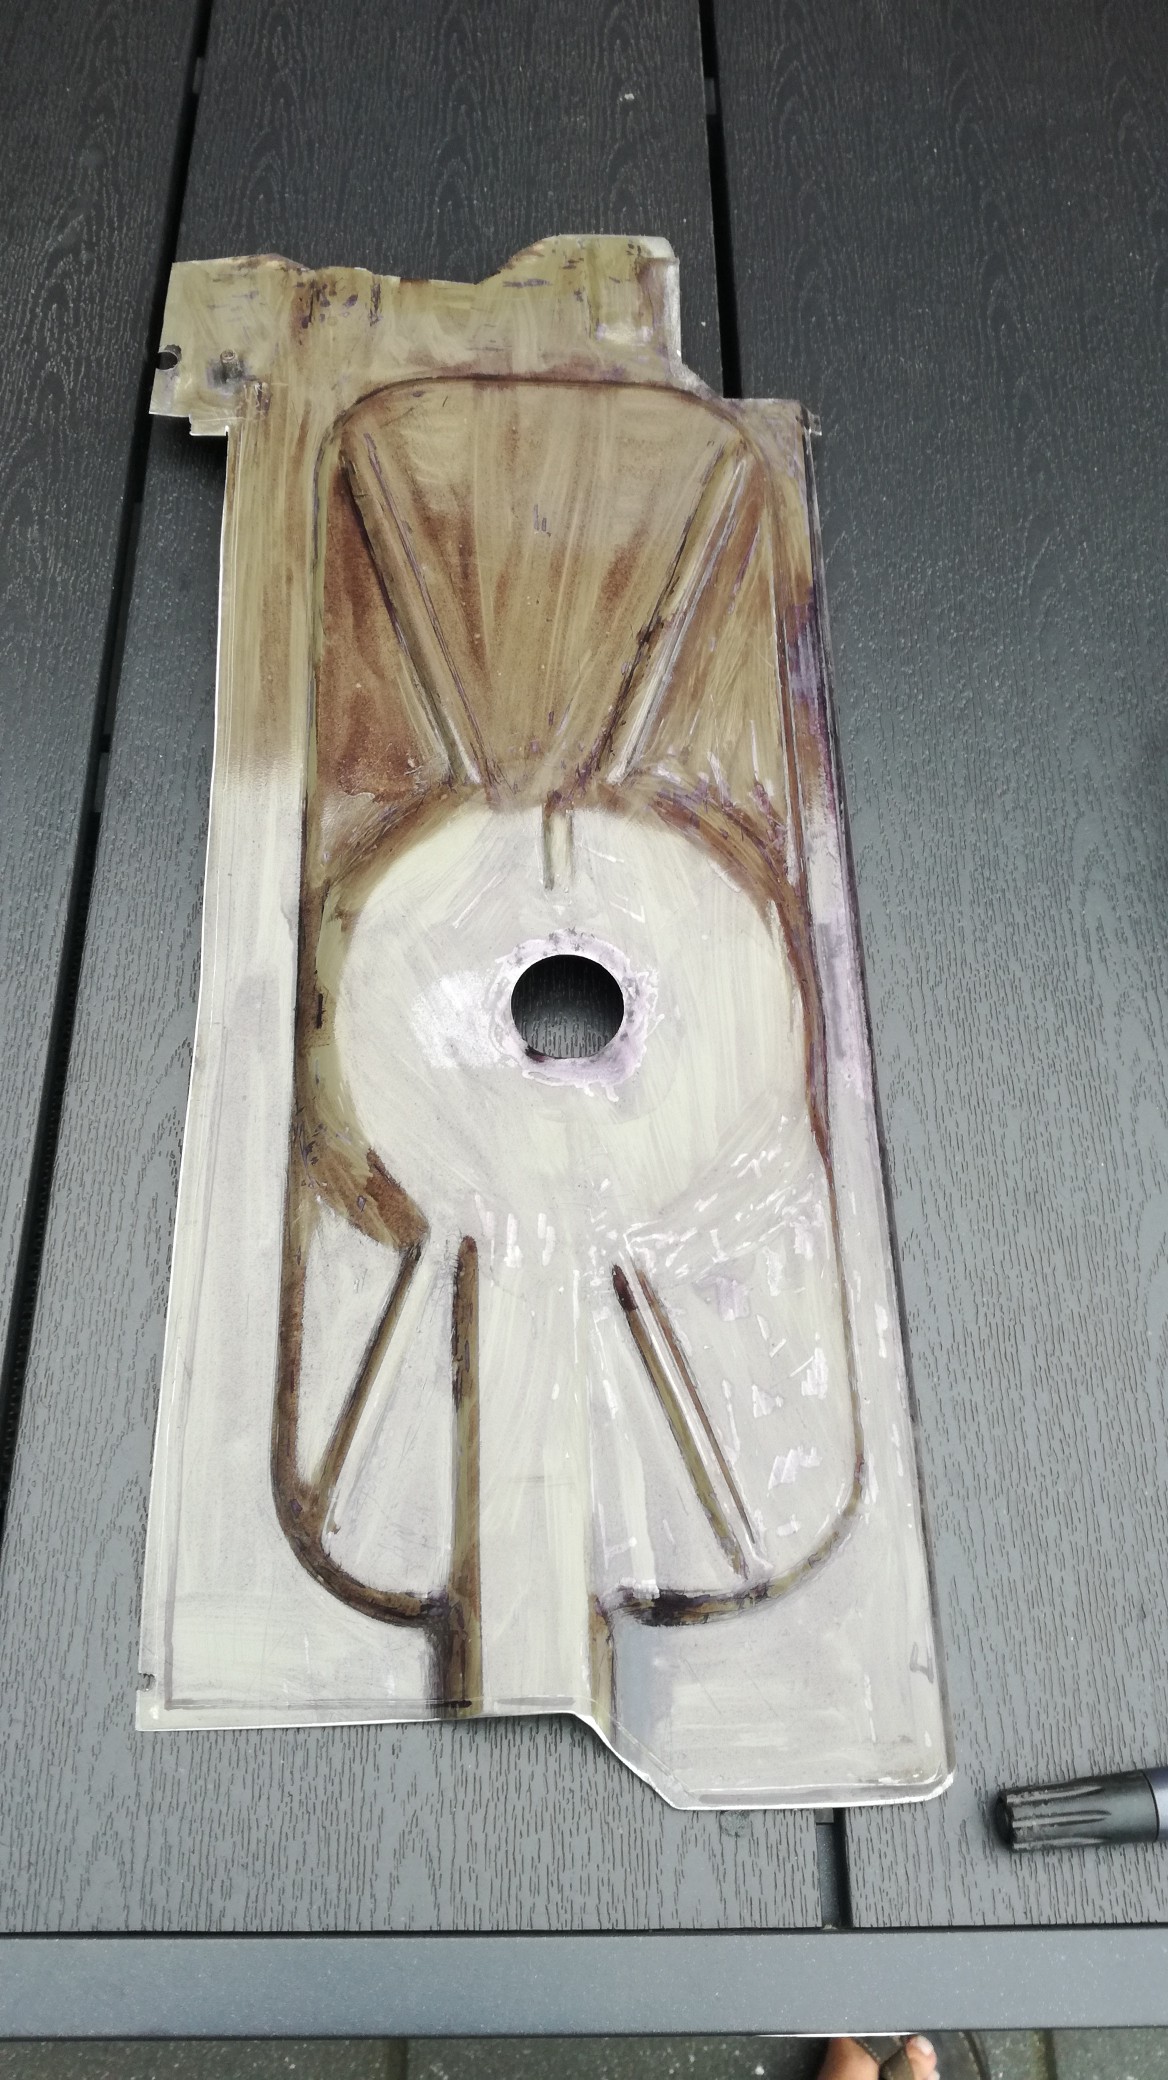
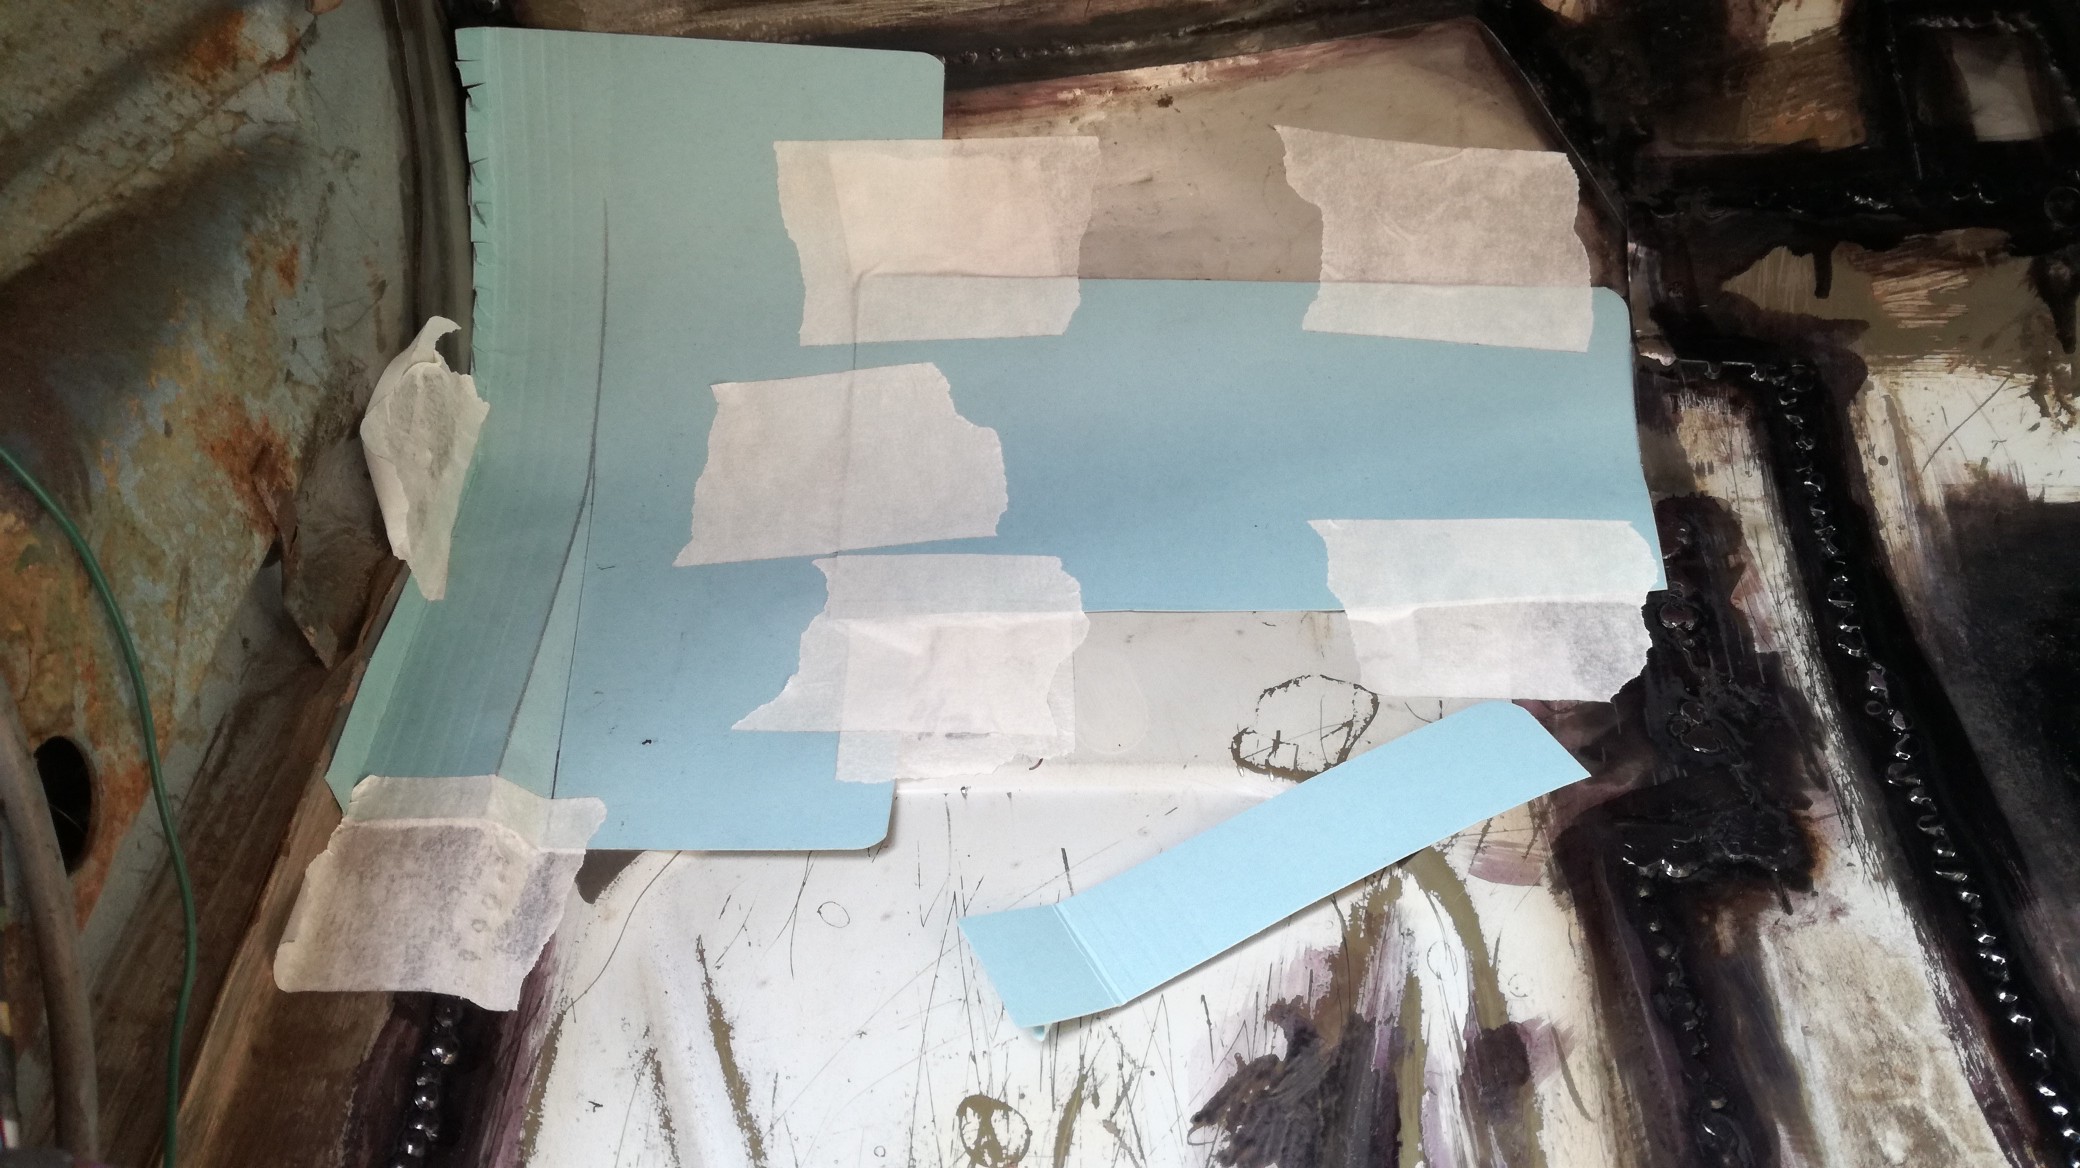
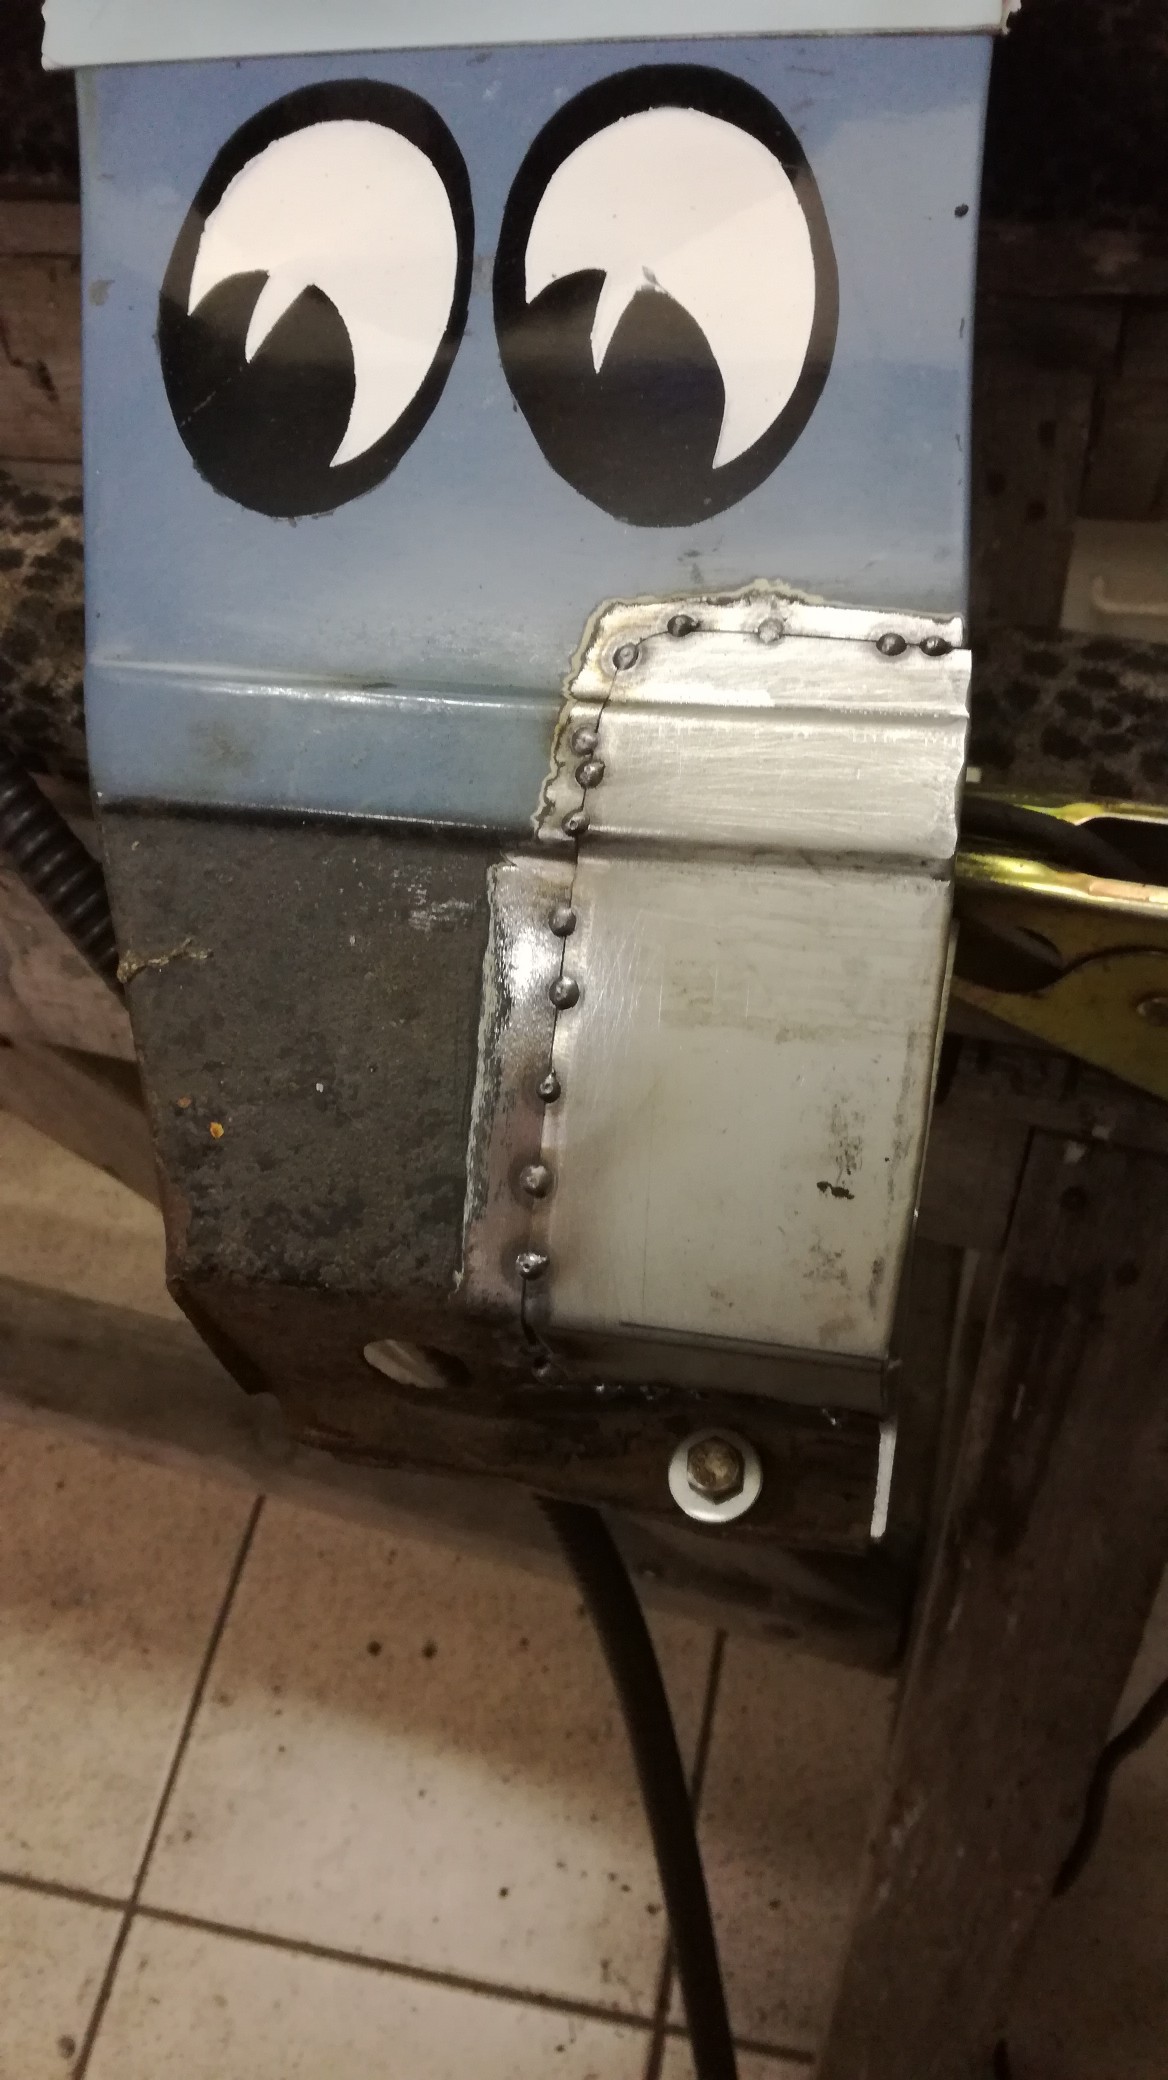
So time for repairs, i got a donor floorpan which was in a better condition, but still needed an amount of repair work:
slowly started with the repairs:
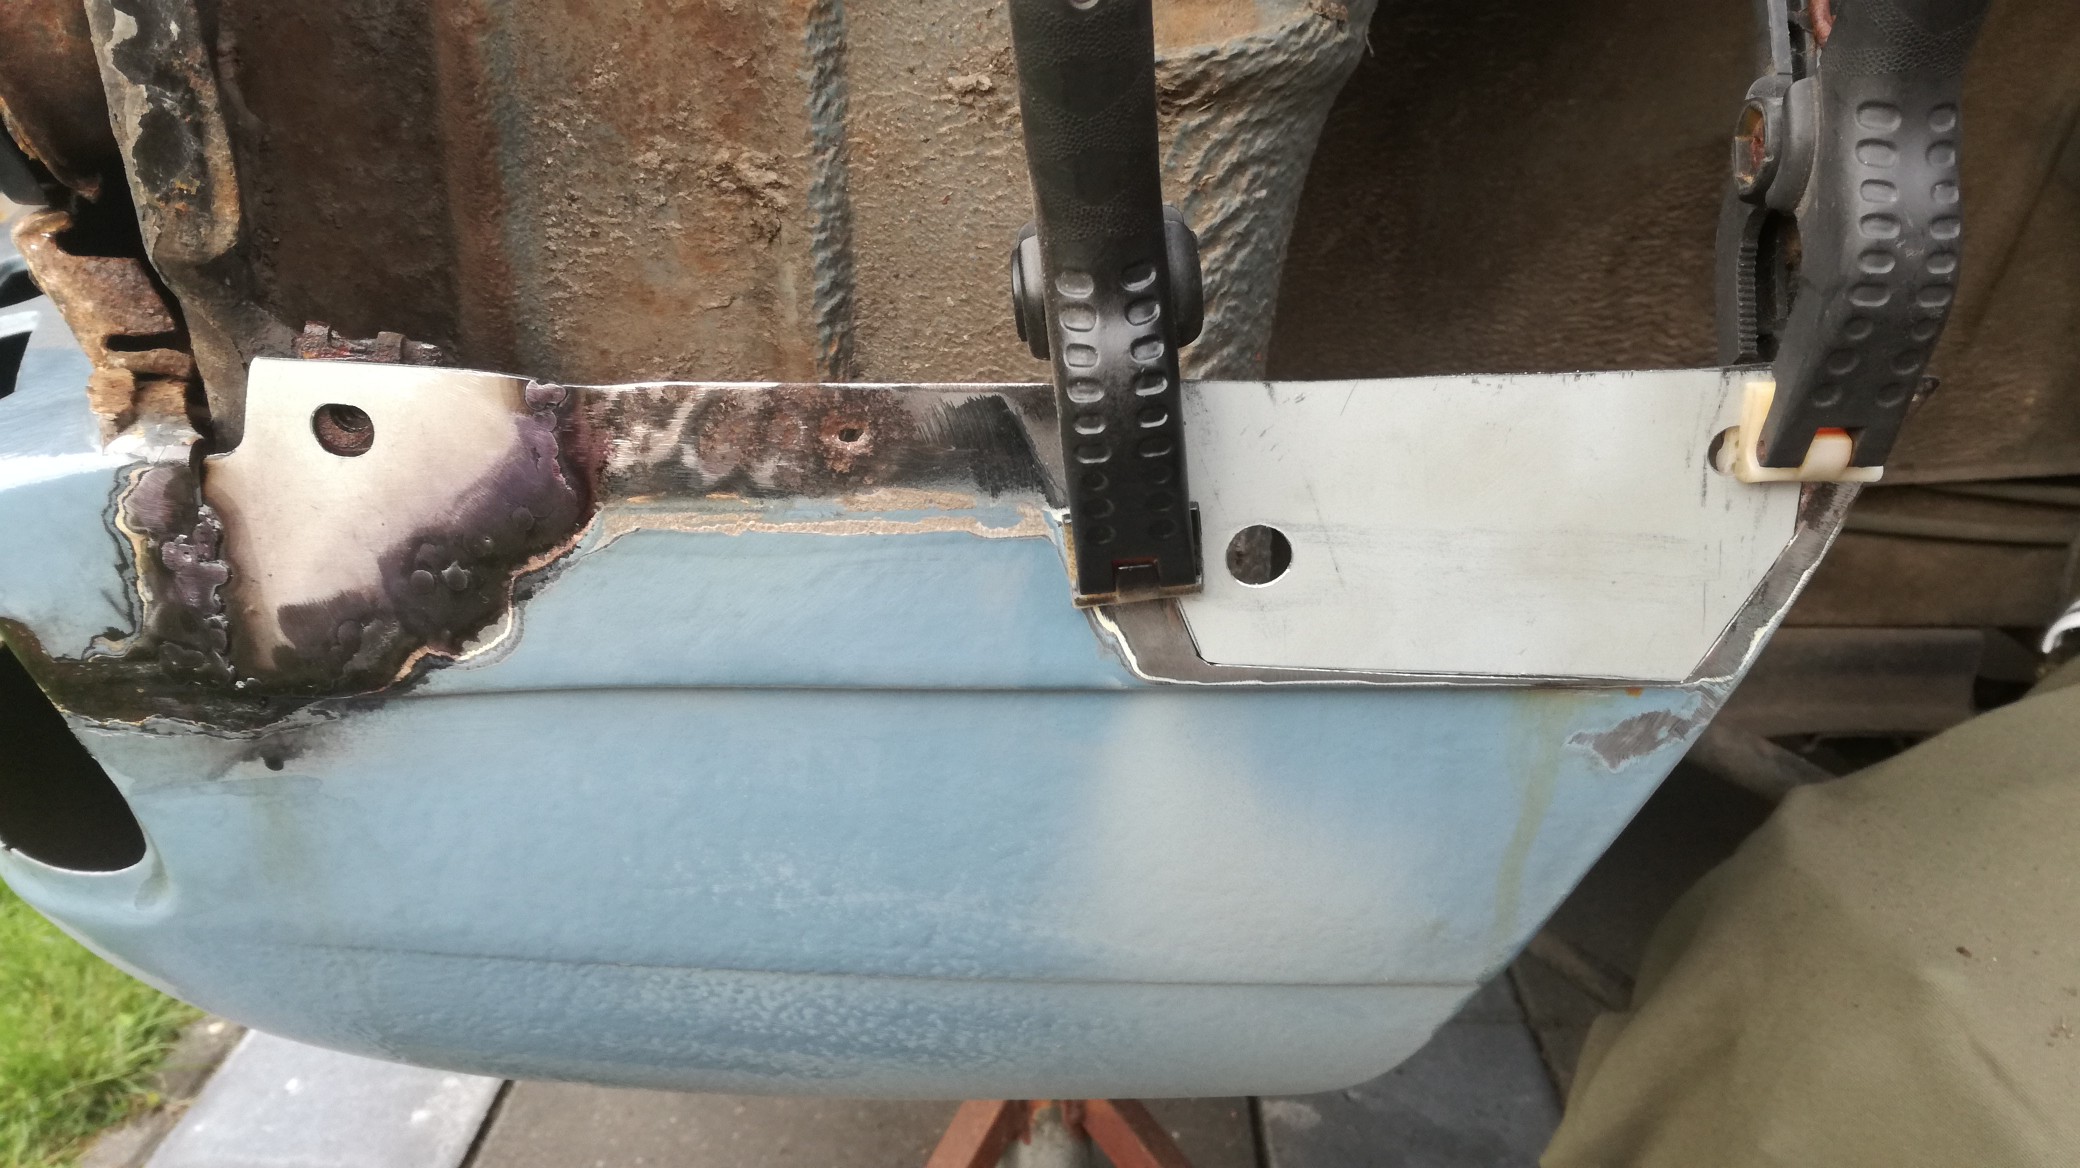
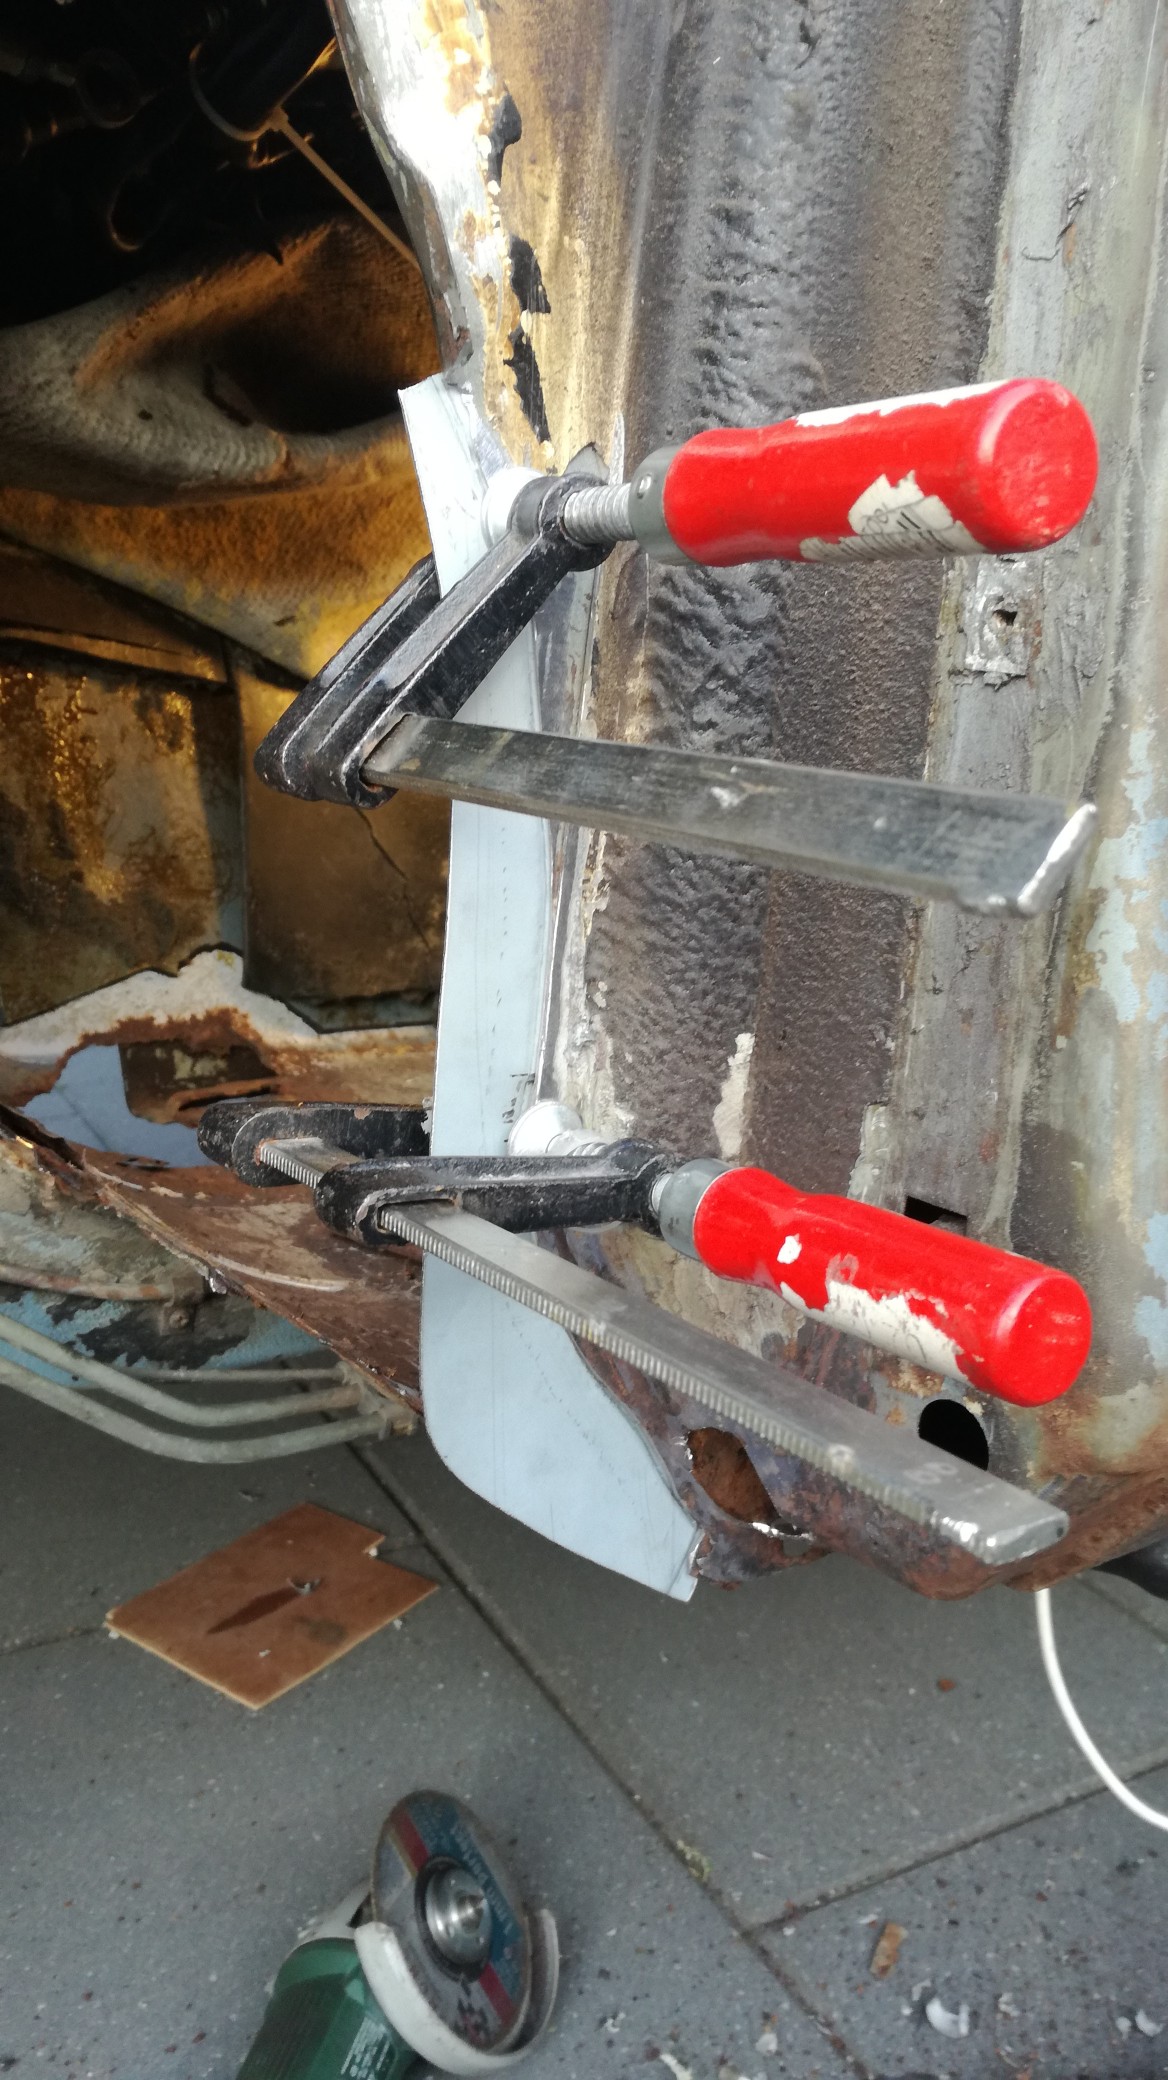
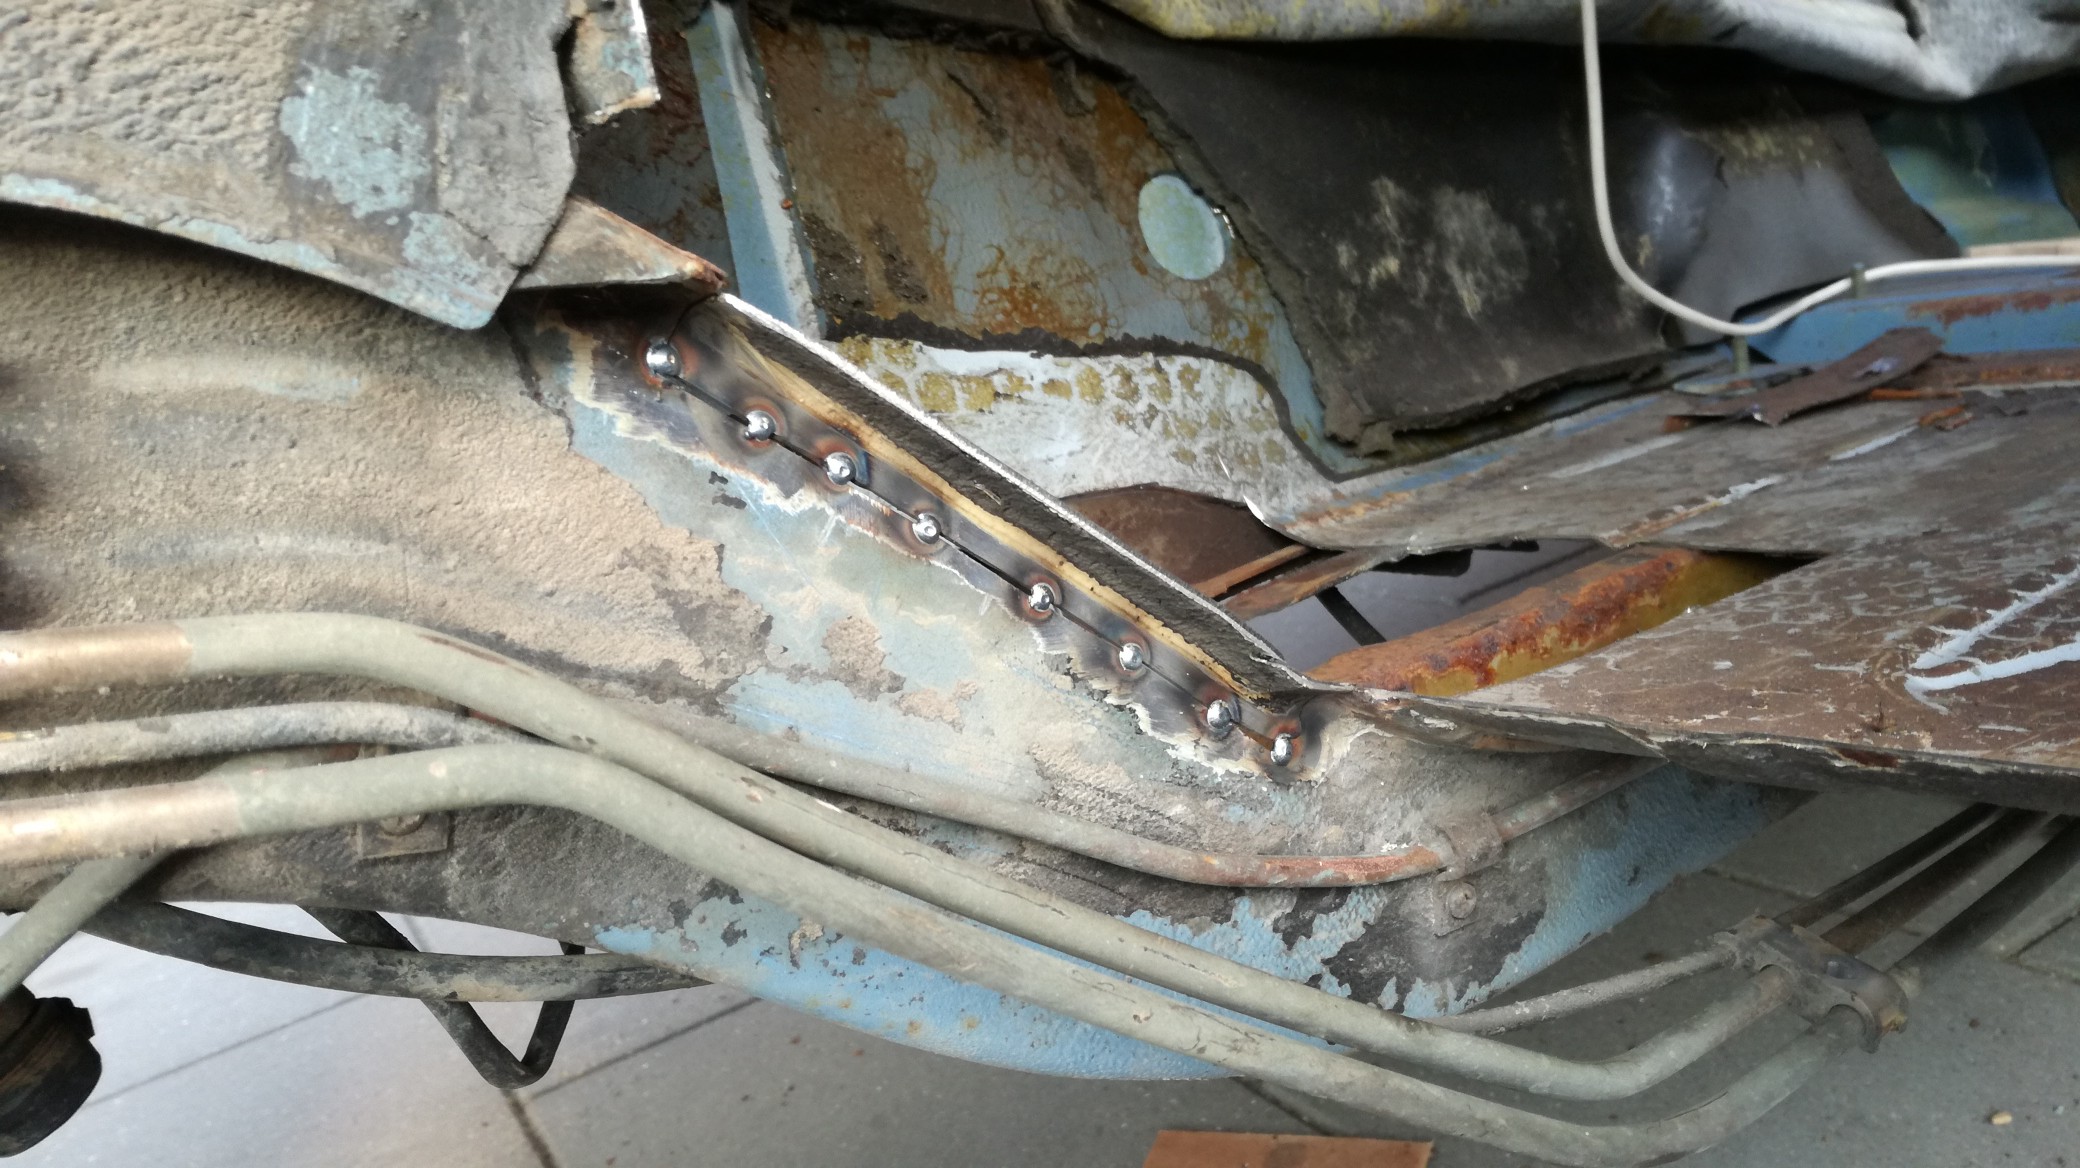
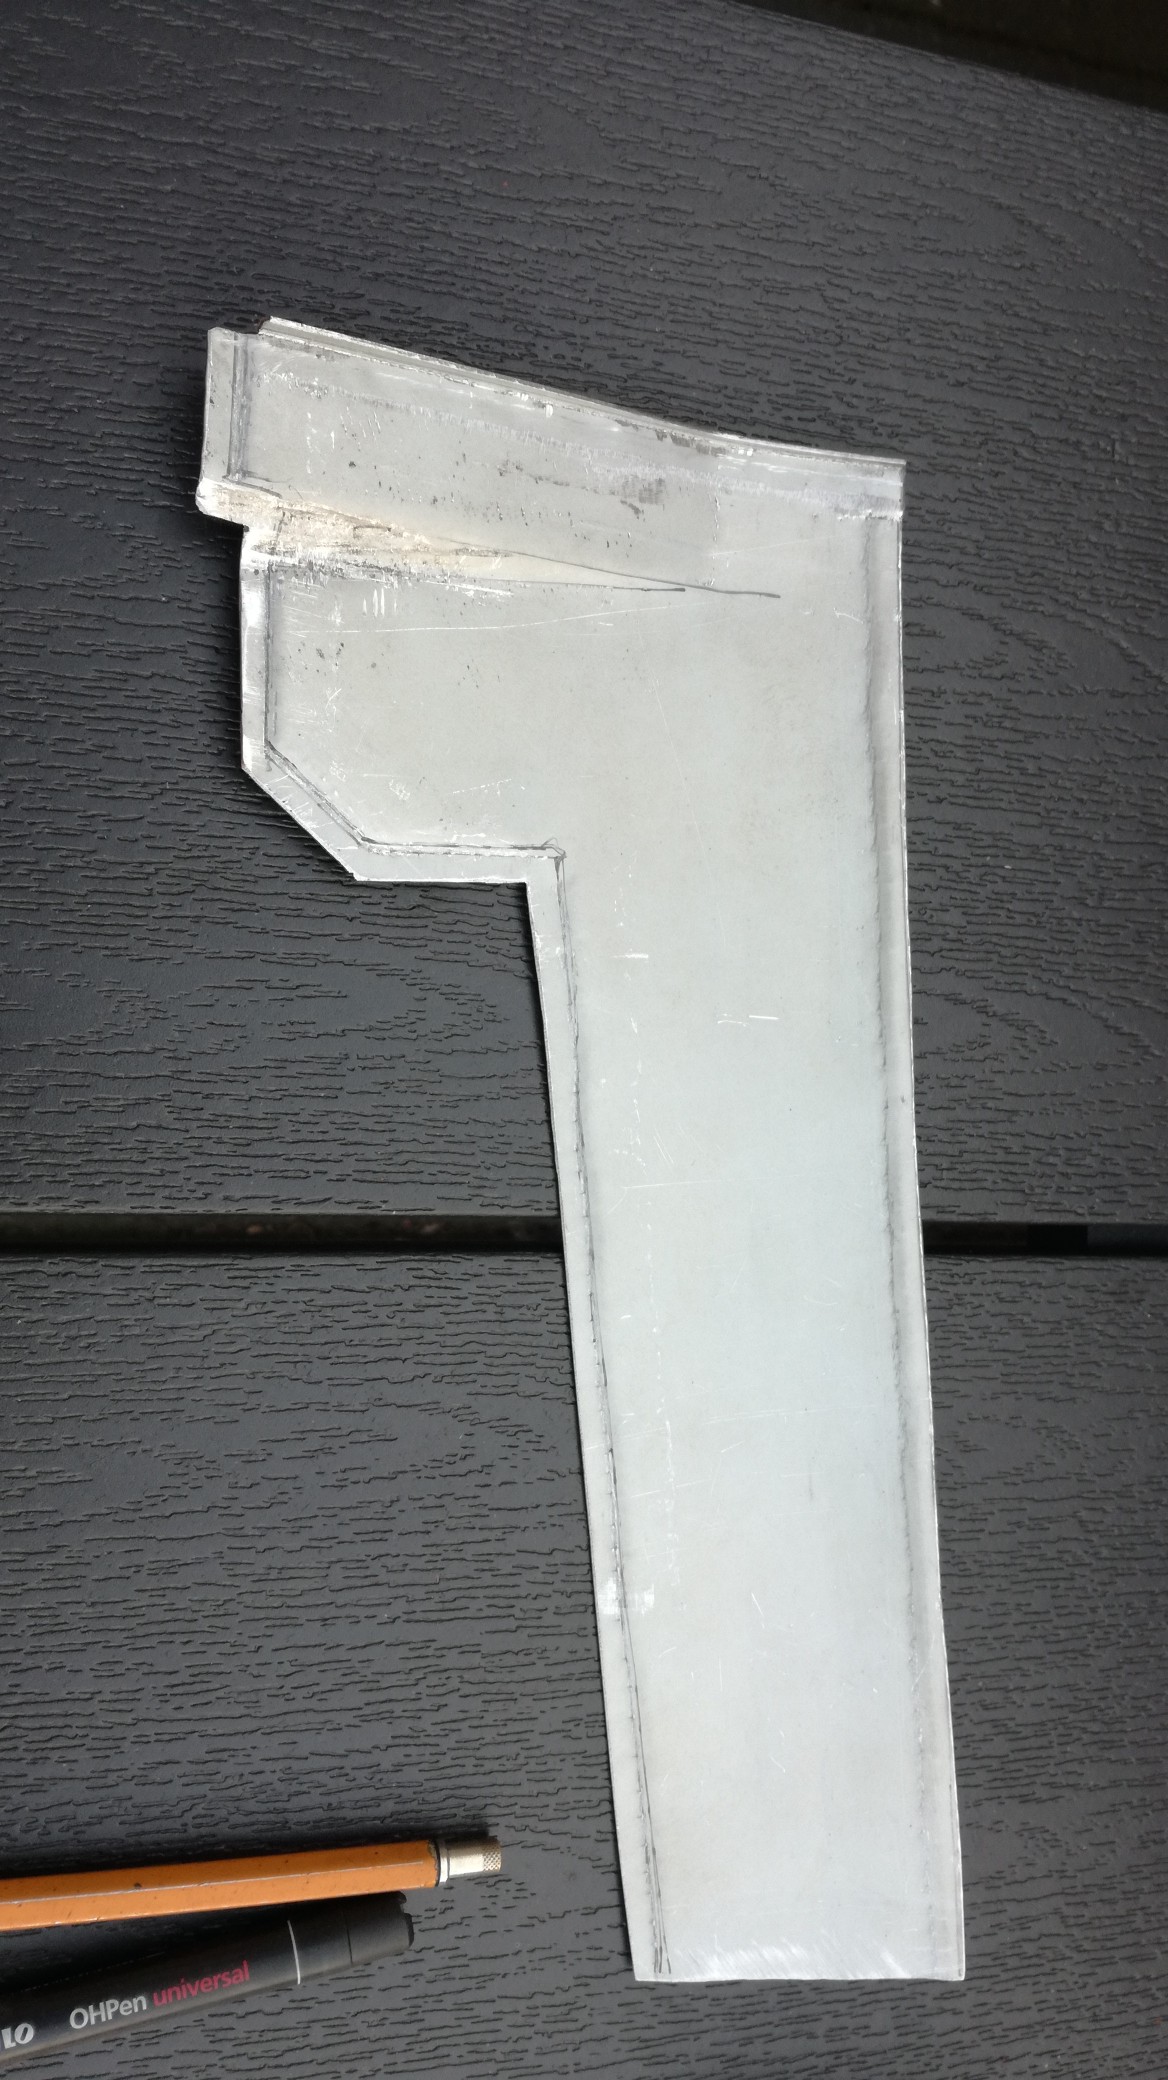
slowly making a donor pieces that fits:

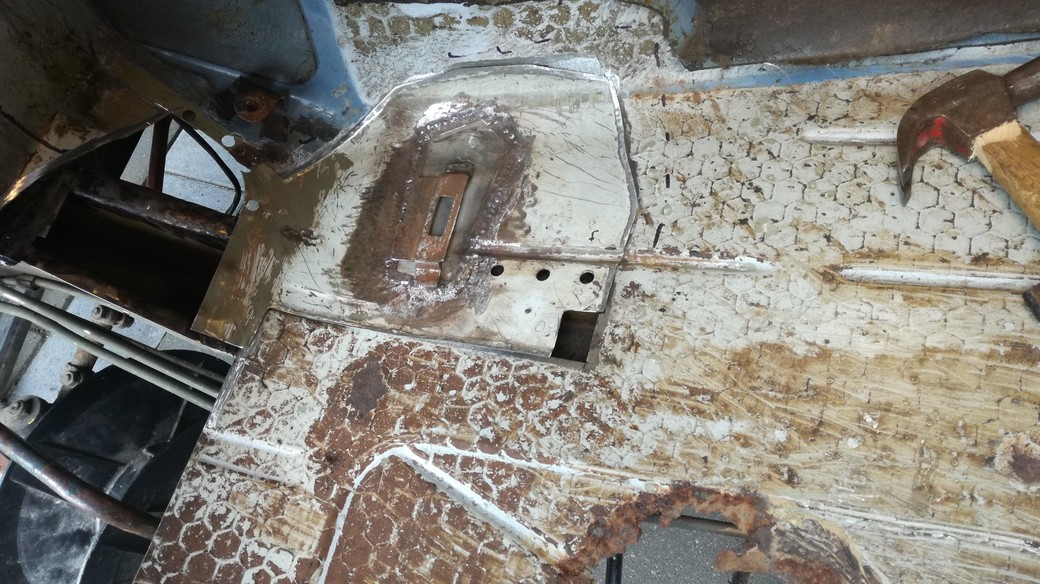
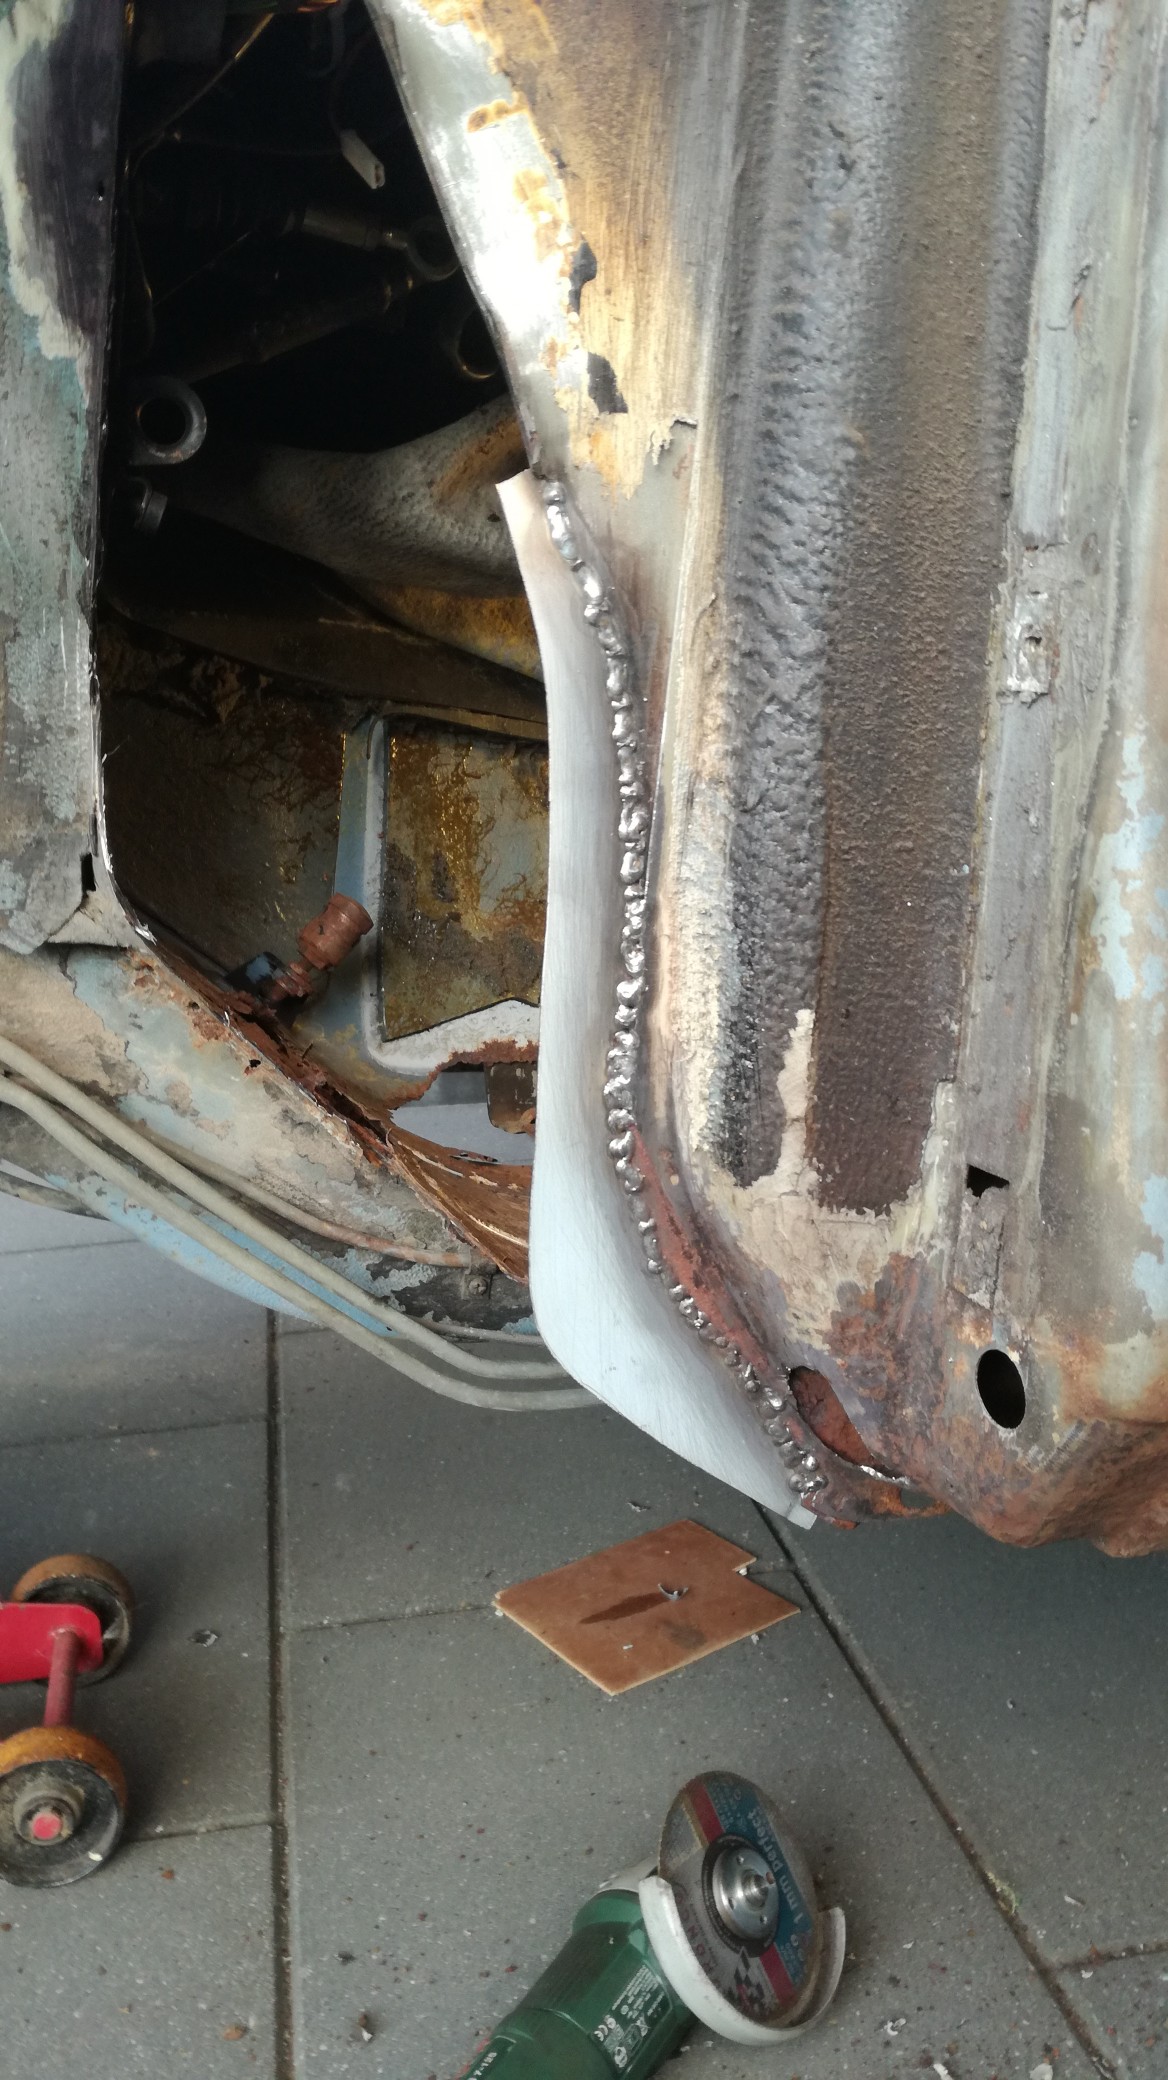
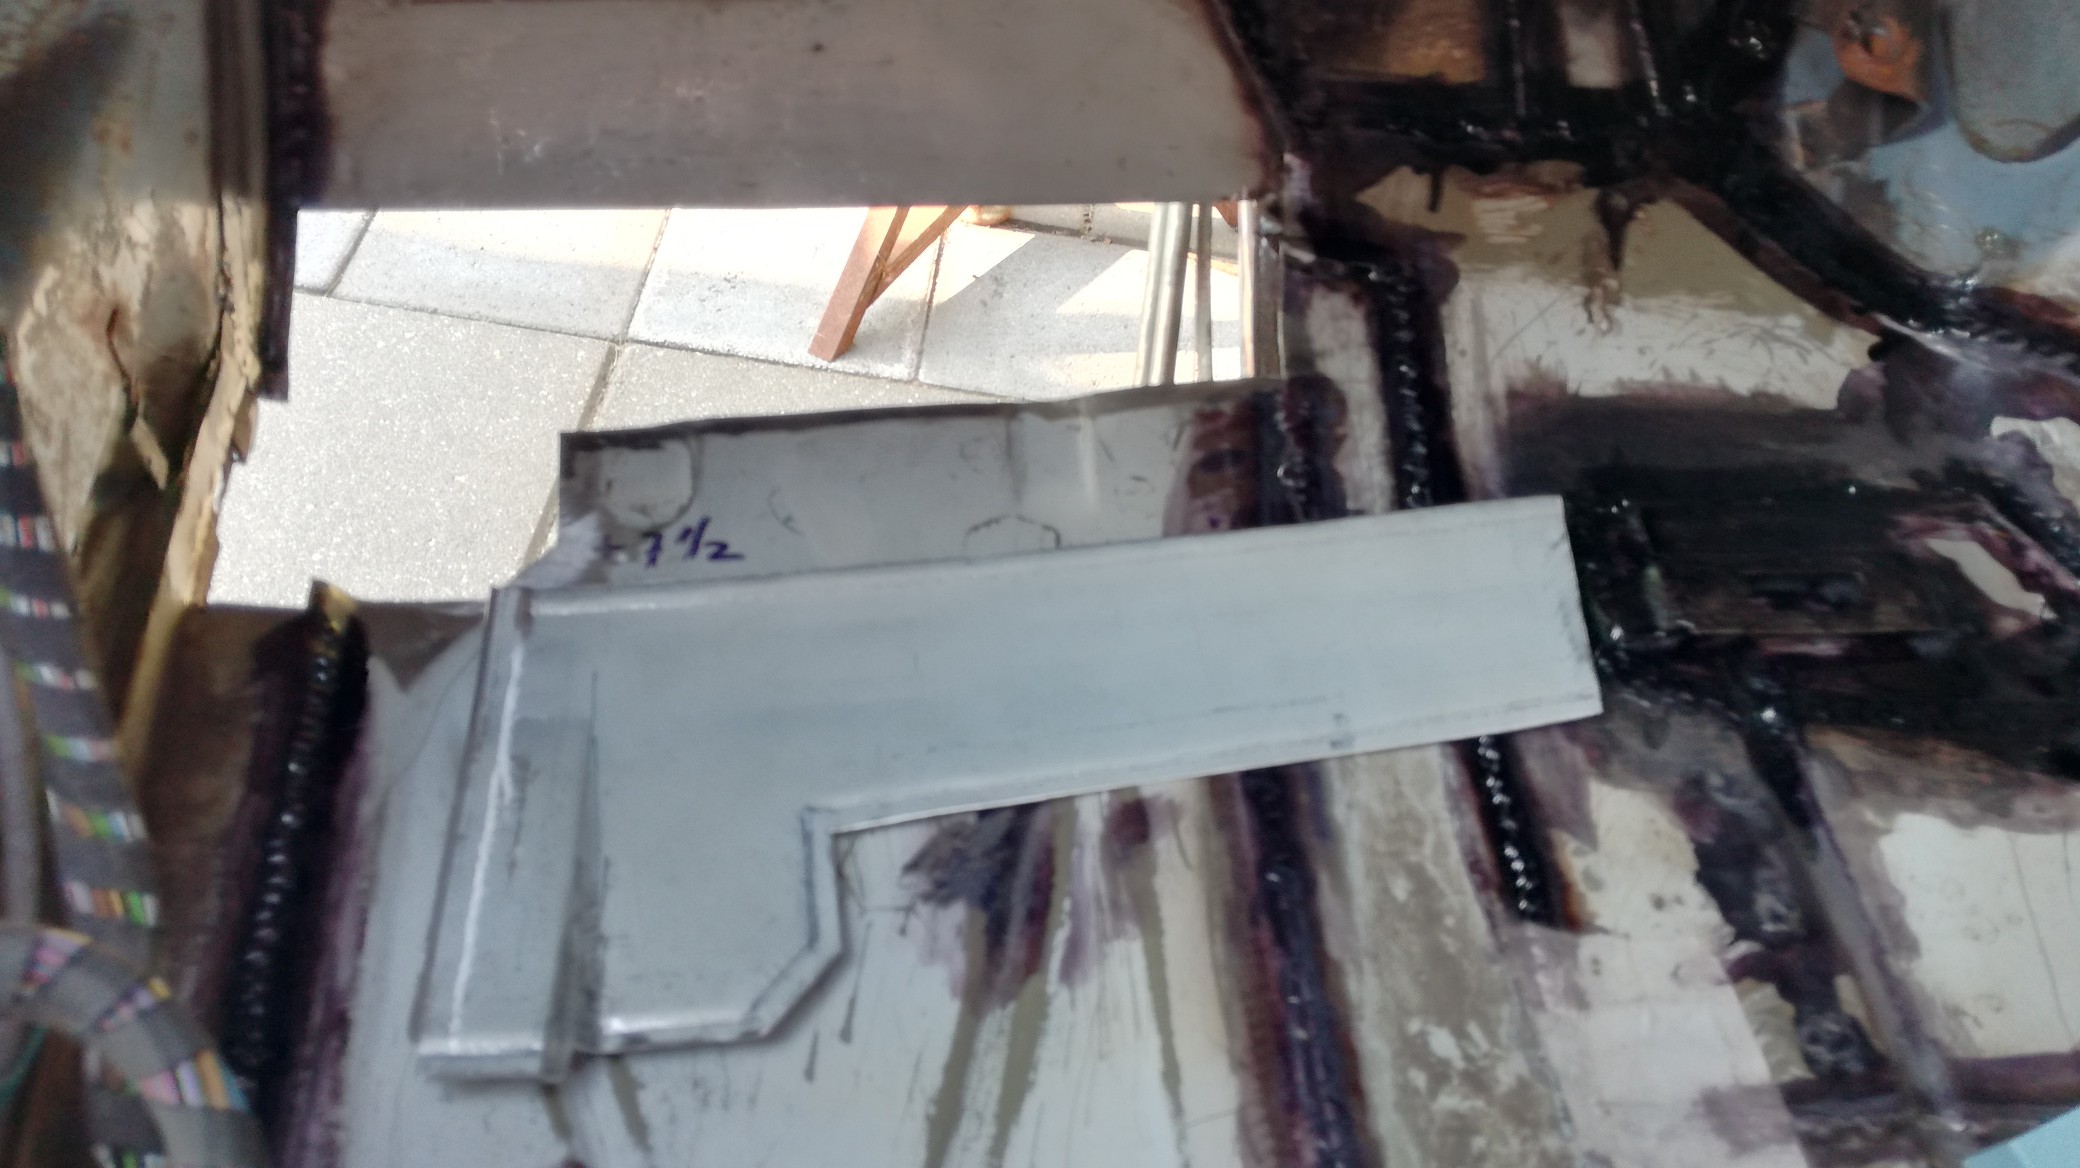
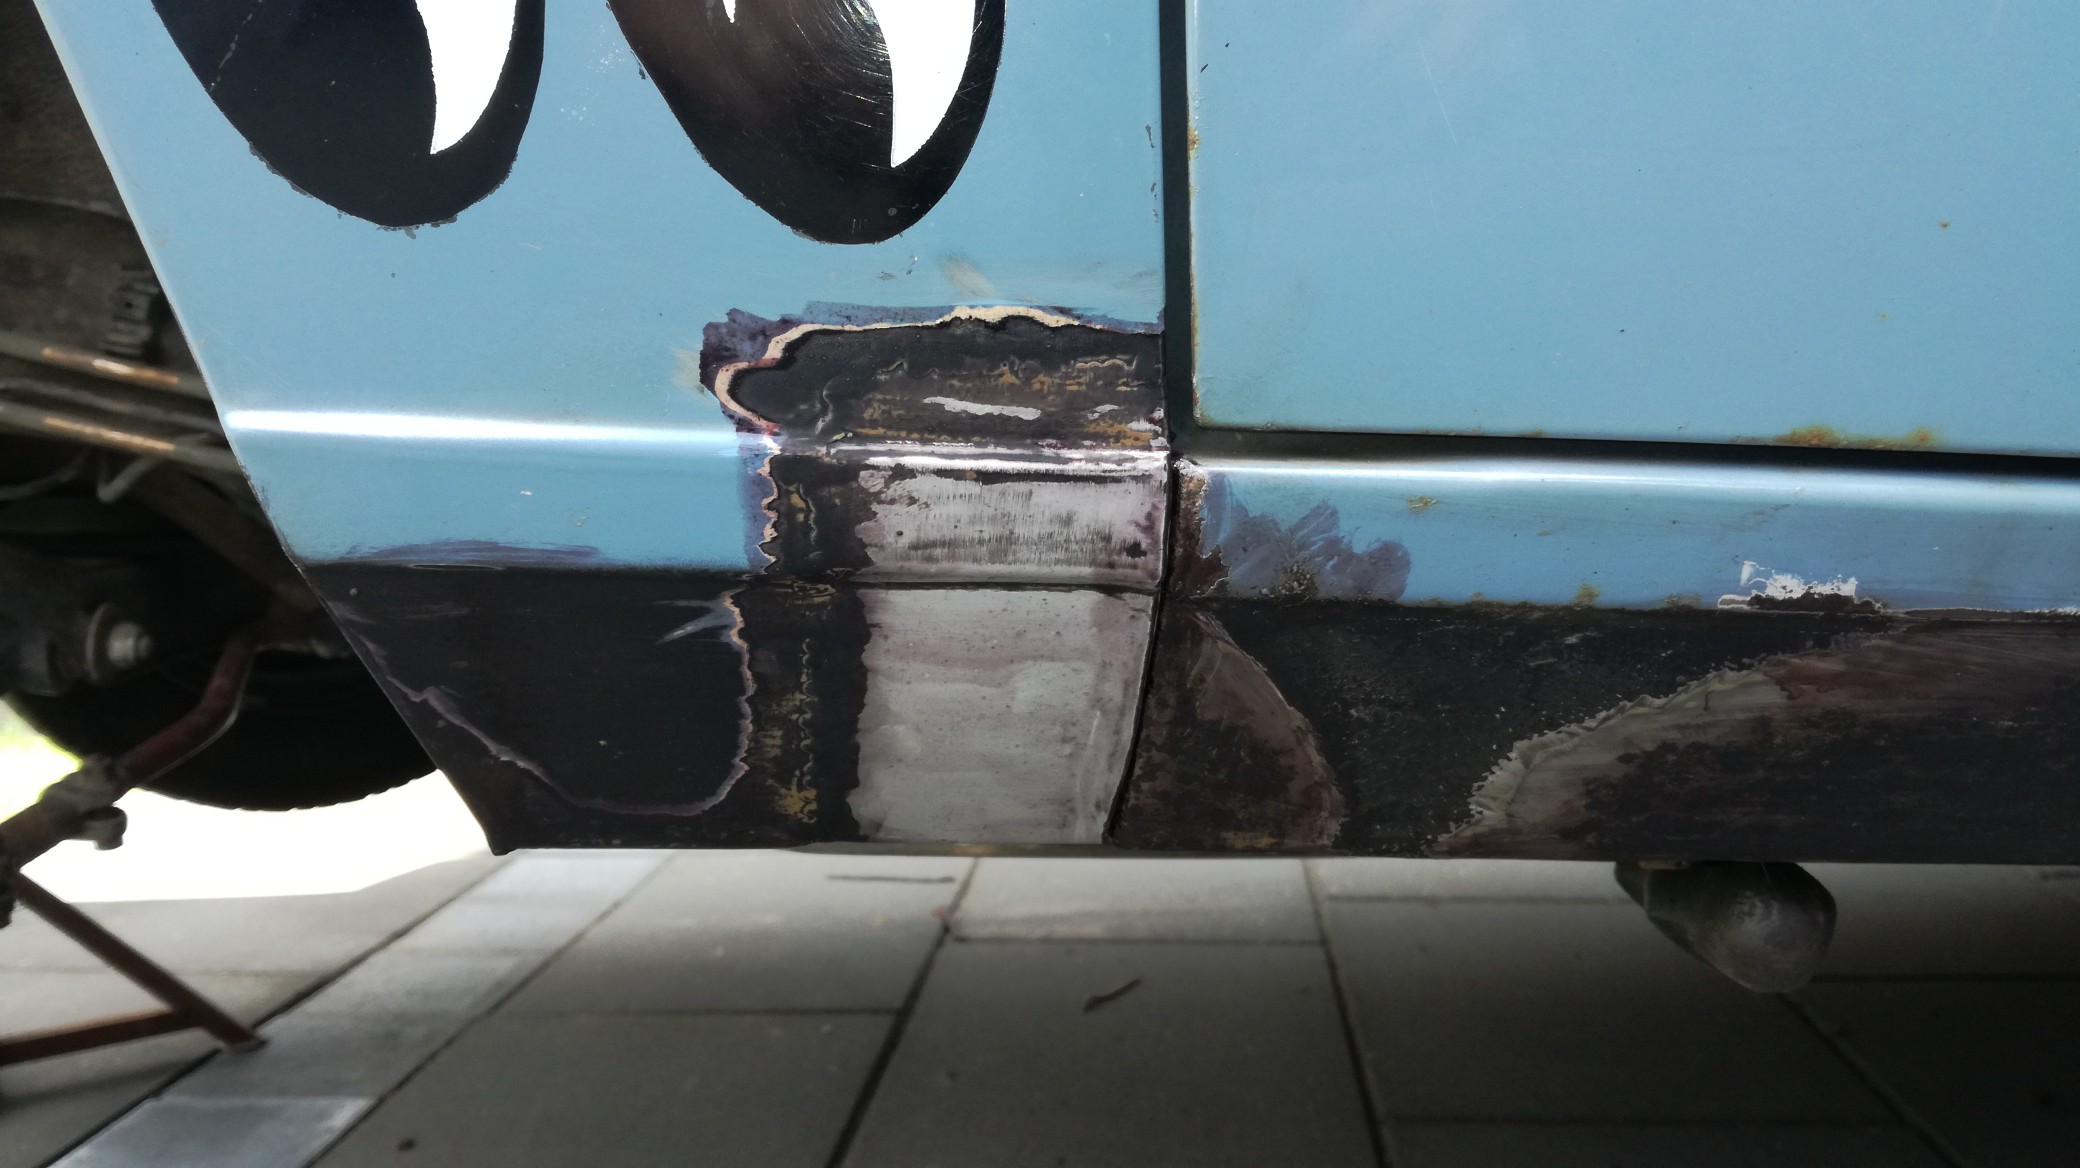
and welding the "new" pieces in place:
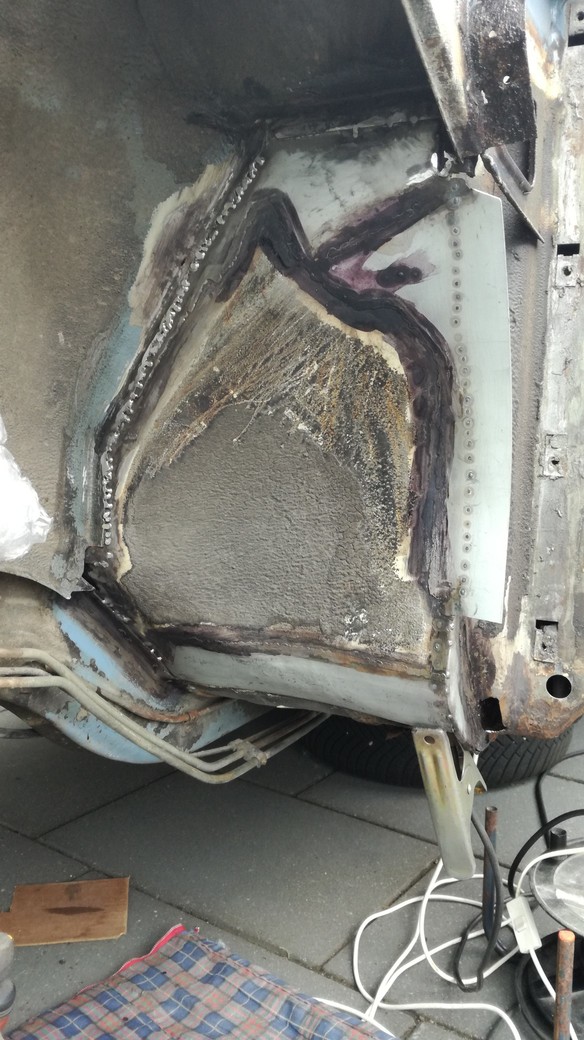
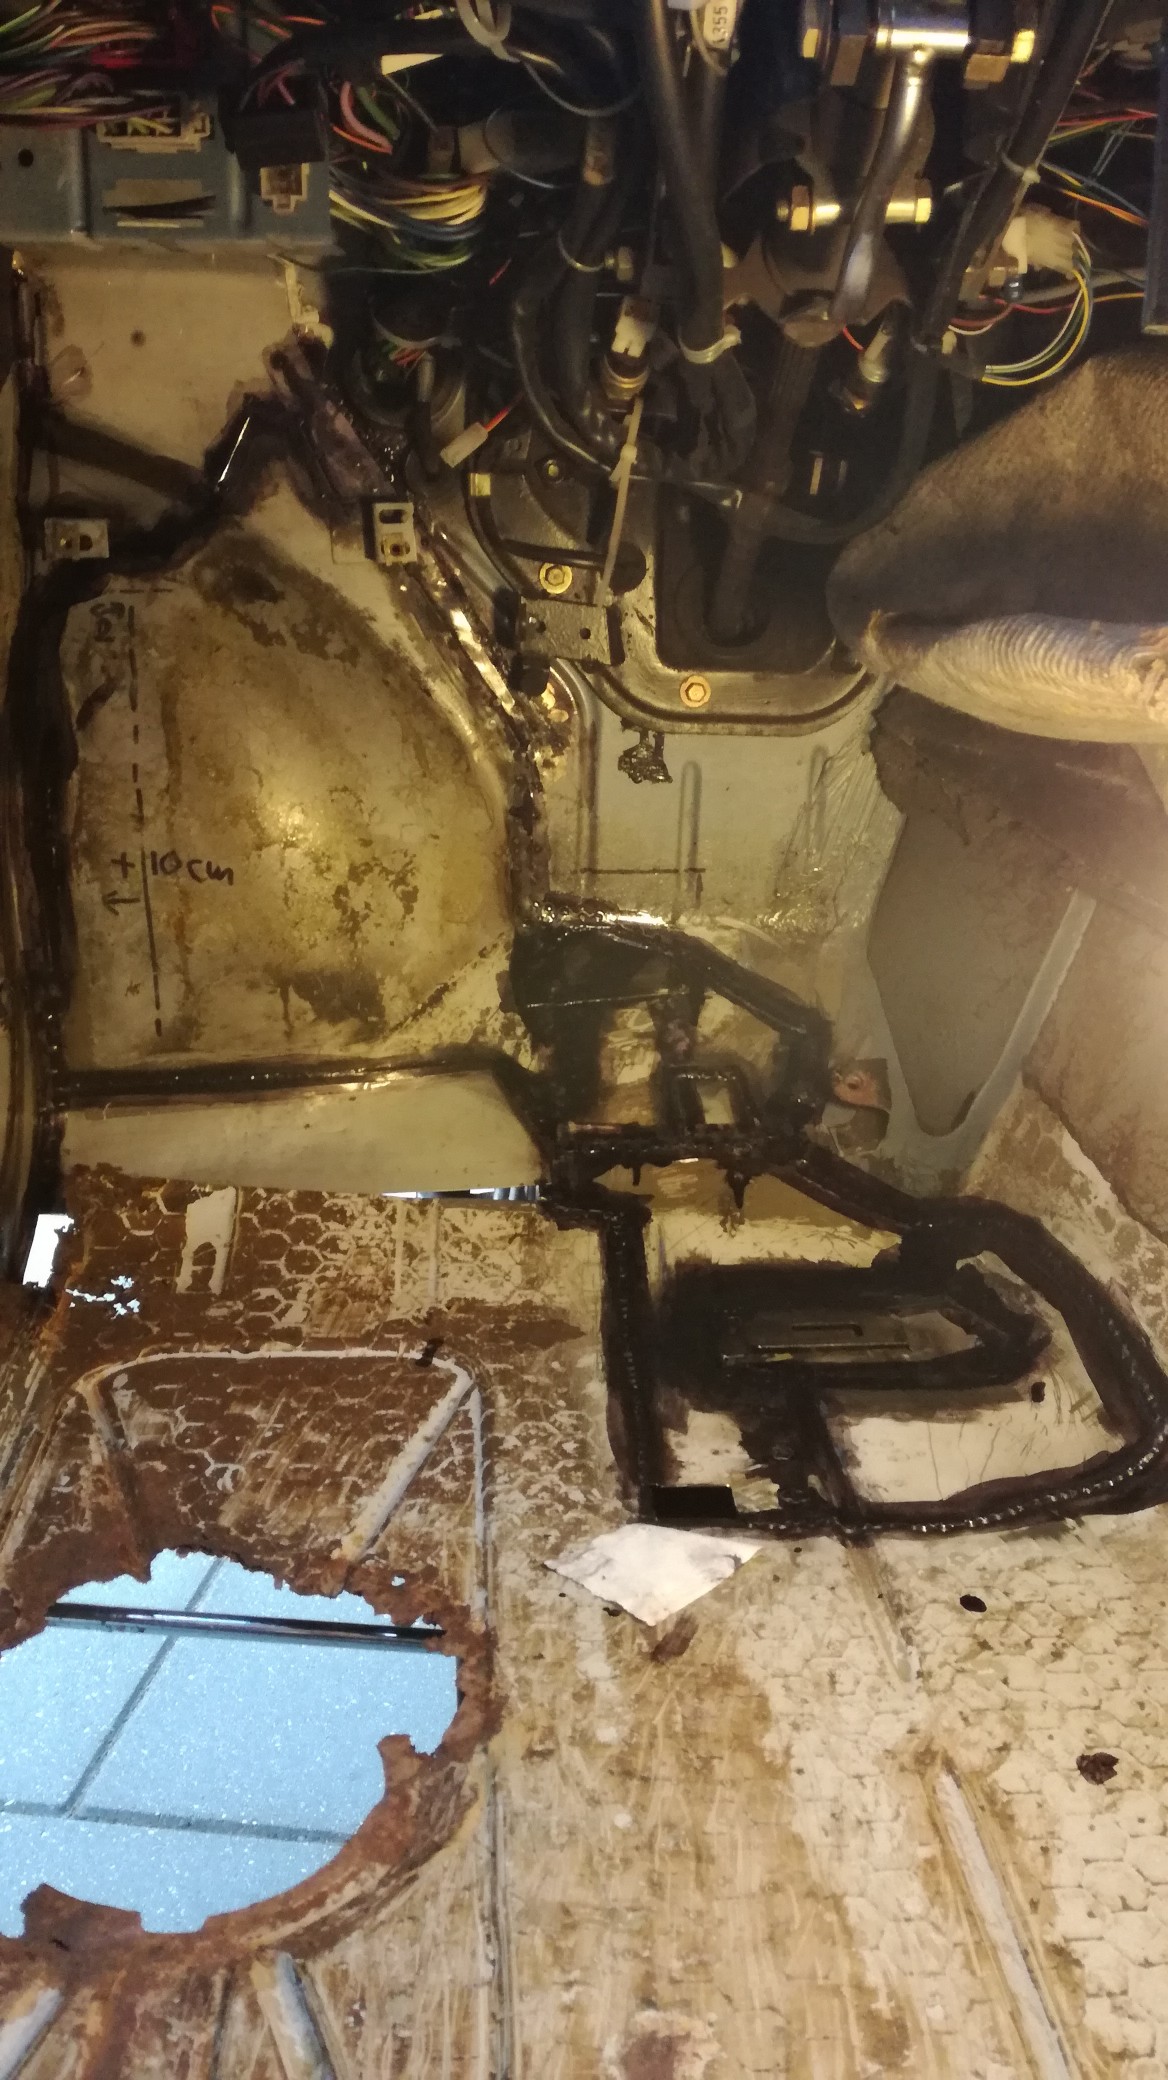
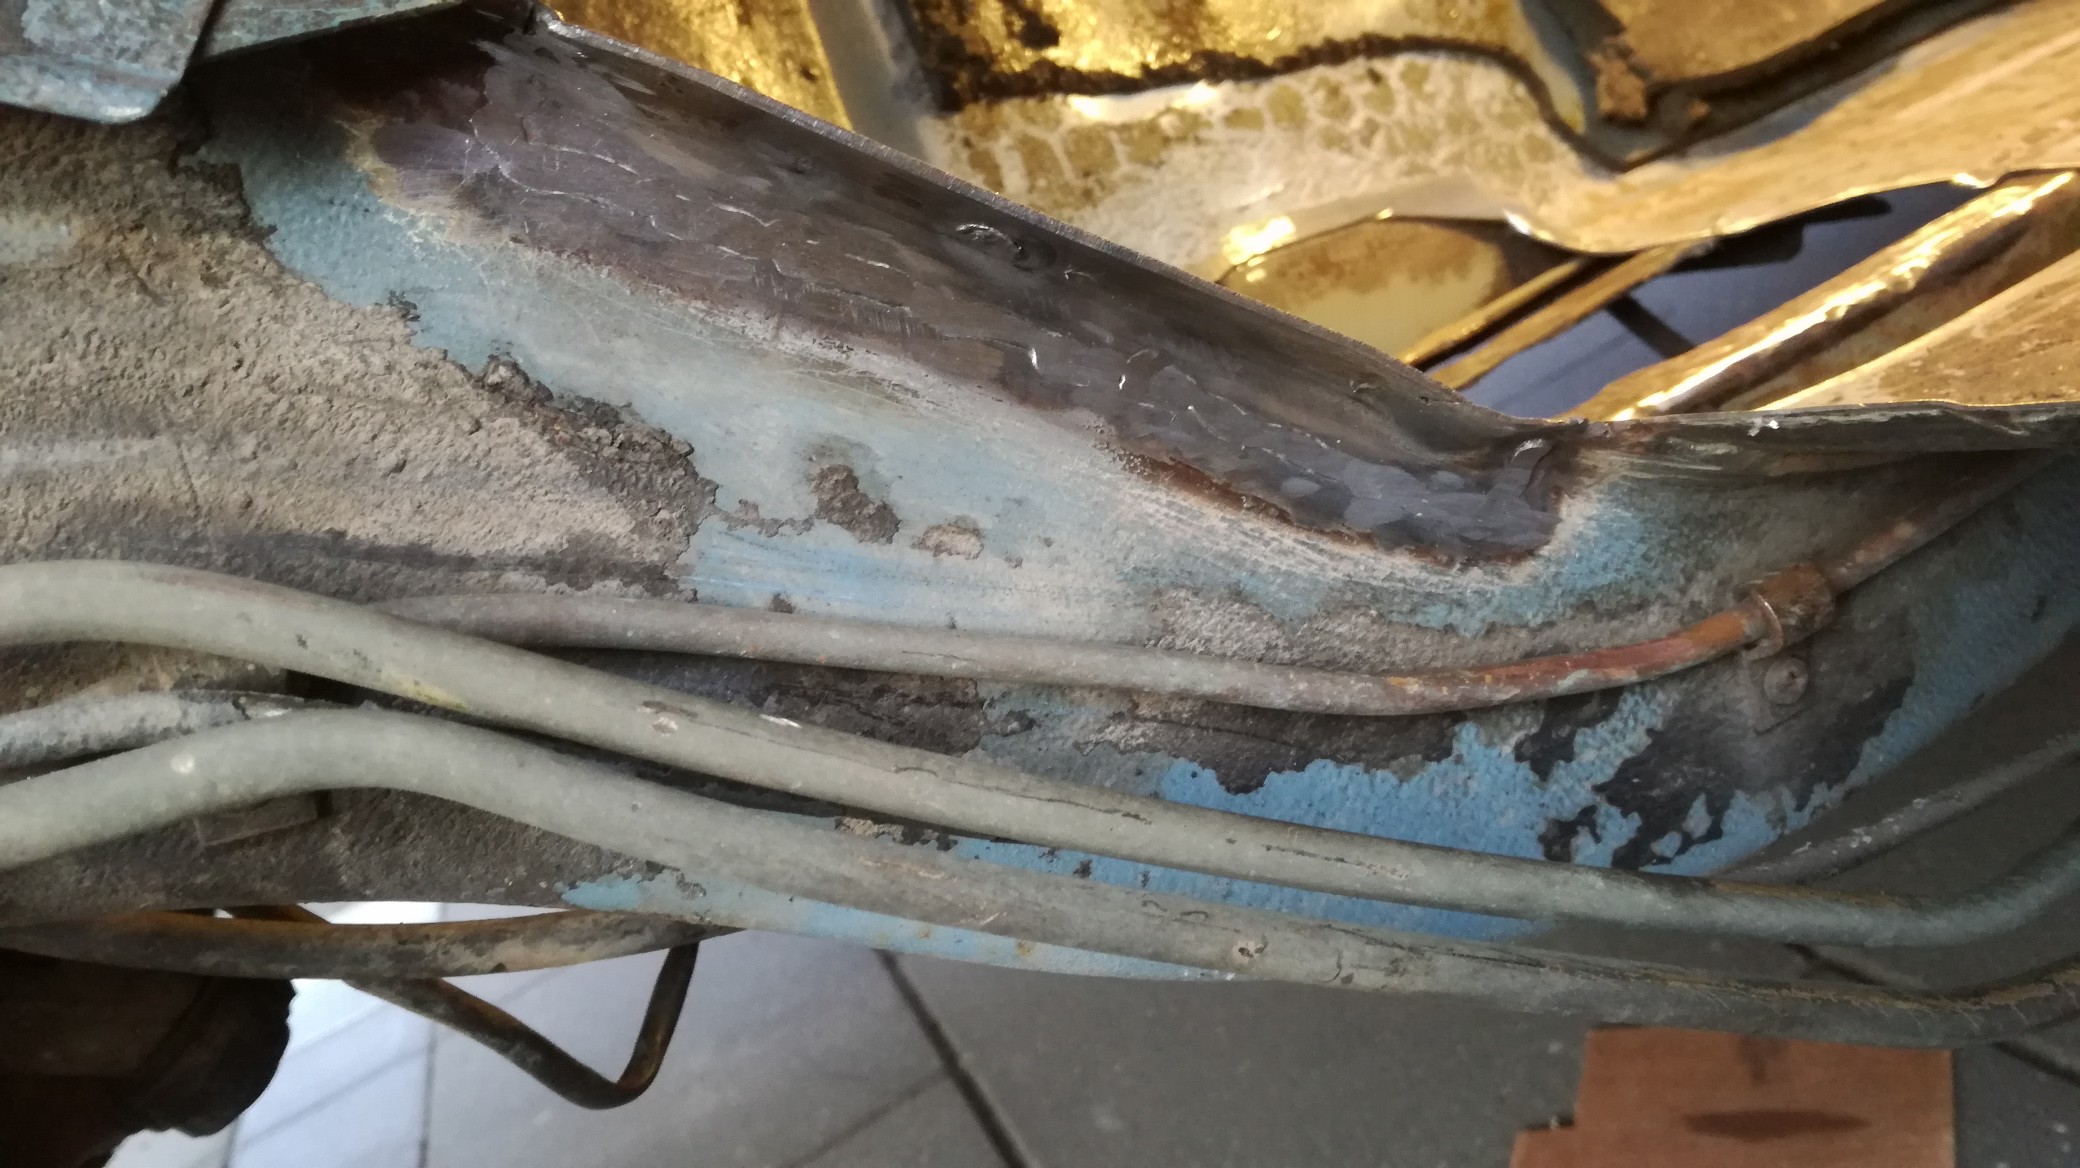
another big rot piece cut out:
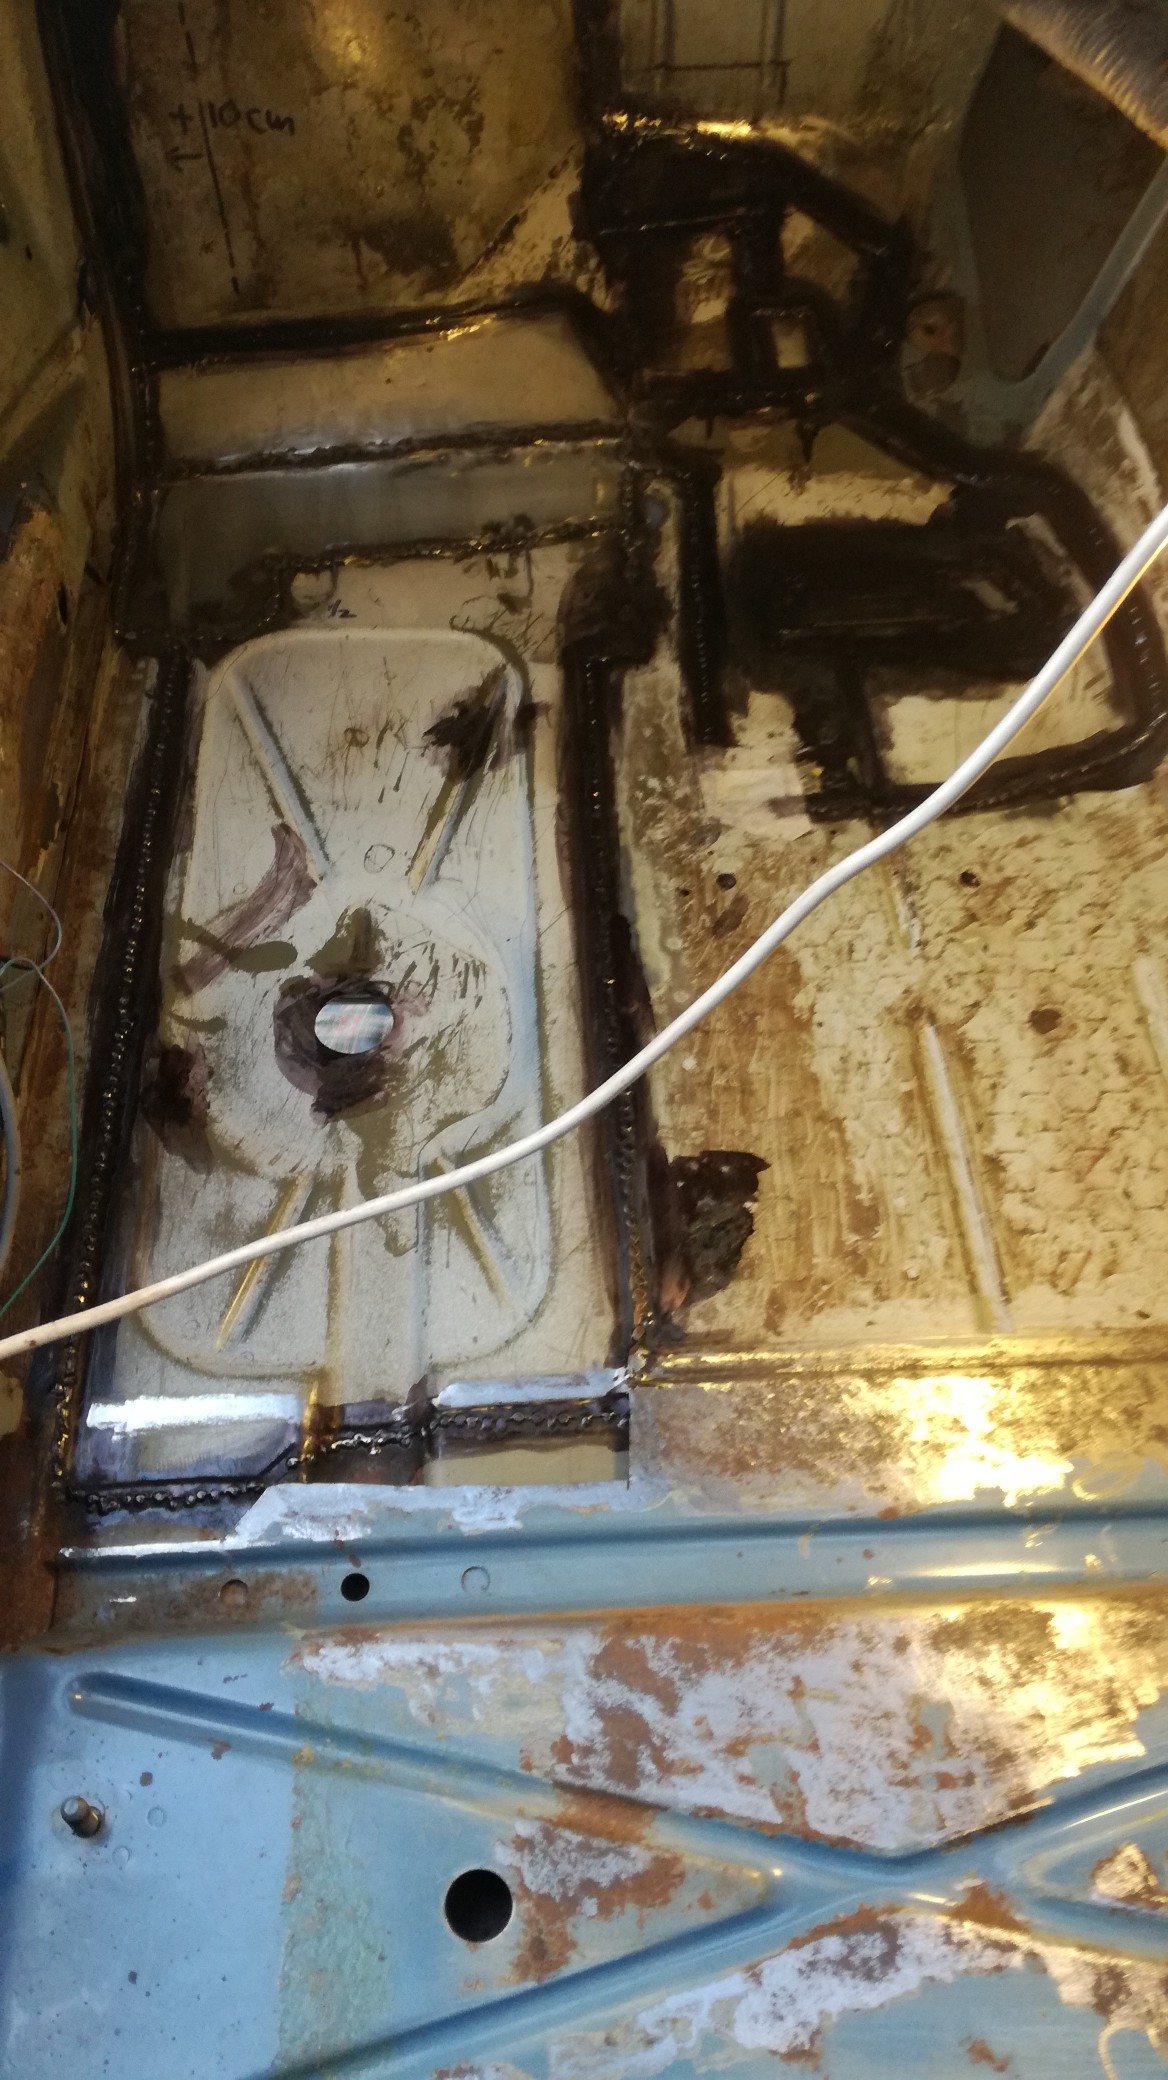
and again making a donor piece fit:
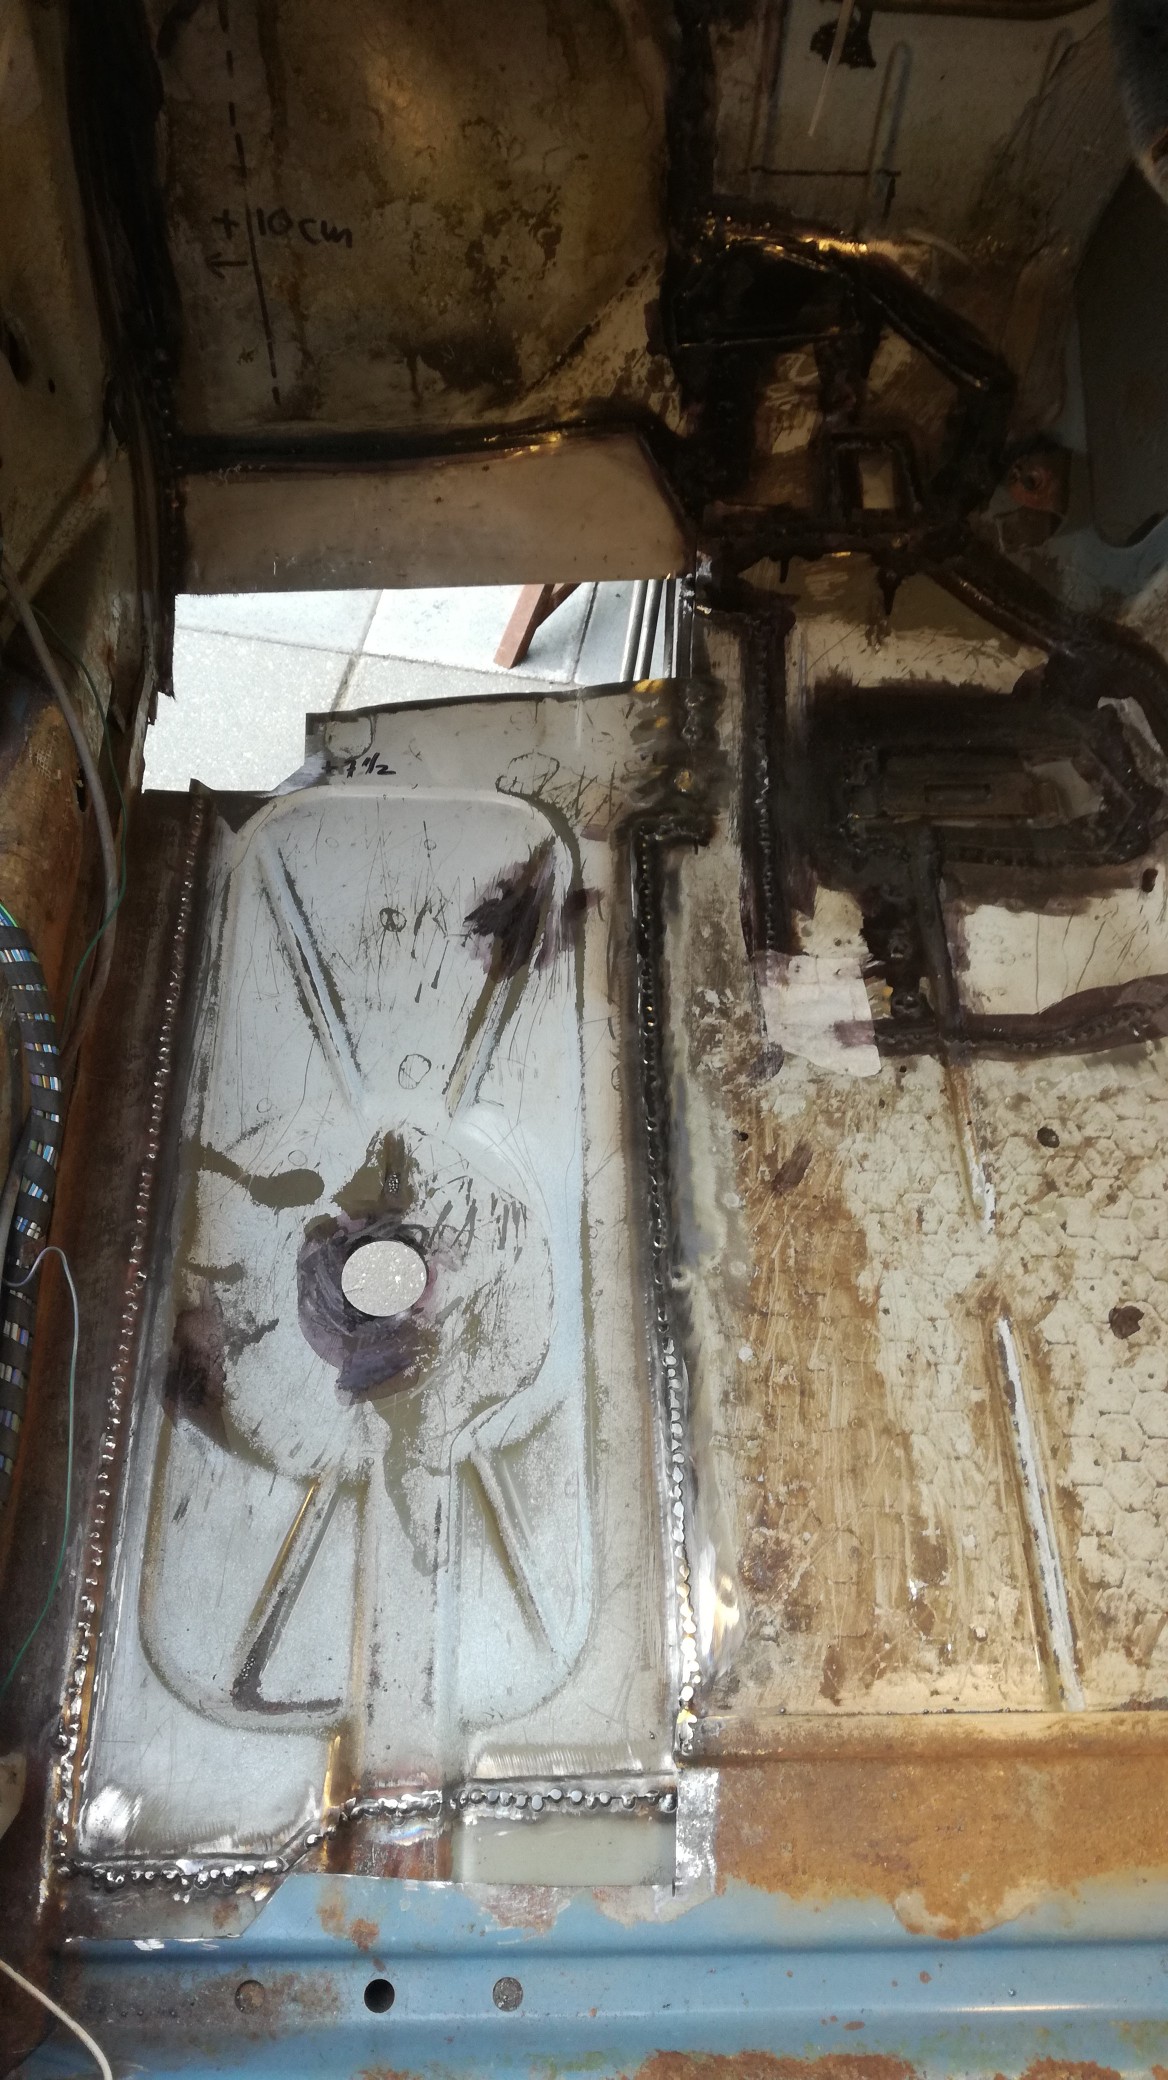
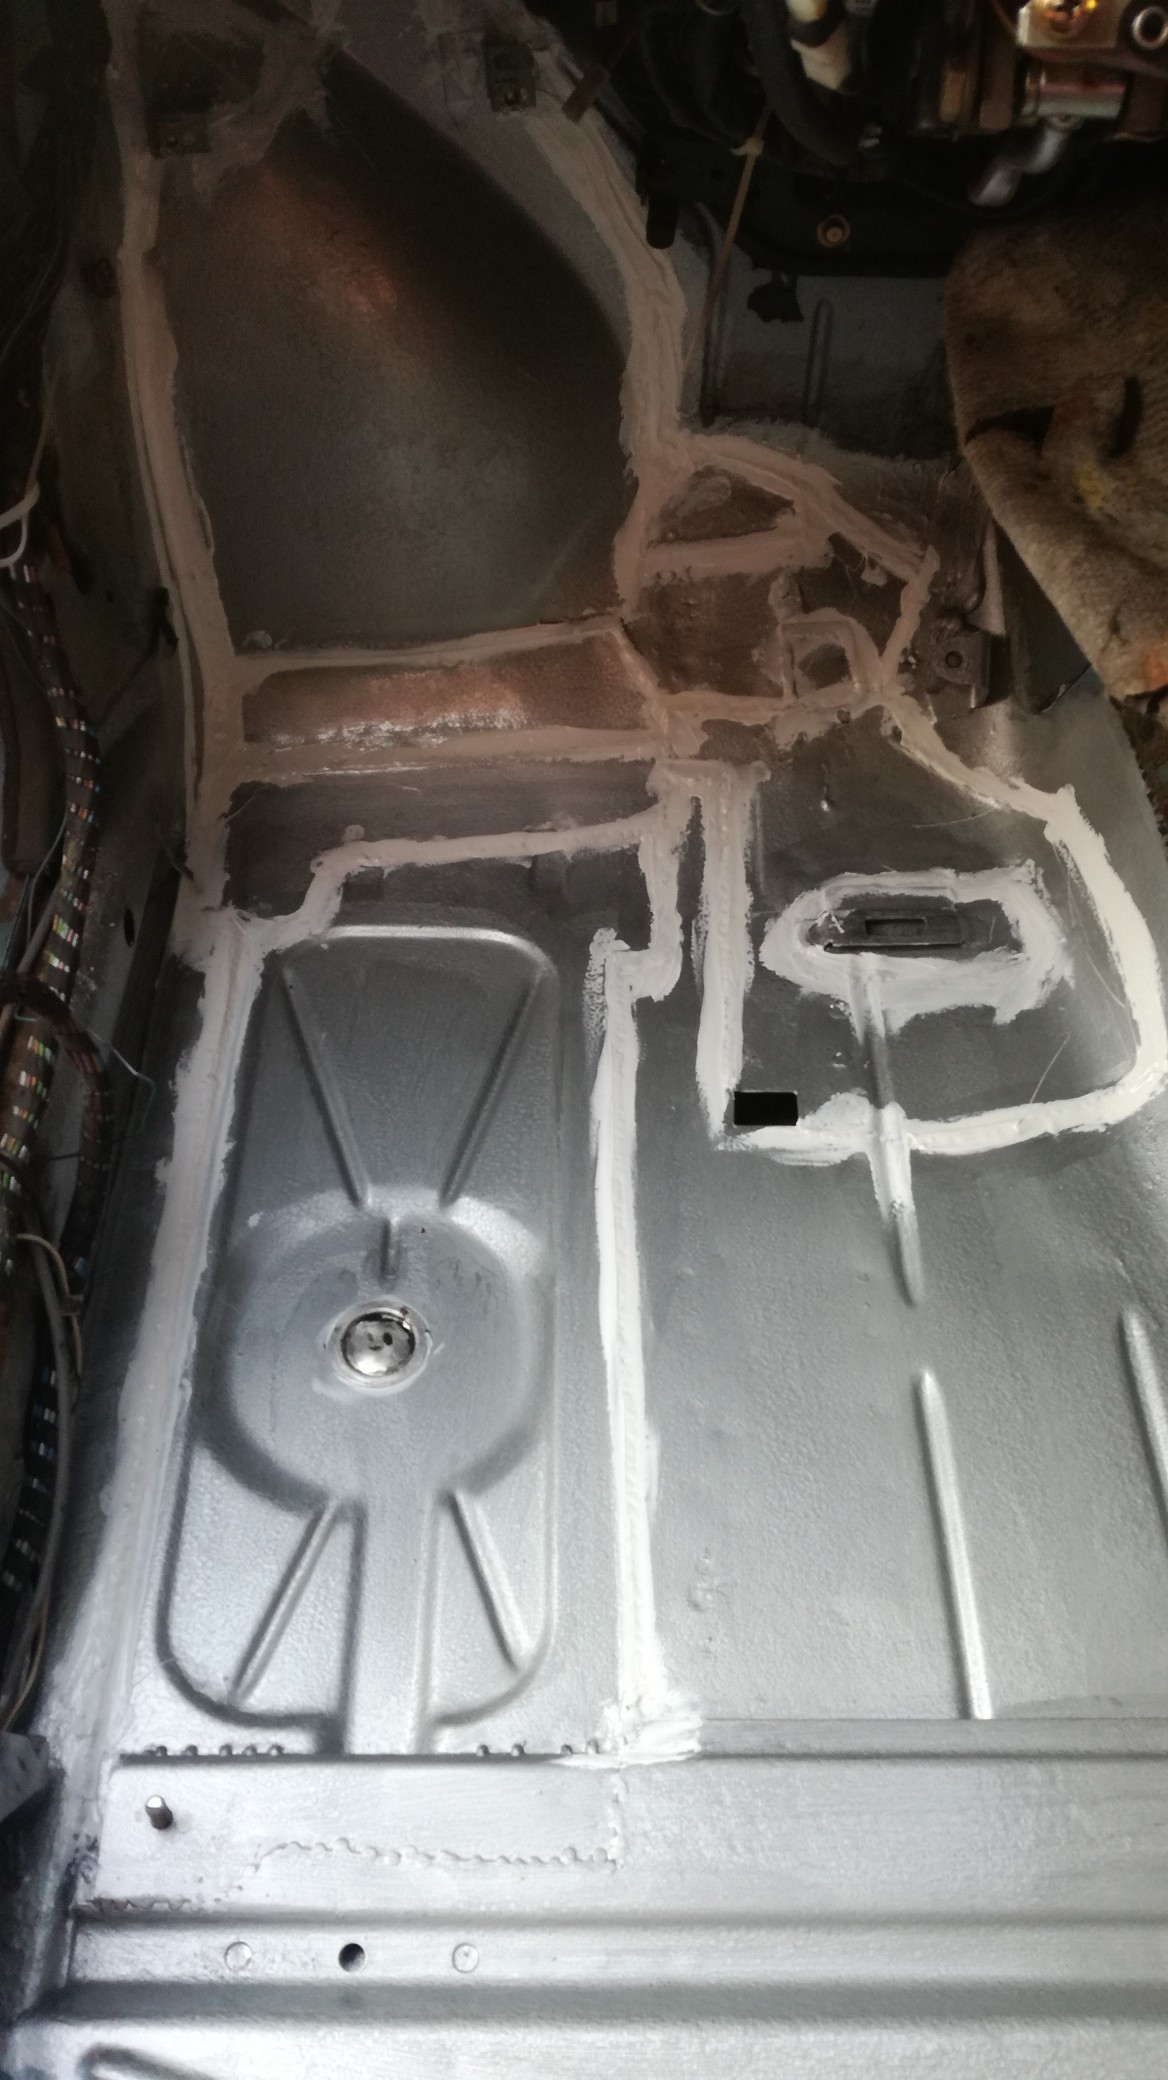
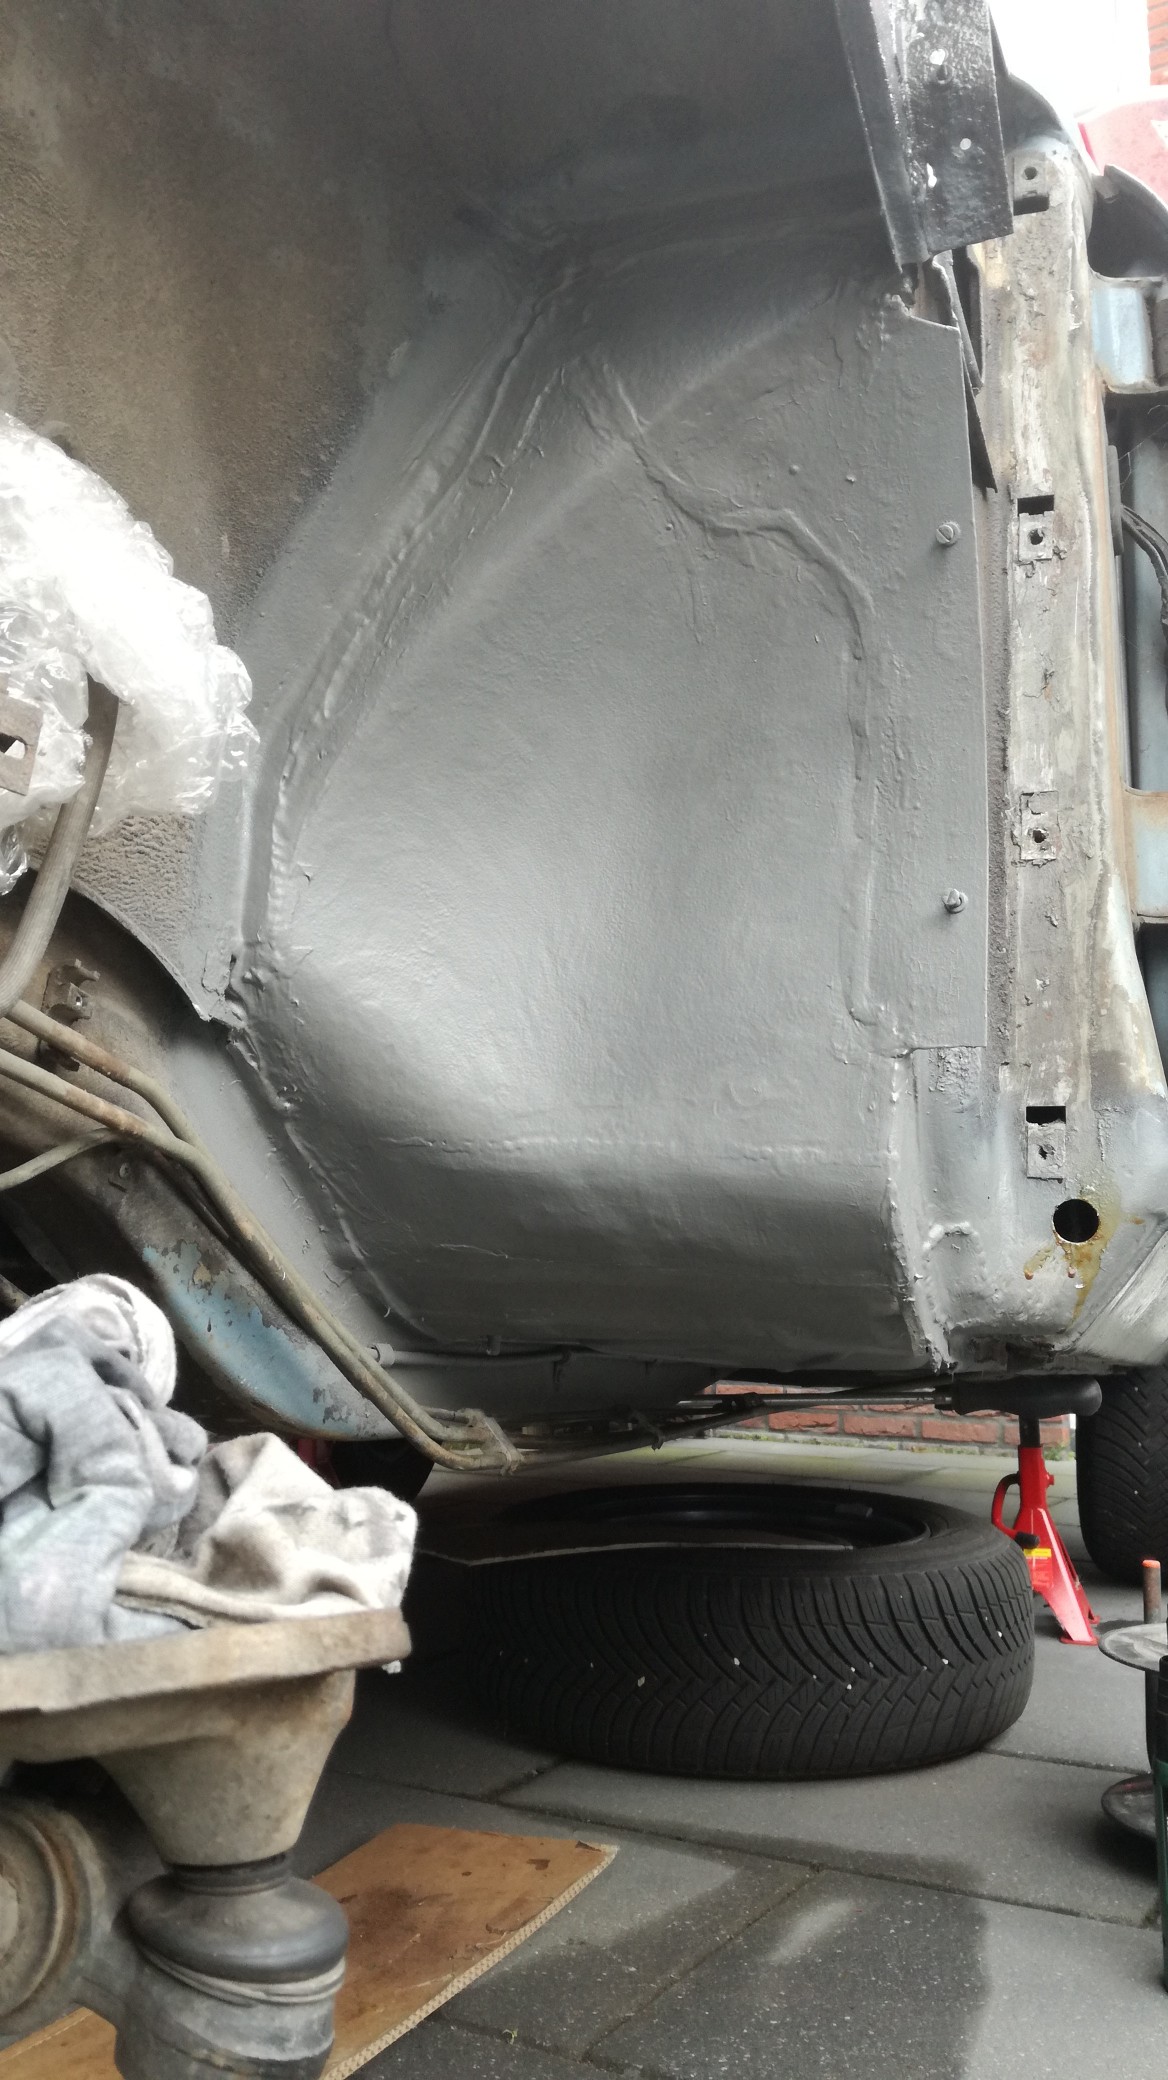
last piece welded in, and we have a hard floorpan again:


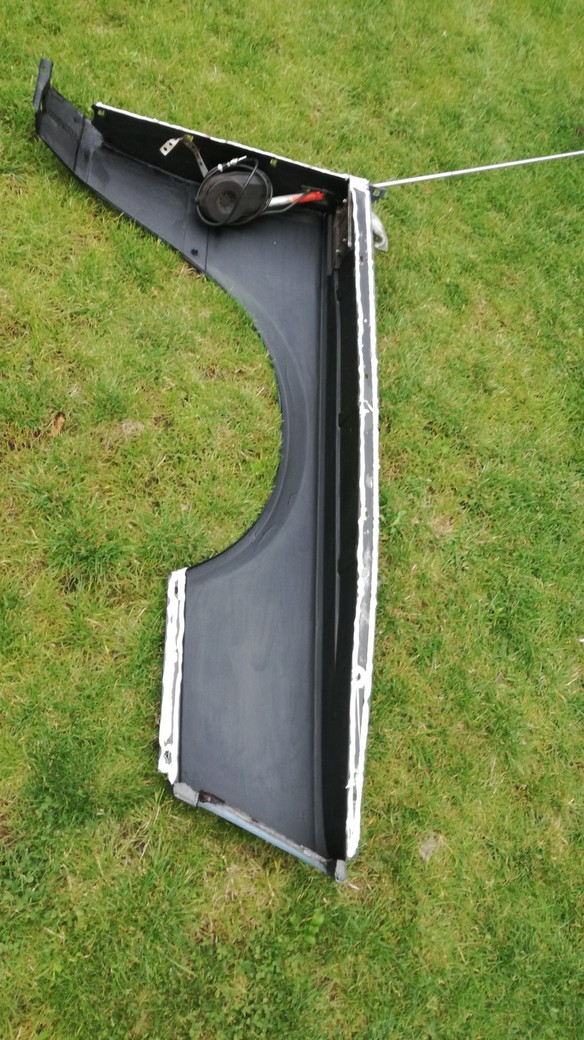
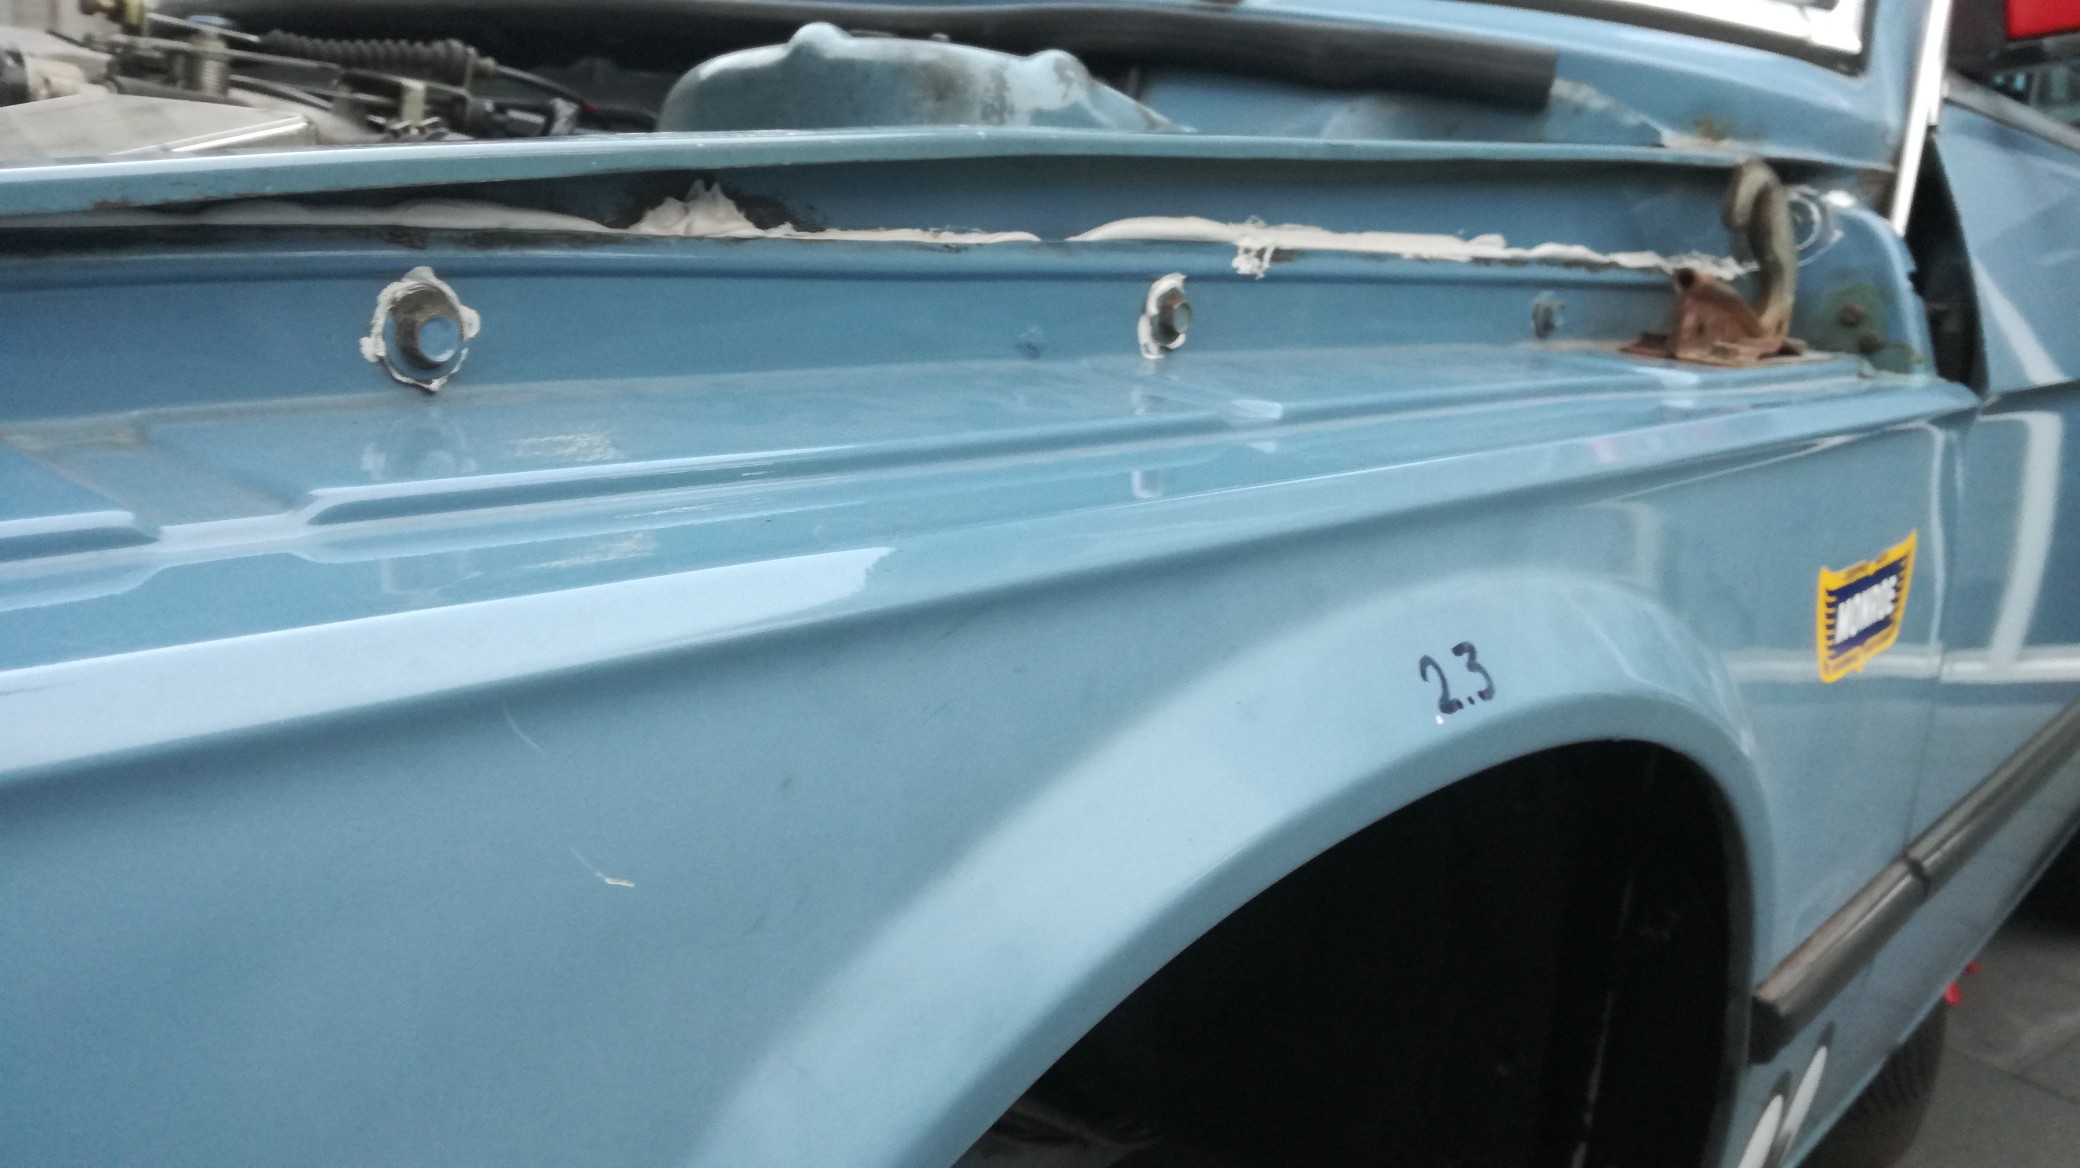
The wing also needed a small repair:
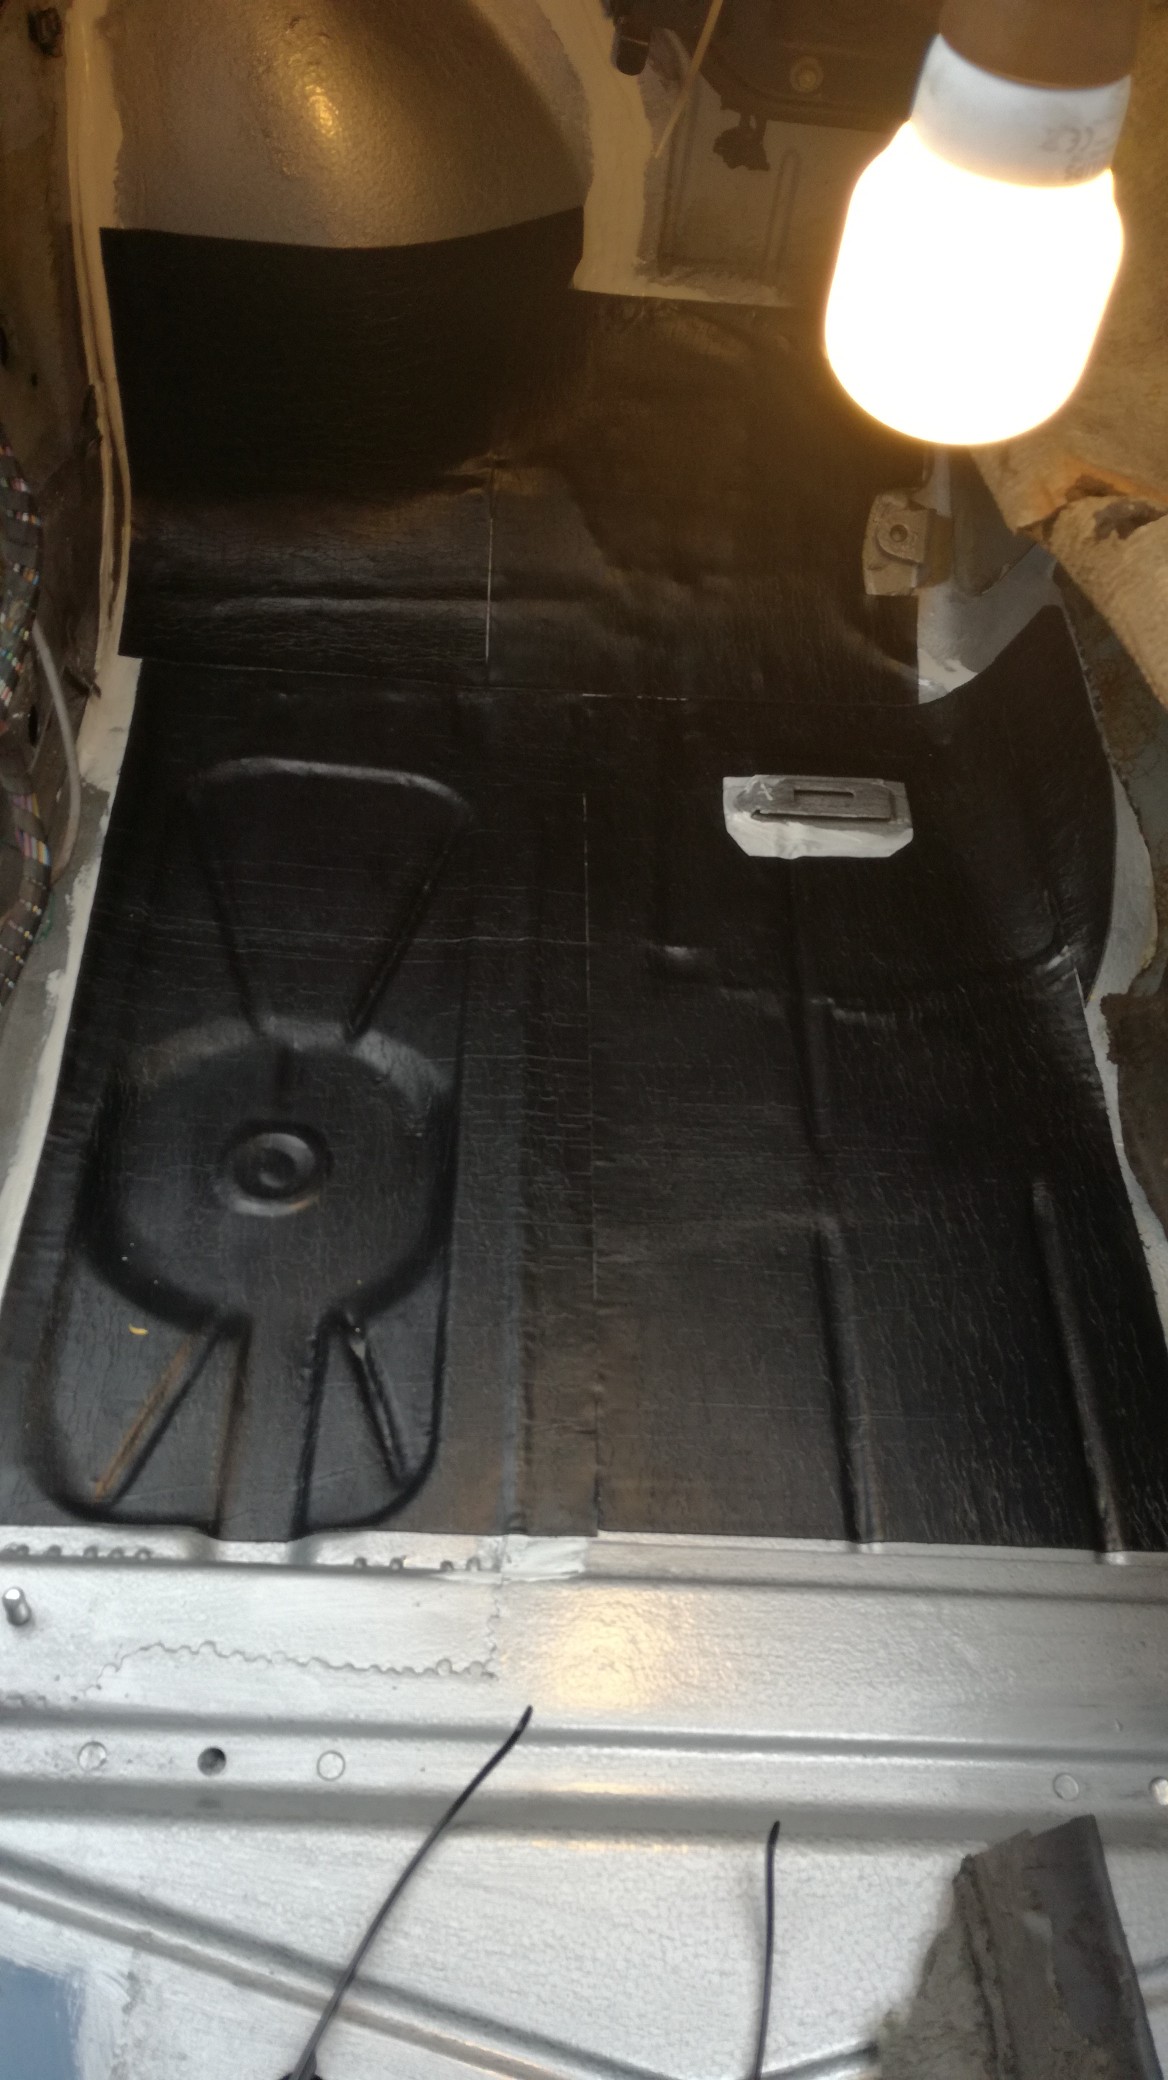
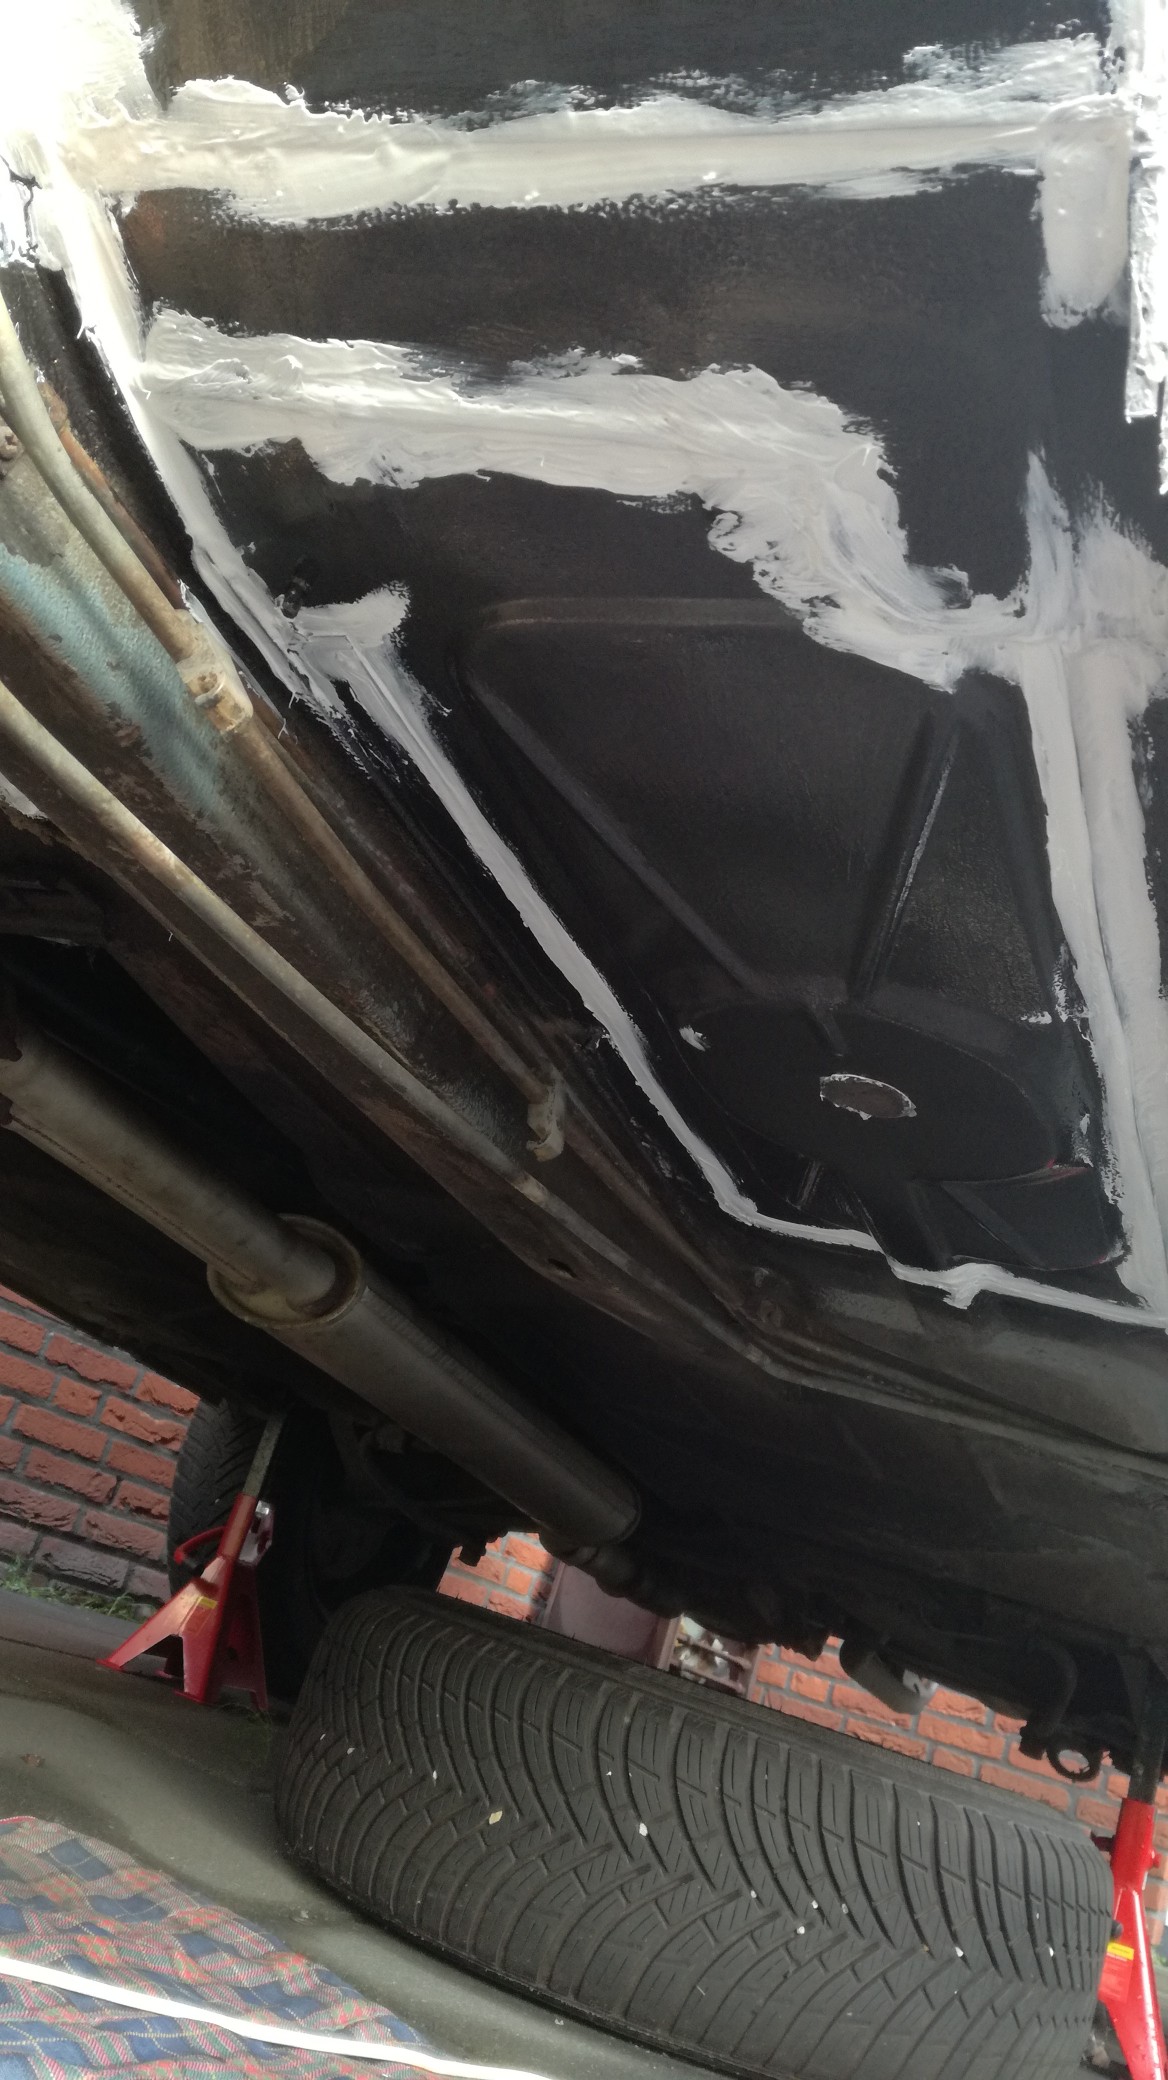
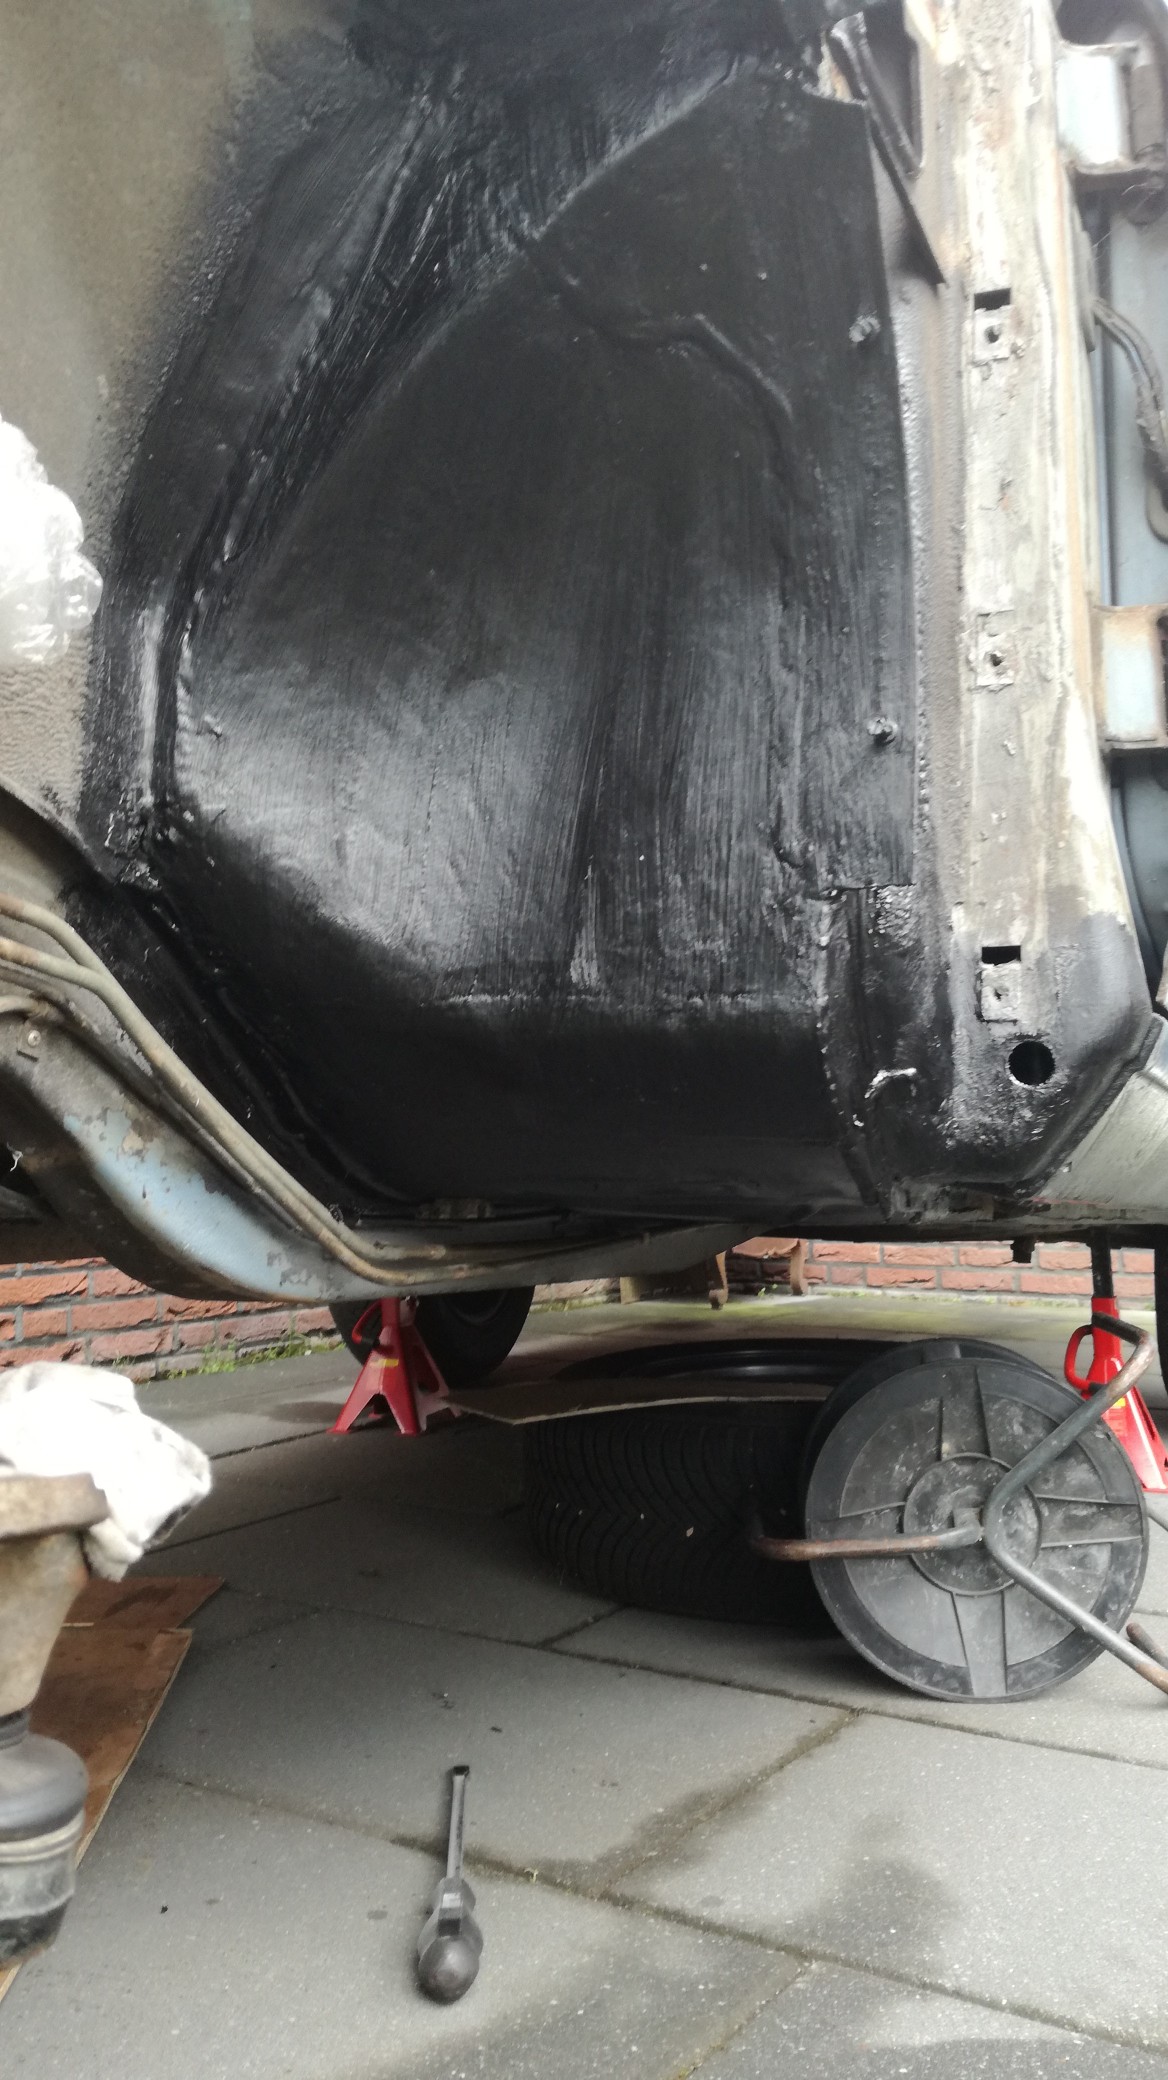
Finishing touch, sealing, painting and new dampening material:
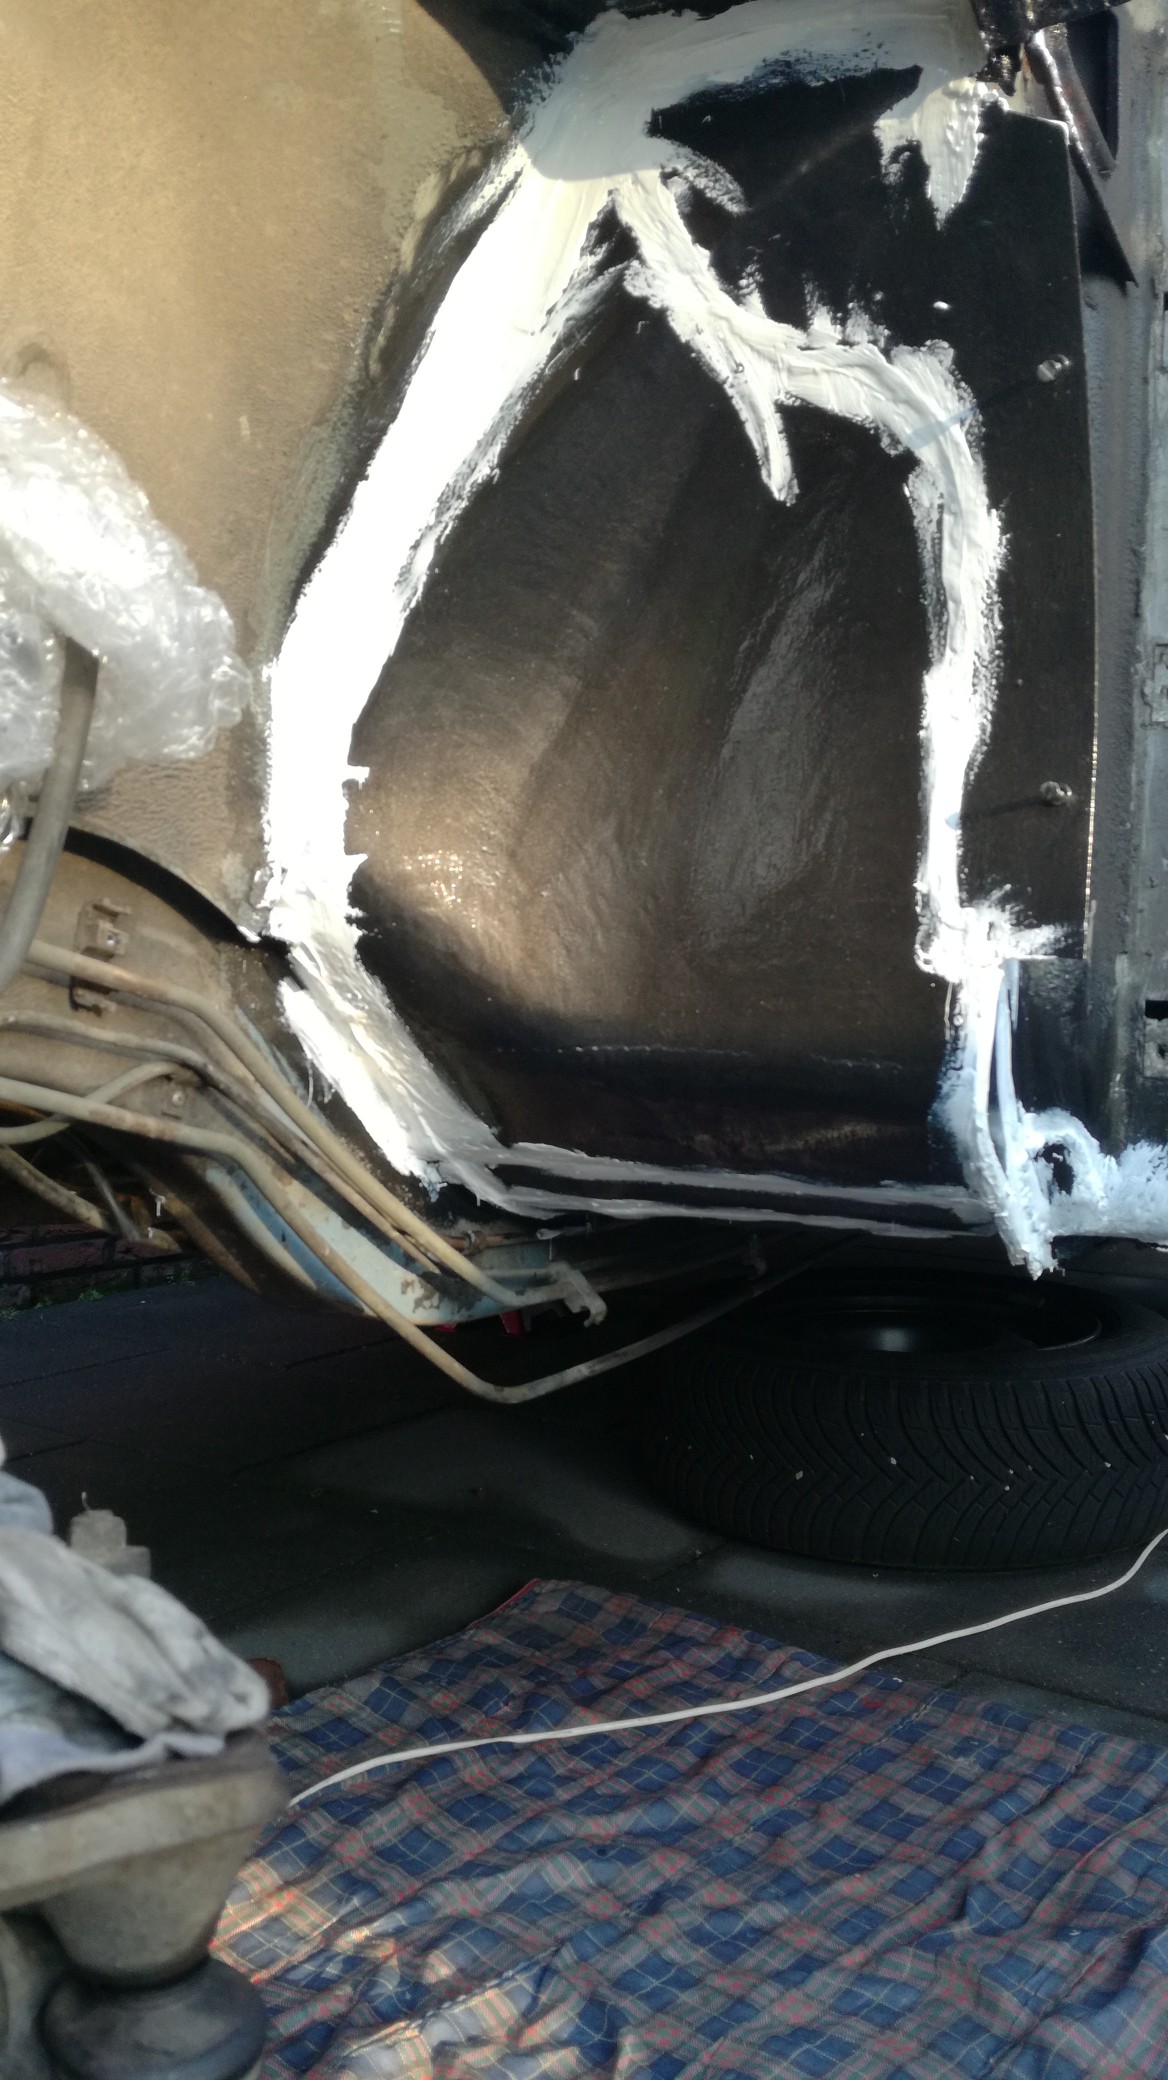
And put the repaired wing back:
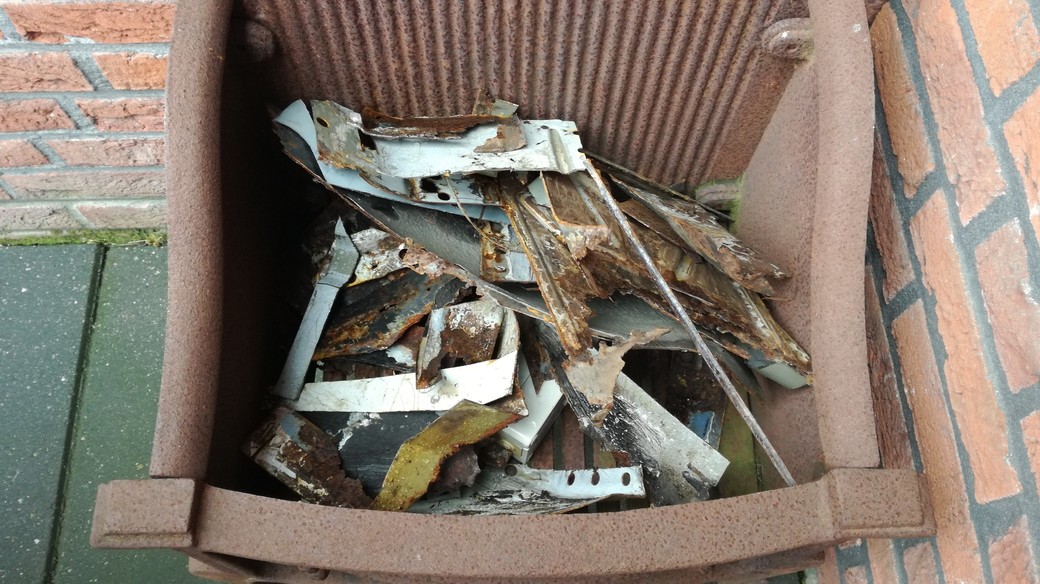
binned rot:
so now the car is ready again for some rally action
Some photo's above showing the EVAP return line underneath shows that the left side bottom was a little rusty crusty at some places.
The car got MOT last year, but the mechanic warned me that there was serious work coming up, so this last summer i started working on the left bottom area.
First the front brake upgrade, converting to vented discs only needs new vented discs ofcource and suitable calipers.
Old situation:
I got some rotten vented disc calipers as parts spender, they spended the needed spacers which make the calipers wider and longer bolts to clamp the 2 halves together.
Parts spenders:
I also got new seals for the caliper halves, all parts gathered:
I drained the brake fluid and then splitted the calipers while still on the car, then changed the discs, and assembled the calipers with the spacers, longer bolts an new pads and ancillaries:
One dust boot and piston was damaged, and was changed for the best piston from the spare calipers and got a new dust boot:
damaged (rust) piston
other piston and new dust boot placed:
Do vented discs brake better? No not really, but when hard and much braking is required they keep cooler !
Next job was the rotten left floorpan:
brrr, old repairs are rotten again:
Throttle pedal wasn't attached to the floorpan anymore, clip totally gone:
More digging reveals more rot:
The whole floorpan from paravent till seat needs to be renewed, to make working space, the wing was removed and revealed more rot.
Repair is only possible when first all rot is cut away, a huge hole:
So time for repairs, i got a donor floorpan which was in a better condition, but still needed an amount of repair work:
slowly started with the repairs:
slowly making a donor pieces that fits:
and welding the "new" pieces in place:
another big rot piece cut out:
and again making a donor piece fit:
last piece welded in, and we have a hard floorpan again:
The wing also needed a small repair:
Finishing touch, sealing, painting and new dampening material:
And put the repaired wing back:
binned rot:
so now the car is ready again for some rally action
Last edited by BertjeConti on Wed Nov 23, 2022 9:08 pm, edited 2 times in total.
Megasquirted '77 E12 520-6
Aspen Silver '96 E39 523i
-
Jeroen
- Site Admin
- Posts: 29320
- Joined: Tue Sep 14, 2004 12:23 pm
- My E21(s): '81 323i Baur
- Location: The Netherlands
- Contact:
Re: Pastelblau 520/6
My thoughts exactly! Looks like you guys are ready for another season of rally fun! Thanks for keeping us updated in such a detailed way!
Regards/groeten, Jeroen
-
BertjeConti
- E21 Mad
- Posts: 3019
- Joined: Mon Nov 04, 2013 9:49 pm
- My E21(s): E12 520-6
- Location: nederland , Weert
Re: Pastelblau 520/6
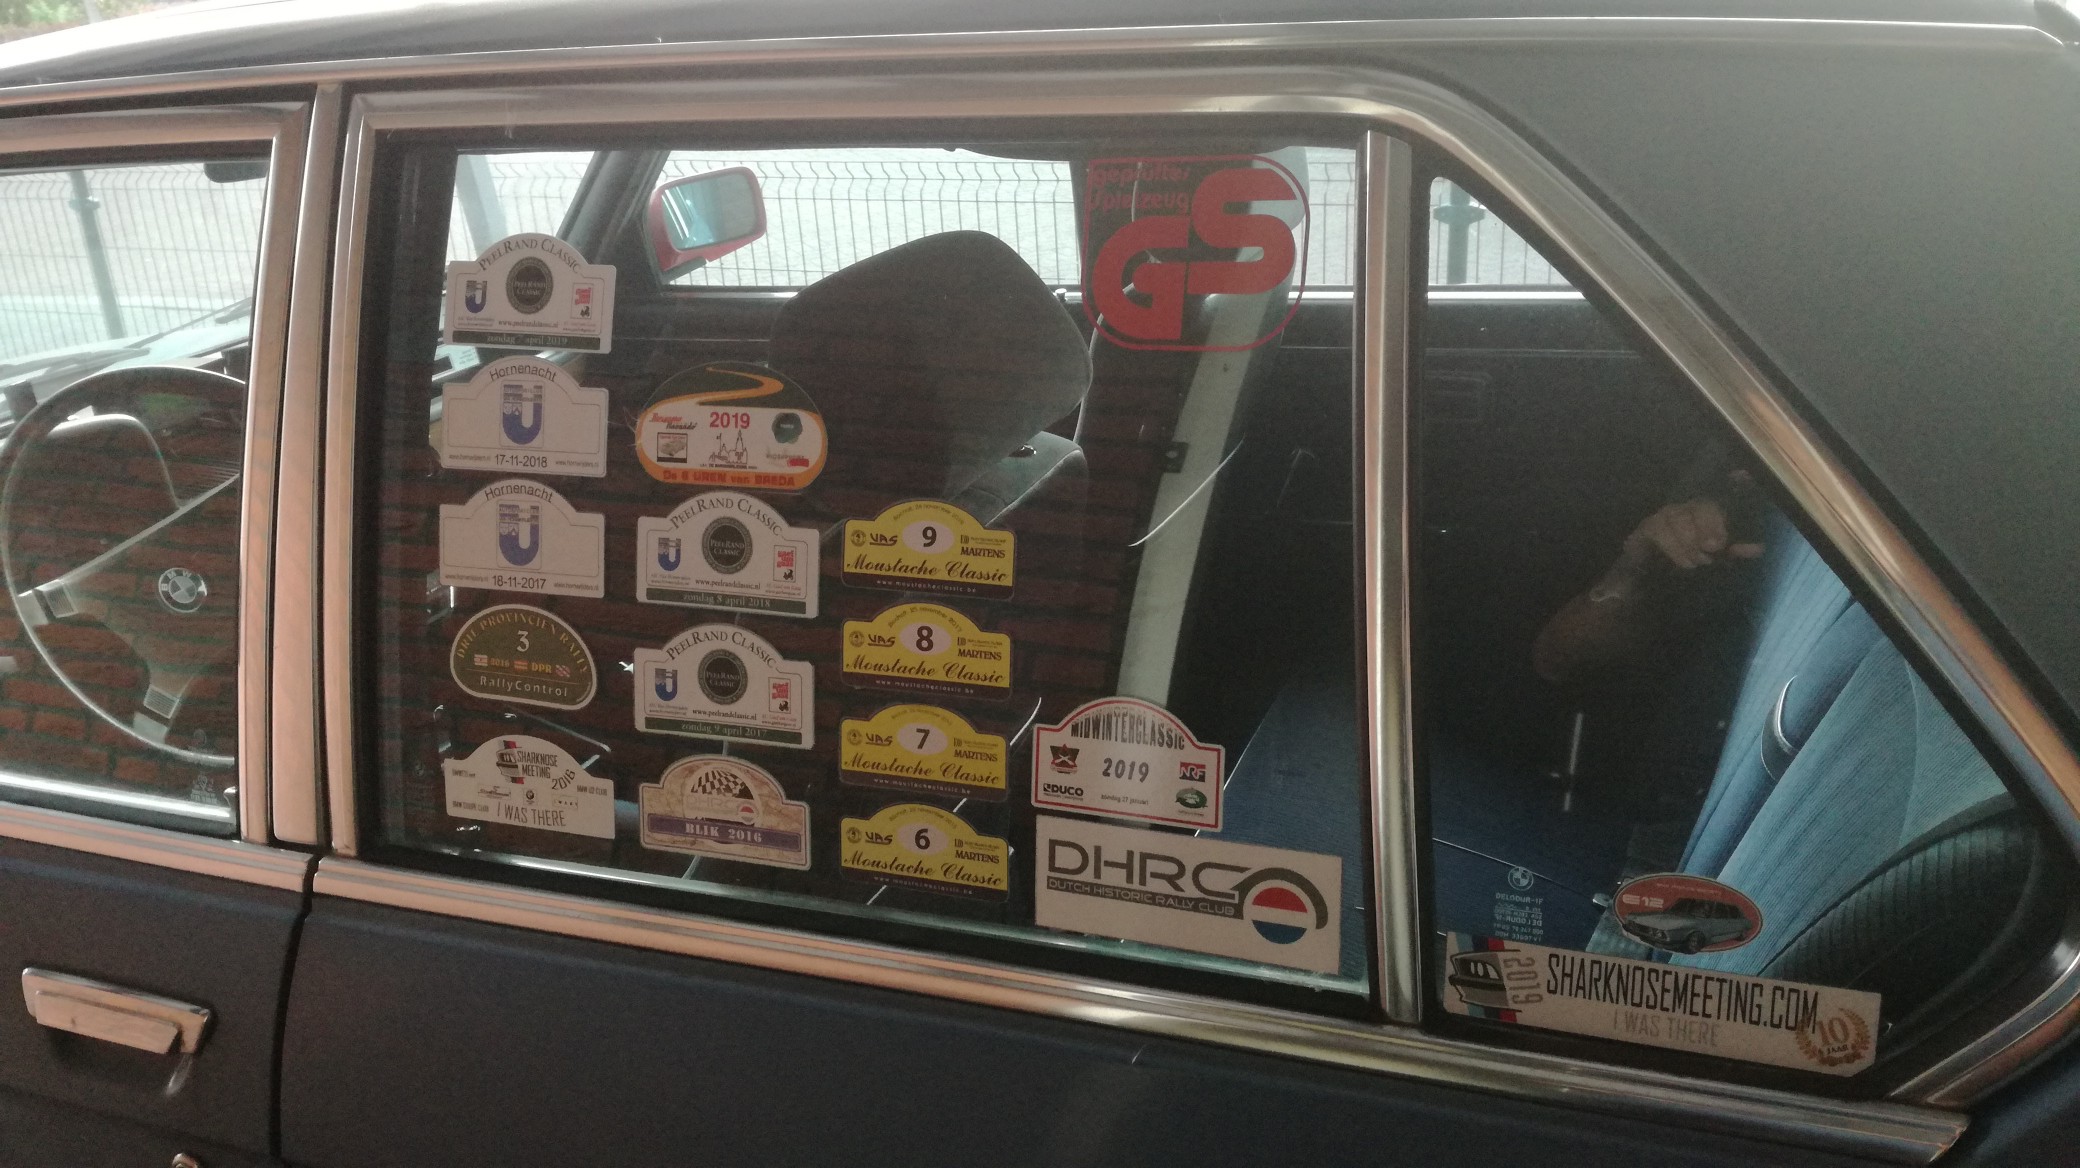
stickers on our E12 are slowly growing:
Last edited by BertjeConti on Wed Nov 23, 2022 8:58 pm, edited 1 time in total.
Megasquirted '77 E12 520-6
Aspen Silver '96 E39 523i
-
BertjeConti
- E21 Mad
- Posts: 3019
- Joined: Mon Nov 04, 2013 9:49 pm
- My E21(s): E12 520-6
- Location: nederland , Weert
Re: Pastelblau 520/6
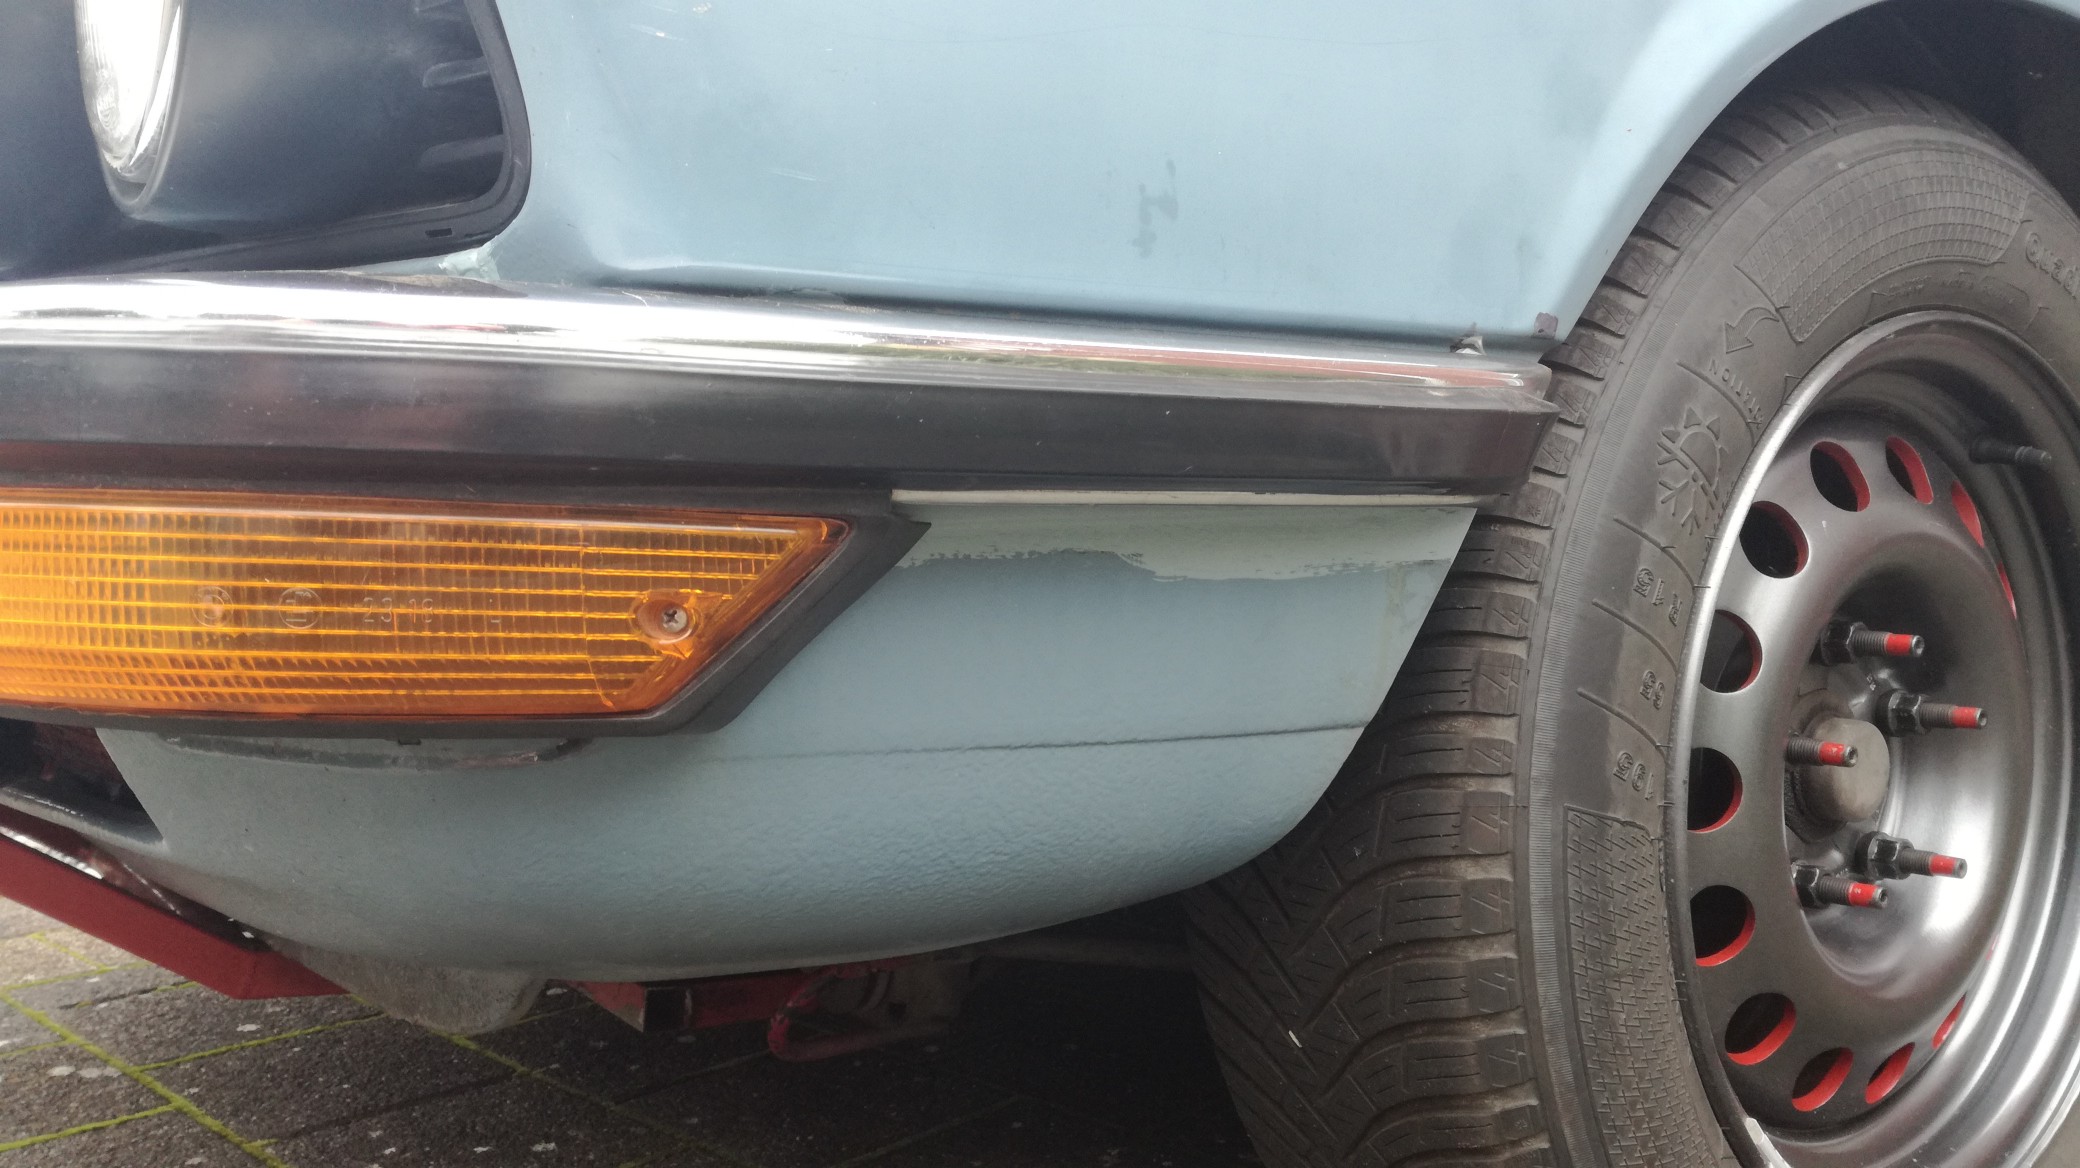
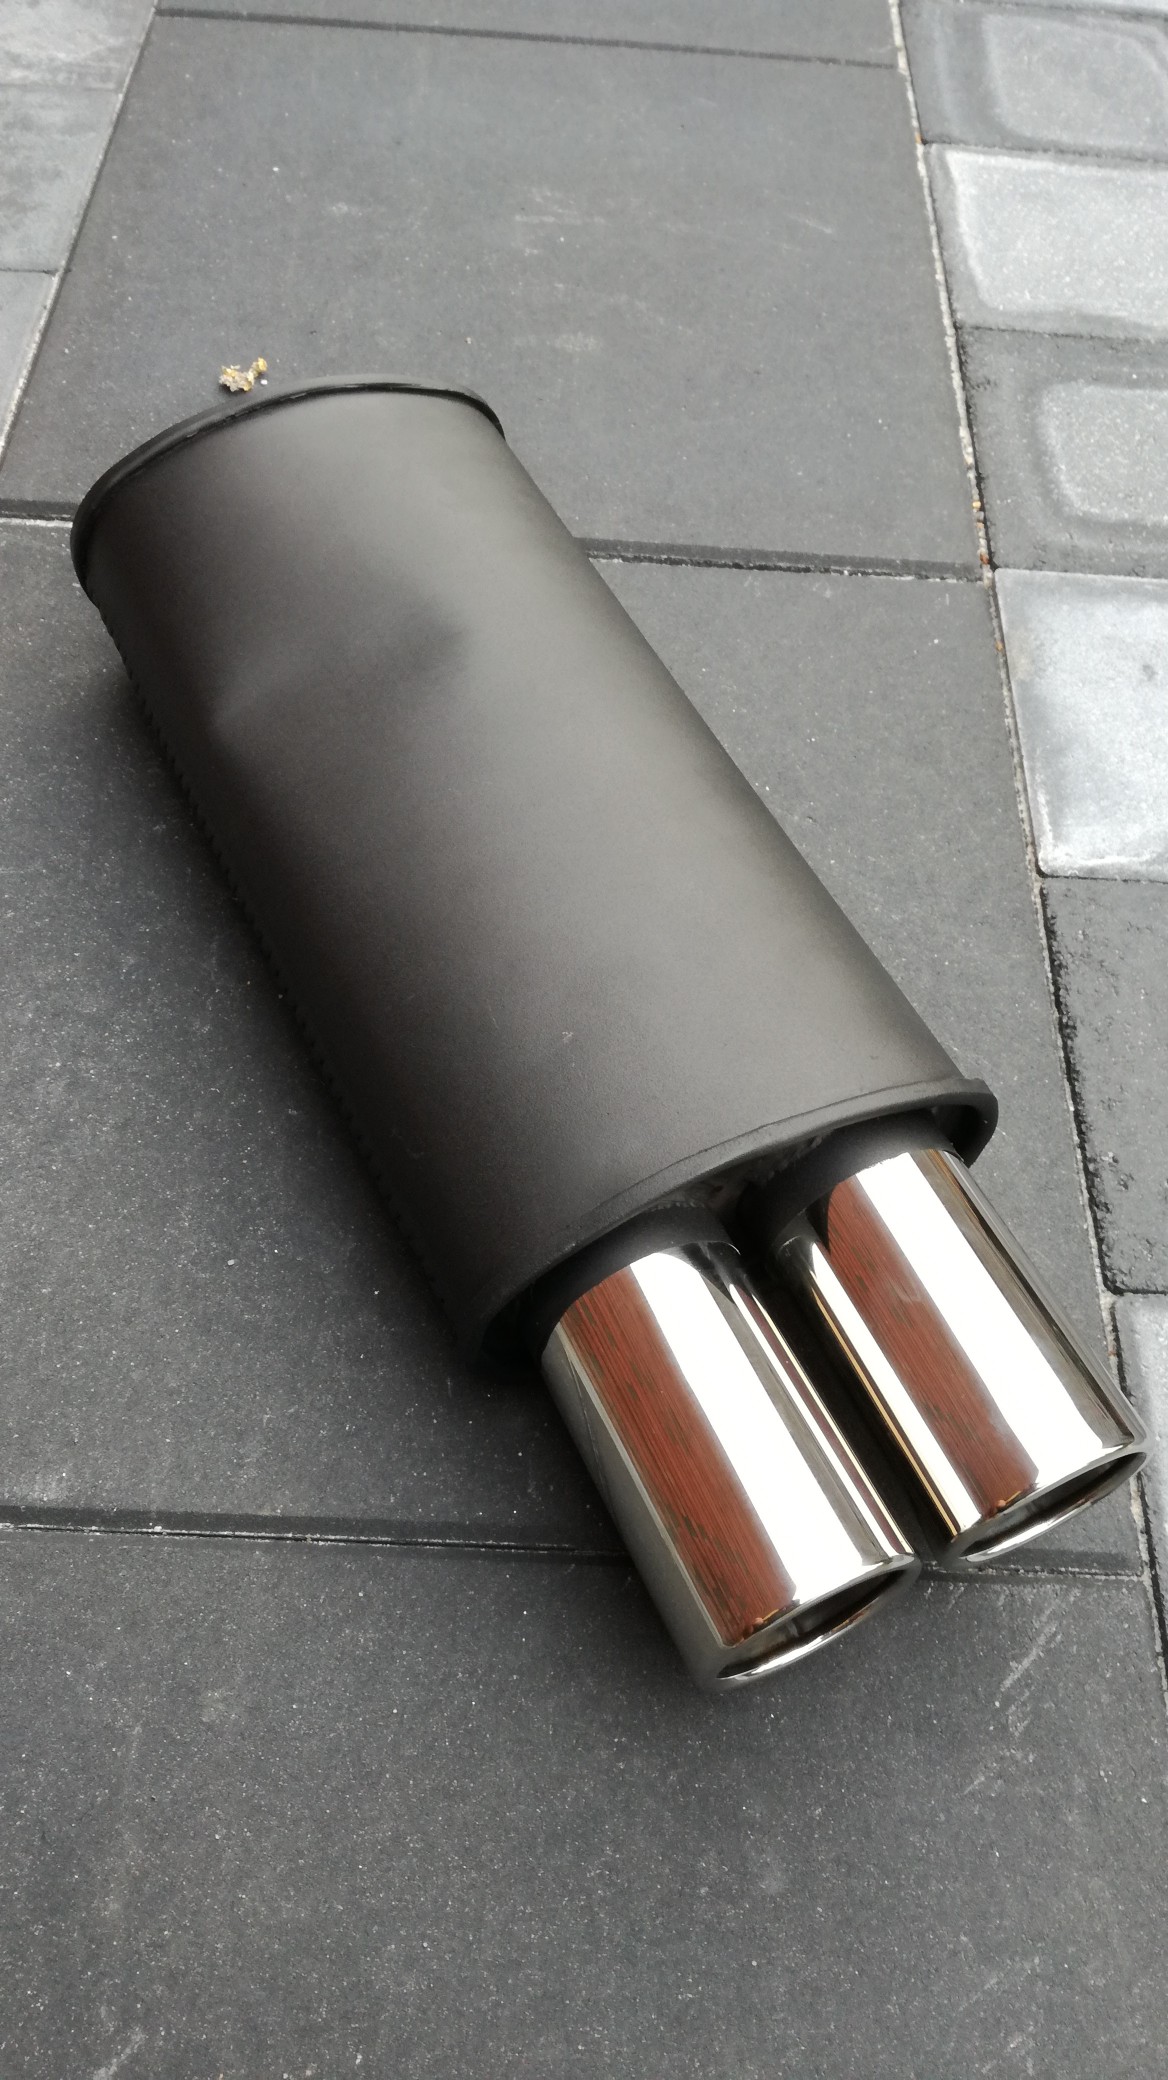
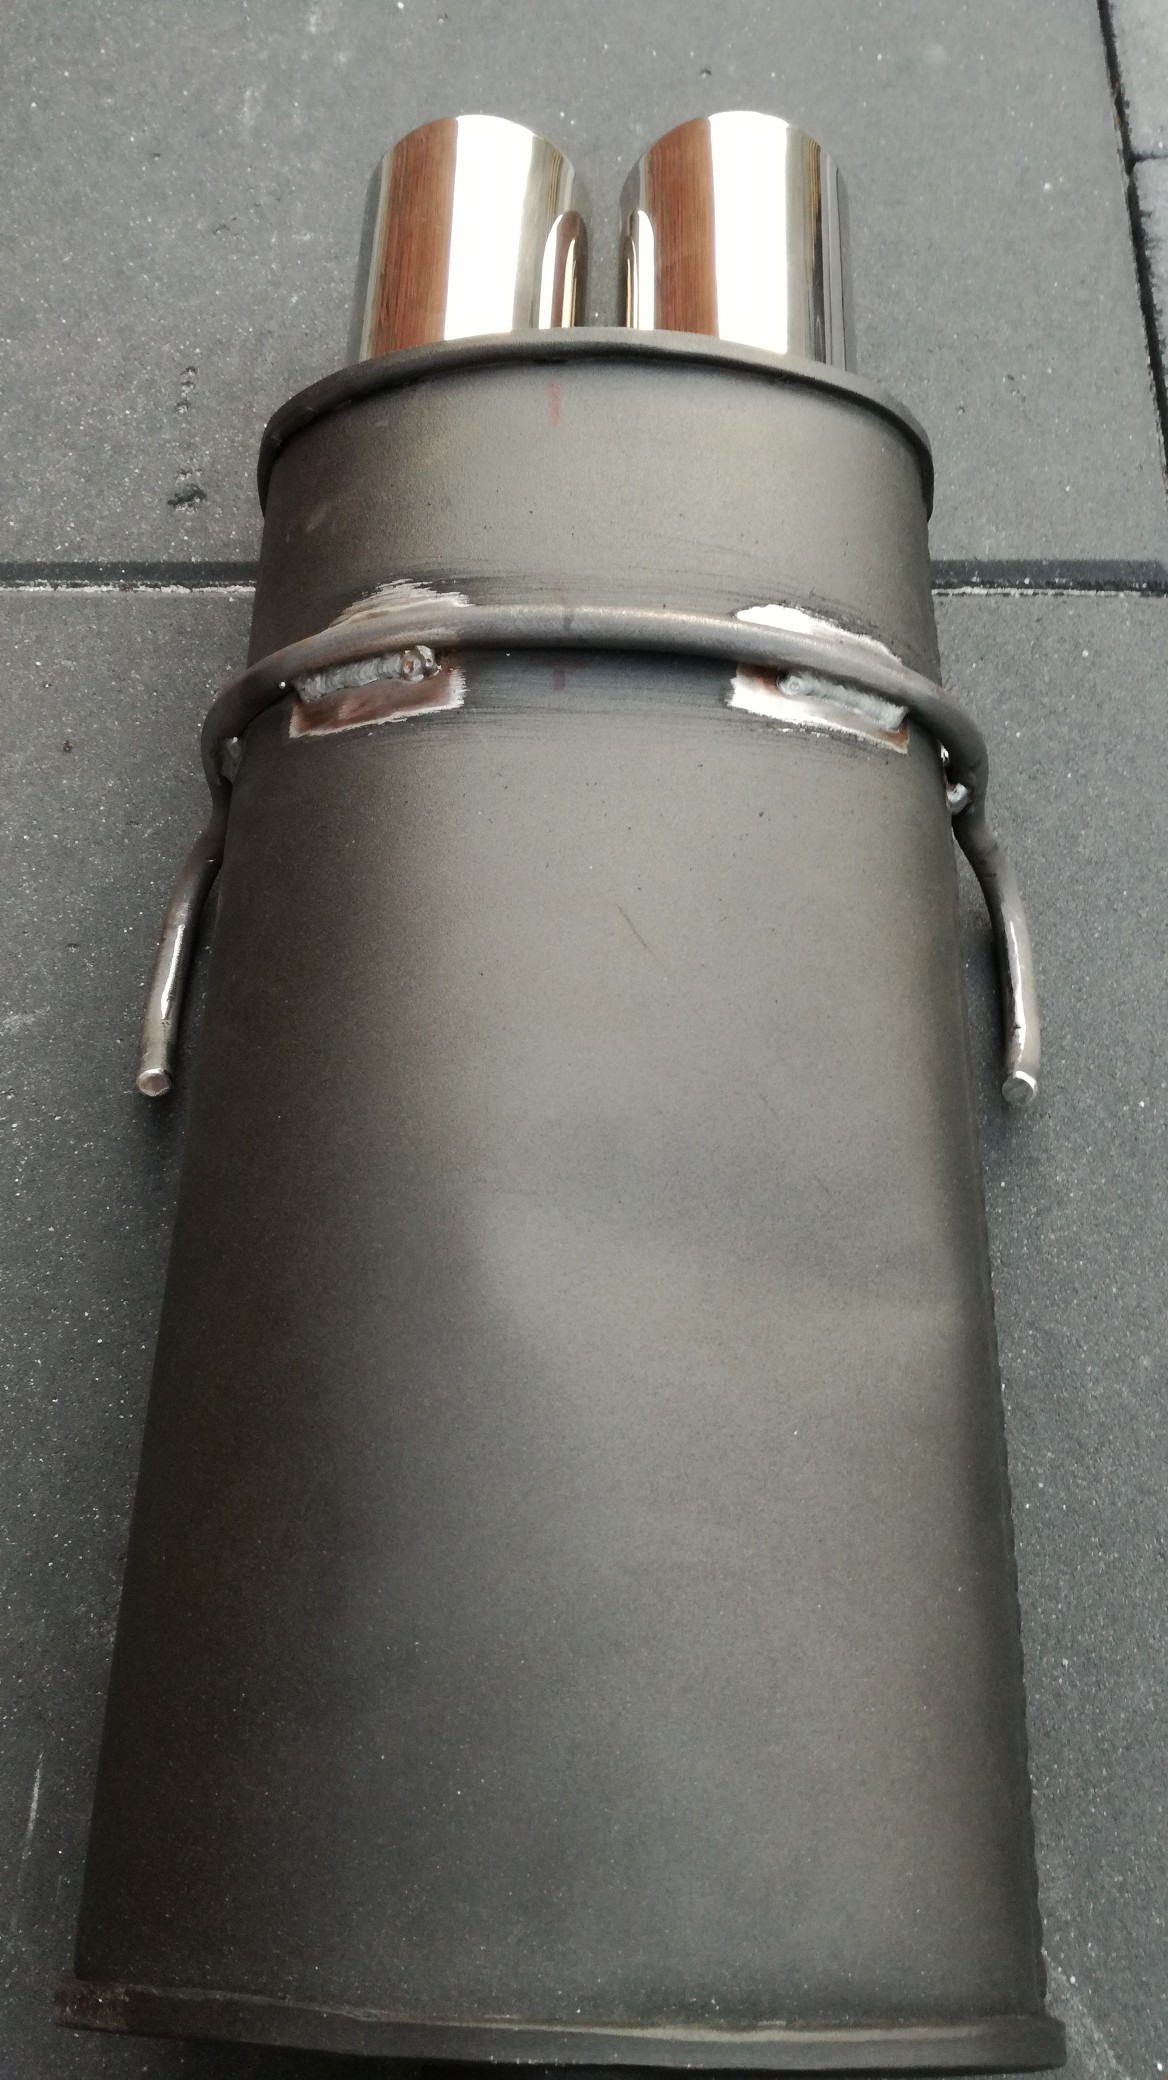
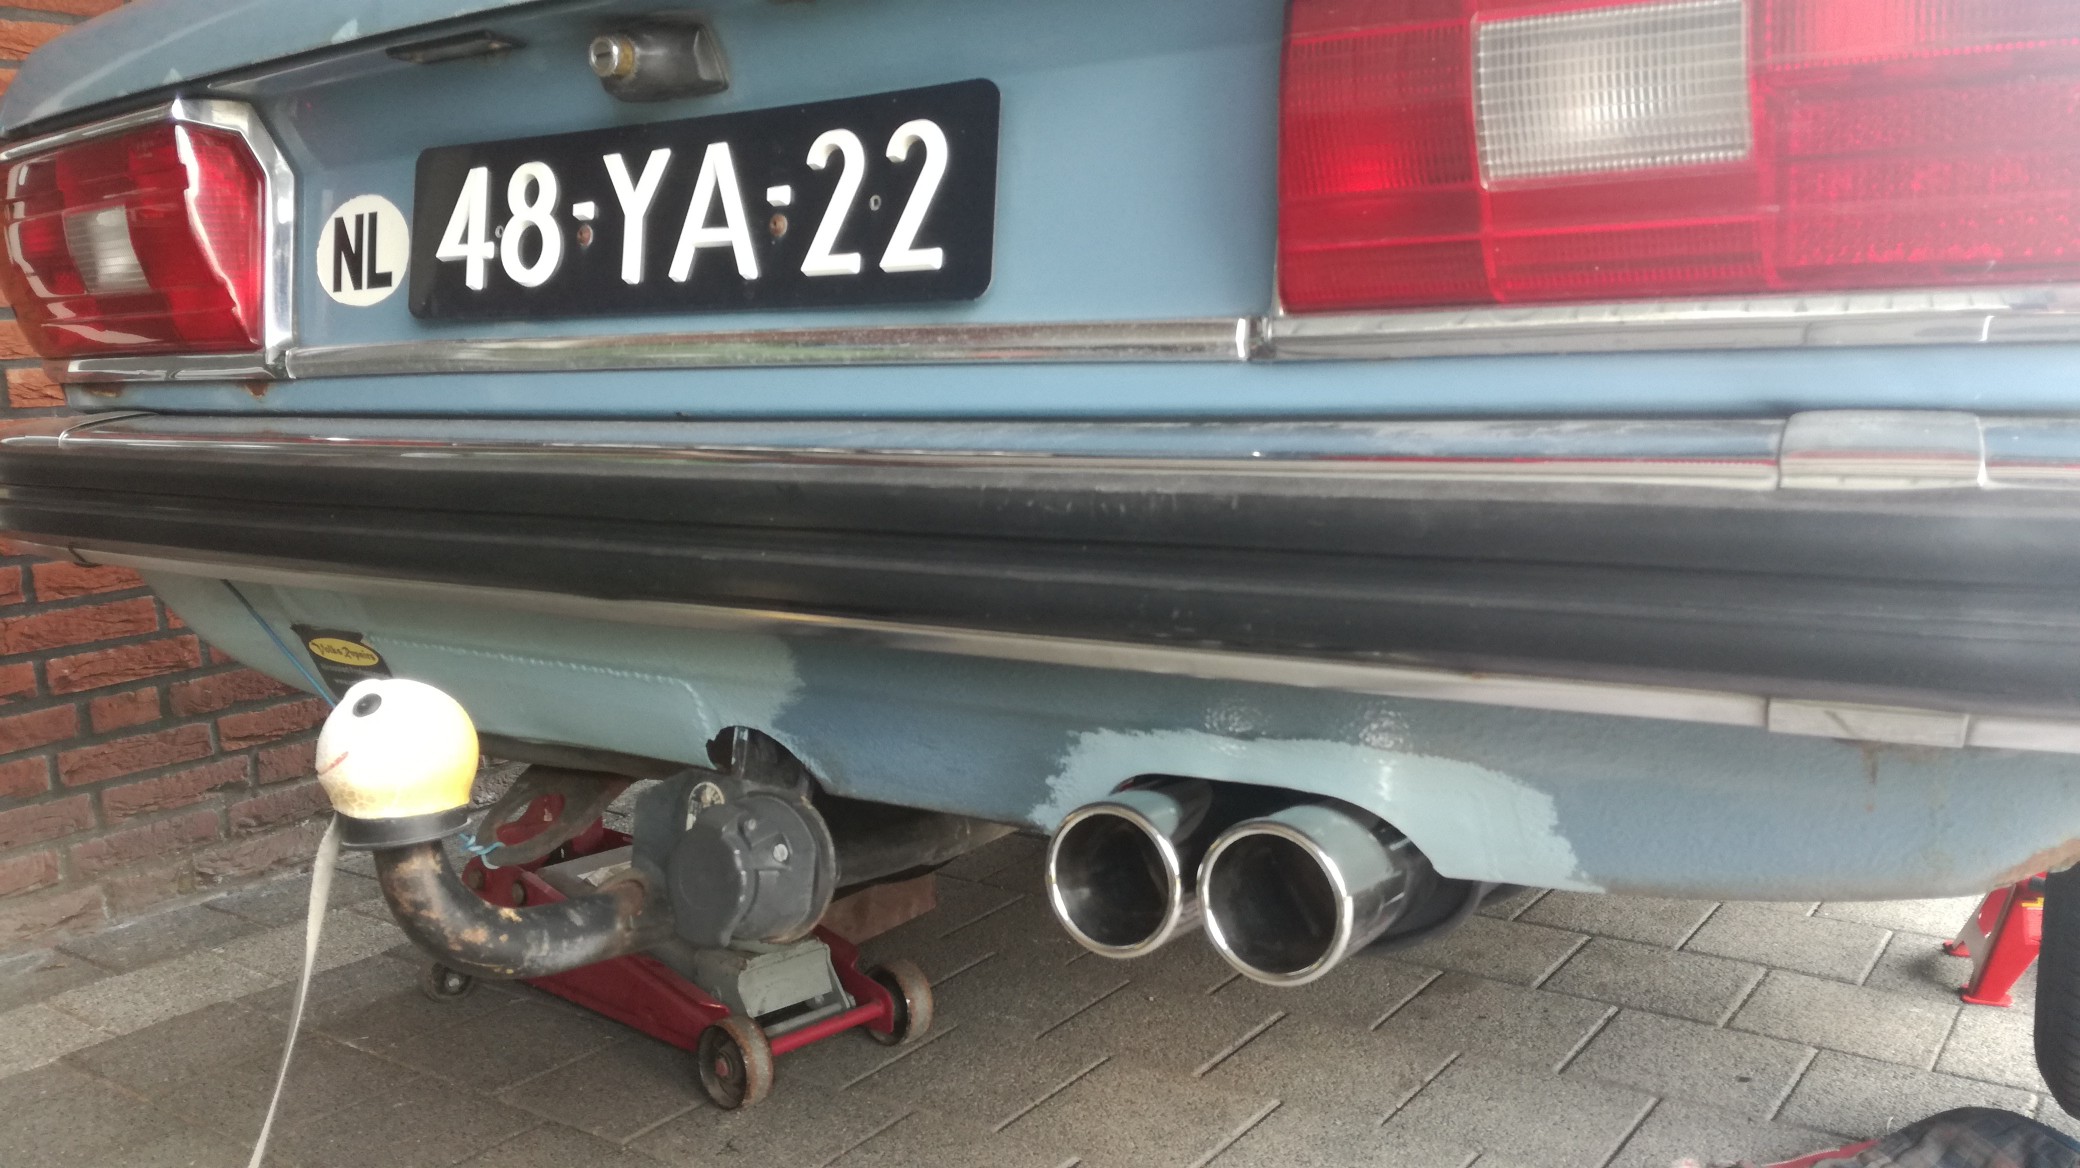
another update, a rally car needs a good sound
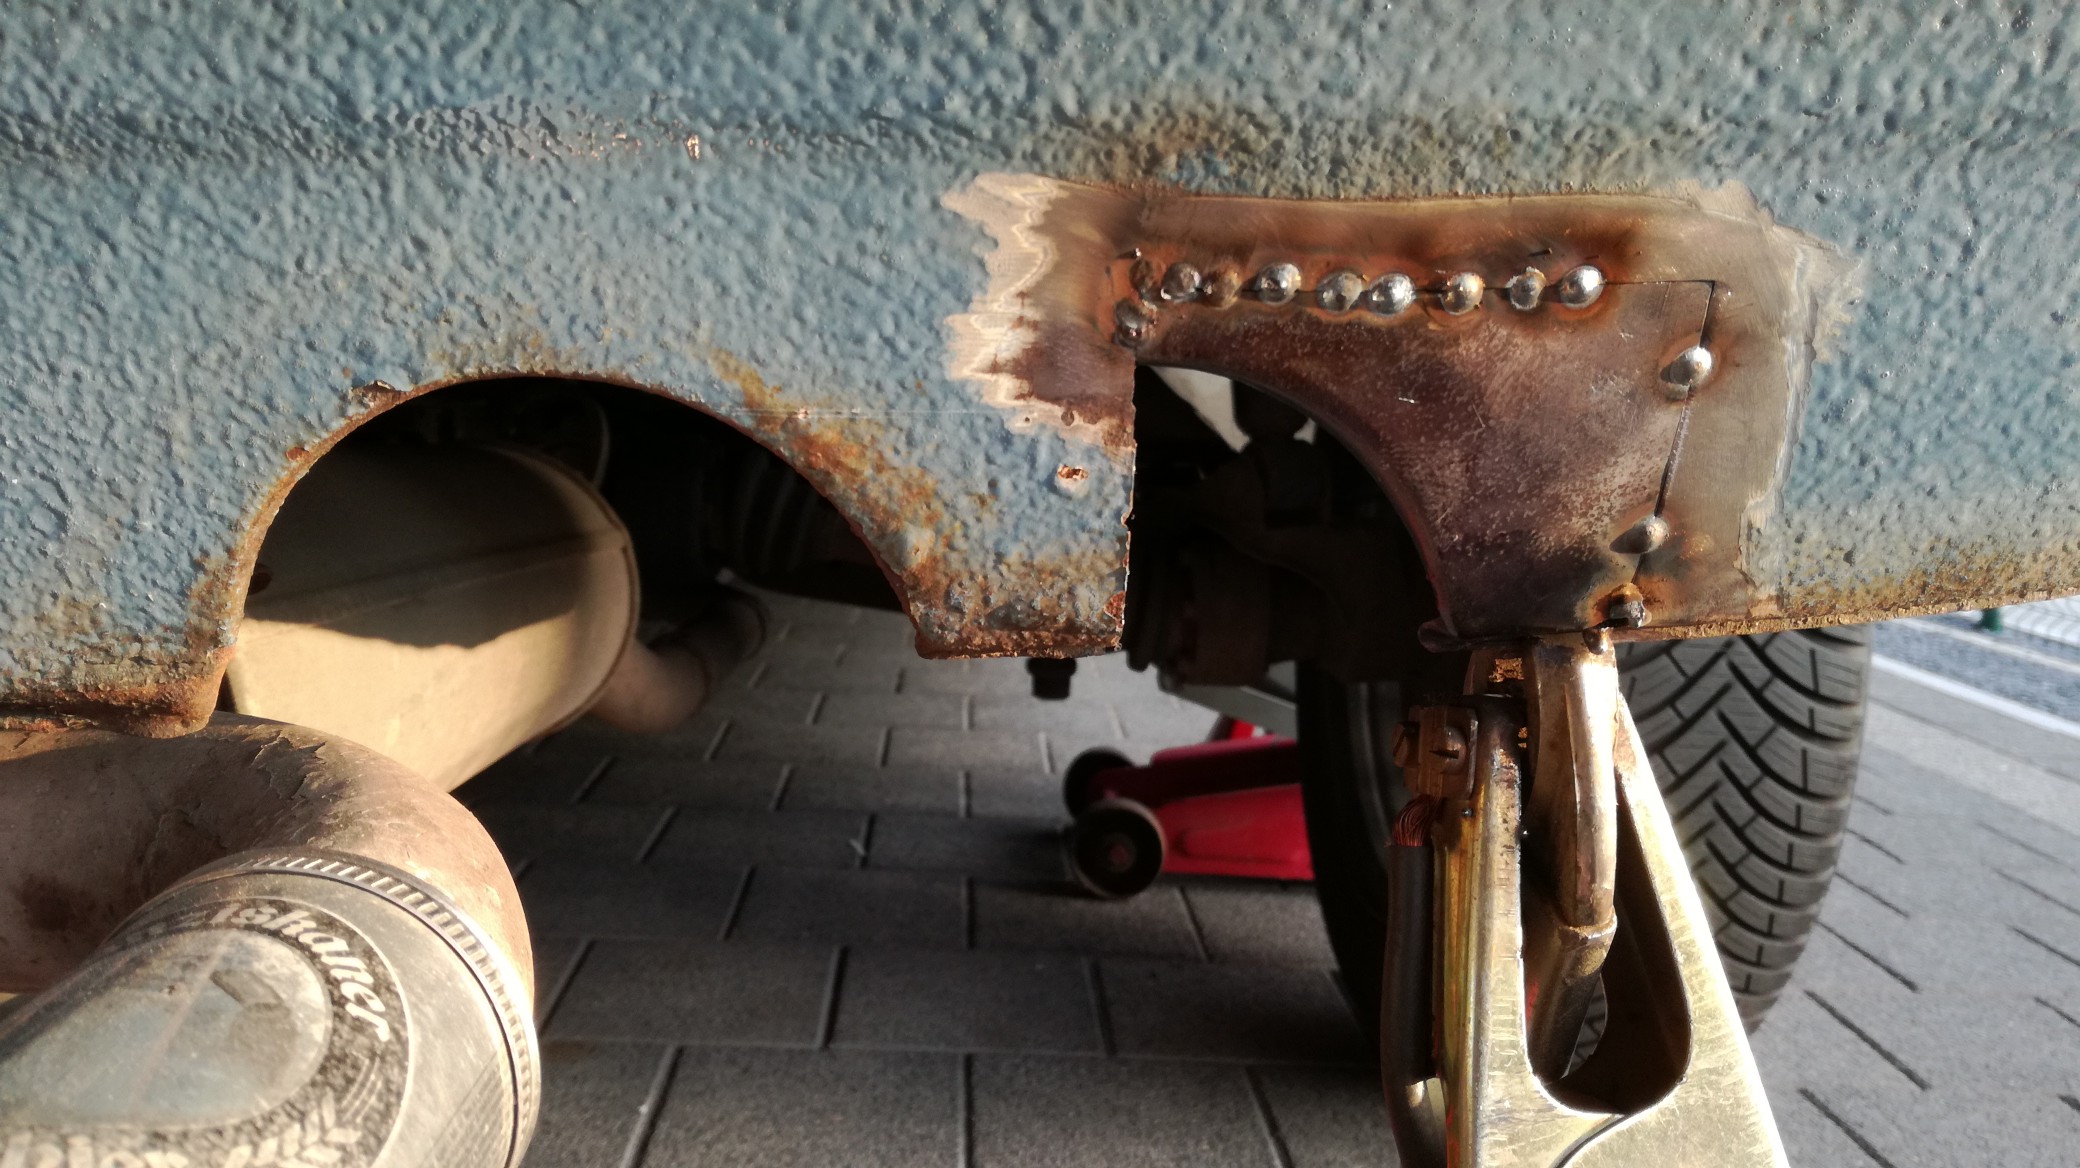
With the fueltank under the car gone, there's a lot of space to route a custom exhaust endpiece, so i took the cutting tools an welder out again and started fabricating something for this absorbsion silencer:
started with a donor piece:
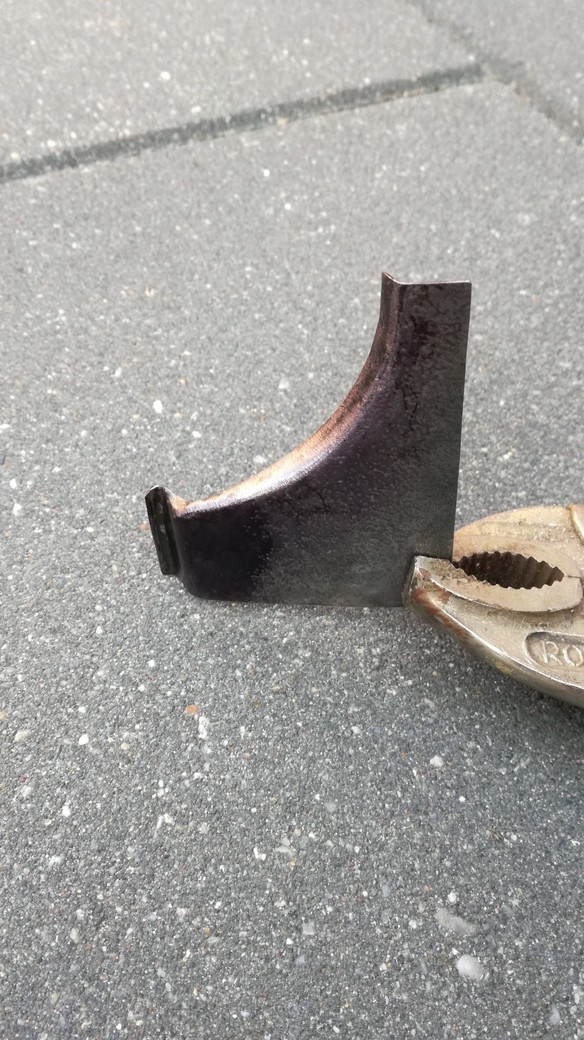
roughly hold the donor piece in place:
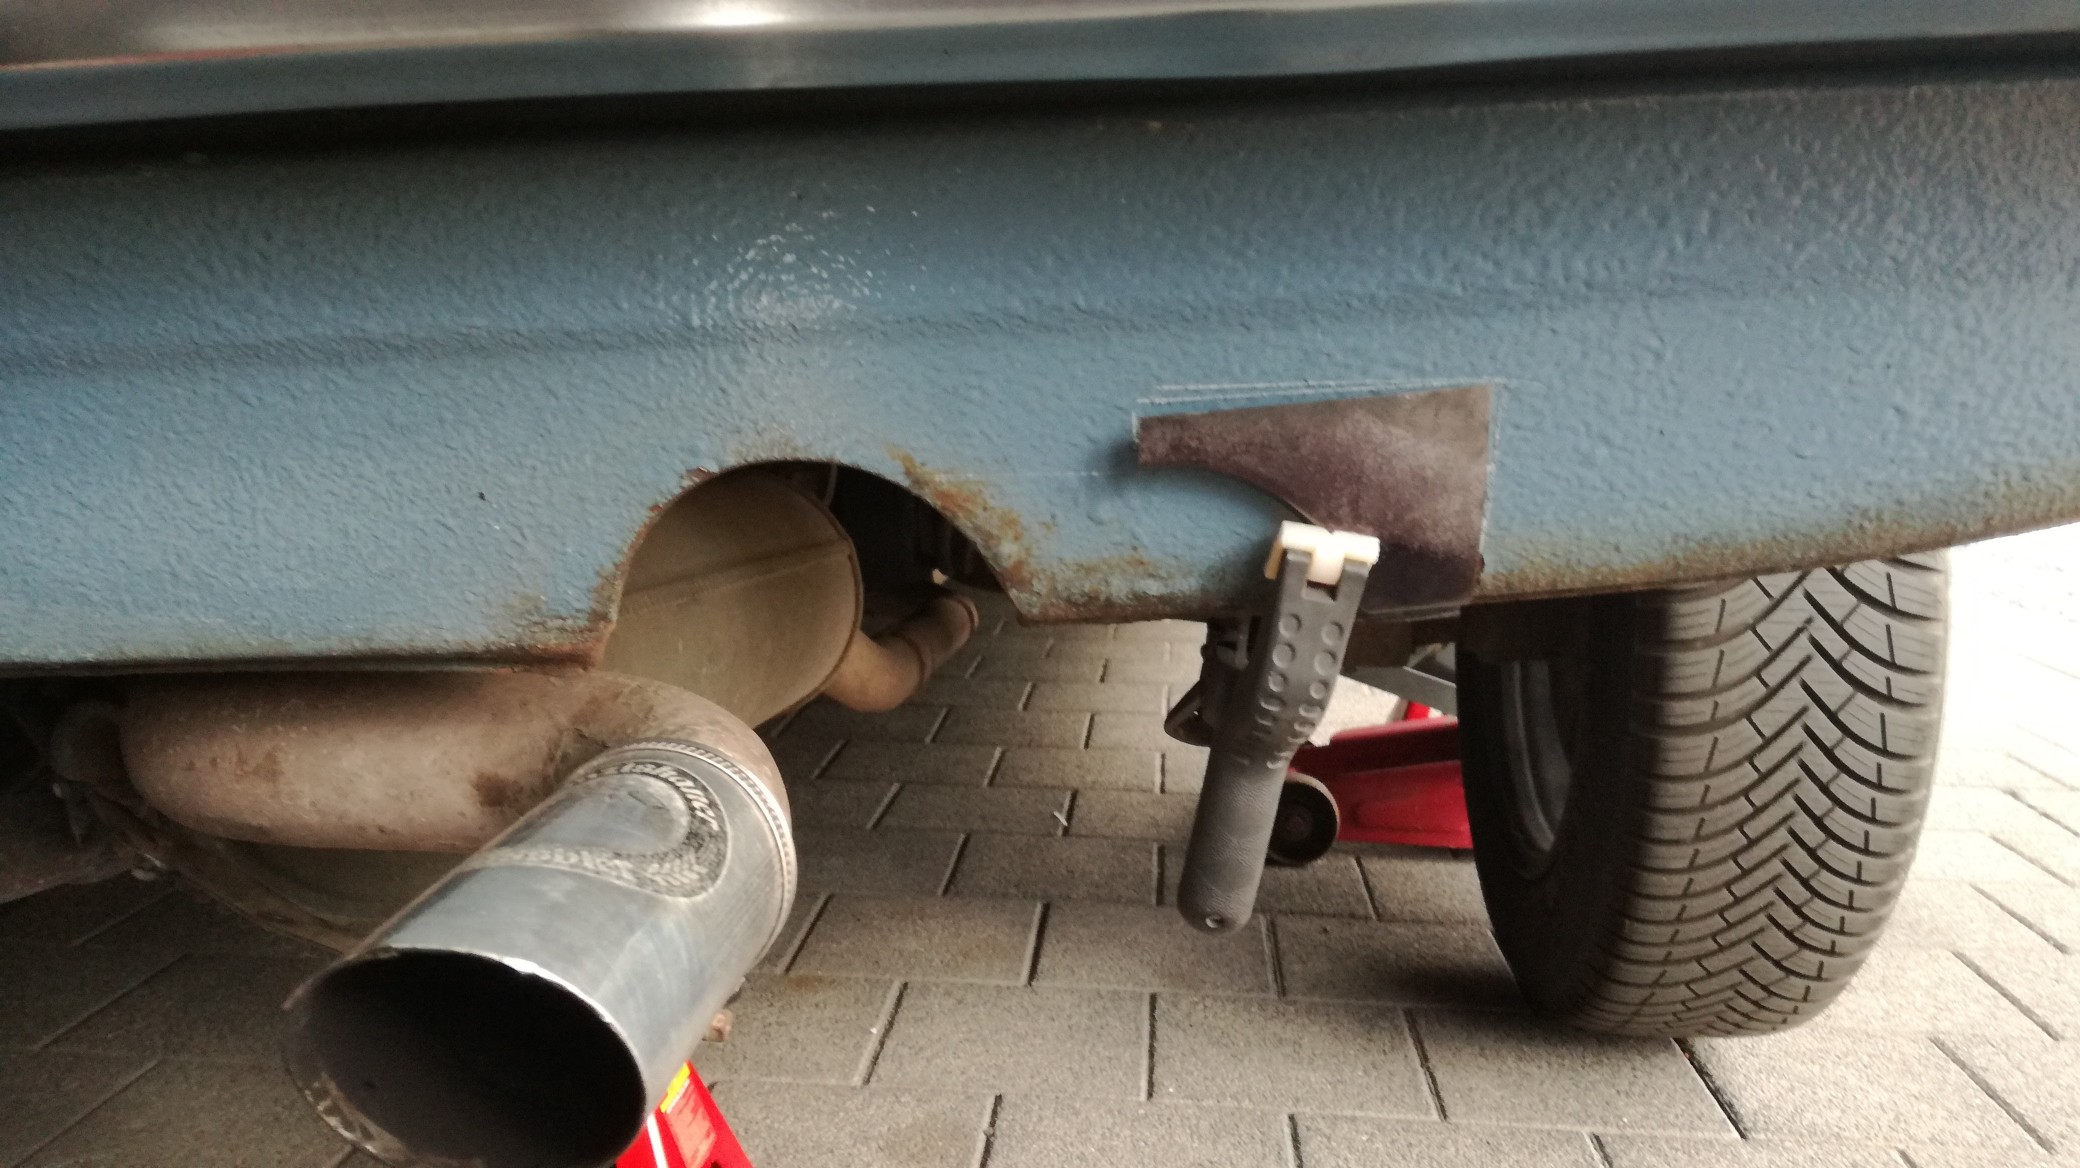
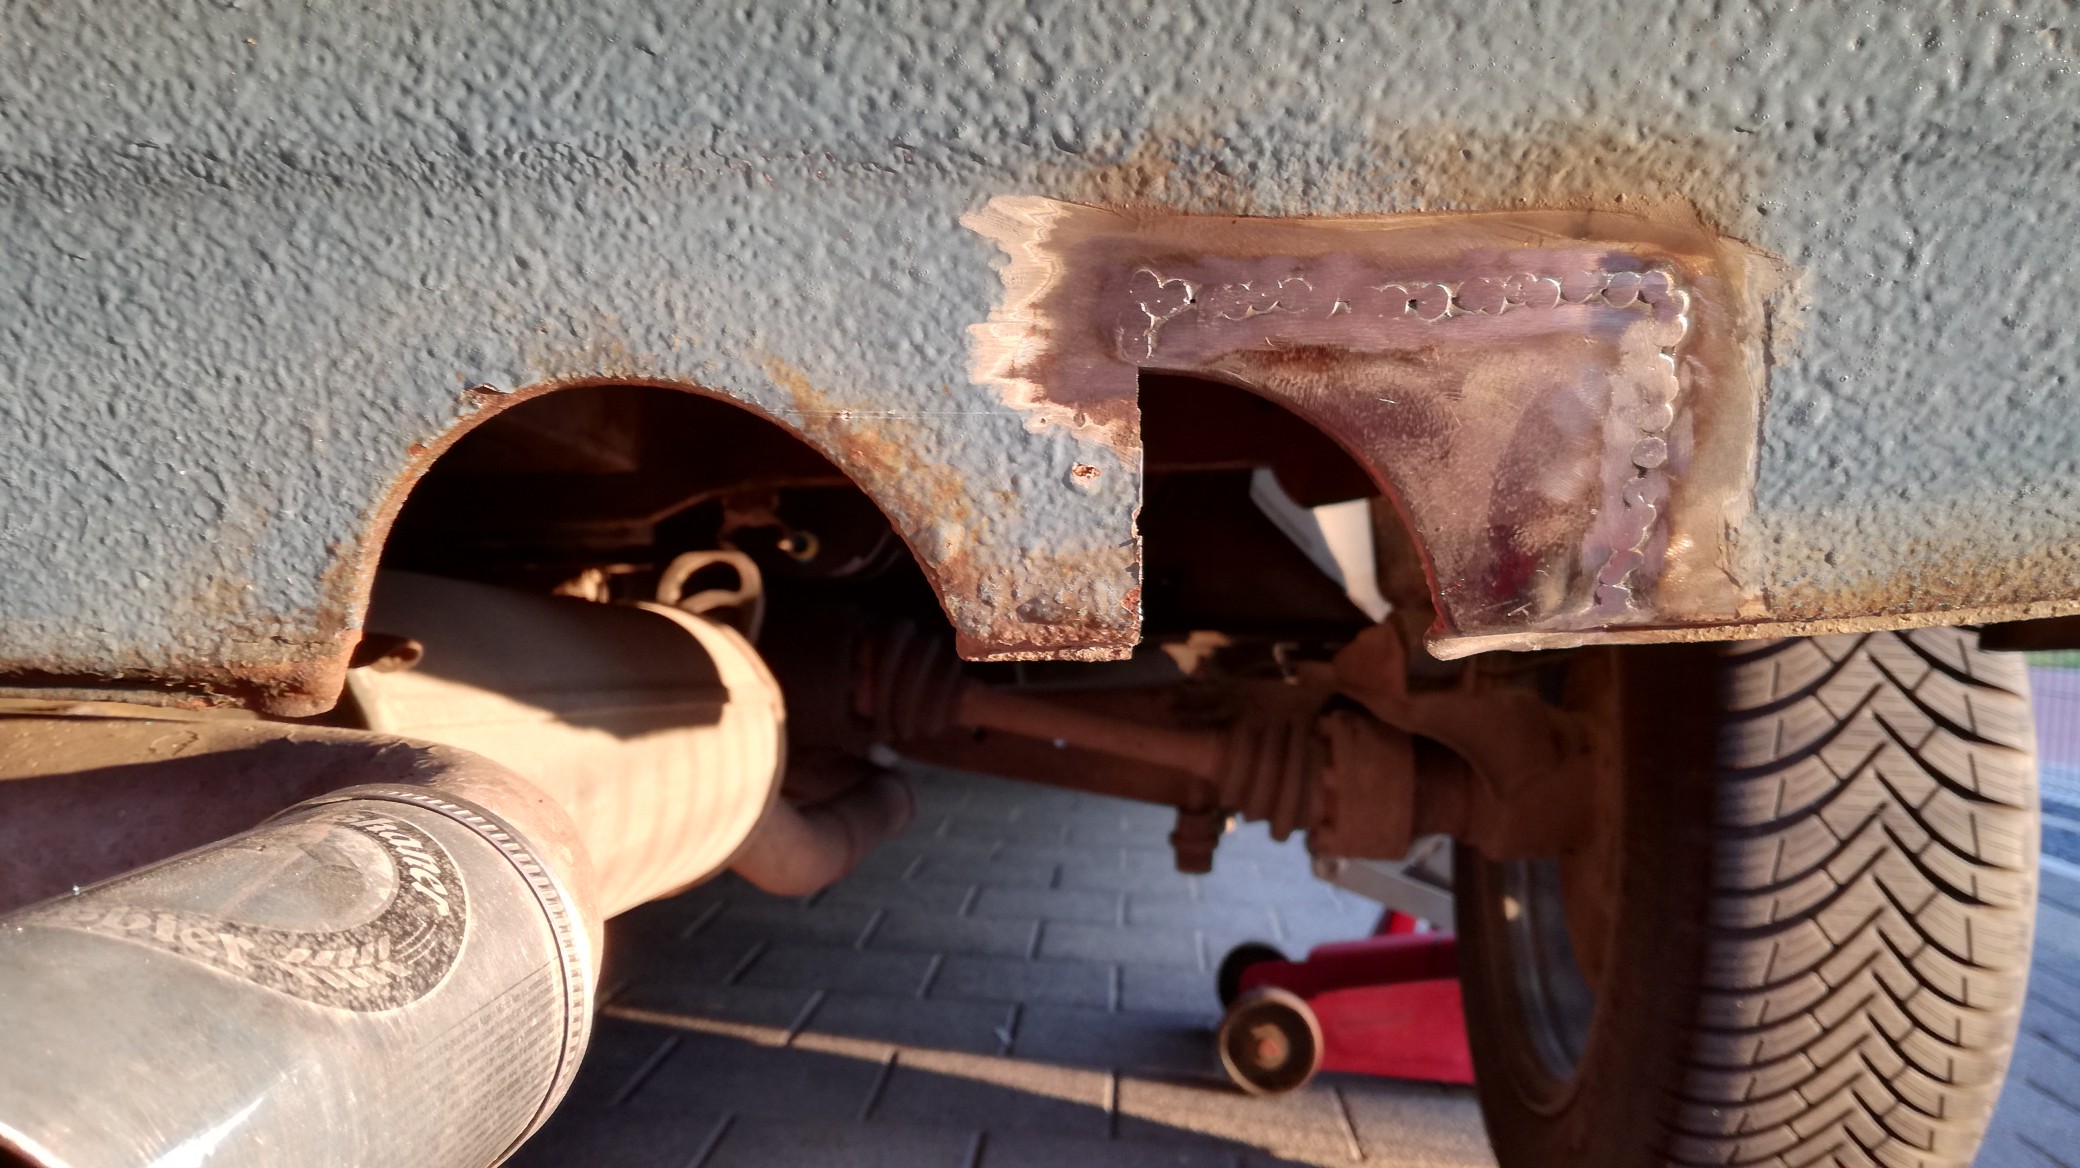
and cutting in the rear valance:
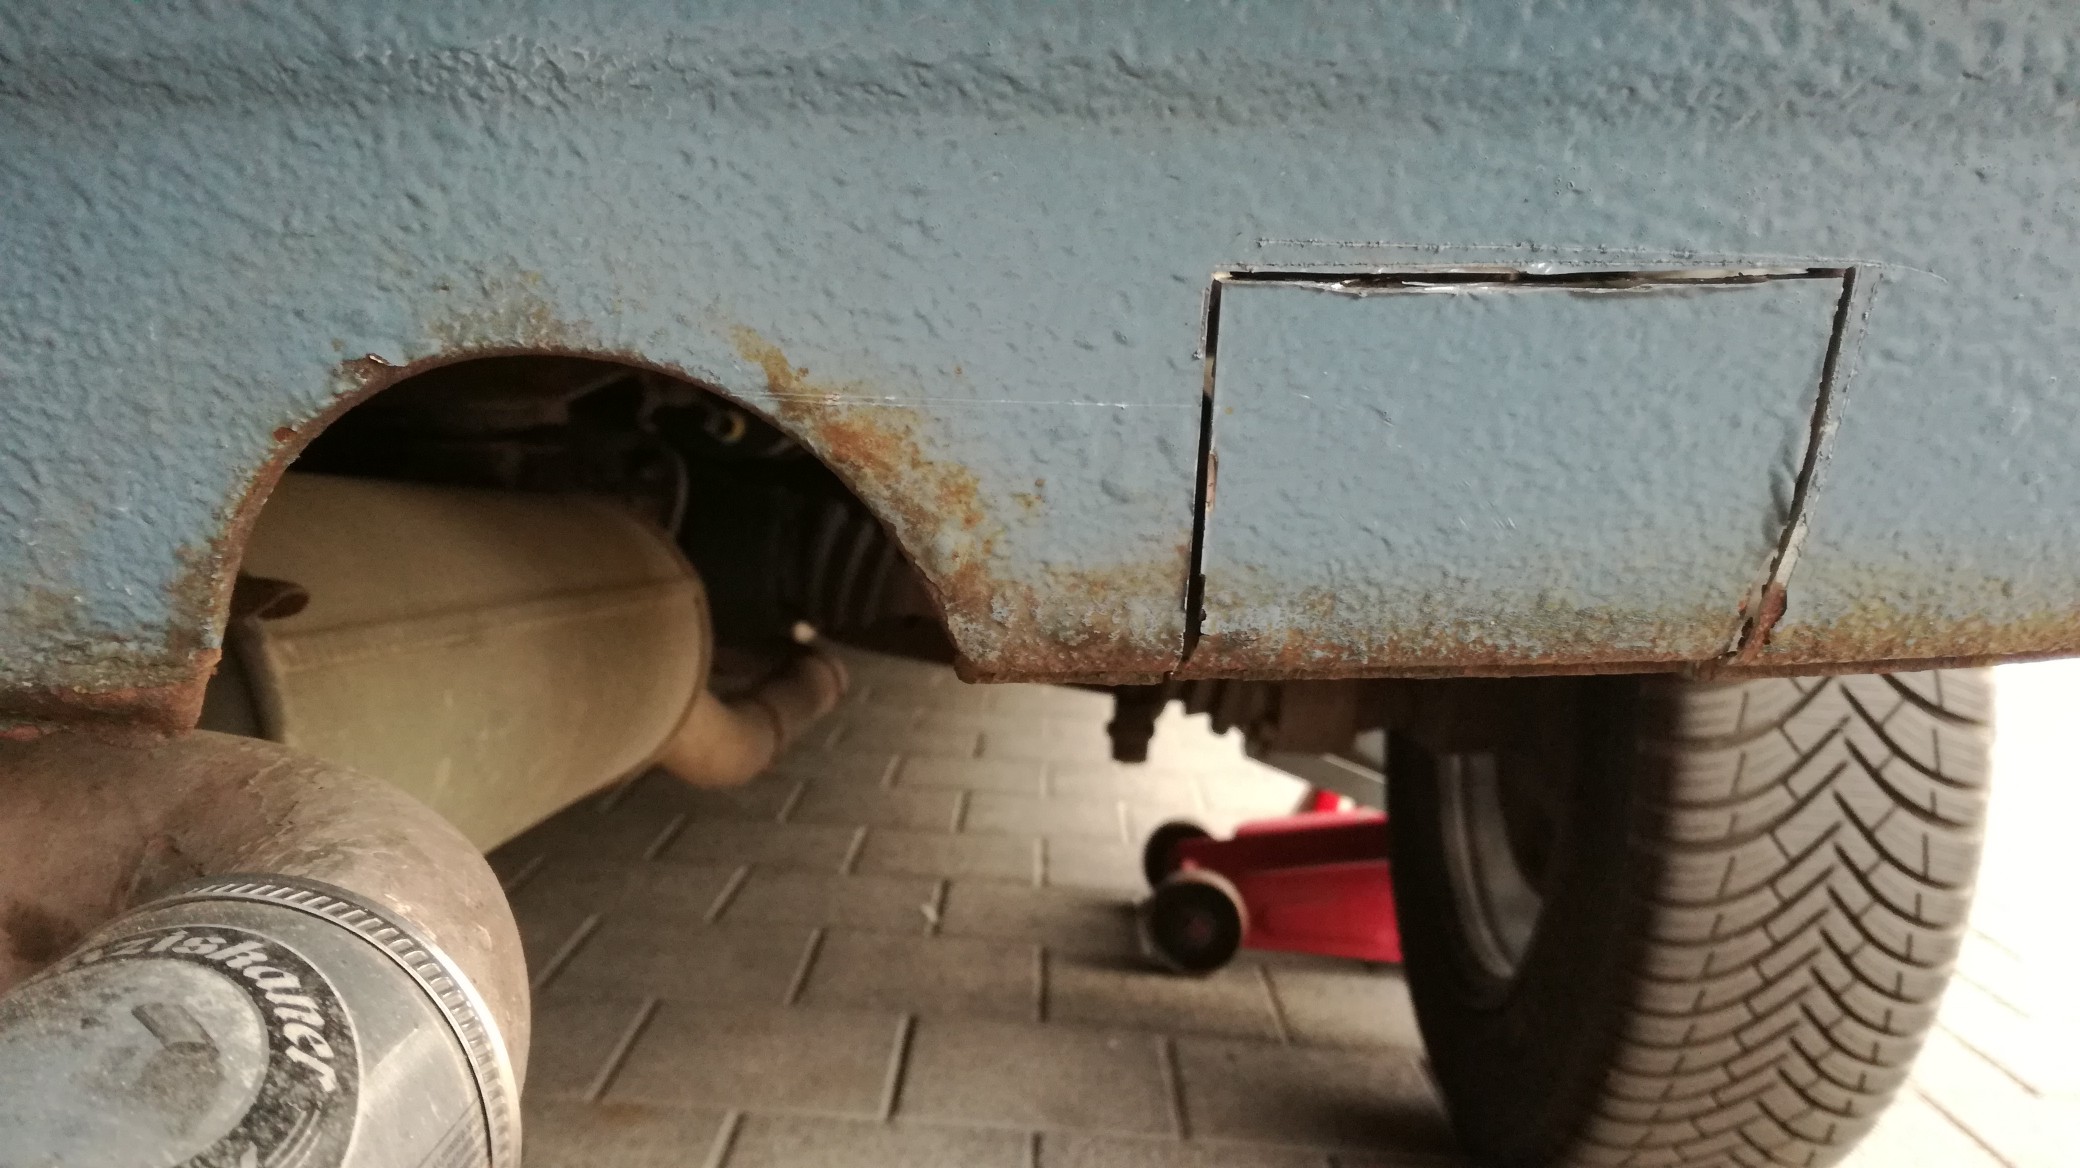
tack welding the donor piece in:
almost ready:
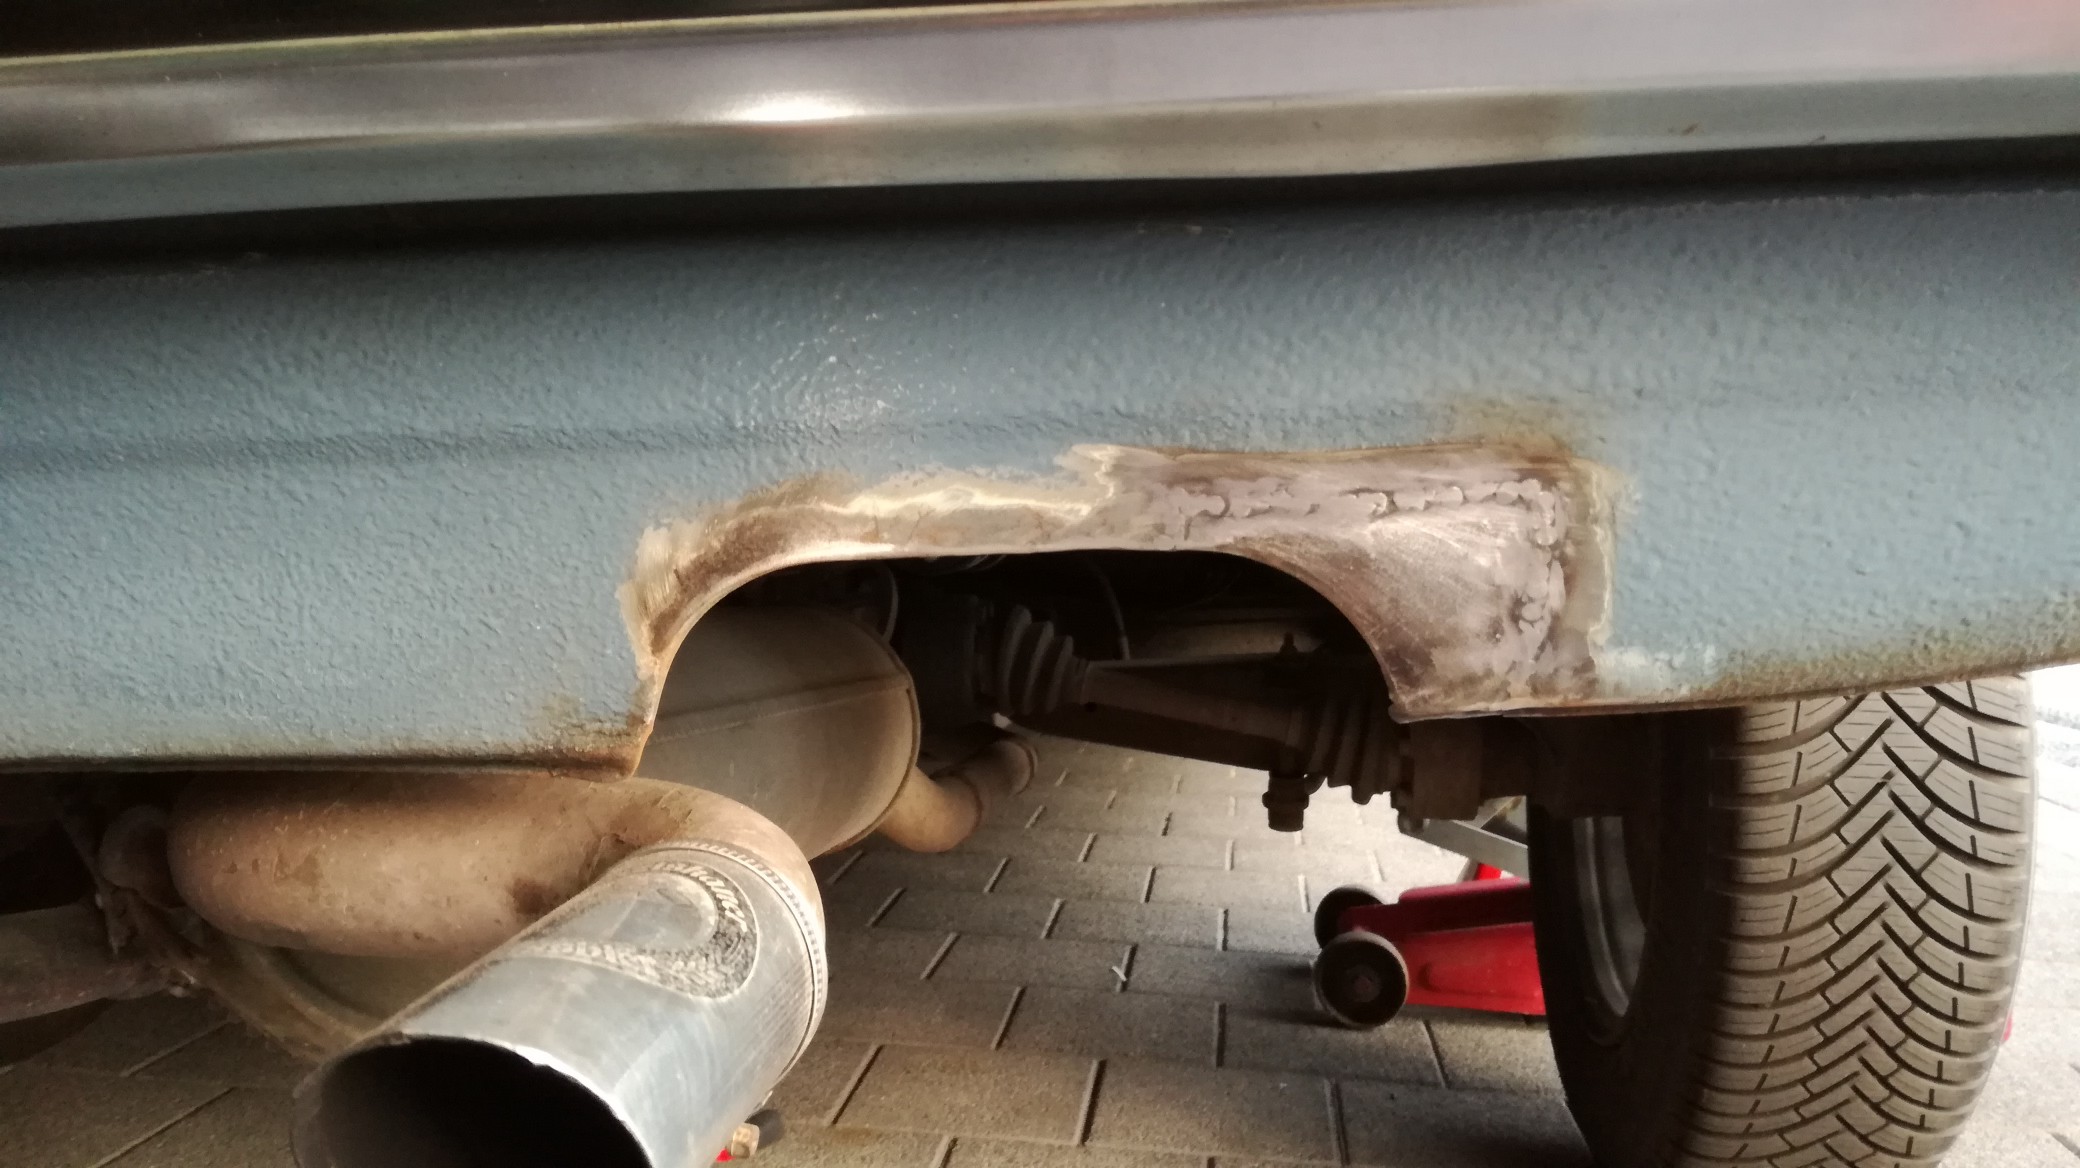
and finishing with some matching paint:
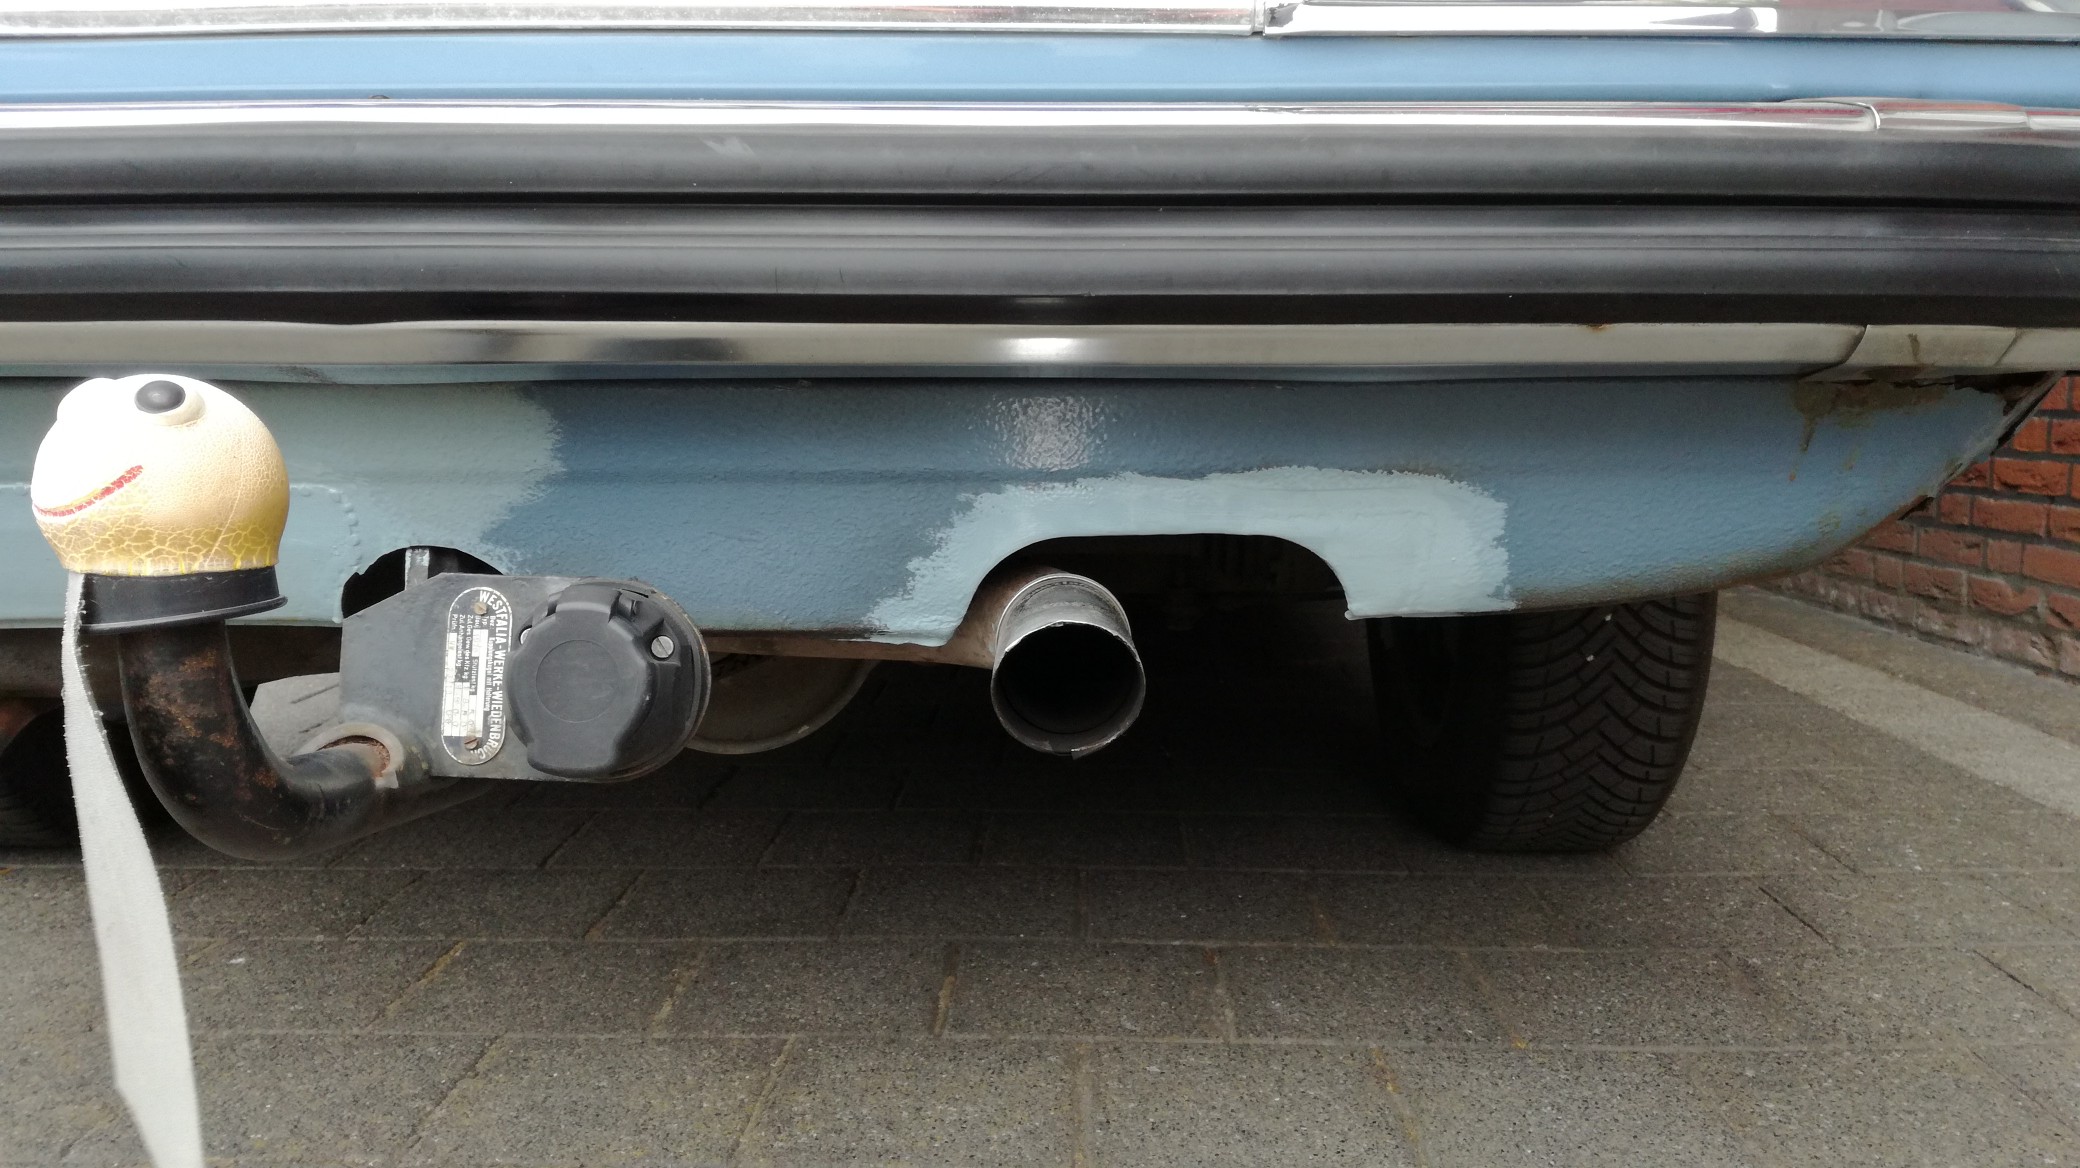
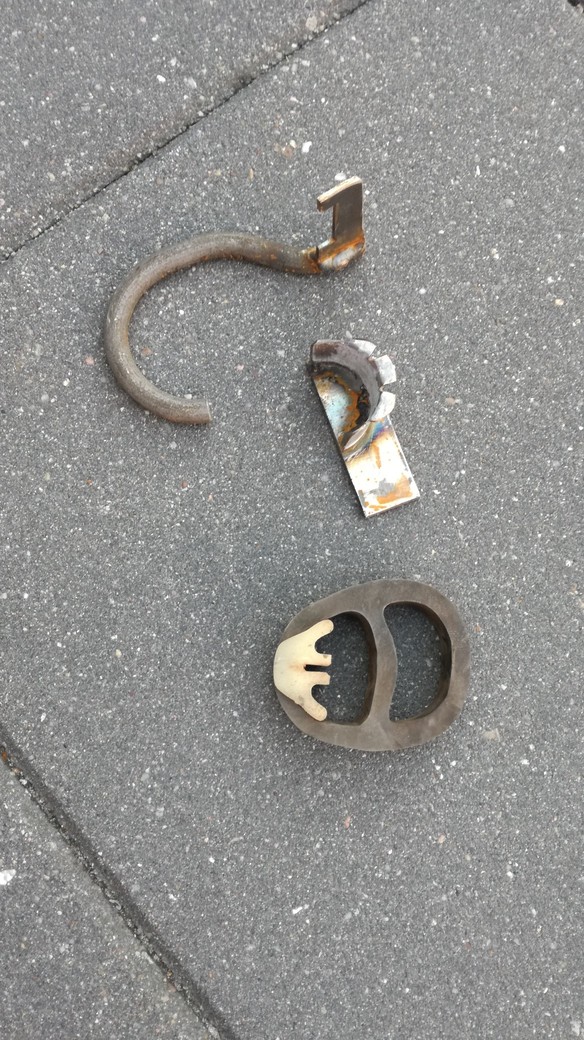
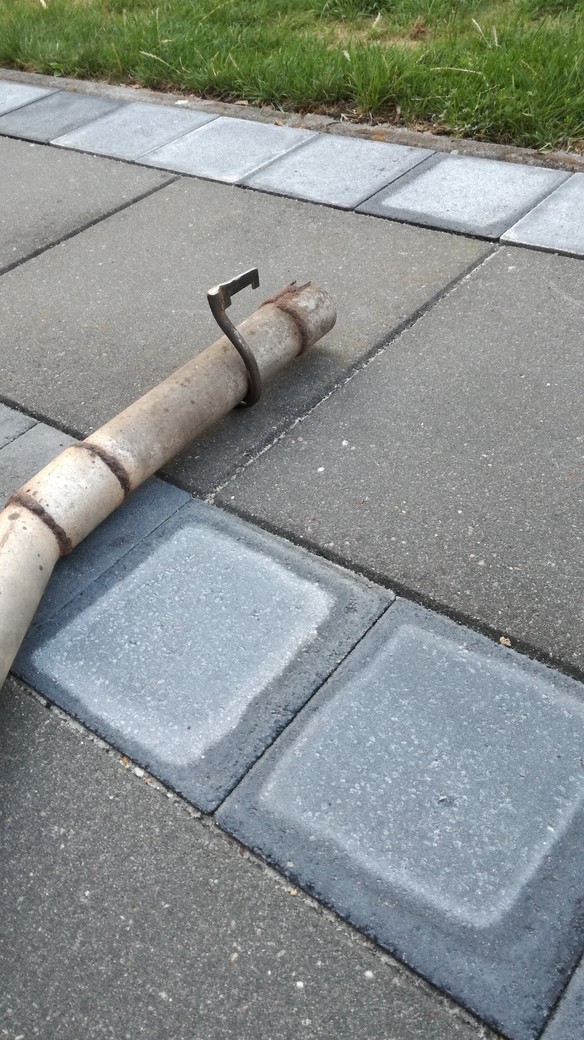
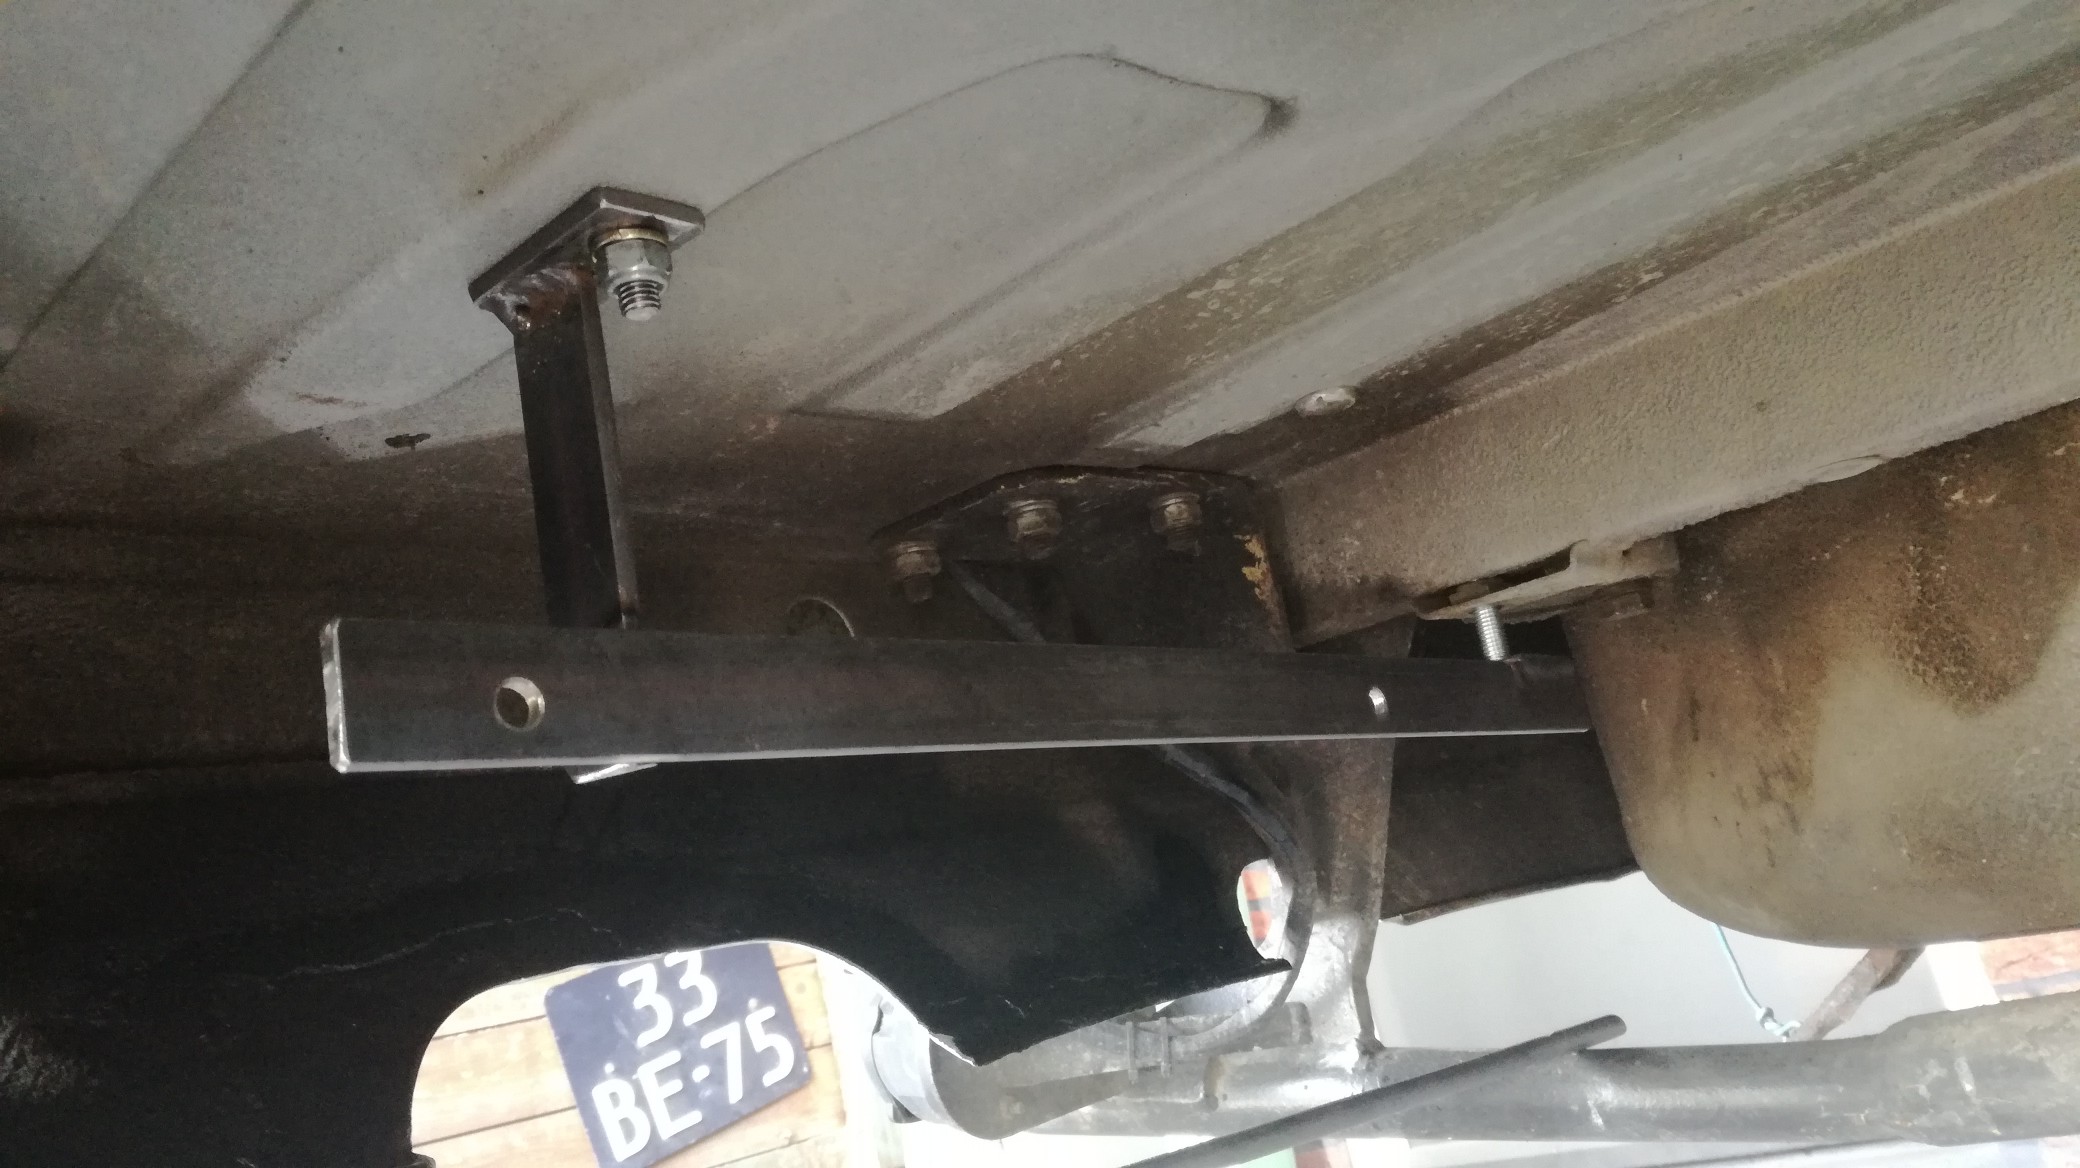
now it's time to fabricate a new end silencer to the existing exhaust and fabricating hangers for it:
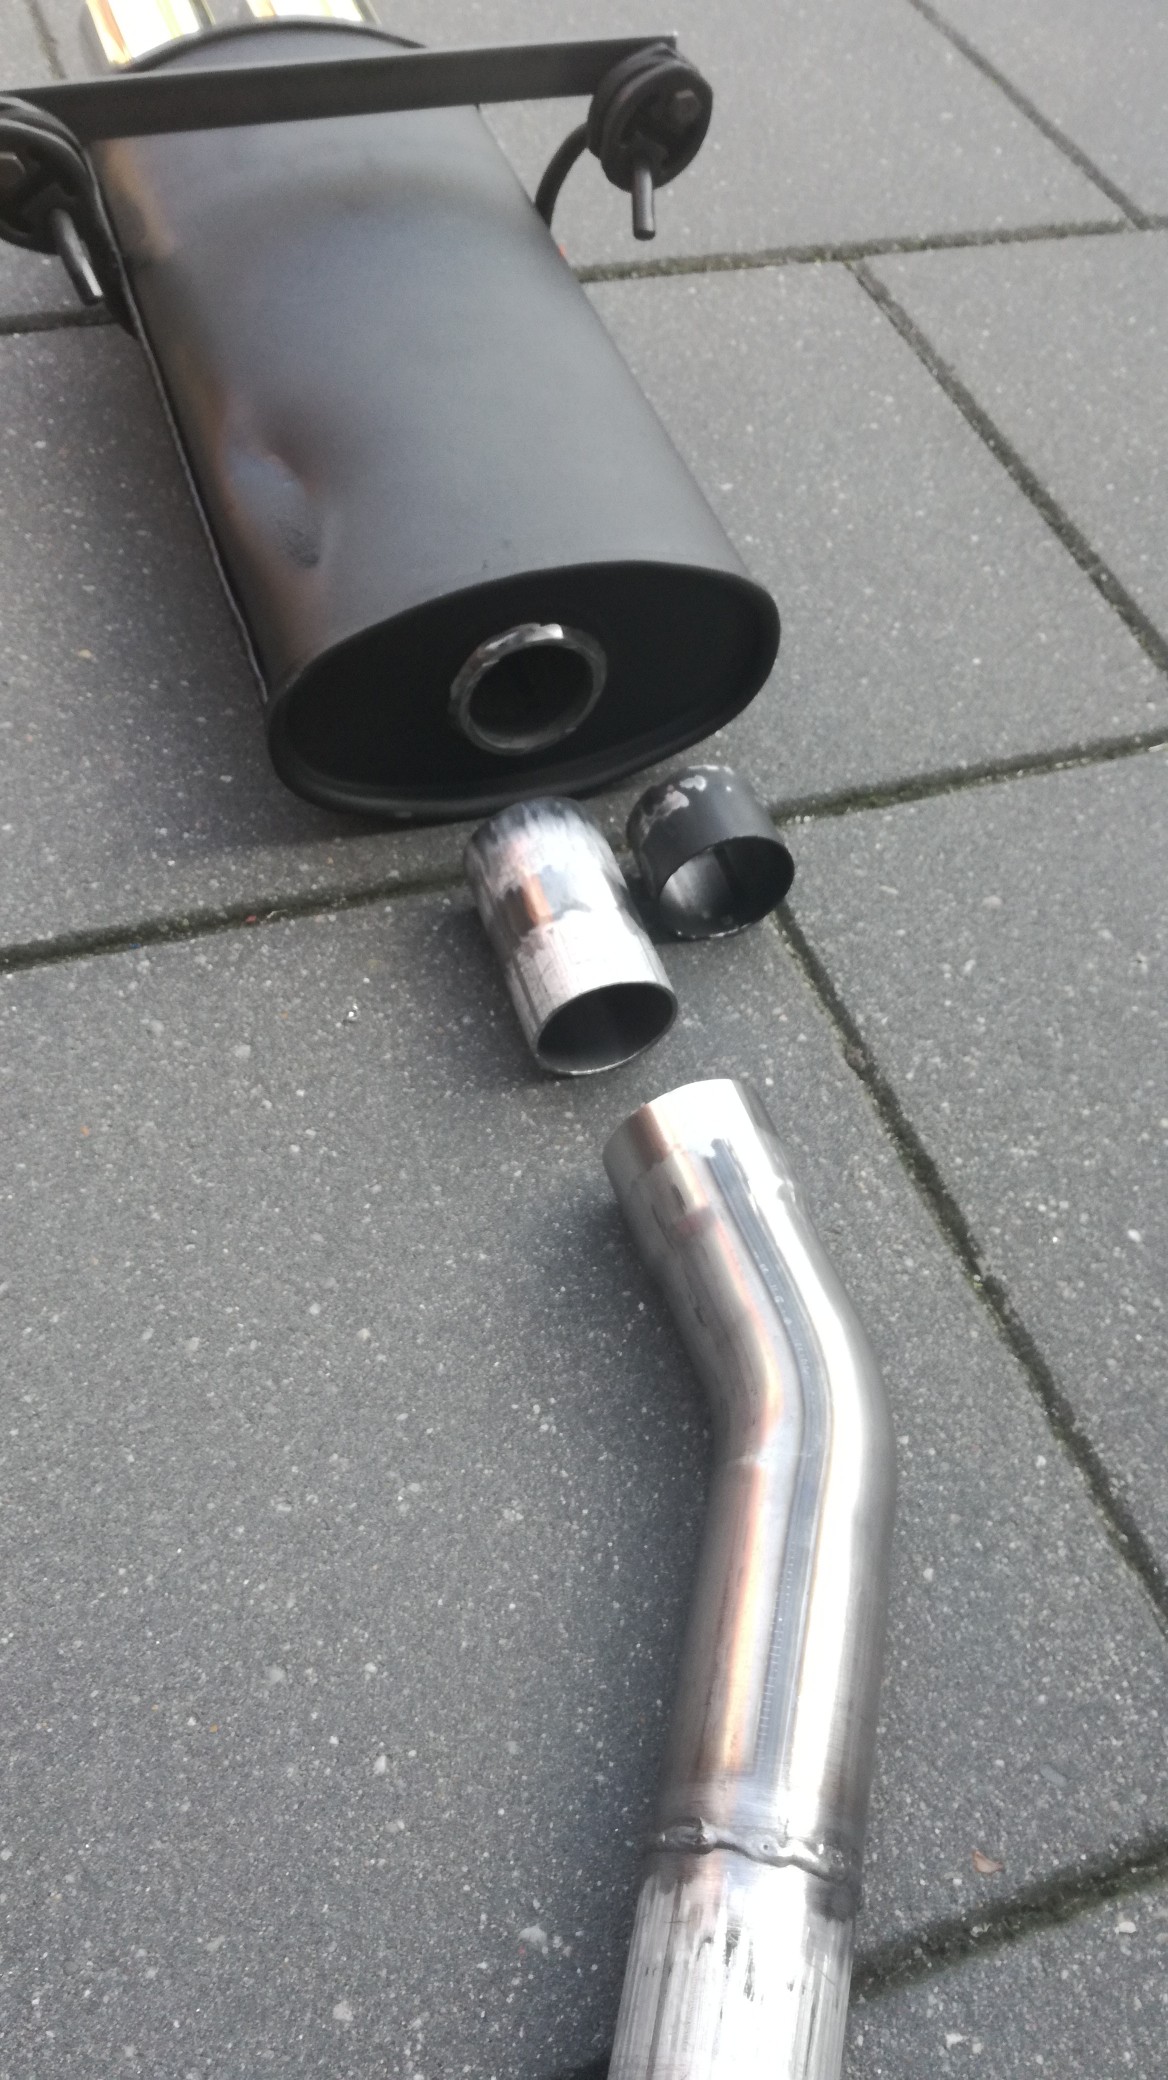
old versus new:

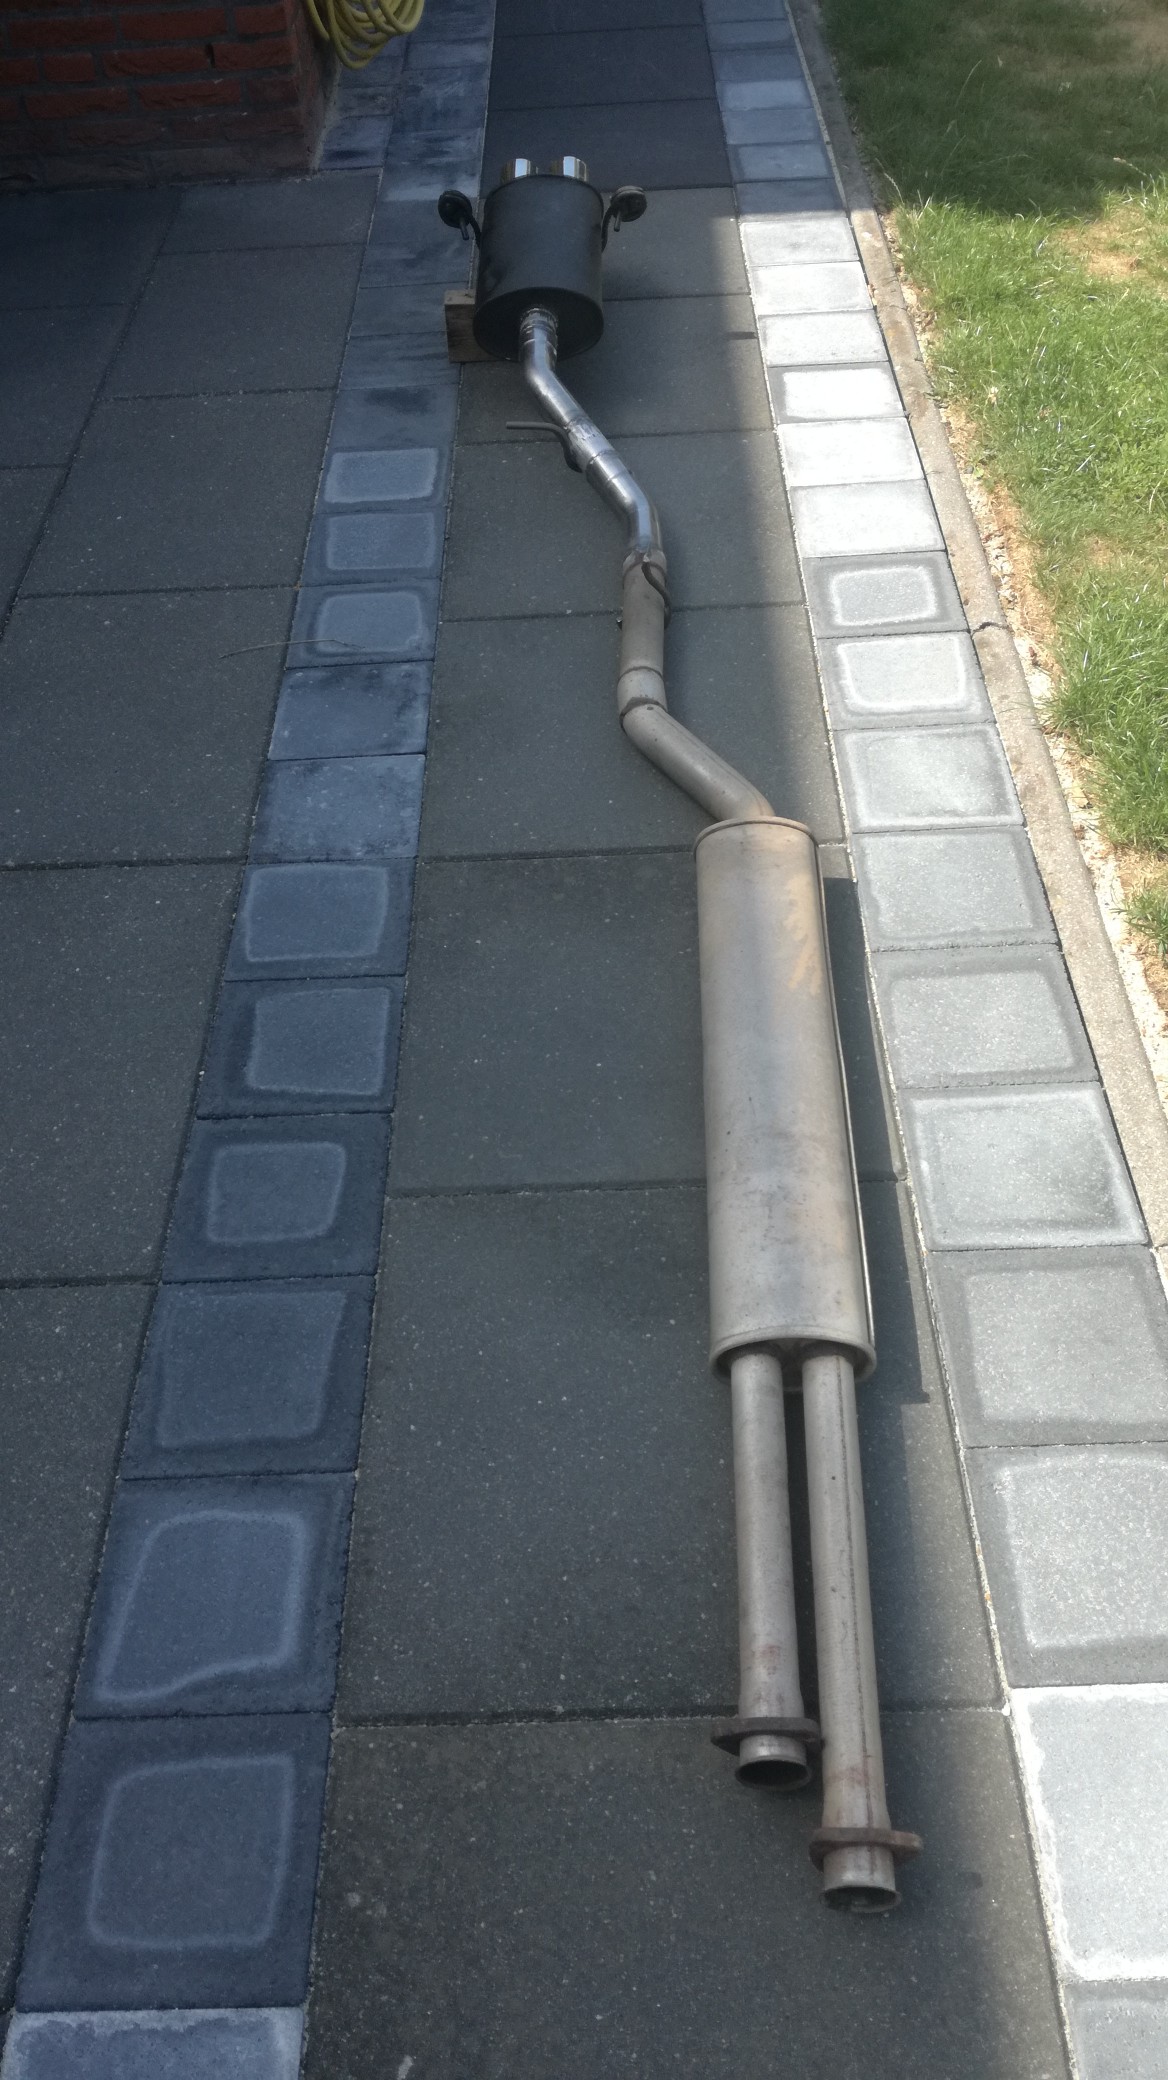


fits like a glove, radio is out of the car now, we've M20 music all the way:
With the fueltank under the car gone, there's a lot of space to route a custom exhaust endpiece, so i took the cutting tools an welder out again and started fabricating something for this absorbsion silencer:
started with a donor piece:
roughly hold the donor piece in place:
and cutting in the rear valance:
tack welding the donor piece in:
almost ready:
and finishing with some matching paint:
now it's time to fabricate a new end silencer to the existing exhaust and fabricating hangers for it:
old versus new:
fits like a glove, radio is out of the car now, we've M20 music all the way:
Last edited by BertjeConti on Wed Nov 23, 2022 8:57 pm, edited 2 times in total.
Megasquirted '77 E12 520-6
Aspen Silver '96 E39 523i