You can't possibly put those on a car, sling the flatscreen and mount those bad boys on your living room wall!
My E21 M30B35 project
- E21meister
- E21 Pro
- Posts: 915
- Joined: Fri Jul 24, 2009 6:46 pm
Re: My RS's nearly ready
So far just over £1800.lemonayd wrote: WOW!!!!!!!!! they look the nuts mate want a set for mine how much do they stand you in mate?
ThanksPho21_girl wrote: Lokking verrrry good
LOL, they are in the living room atmE21meister wrote: WHEEL PORN!
You can't possibly put those on a car, sling the flatscreen and mount those bad boys on your living room wall!

Rav's M30b35 Build
Thought I would post up one here, as I ahven't for a while.
But basically, it goes, i'm doing an M30b35 build, so thought I would share it,as it will be the same for the E21 later.
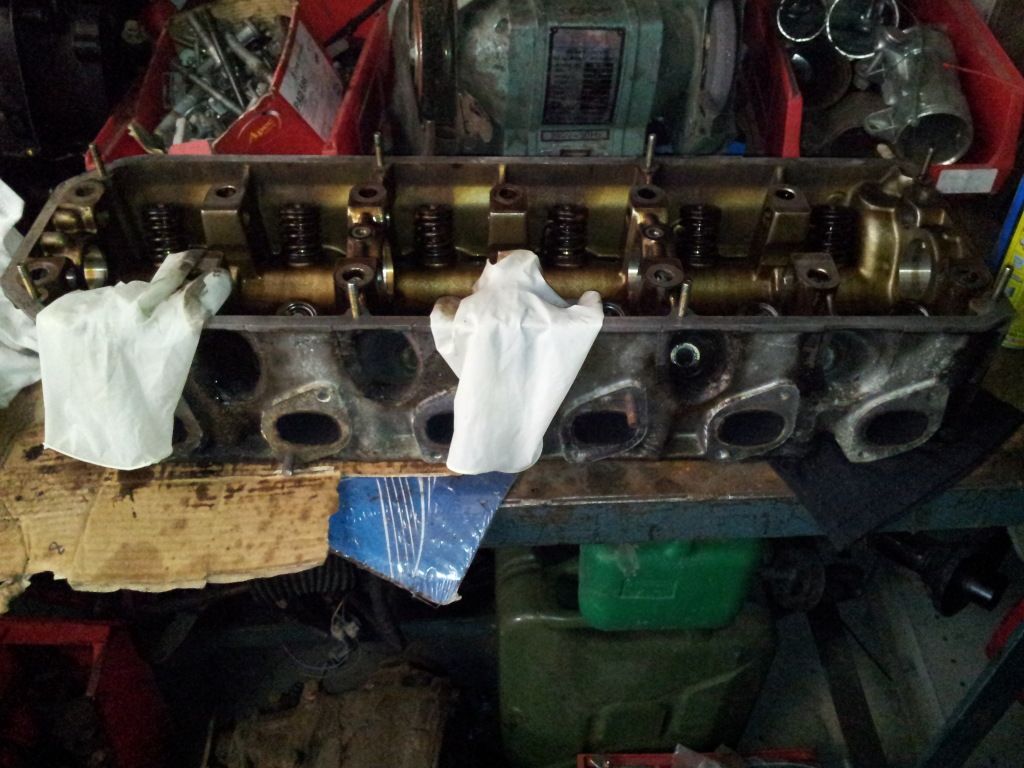
Head off, rocker shafts removed, rockers and cam out too.
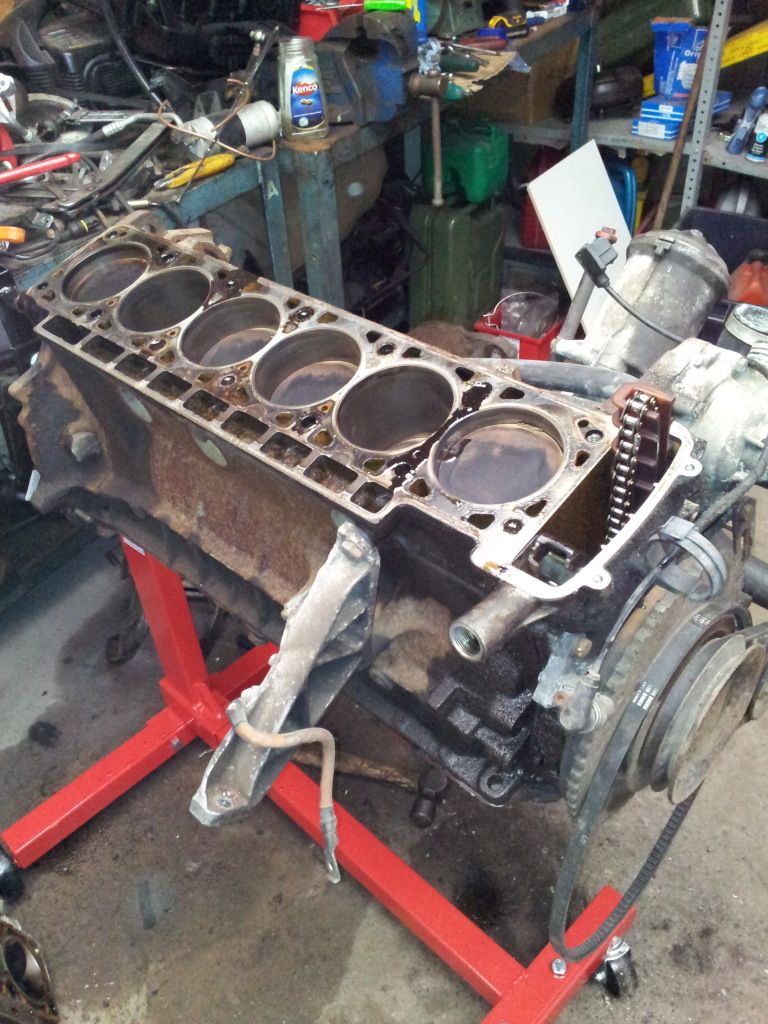
Head now booked in for Monday for a pressure test and a 1/2mm skim
I'll take out the valves on Monday for those eagled eye fookers!
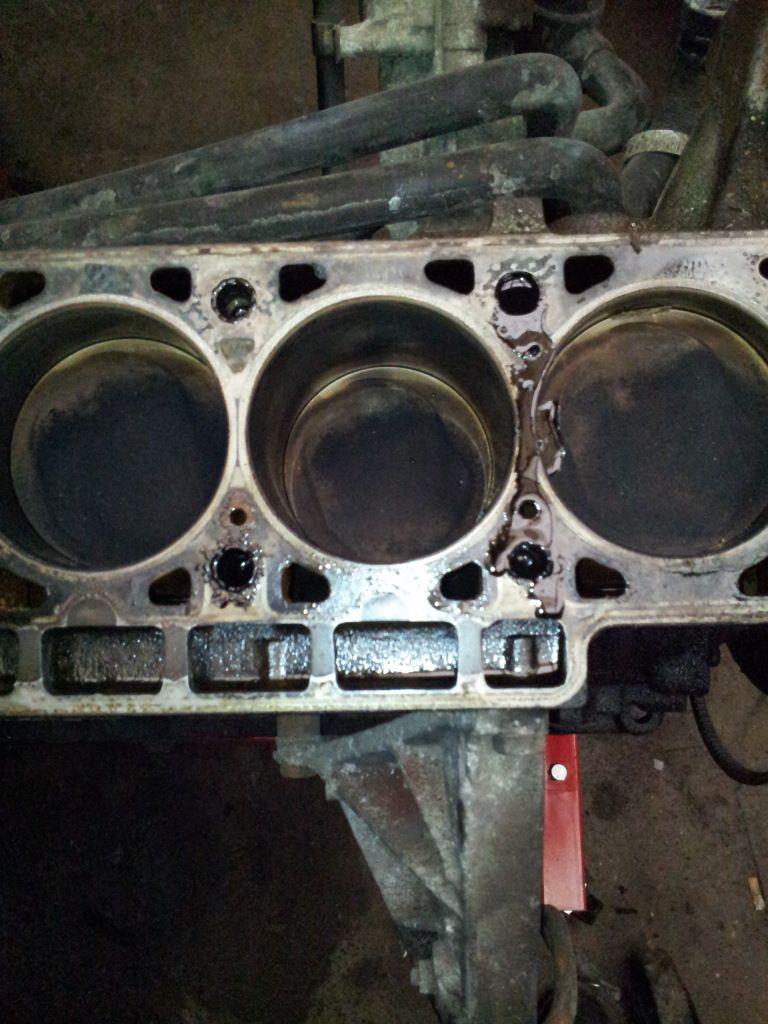
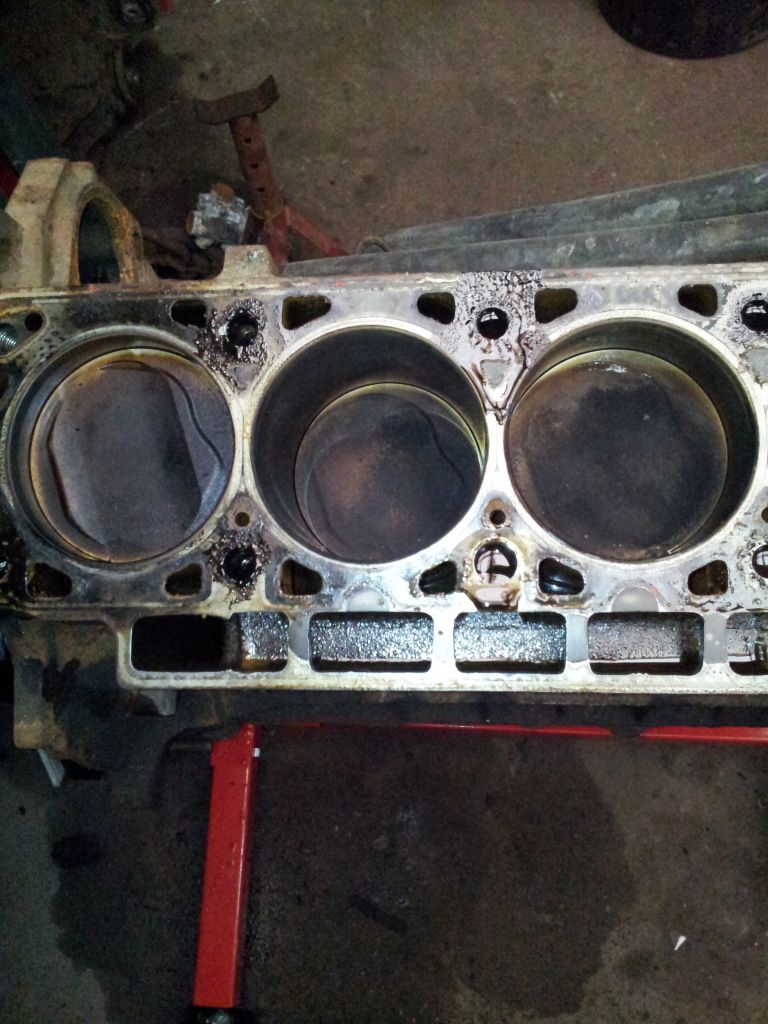
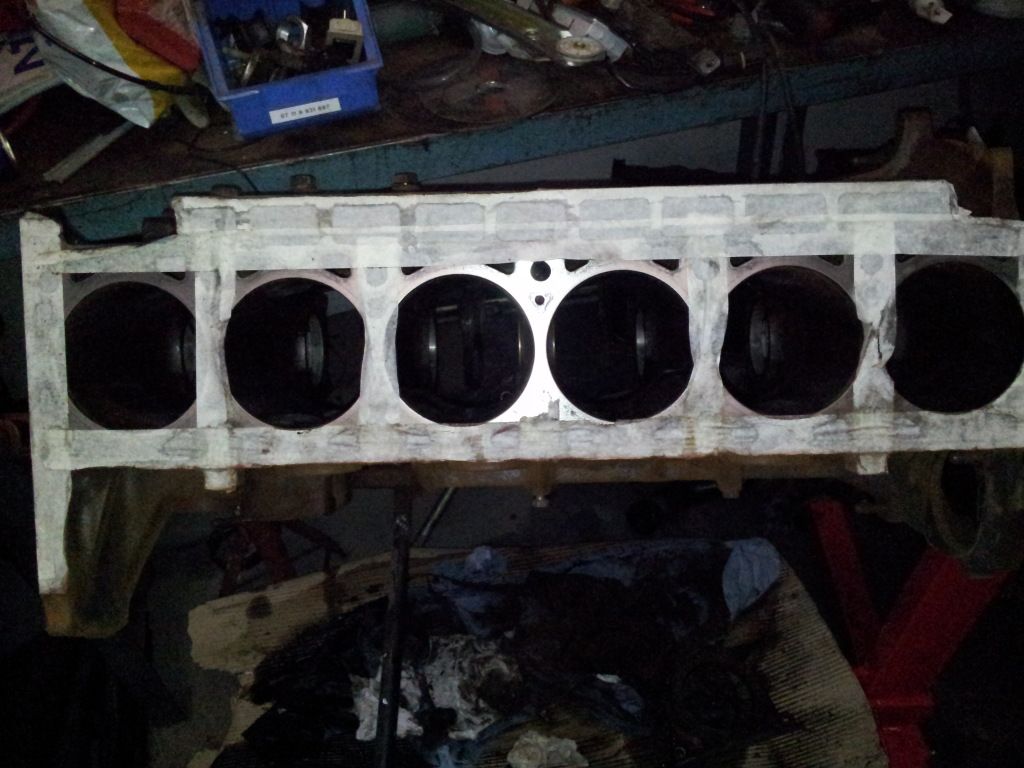
Pistons look to be OK, and the bores look good too, can still see the honing marks on them.
Looks to have been running rick though.
Going "Supercharged" on this engine, so the 1/2mm skim was put on hild for a clean face instead.
Going for a Rotrex C30 range.
Gave the head in on Monday for a pressure test and skim.
Pressure test was good, and a skim of 4 thou wasa only needed.
Picked it up this morning, removed the valves, and the guides and gave it a quick clean.
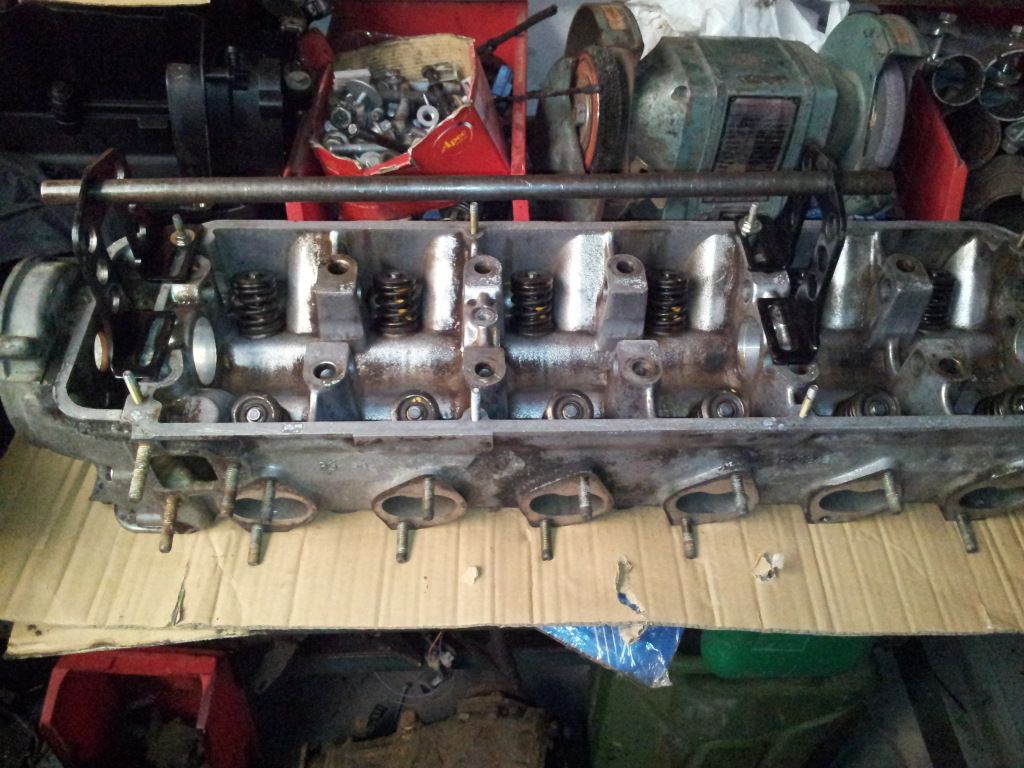
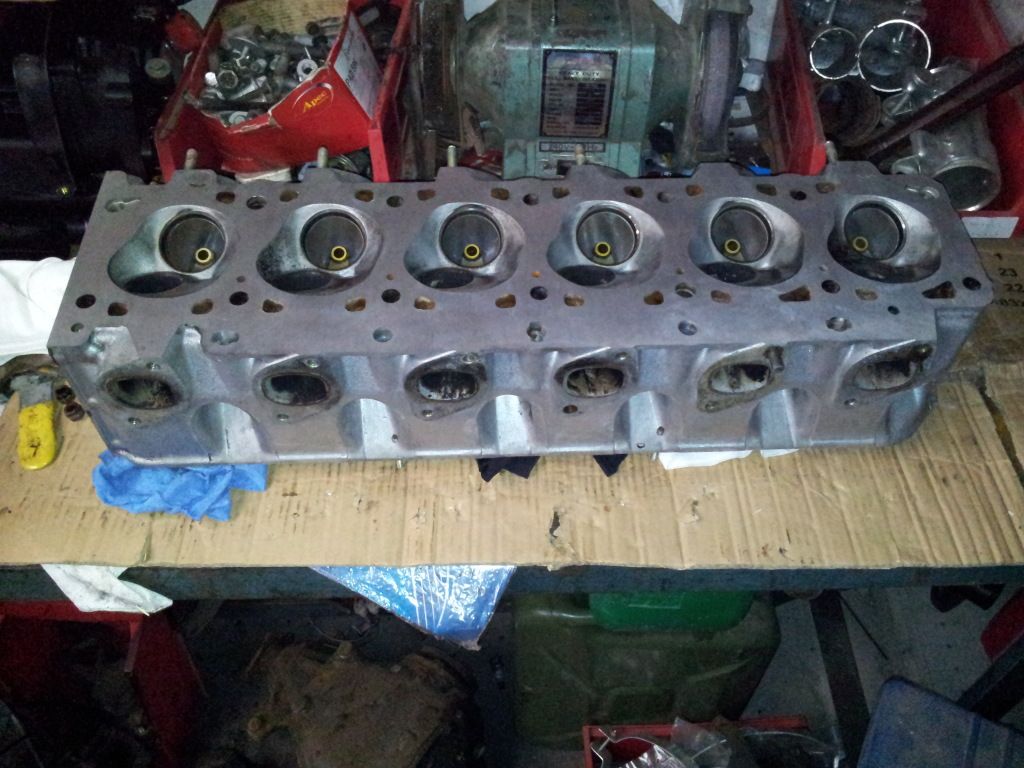
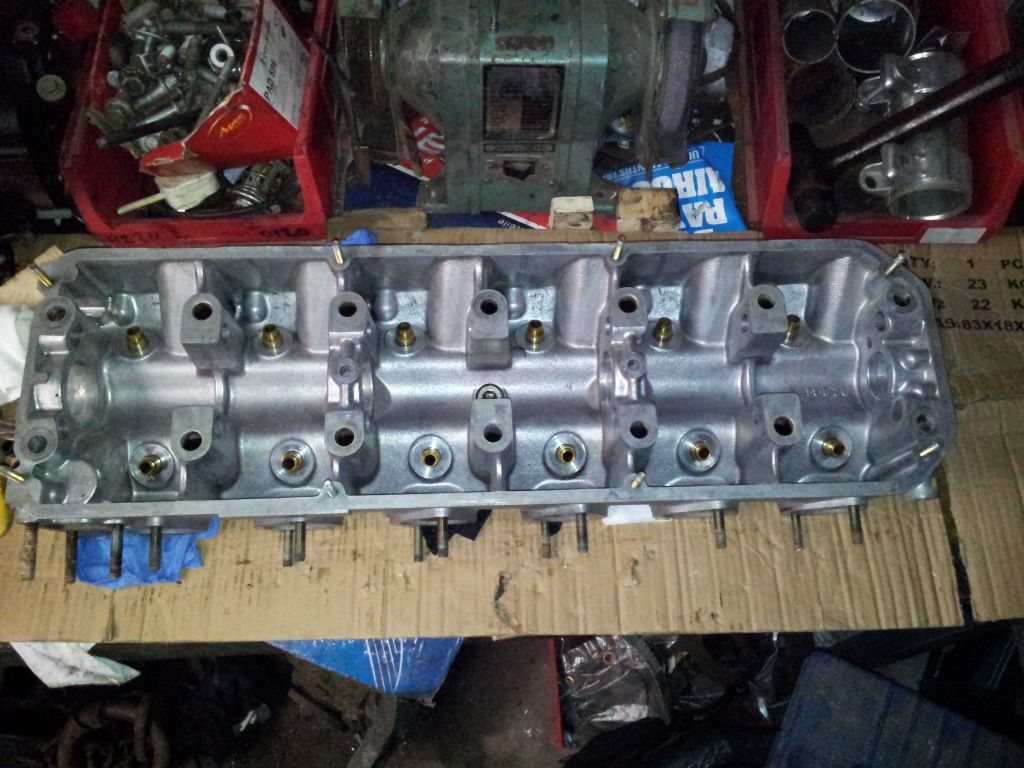
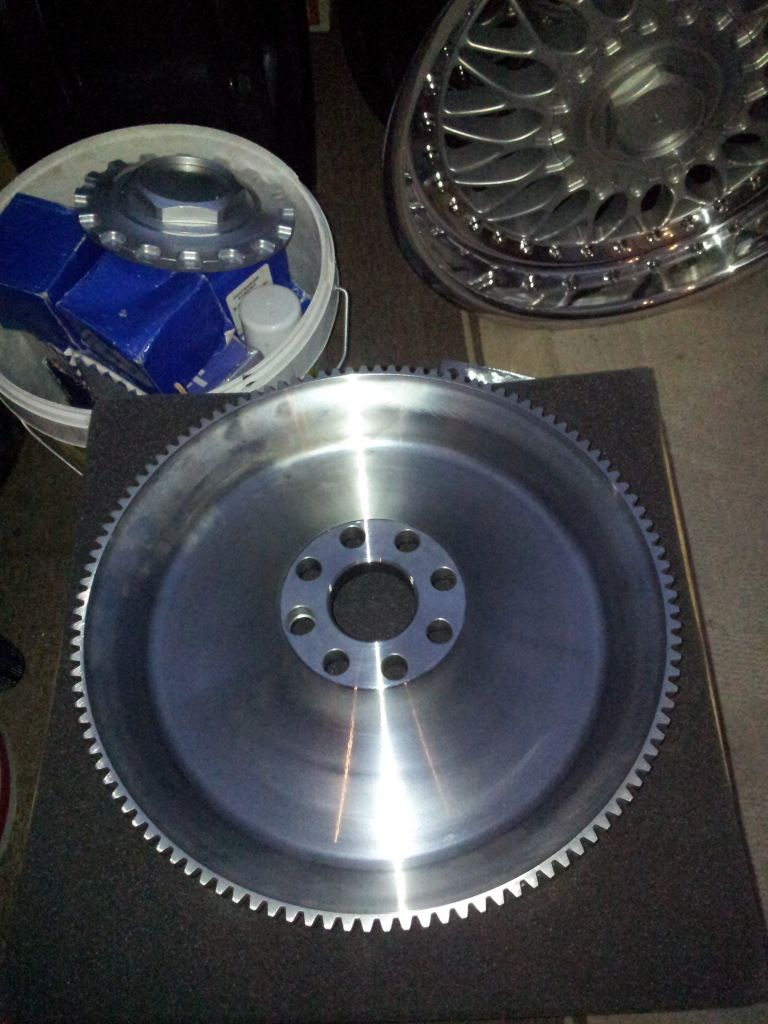
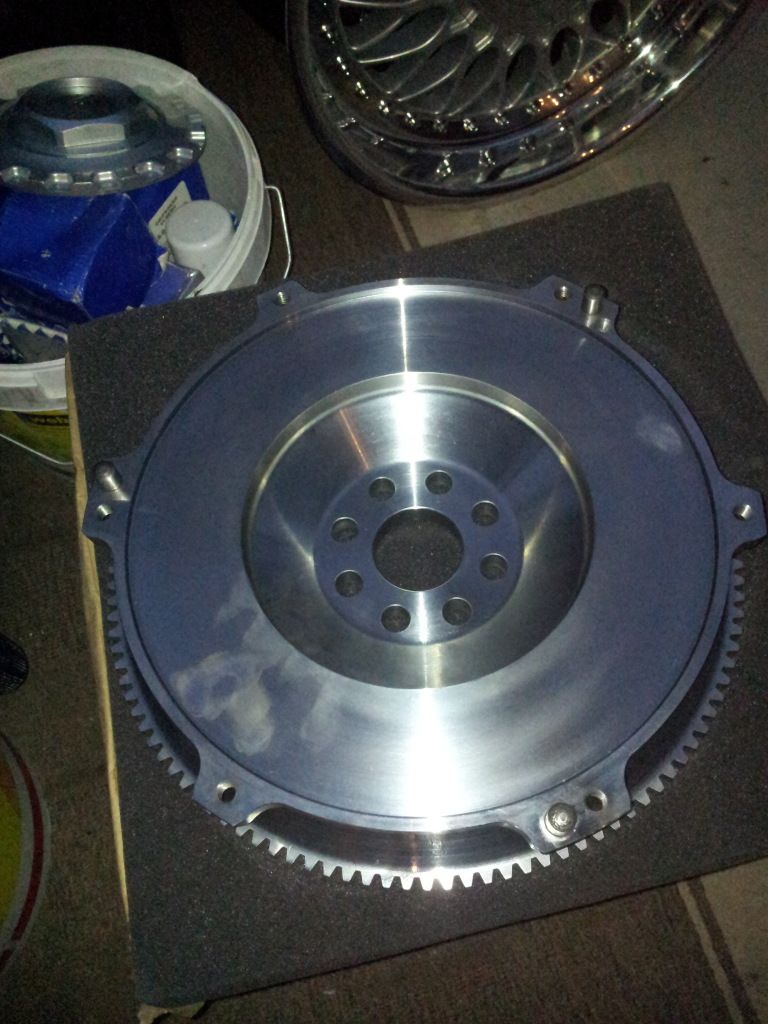
Lovely brand new Light billet flywheel, takes the E34 clutch. winkeye
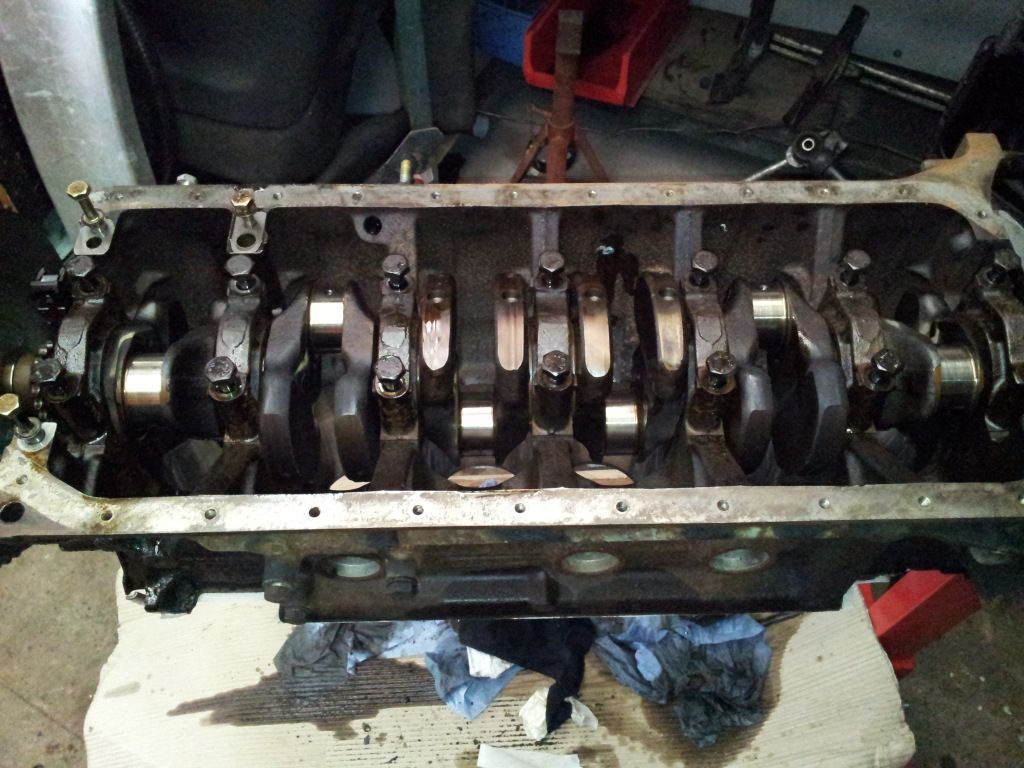
Looked into the bottom end shells and big end bearings
Not good, slighty worn and will need to be replaced, so ordered they were.
Cleaned up the face with wet'n'dry and taped up.
Removed the shells and crank and pistons
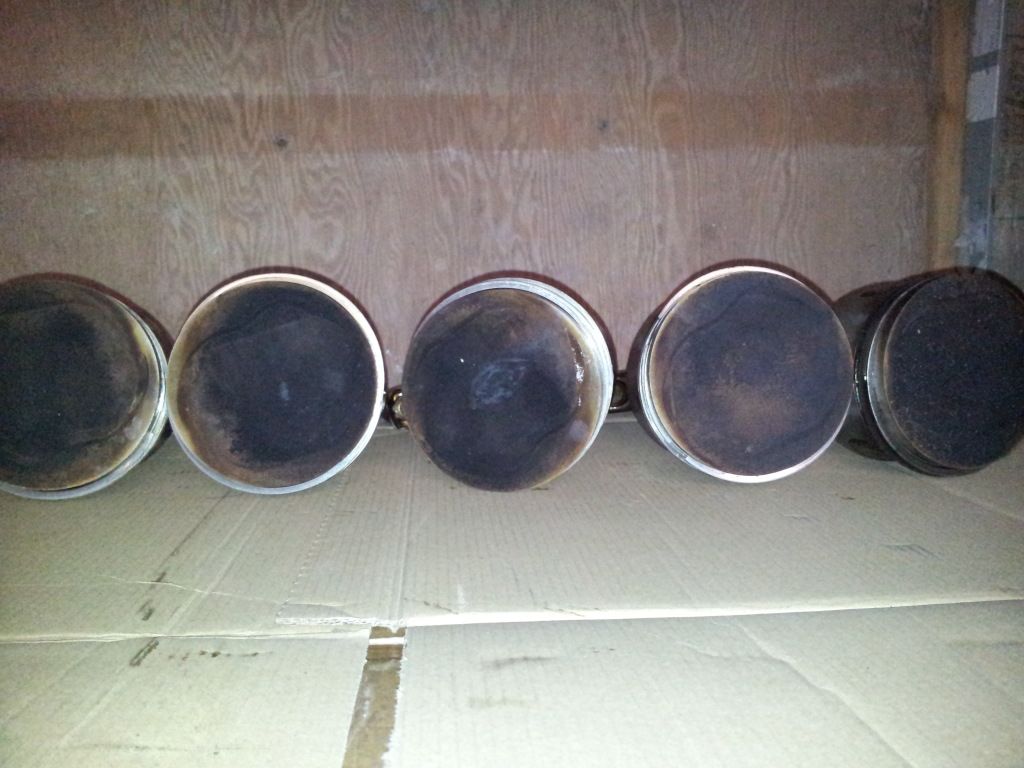
And left it at that.
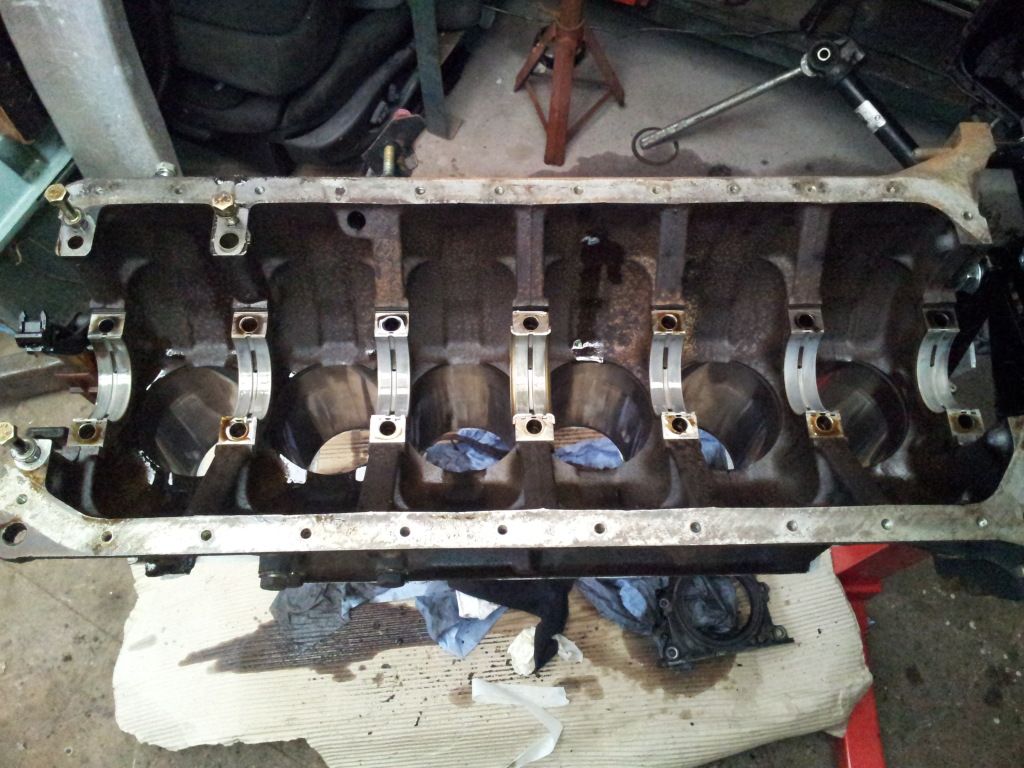
Tomorrow, it's clean up time, and painting the block.
Adaptors for the ITB's
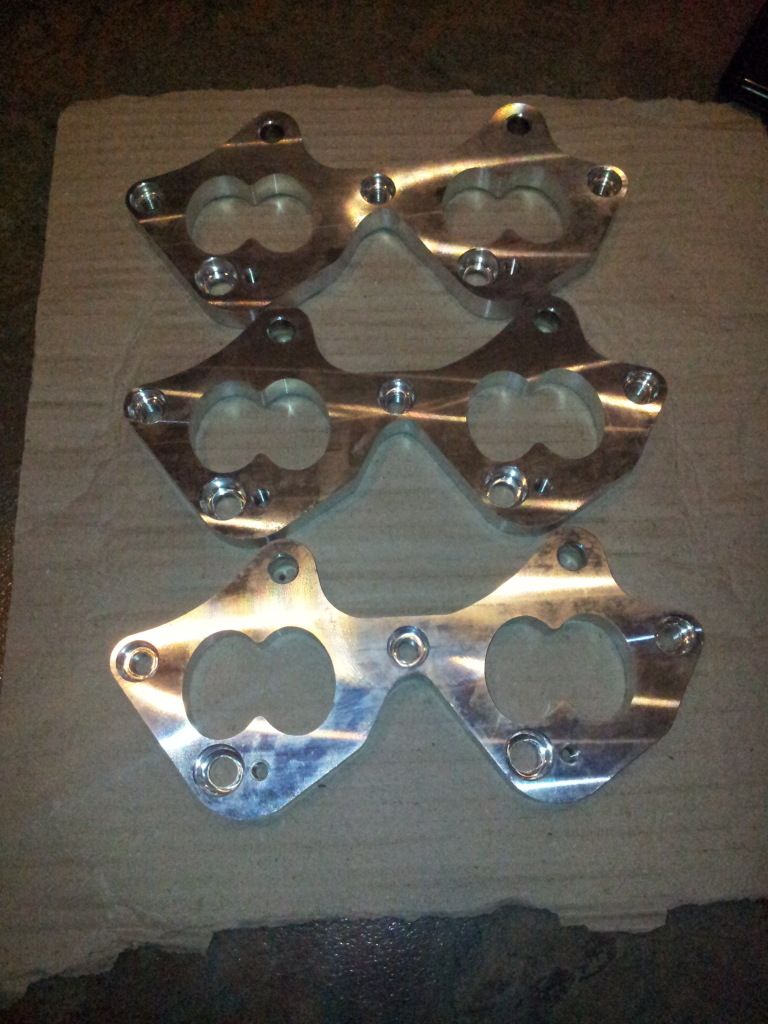
Anyway, can't try them, as i've sent the head away for the valves and valve seats to have 3 angles put on to them, couldn't resist it as I had a very good price quoted to have it done.
Had the block honed today too, needed doing as there was slight scoring on a few of the bores.
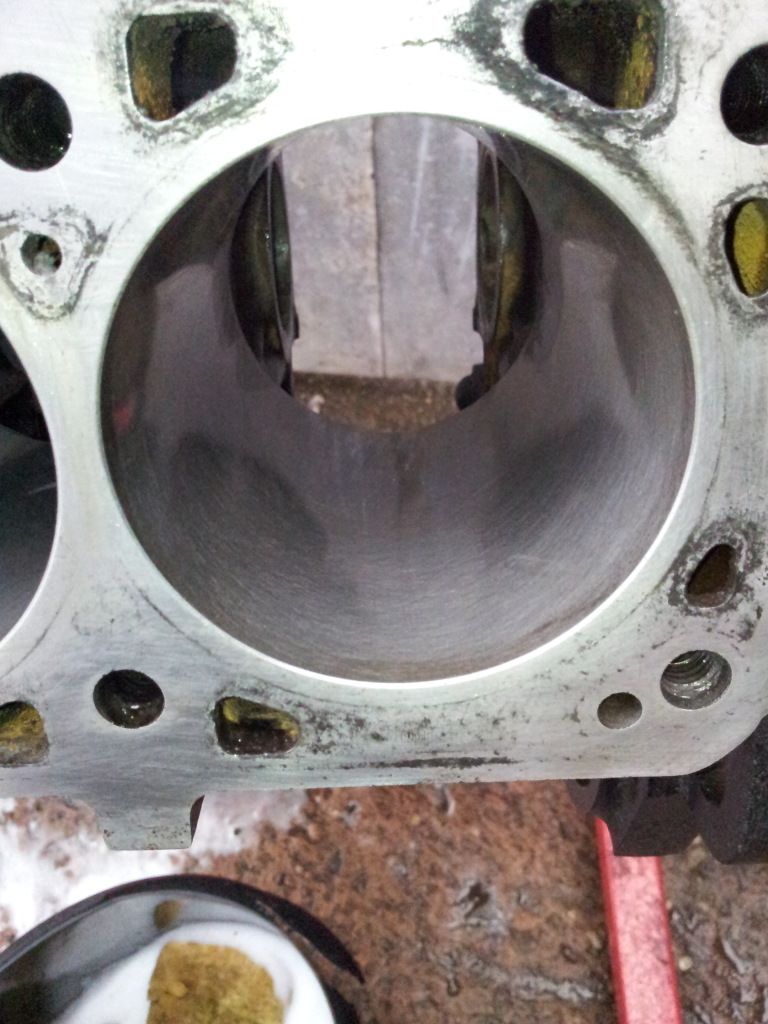
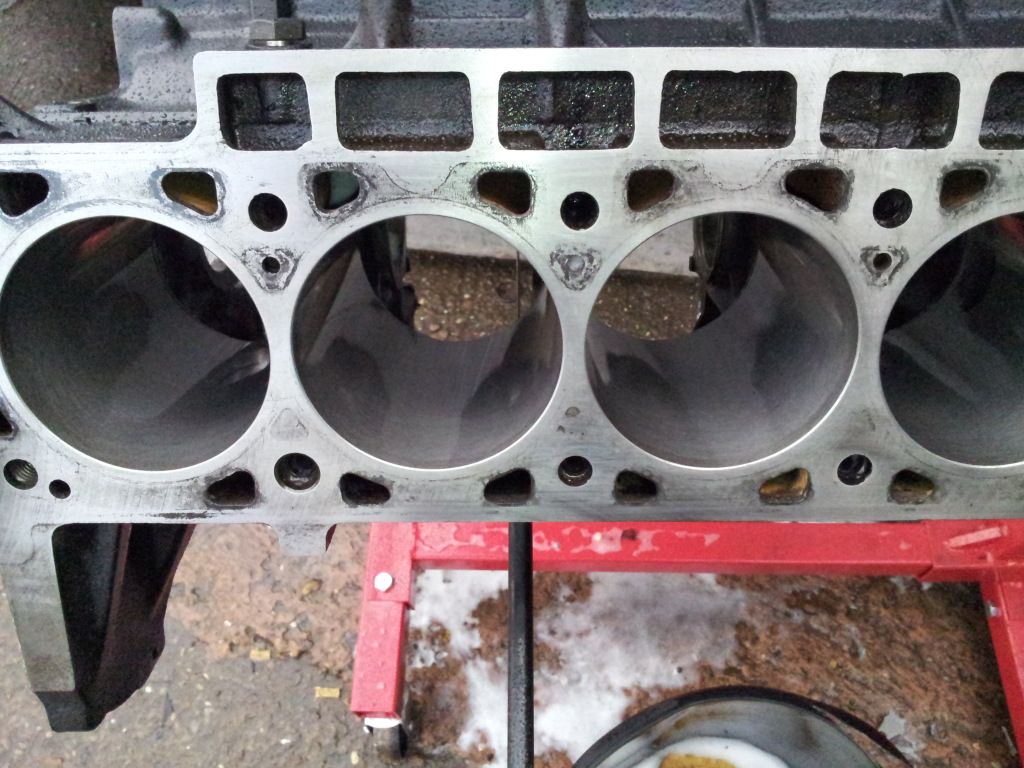
Had a load of parts Soda and media blasted to get rid of all the oil and wax on the parts.
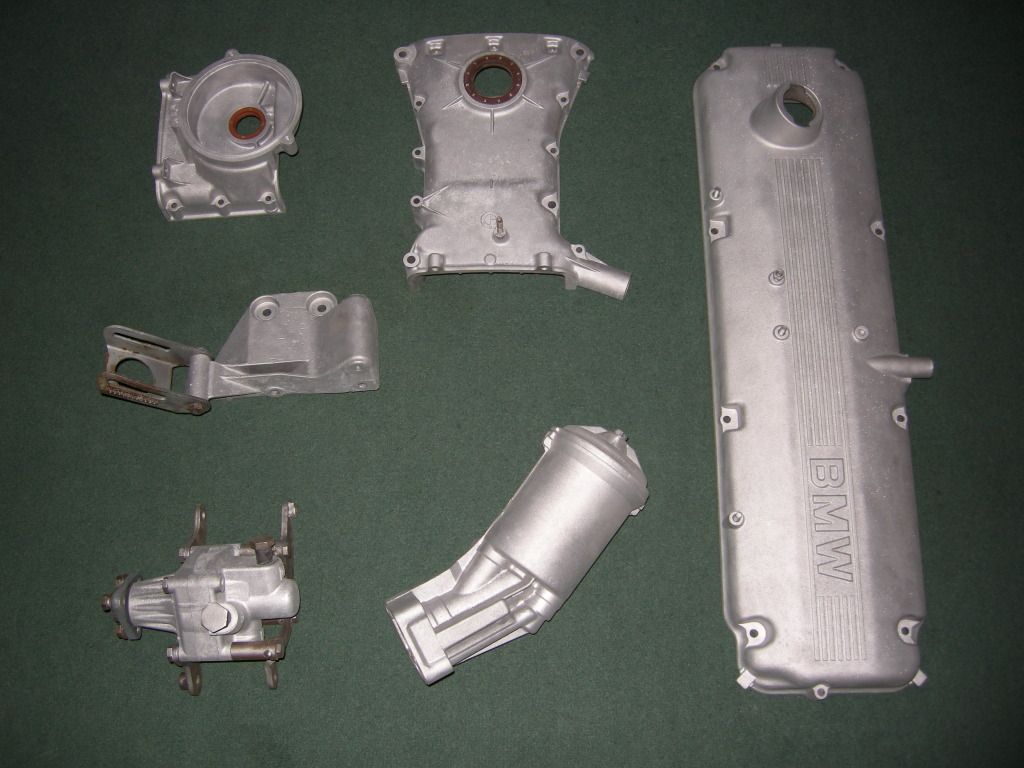
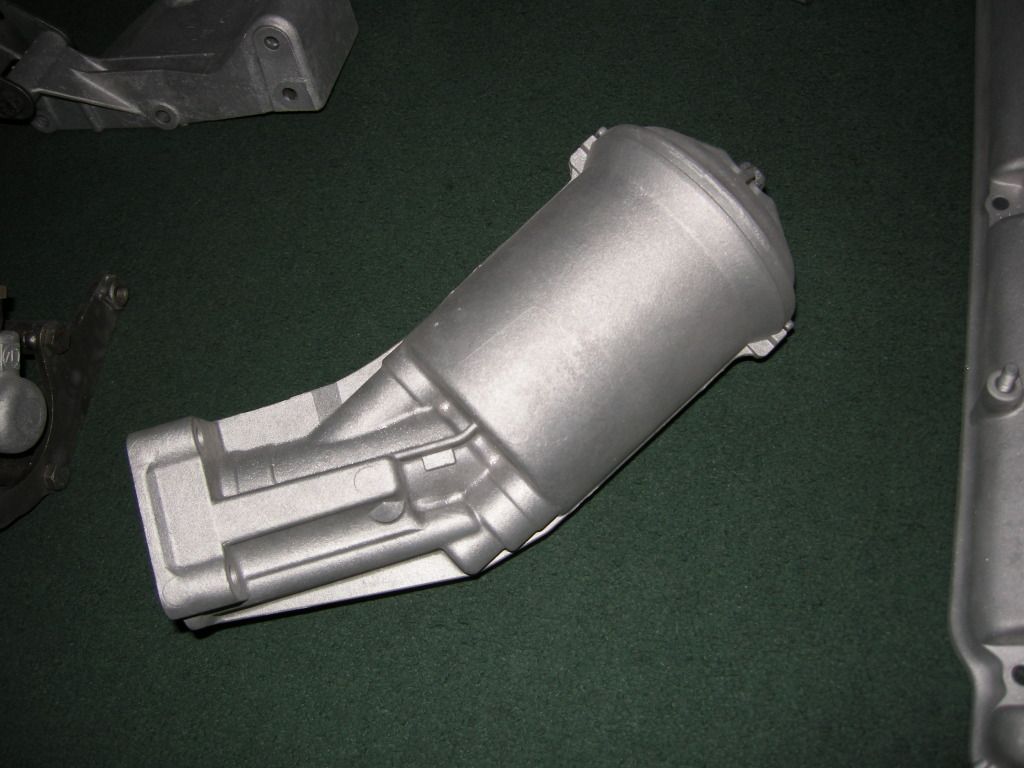
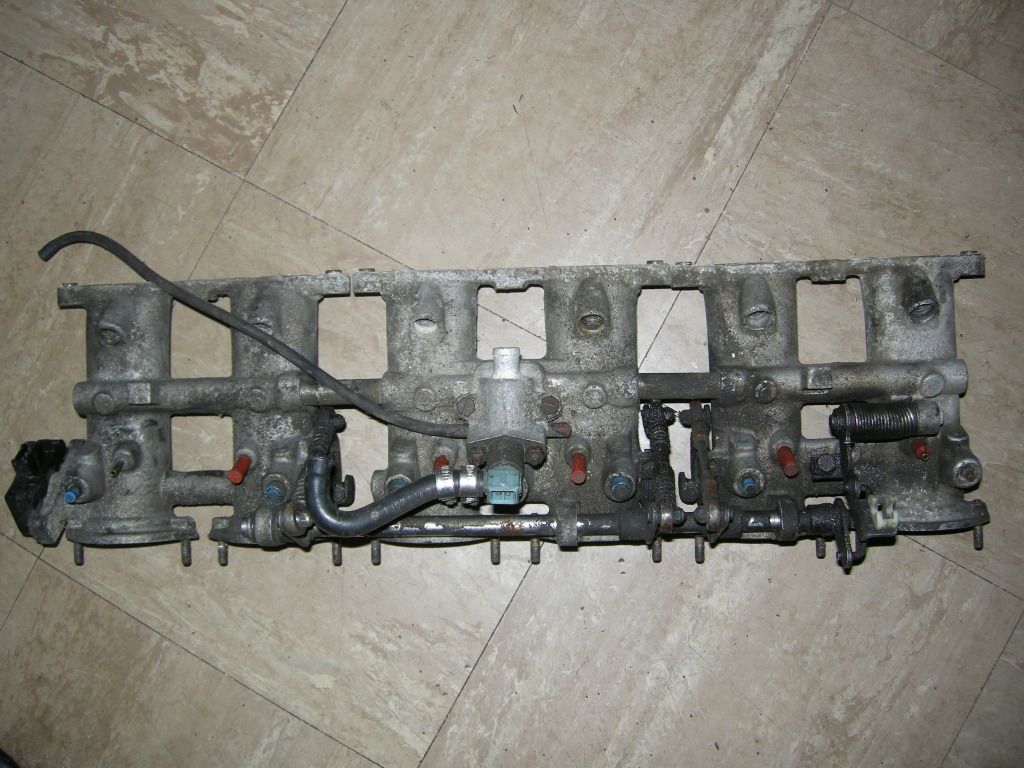
The ITB's were like this
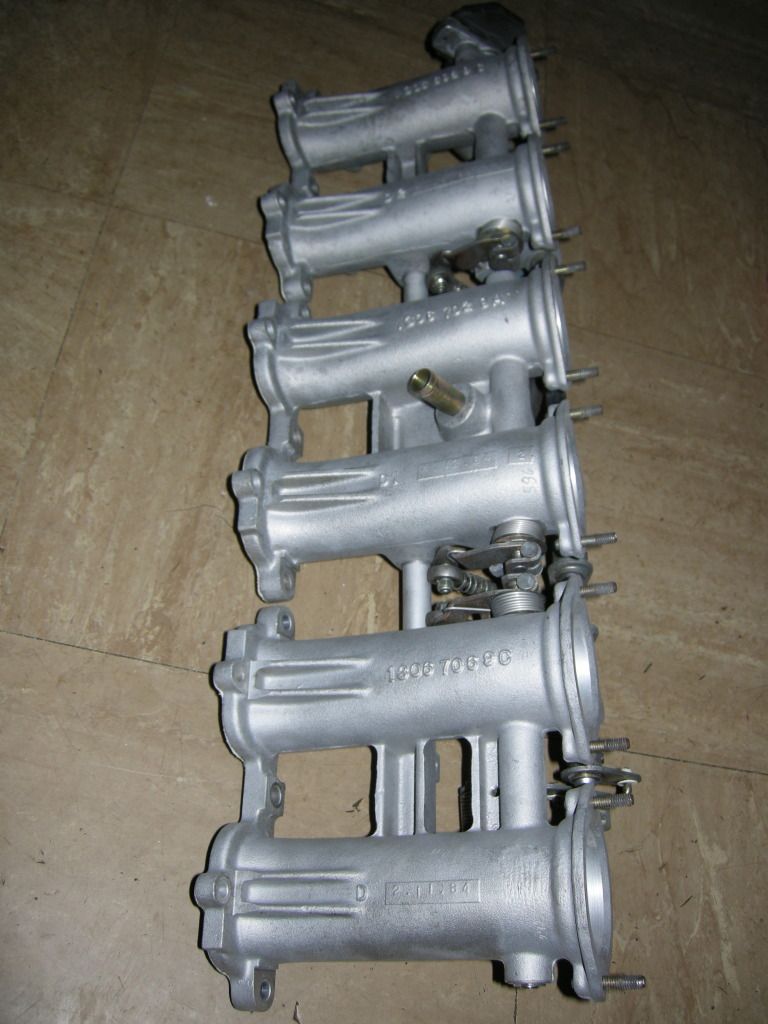
To this
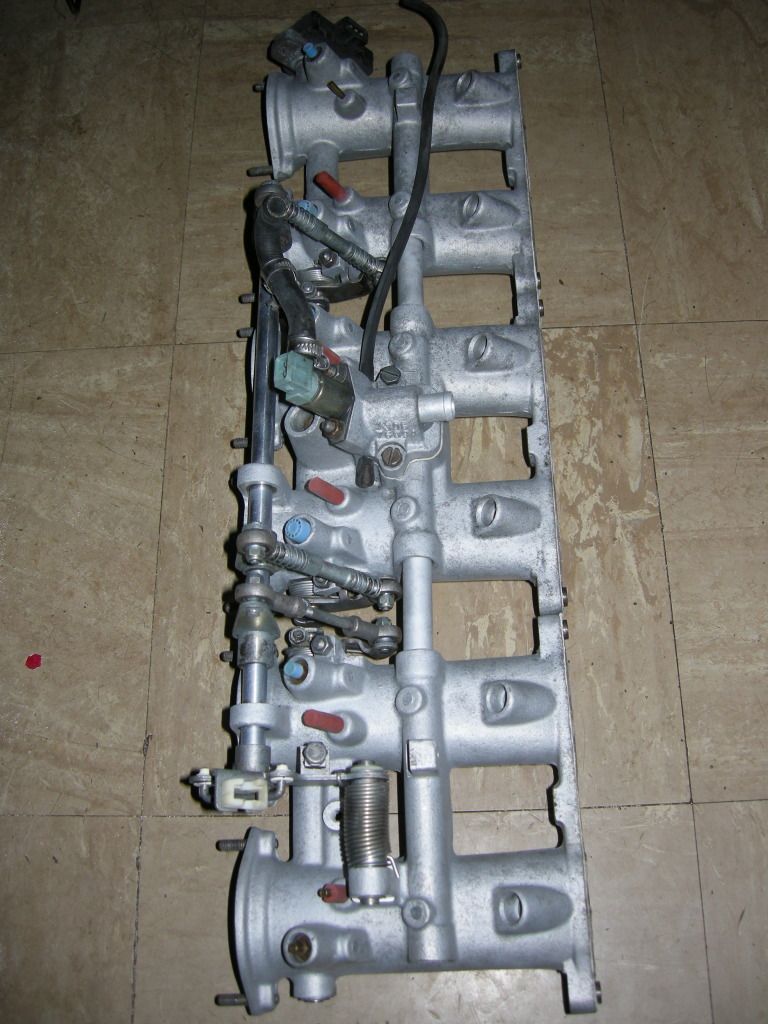
Also, had some head work done in the last few weeks too, thought it would be nice to treat it to a better flow
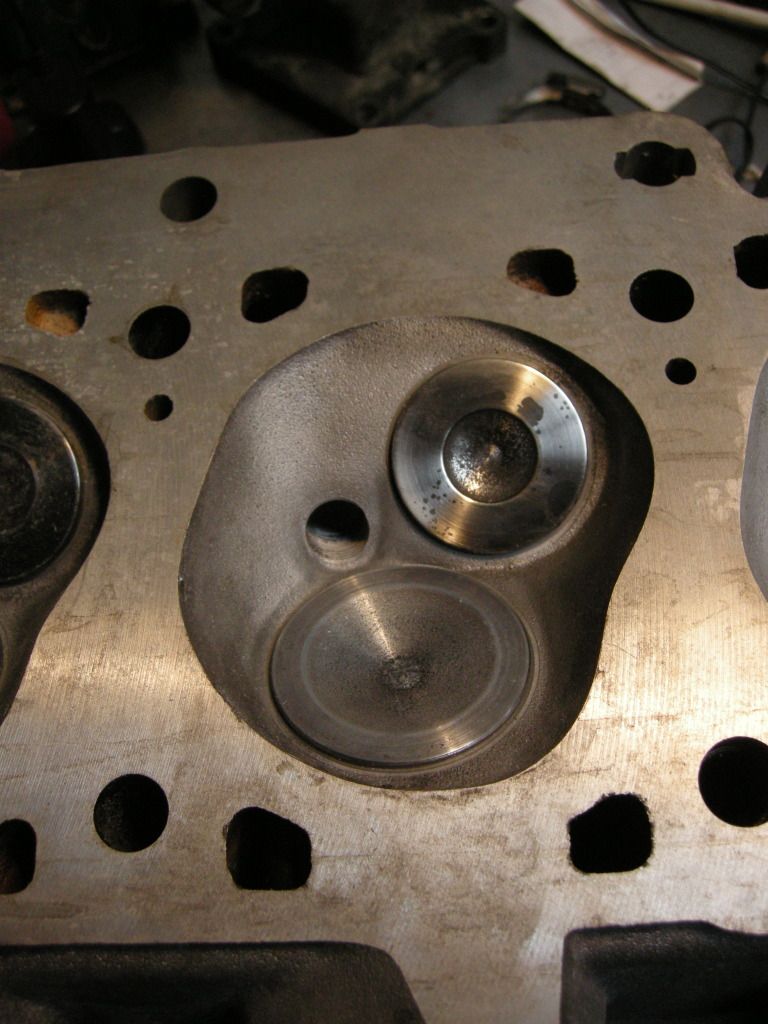
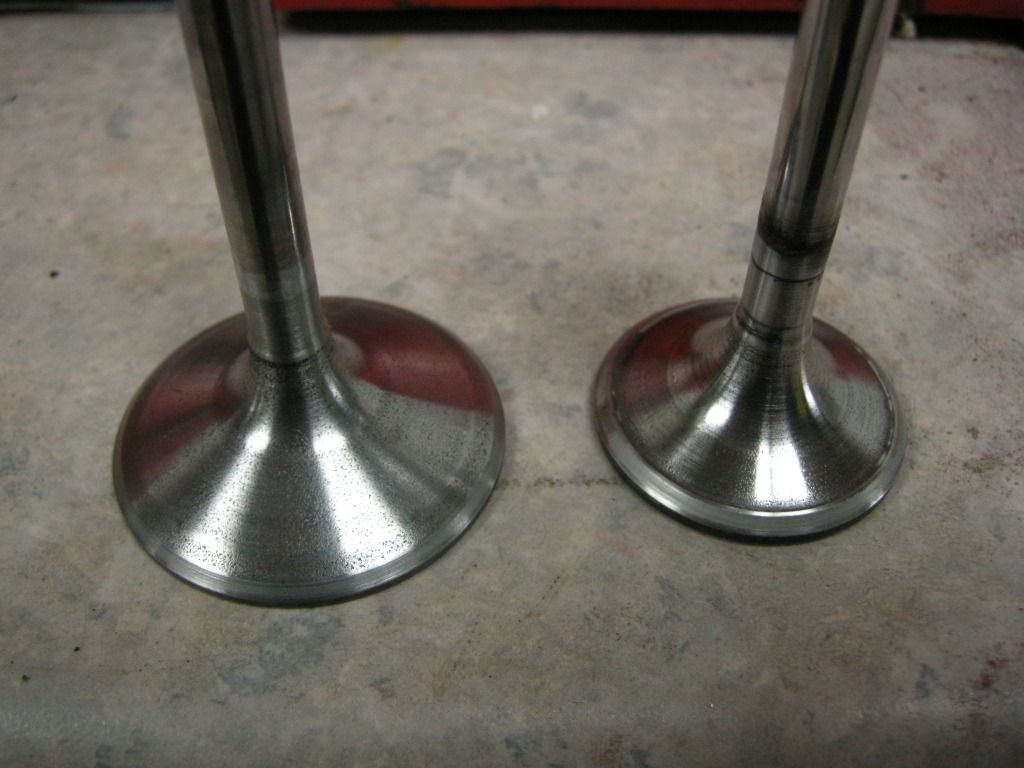
Had the seats and vlaves cut to 3 angled finishes.
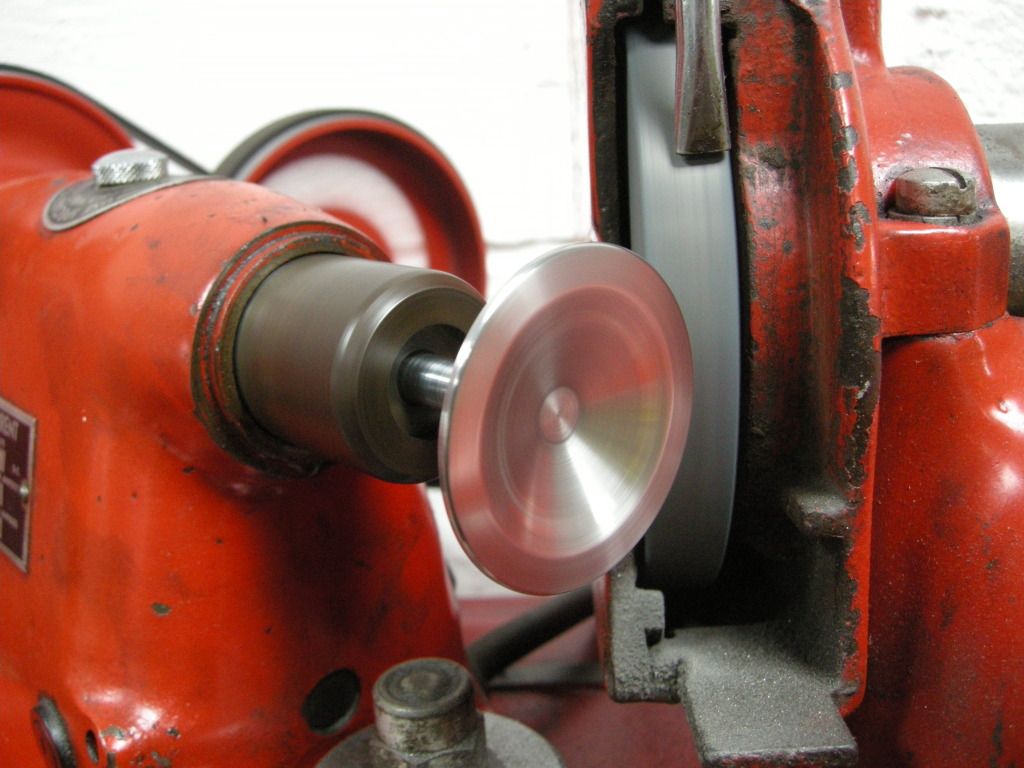
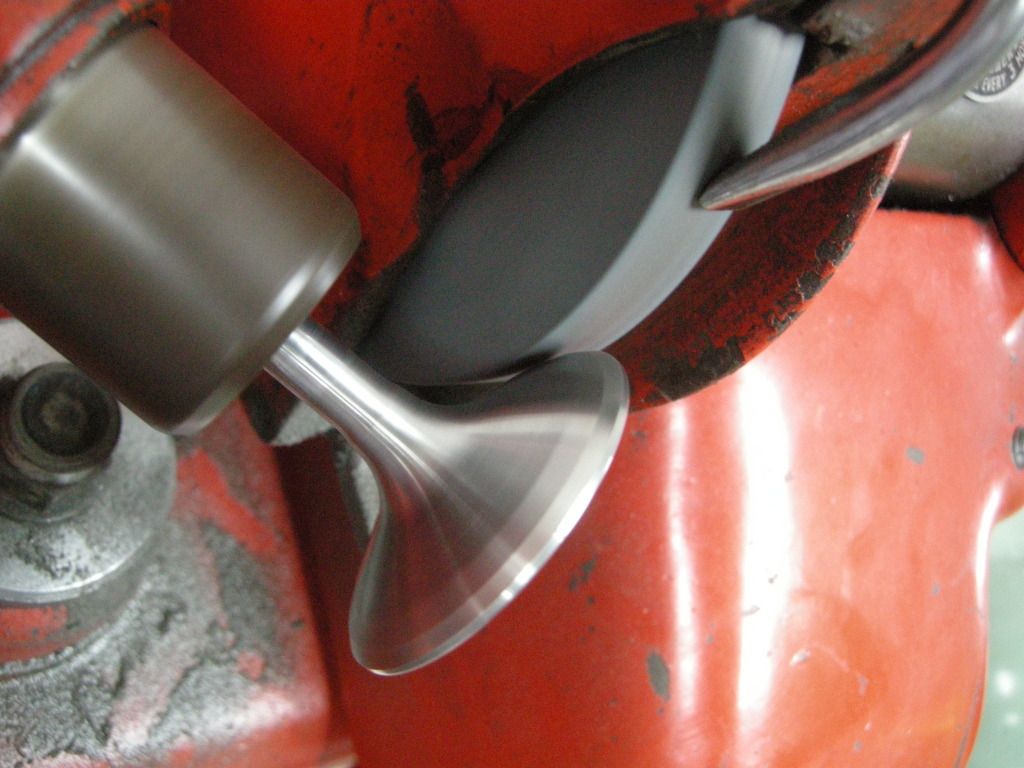
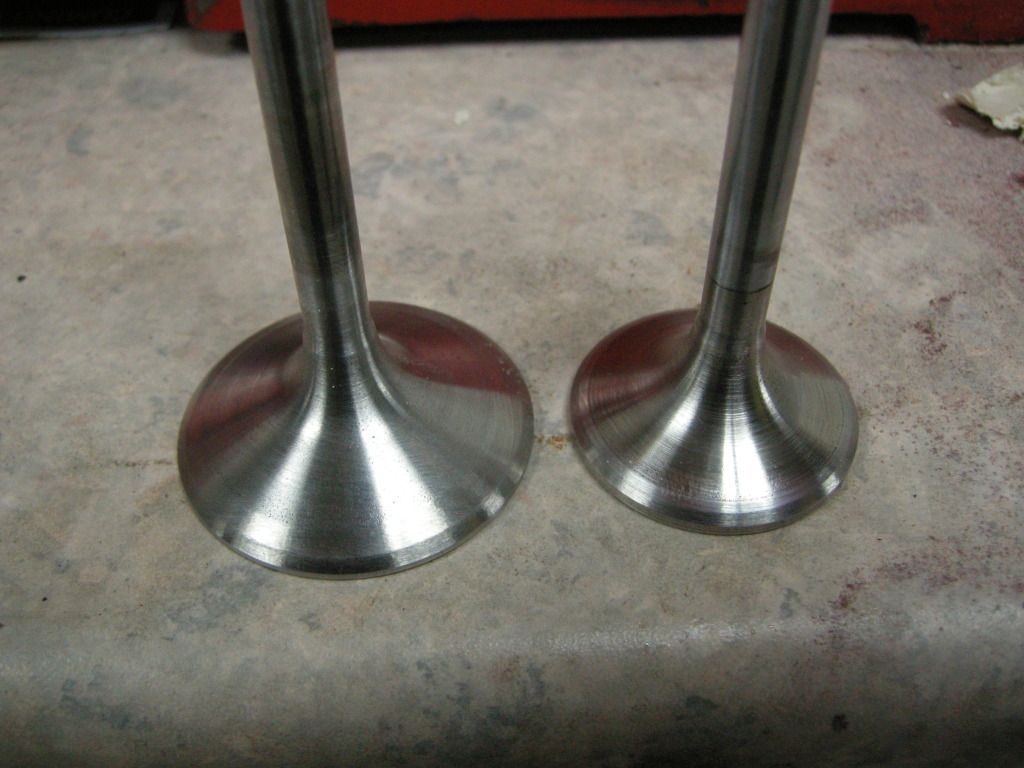
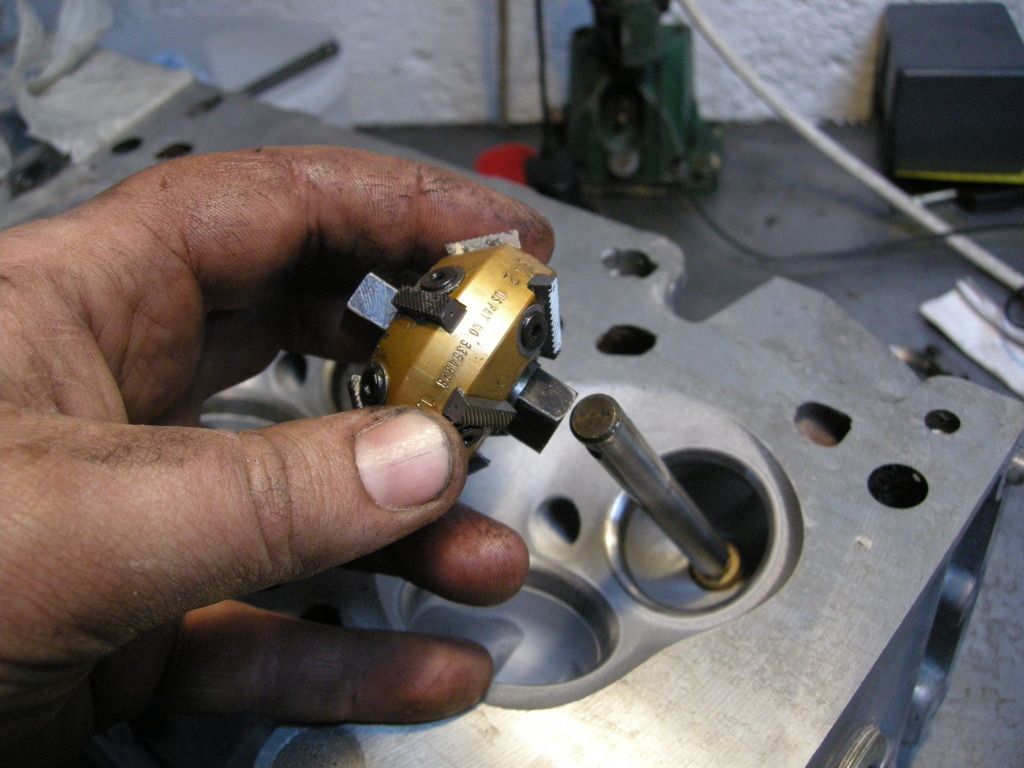
Next new seats, cutter pilot installed.
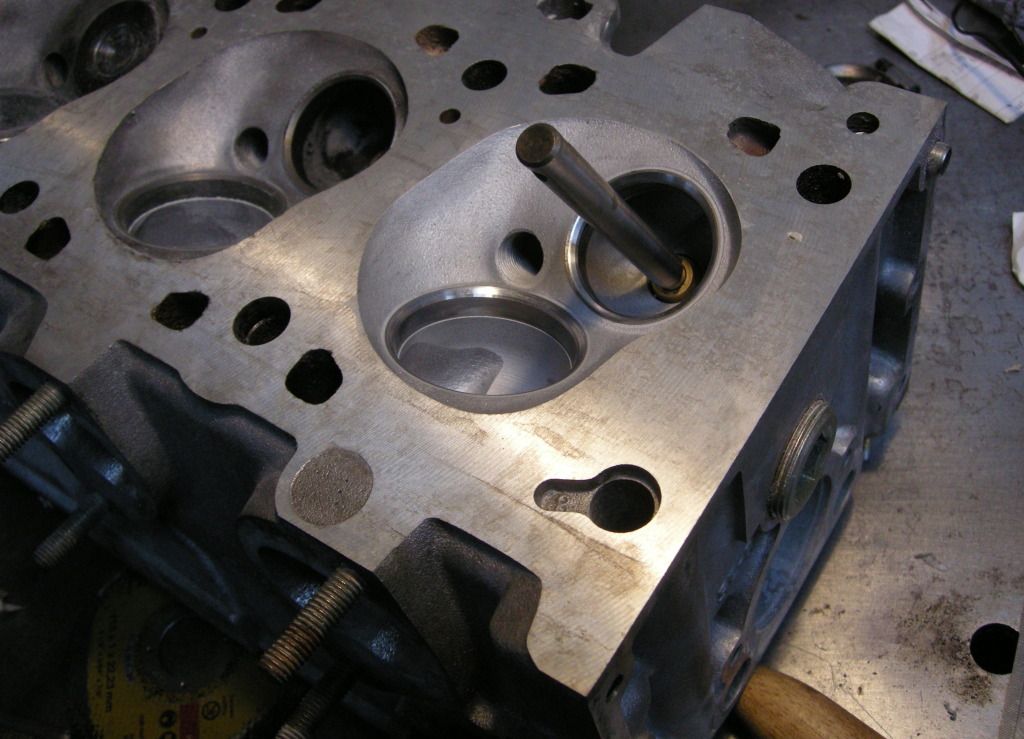
The first cut at 60* is the bottom cut.
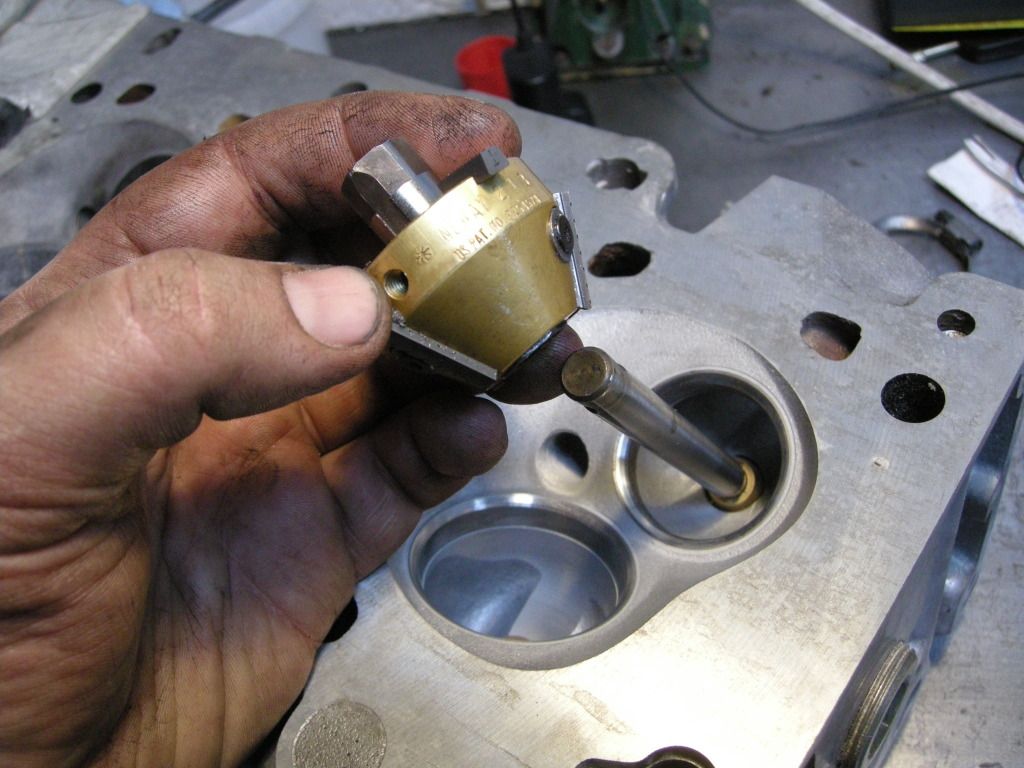
Followed by a 30* top cut, then the seat cut, both are on a double sided cutter. The seat cut is at 46* the two faces will bed in together within the first moments of the engine being started.
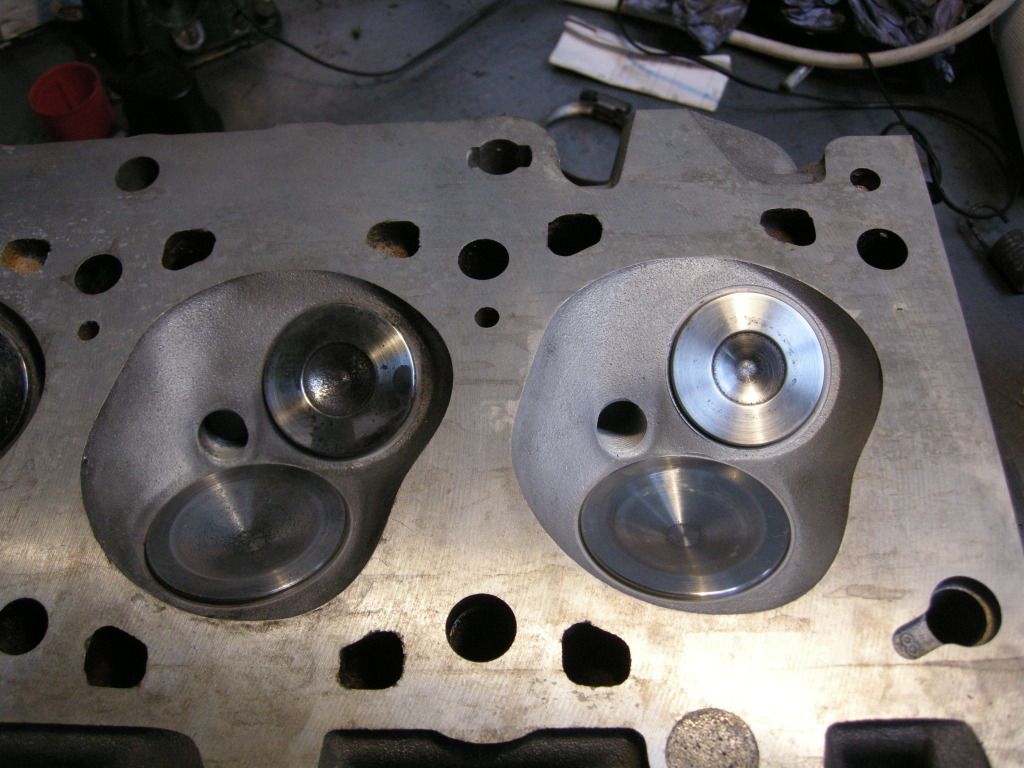
This is what you end up with after it has been soda blasted, and all the cuts finished.
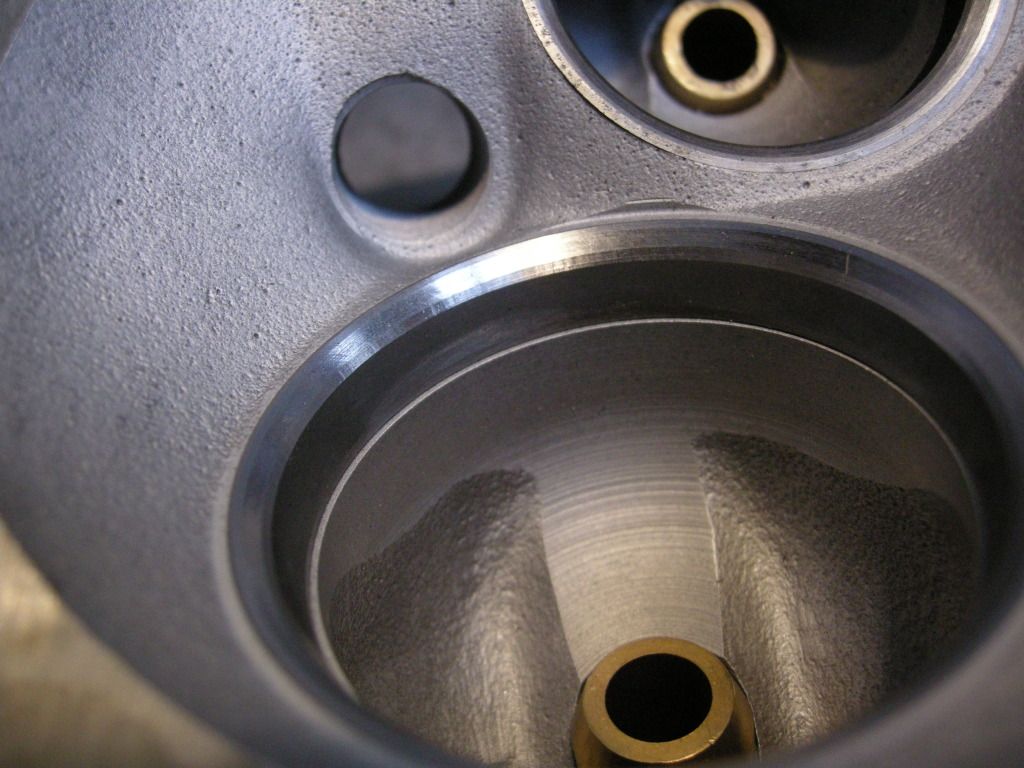
A before and after, not alot of difference really as the head had already been scrubbed, but the soda gives it a nice uniform look and doesn't damage the surface of the alloy.
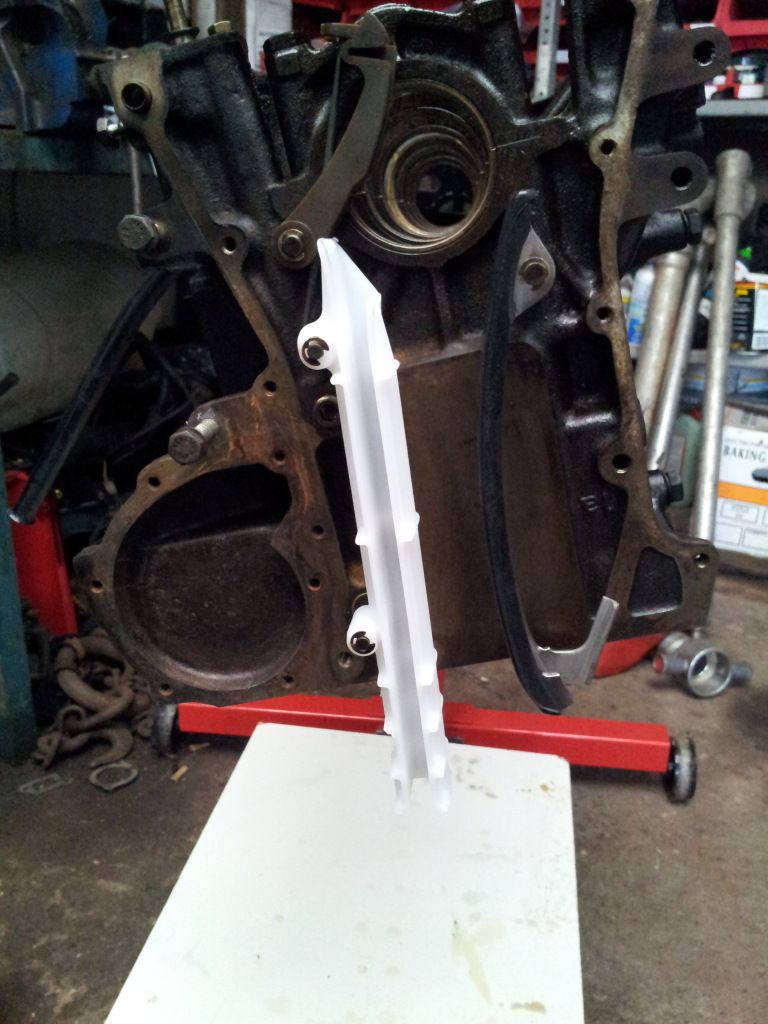
Firstly, all new chain guides fitted yesterday,
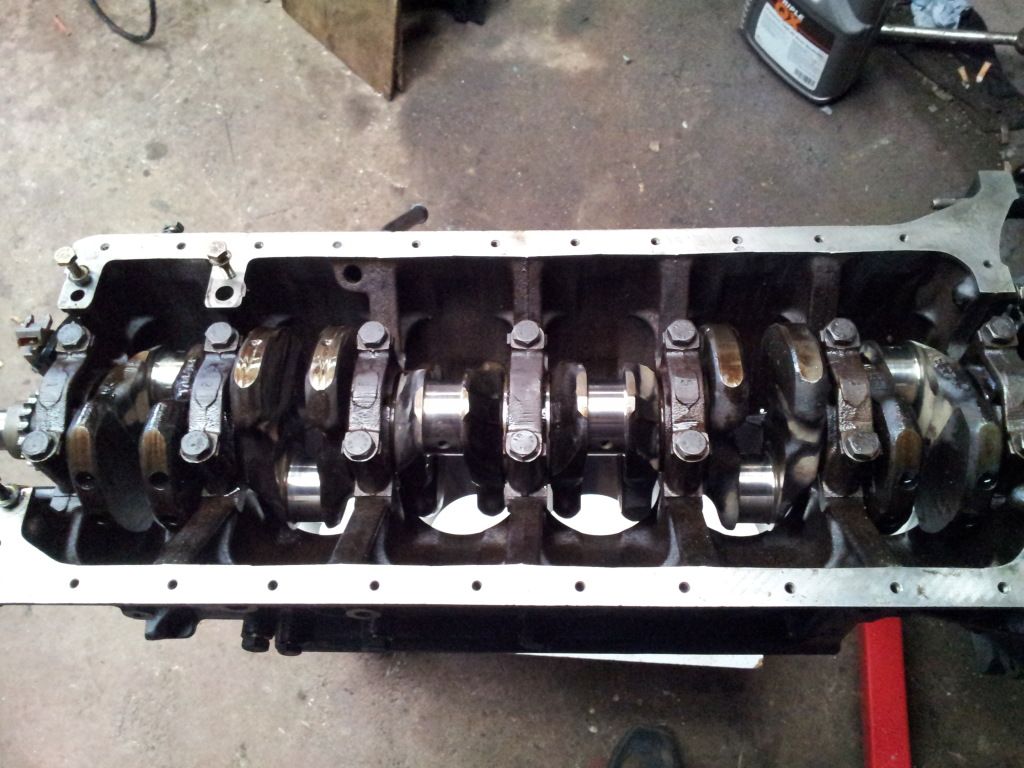
New thrust bearing and shells fitted, dropped the crank in and tightened up the bolts.
For some reason, there was quite alot of end float which was a bit baffling, as everything was measured by using a micrometer .
.
So off came the crank again, the old thrust bearing installed, and then everything reinstalled again, this was to check the origional end float on the crank, cam to 0.005th
So, vice versa, new one installed, and for some reason, don't ask, there was reduced crank end float to about 0.002th, so checked and rechecked, phoned a few guys on the Zone to make sure and all is now ok.
Thought i'd strip/paint and rebuild the ITB's ready for when they're needed.
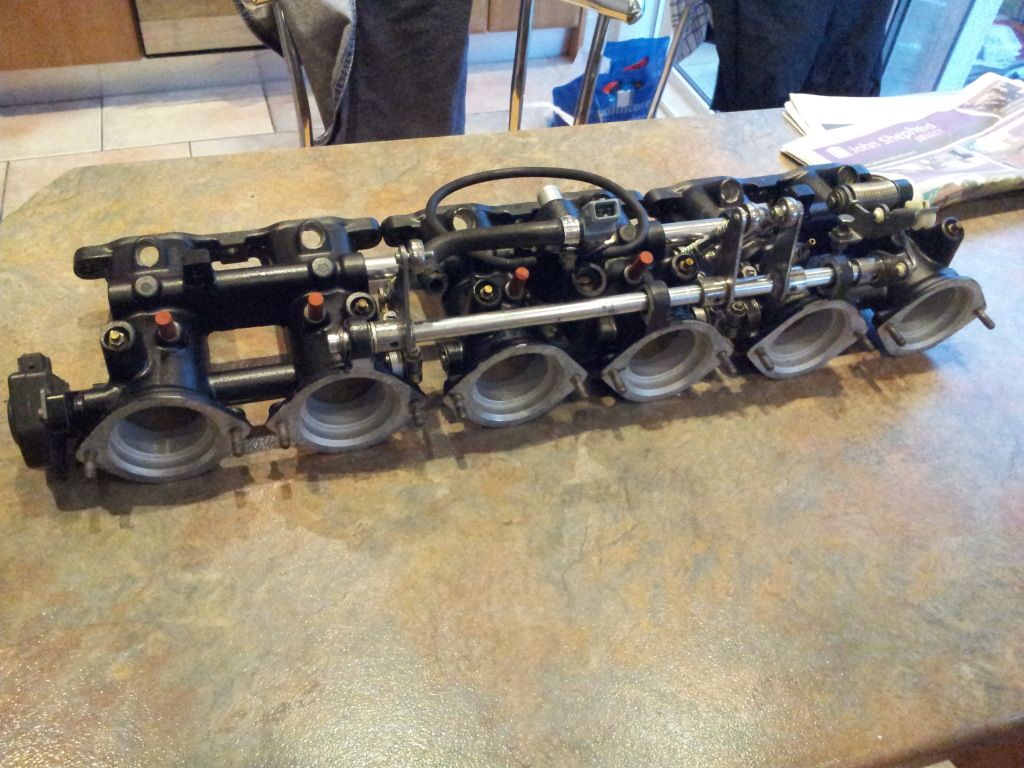
And a few more,
That'll be it till next week when I get the head back.
Then i'll try the Stainless Steel 6 branch and see what needs to be done to make it fit.
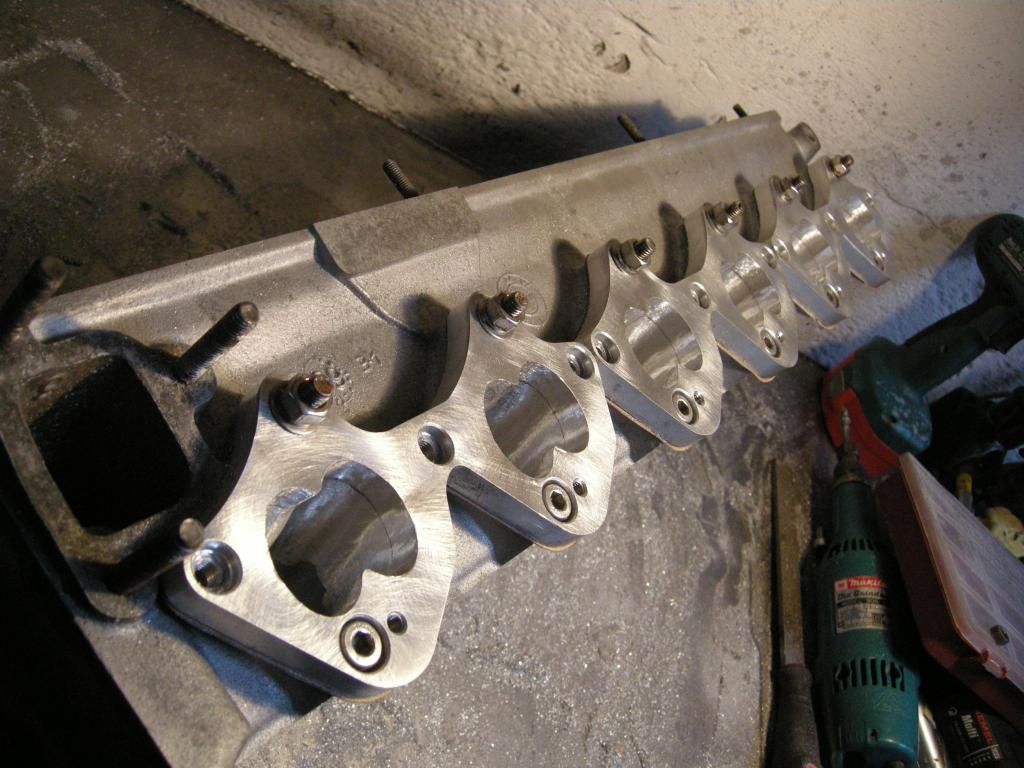
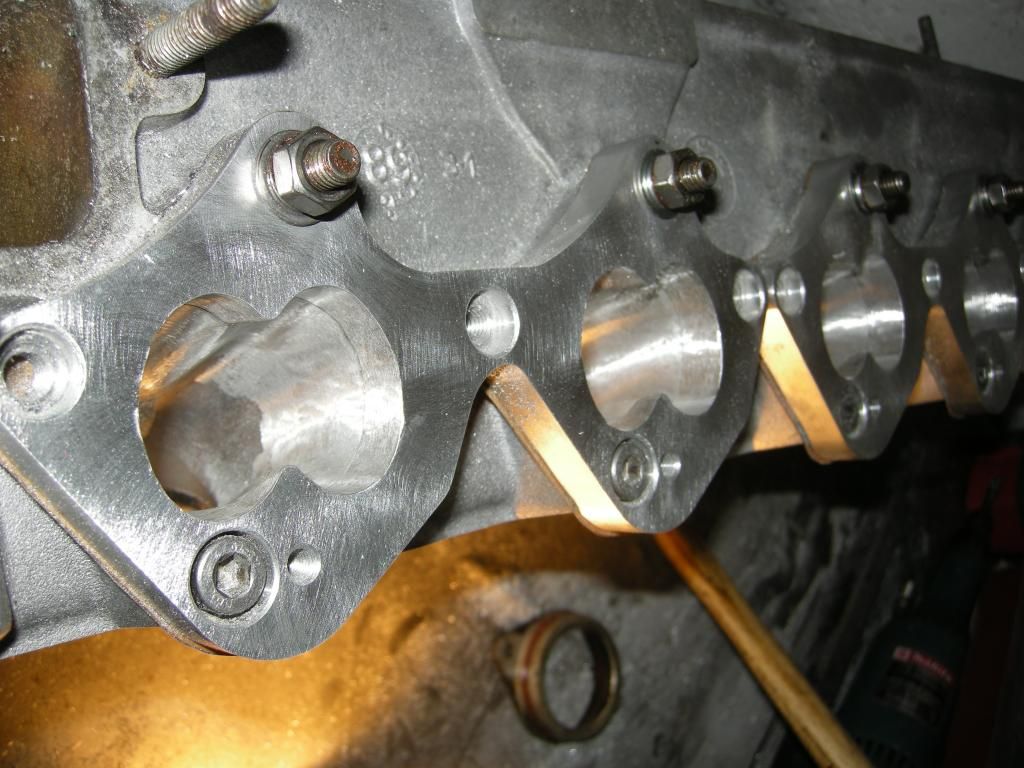
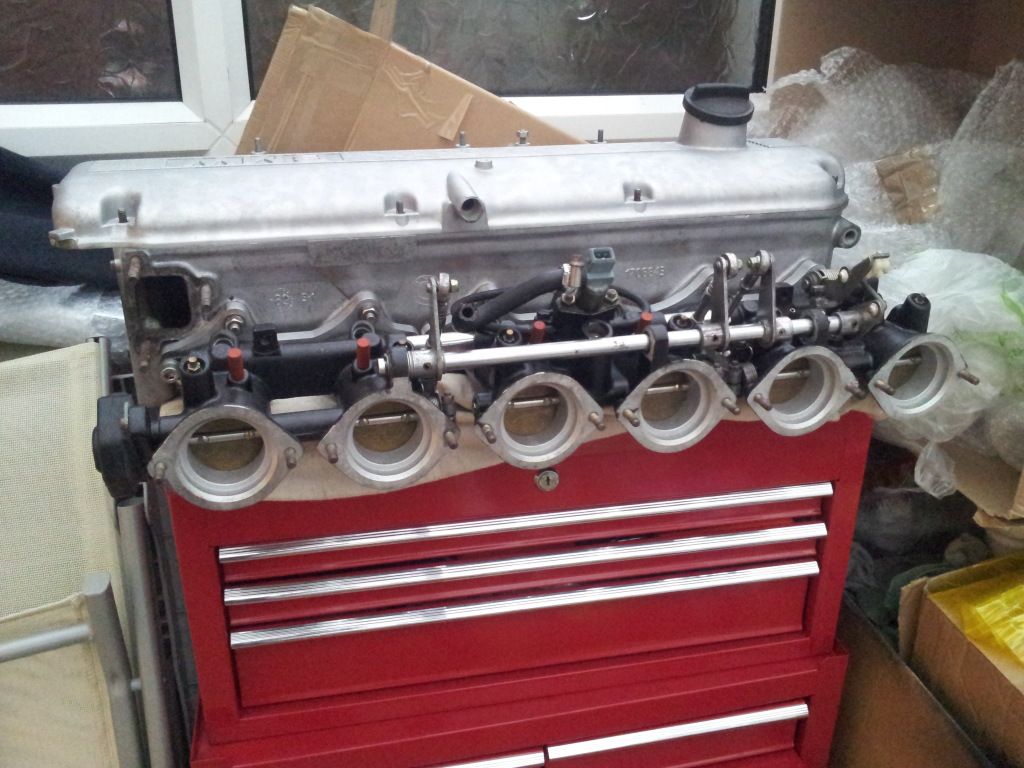
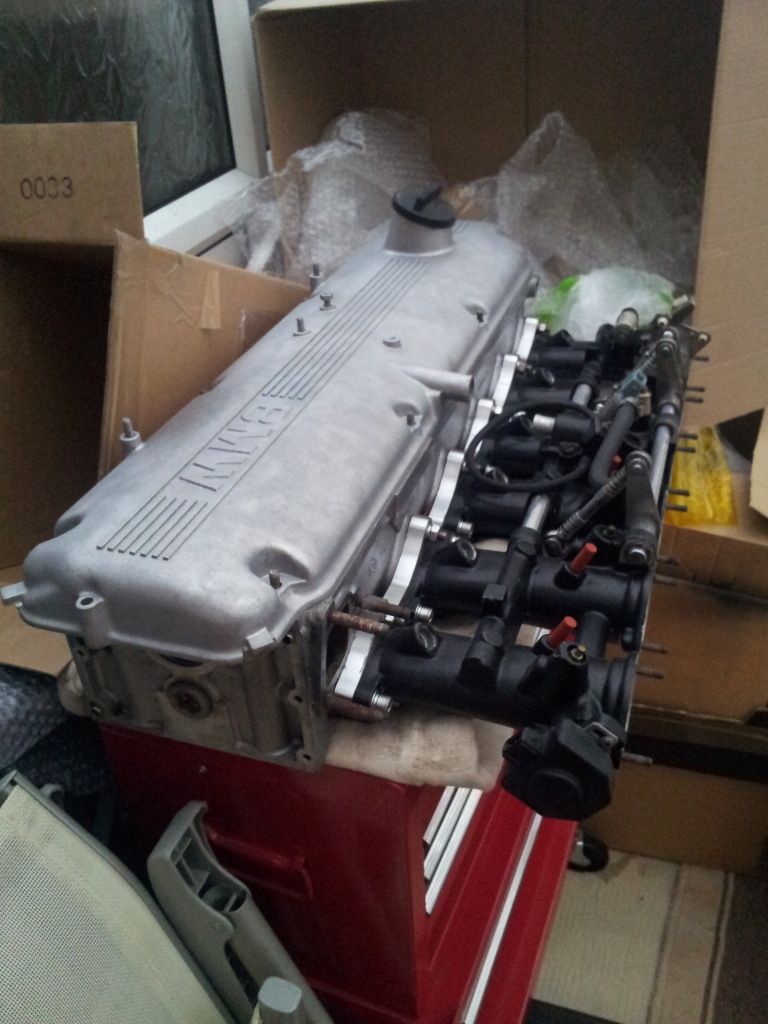
And this is where it satnds atm.
Hopefully more later on this month.
But basically, it goes, i'm doing an M30b35 build, so thought I would share it,as it will be the same for the E21 later.
Head off, rocker shafts removed, rockers and cam out too.

Head now booked in for Monday for a pressure test and a 1/2mm skim
I'll take out the valves on Monday for those eagled eye fookers!

Pistons look to be OK, and the bores look good too, can still see the honing marks on them.
Looks to have been running rick though.


Going "Supercharged" on this engine, so the 1/2mm skim was put on hild for a clean face instead.
Going for a Rotrex C30 range.
Gave the head in on Monday for a pressure test and skim.
Pressure test was good, and a skim of 4 thou wasa only needed.
Picked it up this morning, removed the valves, and the guides and gave it a quick clean.


Lovely brand new Light billet flywheel, takes the E34 clutch. winkeye


Looked into the bottom end shells and big end bearings
Not good, slighty worn and will need to be replaced, so ordered they were.
Cleaned up the face with wet'n'dry and taped up.

Removed the shells and crank and pistons


And left it at that.

Tomorrow, it's clean up time, and painting the block.
Adaptors for the ITB's

Anyway, can't try them, as i've sent the head away for the valves and valve seats to have 3 angles put on to them, couldn't resist it as I had a very good price quoted to have it done.
Had the block honed today too, needed doing as there was slight scoring on a few of the bores.


Had a load of parts Soda and media blasted to get rid of all the oil and wax on the parts.


The ITB's were like this

To this


Also, had some head work done in the last few weeks too, thought it would be nice to treat it to a better flow


Had the seats and vlaves cut to 3 angled finishes.


Next new seats, cutter pilot installed.

The first cut at 60* is the bottom cut.

Followed by a 30* top cut, then the seat cut, both are on a double sided cutter. The seat cut is at 46* the two faces will bed in together within the first moments of the engine being started.

This is what you end up with after it has been soda blasted, and all the cuts finished.

A before and after, not alot of difference really as the head had already been scrubbed, but the soda gives it a nice uniform look and doesn't damage the surface of the alloy.

Firstly, all new chain guides fitted yesterday,

New thrust bearing and shells fitted, dropped the crank in and tightened up the bolts.
For some reason, there was quite alot of end float which was a bit baffling, as everything was measured by using a micrometer
So off came the crank again, the old thrust bearing installed, and then everything reinstalled again, this was to check the origional end float on the crank, cam to 0.005th
So, vice versa, new one installed, and for some reason, don't ask, there was reduced crank end float to about 0.002th, so checked and rechecked, phoned a few guys on the Zone to make sure and all is now ok.

Thought i'd strip/paint and rebuild the ITB's ready for when they're needed.

And a few more,
That'll be it till next week when I get the head back.
Then i'll try the Stainless Steel 6 branch and see what needs to be done to make it fit.


And this is where it satnds atm.
Hopefully more later on this month.

- e21-Mark
- E21 Master
- Posts: 5715
- Joined: Fri Mar 21, 2008 2:19 pm
- My E21(s): 316 m52/2.8 Cat Cams & Jenvey ITB
- Facebook page: https://www.facebook.com/JackyardBackoff
- Location: Cornwall - UK
Re: Rav's M30b35 Build
Nice. I know people bang on about m30 being heavy but the epic turque is great. I want a hot 3.5 in my e12.
-
lemonayd
- E21 VIP

- Posts: 347
- Joined: Thu Feb 28, 2008 11:55 am
- My E21(s): 1981 Bmw 323i manual Ascot Grey
- Location: london
Re: Rav's M30b35 Build
welcome back Rav , glad to see you havnt given up on the E21 . great pics that engine's gonna be epic.........
...ayds
...ayds
All Men Truly Die, But Not All Men Have Truly Lived
www.pristinebodyworks.co.uk
www.pristinebodyworks.co.uk
- Jeroen
- Site Admin
- Posts: 29892
- Joined: Tue Sep 14, 2004 12:23 pm
- My E21(s): '81 323i Baur
- Location: The Netherlands
- Contact:
Re: My E21 M30B35 project
Welcome back! I merged your topics to get the project together in one topic, please update here!
Amazing work and that's going to be one hot M30 indeed! Using S38 ITB's?
Keep up the good work and keep us updated!
Amazing work and that's going to be one hot M30 indeed! Using S38 ITB's?
Keep up the good work and keep us updated!
Regards/groeten, Jeroen
Re: My E21 M30B35 project
Good work keep us updated as the engine goes back together
I love to see an engine rebuild.now rebuilding my old m20 never
Done it before but its great fun.those throttle bodies look great.
I love to see an engine rebuild.now rebuilding my old m20 never
Done it before but its great fun.those throttle bodies look great.
E21 323i [kashmere] Off the road pending restoration
E21 3231[Graphite metalic] Restoration and conversion to M52
E36 318i Had it nearly 10 years work in progress
E36 328i Daily driver
E39 520i Family car school run workhorse
E36 328i Touring
E21 3231[Graphite metalic] Restoration and conversion to M52
E36 318i Had it nearly 10 years work in progress
E36 328i Daily driver
E39 520i Family car school run workhorse
E36 328i Touring
Re: My E21 M30B35 project
thats a very nice job your doing on that engine.
[img]http://s13.photobucket.com/albums/a285/nasbucket/forumsig.jpg[/img]
Re: My E21 M30B35 project
So just out of interest I was wondering what sort of power are we talking from all this engine stuff your doing?
What you going to be doing for brakes / suspension etc
[img]http://s13.photobucket.com/albums/a285/nasbucket/forumsig.jpg[/img]
Re: My E21 M30B35 project
Thanks Lads.
Nas, you know i'm M30 through and thorugh
Power wise, with out a Cam change, i think about 230hp, with a cam change, i think close to 250bhp.
I'll need to bed the engine in after it's installed, and then Supercharge it, then it should be about 450+bhp


Nas, you know i'm M30 through and thorugh
Power wise, with out a Cam change, i think about 230hp, with a cam change, i think close to 250bhp.
I'll need to bed the engine in after it's installed, and then Supercharge it, then it should be about 450+bhp

