Bealo's 320/6
-
bealo
- E21 Fanatic
- Posts: 245
- Joined: Wed Jun 06, 2012 11:31 pm
- My E21(s): 83 316 1.8
82 320/6 - Location: Essex
Re: Bealo's 320/6
So Im into May now, My paint guy came over to have a look and the car is booked in to be preped and painted in September so I had to get a move on!!
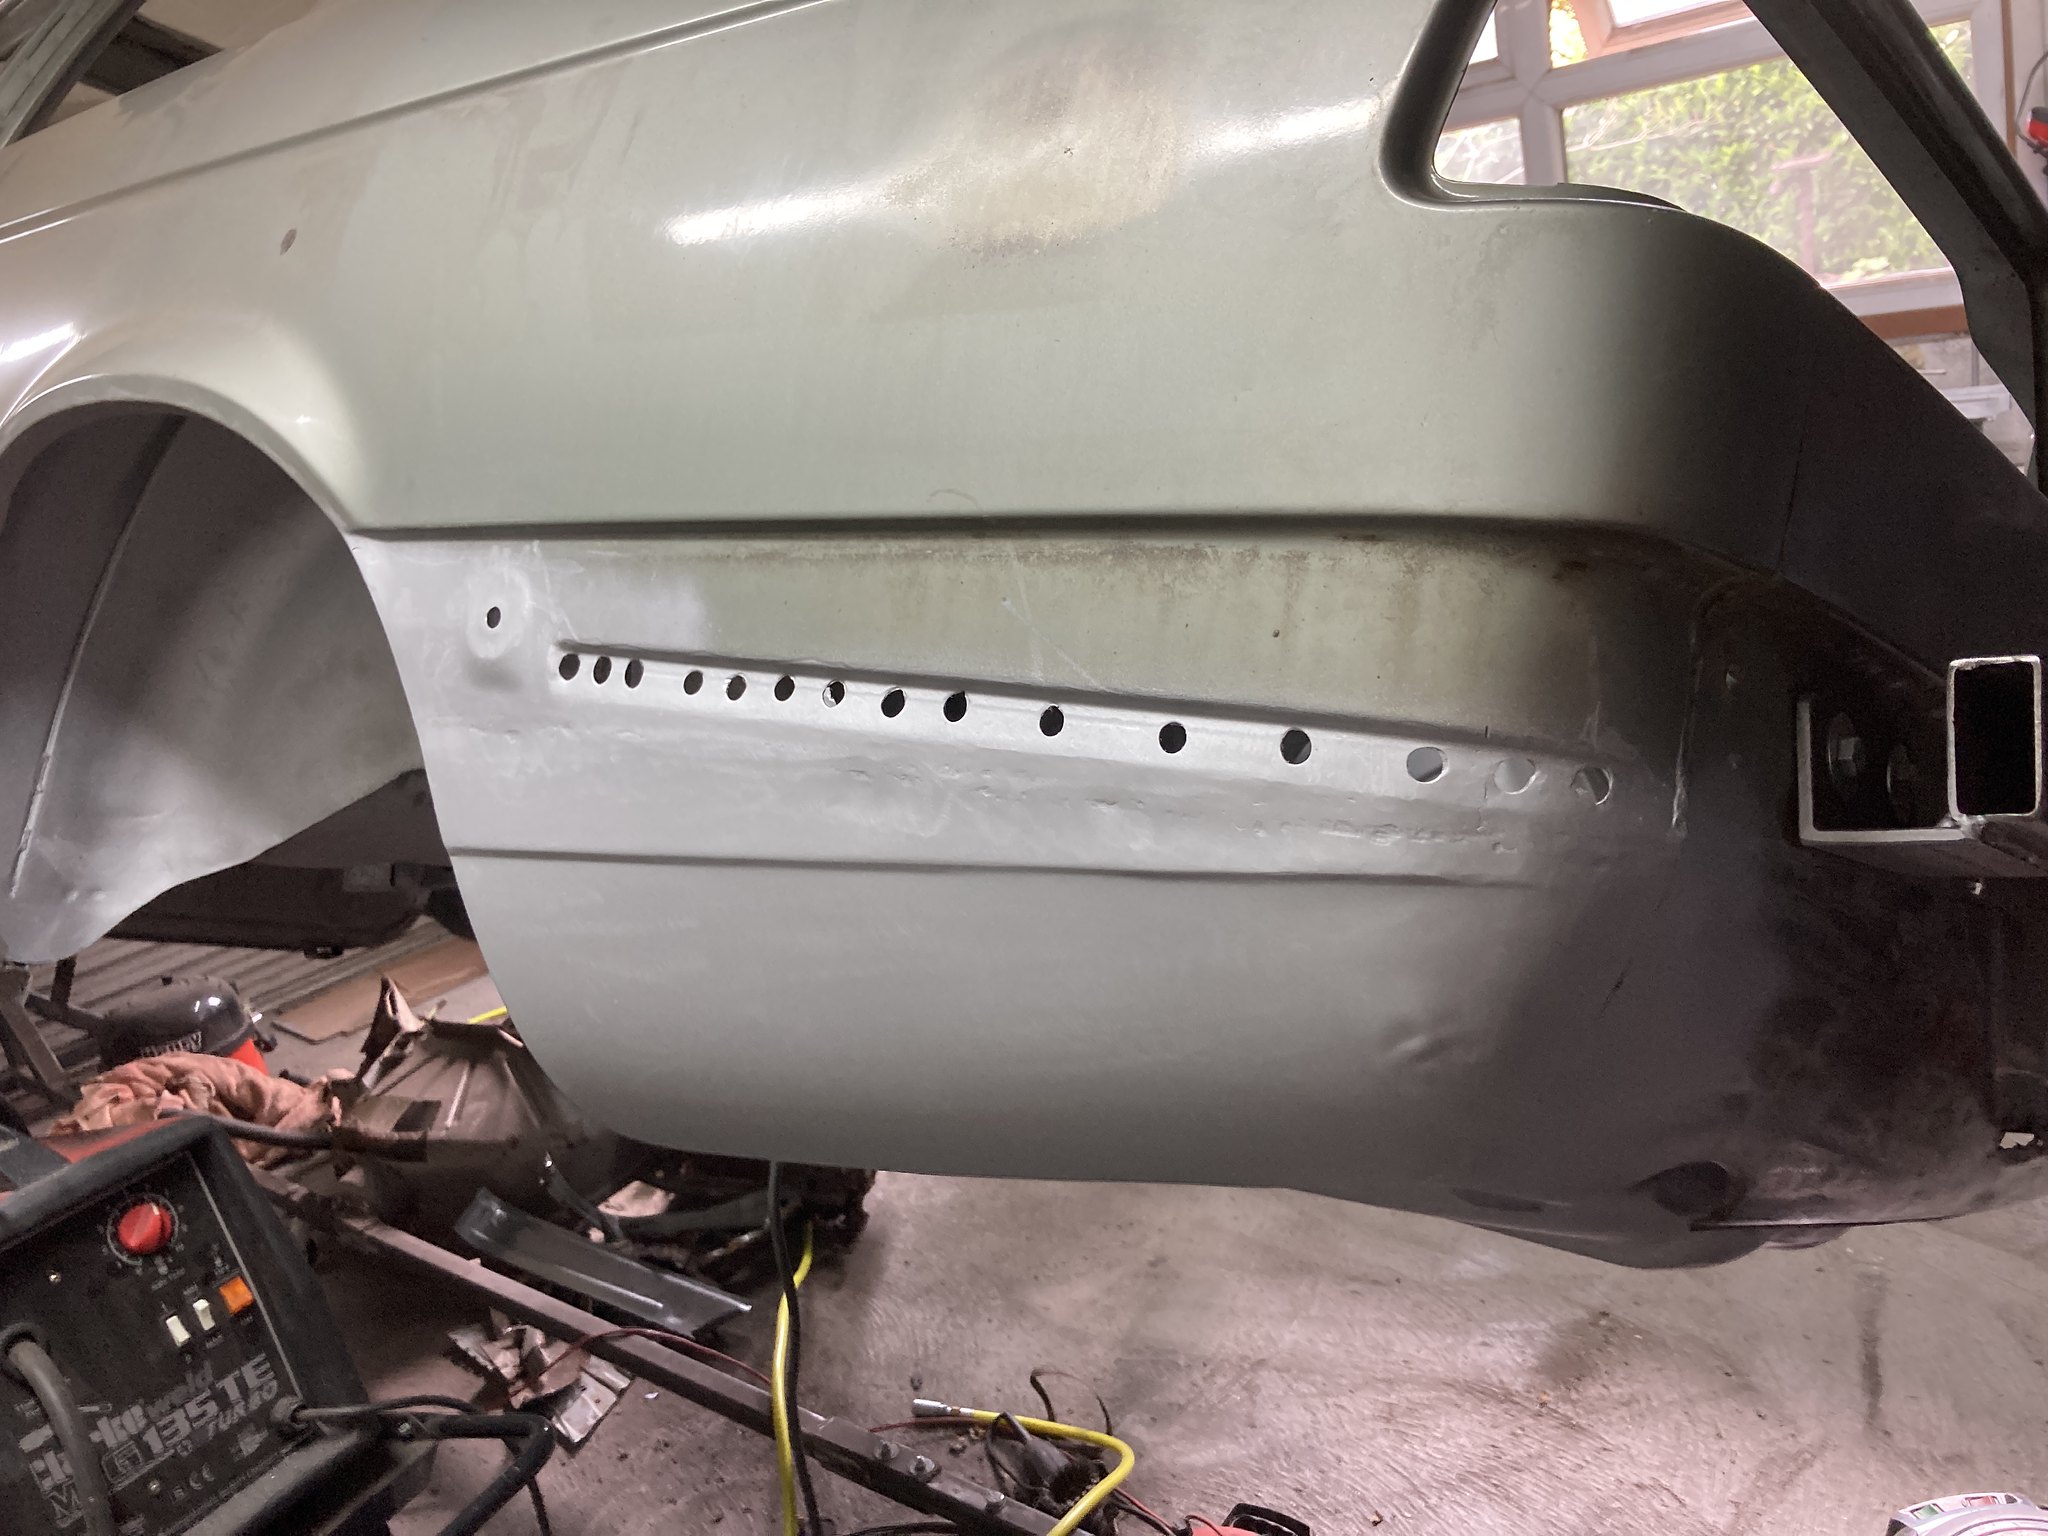
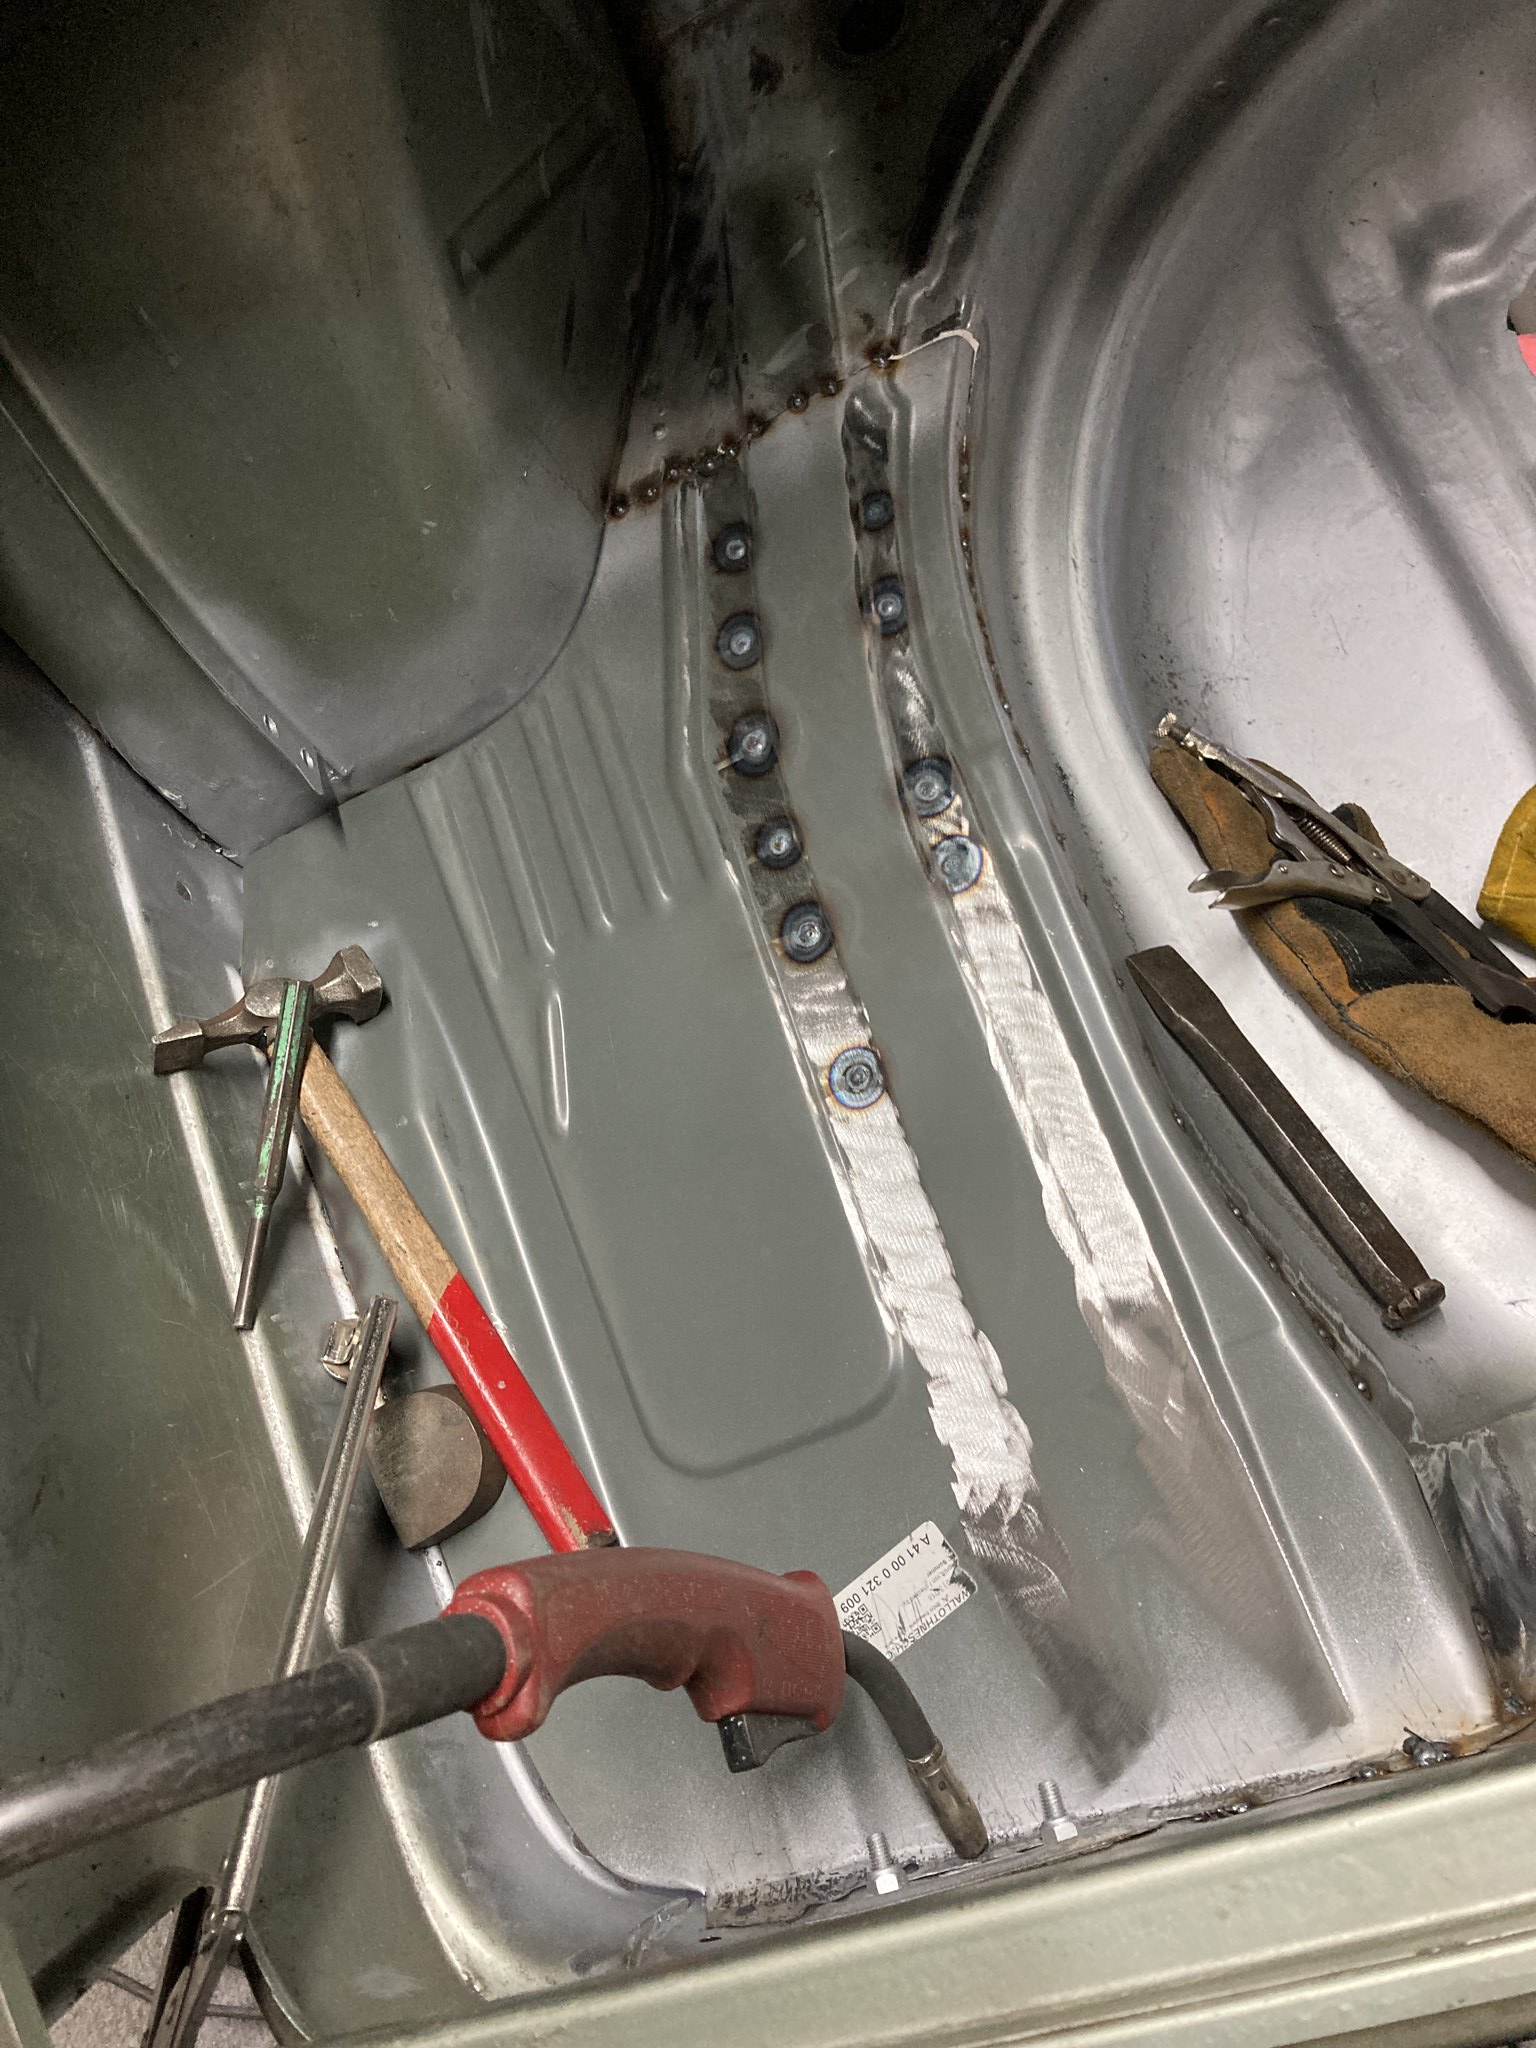
On to the other side of the boot floor, thought this would be a bit easier as I had done the other side but to be honest I struggled to get it fitting as nice as the other side, a bit of time and patience and I got it to an acceptable standard.
The process was pretty much the same mark and cut out the panel, repair the lower edge of the arch tub and weld in new panel. upon prepping everything I found the lower quater panel on this side also needed replaced so this slowed me down while I waited for it to arrive. Lesson learned here, dont assume panels are ok, thoroughly check everything before ordering! This will also save you on shipping costs.
When fitting both of the quater panels I found the best place to weld them was behind where the bumper will sit to reduce the chance of any big buckling from heat on the rear quater


You can't polish a turd.... but you can roll it in glitter!!!!
-
bealo
- E21 Fanatic
- Posts: 245
- Joined: Wed Jun 06, 2012 11:31 pm
- My E21(s): 83 316 1.8
82 320/6 - Location: Essex
Re: Bealo's 320/6
After the last couple of bits in the boot the finish line of welding was at last in sight 
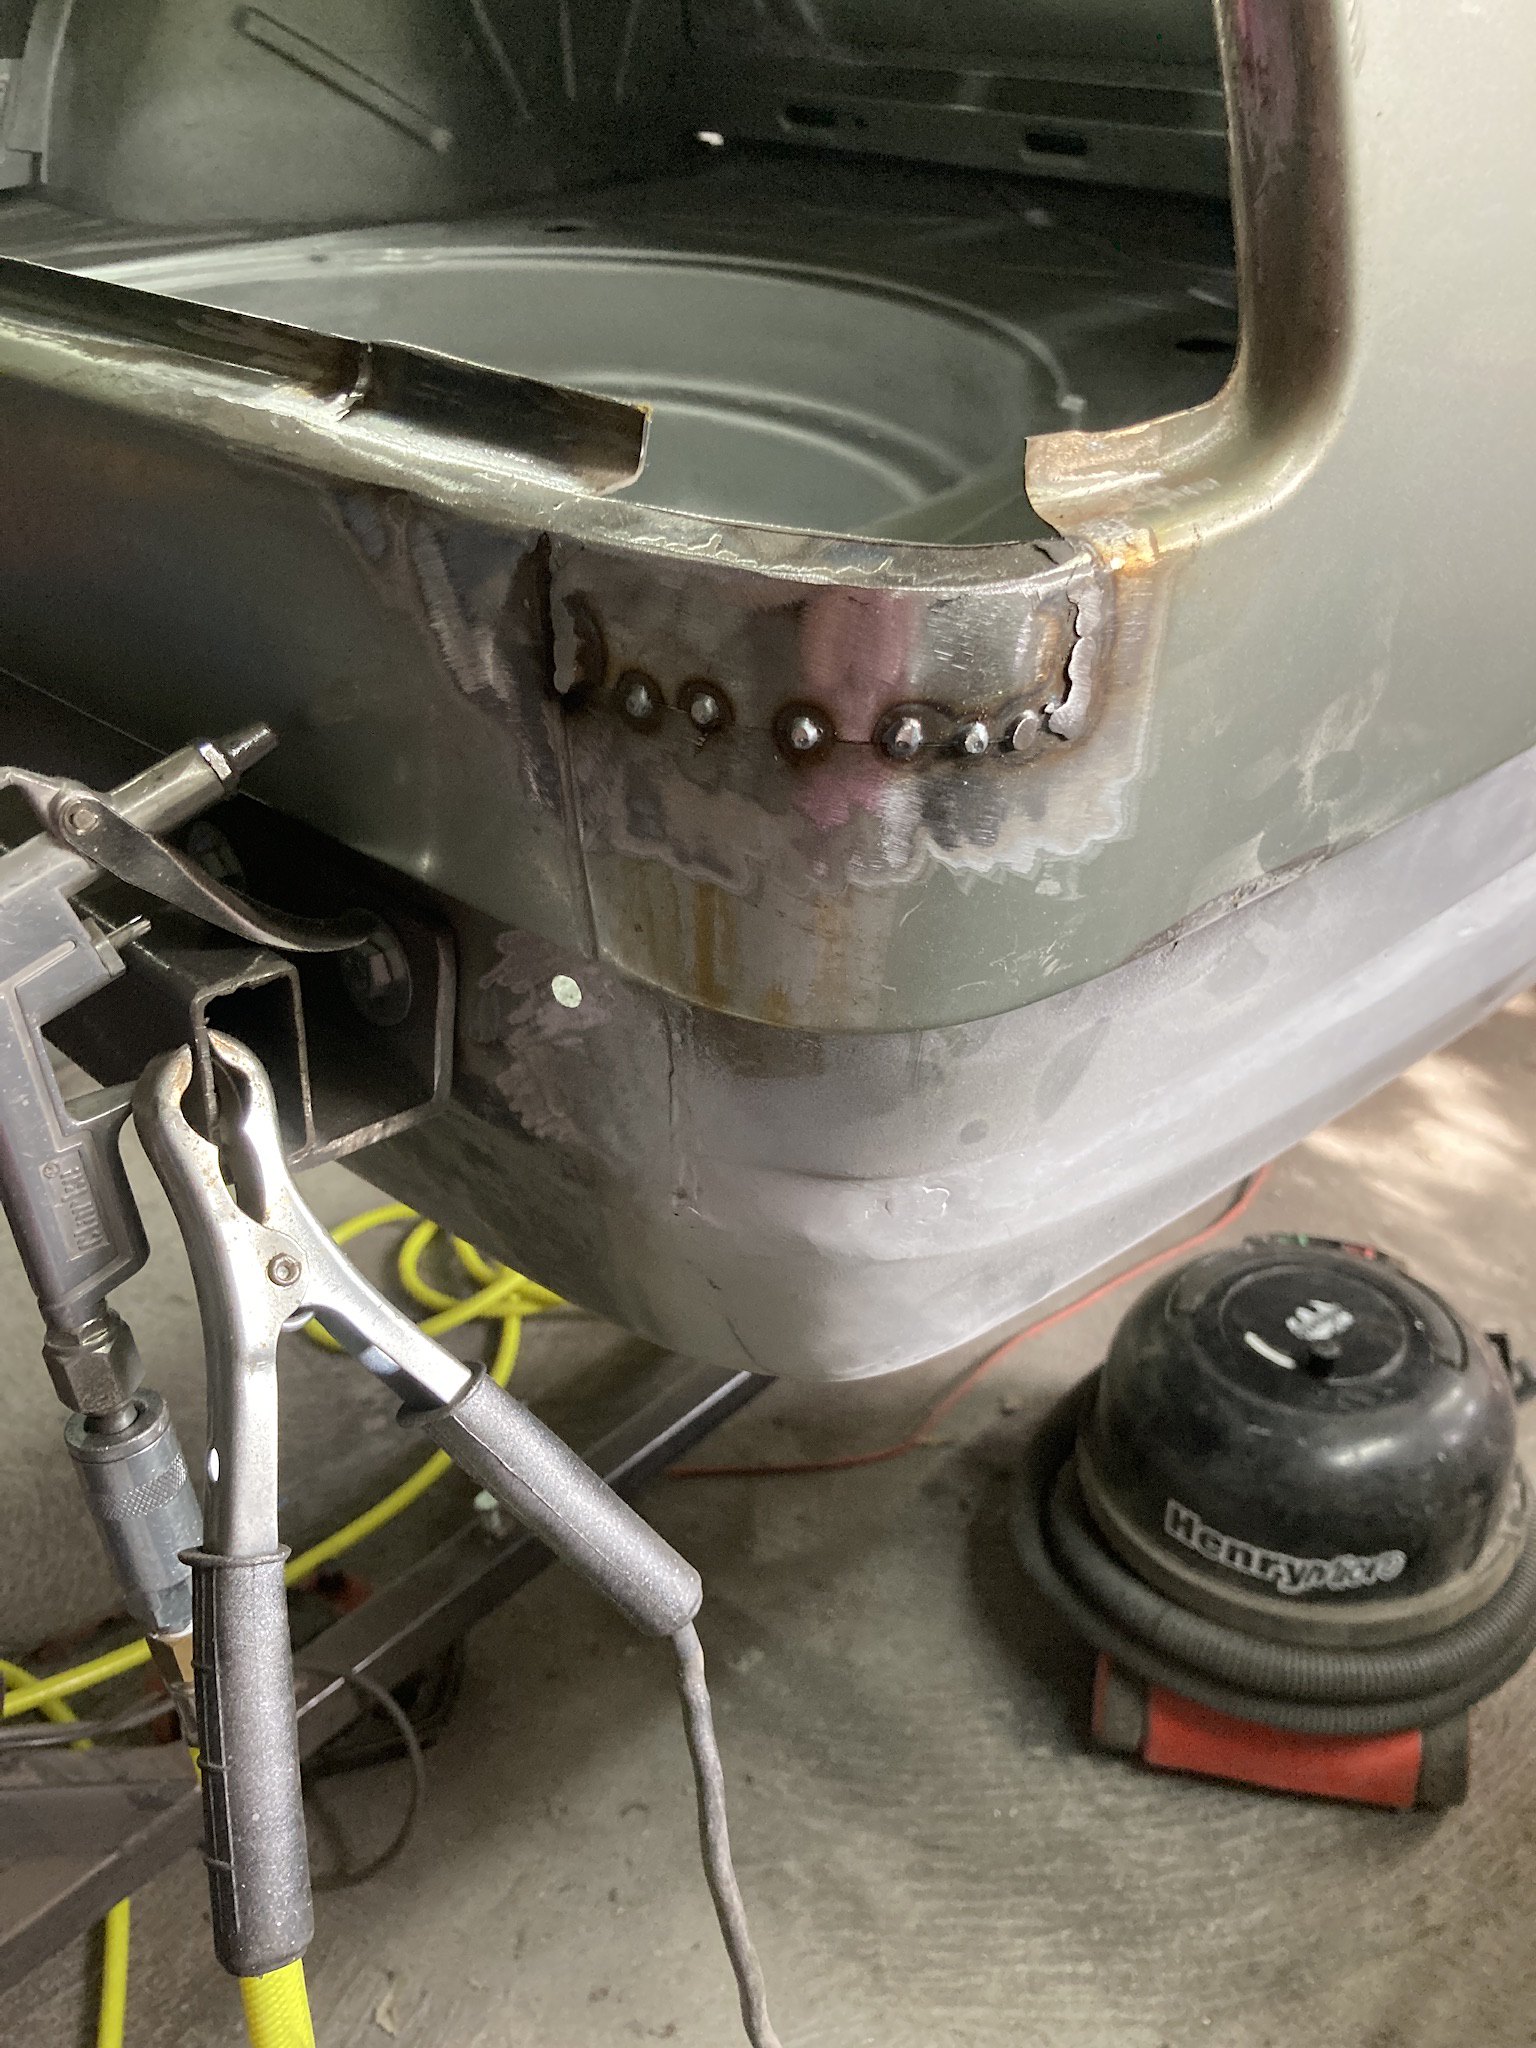
I had an old aerial hole and a hole from an old alarm system in the rear quater to weld up and a challenging repair around the rear light apeture.
I took insperation from an american guy "Bad Chad" on Youtube. He says that that if the repair piece has curves, steps etc to build it up in sections so thats what i did and it came out awsome
I started with the curve then added the return and then the upright piece


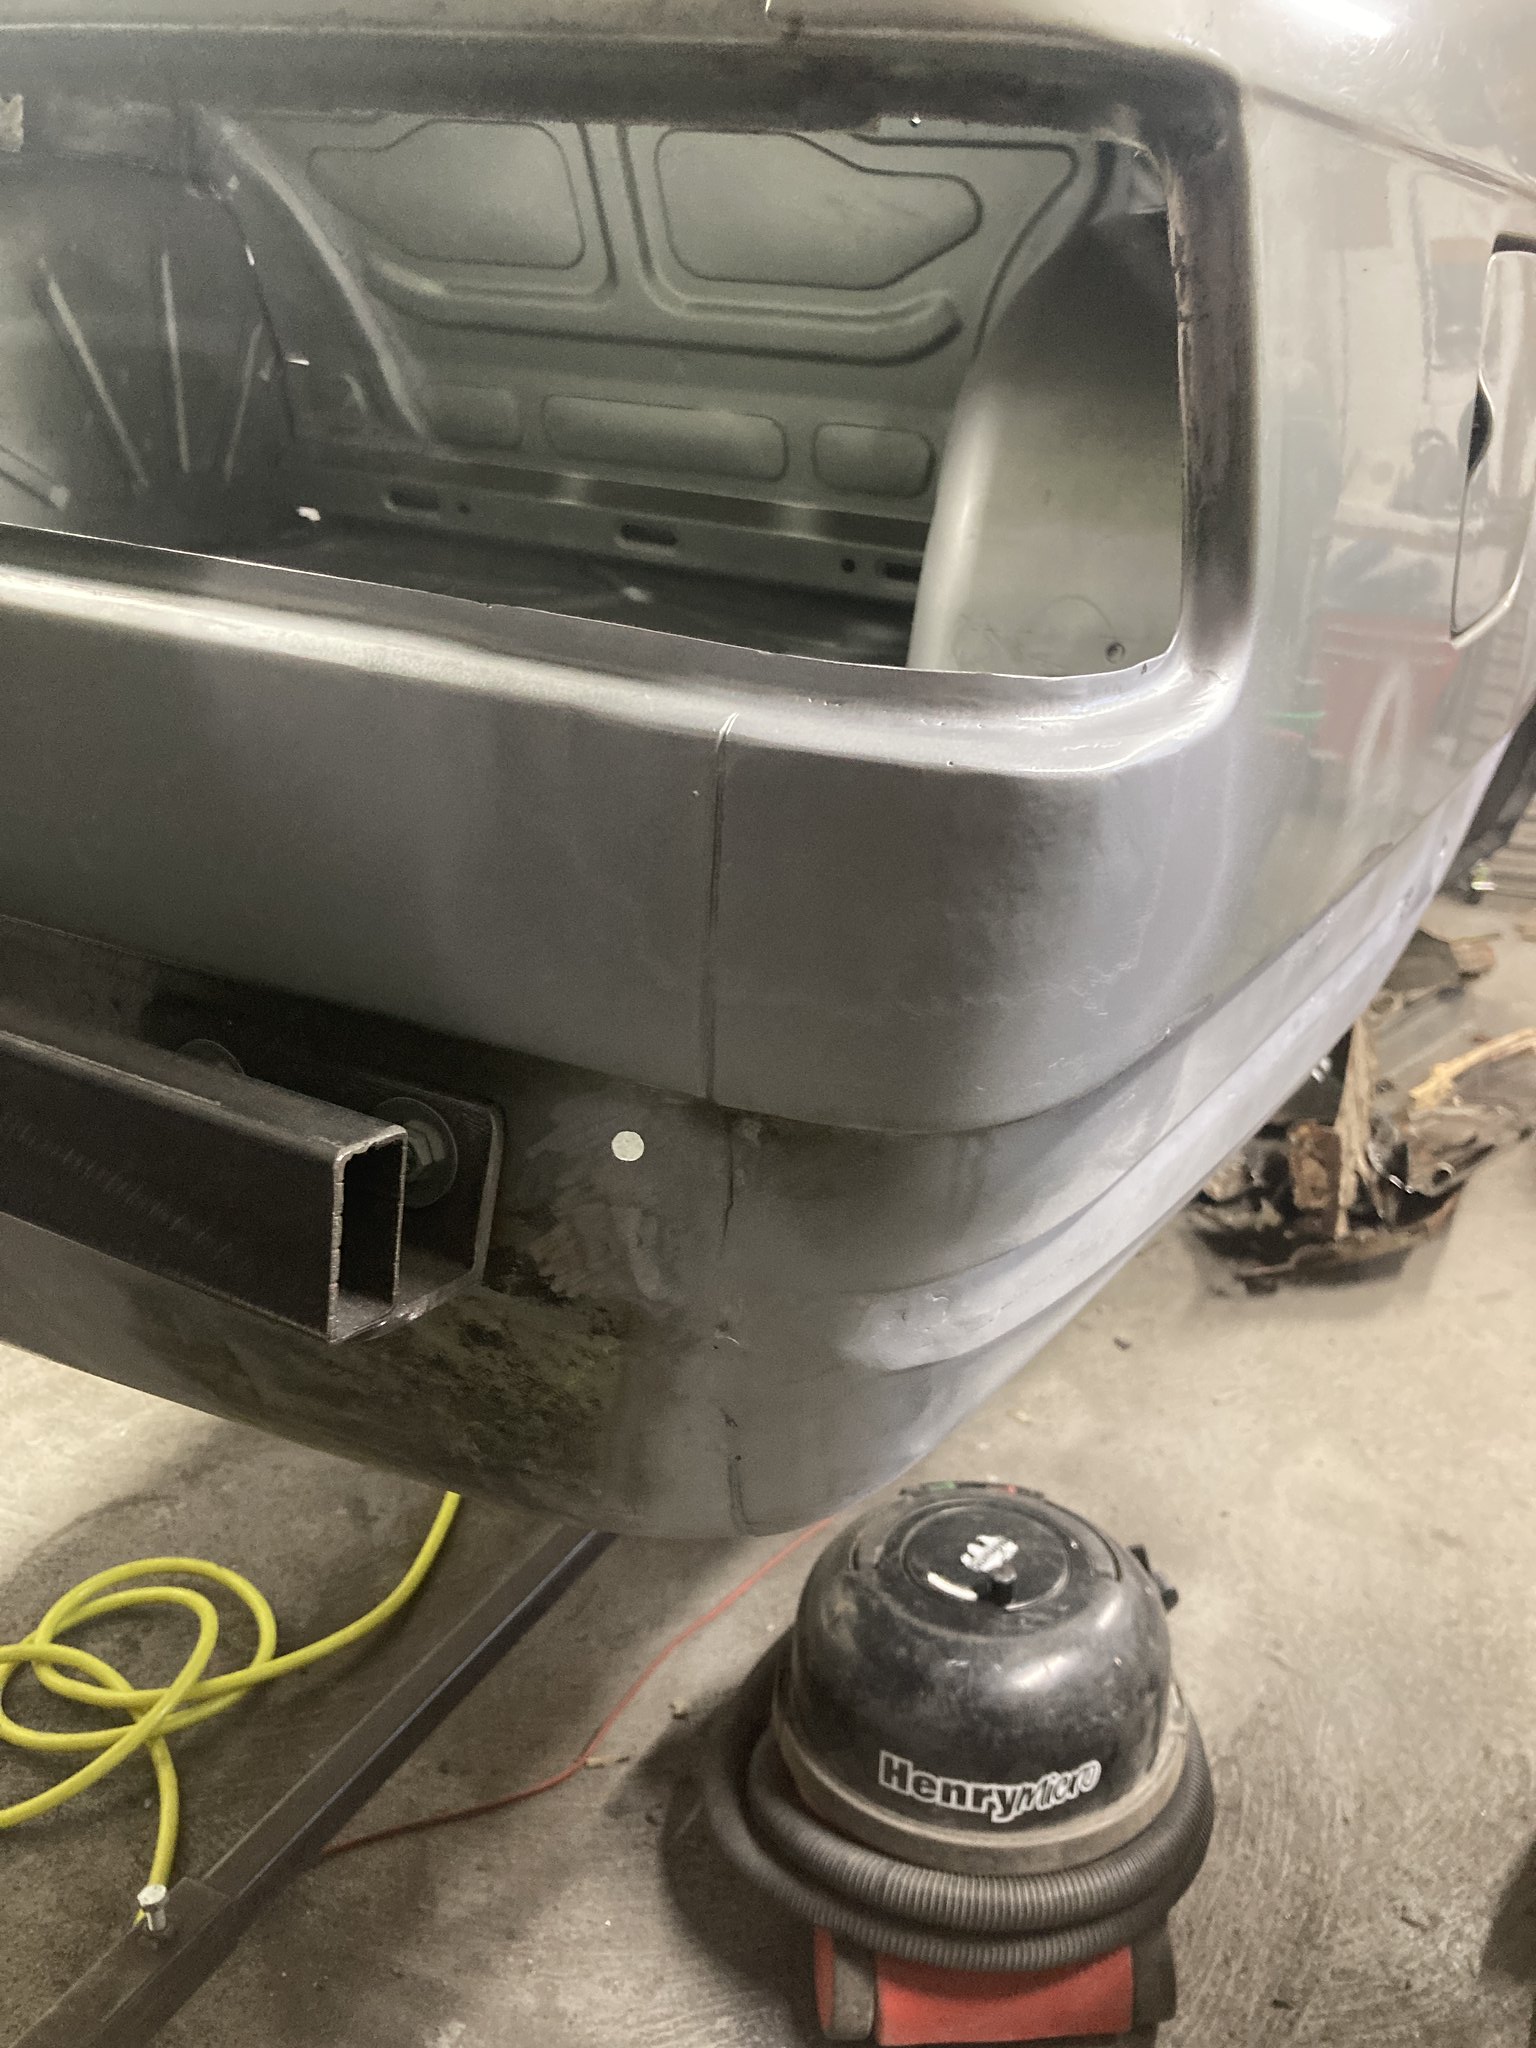
I done a couple of repairs to the rear valence where the number plate mounts and then it was June and time for the replacement sunroof cassette
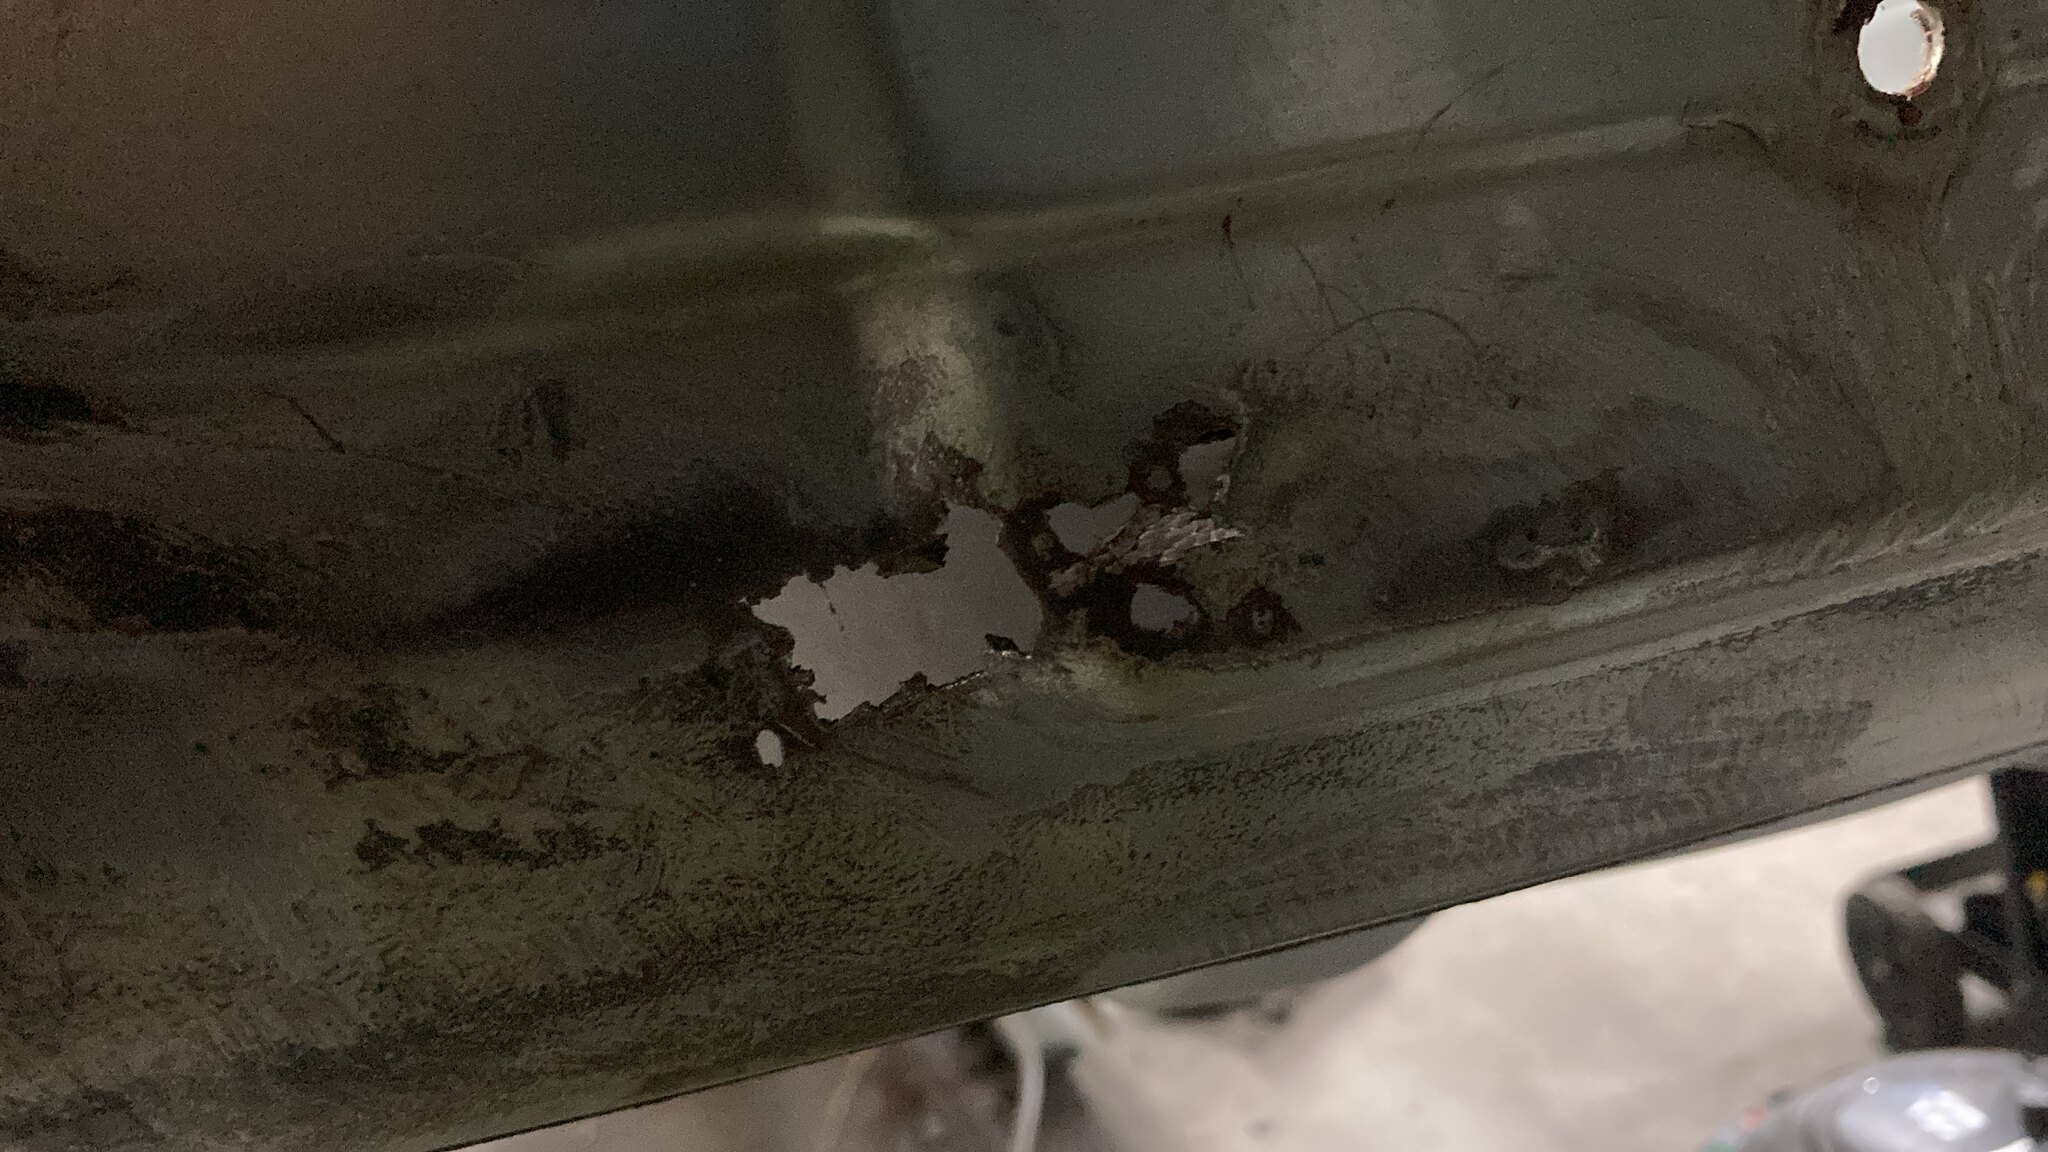
I had an old aerial hole and a hole from an old alarm system in the rear quater to weld up and a challenging repair around the rear light apeture.
I took insperation from an american guy "Bad Chad" on Youtube. He says that that if the repair piece has curves, steps etc to build it up in sections so thats what i did and it came out awsome
I started with the curve then added the return and then the upright piece


I done a couple of repairs to the rear valence where the number plate mounts and then it was June and time for the replacement sunroof cassette

You can't polish a turd.... but you can roll it in glitter!!!!
-
bealo
- E21 Fanatic
- Posts: 245
- Joined: Wed Jun 06, 2012 11:31 pm
- My E21(s): 83 316 1.8
82 320/6 - Location: Essex
Re: Bealo's 320/6
so after putting this offI finally fitted the sunroof cassette.
There was a bit of rust on the lip that gets bonded to the roof so I cut it out and managed to salvage some pieces from the original cassette
Bonding the cassette to the roof wasnt too bad. I carefully checked and measured and done a "dry fit" first. Once I was happy, out came the Tiger seal and I fitted the cassette using tubing, wood and whatever I could find to keep pressure on it while the adheasive set. Having the car on the jig made this a whole lot easier and would definatley recommend.
Once dry I welded the tabs at the sides and spot welds in the sunroof apeture.
I really hope I have this right as Im not going to know now until after paint when I fit the sunroof.

You can't polish a turd.... but you can roll it in glitter!!!!
-
bealo
- E21 Fanatic
- Posts: 245
- Joined: Wed Jun 06, 2012 11:31 pm
- My E21(s): 83 316 1.8
82 320/6 - Location: Essex
Re: Bealo's 320/6
Its now June and time to start priming and sealing reading for the underseal/stonechip
I was struggling for time as I was getting married in July and we were in full wedding planning mode!!
Never the less I managed to get a bit of time and cleaned up the underside and treated any surface rust that I hadnt already treated.
A quick going over with panel wipe and then a couple of coats of primer
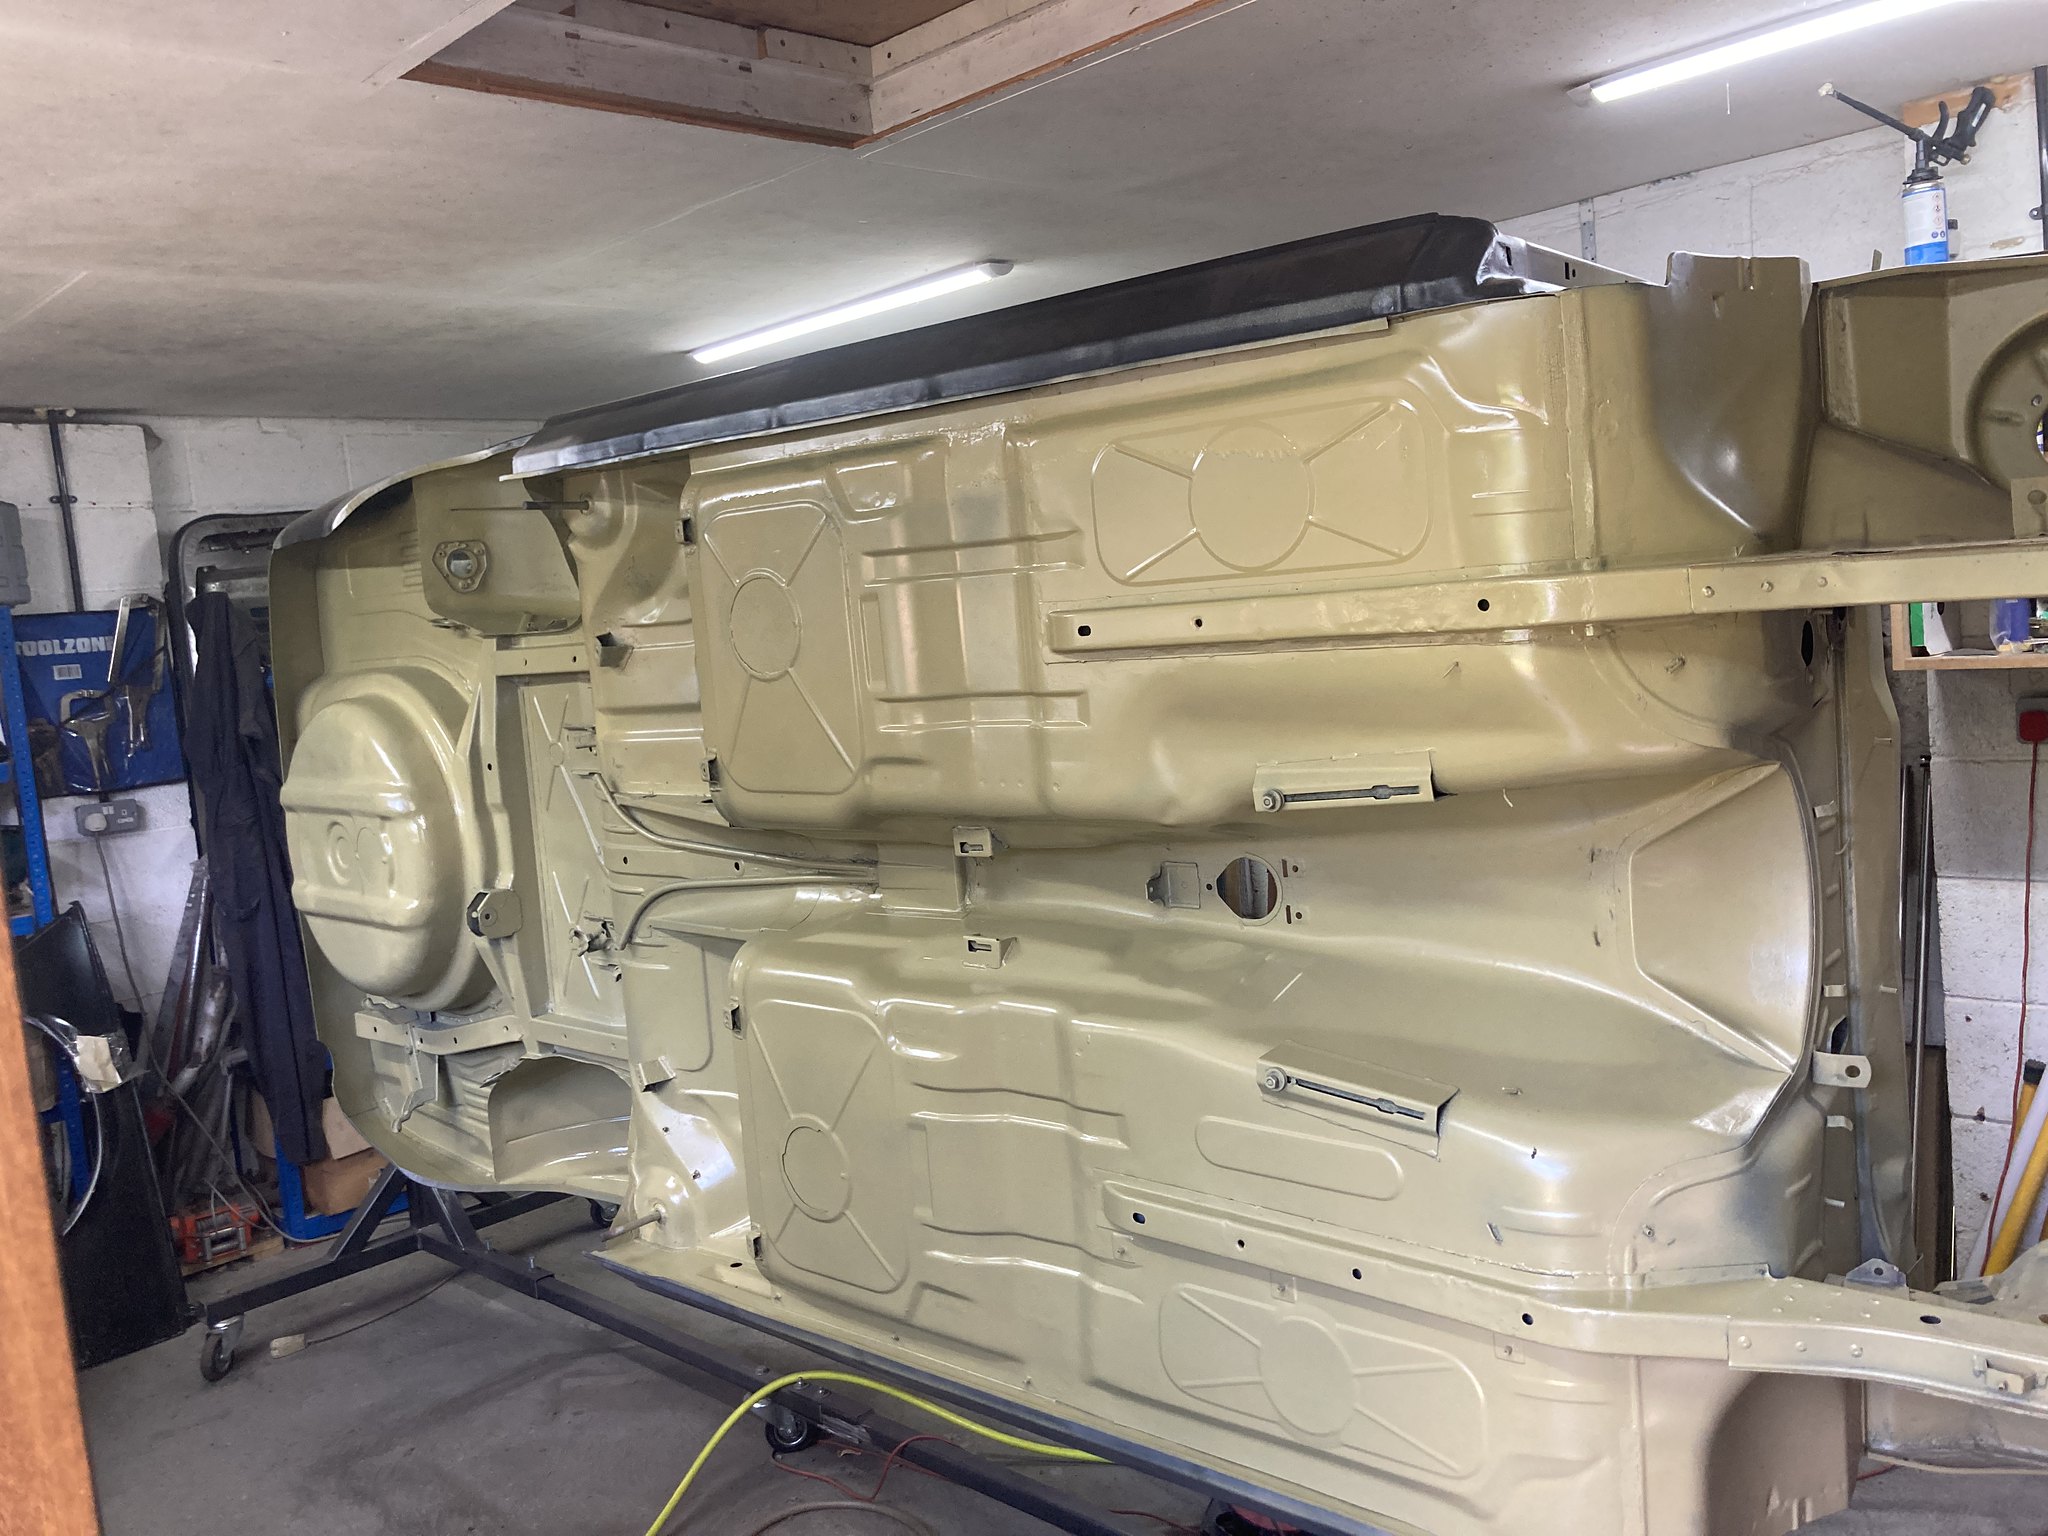
I left it to dry for a couple of days and then started on the seam sealer which I found to be quite a messy job. I used 3m seal sealer and the 3m seam sealer brushes to get as close as I could to the factory look.
The car was really coming on now and was a great sense of achievment to start making it look pretty rather attacking it with a cutting disk!!
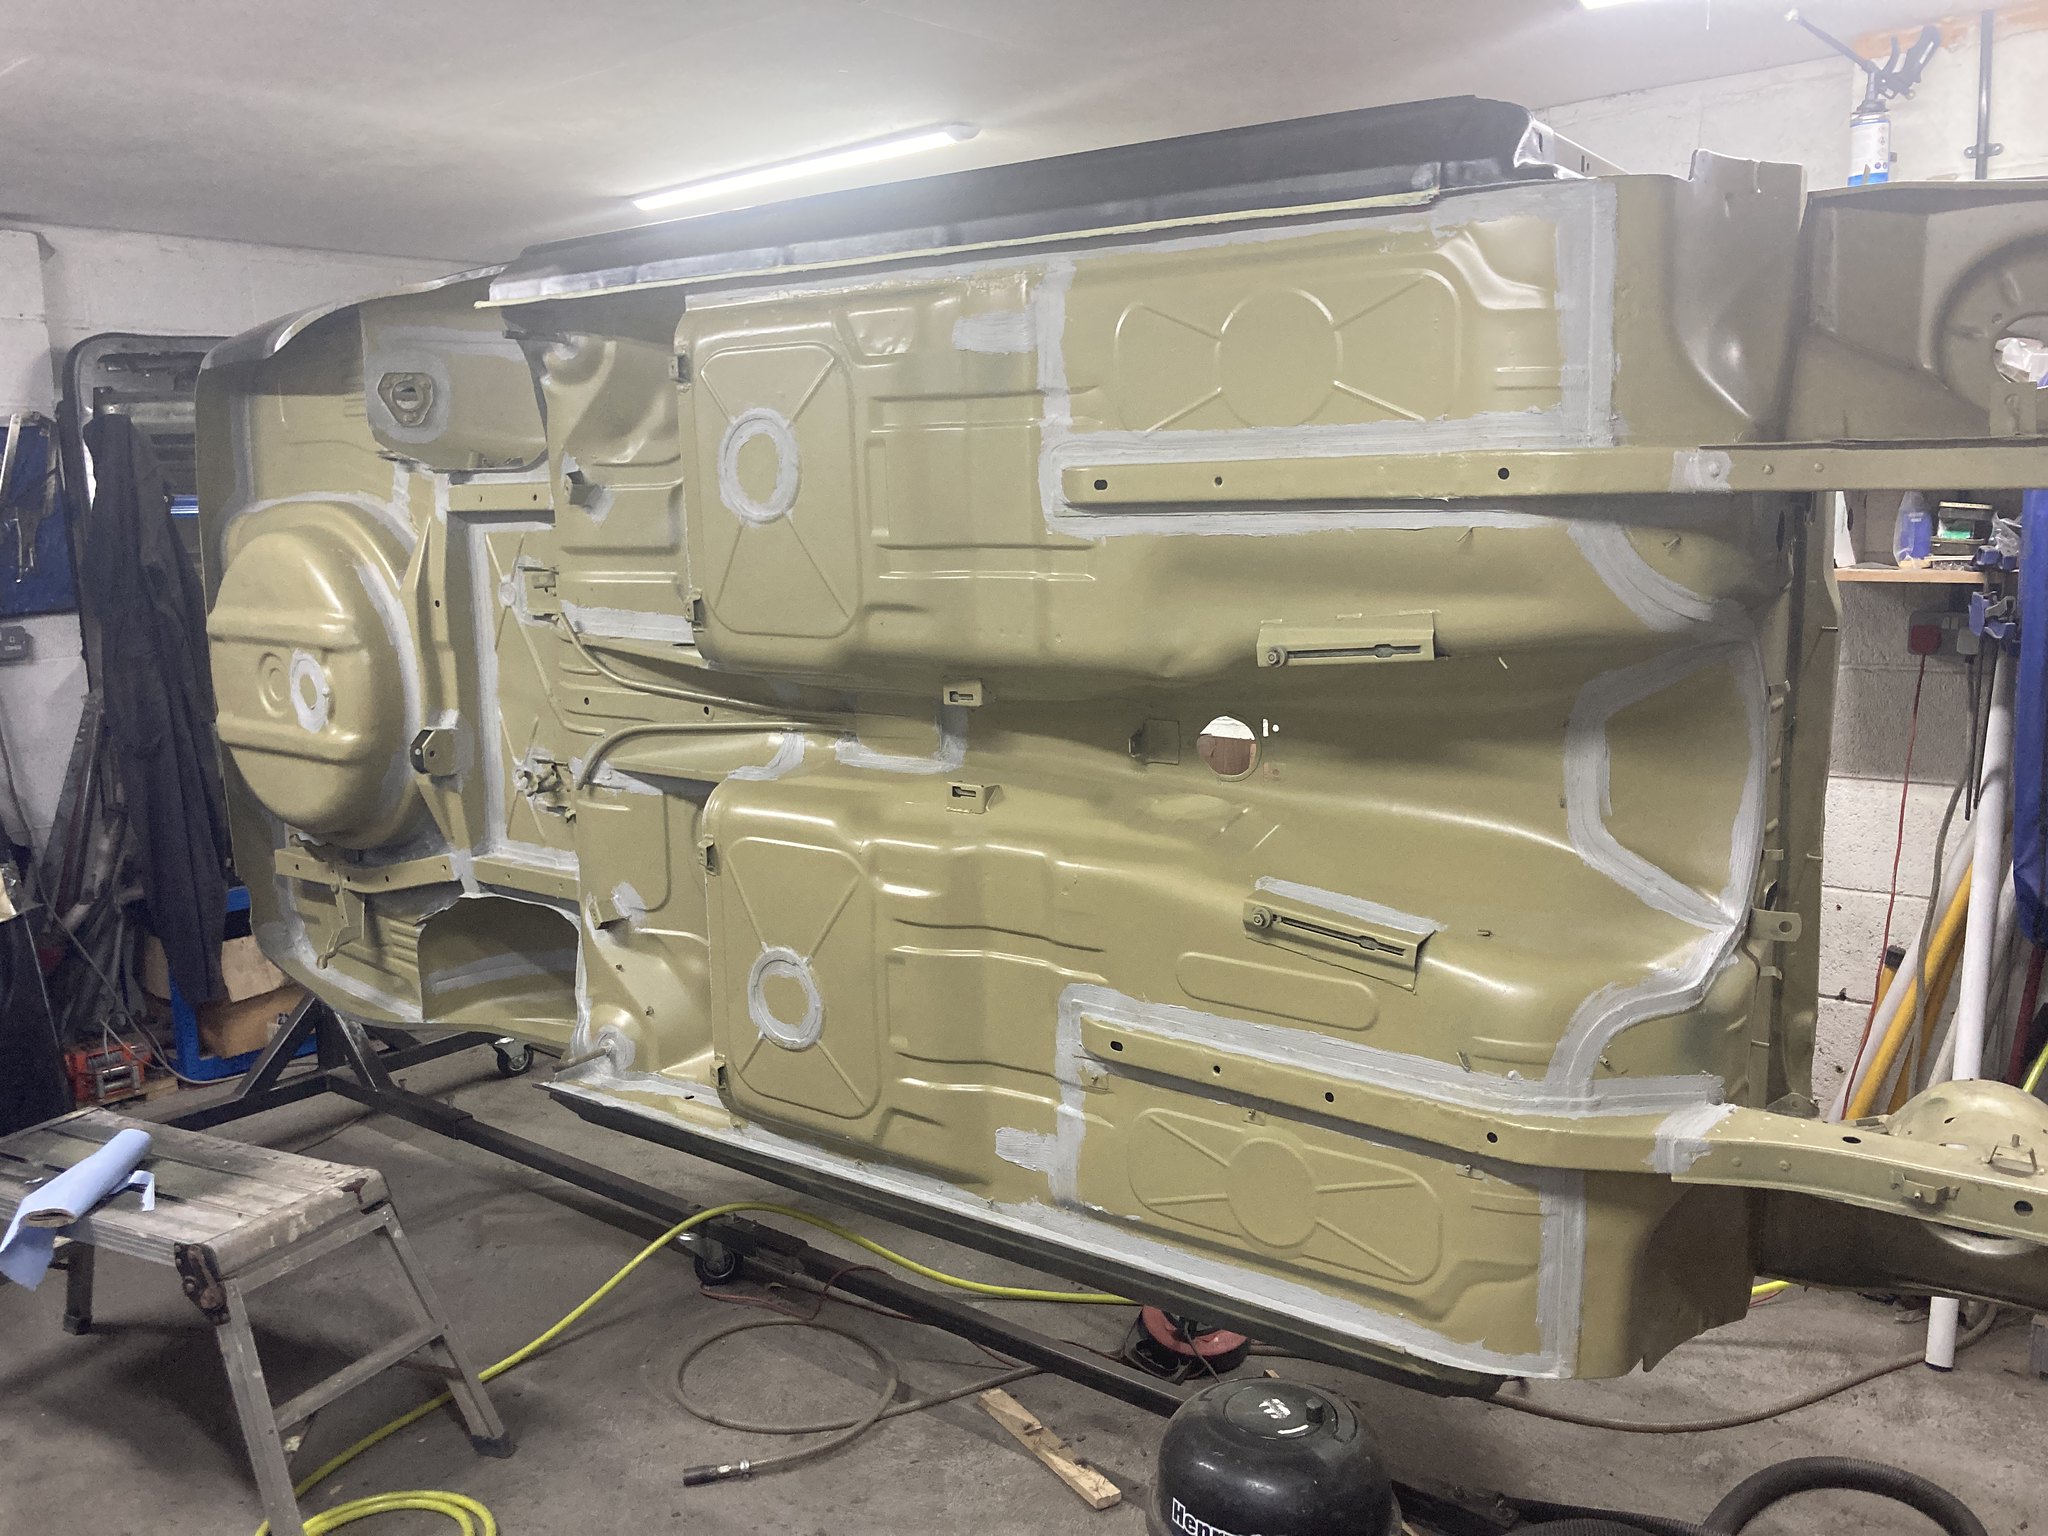
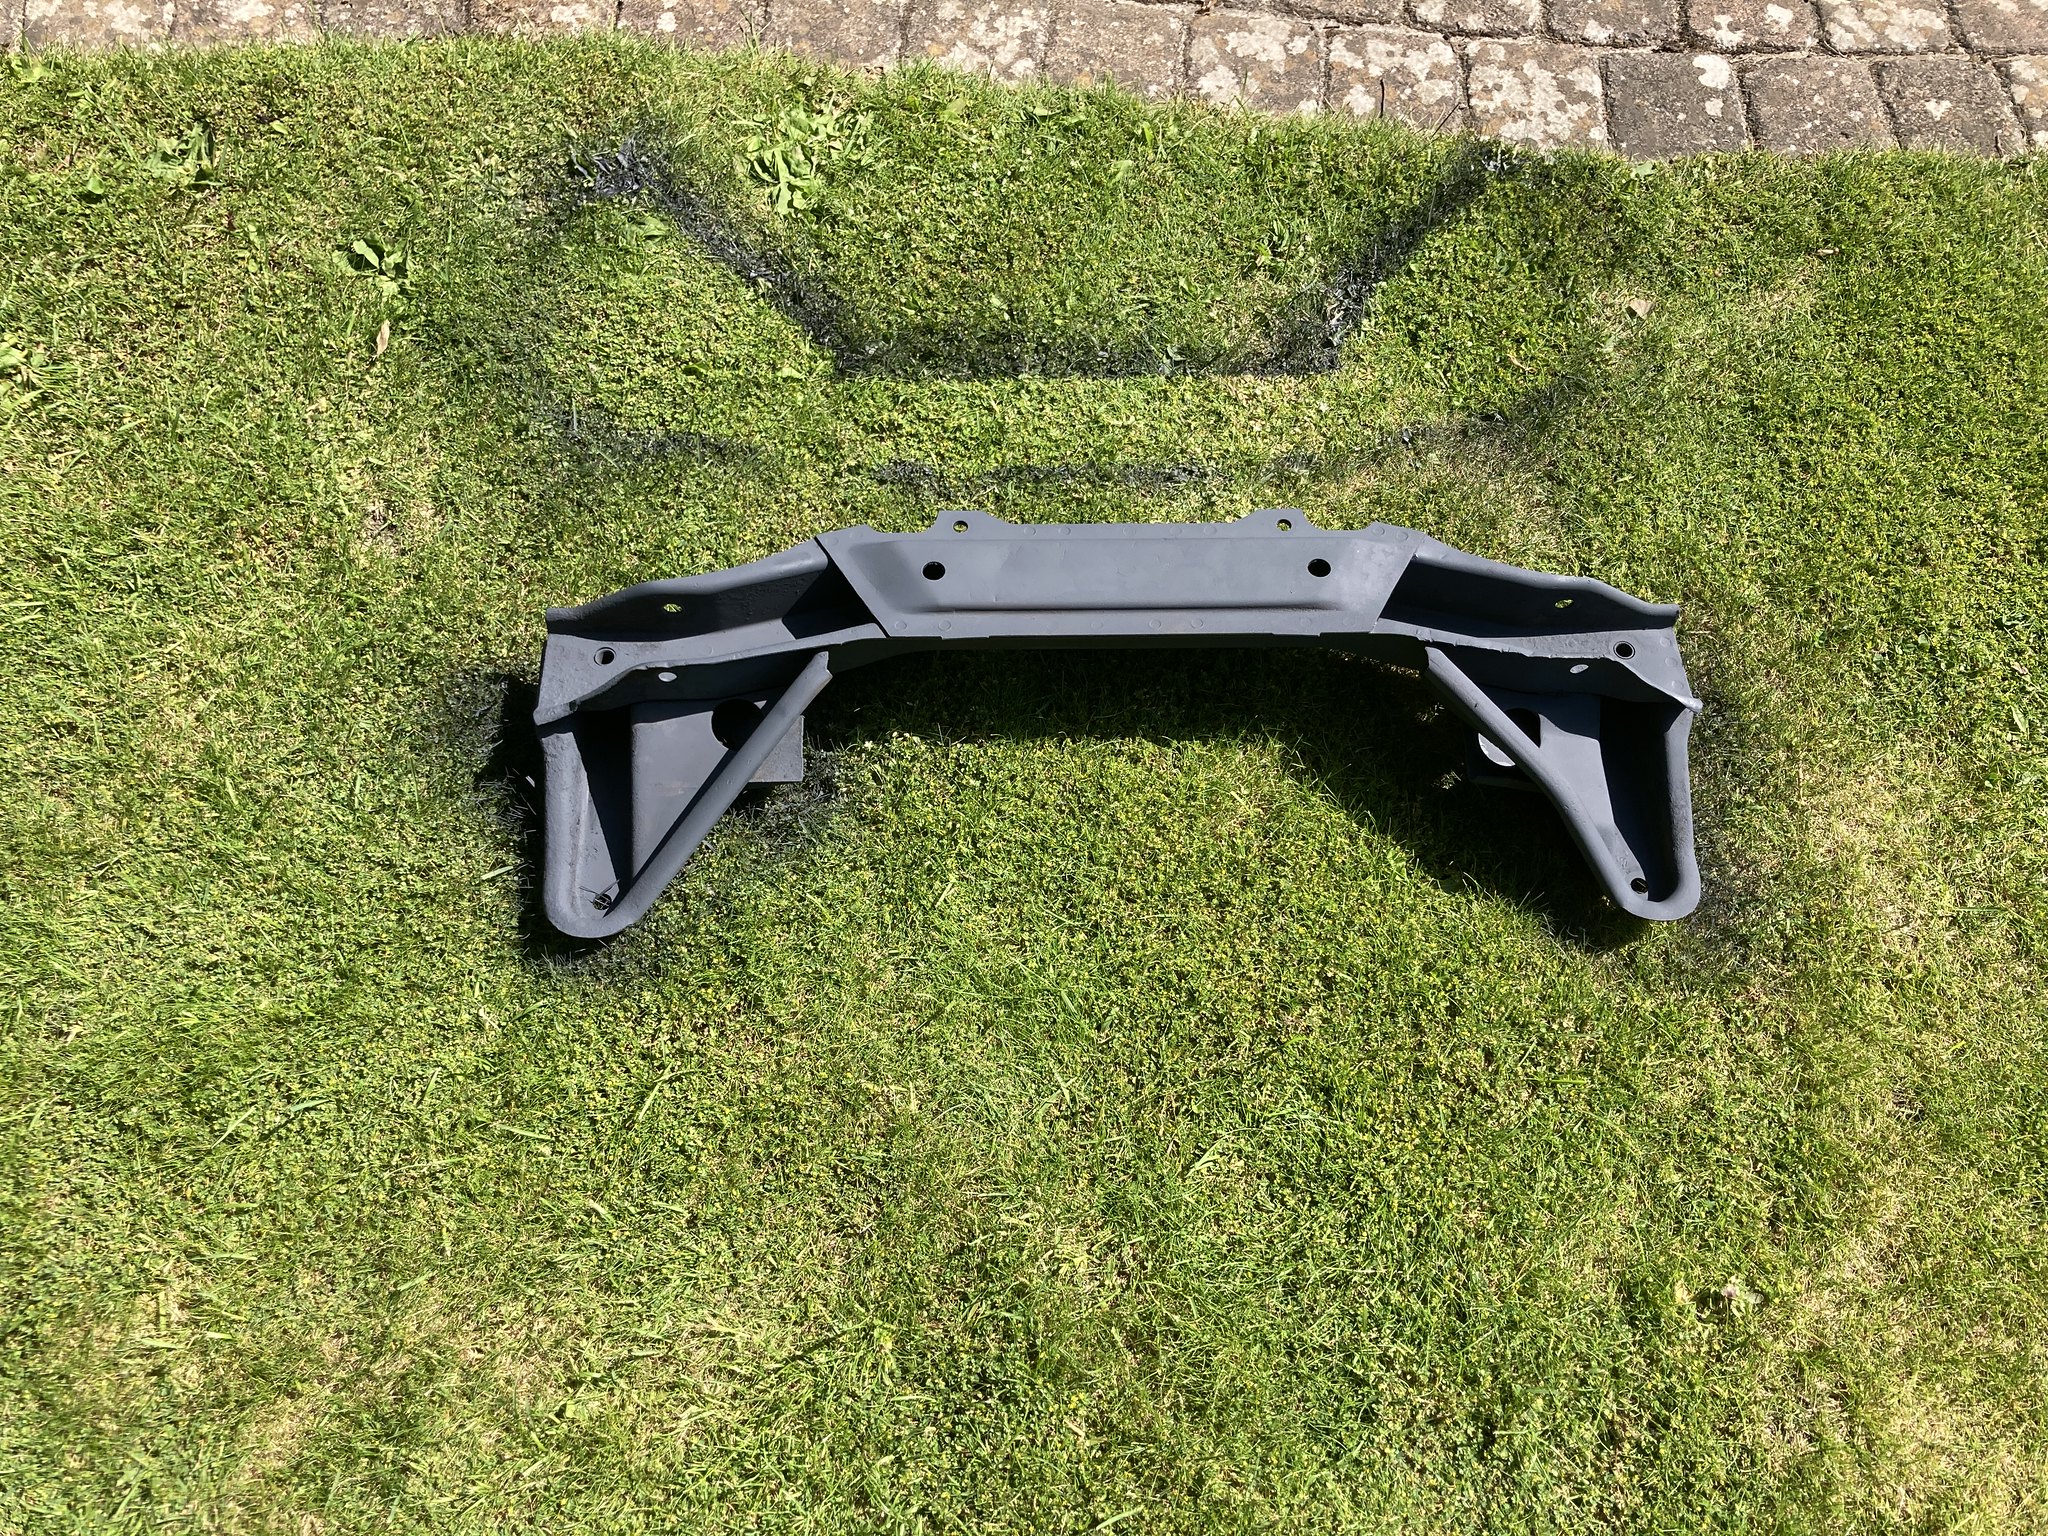
This takes me to the start of July, the wedding was getting close but I had a spare morning so I dragged out the subframes.
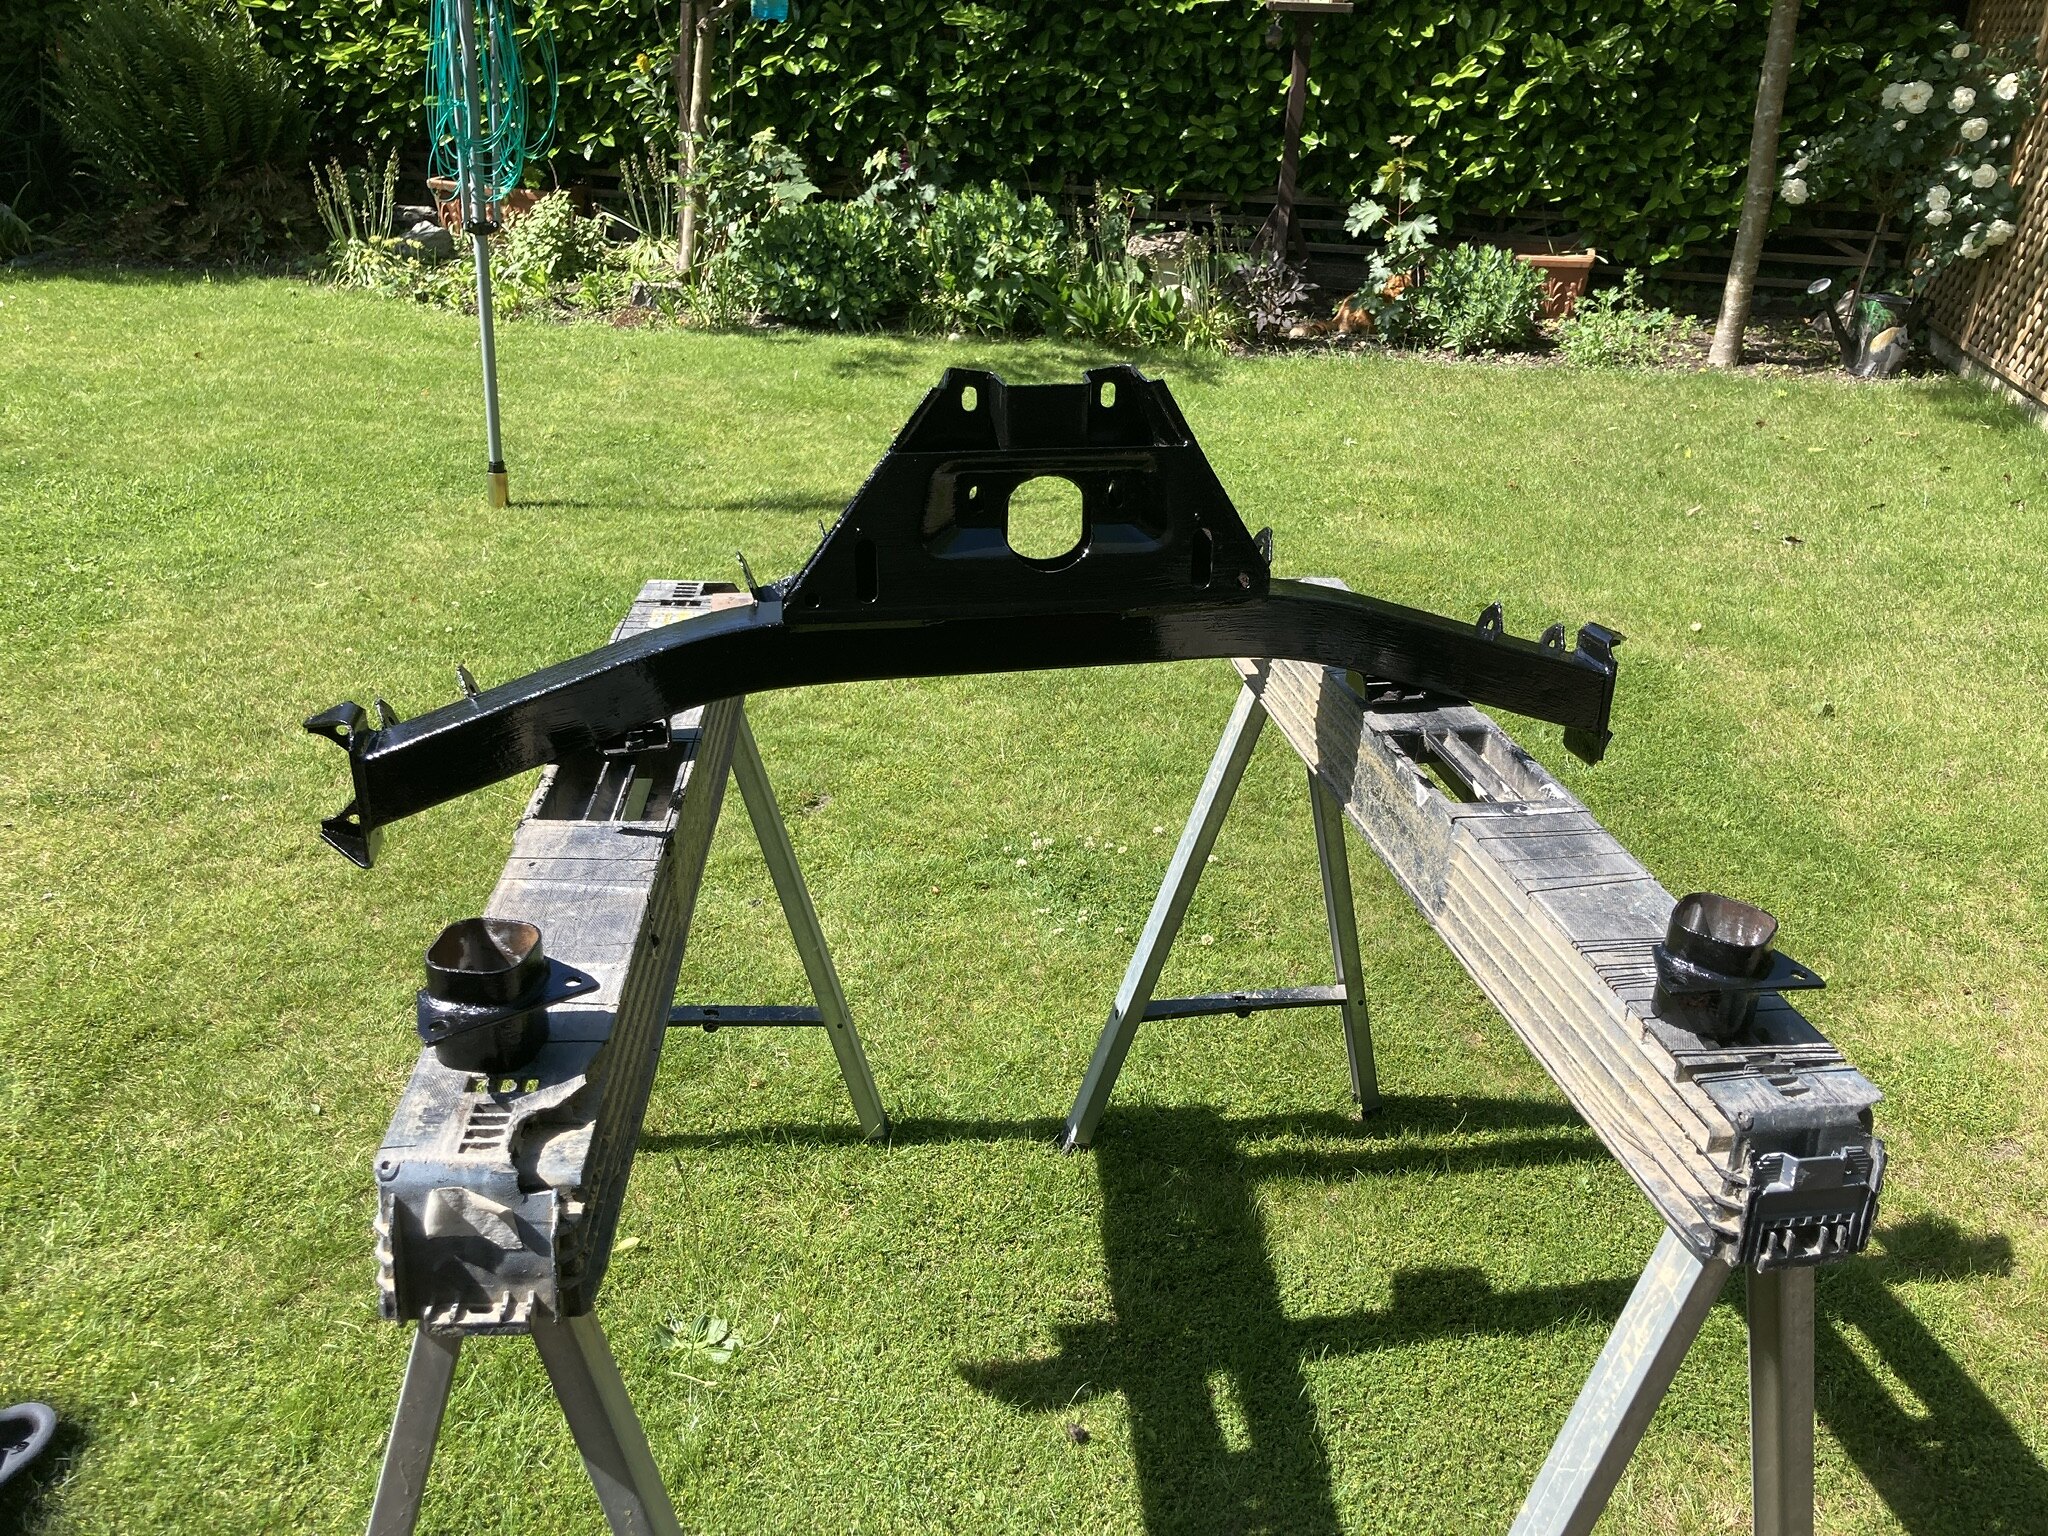
A lot of degreasing and cleaning, a blast with the twisted knot wheel and prime and paint. I went for gloss black Hammerite applied with a brush. They looked clean and shiny but the brush marks in the paint looked f##king awful, They will get re painted at a later date.
Also sold the 2.0L 6 cylinder engine I had re built. Shame as I nevet got to here it run but hey plans change!! It was good expeirience and I enjoyed it!


I was struggling for time as I was getting married in July and we were in full wedding planning mode!!
Never the less I managed to get a bit of time and cleaned up the underside and treated any surface rust that I hadnt already treated.
A quick going over with panel wipe and then a couple of coats of primer

I left it to dry for a couple of days and then started on the seam sealer which I found to be quite a messy job. I used 3m seal sealer and the 3m seam sealer brushes to get as close as I could to the factory look.
The car was really coming on now and was a great sense of achievment to start making it look pretty rather attacking it with a cutting disk!!

This takes me to the start of July, the wedding was getting close but I had a spare morning so I dragged out the subframes.
A lot of degreasing and cleaning, a blast with the twisted knot wheel and prime and paint. I went for gloss black Hammerite applied with a brush. They looked clean and shiny but the brush marks in the paint looked f##king awful, They will get re painted at a later date.
Also sold the 2.0L 6 cylinder engine I had re built. Shame as I nevet got to here it run but hey plans change!! It was good expeirience and I enjoyed it!


You can't polish a turd.... but you can roll it in glitter!!!!
- Manitoba
- E21 VIP

- Posts: 2544
- Joined: Sun Mar 18, 2012 11:47 am
- My E21(s): '80 323i, 5-speed manual Kastanien rot
- Location: Utrecht area, the Netherlands
Re: Bealo's 320/6
Amazing to see how you do this…. Great work, deep respect and compliments!
Greetz,
Walter.
Greetz,
Walter.
BMW e21 323i Kastanien Rot 1980
BMW f31 320iA X-drive Imperial Blue 2016
-
bealo
- E21 Fanatic
- Posts: 245
- Joined: Wed Jun 06, 2012 11:31 pm
- My E21(s): 83 316 1.8
82 320/6 - Location: Essex
Re: Bealo's 320/6
Thanks Walter, it’s by no means perfect but not bad considering I never done anything like this before.
When I bought the car I didn’t even know how to weld!!!
When I bought the car I didn’t even know how to weld!!!
You can't polish a turd.... but you can roll it in glitter!!!!
- BertjeConti
- E21 Mad
- Posts: 3104
- Joined: Mon Nov 04, 2013 9:49 pm
- My E21(s): E12 520-6
- Location: nederland , Weert
Re: Bealo's 320/6
I think you did a great job, well done!!!
Megasquirted '77 E12 520-6
Aspen Silver '96 E39 523i
- uwbuurman
- E21 VIP

- Posts: 19101
- Joined: Fri Jun 12, 2009 4:49 pm
- My E21(s): 1978 type 1 323i 5speed dogleg Polaris
- Location: Ljouwert
Re: Bealo's 320/6
Whahaha, even this is a 1 on 1 copy of my story. Keep it up, mate!!bealo wrote: Tue Sep 20, 2022 3:23 pm Thanks Walter, it’s by no means perfect but not bad considering I never done anything like this before.
When I bought the car I didn’t even know how to weld!!!
- Manitoba
- E21 VIP

- Posts: 2544
- Joined: Sun Mar 18, 2012 11:47 am
- My E21(s): '80 323i, 5-speed manual Kastanien rot
- Location: Utrecht area, the Netherlands
Re: Bealo's 320/6
I was just about to say there’s an exact similar story to be found on this forum.uwbuurman wrote: Tue Sep 20, 2022 10:58 pmWhahaha, even this is a 1 on 1 copy of my story. Keep it up, mate!!bealo wrote: Tue Sep 20, 2022 3:23 pm Thanks Walter, it’s by no means perfect but not bad considering I never done anything like this before.
When I bought the car I didn’t even know how to weld!!!
Greetz,
Walter.
BMW e21 323i Kastanien Rot 1980
BMW f31 320iA X-drive Imperial Blue 2016
- Jeroen
- Site Admin
- Posts: 29892
- Joined: Tue Sep 14, 2004 12:23 pm
- My E21(s): '81 323i Baur
- Location: The Netherlands
- Contact:
Re: Bealo's 320/6
Nice progress, underside looks amazing again already! And the spray painted grass brings back some memories here as well hahaha
Keep up the good work!
Keep up the good work!
Regards/groeten, Jeroen
-
bealo
- E21 Fanatic
- Posts: 245
- Joined: Wed Jun 06, 2012 11:31 pm
- My E21(s): 83 316 1.8
82 320/6 - Location: Essex
Re: Bealo's 320/6
if uwbuurman was an as inexperienced as me when he started it fills me with confidence
I’d be happy if my build was even half as good as the amazing job he done
I’d be happy if my build was even half as good as the amazing job he done
You can't polish a turd.... but you can roll it in glitter!!!!
- uwbuurman
- E21 VIP

- Posts: 19101
- Joined: Fri Jun 12, 2009 4:49 pm
- My E21(s): 1978 type 1 323i 5speed dogleg Polaris
- Location: Ljouwert
Re: Bealo's 320/6
Thanks. Honestly, I had never ever welded, I had never taken an engine apart, I had never restored a car before, it was my first e21 ever.
As your pics show clearly, you"ll get there!! Doing an amazing job!
As your pics show clearly, you"ll get there!! Doing an amazing job!
-
bealo
- E21 Fanatic
- Posts: 245
- Joined: Wed Jun 06, 2012 11:31 pm
- My E21(s): 83 316 1.8
82 320/6 - Location: Essex
Re: Bealo's 320/6
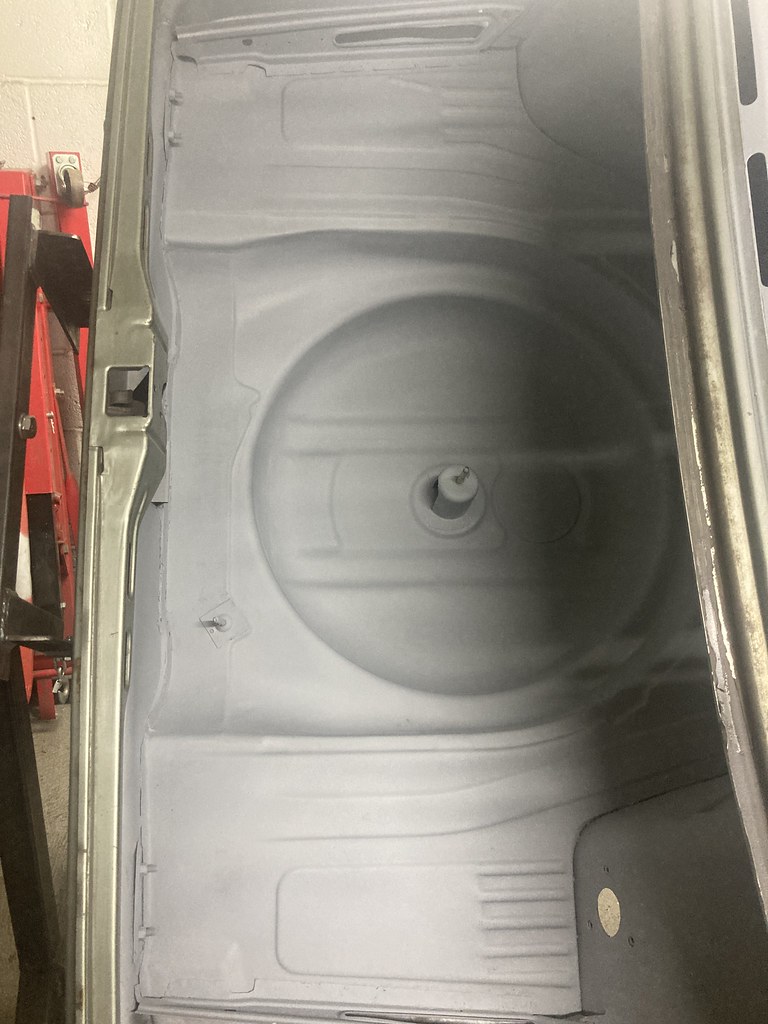
I got back in the garage late July to start cleaning up the inside of the car and giving it 2 coats of high build primer and seam sealer.
Unsure how I'm going to finish the inside yet but I think probably base coat and clear coat in my chosen colour.
Its amazing what high build primer can hide!!!


Unsure how I'm going to finish the inside yet but I think probably base coat and clear coat in my chosen colour.
Its amazing what high build primer can hide!!!


You can't polish a turd.... but you can roll it in glitter!!!!