
Thanks for all the updates Rob! Keep us posted, and keep up the good work!
Ite and I still have our E12 520i at the body shop, hope the guy gets around to do the respray soon so we can continue with our project!

Pastelblau 520/6
-
BertjeConti

- E21 Mad
- Posts: 3012
- Joined: Mon Nov 04, 2013 9:49 pm
- My E21(s): E12 520-6
- Location: nederland , Weert
Re: Pastelblau 520/6
Conrod balancing
Balancing the pistons was a relative easy job, balancing conrods is a totaly different story.
The trick with conrods is not only bring all conrods to the same weight, but also balance them in such way they all have the same center of gravity, explained with this diagram:
Goal is to get the same rotating weight and reciprocating for all conrods, special jigs for this purpose are available on the internet. i've tried a setup like the jig shown here, but my results weren't that consistent at all, so i went of searching for another method accurate weighing the big-end and wrist end simultaniously.

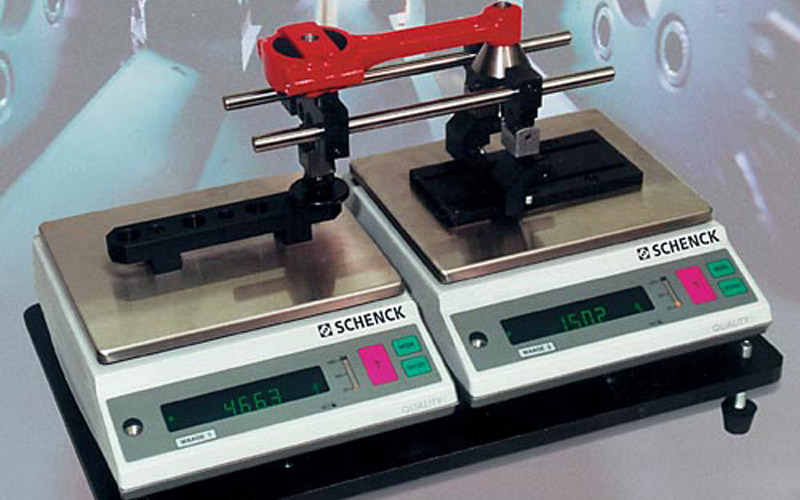
After a intensive search i found this professional conrod balancing jig, using two scales, ofcourse this jig is way to expensive for only one time use:
So hands out and build a low cost setup mimmicing the above setup using 2 jewelery scales.
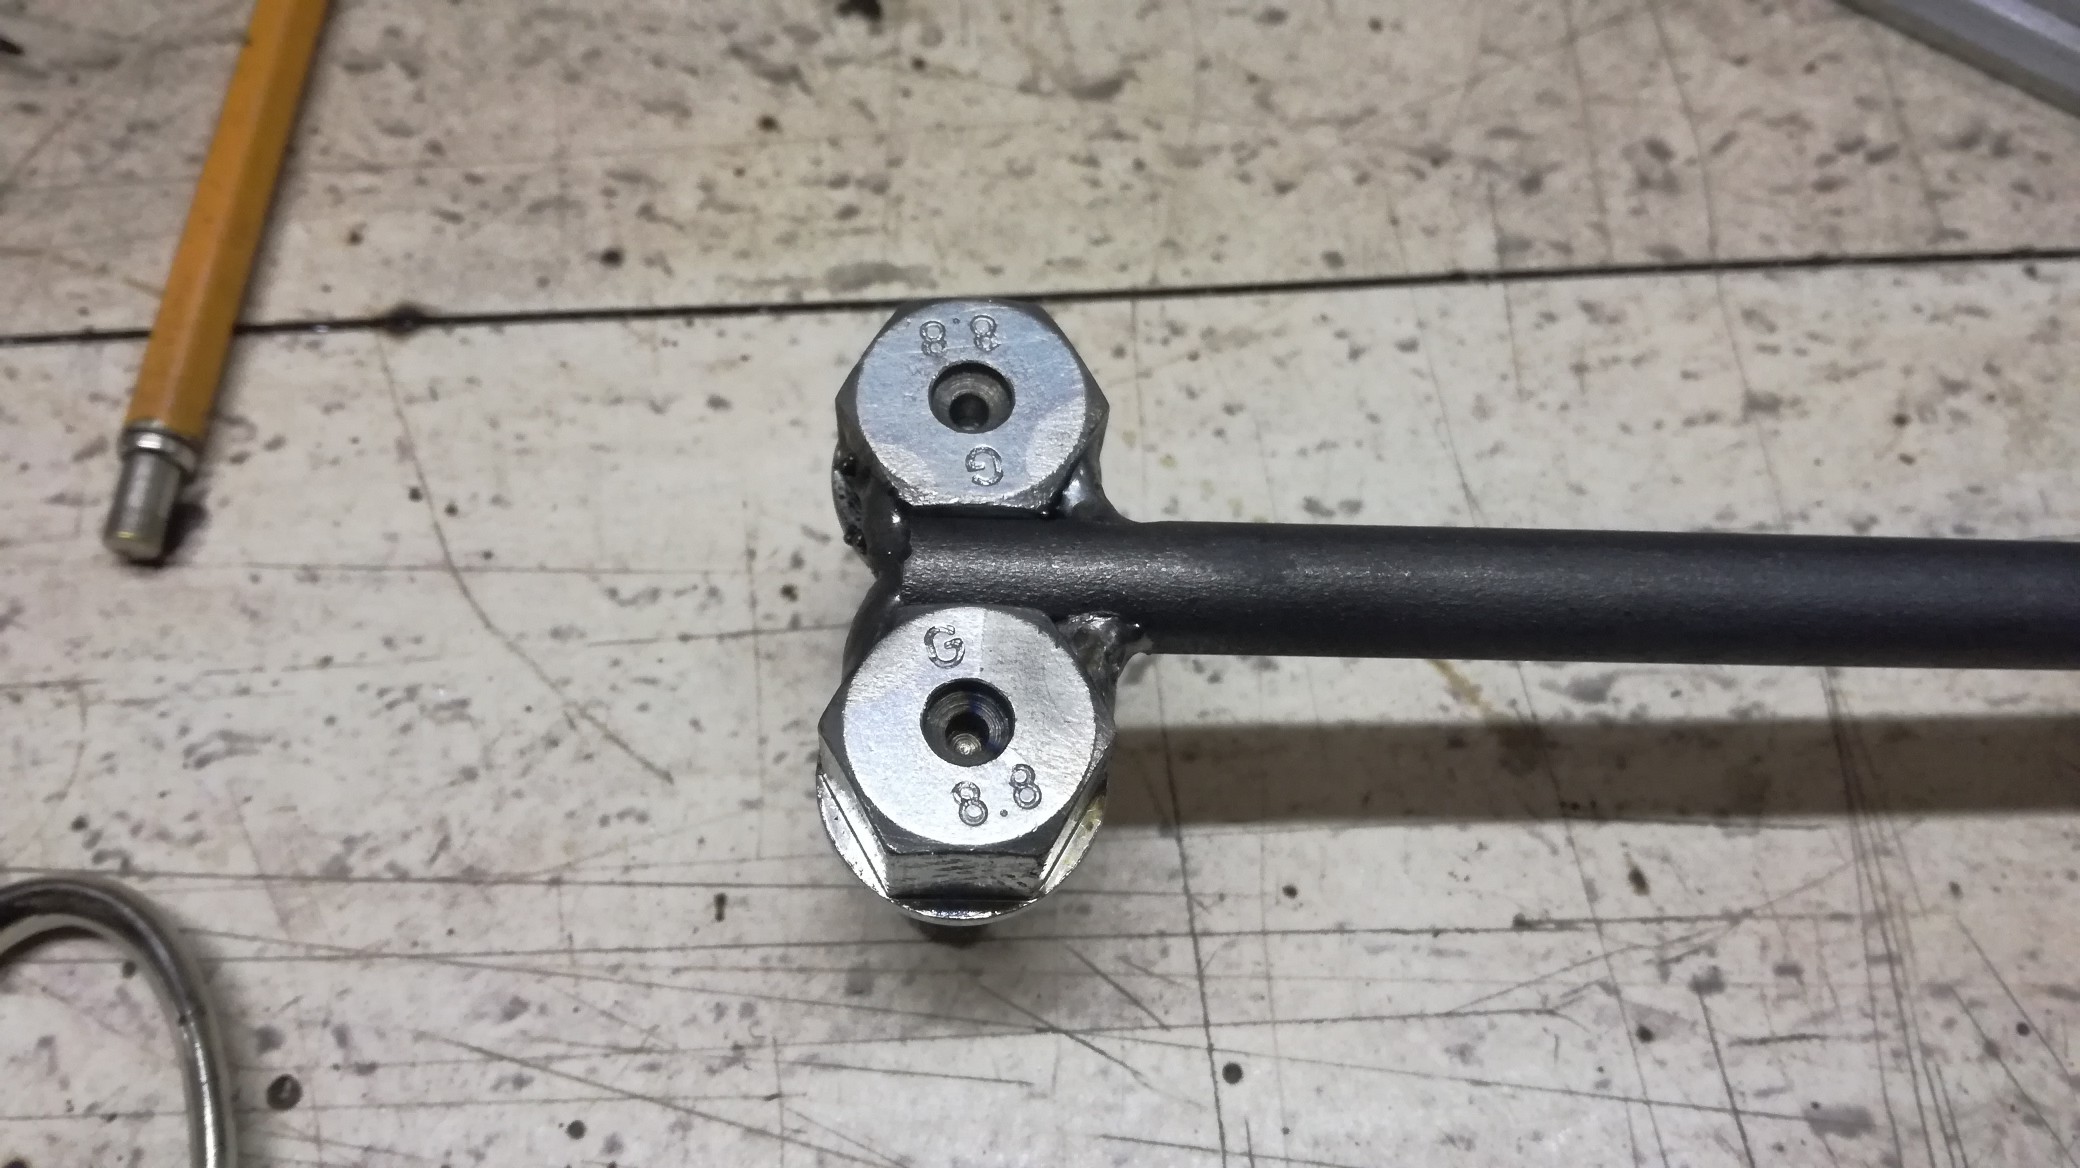
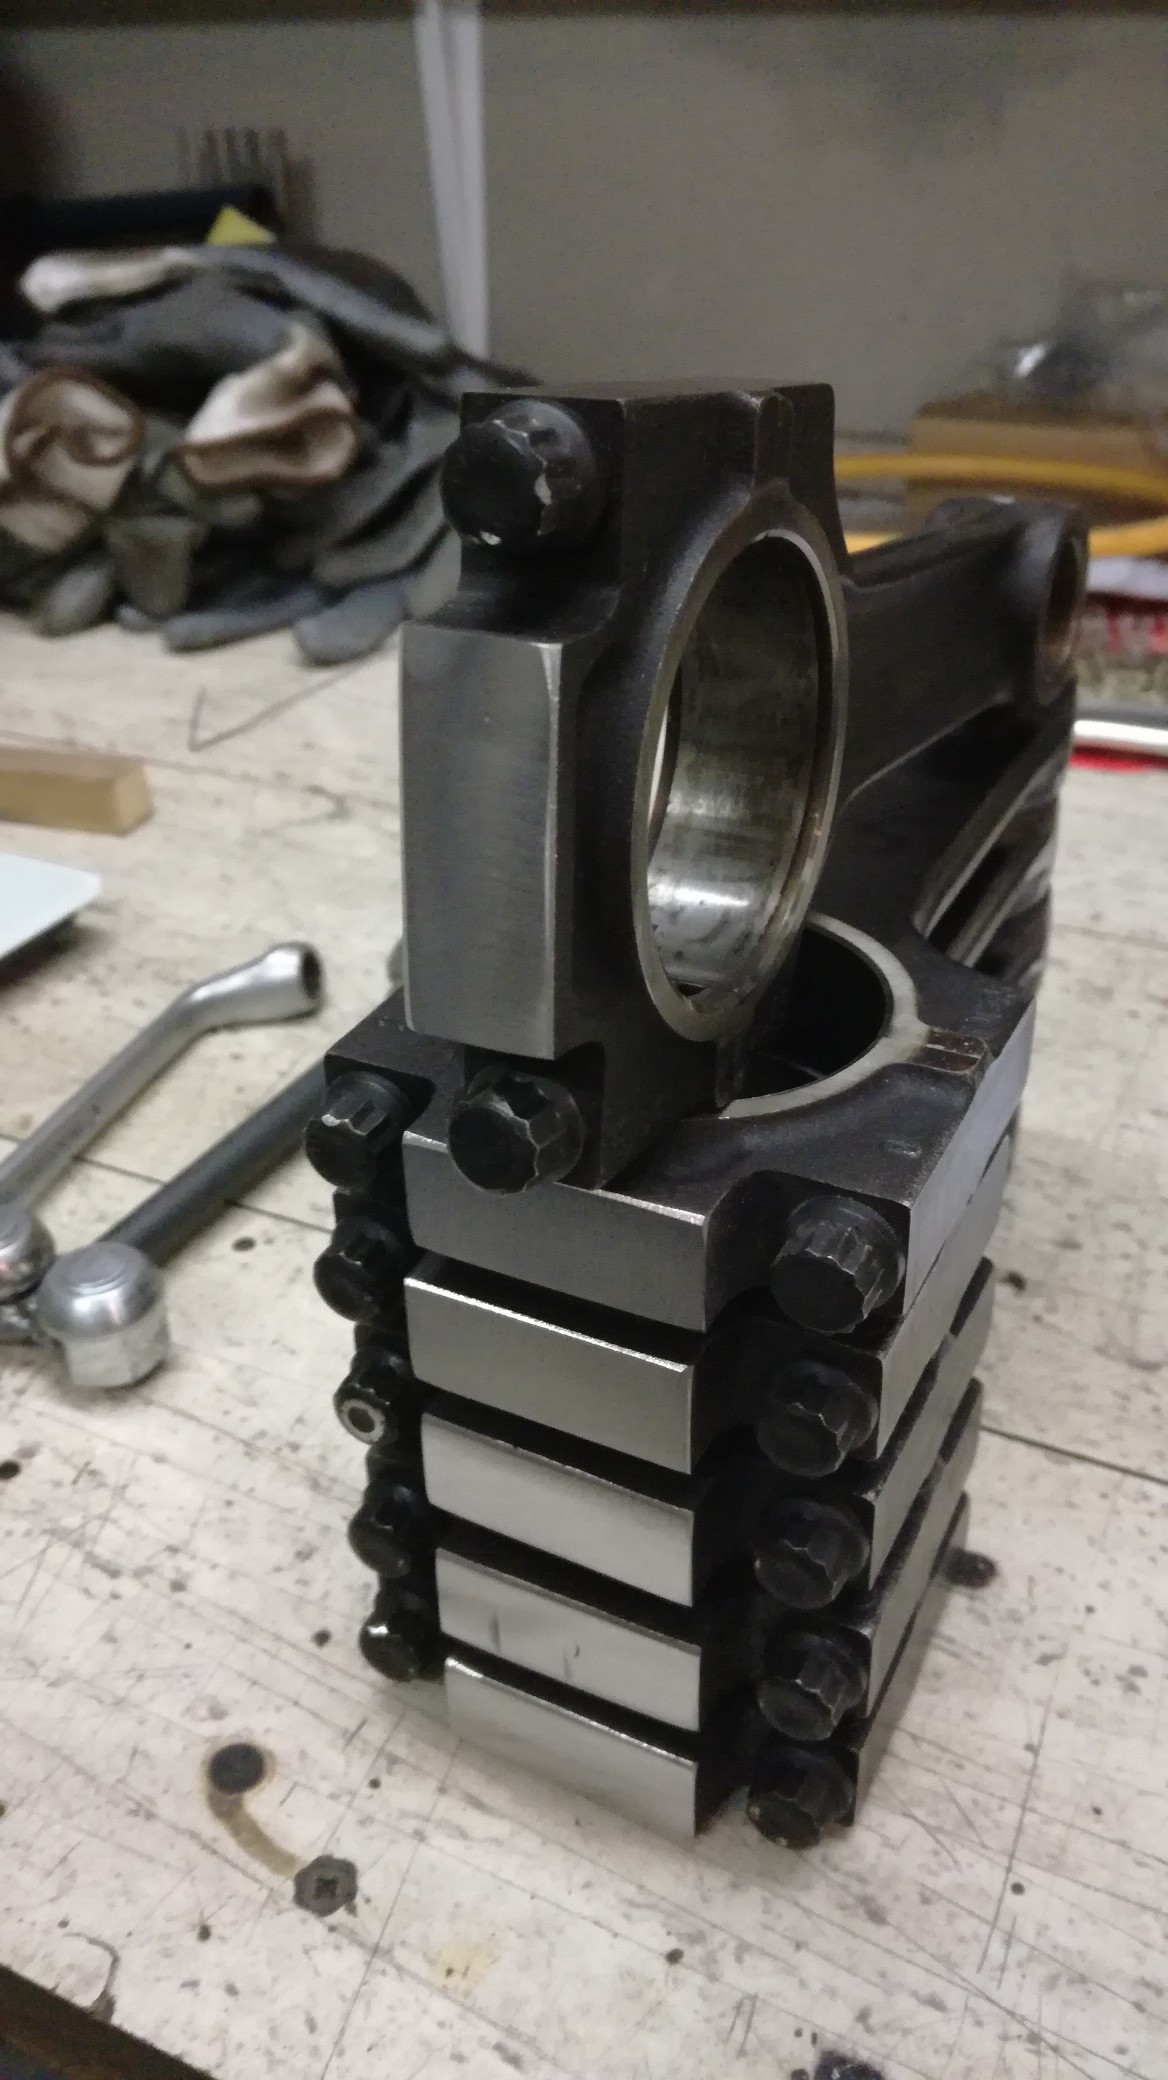
Getting parts together building a jig which would hold a conrod exactly the same each time it's placed into the jig.
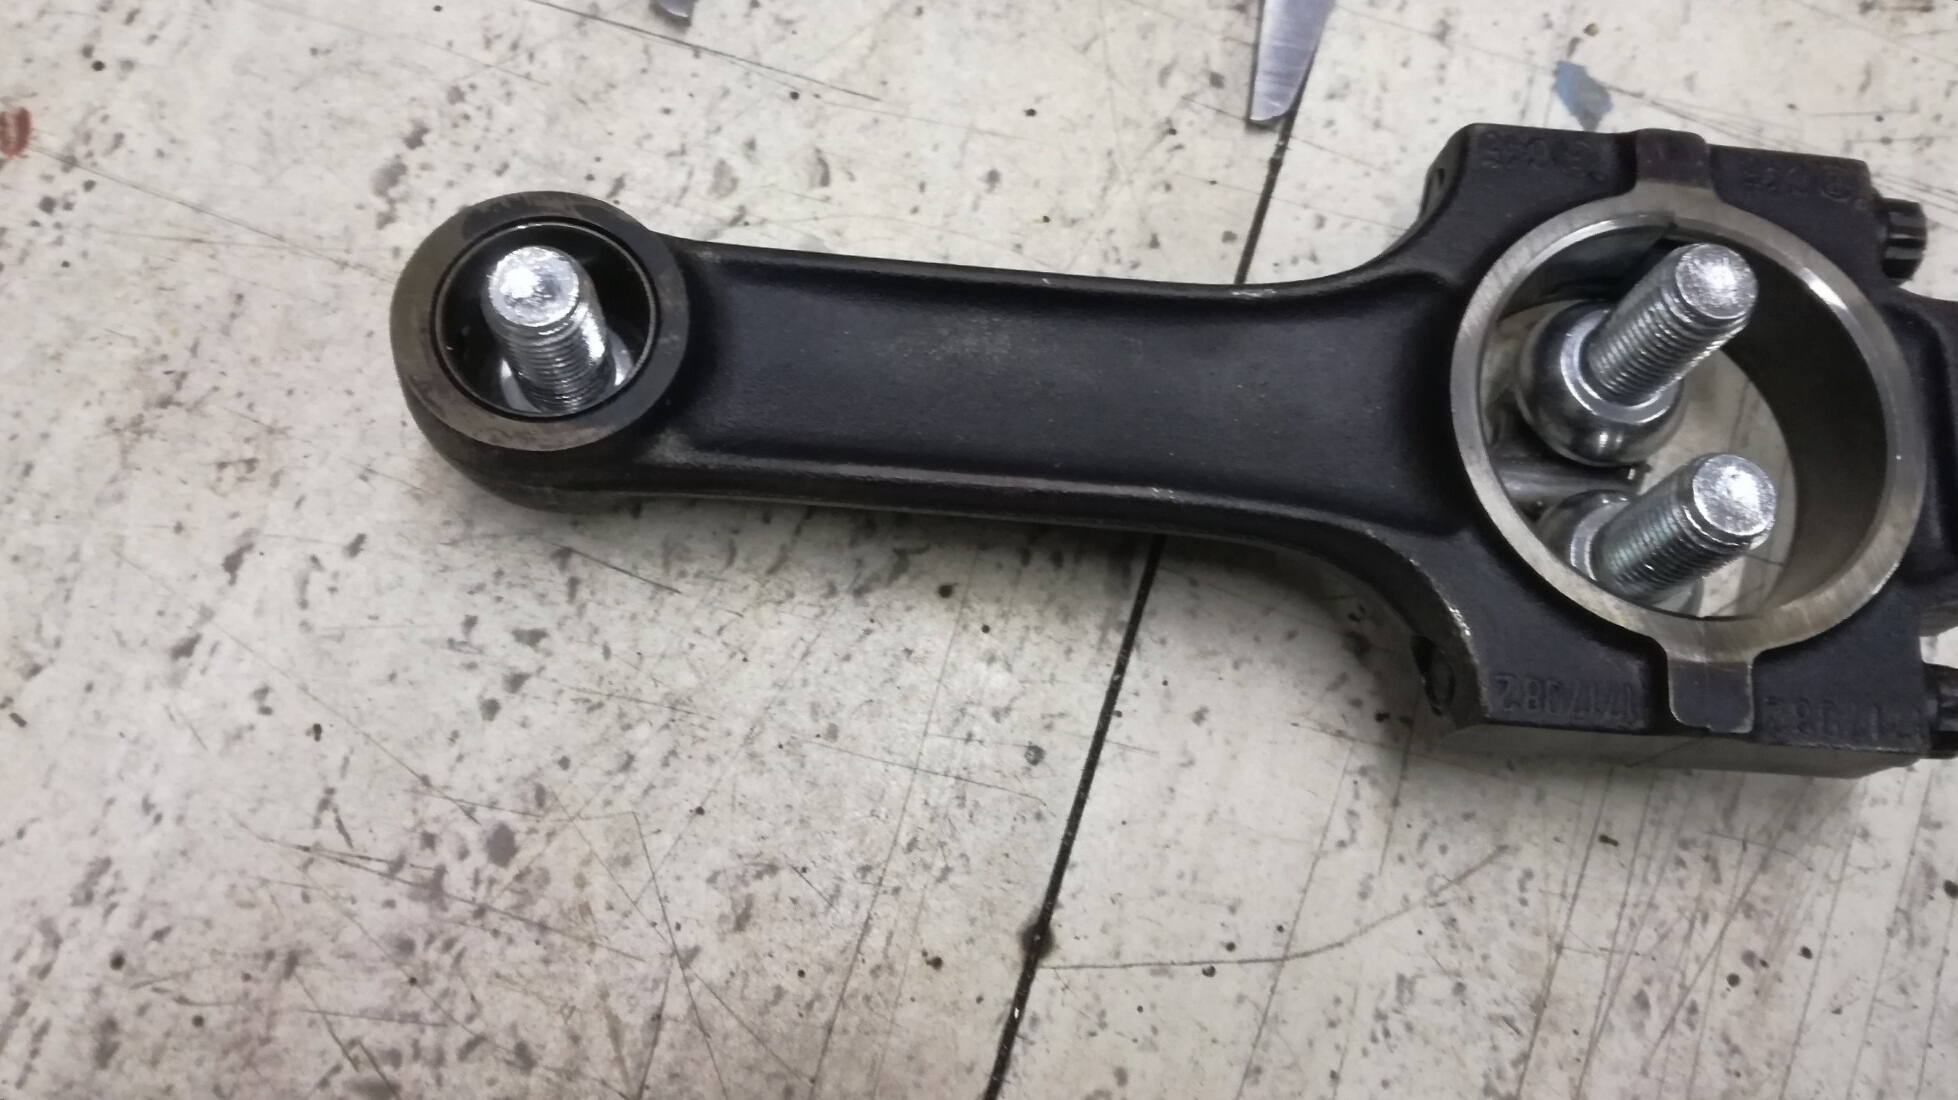
with these cheap (bin) parts i build a jig for the specific 130mm conrods:
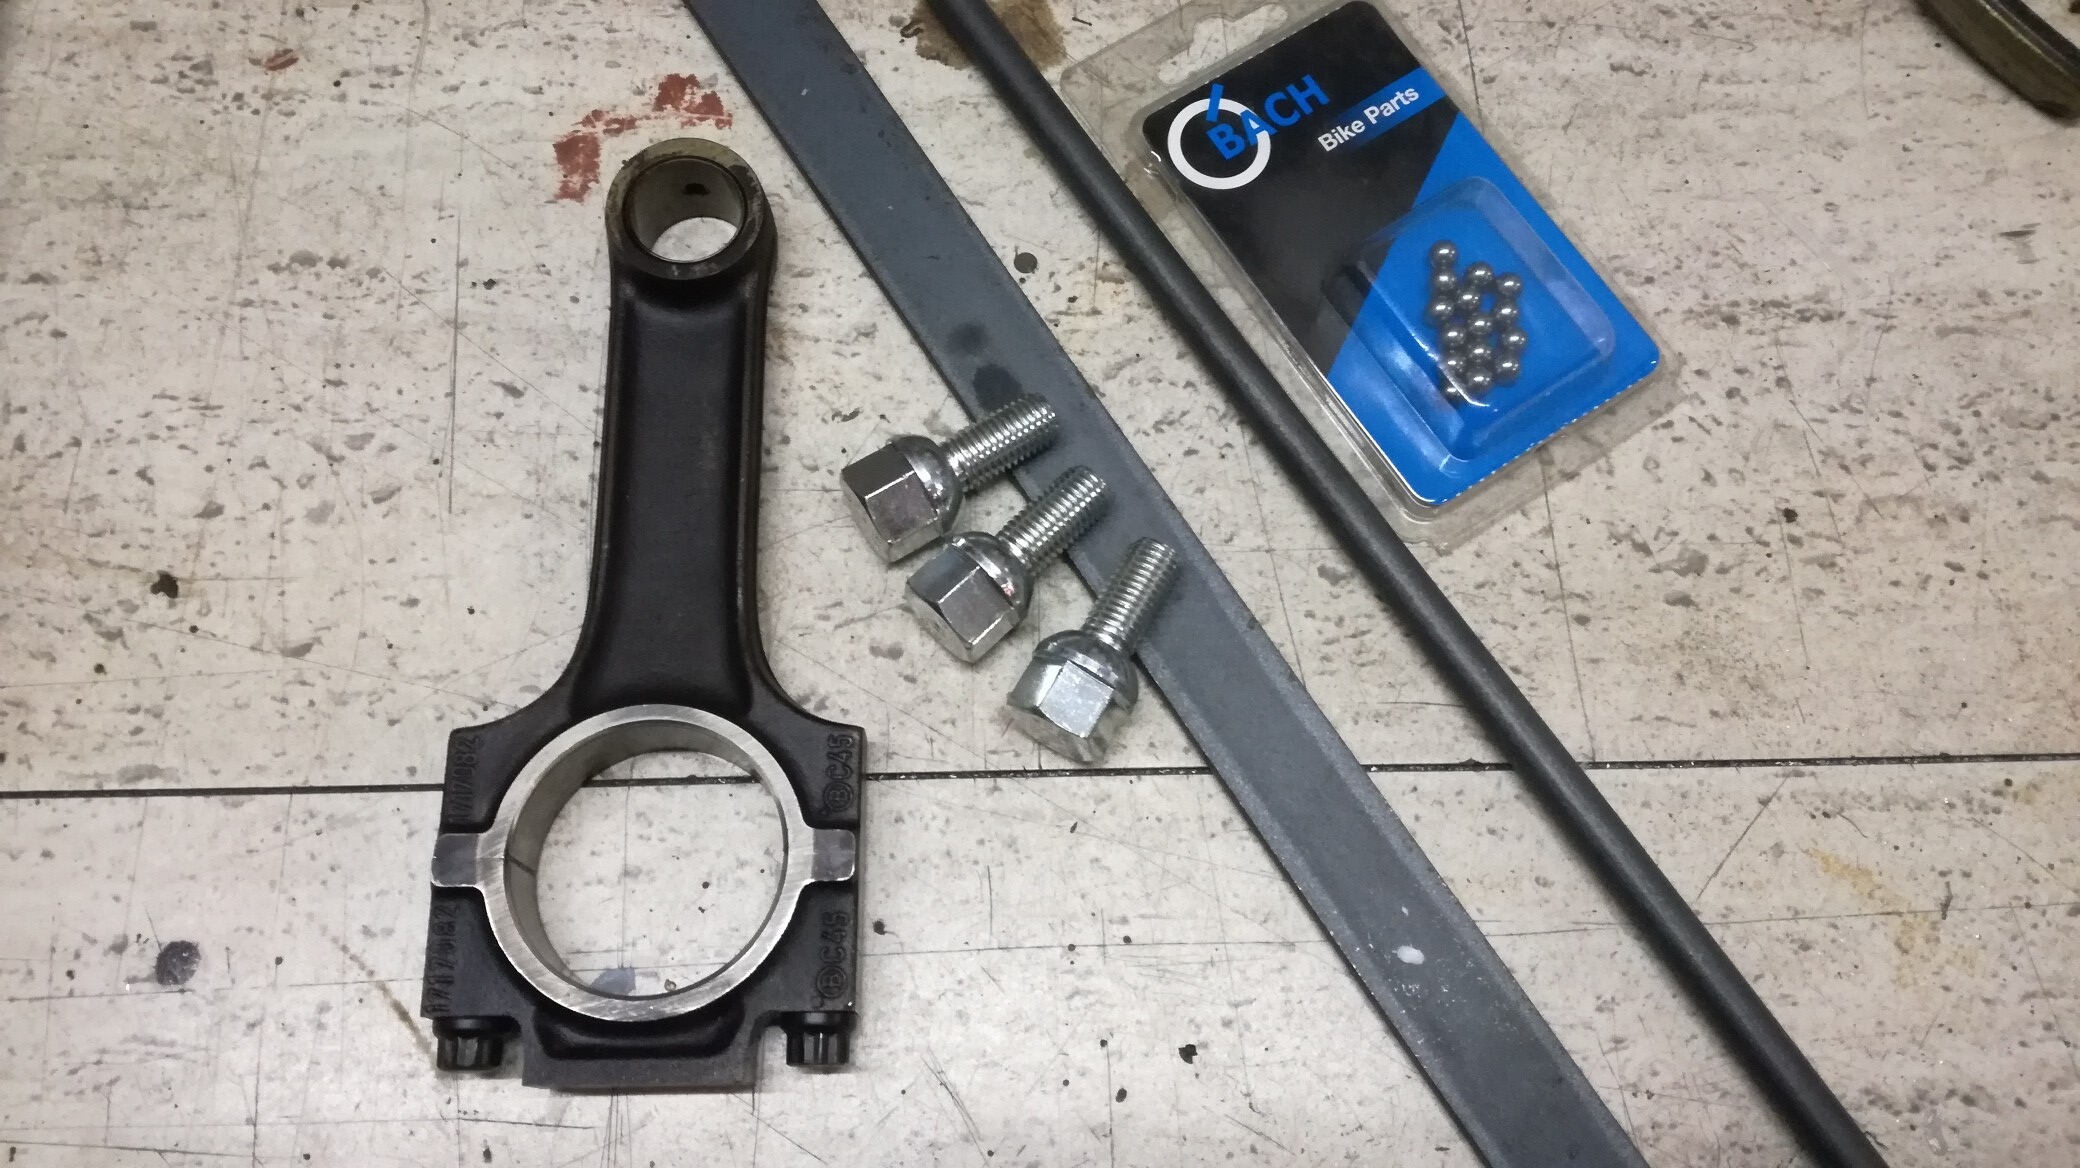
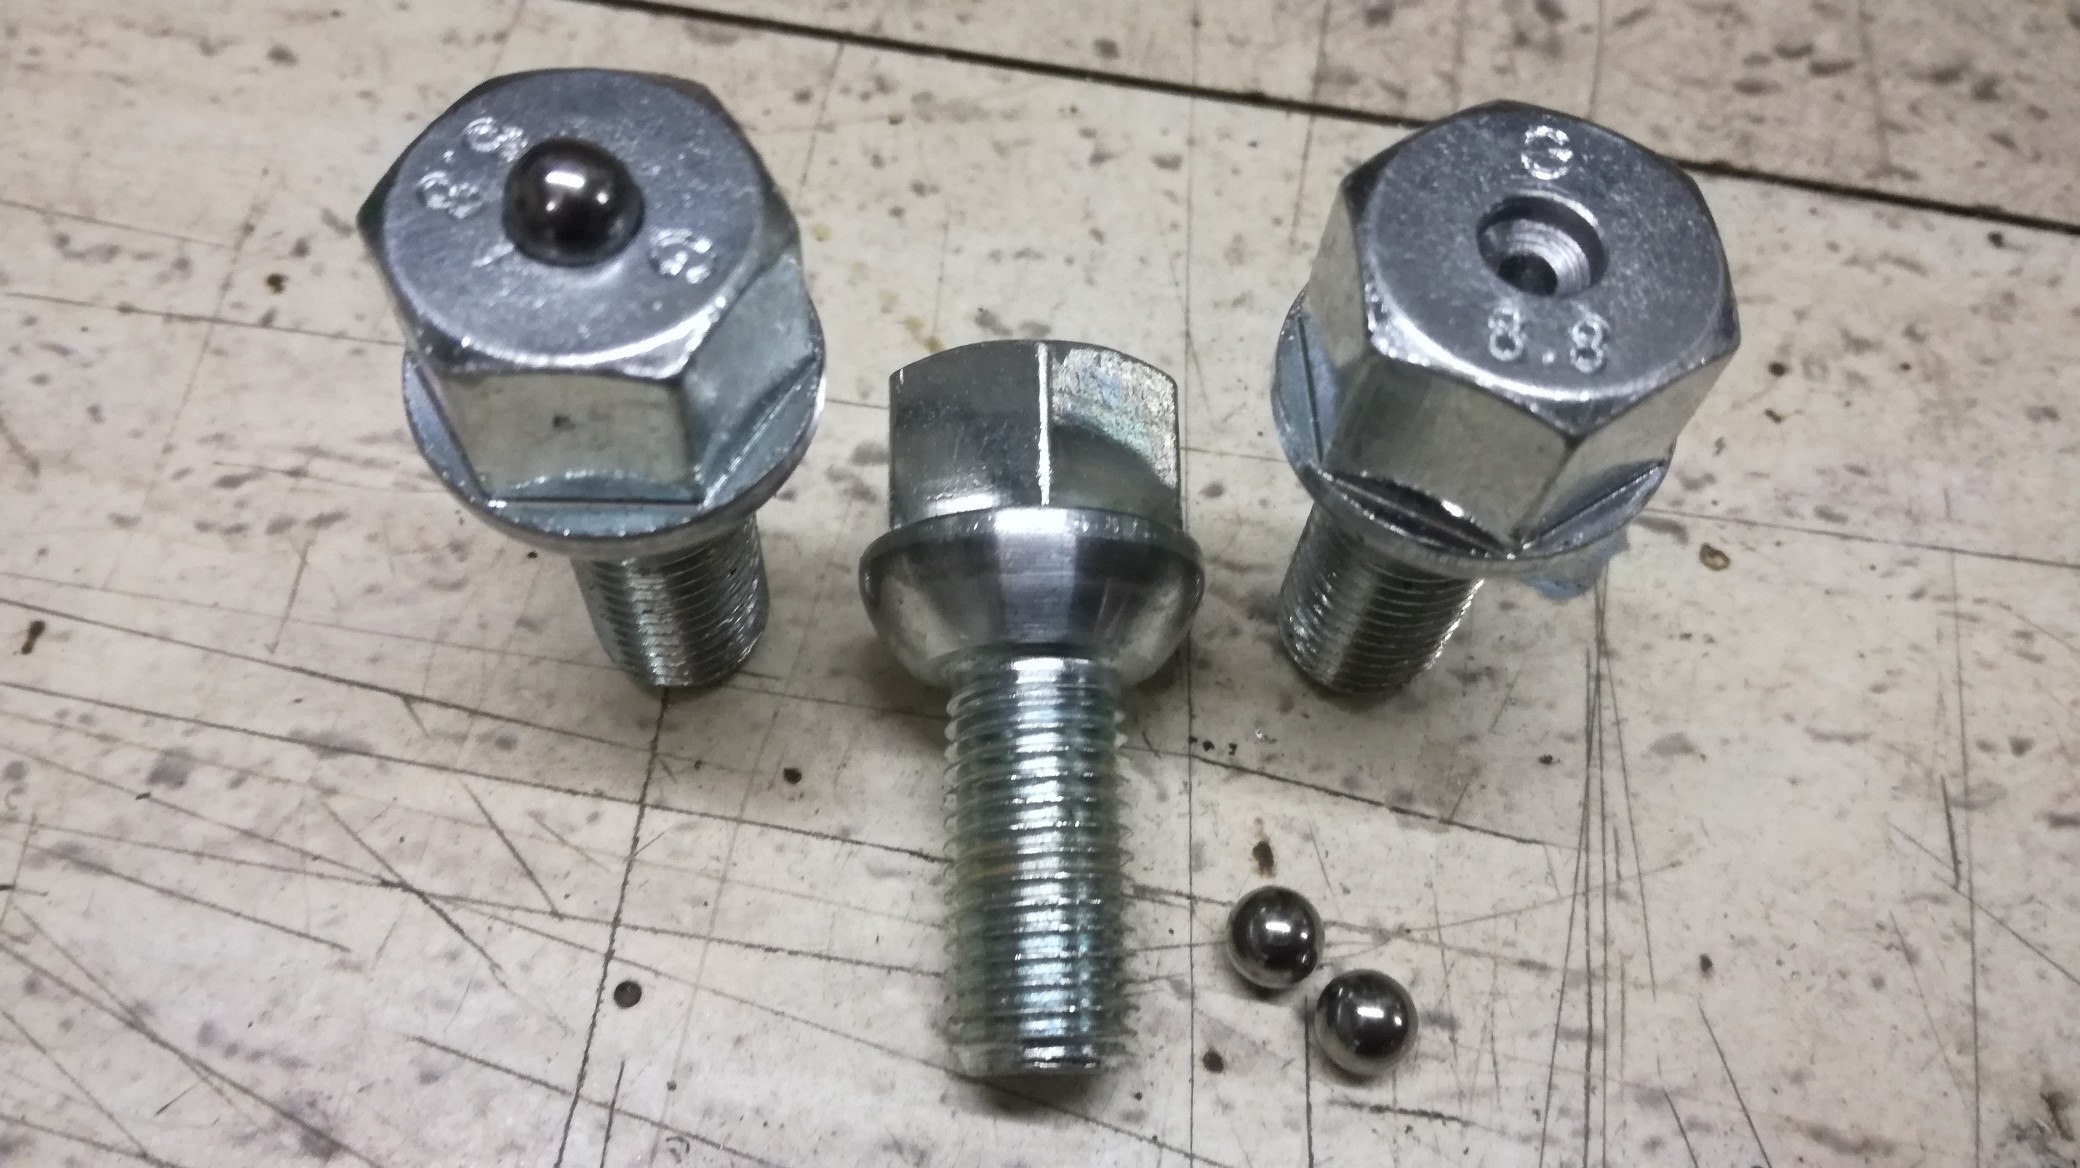
Using 3 spherical wheel bolts , drilled holes into the bolt heads so they would take little bearing balls, to get accurate pressing points on the scales:
then welded the wheel bolts with a piece of rod together, to make it a sturdy piece:
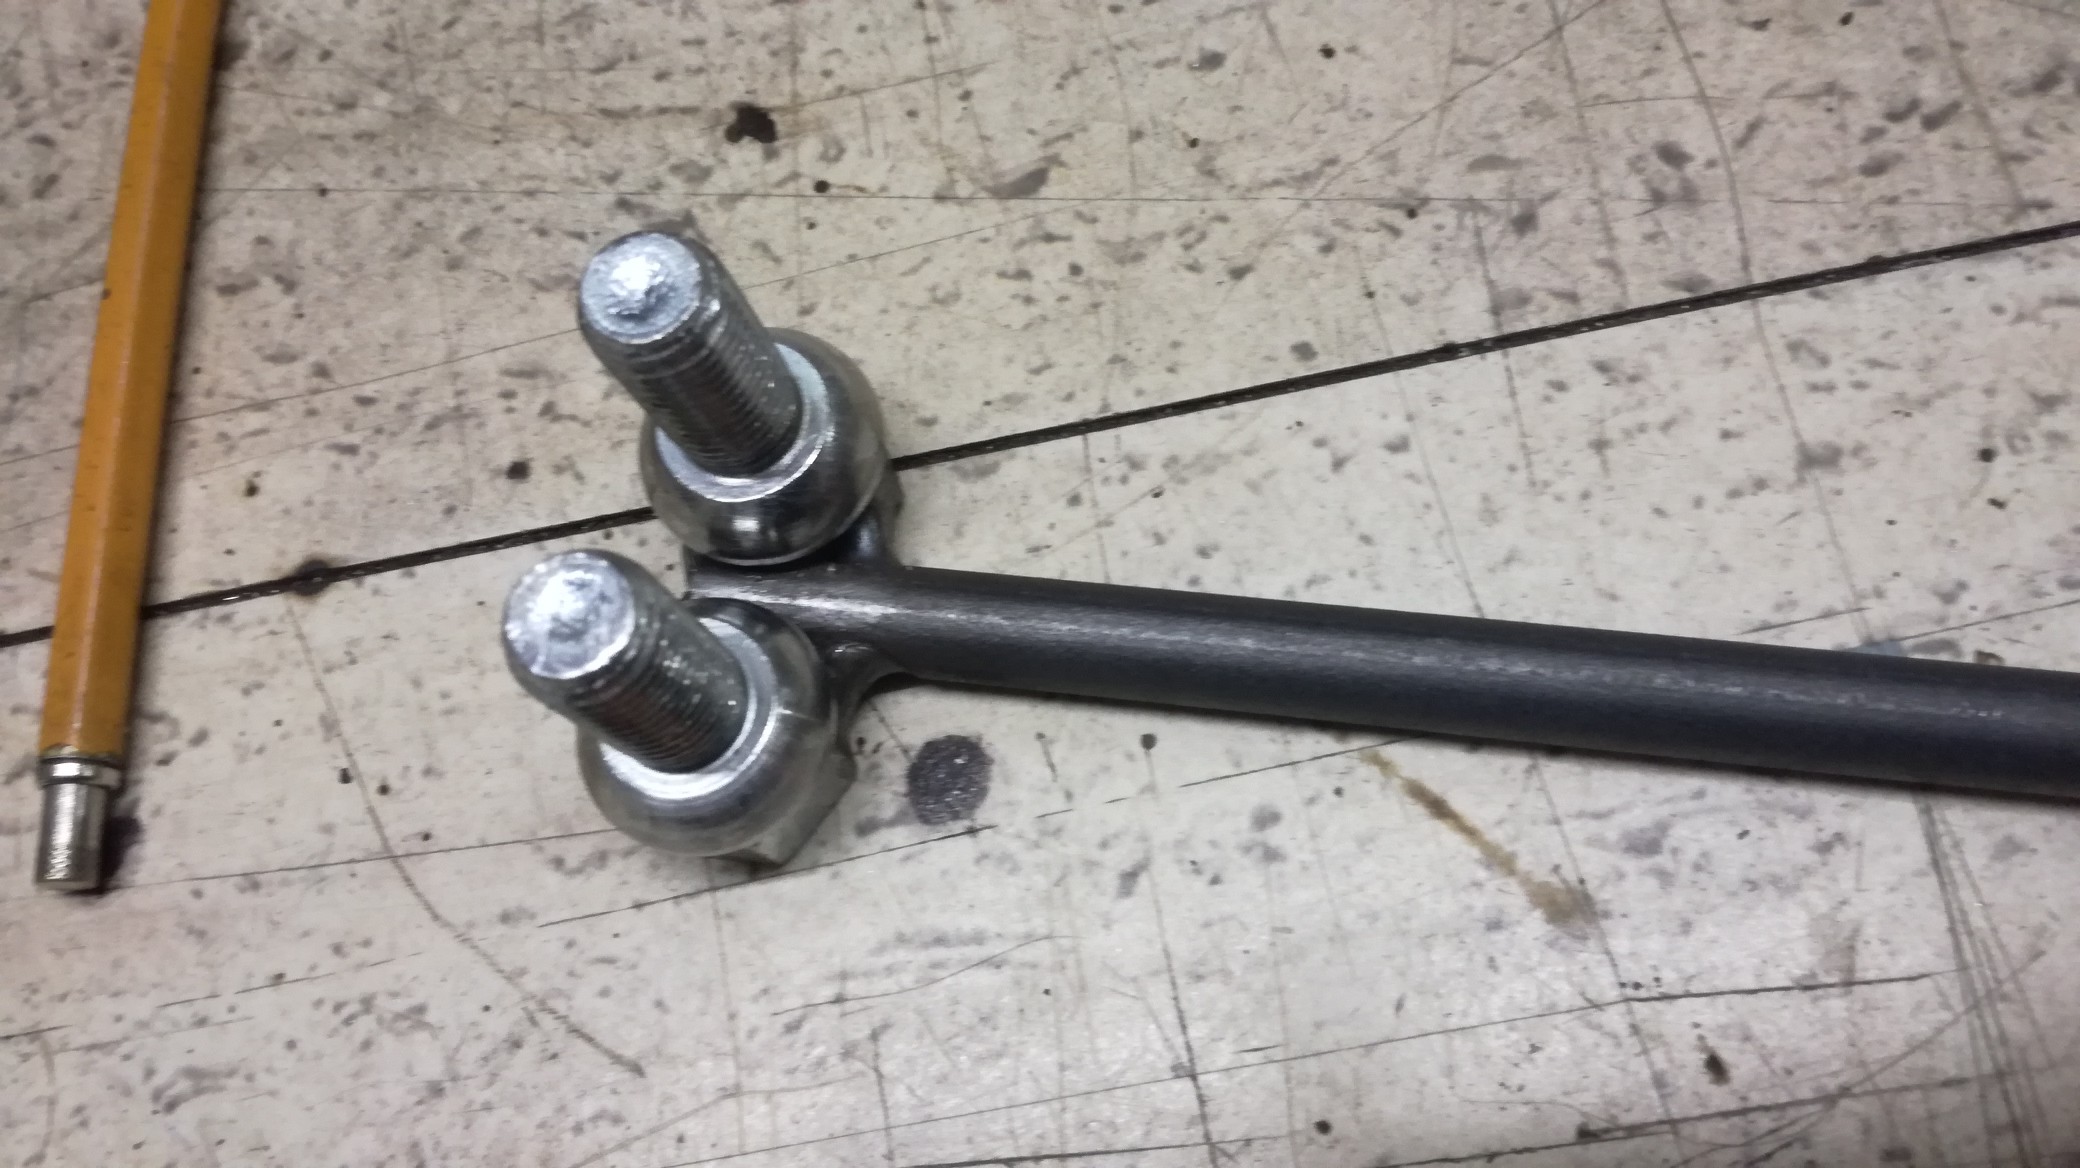
and cut the threads from the wheel bolts:
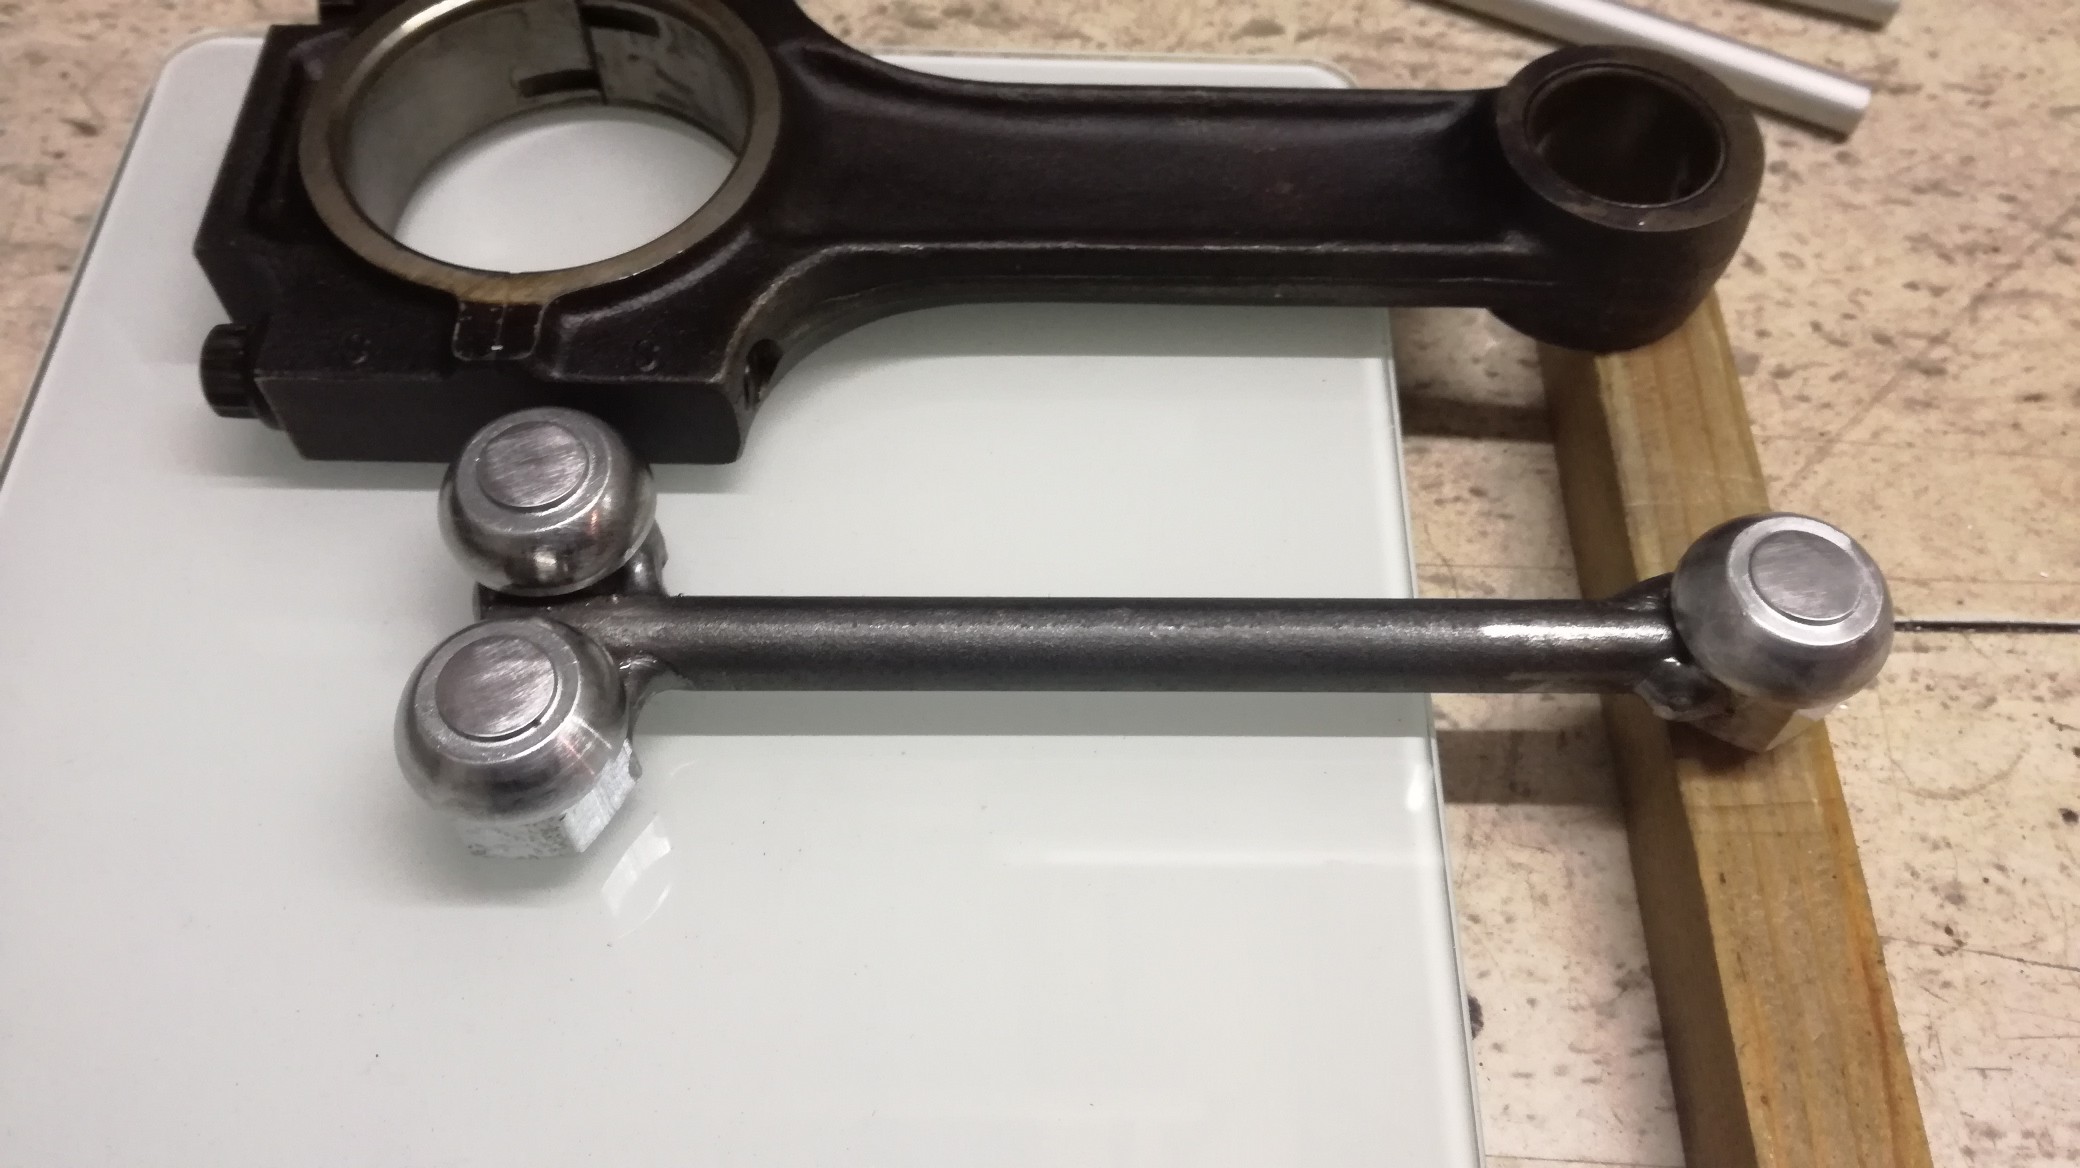
Setup ready for balancing:
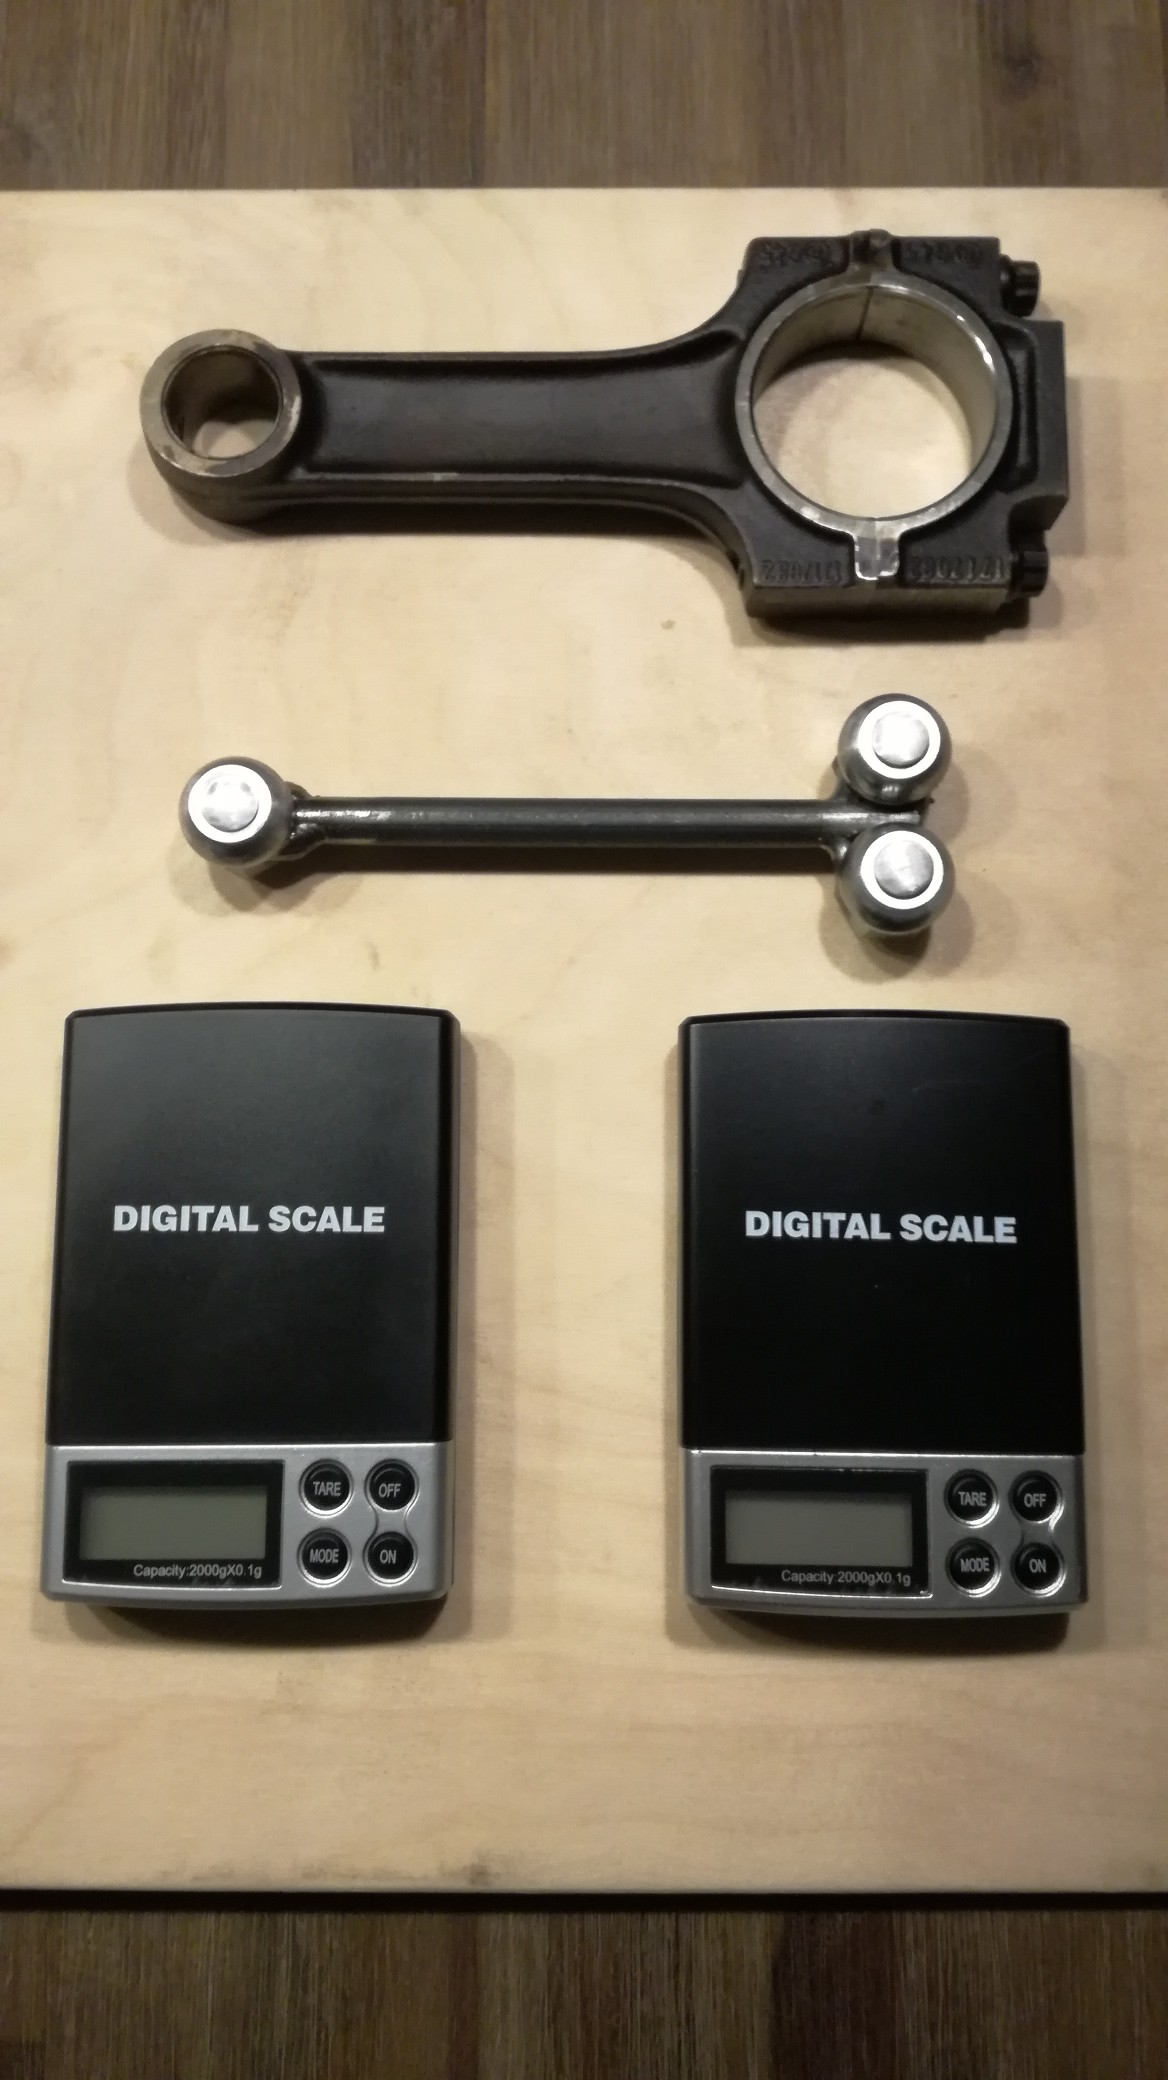
nulling both scales with the jig already placed on the scales:
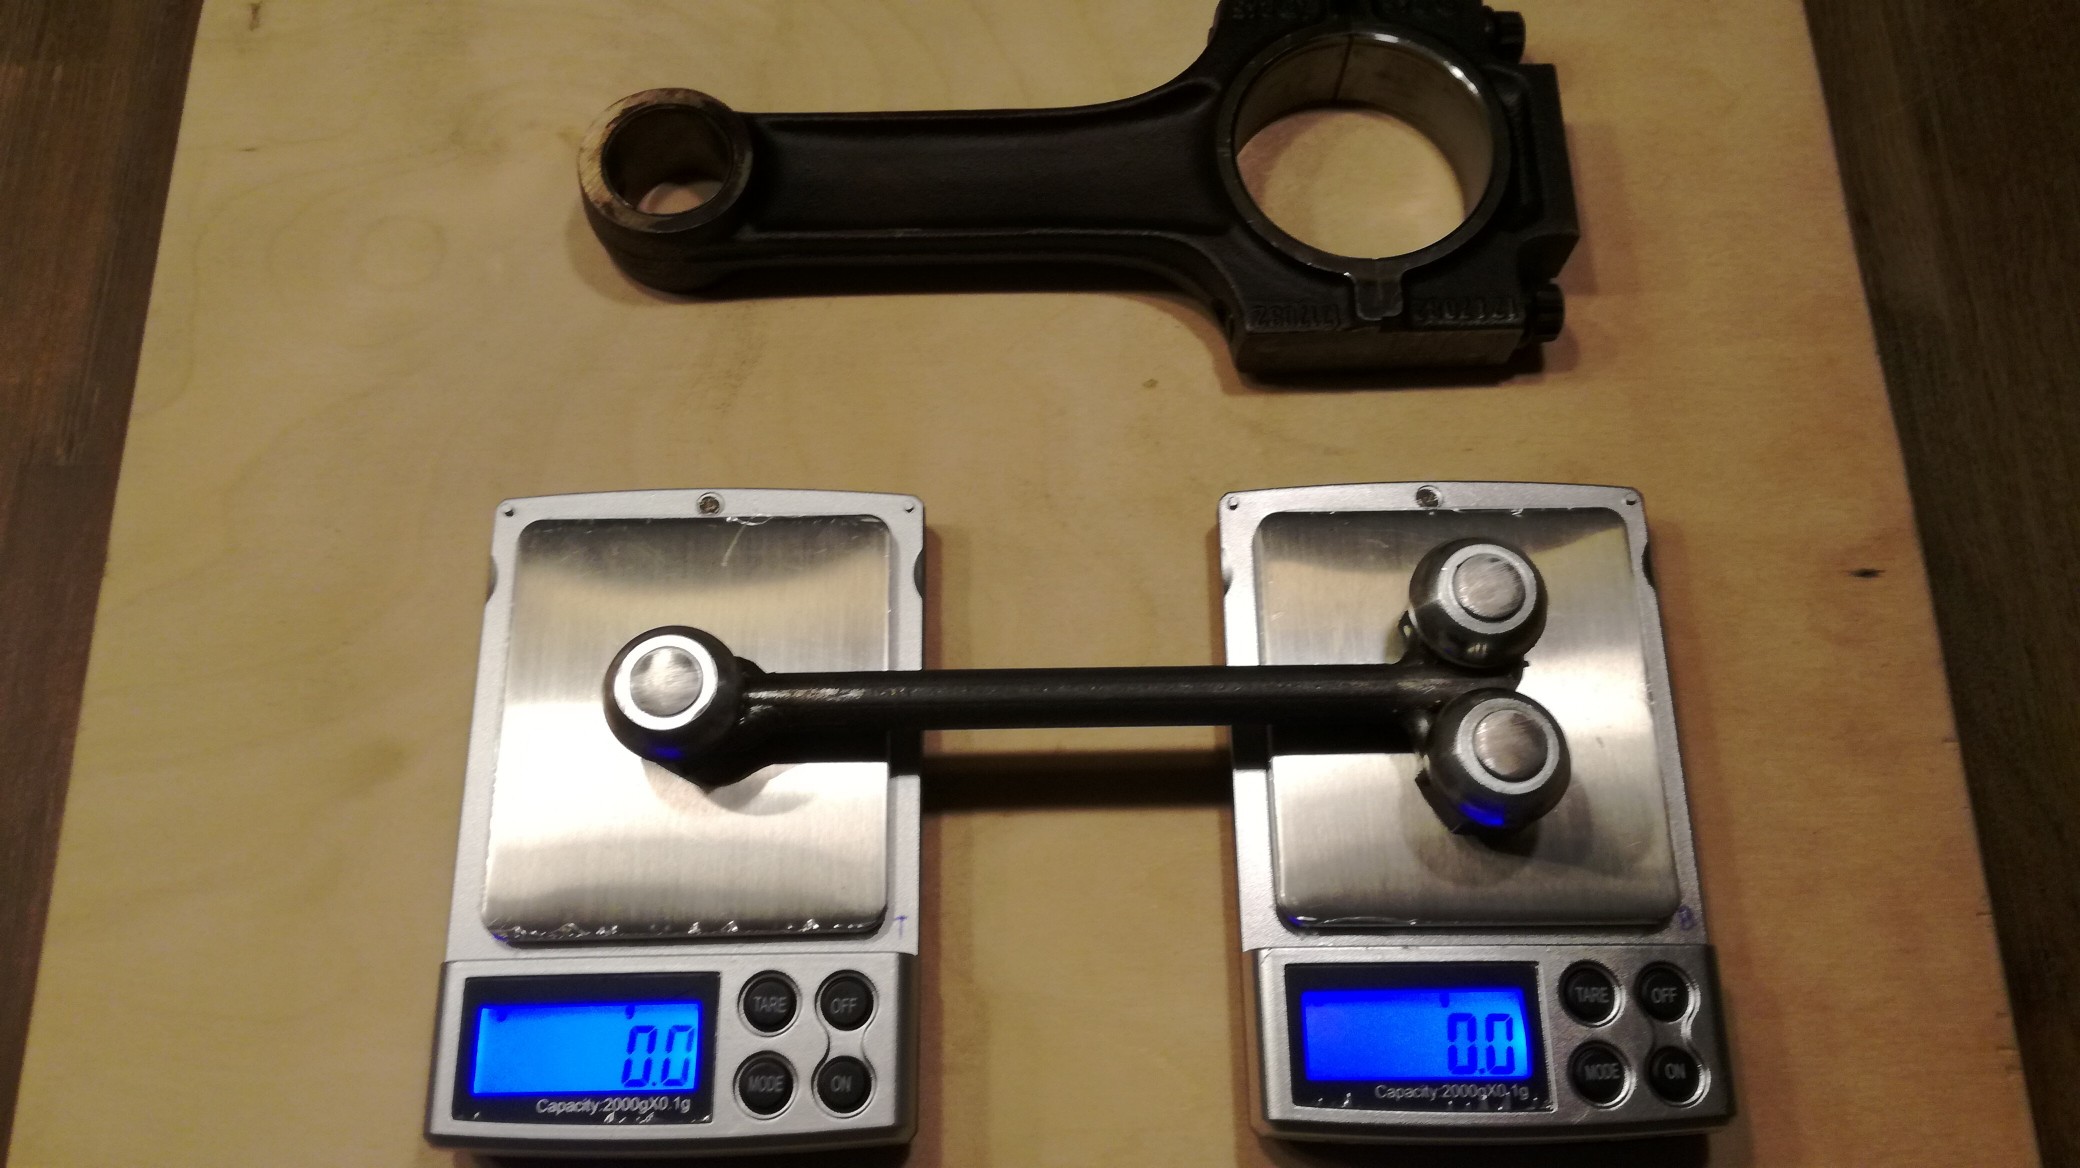
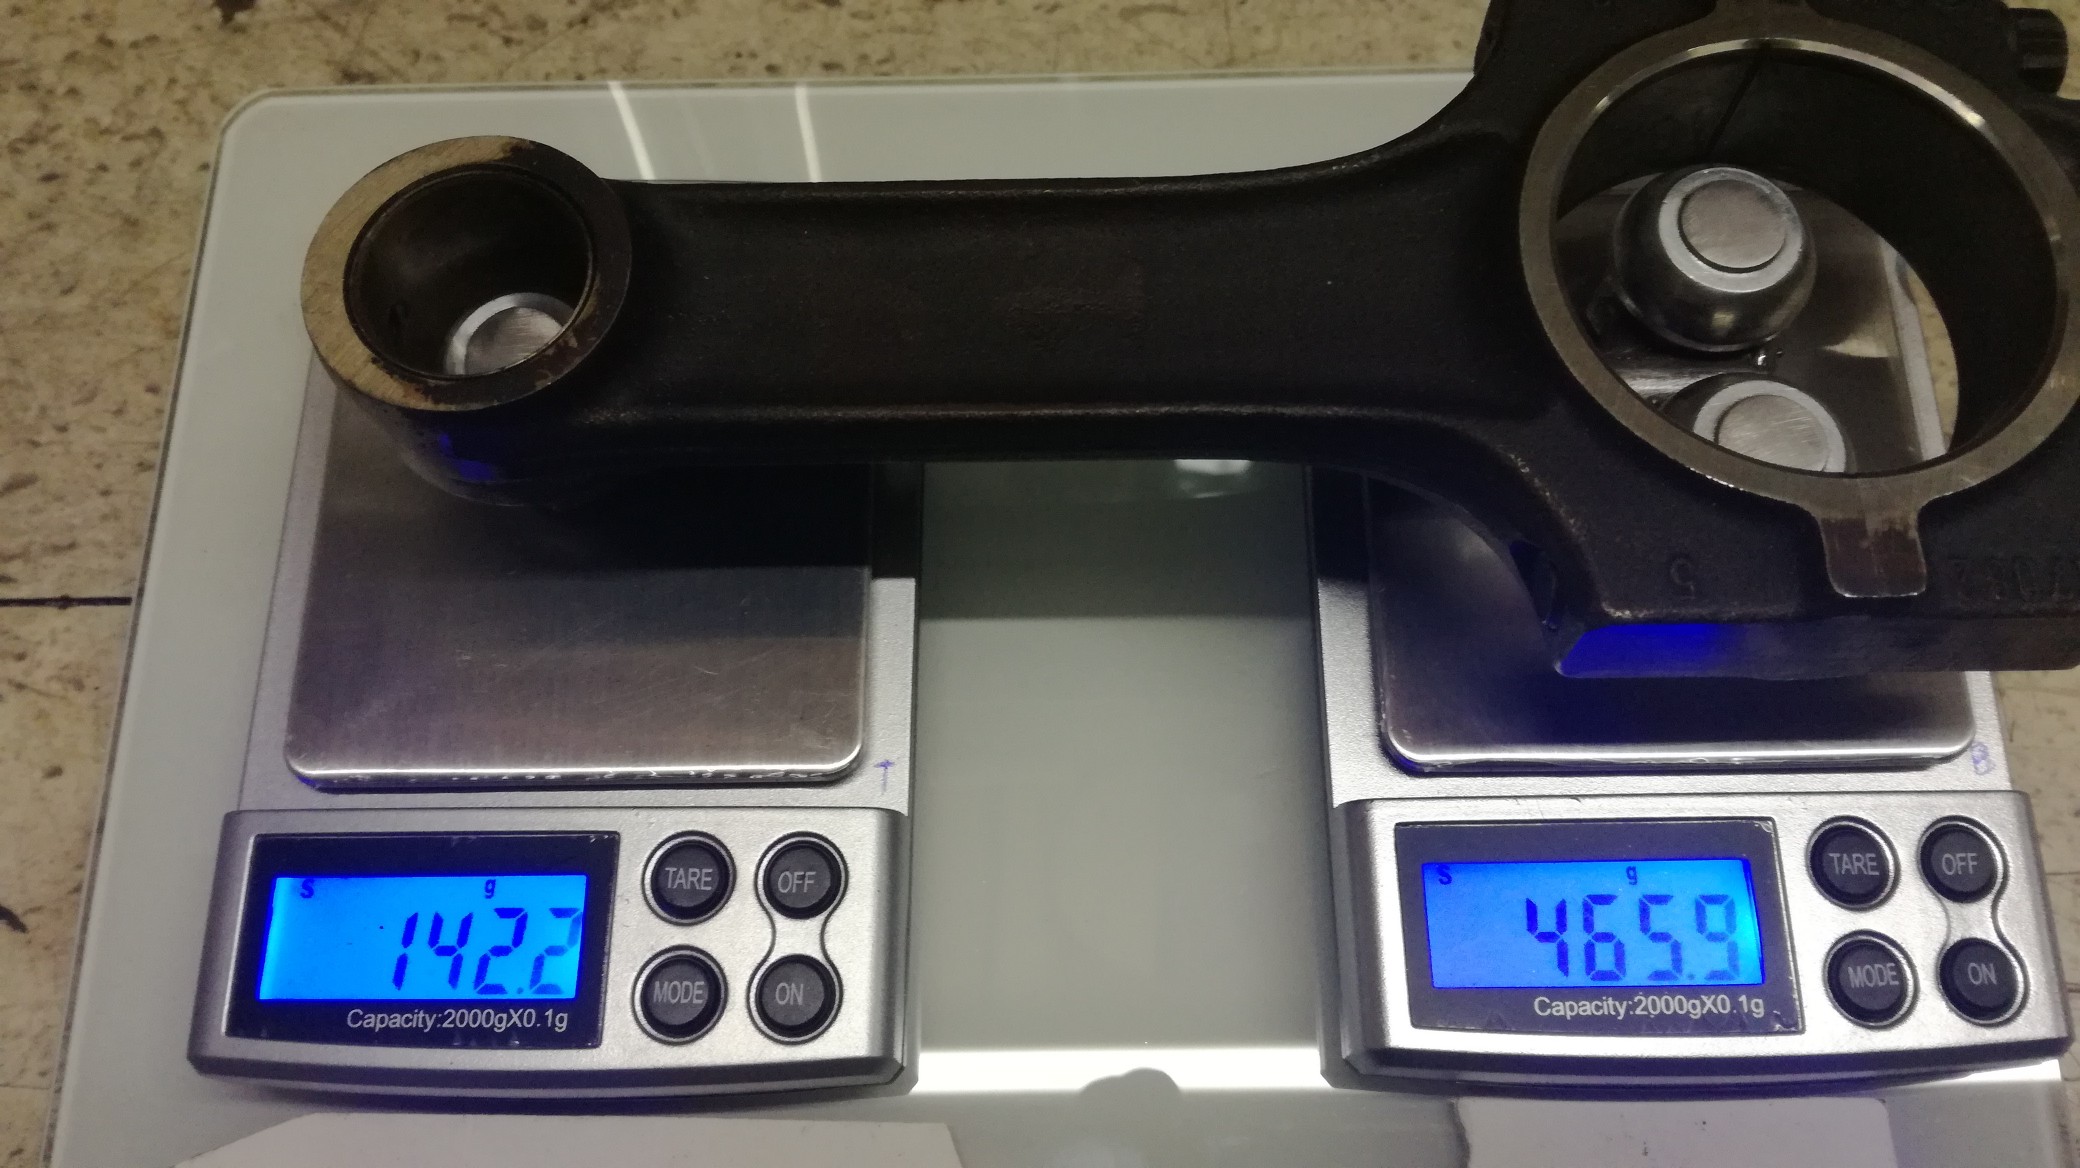
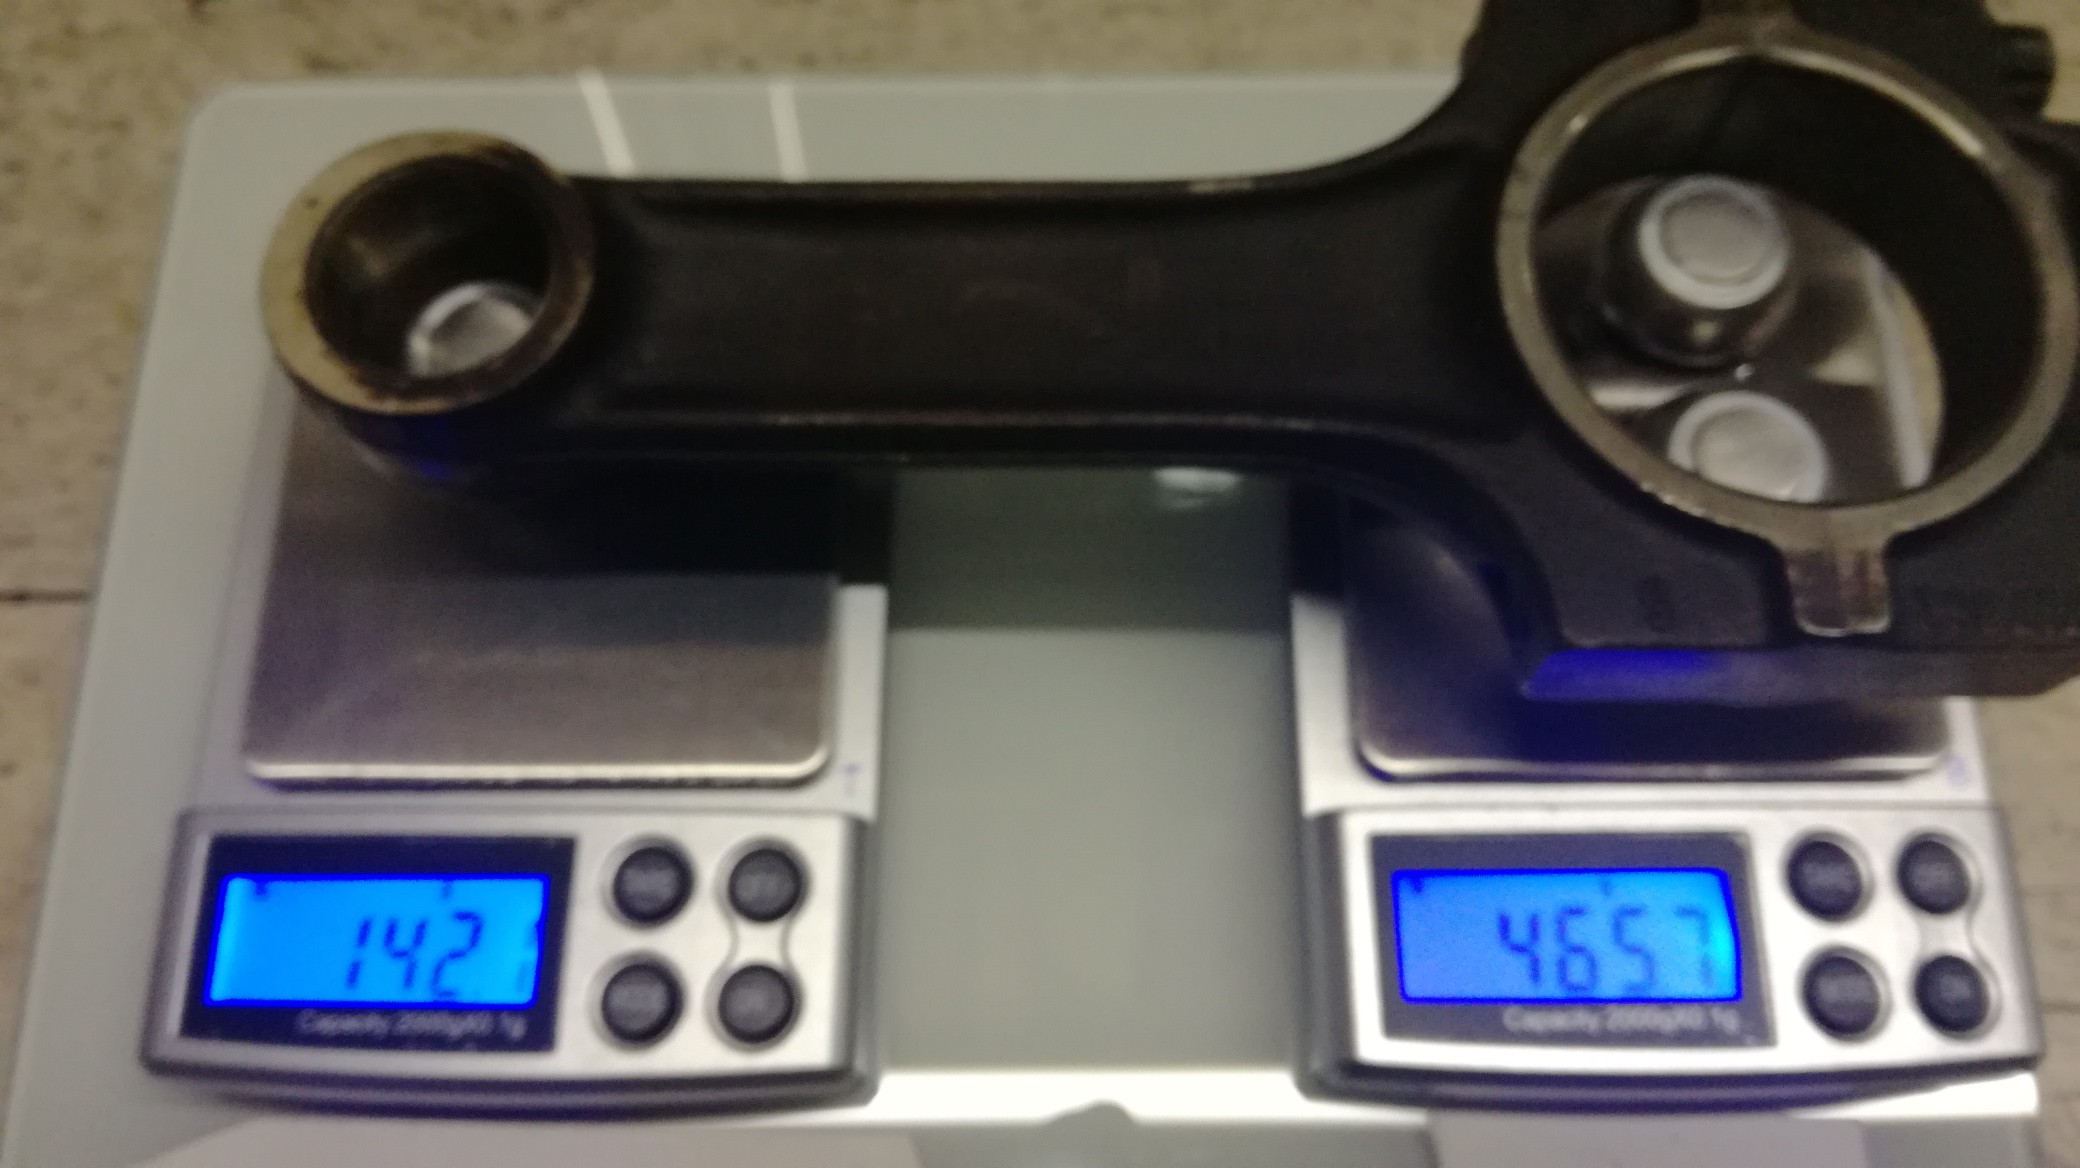
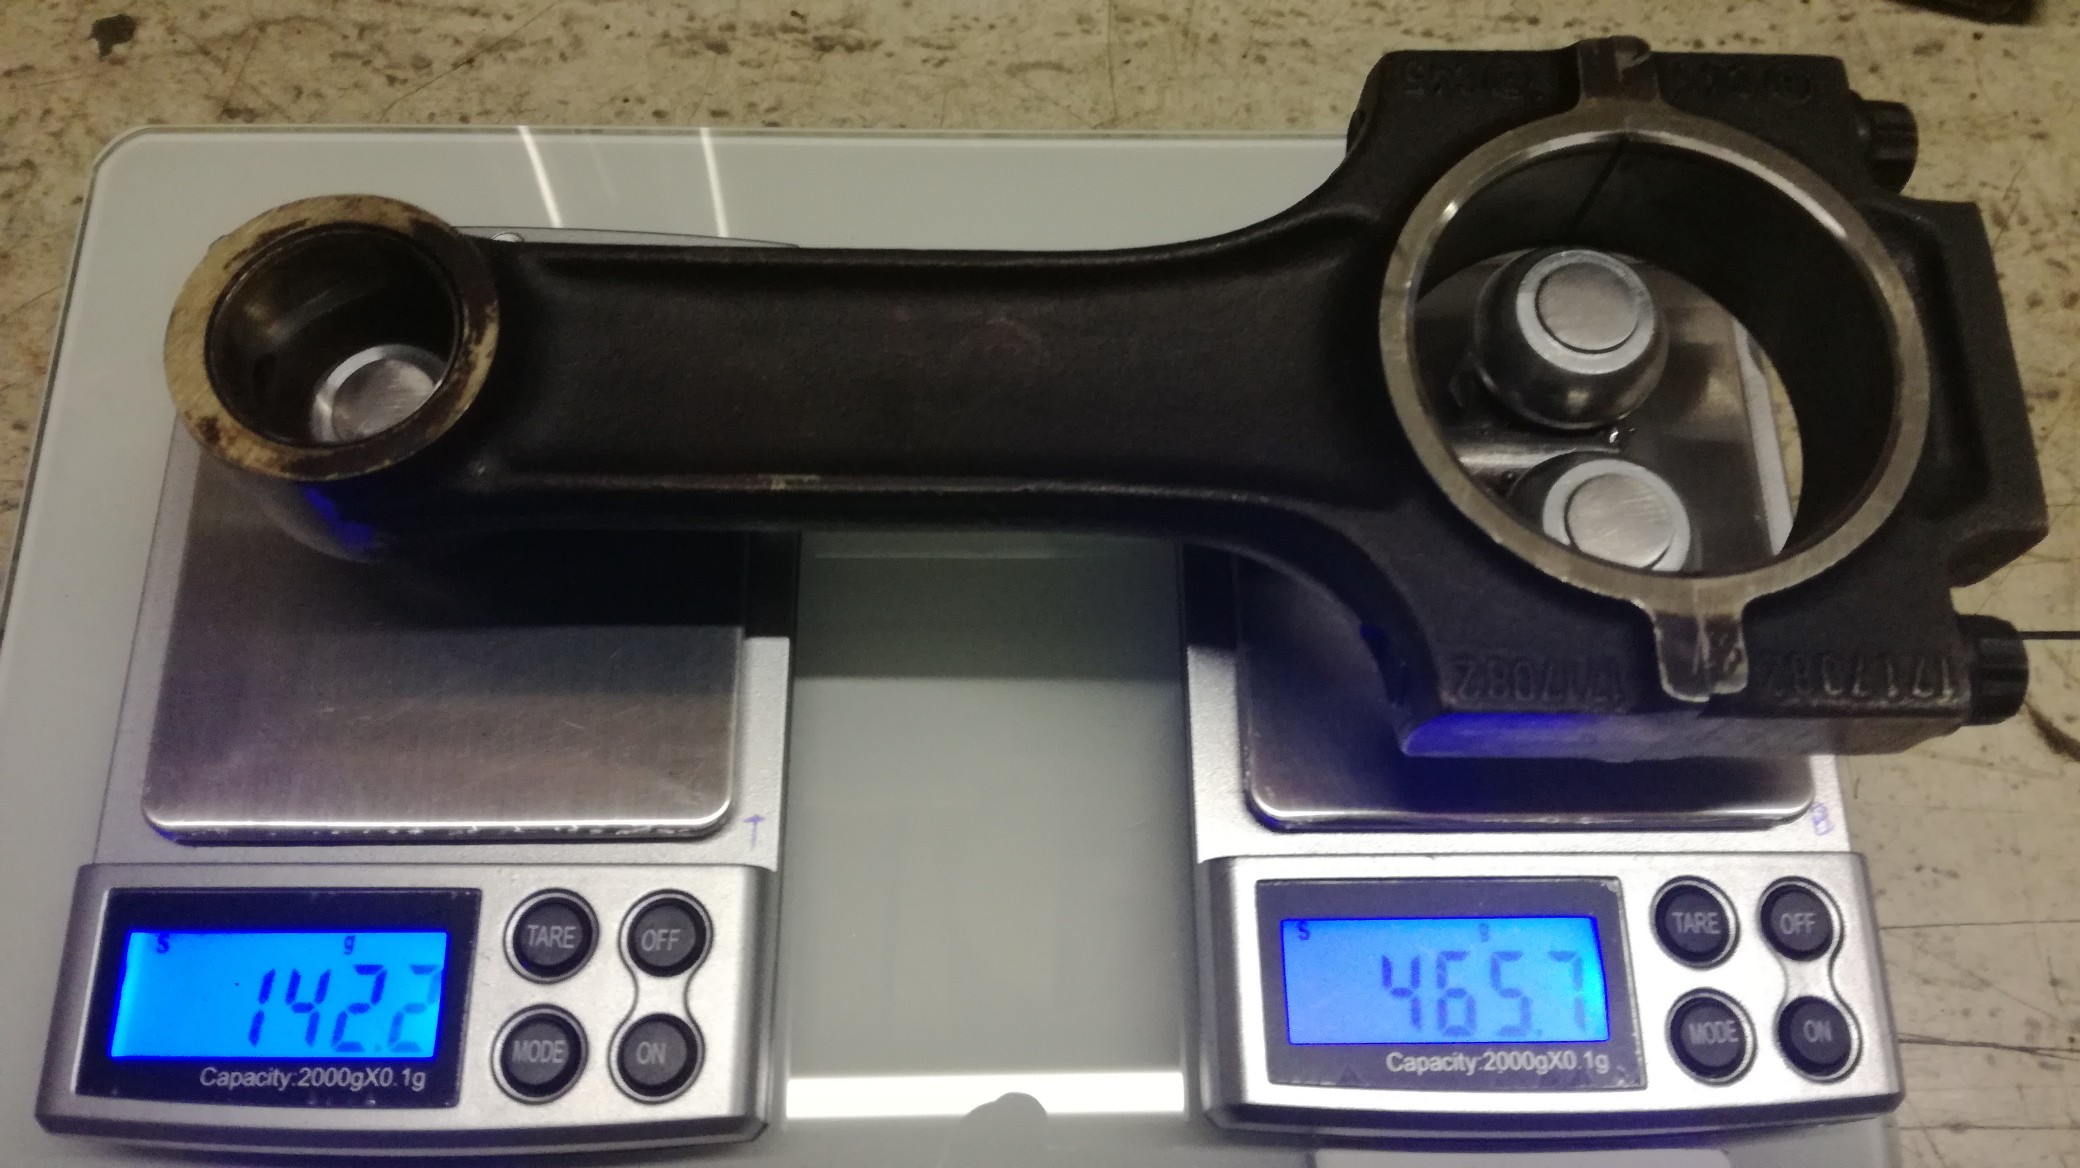
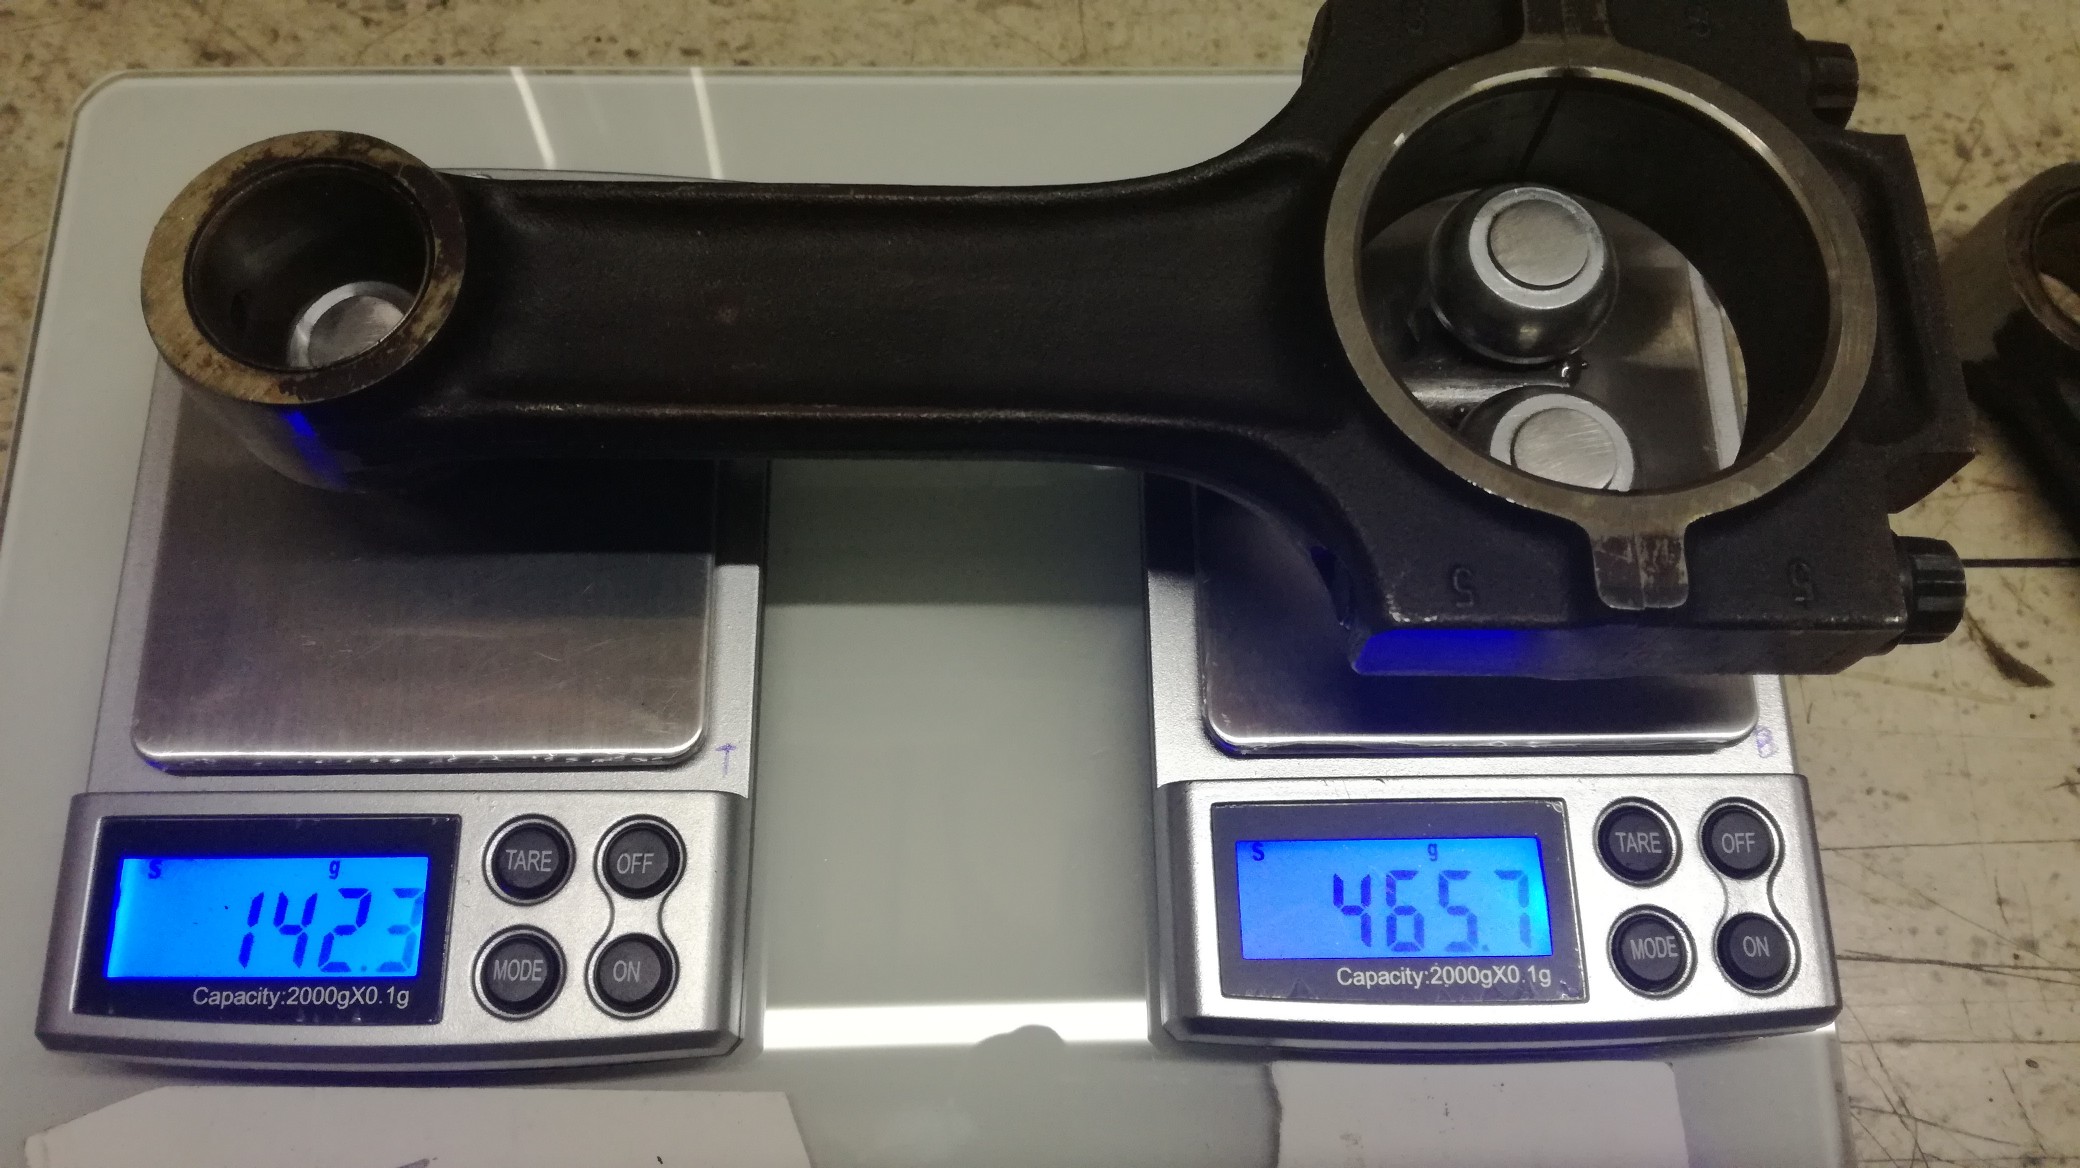
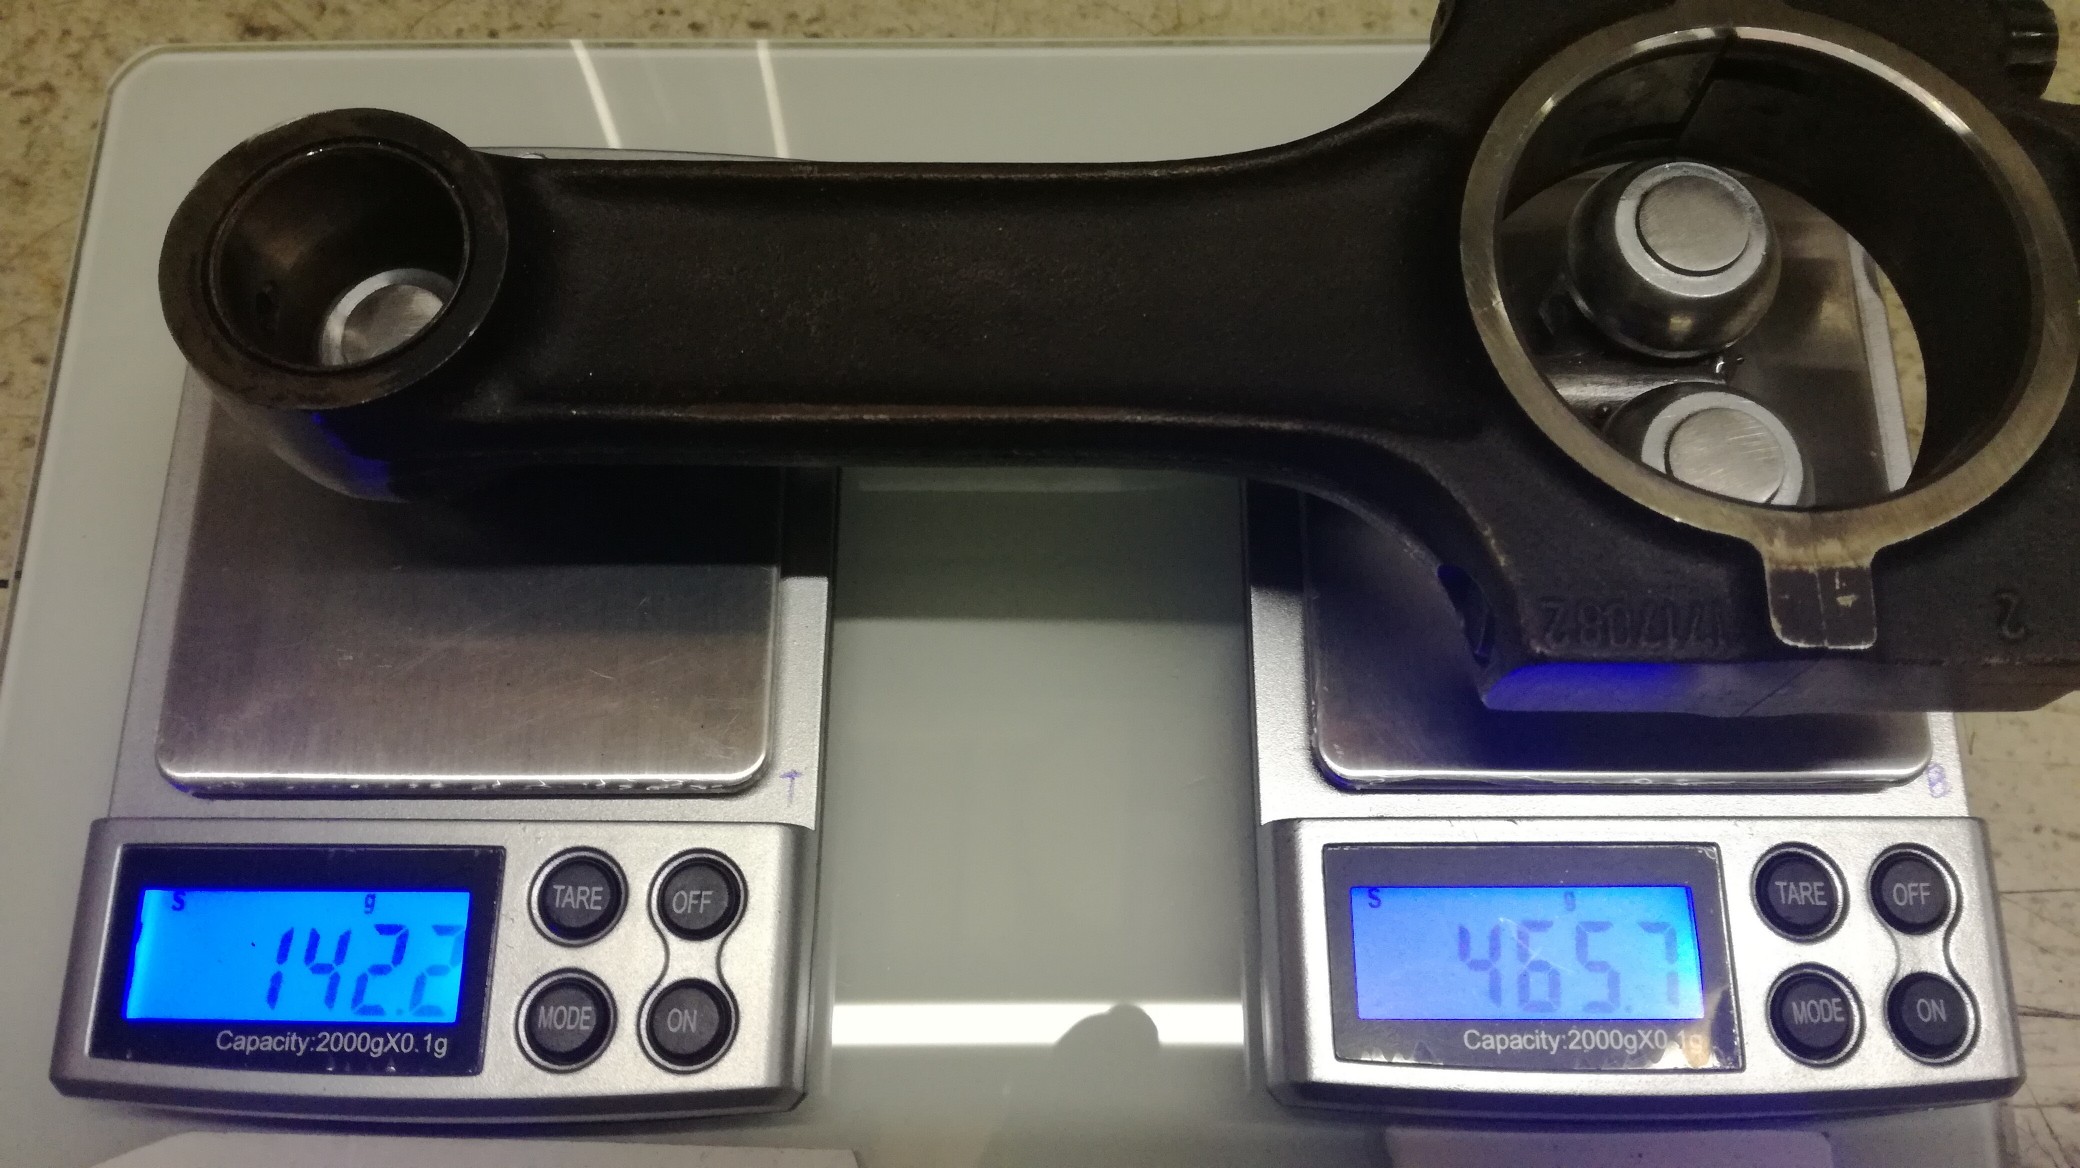
and then weighing the conrods:
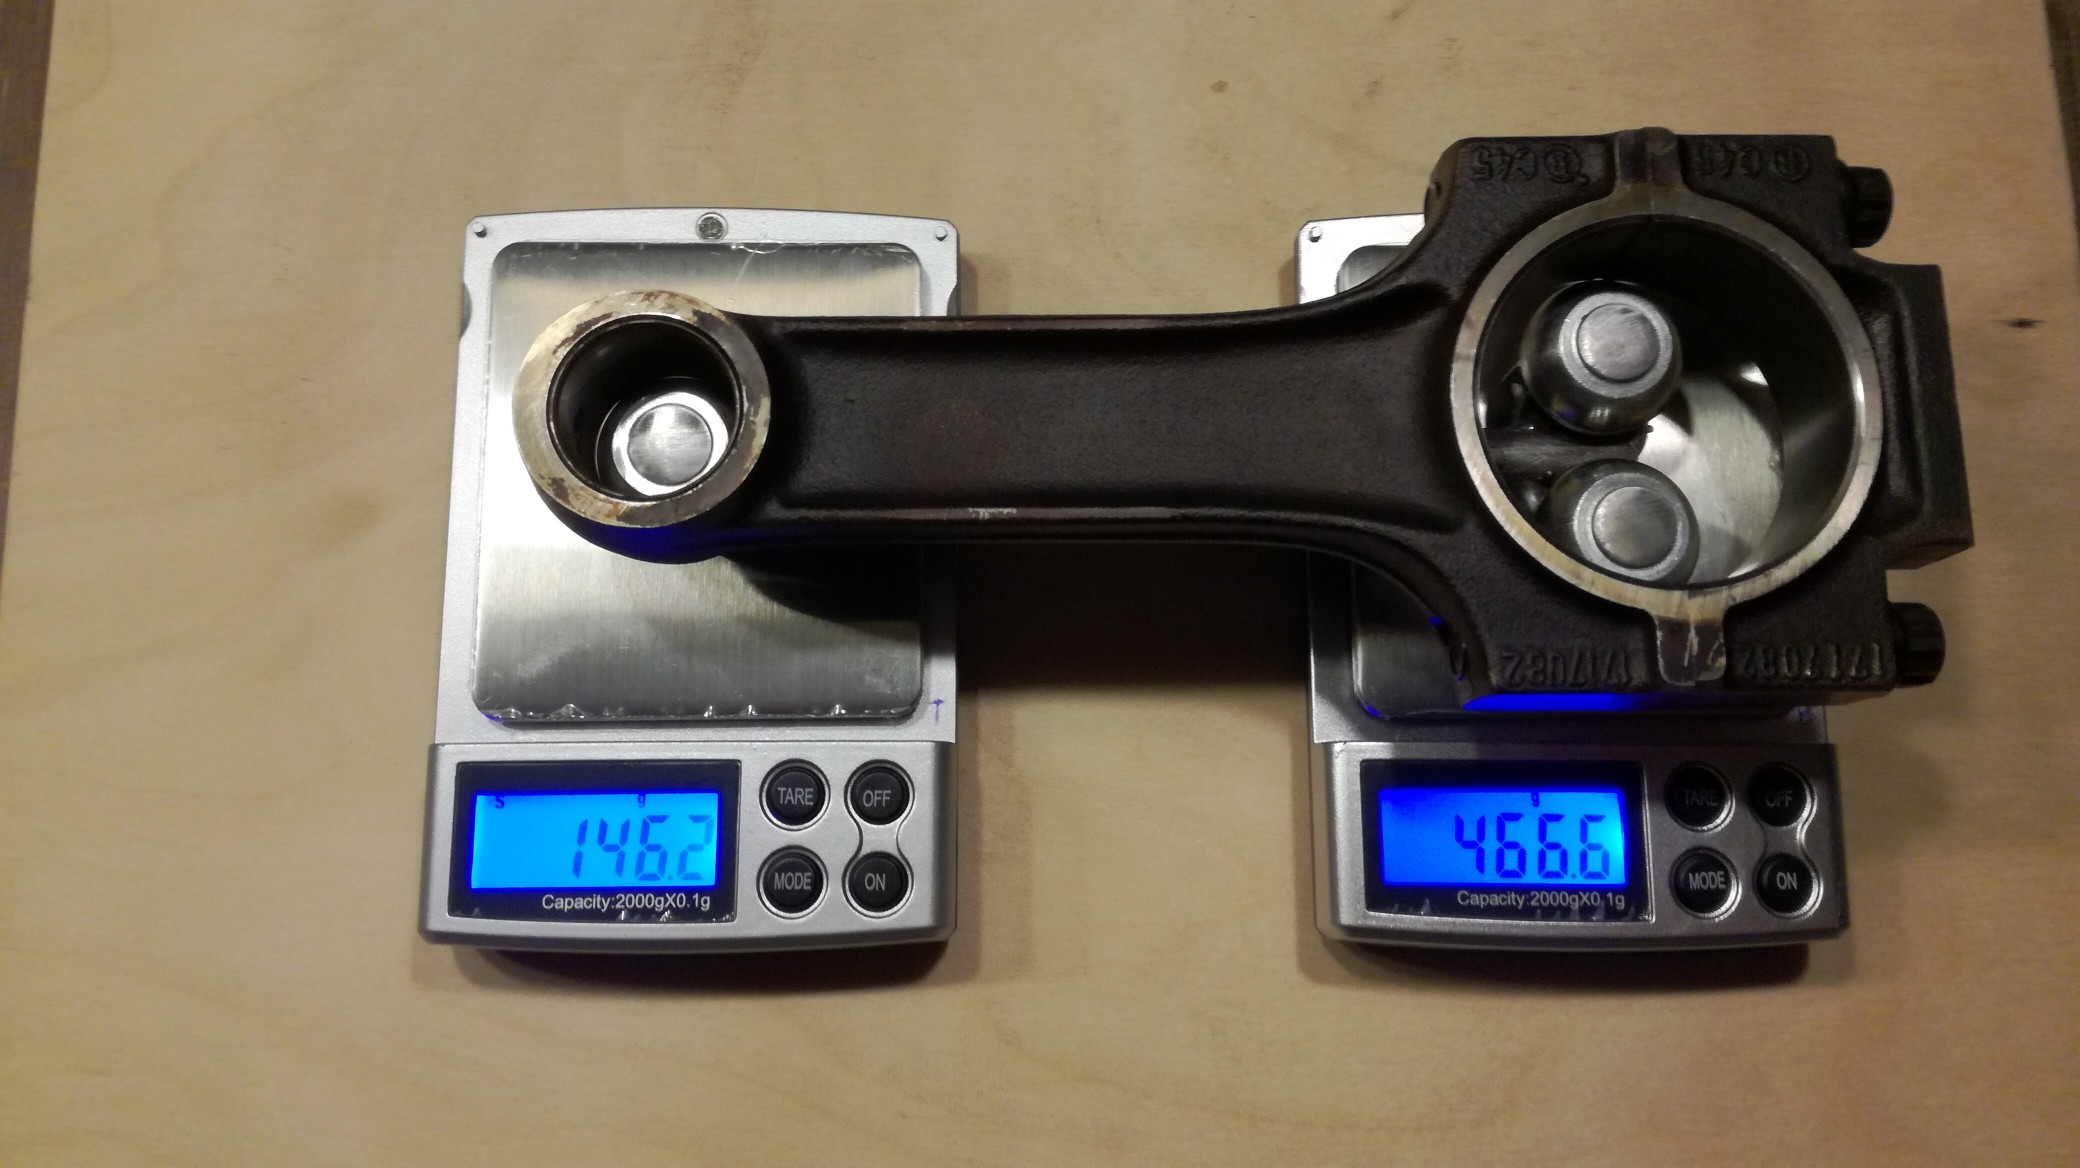
I weighed and noted all conrods a few times, and with this setup it gave very consistant values, 0.1~0.2 gram variation max between different weighing sessions of each conrod.
With this setup it is possible to balance the conrods very accurate, also very importand to usa a flat and stable undergroud, i used a glass plate.
A common mistake is bring all big ends to the same weight before concentrating on the wristpin end, FAULT !!!!
When you grind off some material from the big end foot, the wristpin end gets heavier, because the center of gravity moves to the wristpin end.
In my case the bottom of the big end is 39mm out off the center of the big end bore.
example: if you take 1.5 gram material away at the bottom of the conrod, the total weight lost at the big end is 1.9 gram and the wrist pin end gaines 0.4 gram. OW YES
So it is ver important to grind off little portions and weighing al lot between grinding. This is very time consuming.
Take the conrod with the lowest total weight as goal for all other conrods.
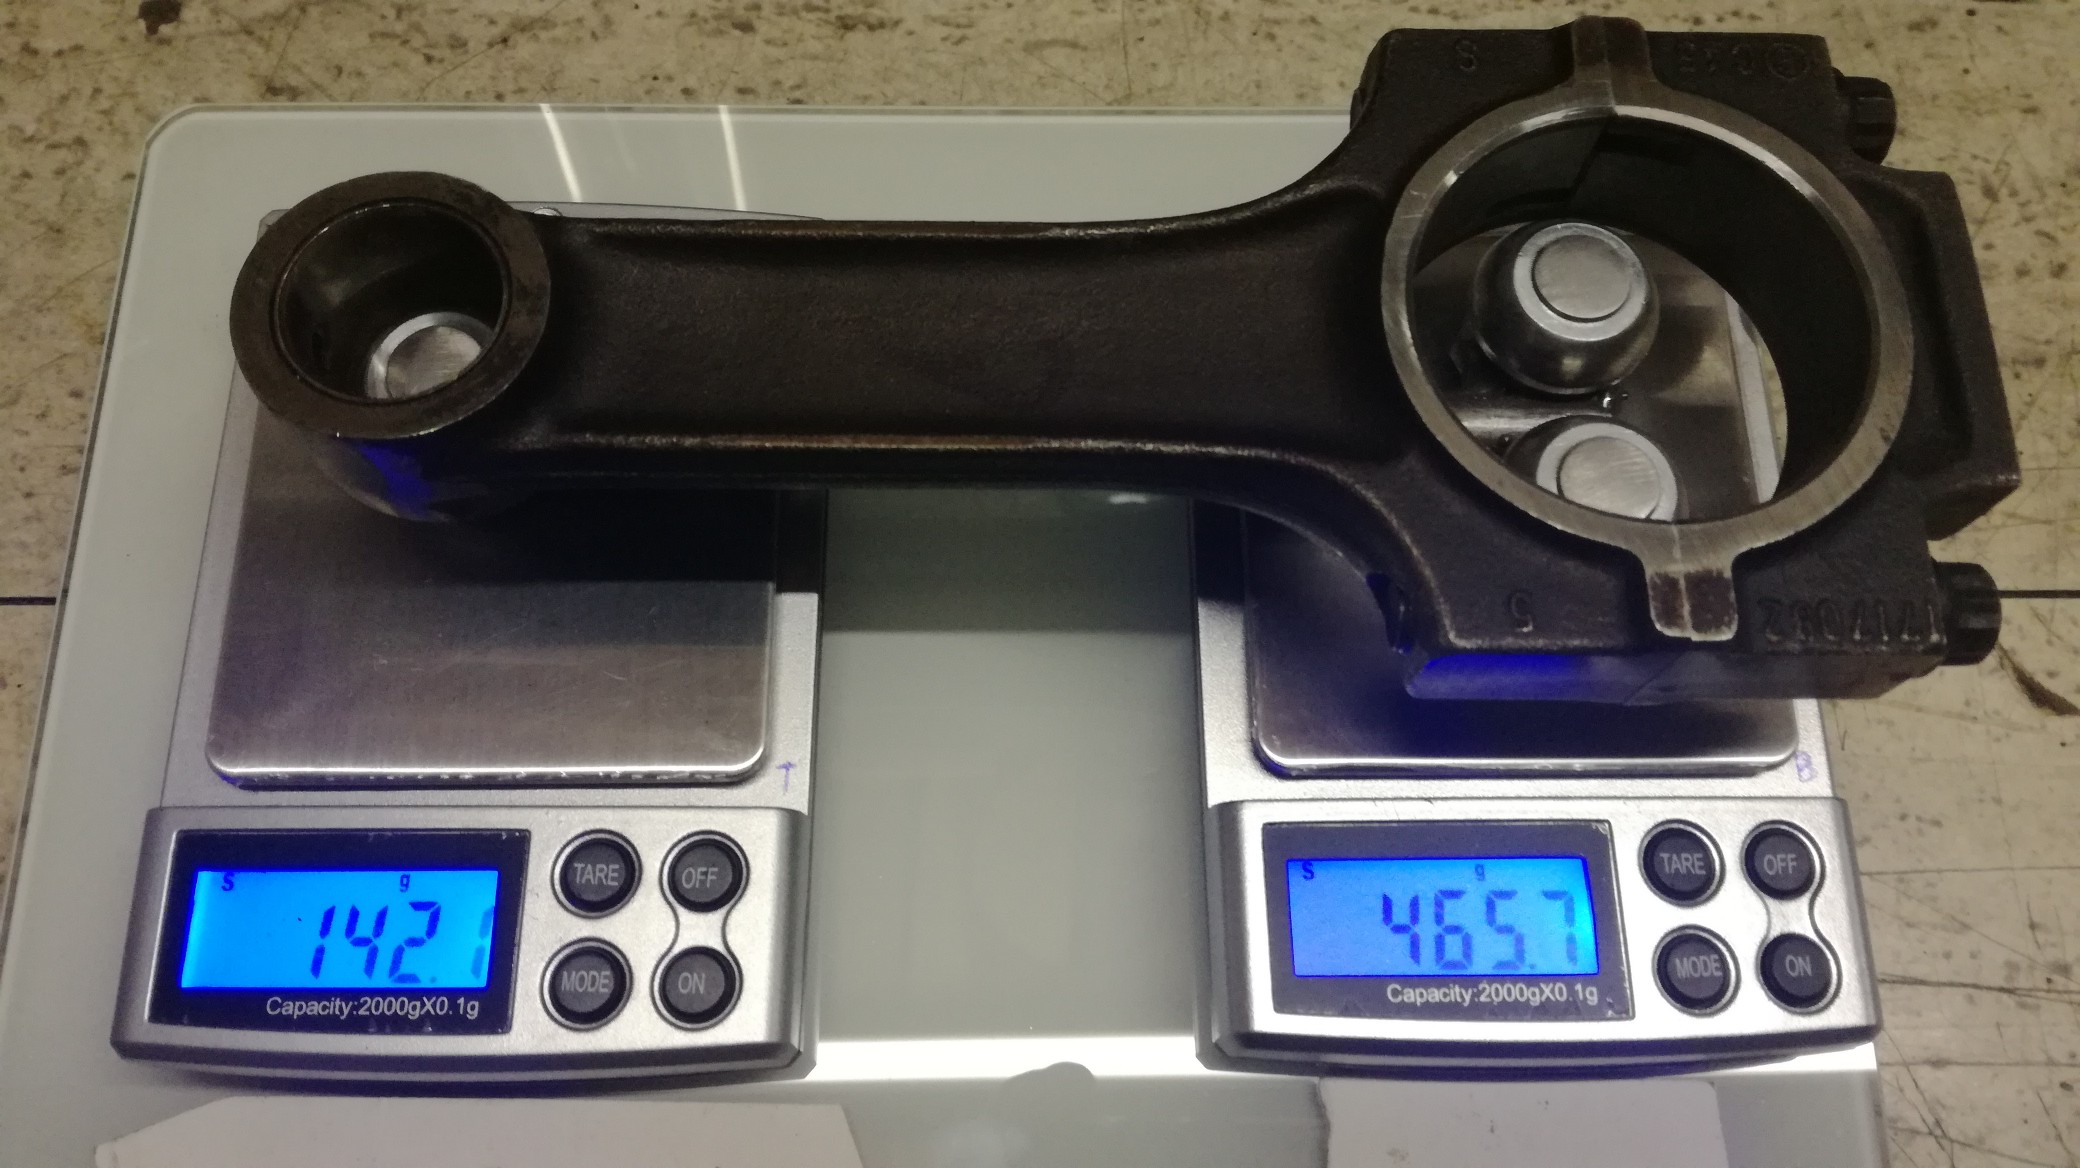
In the end i got all conrod within 0.3 gram at the big end side and 0.2 gram at the wristpin end, very happy with this result
Before i started balancing the biggest weight difference was 4.5 gram, biggest variation was at the wristpin end side.
As seen on the photos i did the balancing with the big end bolts mounted, i weighed the bolts before, and they all had exactly the same weight on my scale. did the same with the bearing shell's, al within 0.1 gram.
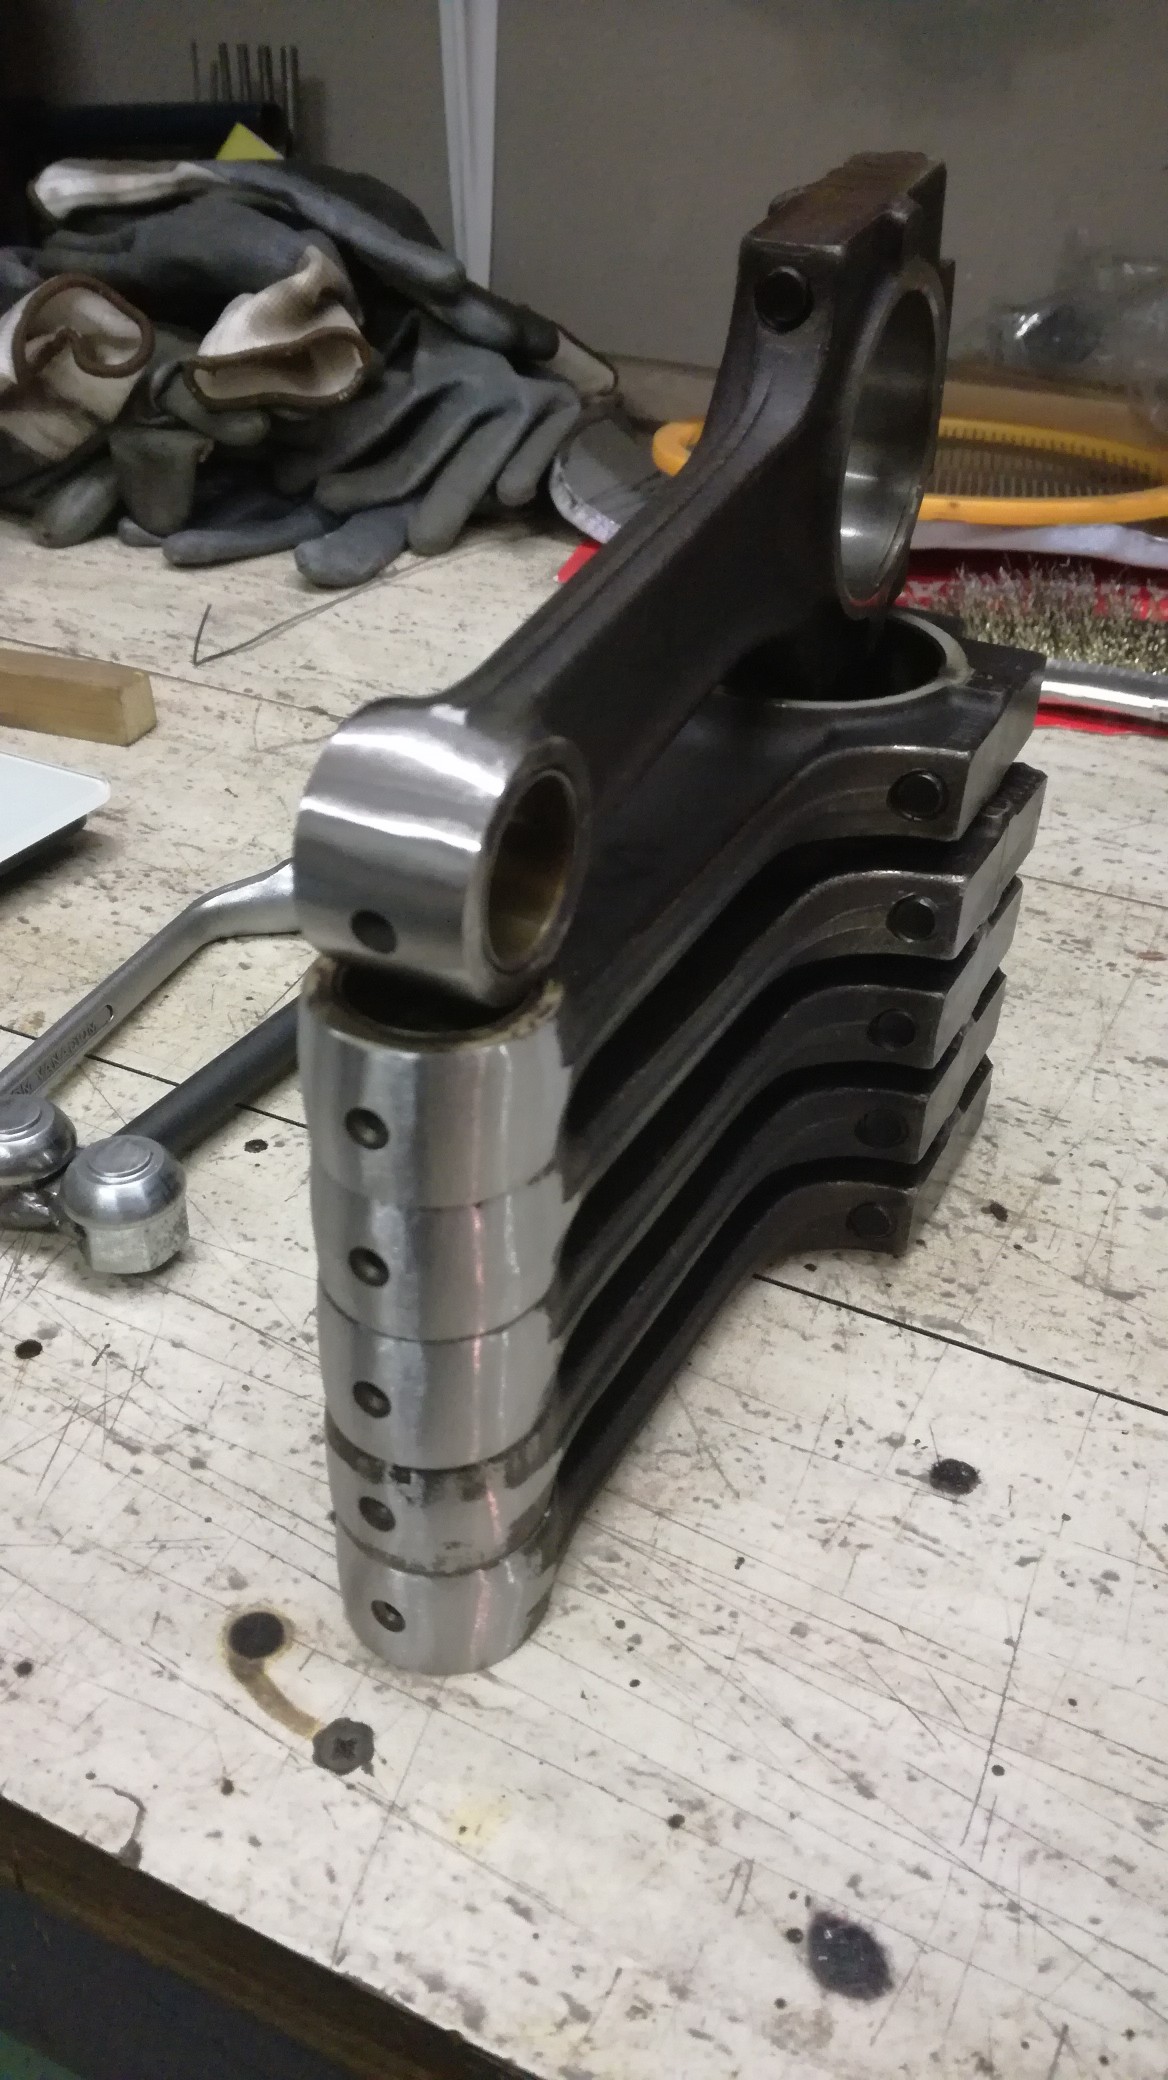
Balanced conrods:
results conrod 1:
results conrod 2:
results conrod 3:
results conrod 4:
results conrod 5:
results conrod 6:
Balancing the pistons was a relative easy job, balancing conrods is a totaly different story.
The trick with conrods is not only bring all conrods to the same weight, but also balance them in such way they all have the same center of gravity, explained with this diagram:
Goal is to get the same rotating weight and reciprocating for all conrods, special jigs for this purpose are available on the internet. i've tried a setup like the jig shown here, but my results weren't that consistent at all, so i went of searching for another method accurate weighing the big-end and wrist end simultaniously.
After a intensive search i found this professional conrod balancing jig, using two scales, ofcourse this jig is way to expensive for only one time use:
So hands out and build a low cost setup mimmicing the above setup using 2 jewelery scales.
Getting parts together building a jig which would hold a conrod exactly the same each time it's placed into the jig.
with these cheap (bin) parts i build a jig for the specific 130mm conrods:
Using 3 spherical wheel bolts , drilled holes into the bolt heads so they would take little bearing balls, to get accurate pressing points on the scales:
then welded the wheel bolts with a piece of rod together, to make it a sturdy piece:
and cut the threads from the wheel bolts:
Setup ready for balancing:
nulling both scales with the jig already placed on the scales:
and then weighing the conrods:
I weighed and noted all conrods a few times, and with this setup it gave very consistant values, 0.1~0.2 gram variation max between different weighing sessions of each conrod.
With this setup it is possible to balance the conrods very accurate, also very importand to usa a flat and stable undergroud, i used a glass plate.
A common mistake is bring all big ends to the same weight before concentrating on the wristpin end, FAULT !!!!
When you grind off some material from the big end foot, the wristpin end gets heavier, because the center of gravity moves to the wristpin end.
In my case the bottom of the big end is 39mm out off the center of the big end bore.
example: if you take 1.5 gram material away at the bottom of the conrod, the total weight lost at the big end is 1.9 gram and the wrist pin end gaines 0.4 gram. OW YES
So it is ver important to grind off little portions and weighing al lot between grinding. This is very time consuming.
Take the conrod with the lowest total weight as goal for all other conrods.
In the end i got all conrod within 0.3 gram at the big end side and 0.2 gram at the wristpin end, very happy with this result
Before i started balancing the biggest weight difference was 4.5 gram, biggest variation was at the wristpin end side.
As seen on the photos i did the balancing with the big end bolts mounted, i weighed the bolts before, and they all had exactly the same weight on my scale. did the same with the bearing shell's, al within 0.1 gram.
Balanced conrods:
results conrod 1:
results conrod 2:
results conrod 3:
results conrod 4:
results conrod 5:
results conrod 6:
Last edited by BertjeConti on Tue Nov 22, 2022 8:05 pm, edited 2 times in total.

Megasquirted '77 E12 520-6
Aspen Silver '96 E39 523i
-
BertjeConti
- E21 Mad
- Posts: 3012
- Joined: Mon Nov 04, 2013 9:49 pm
- My E21(s): E12 520-6
- Location: nederland , Weert
Re: Pastelblau 520/6
Time to put an engine together with these parts
Over time i gathered lots of new components like gaskets, oil rings, piston rings and bearing shells.
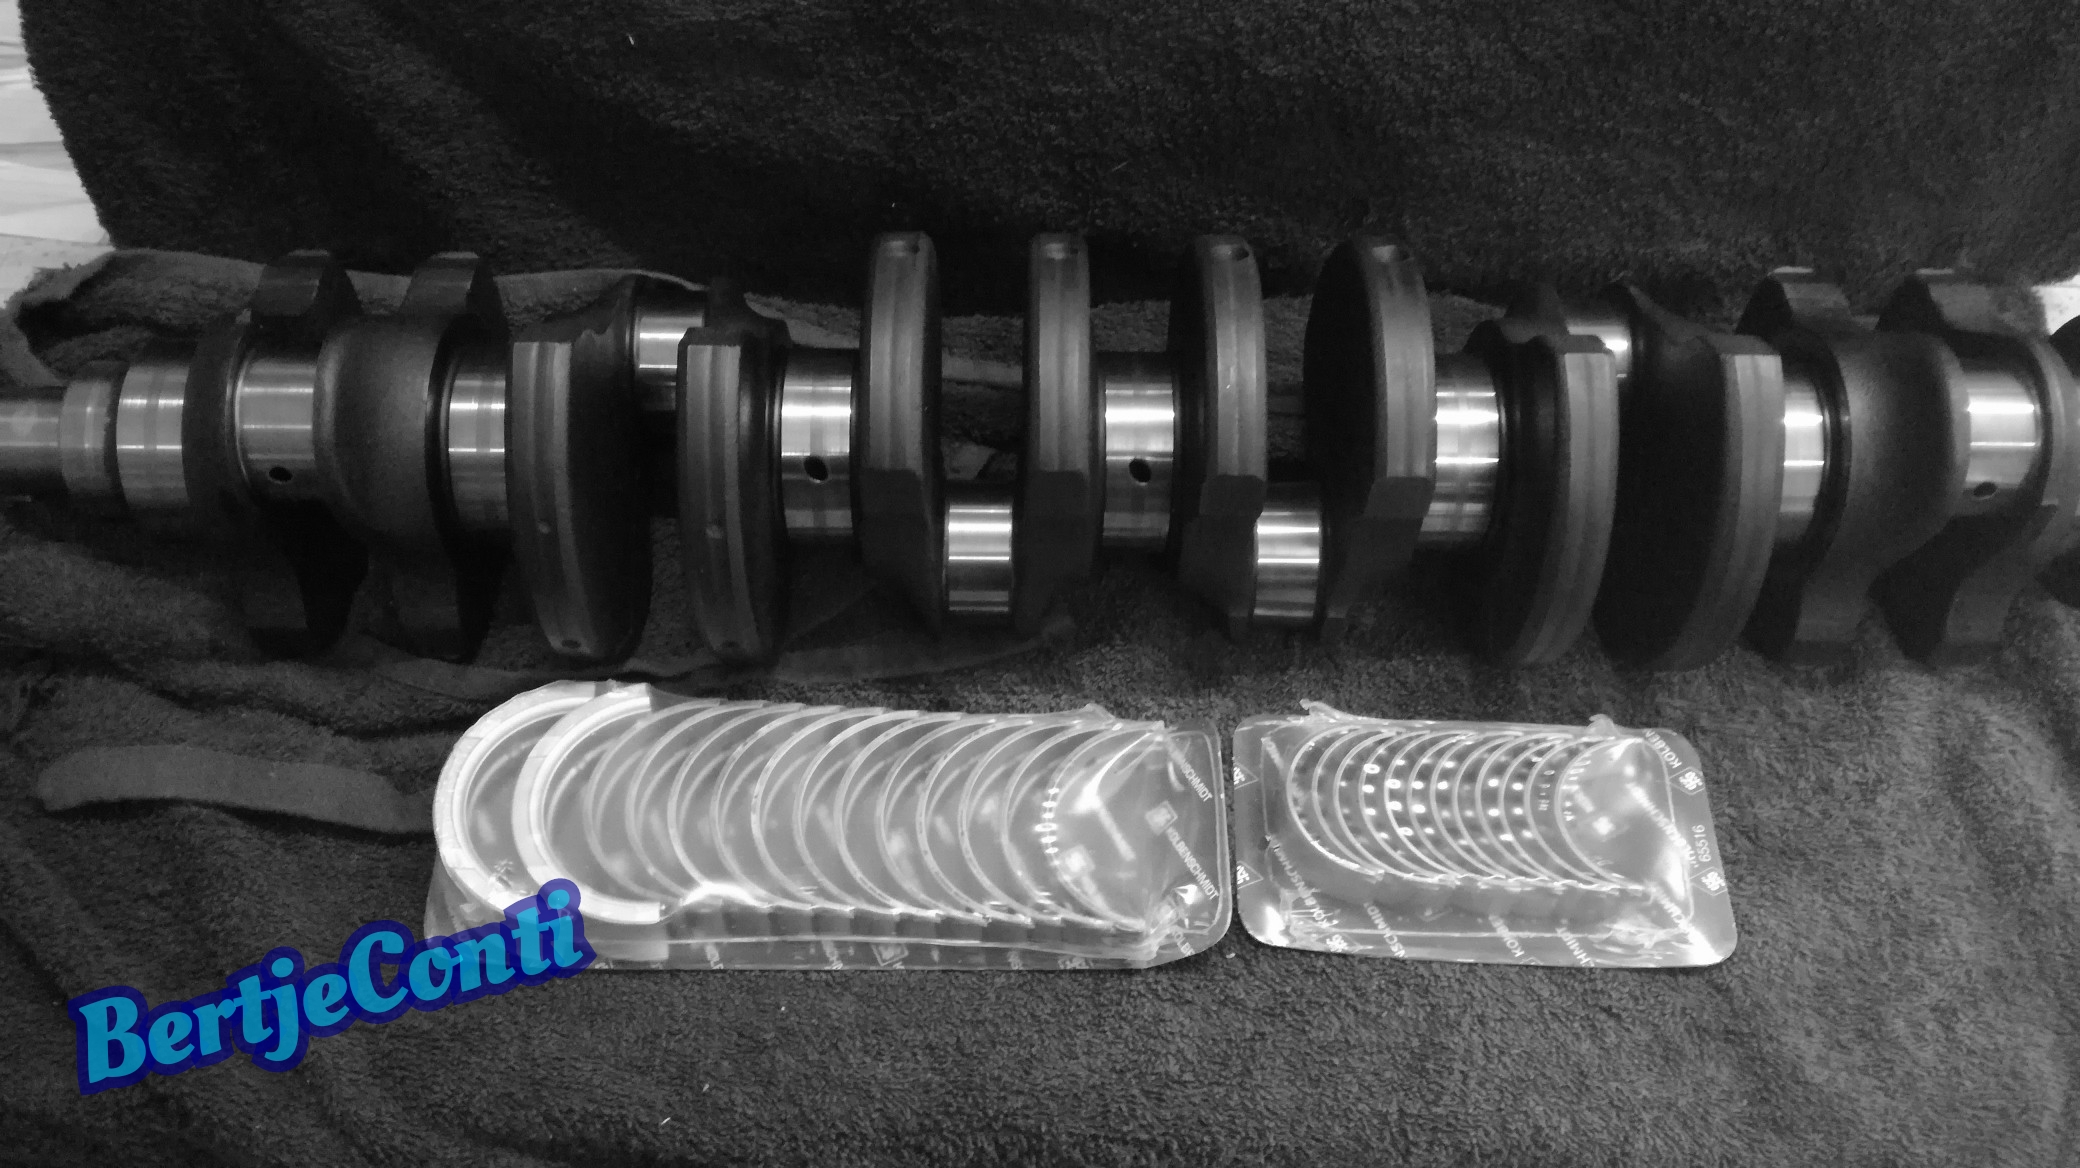
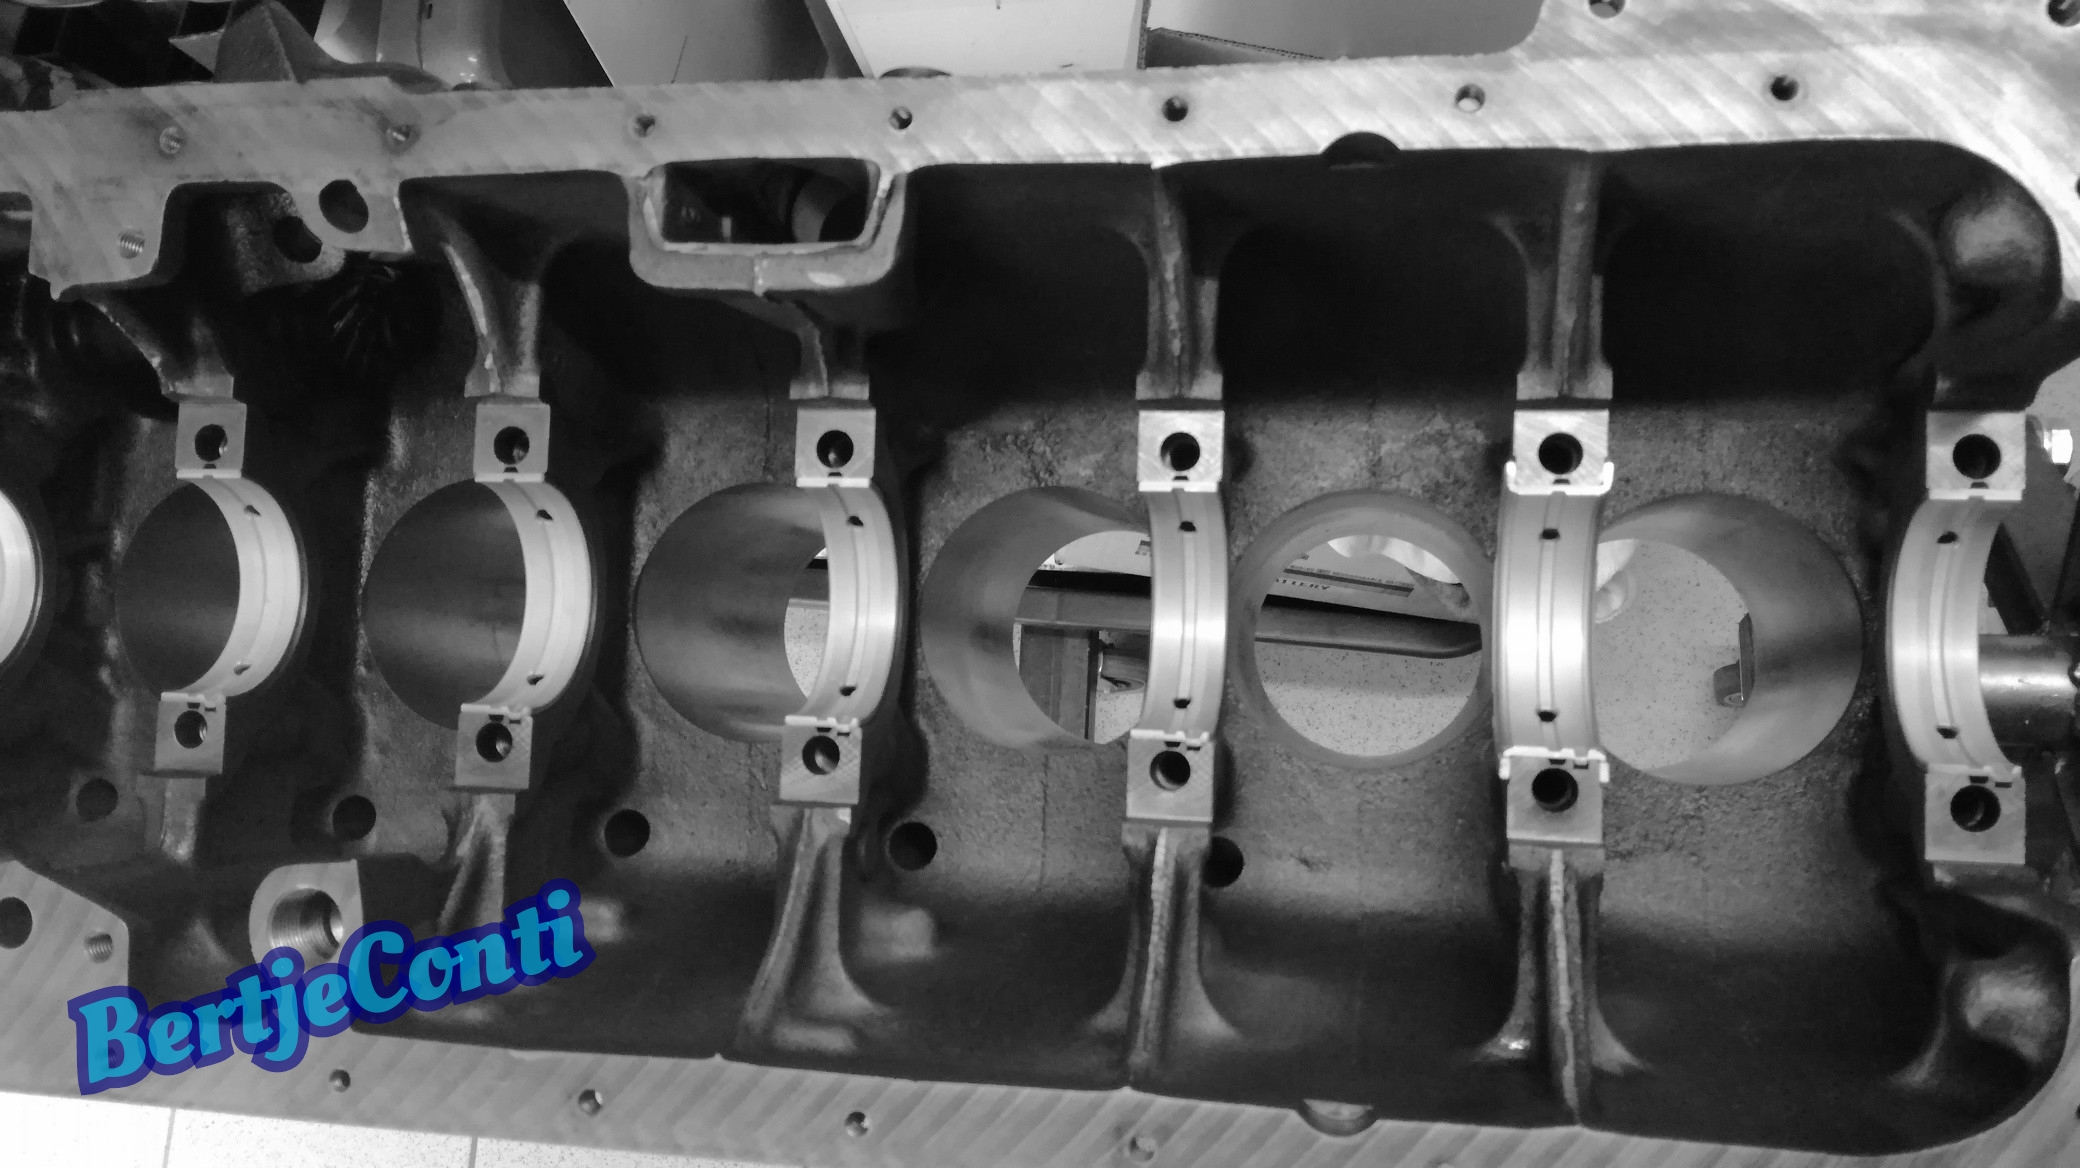
Crankshaft and camshaft from this motor are in excellent condition, no rework needed. Nice, standard bearings shells will be used.
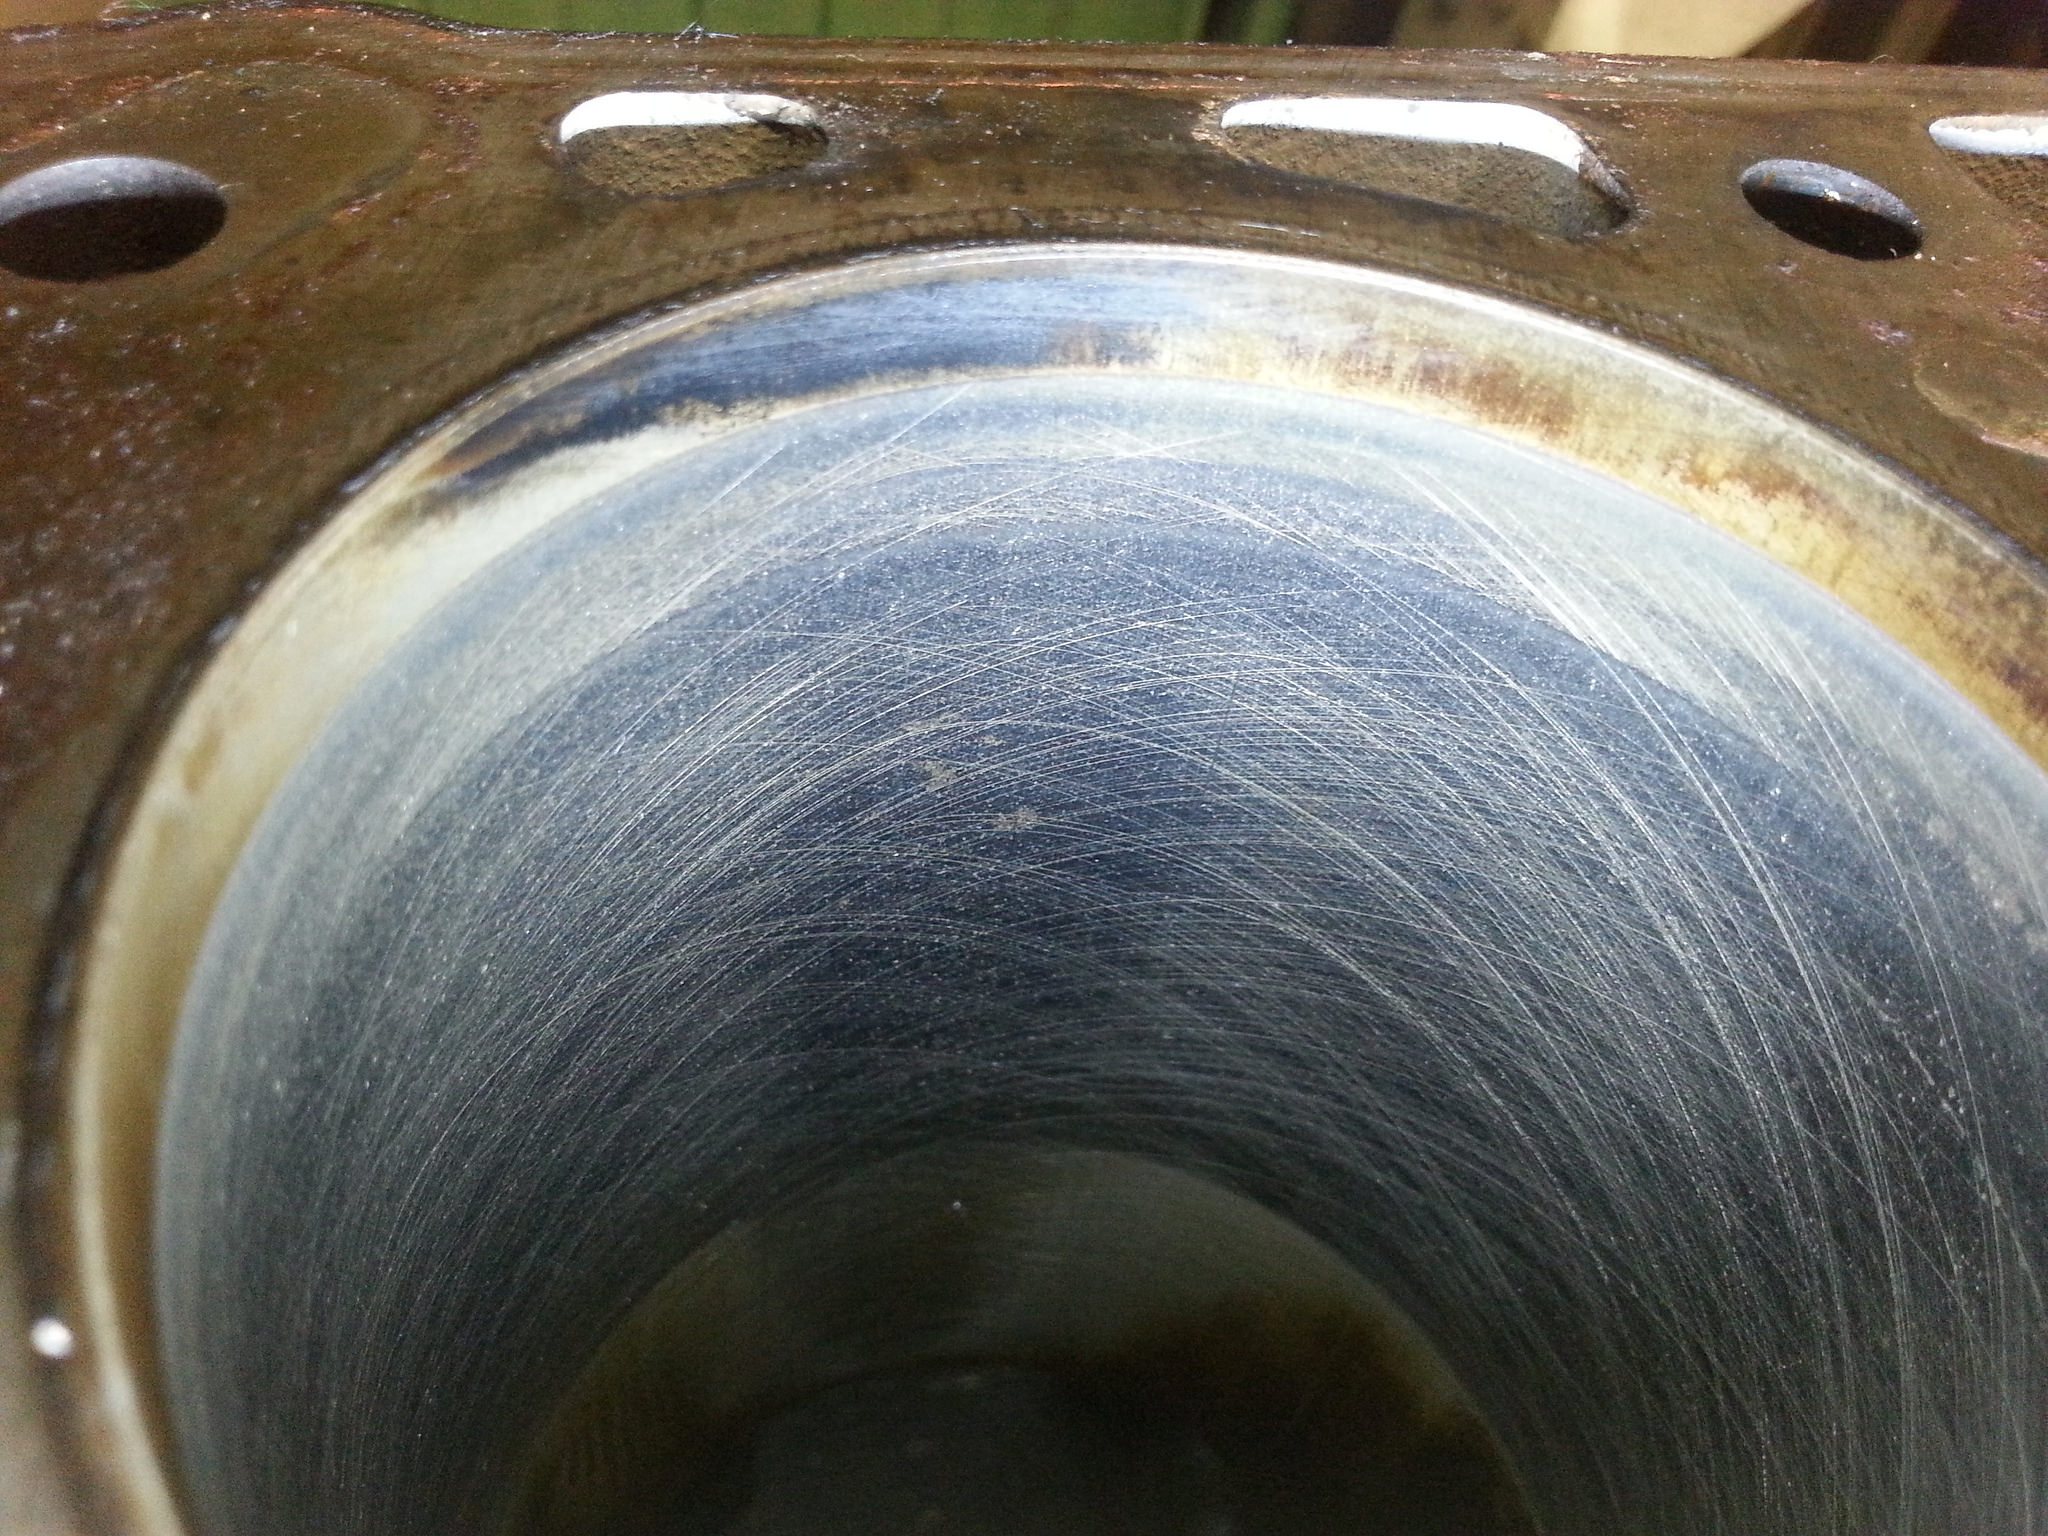
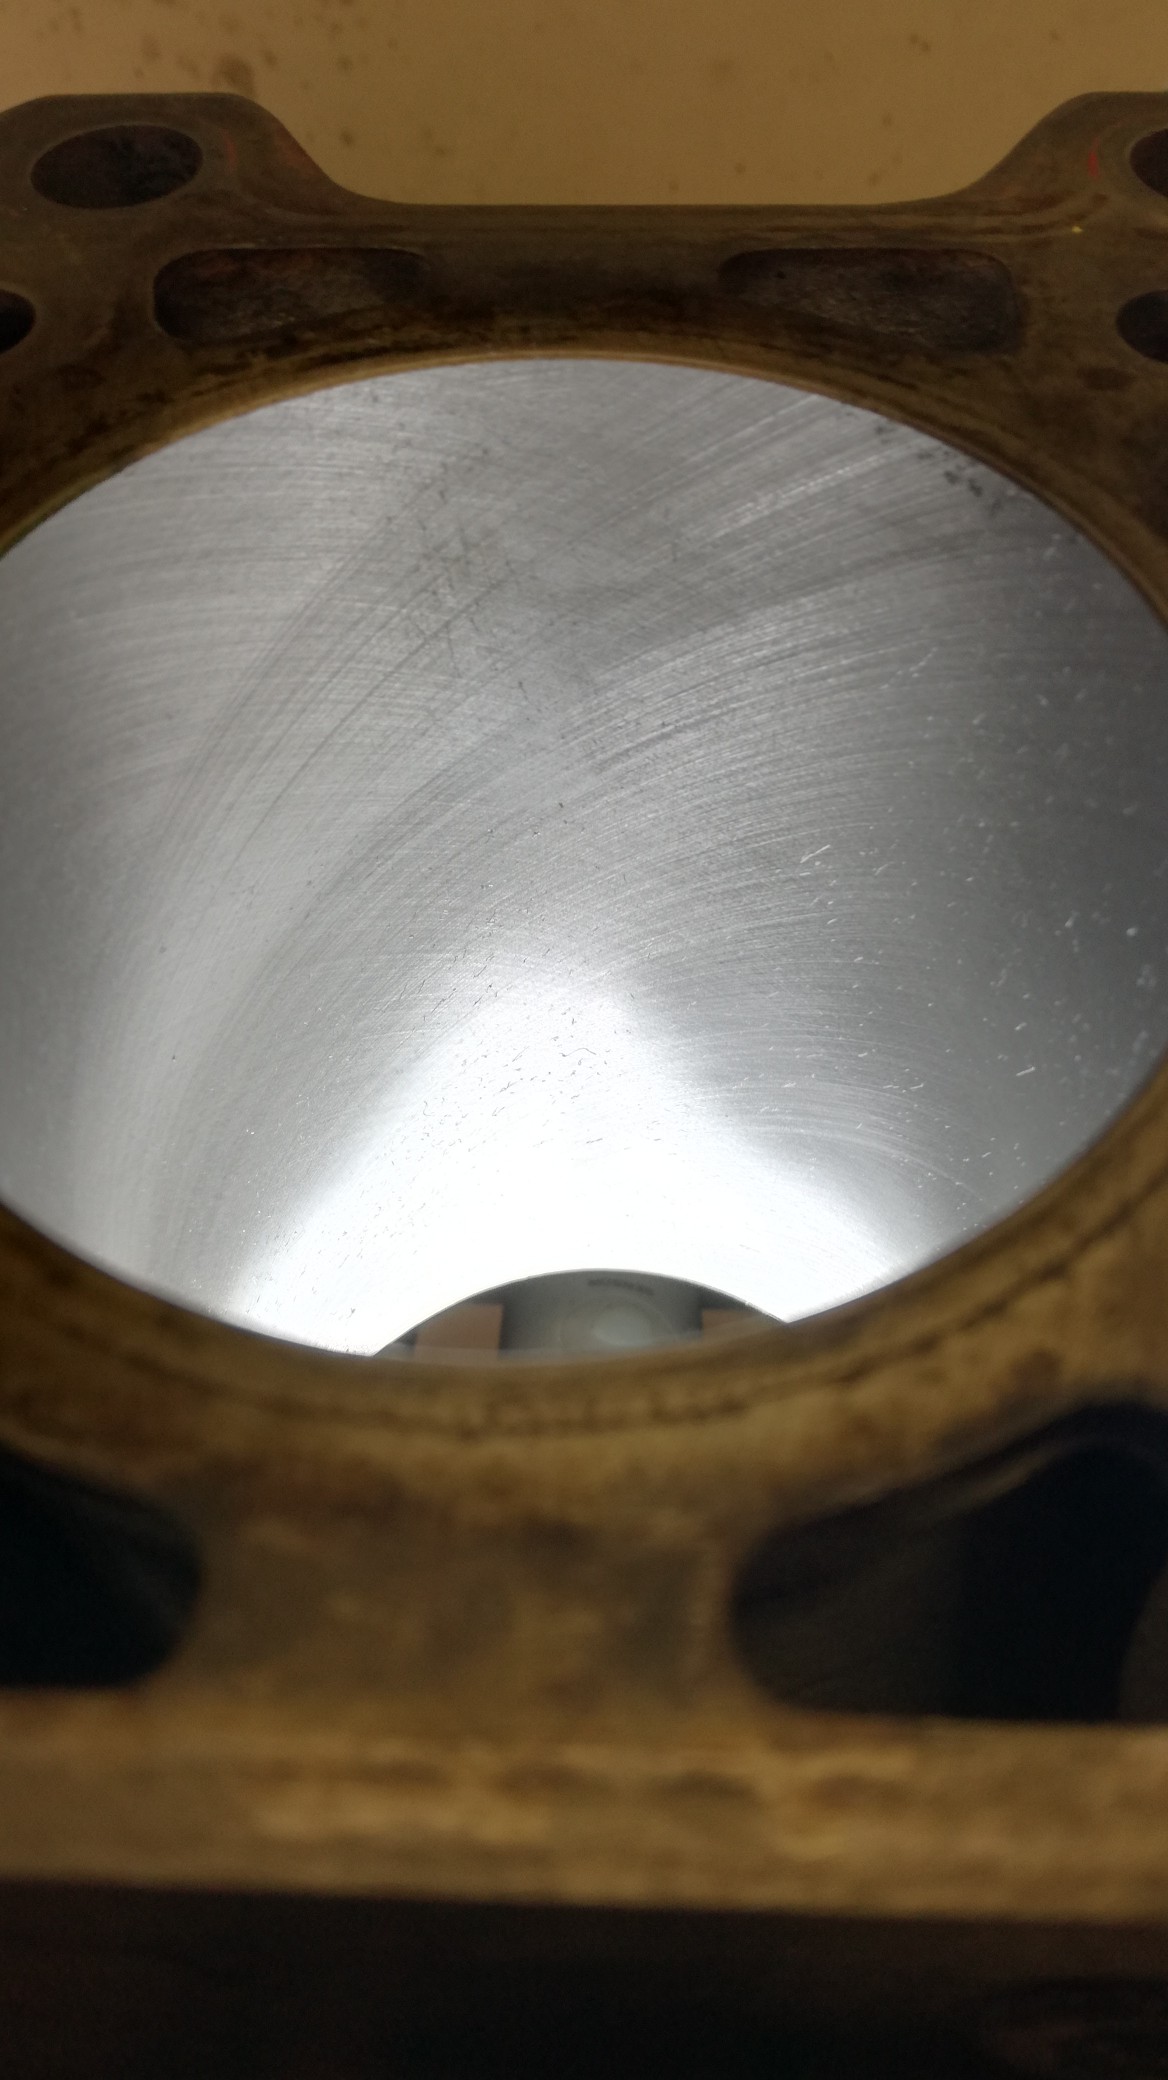
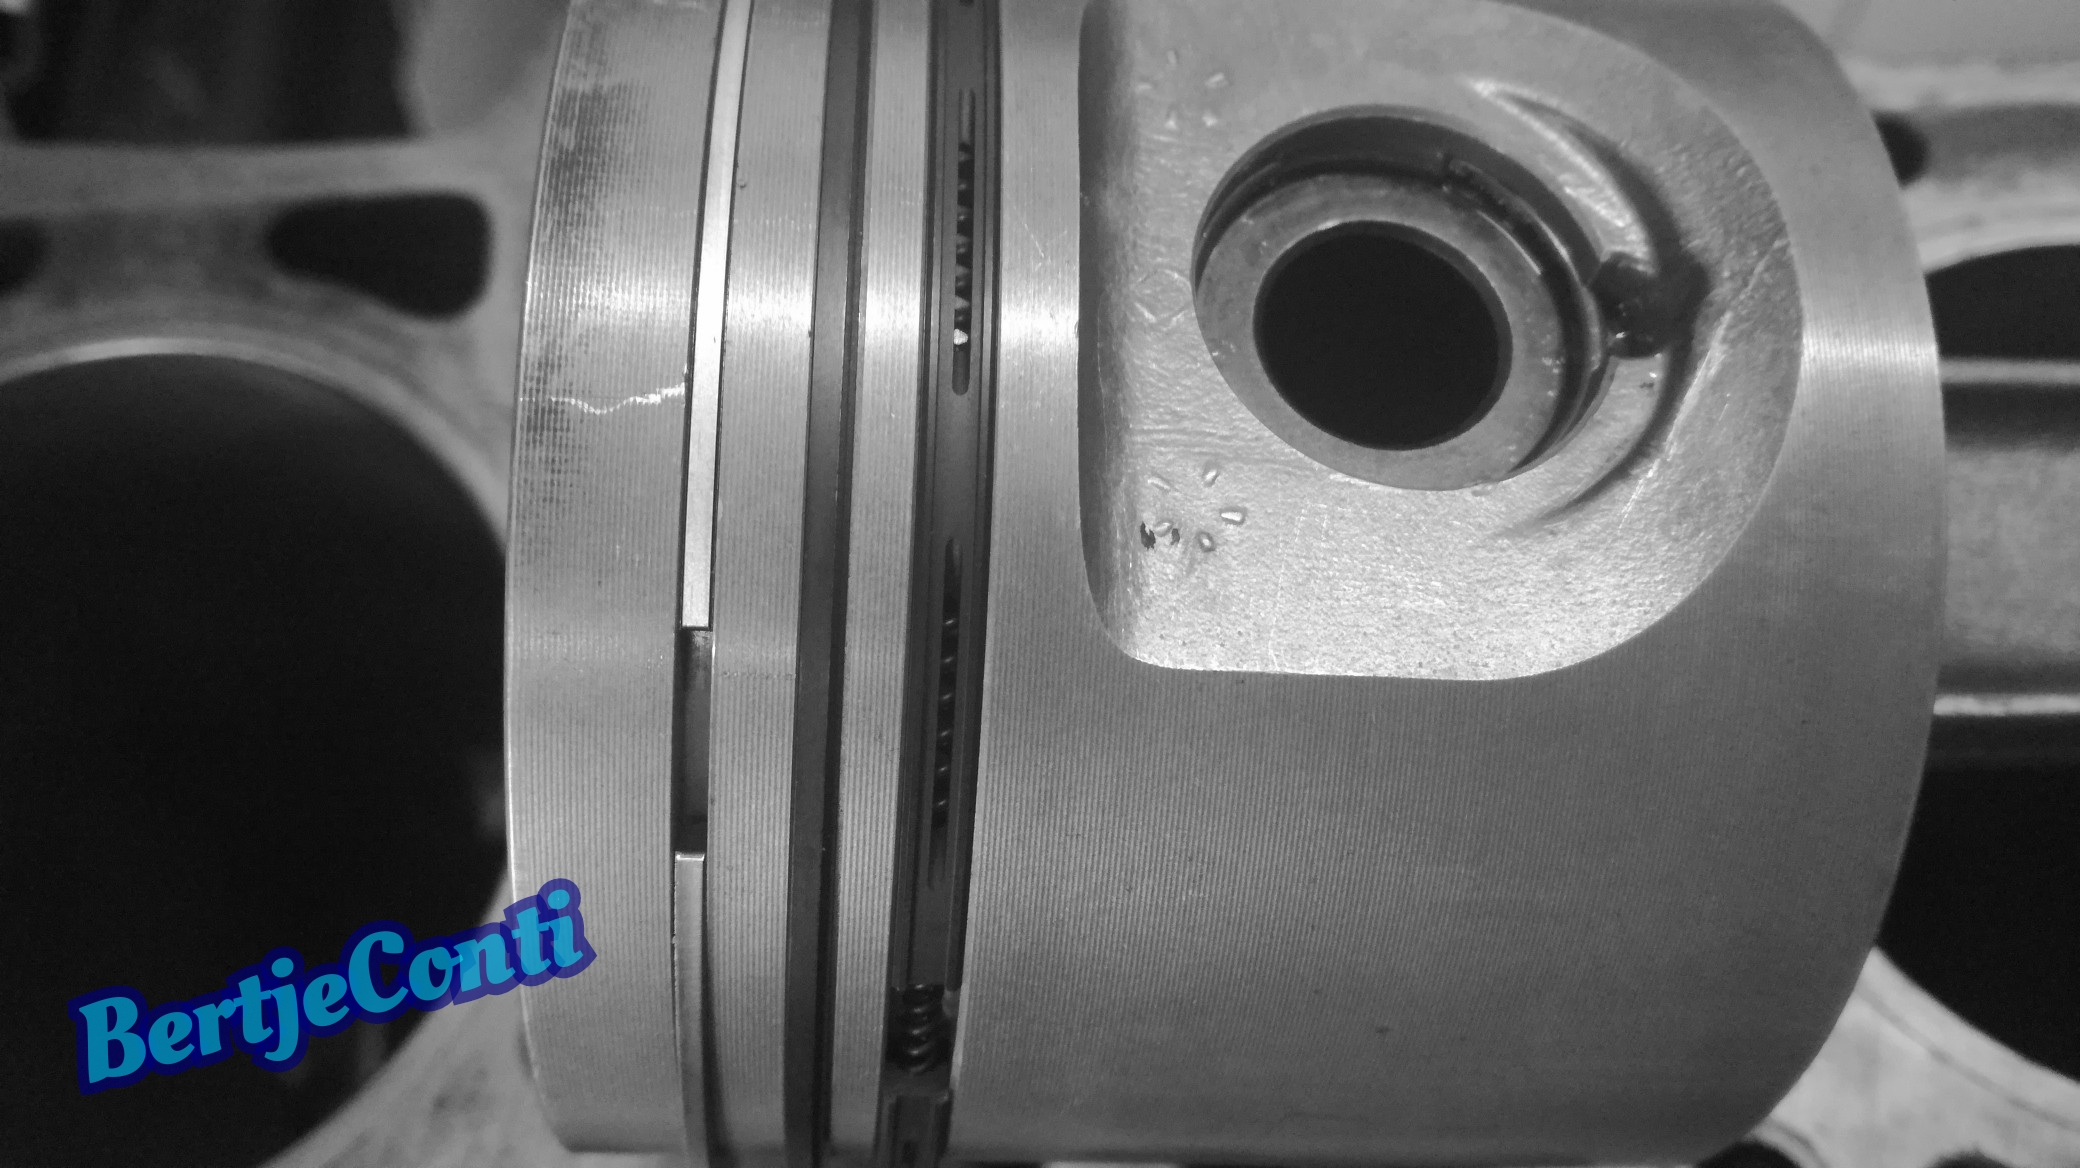
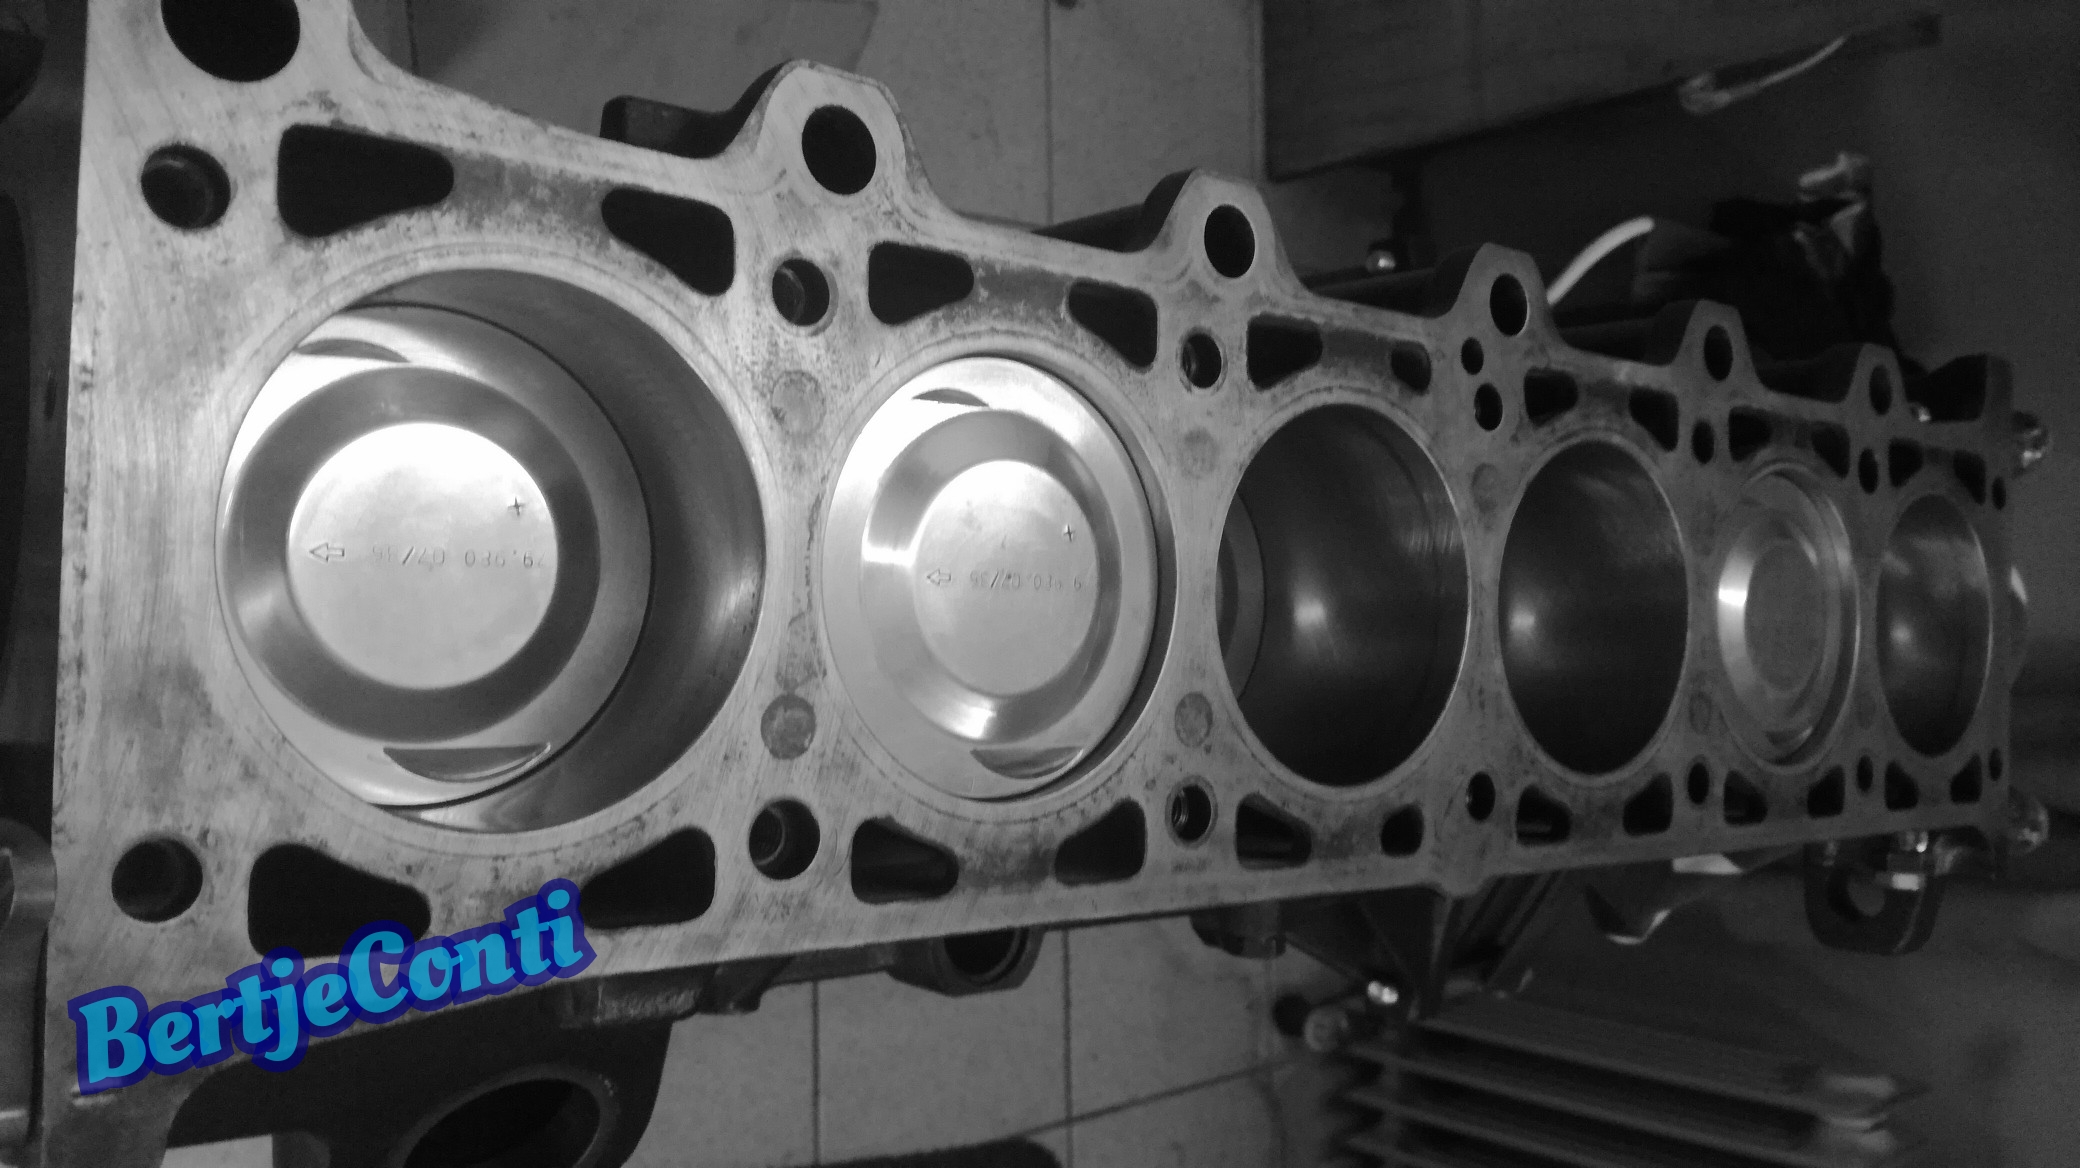
The block went to the machine shop, only for an light hone, so the standard size pistons could be used with standard piston rings.
a before and after shot from a cylinder bore:
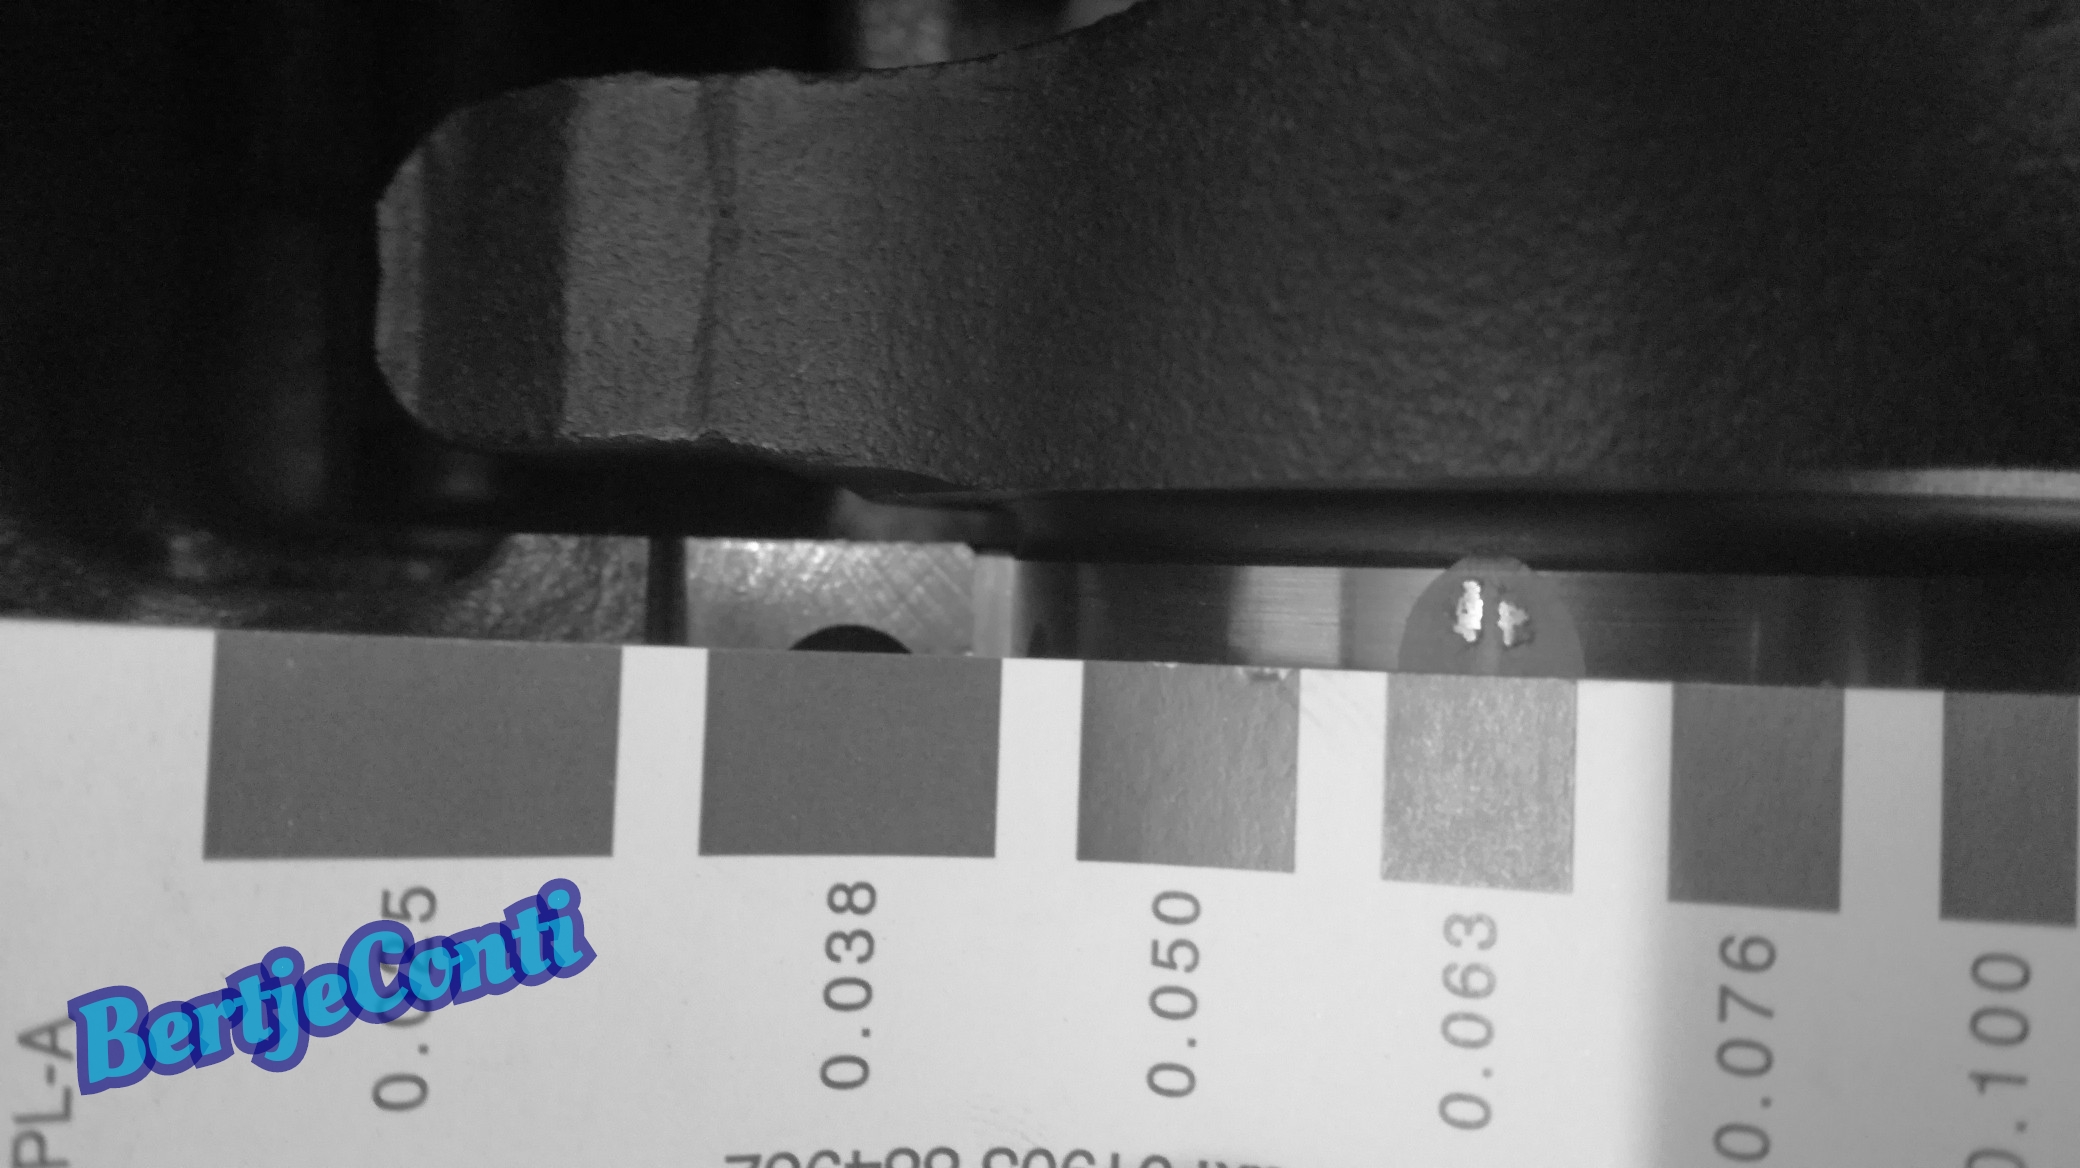
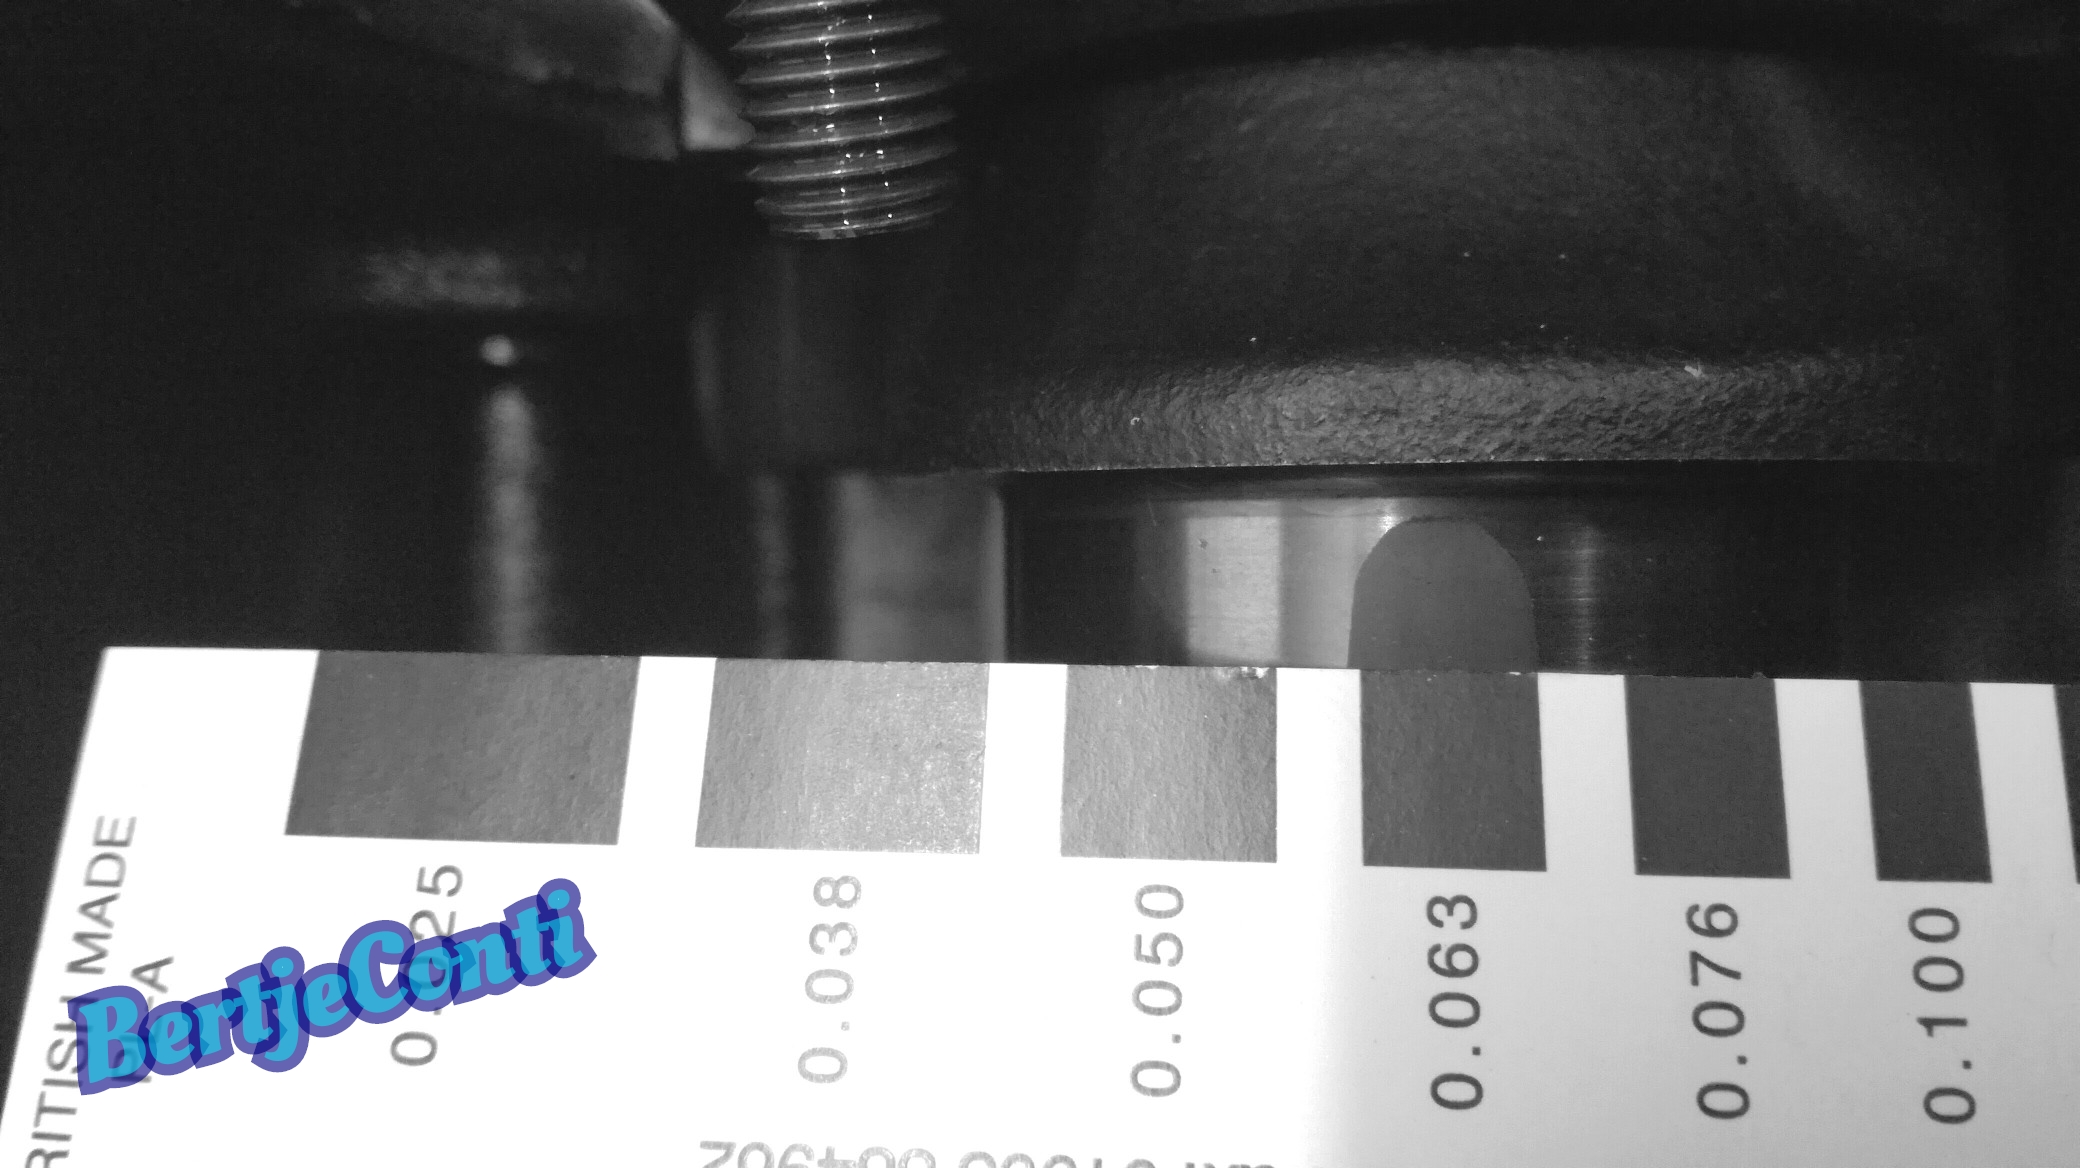
before reassembing i tested the main bearing clearence with plastigauge on different bearings:
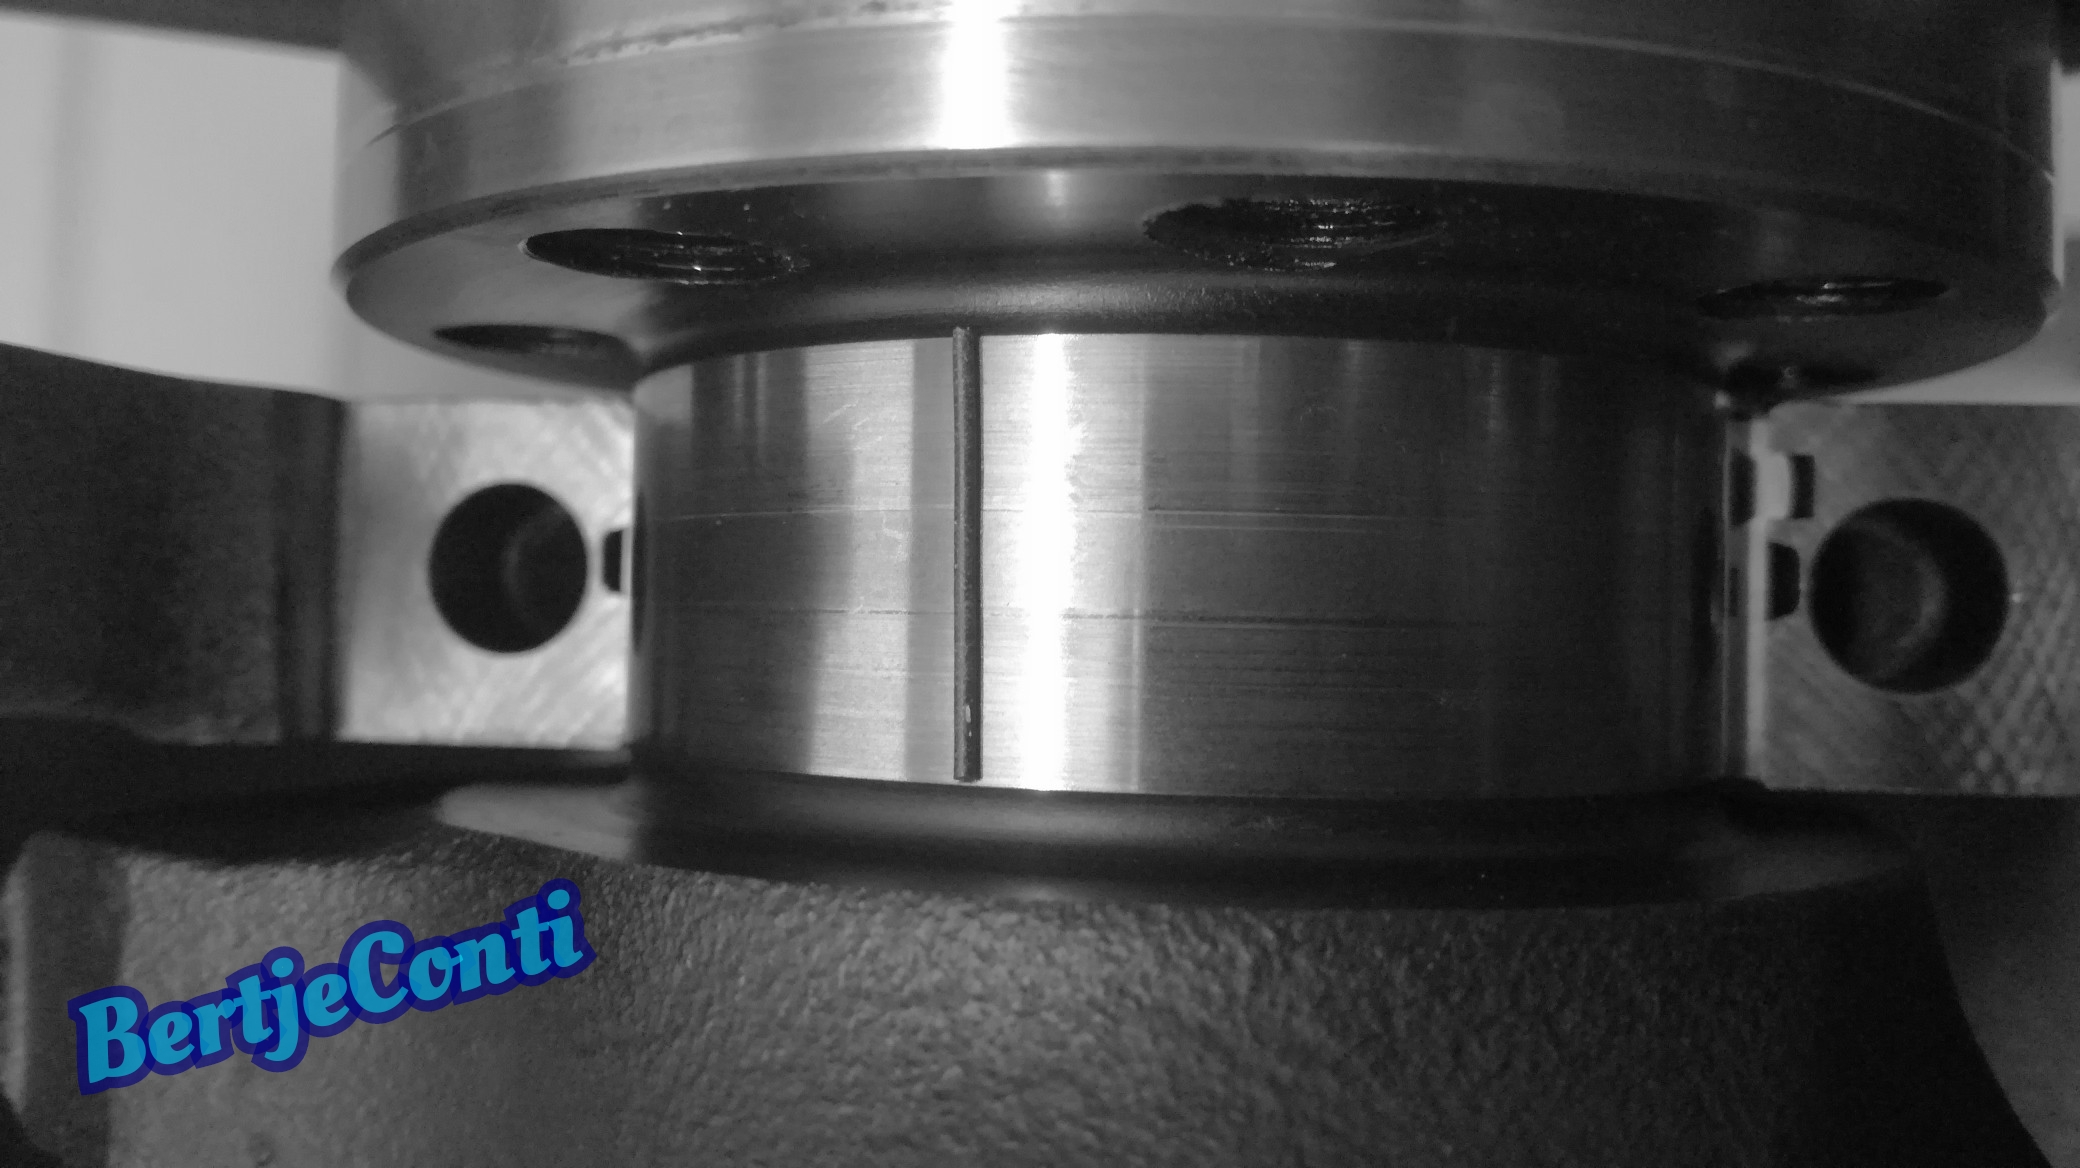
Main bearing clearance is 0.06mm which is within specs for this motor:
Then i checked the conrod bearing clearance also with te plastigauge method. I know it gives only a rough indication.
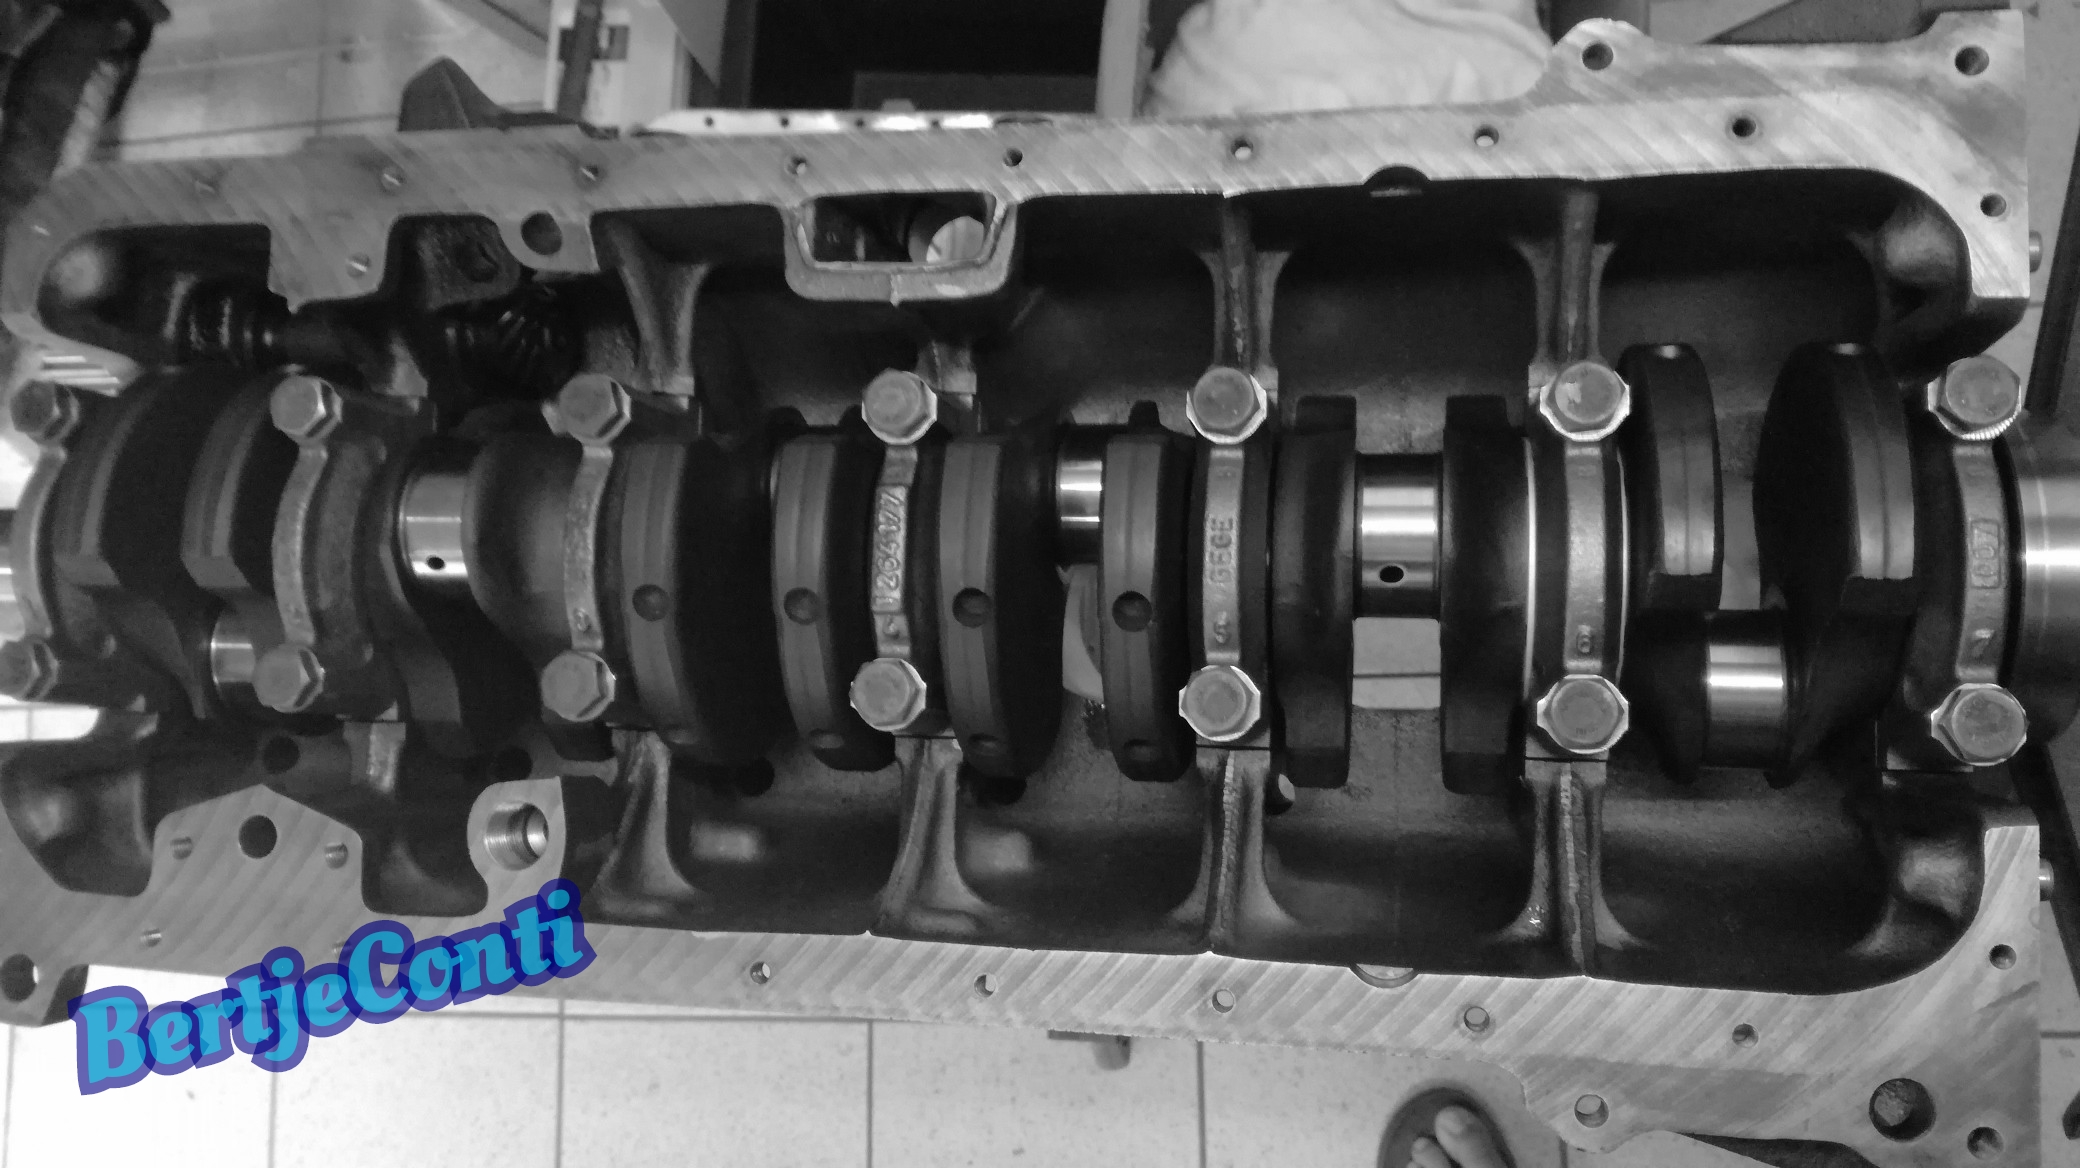
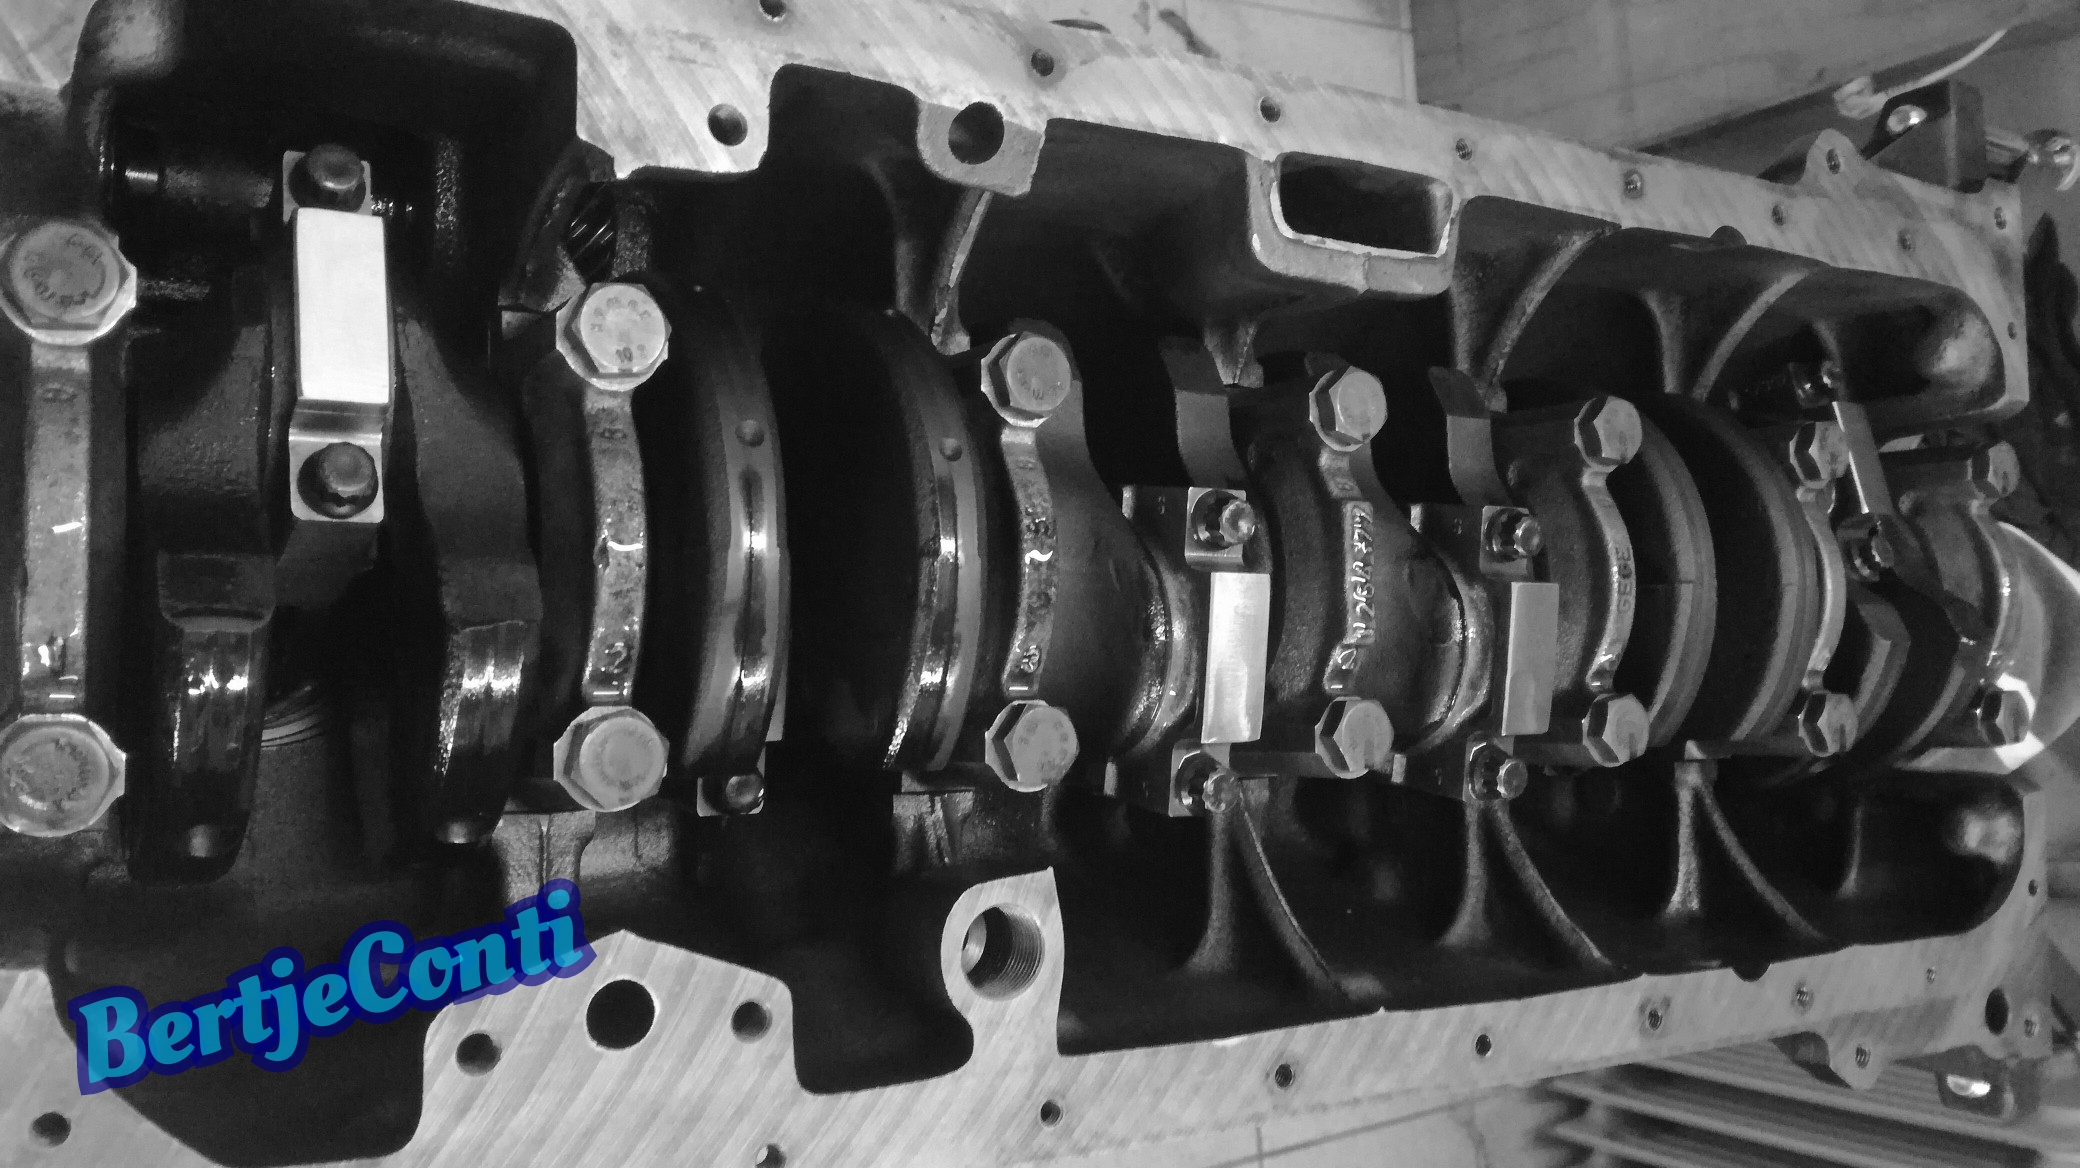
Then it was time installing the crankshaft, placing main bearing shells with lot of engine oil, i didn't use special assembly lube, because i have a plan running the oilpump before the the engine will make its first turns. This will be done when the engine is complete assembled, except for the timing belt, that way i'm able to drive the intermediate shaft with a drill and engage the oilpump without running the engine. all air will be pumped out and the oil galleries filled with oil.
With each main bearing cap installed the crankshaft turned lighter, when all main bearings were installed and the bolts tightened to spec torque the cranshaft turned that light i never expected.
I did reuse the main bearing bolts, because these bolts aren't "stretch" bolts.
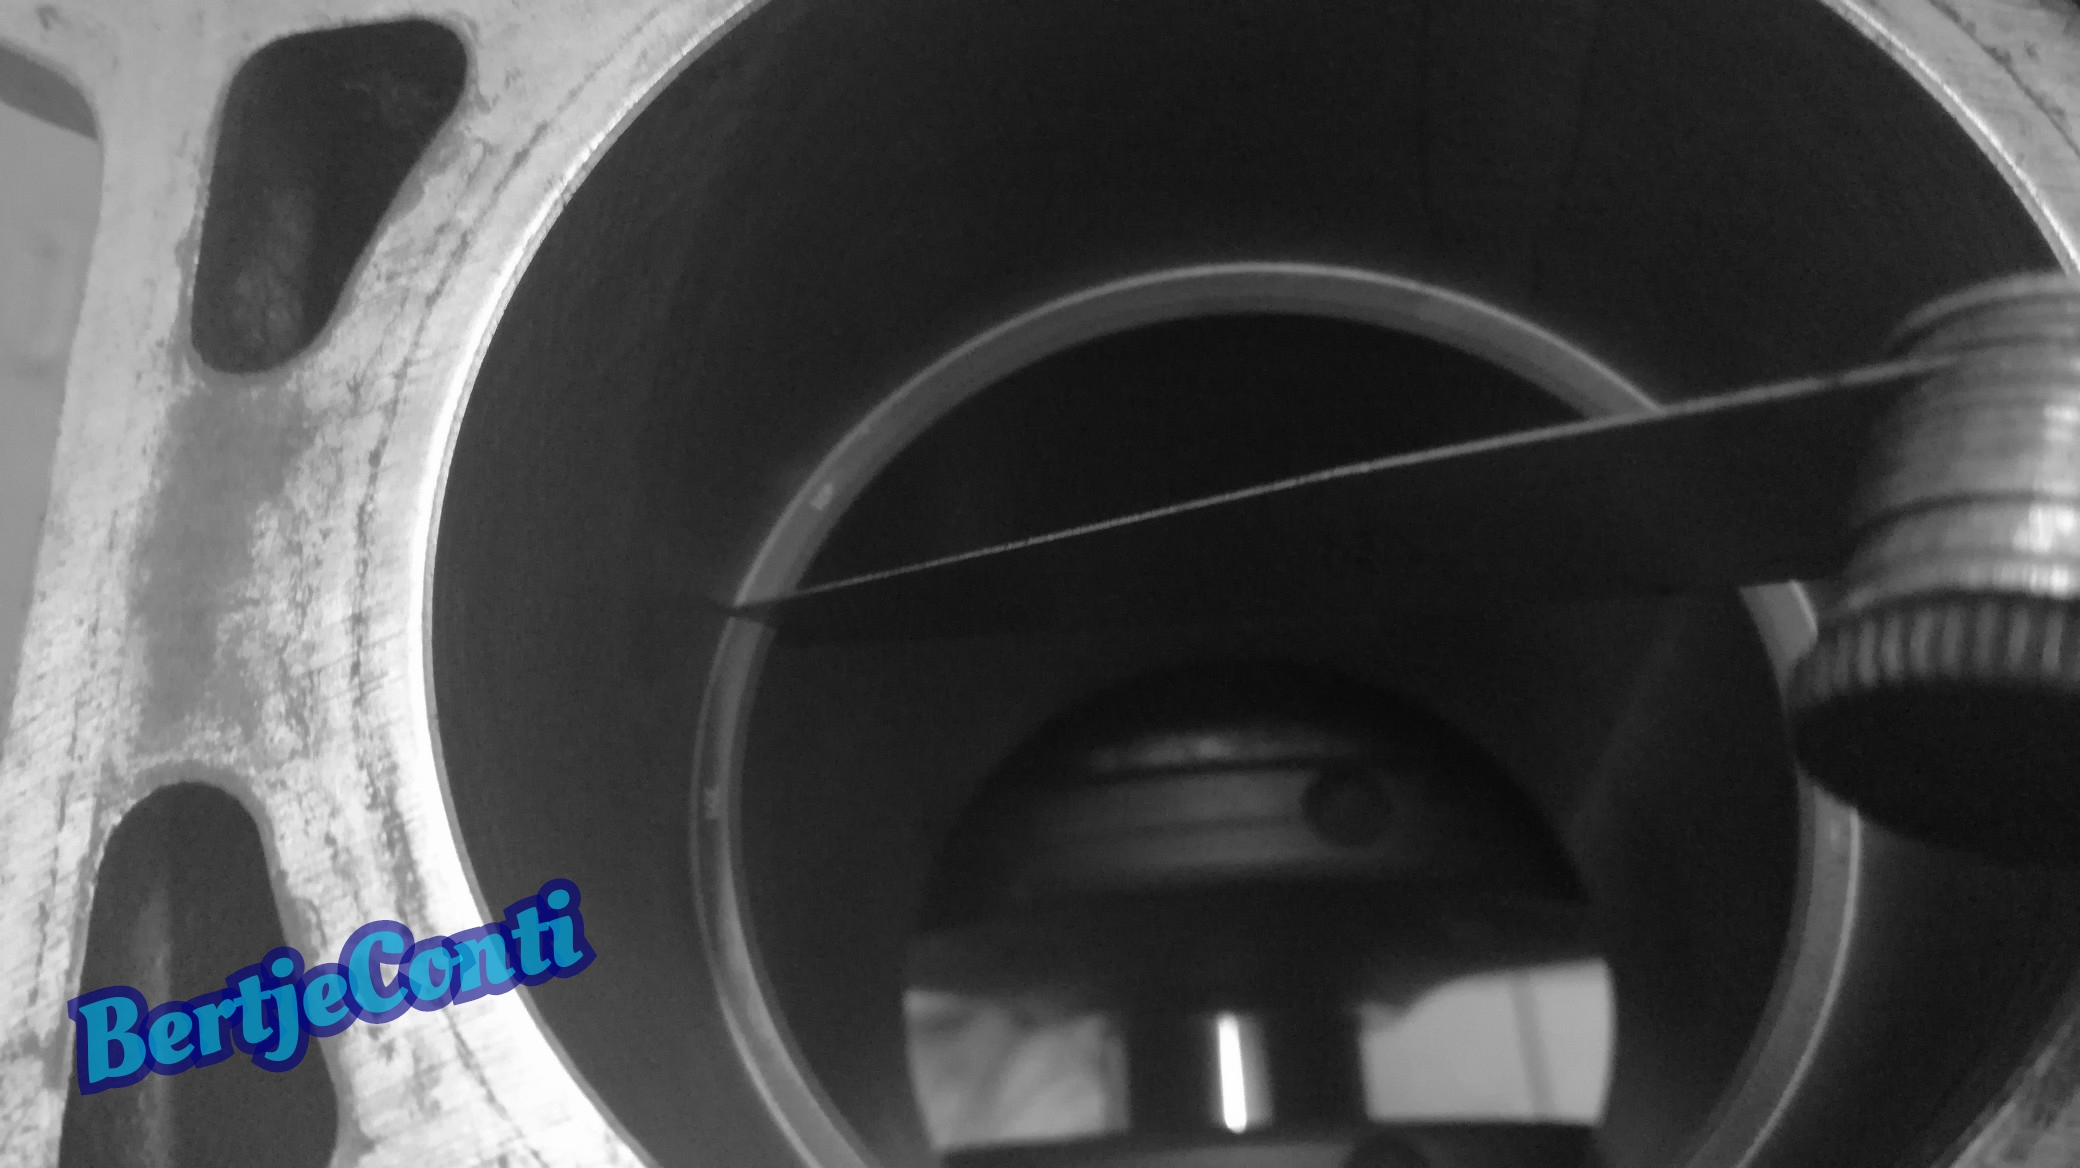
Next was checking the piston ring gap, conform manual.
5 compression rings had a 0.45mm gap, and one had a 0.5mm gap, specs say minimal 0.3mm max 0.5mm
all oil and oil control rings ha a gap 0.4~0.45 gap
This means no re-gapping required.
assembling these piston rings to the pistons was a nervwrecking job, did not like it at all, affraid braking a ring. but luckily that didn't happen, jeej.
After that installing the pistons in the engine with a piston ring compressor tool was a easy job.

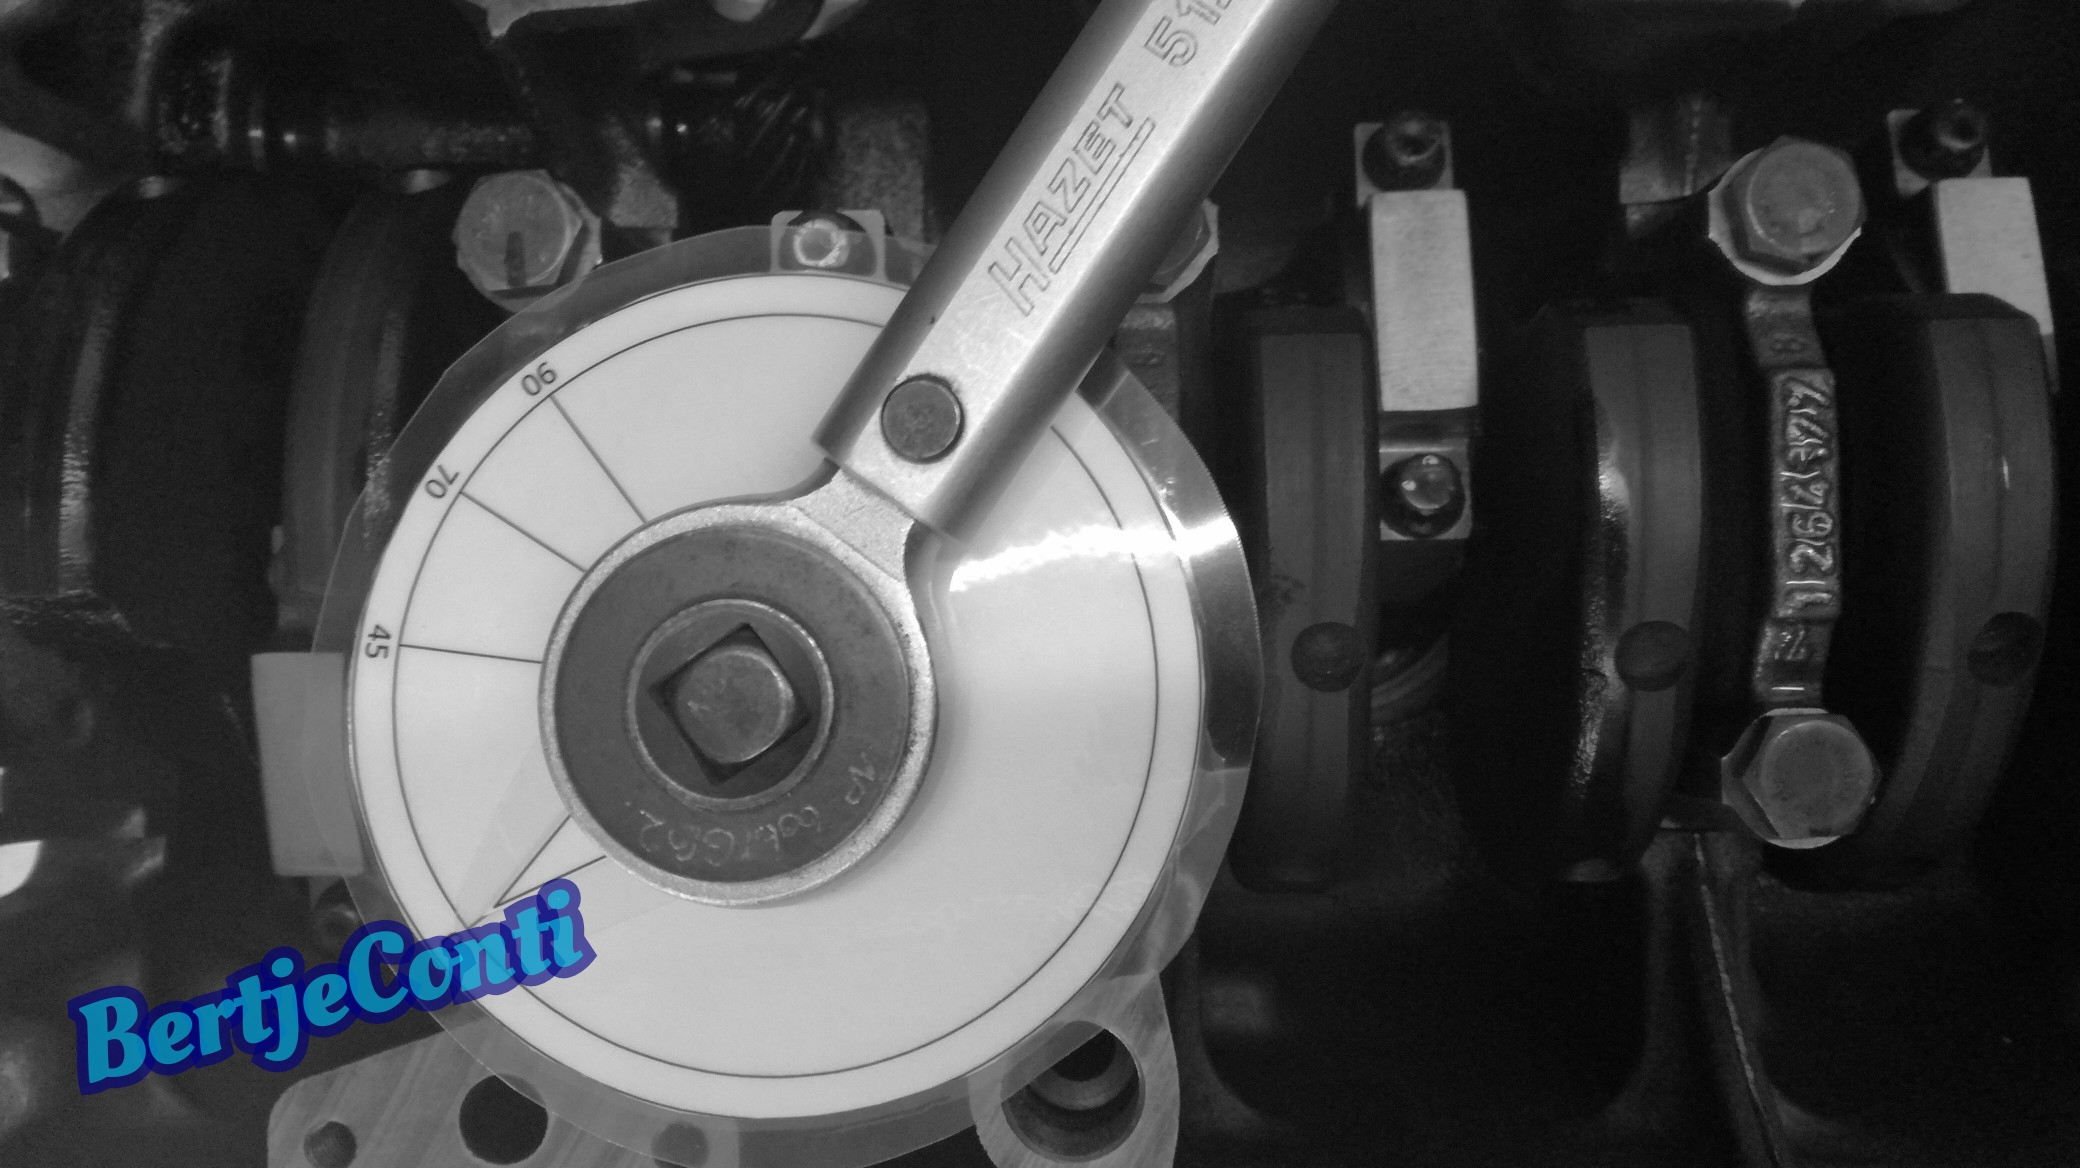
for torqing the conrod bolts i made a simple tool, these bolts needs to be torqued to 5Nm then 20Nm and then 70°, again i reused the conrod bolts, all manuals say new bolts should be used, but i didn't.
They say these bolts are stretch bolts (TTY torque to yield), but thats not entirely true. (i did extended tests with a set off these bolts and my tests confermed these bolts won't stretch plastic when torqued to spec, only elastic stretch)

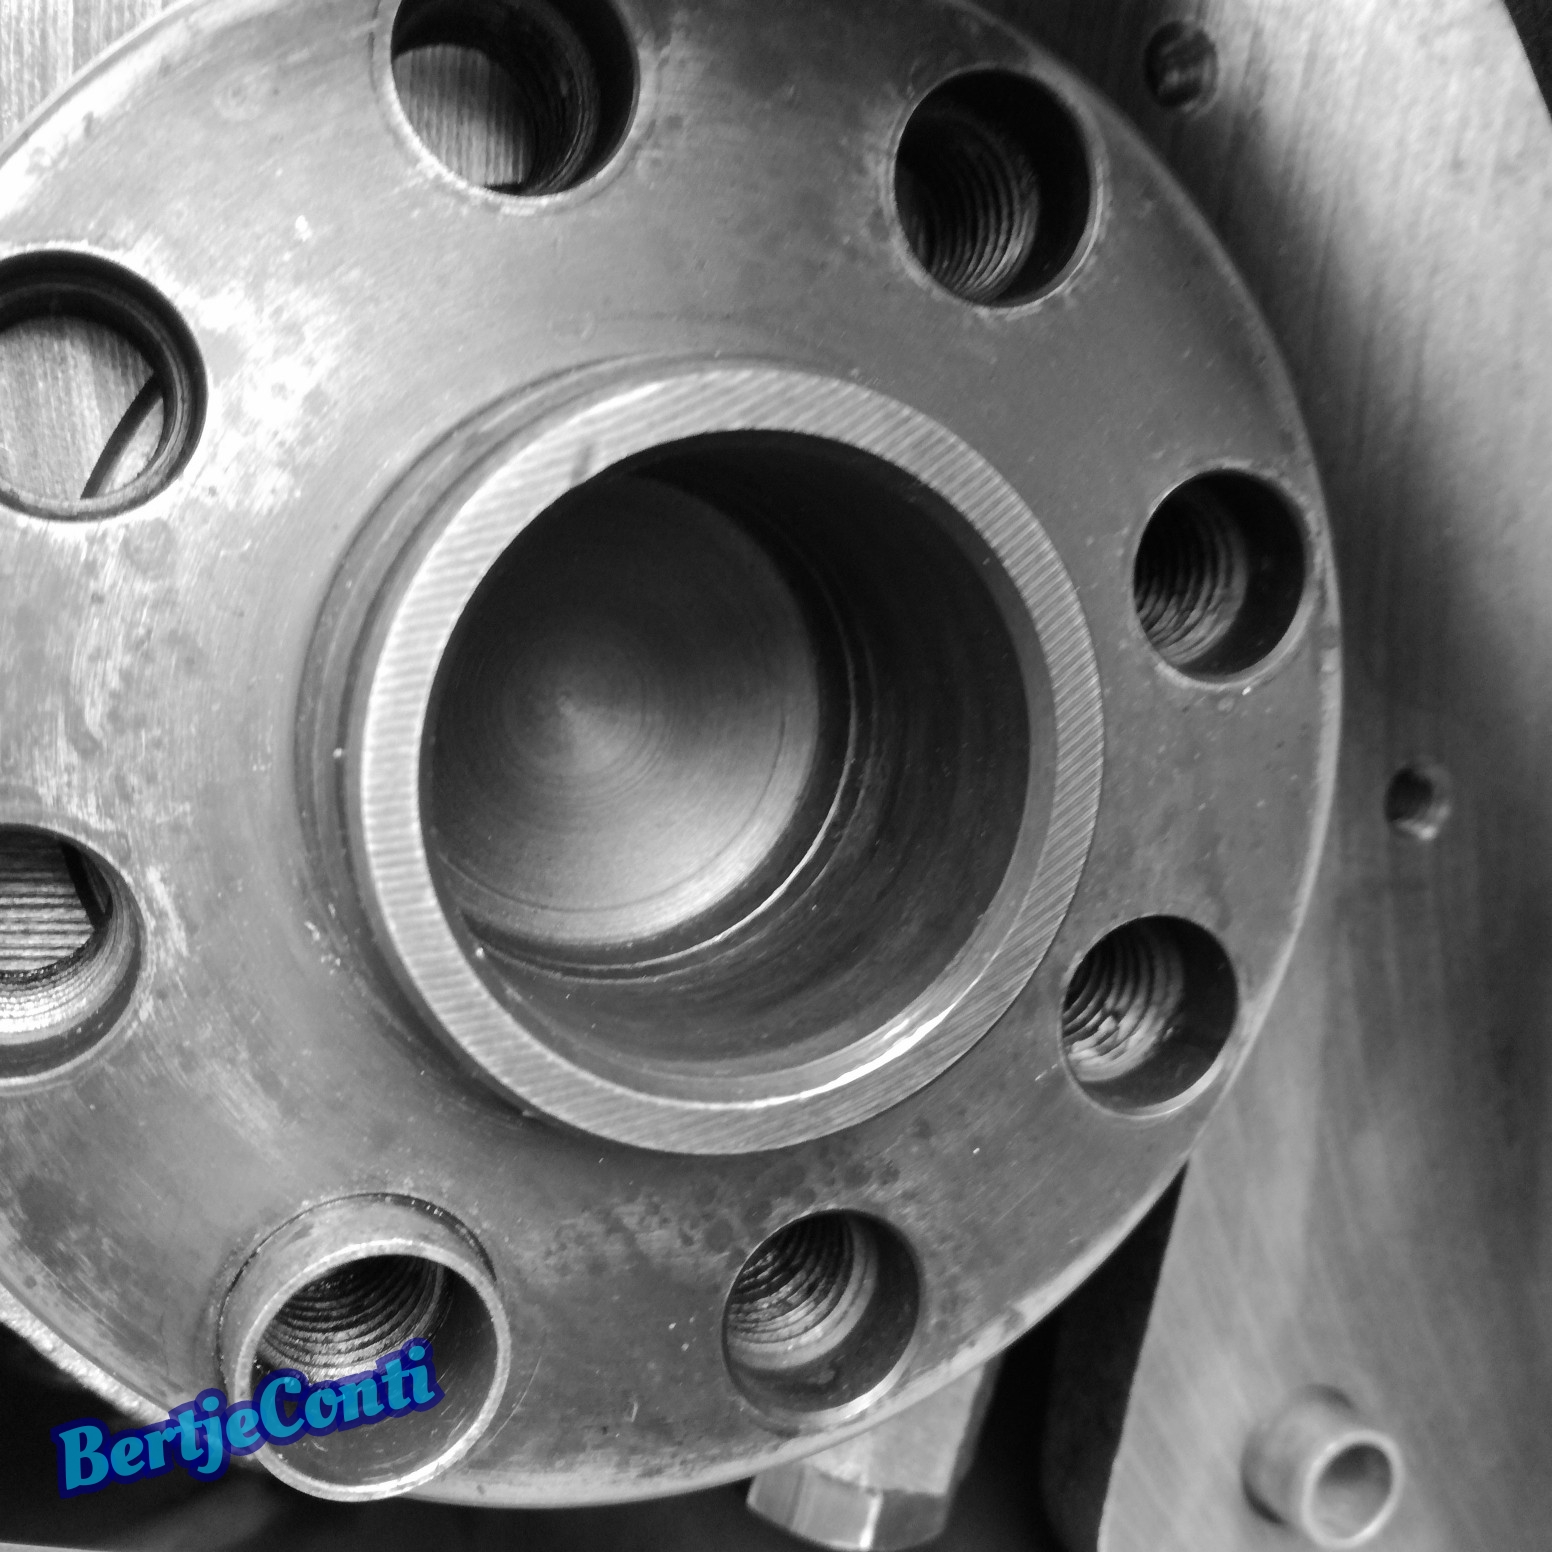
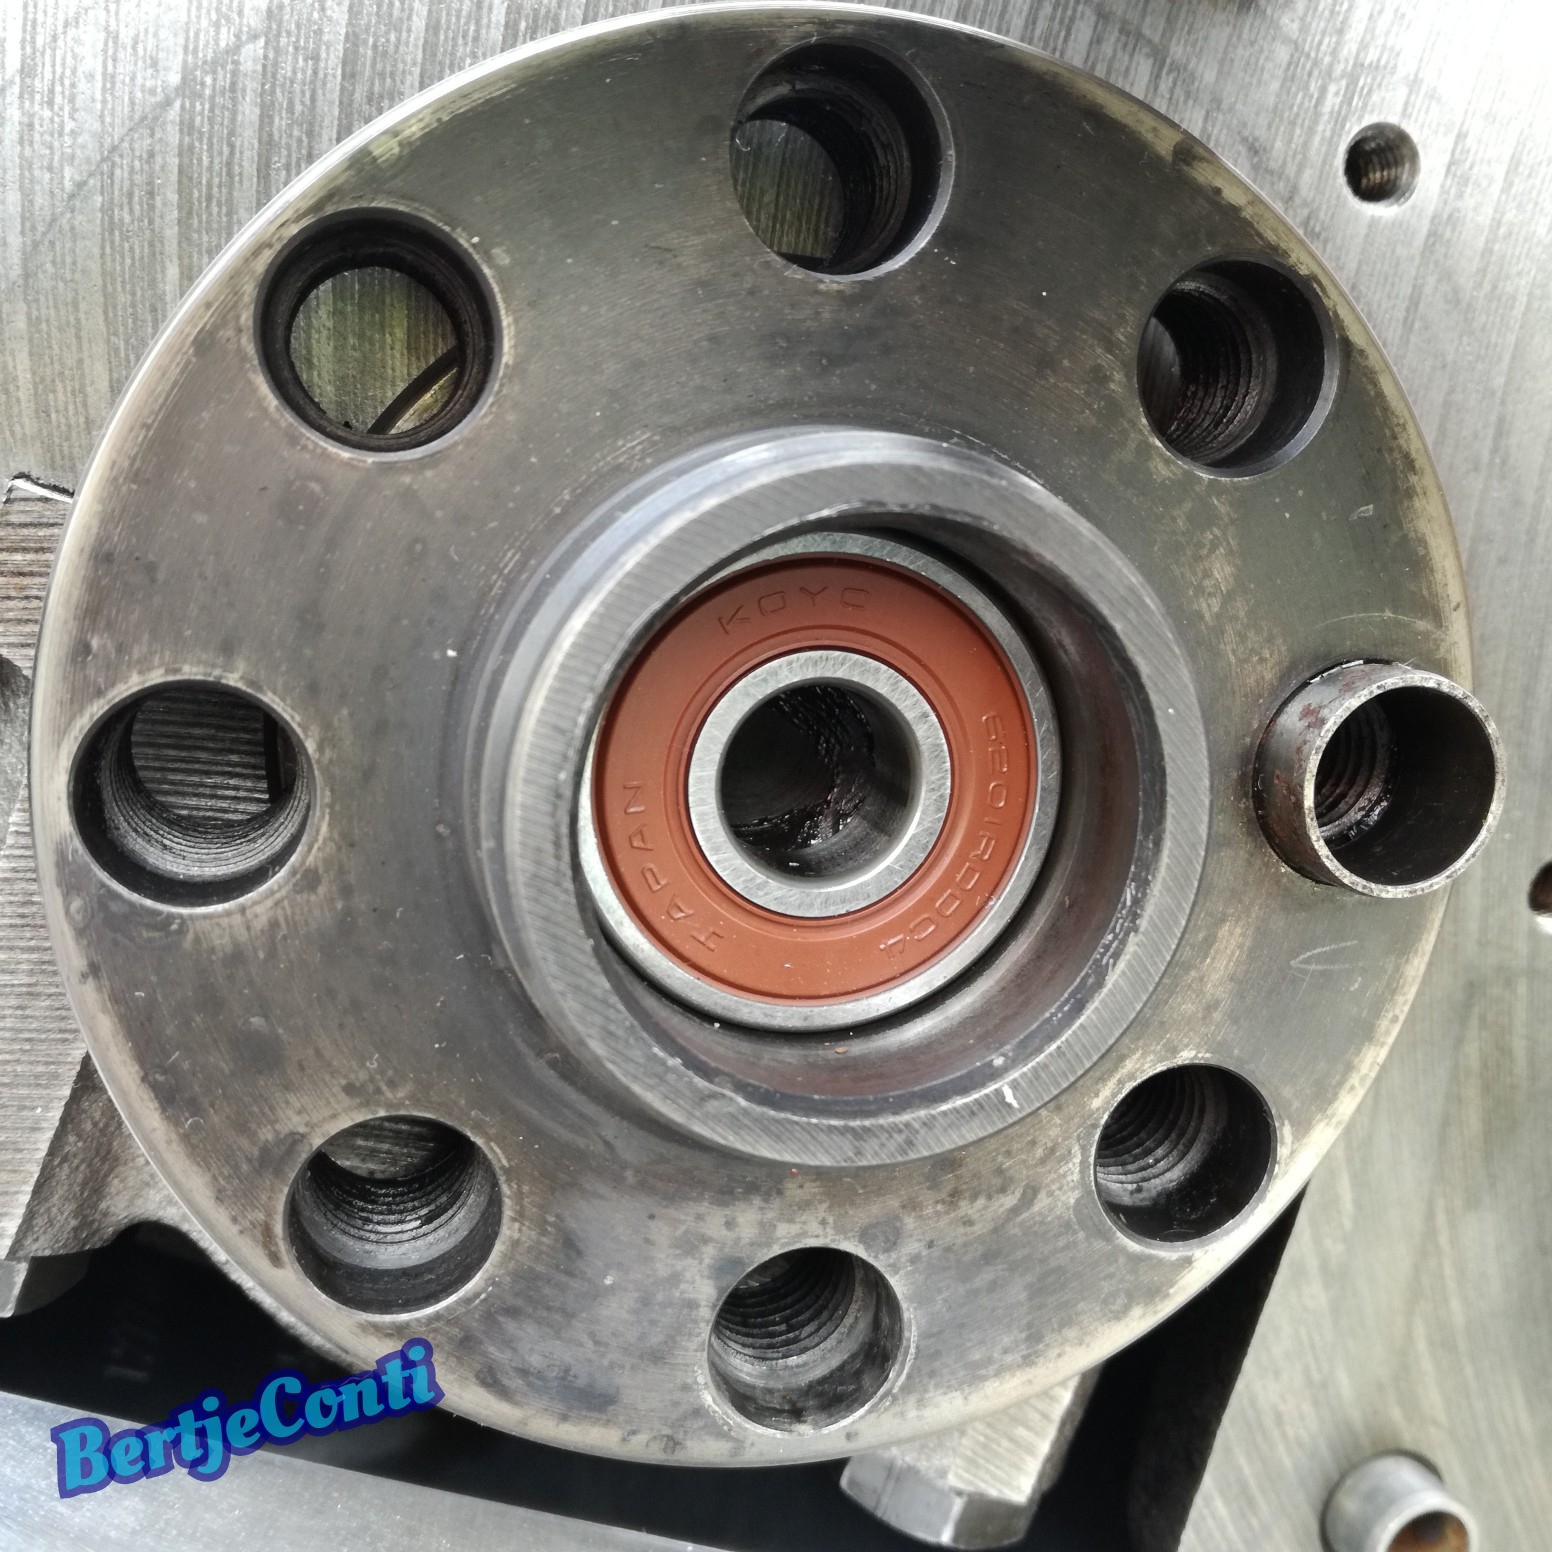
Also renewed the pilot bearing in the crankshaft and washed out the vilt oil ring with lots of brake cleaner and reoiled this ring with fresh oil:
The old protecting cap was damaged, so also replaced for a new cap

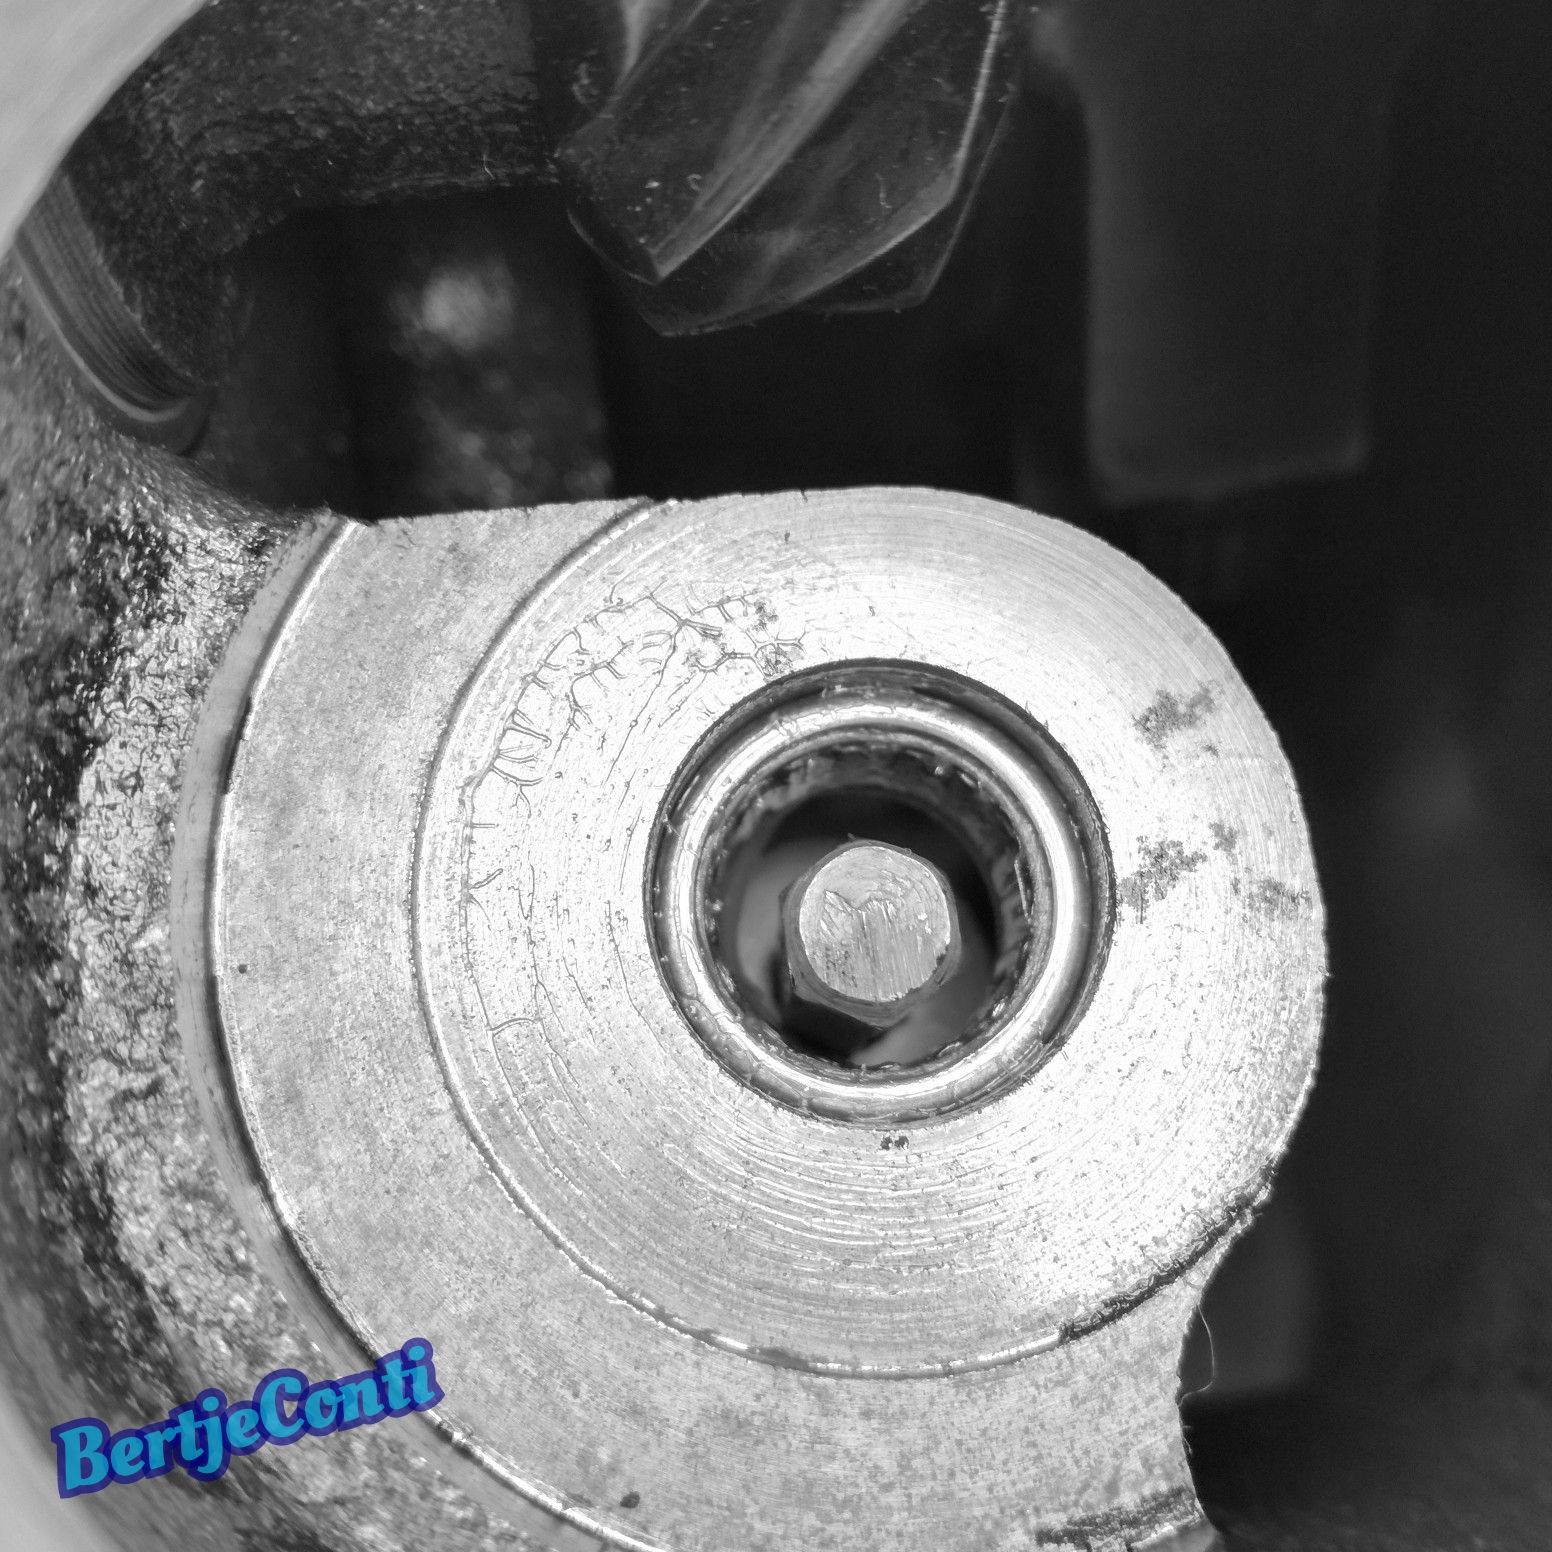
The bore for the pilot bearing had a little notch, so the bearing can't be pressed in to deep:

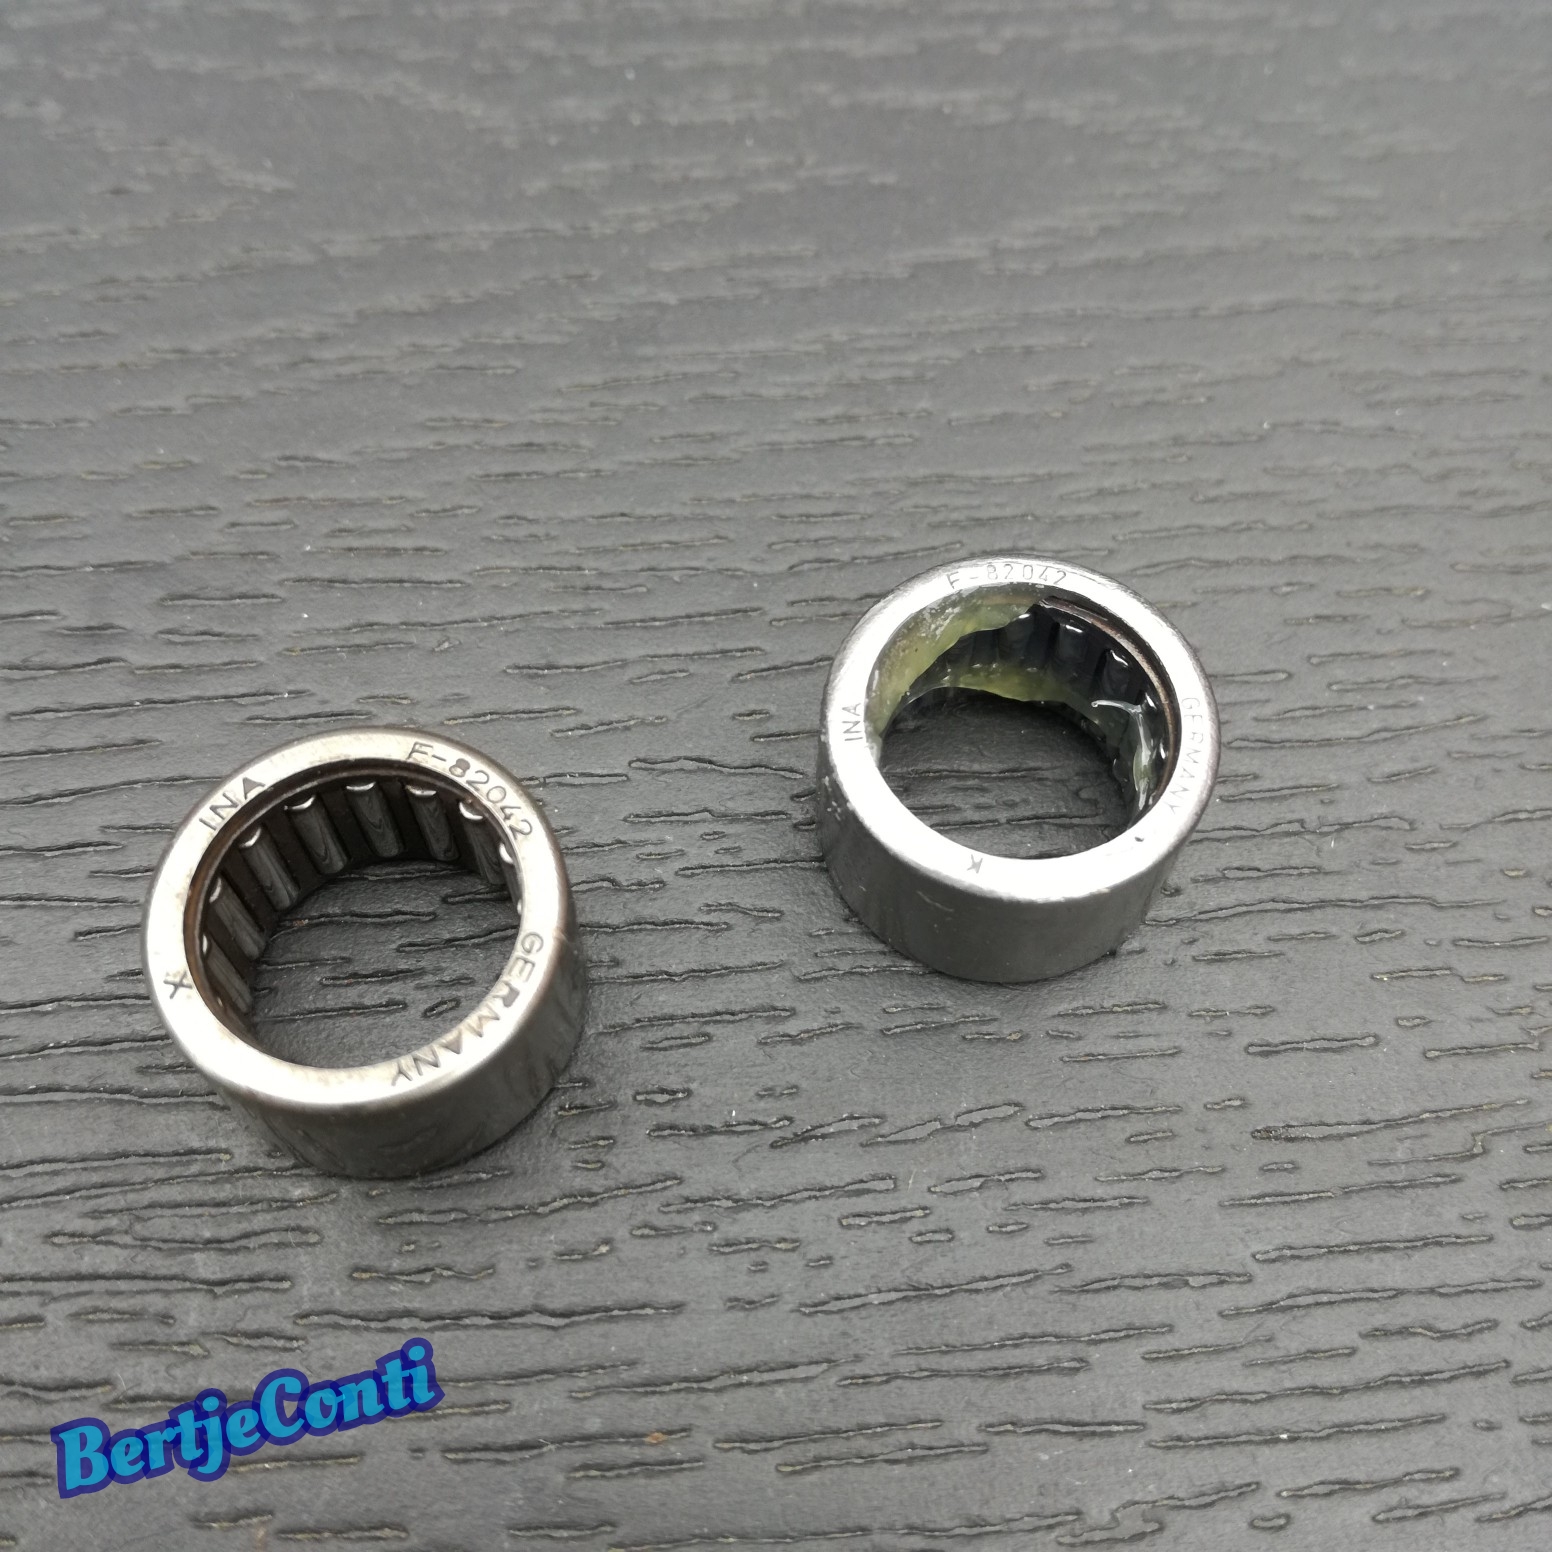
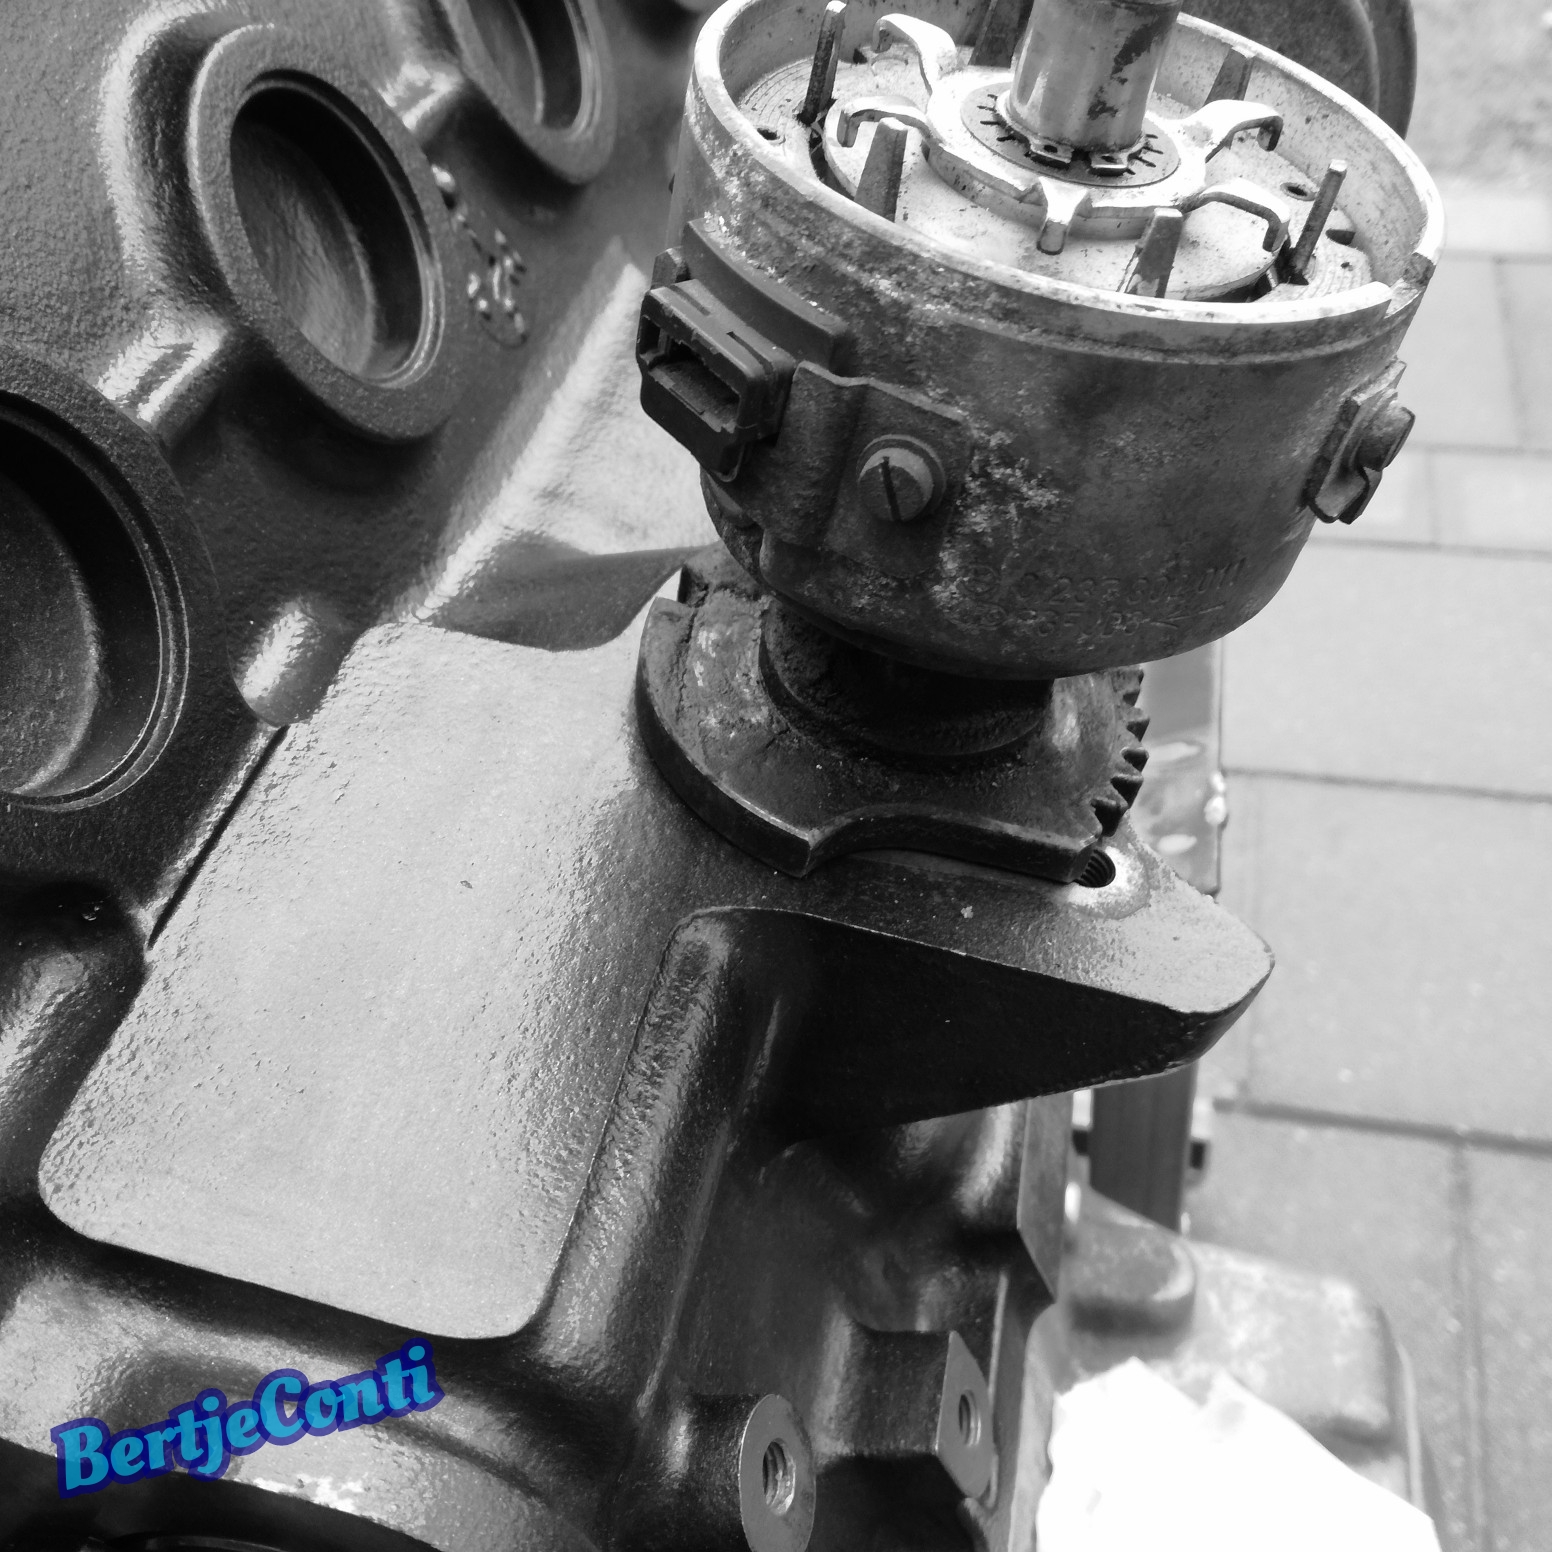
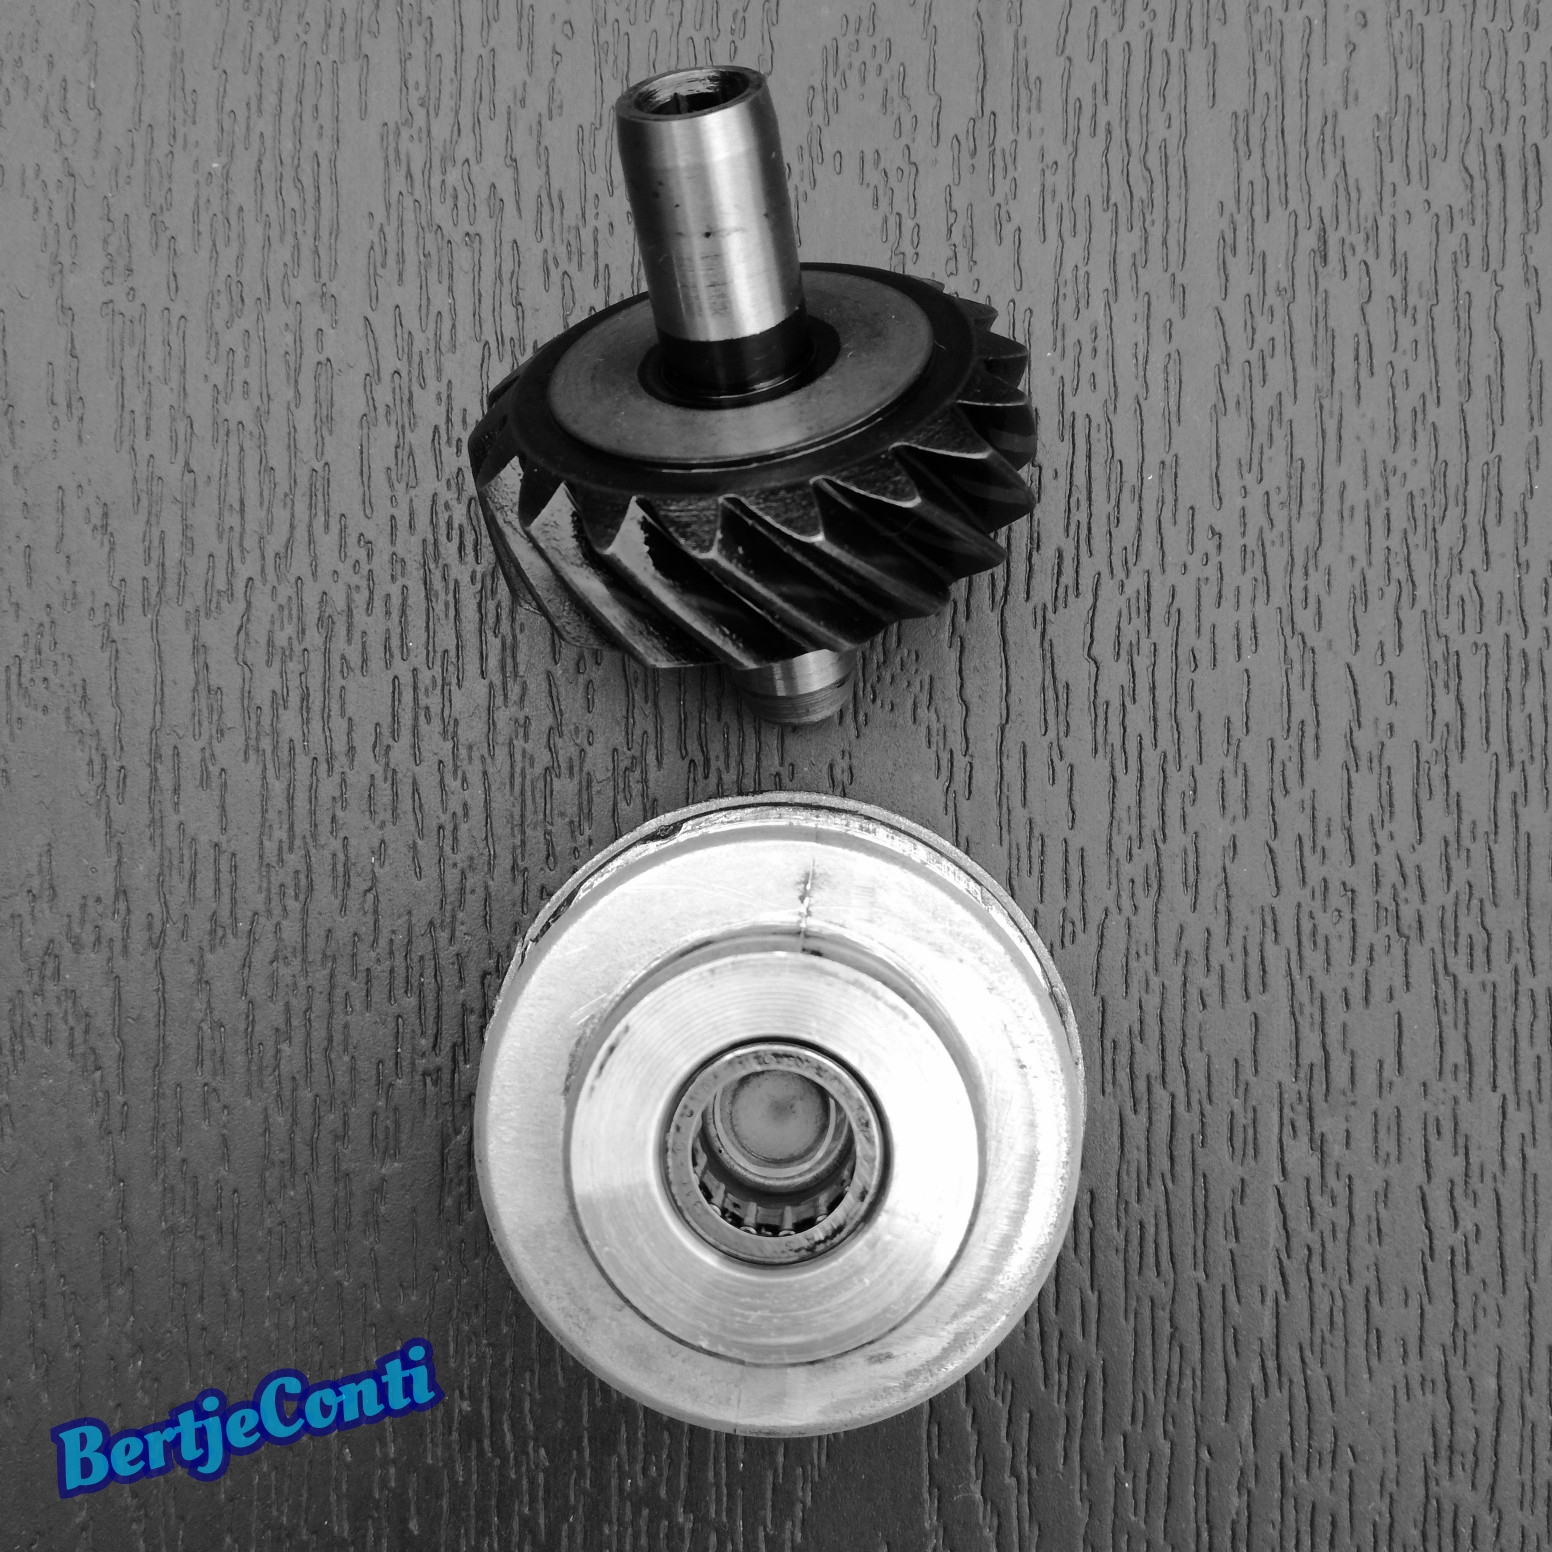
And placed a new needle bearing for the oil pump intermediate gear/distributer gear, installing this bearing isn't easy because it's a fragile little bearing and it's placed deep into the engine block.
I did use a old distributer and "glued" the needle bearing with grease to the shaft and then pressed the bearing in with the distributer as a guide.
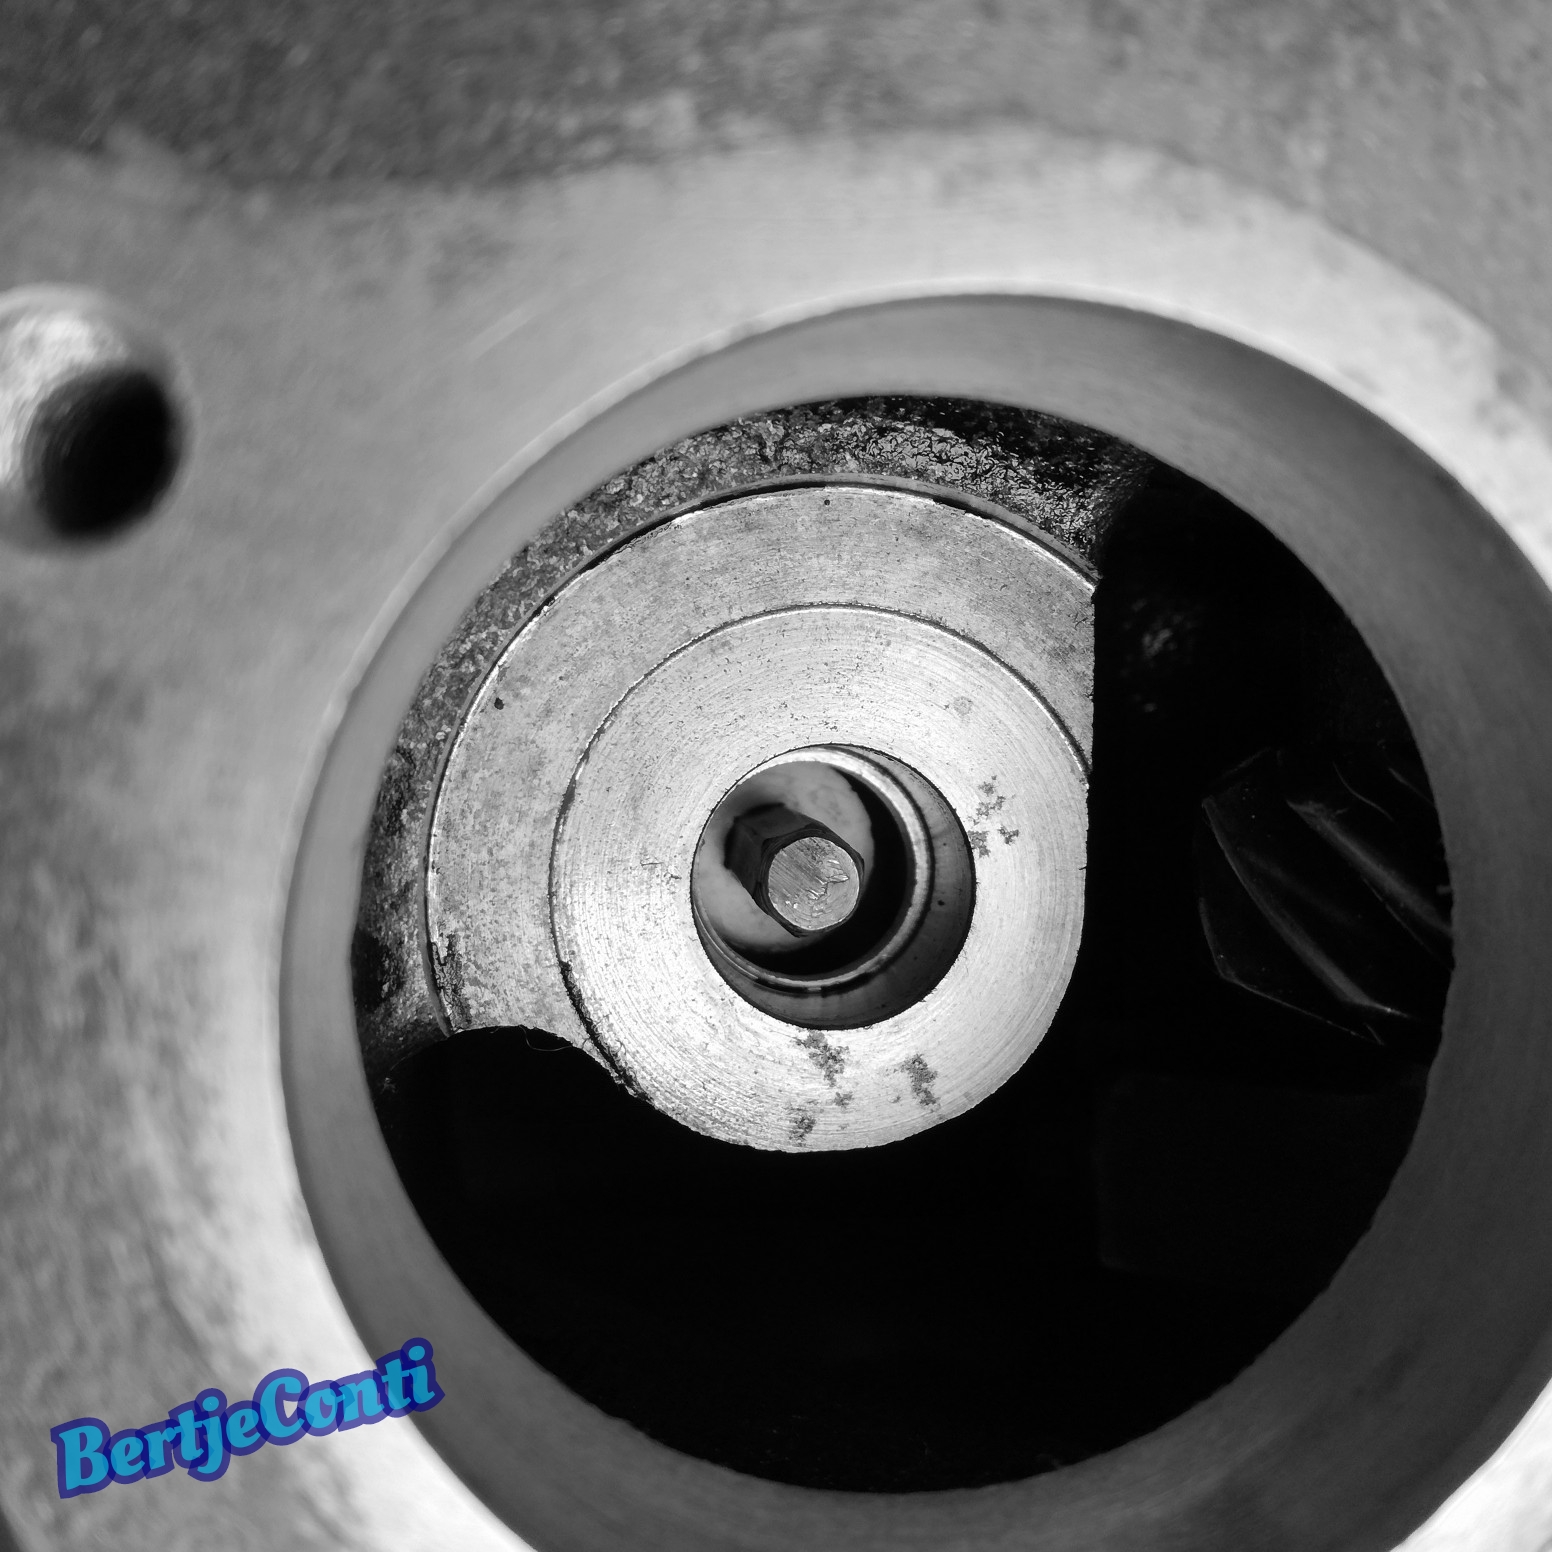
"glued the bearing to the shaft"
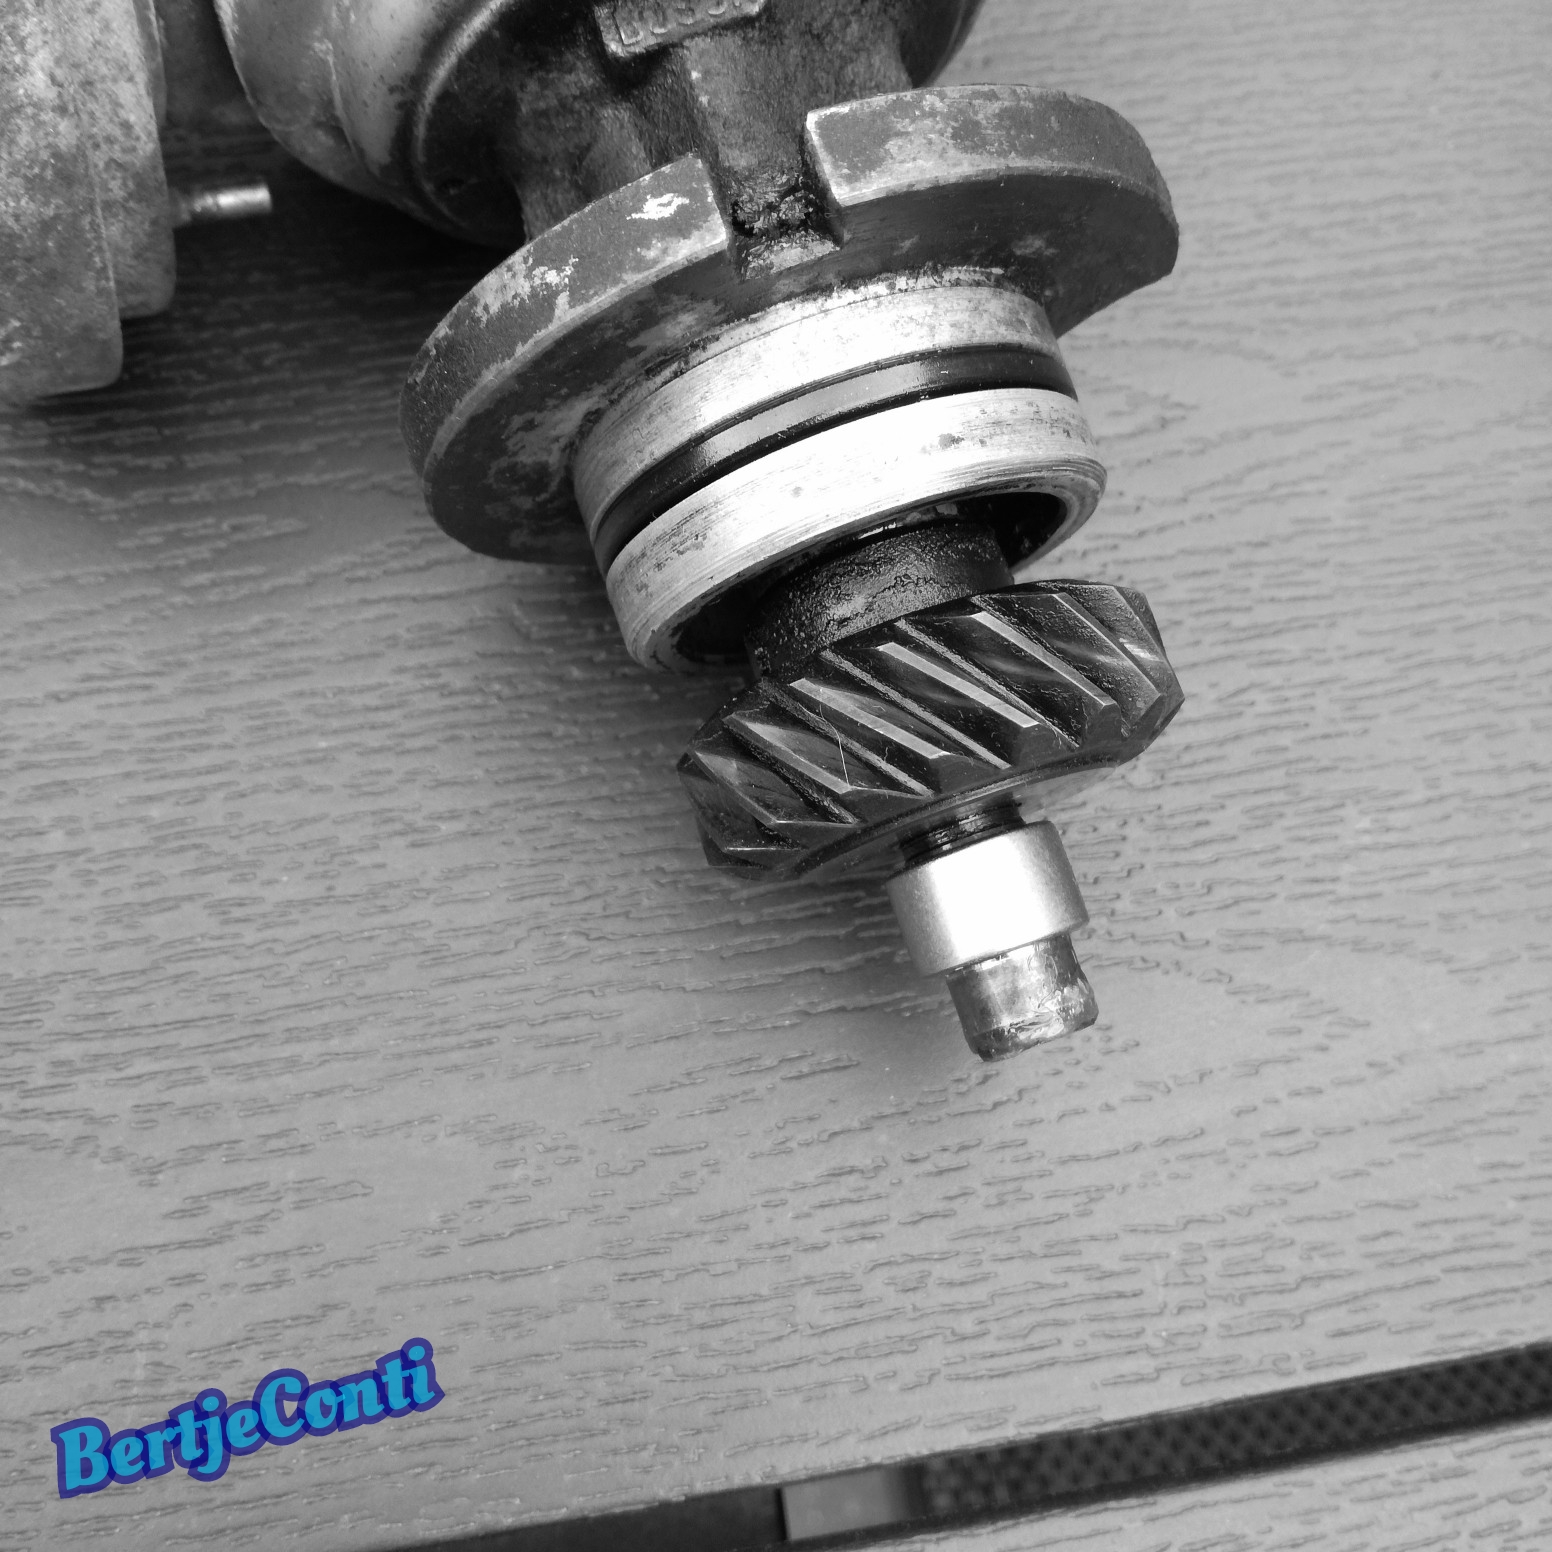
pressed it in and removed the distributer again.
and pressed the bearing with a suitable tool further down.
the installed the intermediate gear and end cap, the end cap has the same needle bearing, this one was OK after a good cleaning job.
to be continued
Over time i gathered lots of new components like gaskets, oil rings, piston rings and bearing shells.
Crankshaft and camshaft from this motor are in excellent condition, no rework needed. Nice, standard bearings shells will be used.
The block went to the machine shop, only for an light hone, so the standard size pistons could be used with standard piston rings.
a before and after shot from a cylinder bore:
before reassembing i tested the main bearing clearence with plastigauge on different bearings:
Main bearing clearance is 0.06mm which is within specs for this motor:
Then i checked the conrod bearing clearance also with te plastigauge method. I know it gives only a rough indication.
Then it was time installing the crankshaft, placing main bearing shells with lot of engine oil, i didn't use special assembly lube, because i have a plan running the oilpump before the the engine will make its first turns. This will be done when the engine is complete assembled, except for the timing belt, that way i'm able to drive the intermediate shaft with a drill and engage the oilpump without running the engine. all air will be pumped out and the oil galleries filled with oil.
With each main bearing cap installed the crankshaft turned lighter, when all main bearings were installed and the bolts tightened to spec torque the cranshaft turned that light i never expected.
I did reuse the main bearing bolts, because these bolts aren't "stretch" bolts.
Next was checking the piston ring gap, conform manual.
5 compression rings had a 0.45mm gap, and one had a 0.5mm gap, specs say minimal 0.3mm max 0.5mm
all oil and oil control rings ha a gap 0.4~0.45 gap
This means no re-gapping required.
assembling these piston rings to the pistons was a nervwrecking job, did not like it at all, affraid braking a ring. but luckily that didn't happen, jeej.
After that installing the pistons in the engine with a piston ring compressor tool was a easy job.
for torqing the conrod bolts i made a simple tool, these bolts needs to be torqued to 5Nm then 20Nm and then 70°, again i reused the conrod bolts, all manuals say new bolts should be used, but i didn't.
They say these bolts are stretch bolts (TTY torque to yield), but thats not entirely true. (i did extended tests with a set off these bolts and my tests confermed these bolts won't stretch plastic when torqued to spec, only elastic stretch)
Also renewed the pilot bearing in the crankshaft and washed out the vilt oil ring with lots of brake cleaner and reoiled this ring with fresh oil:
The old protecting cap was damaged, so also replaced for a new cap
The bore for the pilot bearing had a little notch, so the bearing can't be pressed in to deep:
And placed a new needle bearing for the oil pump intermediate gear/distributer gear, installing this bearing isn't easy because it's a fragile little bearing and it's placed deep into the engine block.
I did use a old distributer and "glued" the needle bearing with grease to the shaft and then pressed the bearing in with the distributer as a guide.
"glued the bearing to the shaft"
pressed it in and removed the distributer again.
and pressed the bearing with a suitable tool further down.
the installed the intermediate gear and end cap, the end cap has the same needle bearing, this one was OK after a good cleaning job.
to be continued
Last edited by BertjeConti on Tue Nov 22, 2022 7:54 pm, edited 2 times in total.
Megasquirted '77 E12 520-6
Aspen Silver '96 E39 523i
-
BertjeConti
- E21 Mad
- Posts: 3012
- Joined: Mon Nov 04, 2013 9:49 pm
- My E21(s): E12 520-6
- Location: nederland , Weert
Re: Pastelblau 520/6
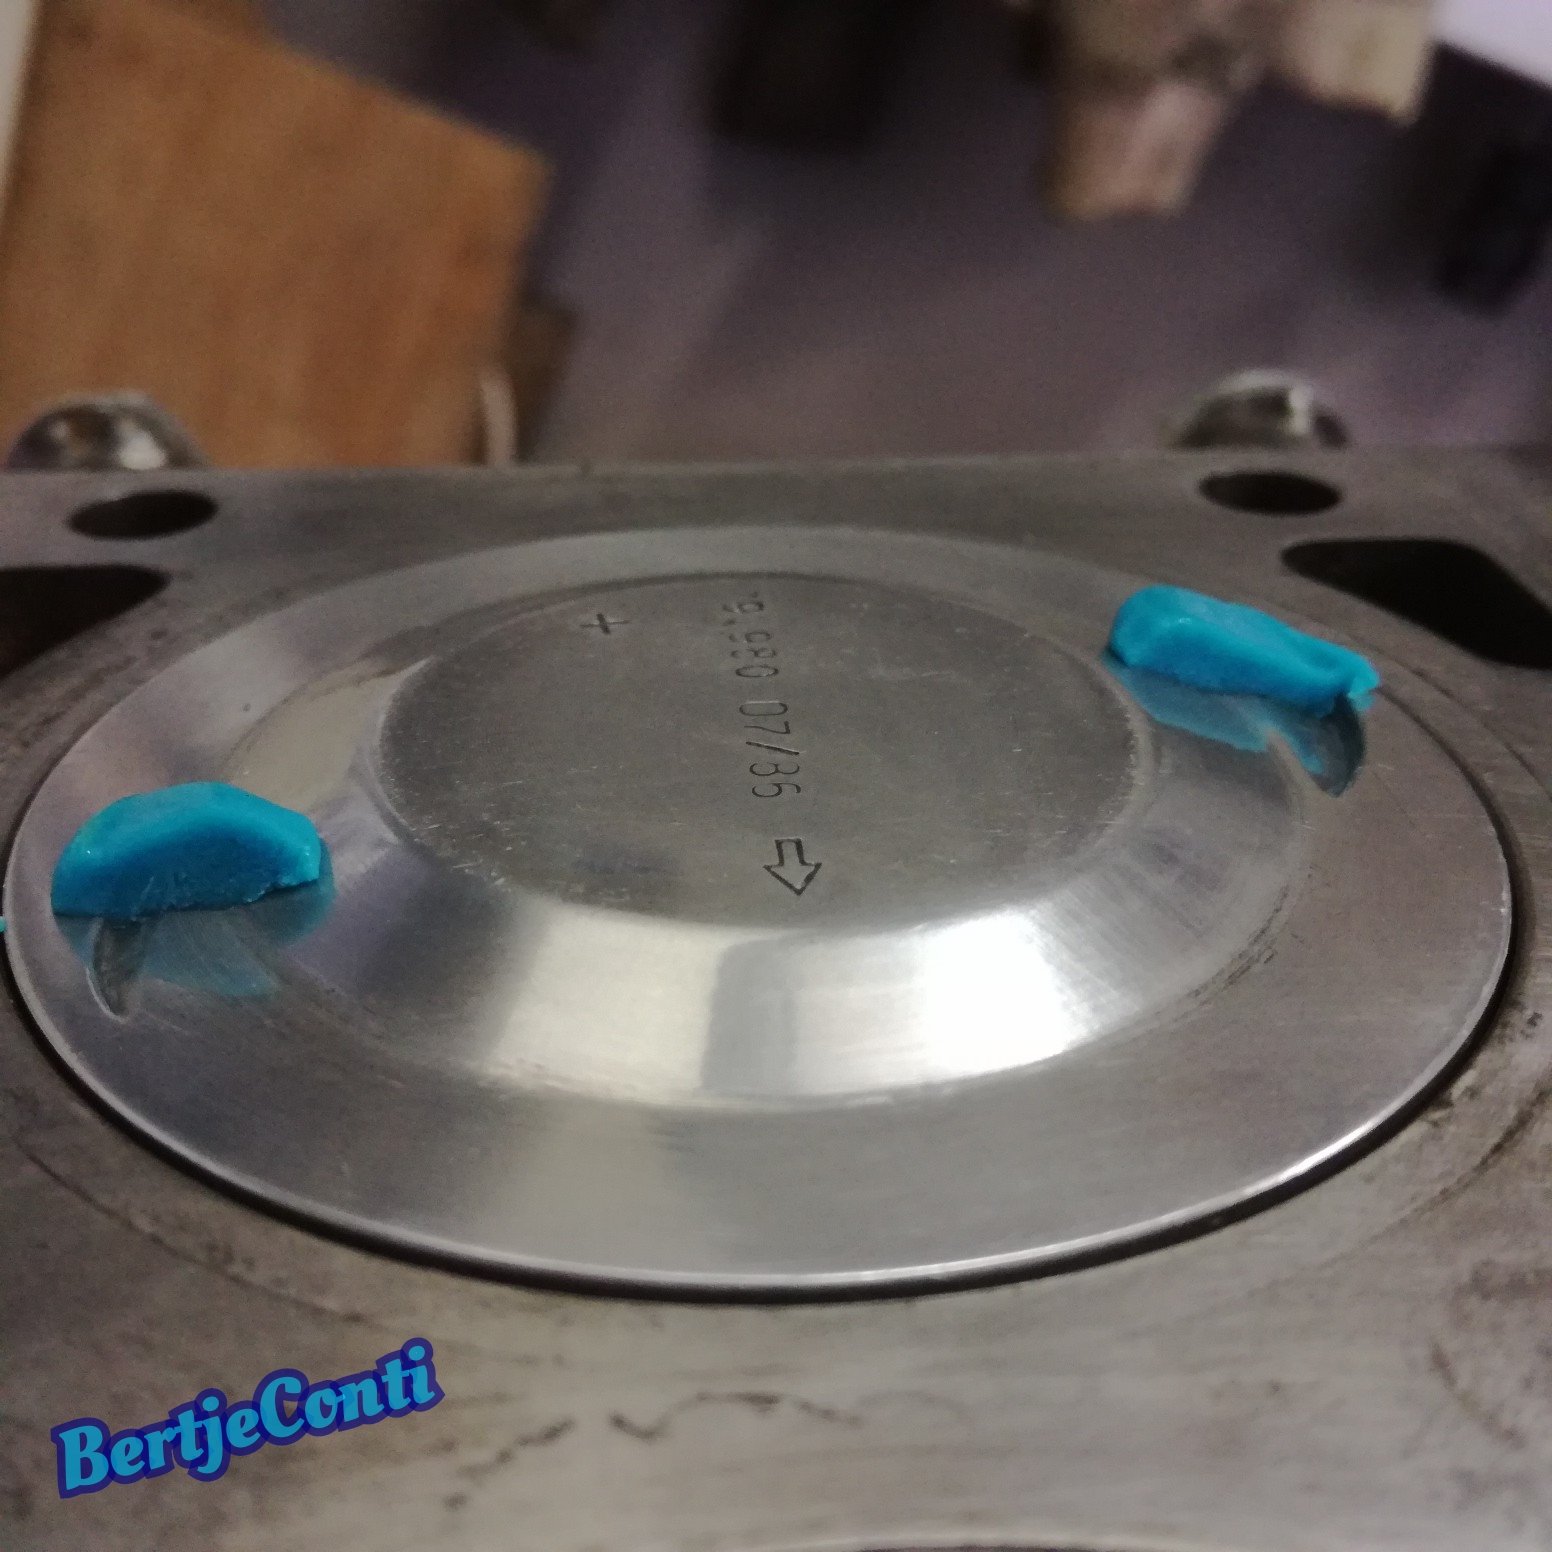
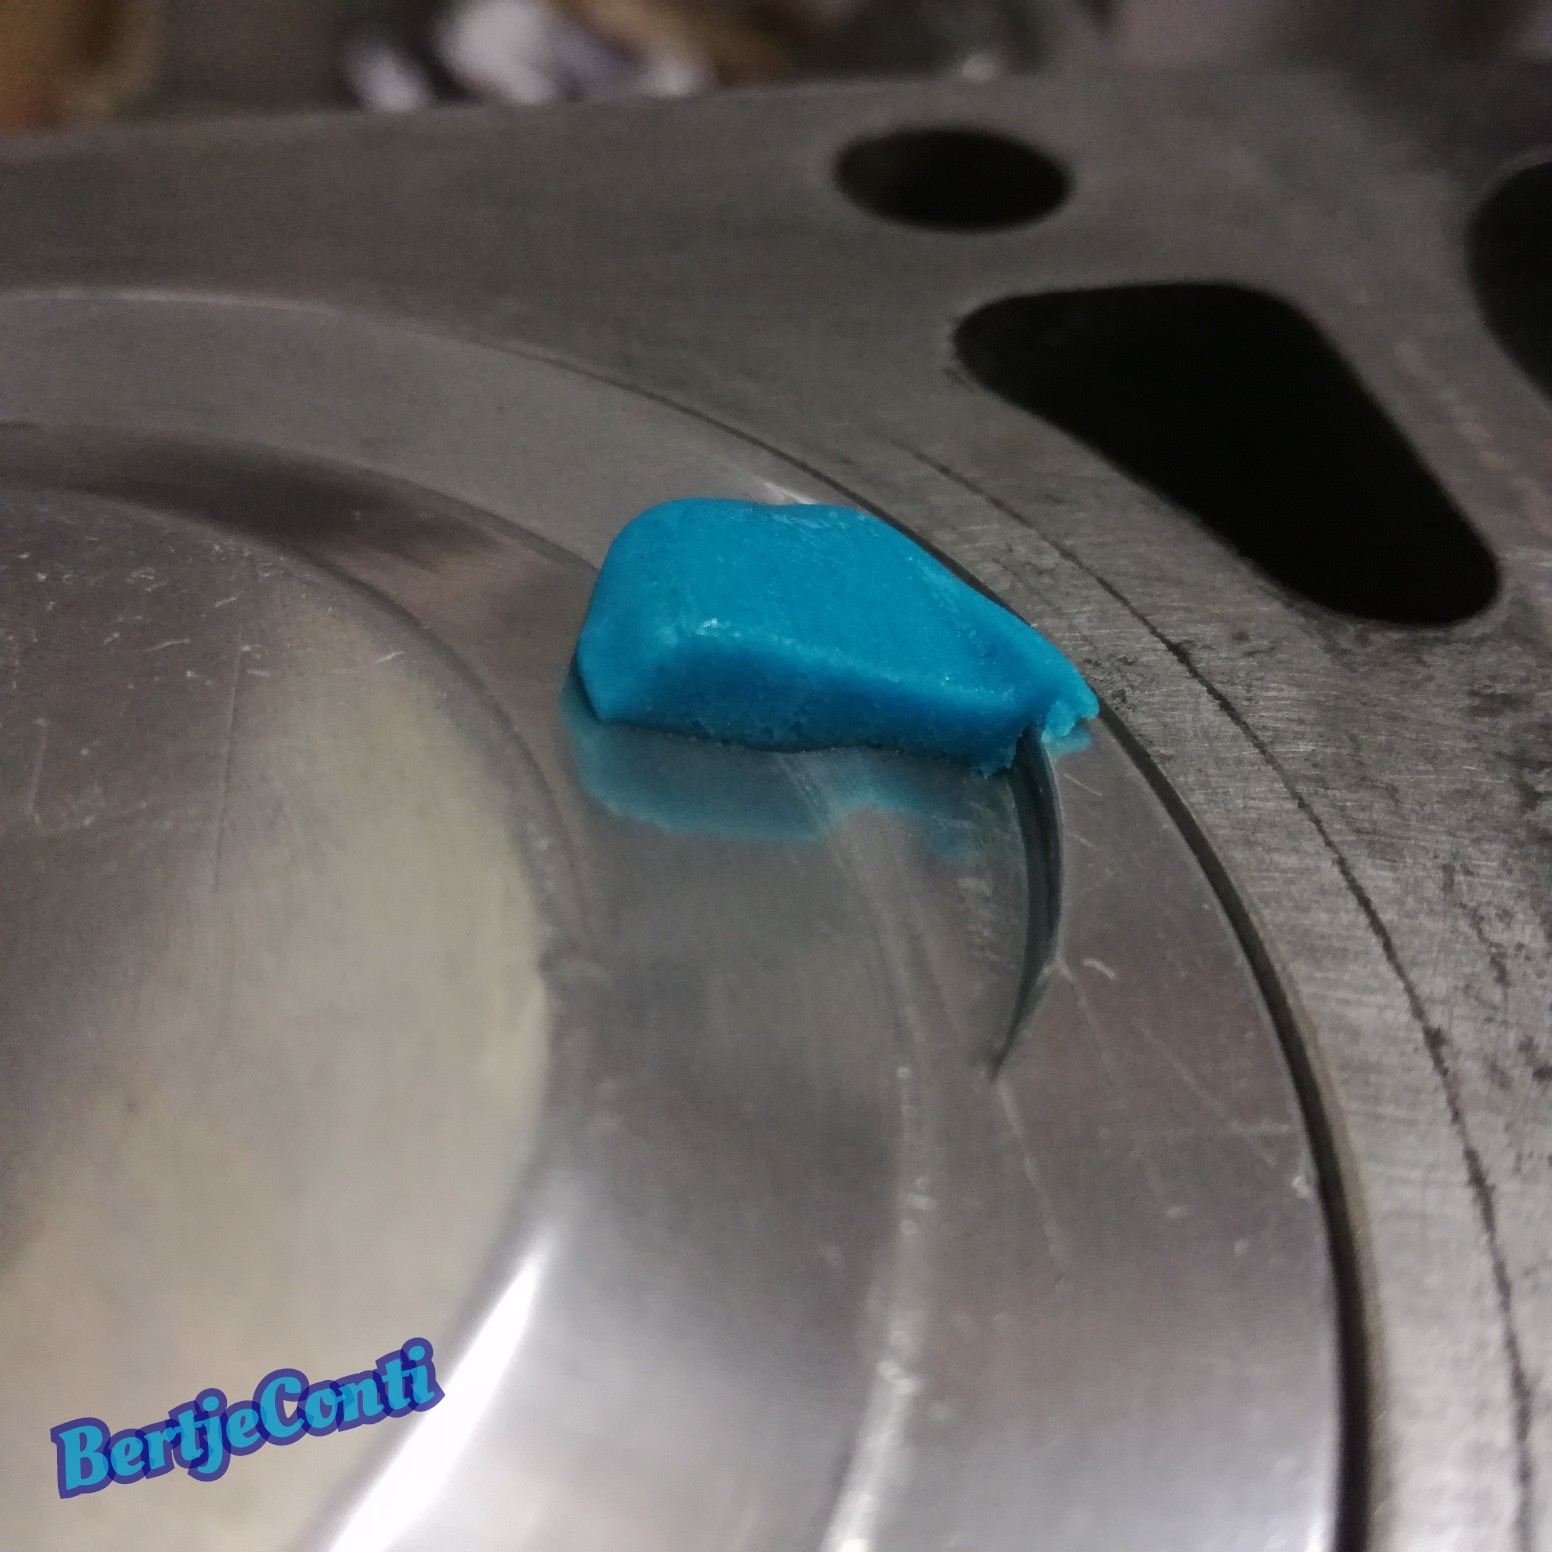
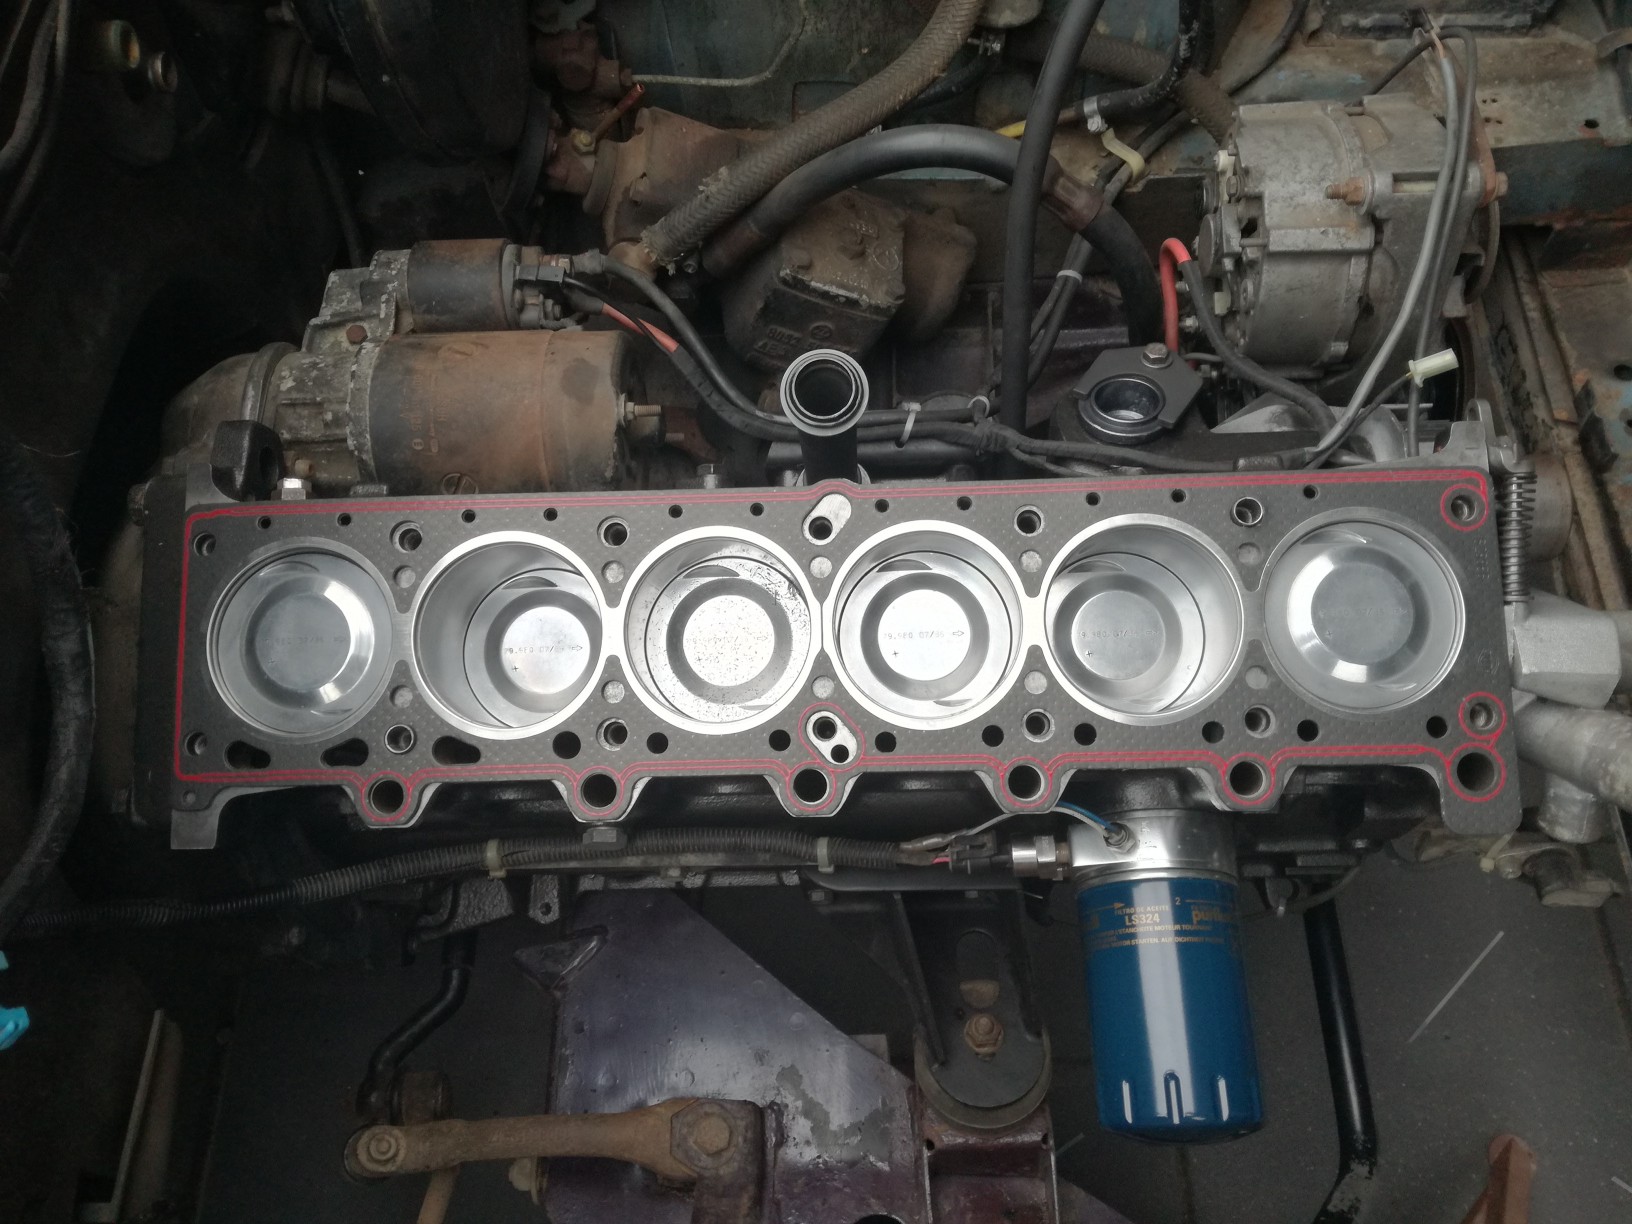
Checking valve to piston clearance
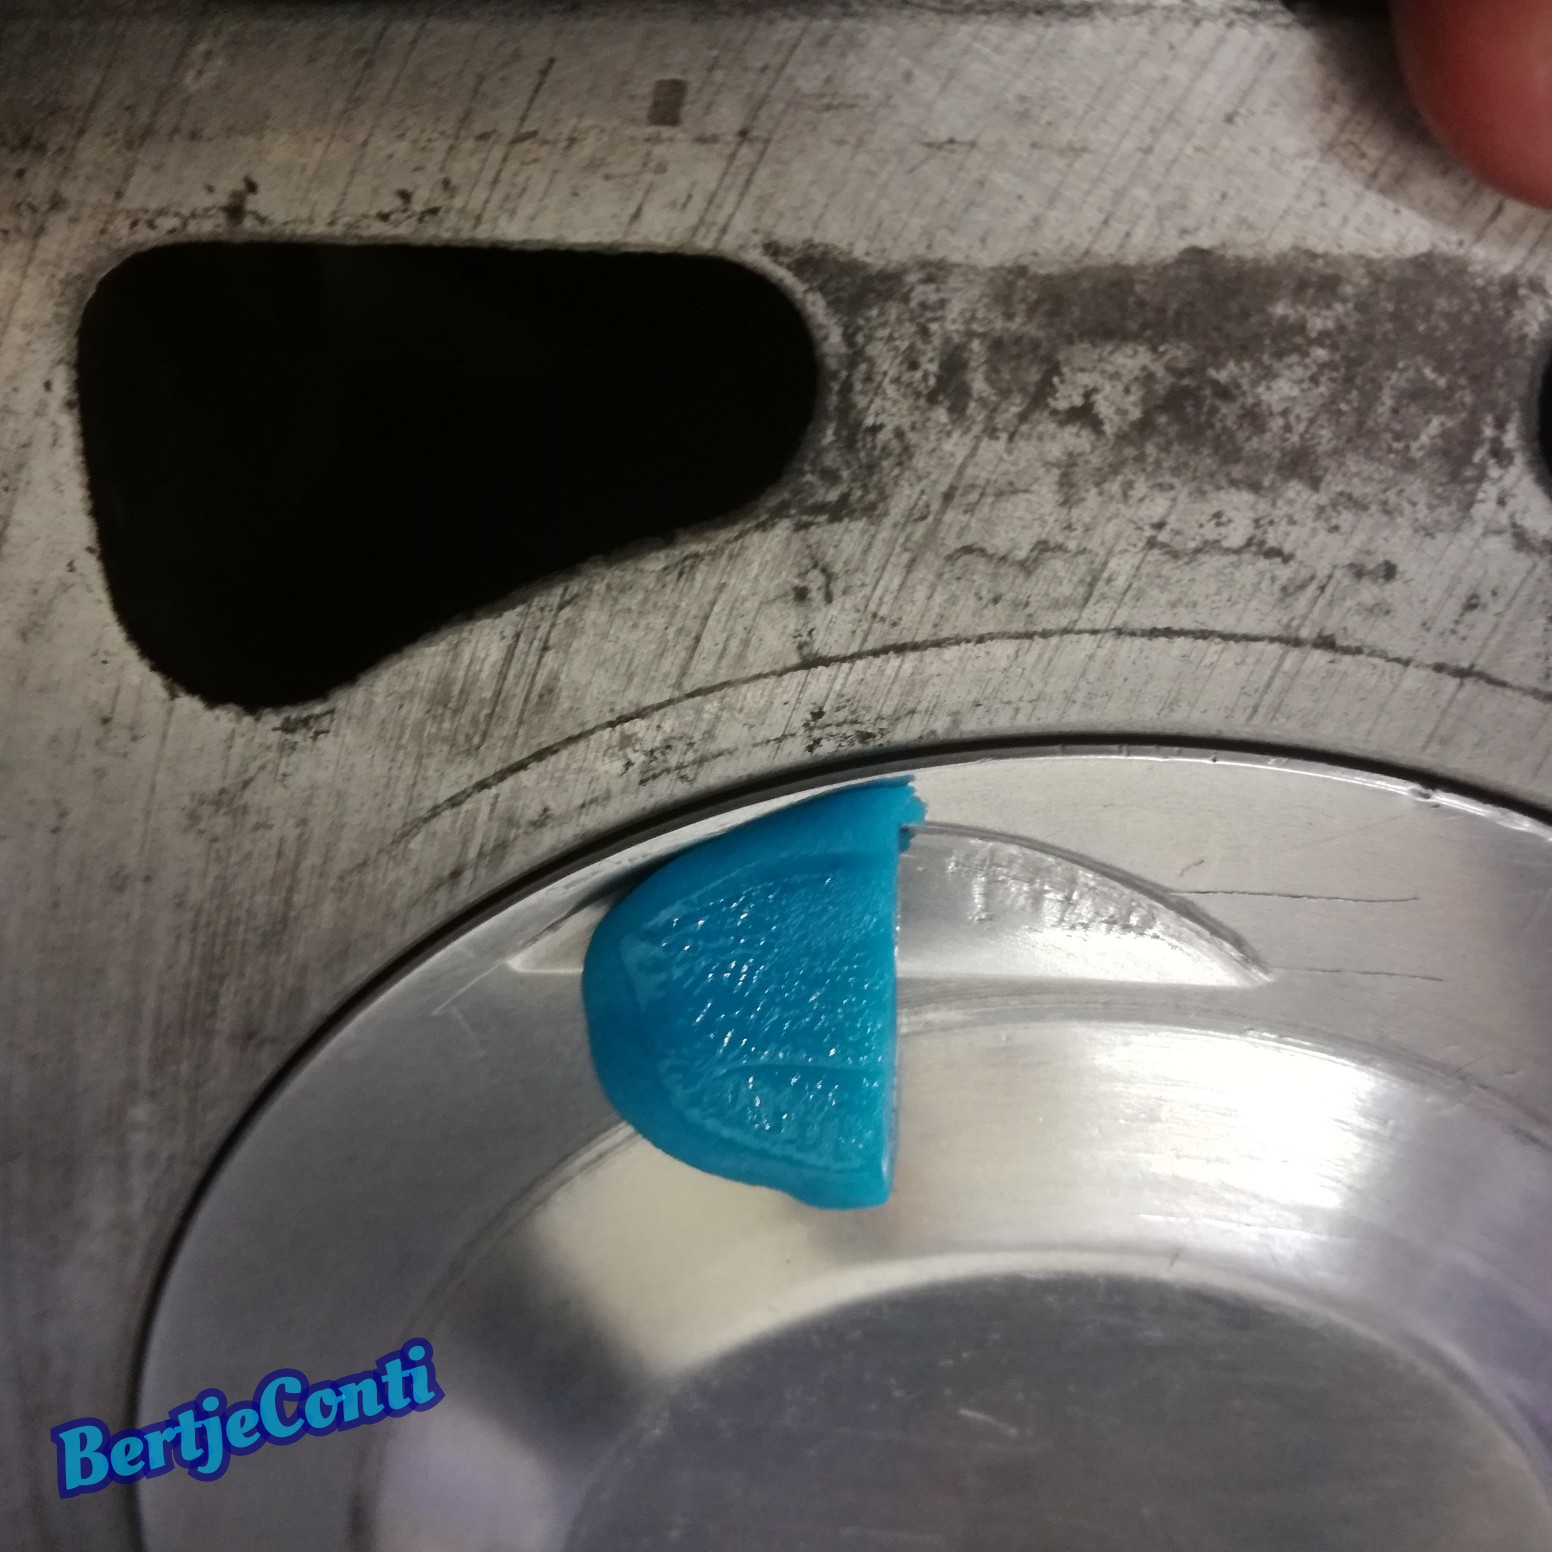
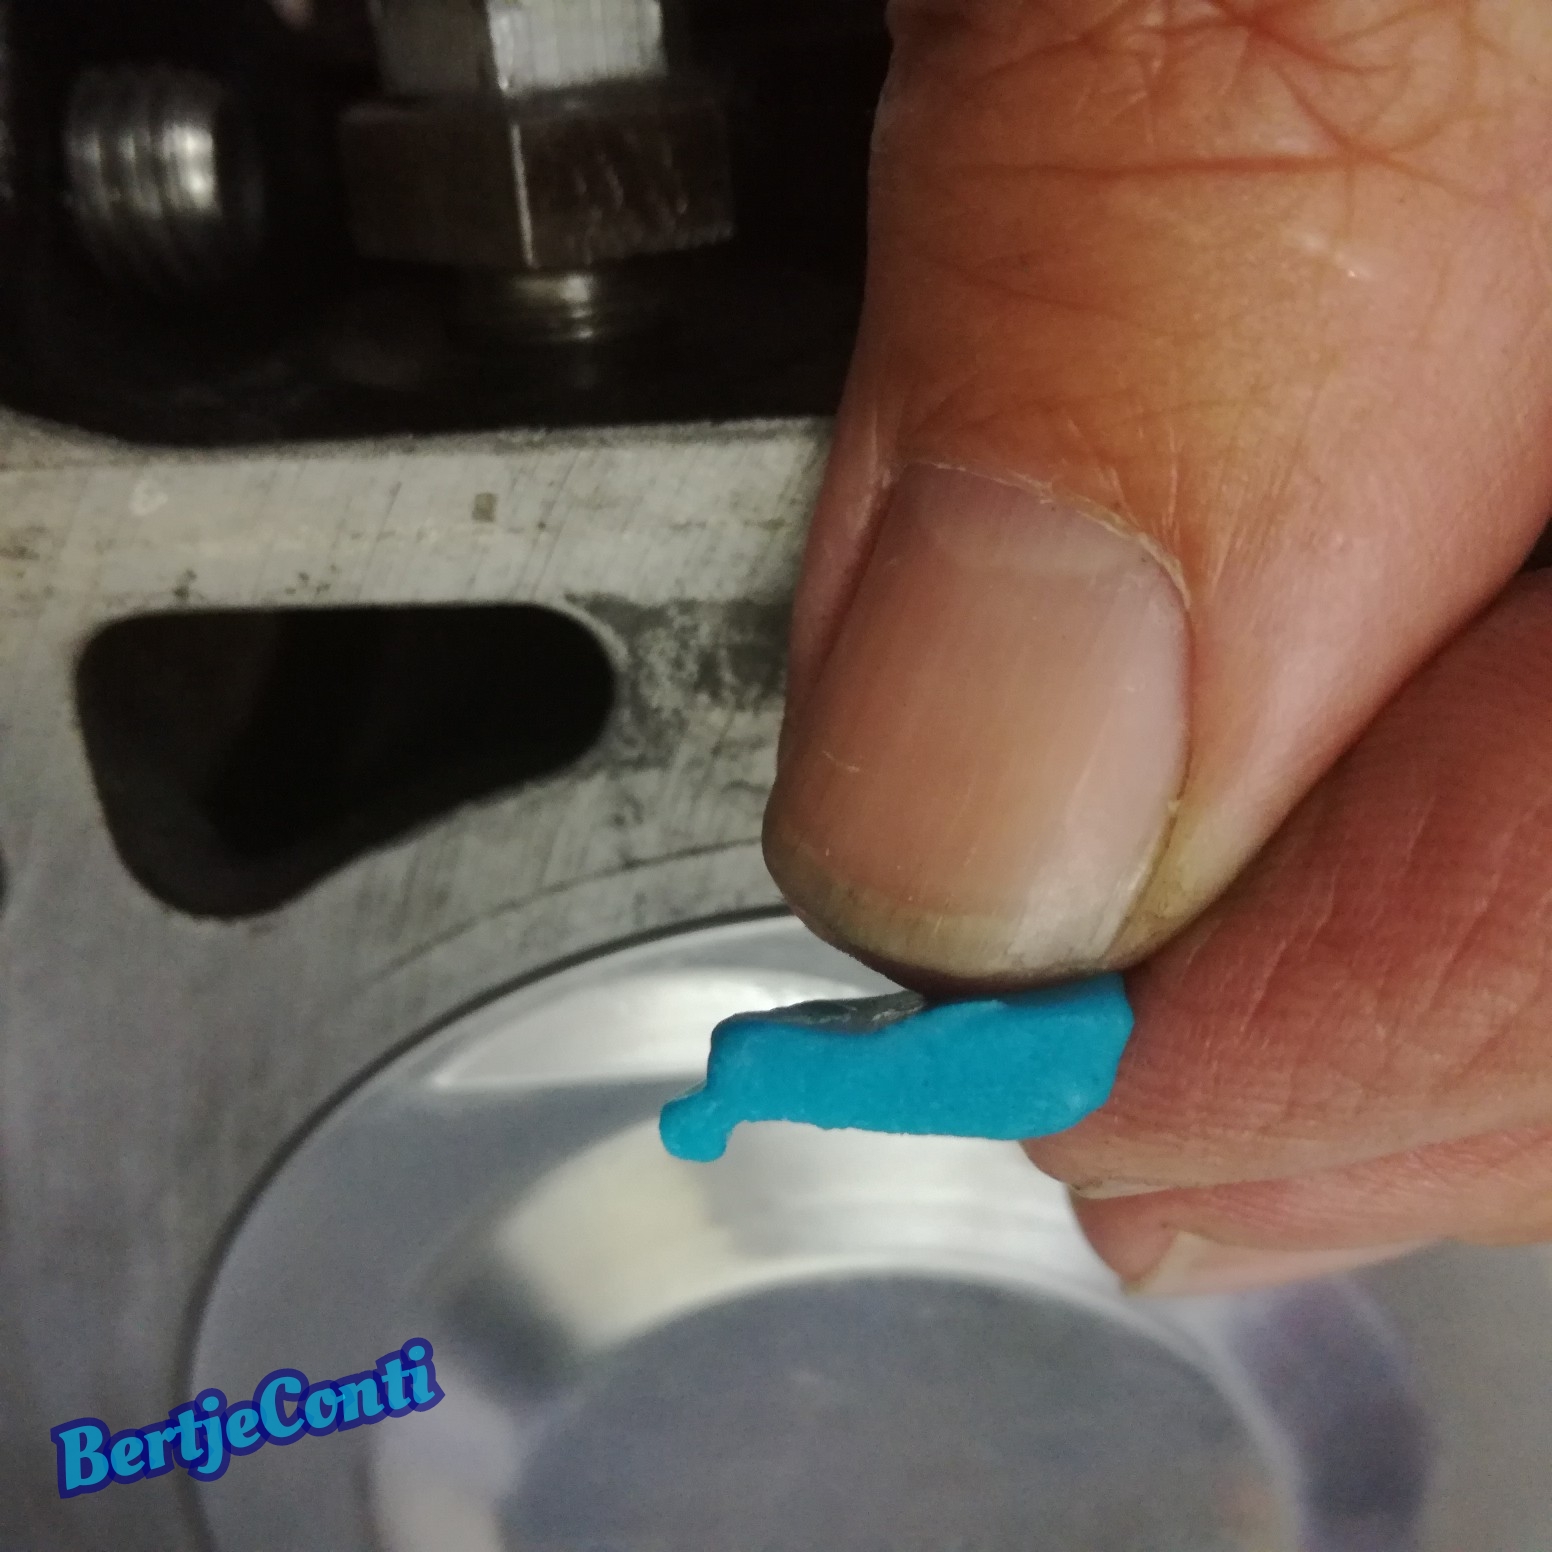
All pistons became a portion clay for measuring the crearance, valves became a smear of grease, so they won't stick to the clay.
then i mounted the head with an old head gasked, and mounted the timing belt, turned the engine 2 revs by hand and removed the head again
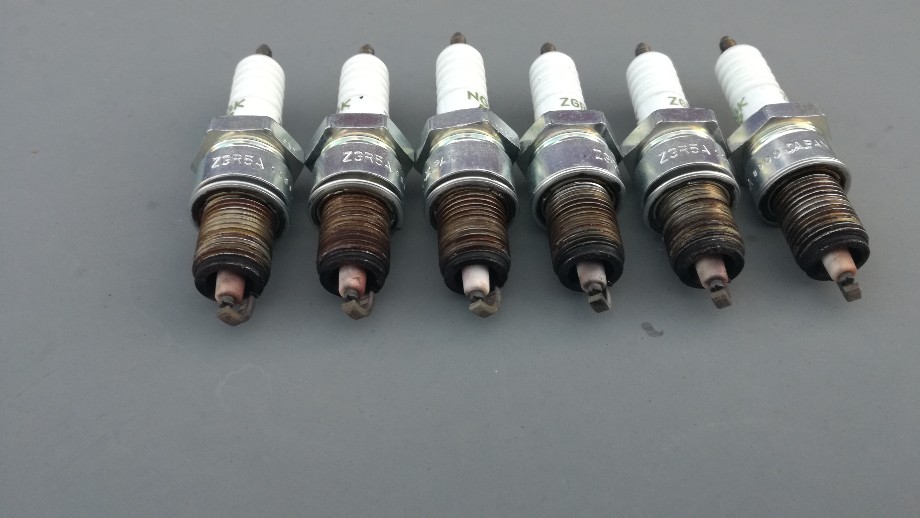
I also measuered the piston-spark plug clearance, because the NGK ZGR5A stick deep into the cylinders, about 8mm. Clearance was 4mm.
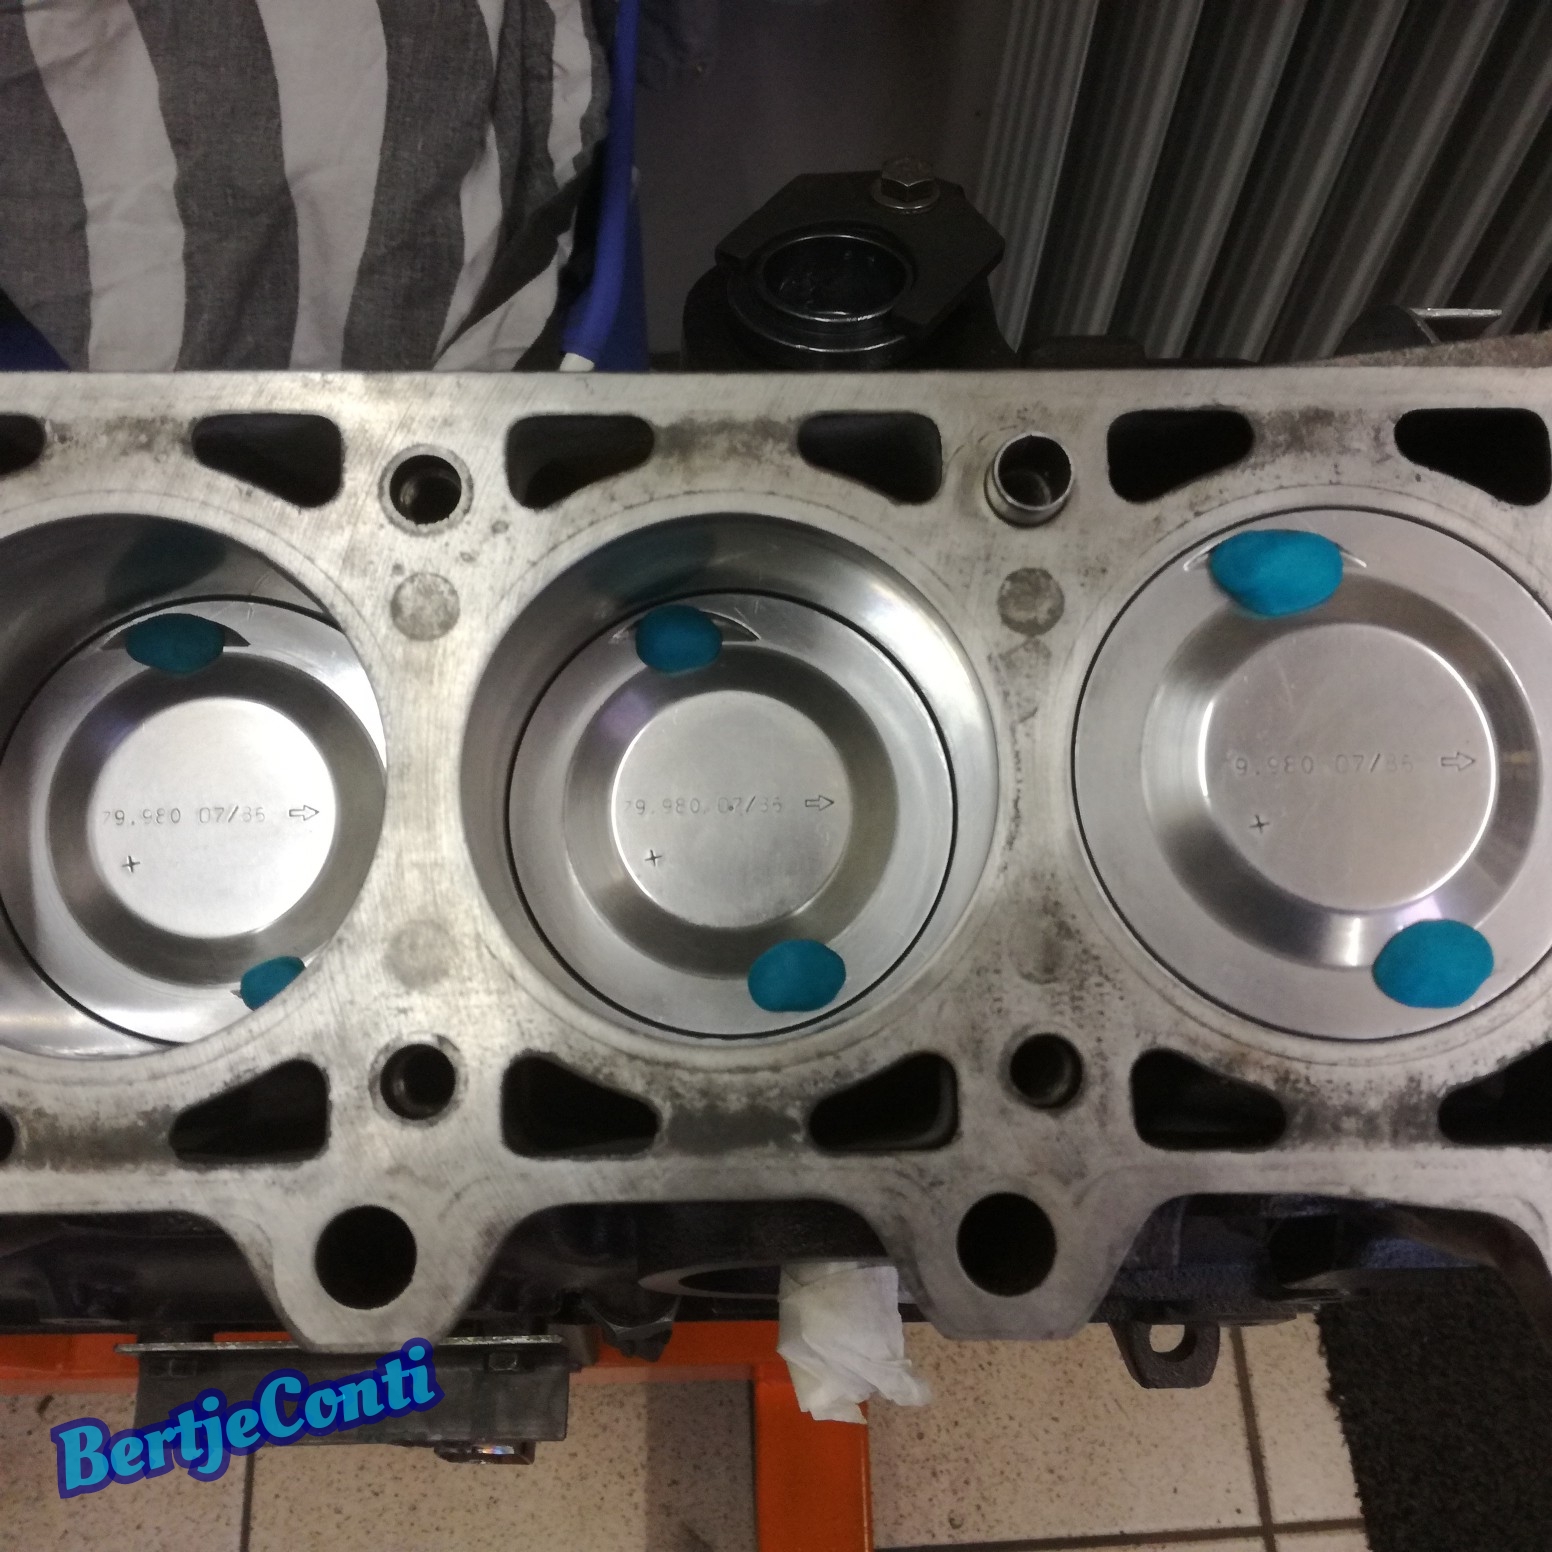
Results:
Clearance between intake valves and pistons is about 2mm, exhaust valves and piston is even more , 3mm. No worries
Conclusion, in the past, when the exhaust valves had hit the pistons in this engine the timing must have been off, only explenation possible.
This might be the reason this engine was sold cheap to me.
I know how bad a engine runs when the timing is out of sync, had these problems with 2 Suzuki GS motorcycle engine's which also came cheap to me due these problems.
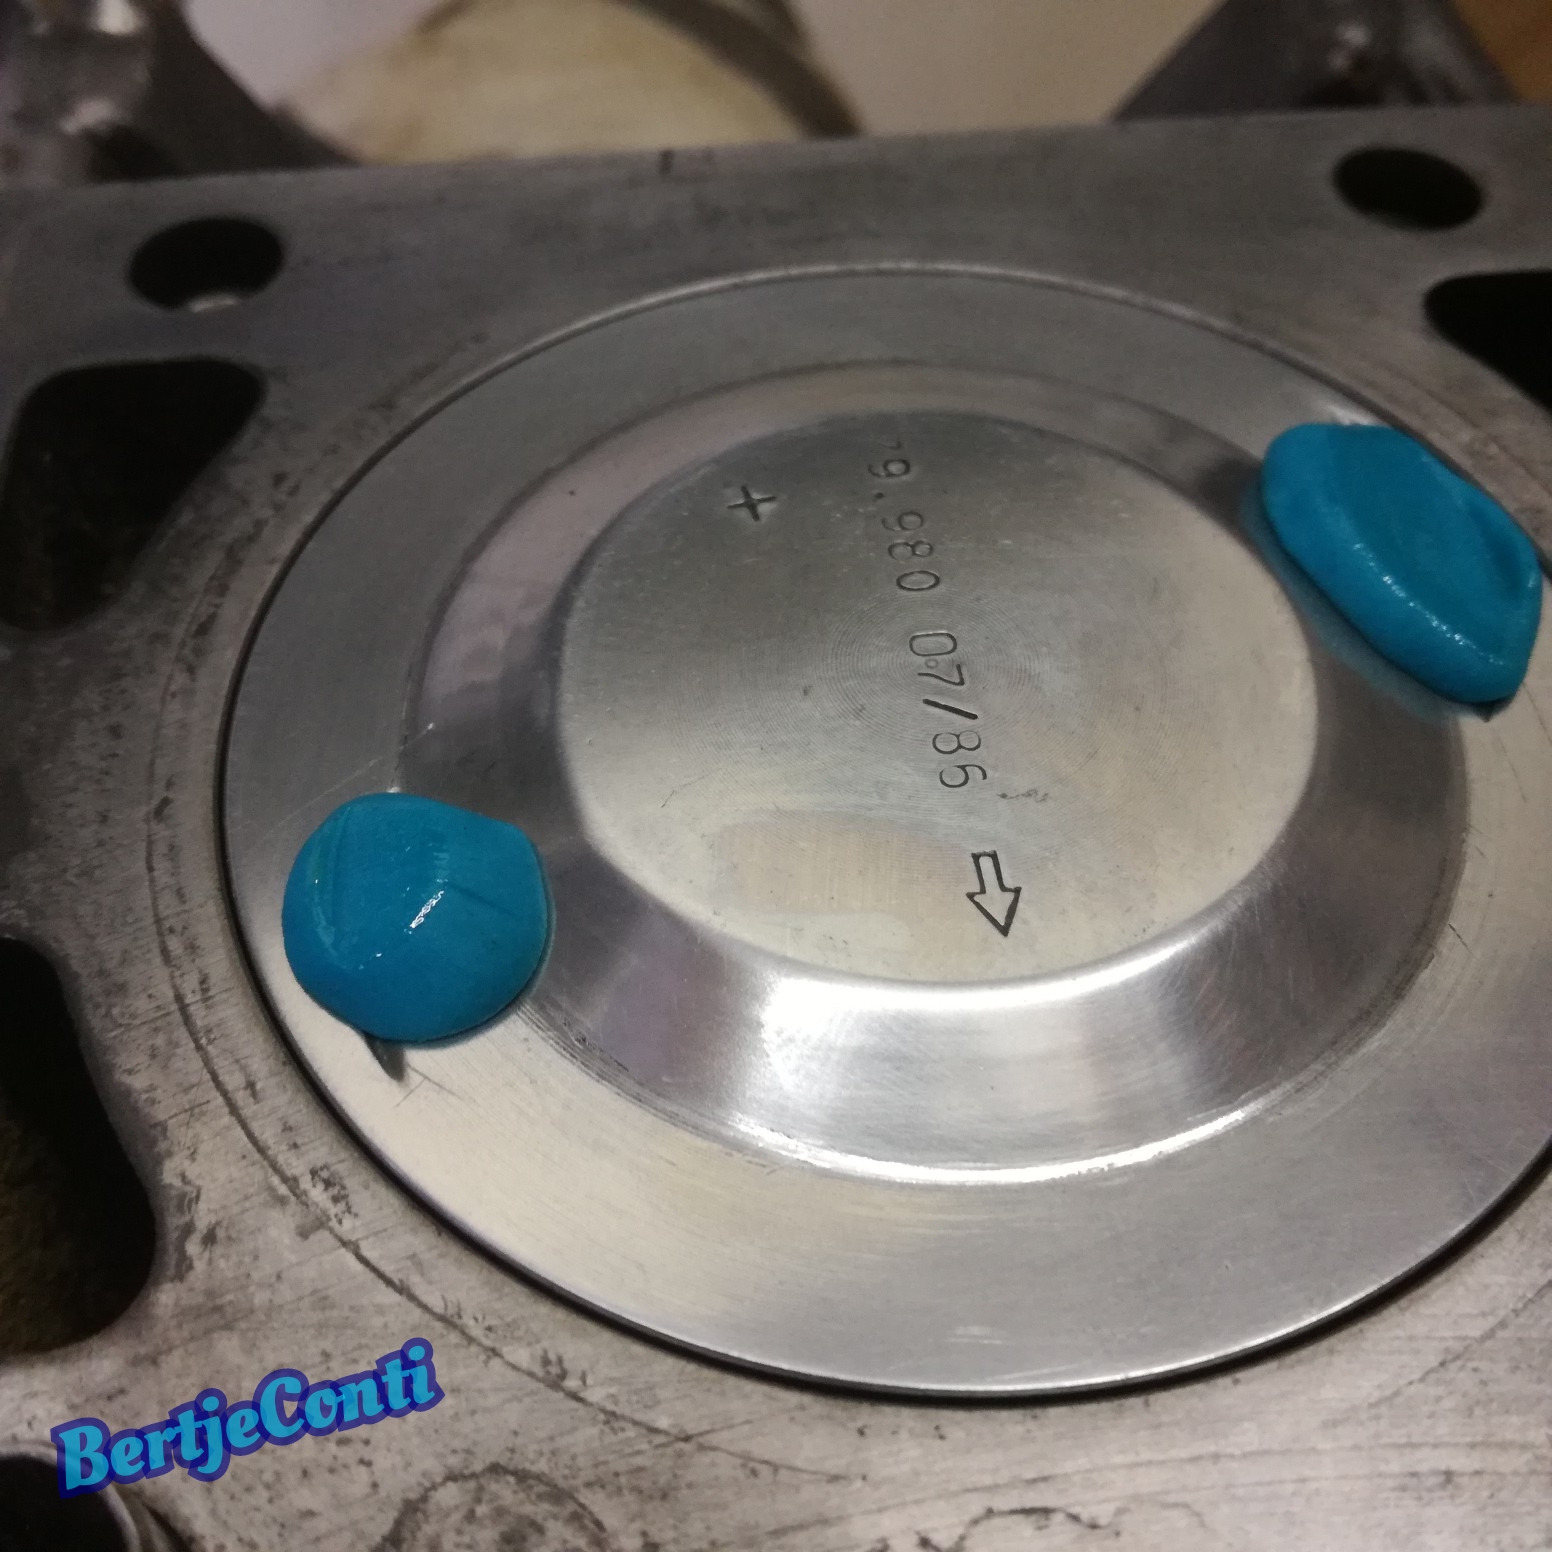
exhaust valve-piston:
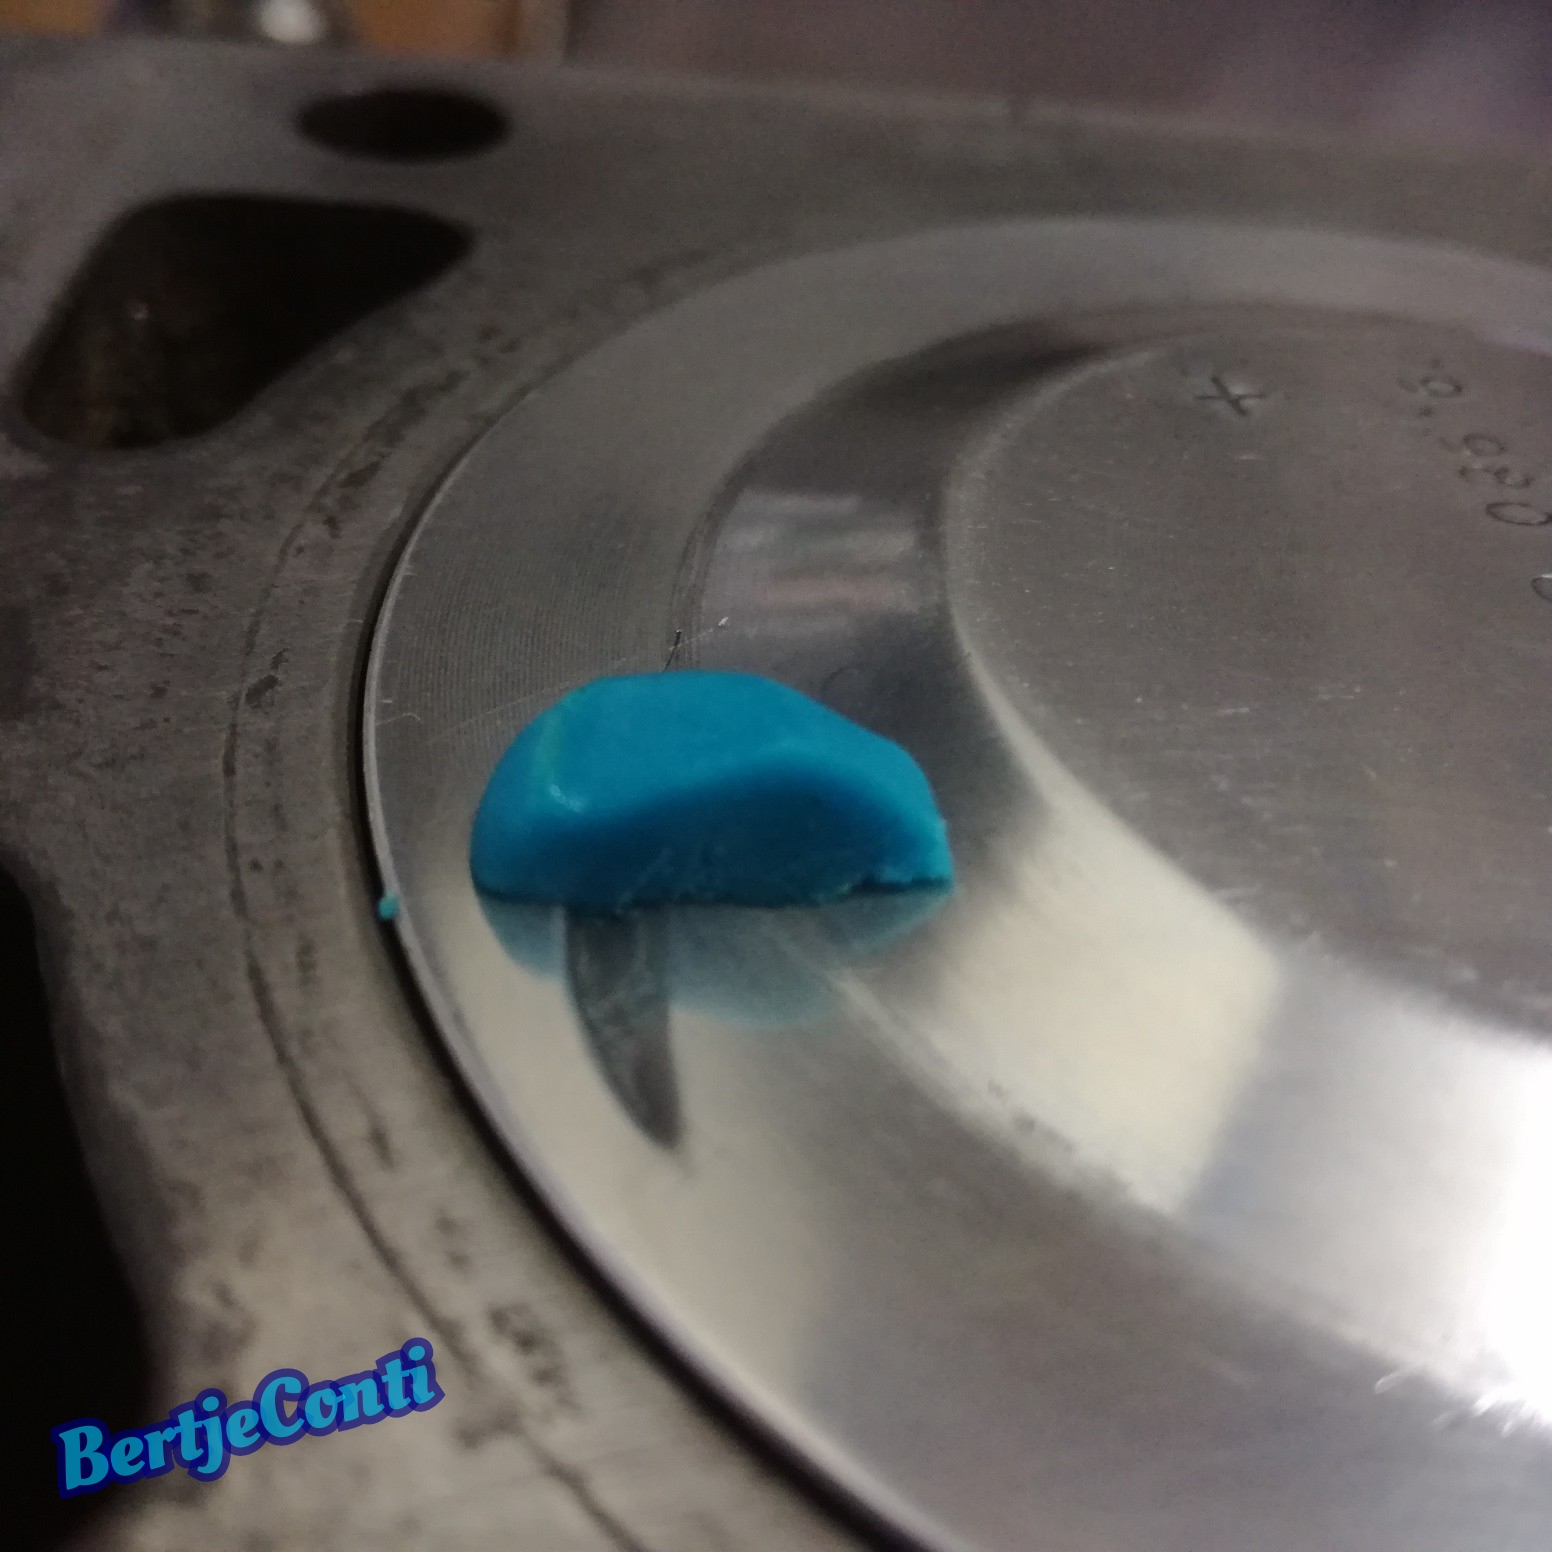
intake valve to piston:
top view intake valve to piston:
I'm going to install the engine without head and other accesoires into the car, in my opinion it is easier doing it this way.
So next is pulling the old engine and make room for this one.
All pistons became a portion clay for measuring the crearance, valves became a smear of grease, so they won't stick to the clay.
then i mounted the head with an old head gasked, and mounted the timing belt, turned the engine 2 revs by hand and removed the head again
I also measuered the piston-spark plug clearance, because the NGK ZGR5A stick deep into the cylinders, about 8mm. Clearance was 4mm.
Results:
Clearance between intake valves and pistons is about 2mm, exhaust valves and piston is even more , 3mm. No worries
Conclusion, in the past, when the exhaust valves had hit the pistons in this engine the timing must have been off, only explenation possible.
This might be the reason this engine was sold cheap to me.
I know how bad a engine runs when the timing is out of sync, had these problems with 2 Suzuki GS motorcycle engine's which also came cheap to me due these problems.
exhaust valve-piston:
intake valve to piston:
top view intake valve to piston:
I'm going to install the engine without head and other accesoires into the car, in my opinion it is easier doing it this way.
So next is pulling the old engine and make room for this one.
Last edited by BertjeConti on Tue Nov 22, 2022 7:50 pm, edited 1 time in total.
Megasquirted '77 E12 520-6
Aspen Silver '96 E39 523i
-
323baur
- E21 VIP

- Posts: 11765
- Joined: Fri Jan 12, 2007 8:44 pm
- Location: the Netherlands, Houten
- Contact:
Re: Pastelblau 520/6
Very impressive, and waaaaay beyond my skills 
Understeer is when you hit the wall with the front of the car and oversteer is when you hit the wall with the rear of the car. Horsepower is how fast you hit the wall. Torque is how far you take the wall with you.
-
BertjeConti
- E21 Mad
- Posts: 3012
- Joined: Mon Nov 04, 2013 9:49 pm
- My E21(s): E12 520-6
- Location: nederland , Weert
Re: Pastelblau 520/6
Last summer it was time to do the engine swap, but before i pulled the old engine i did a benchmark test so i had some figures to compare later.
I did a 0 to 100 km/hour sprint test, did it several times and noted the best time i could get out of this engine which was exactly 11.0 seconds.
Did the test with my tripmaster rally computer which has a special function for this test and is verry accurate.
I had also done a dry compression test a time ago, resulting in 155psi up to 170psi, which wasn't bad at all.
The engine setup will stay the same all over and all external engine parts will be swapped from the old to the new engine block, so in essence only the shortblock and head will be swapped.
So time to drain coolant and oil and disassemble as many parts as possible before lifting the engine.
I'll lift the engine without gearbox.
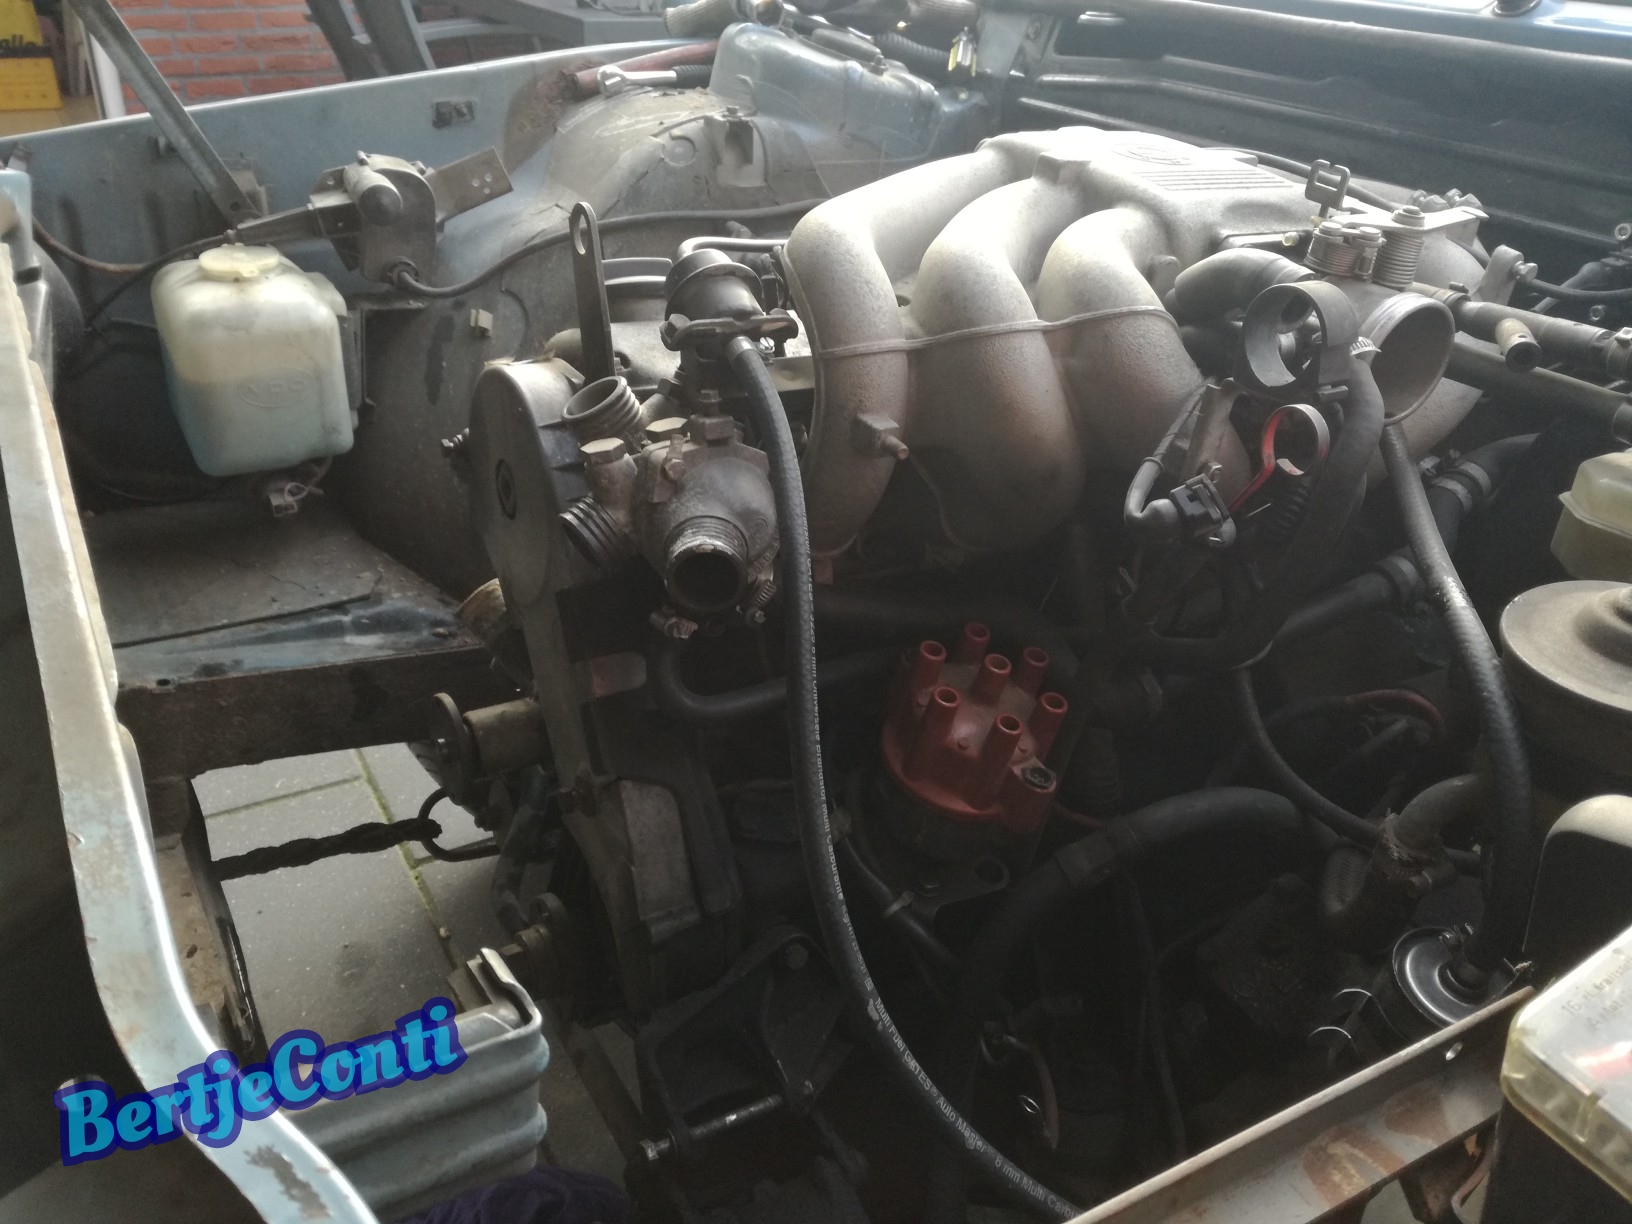
intake manifolt is drained in oil, due worn piston rings of this engine.

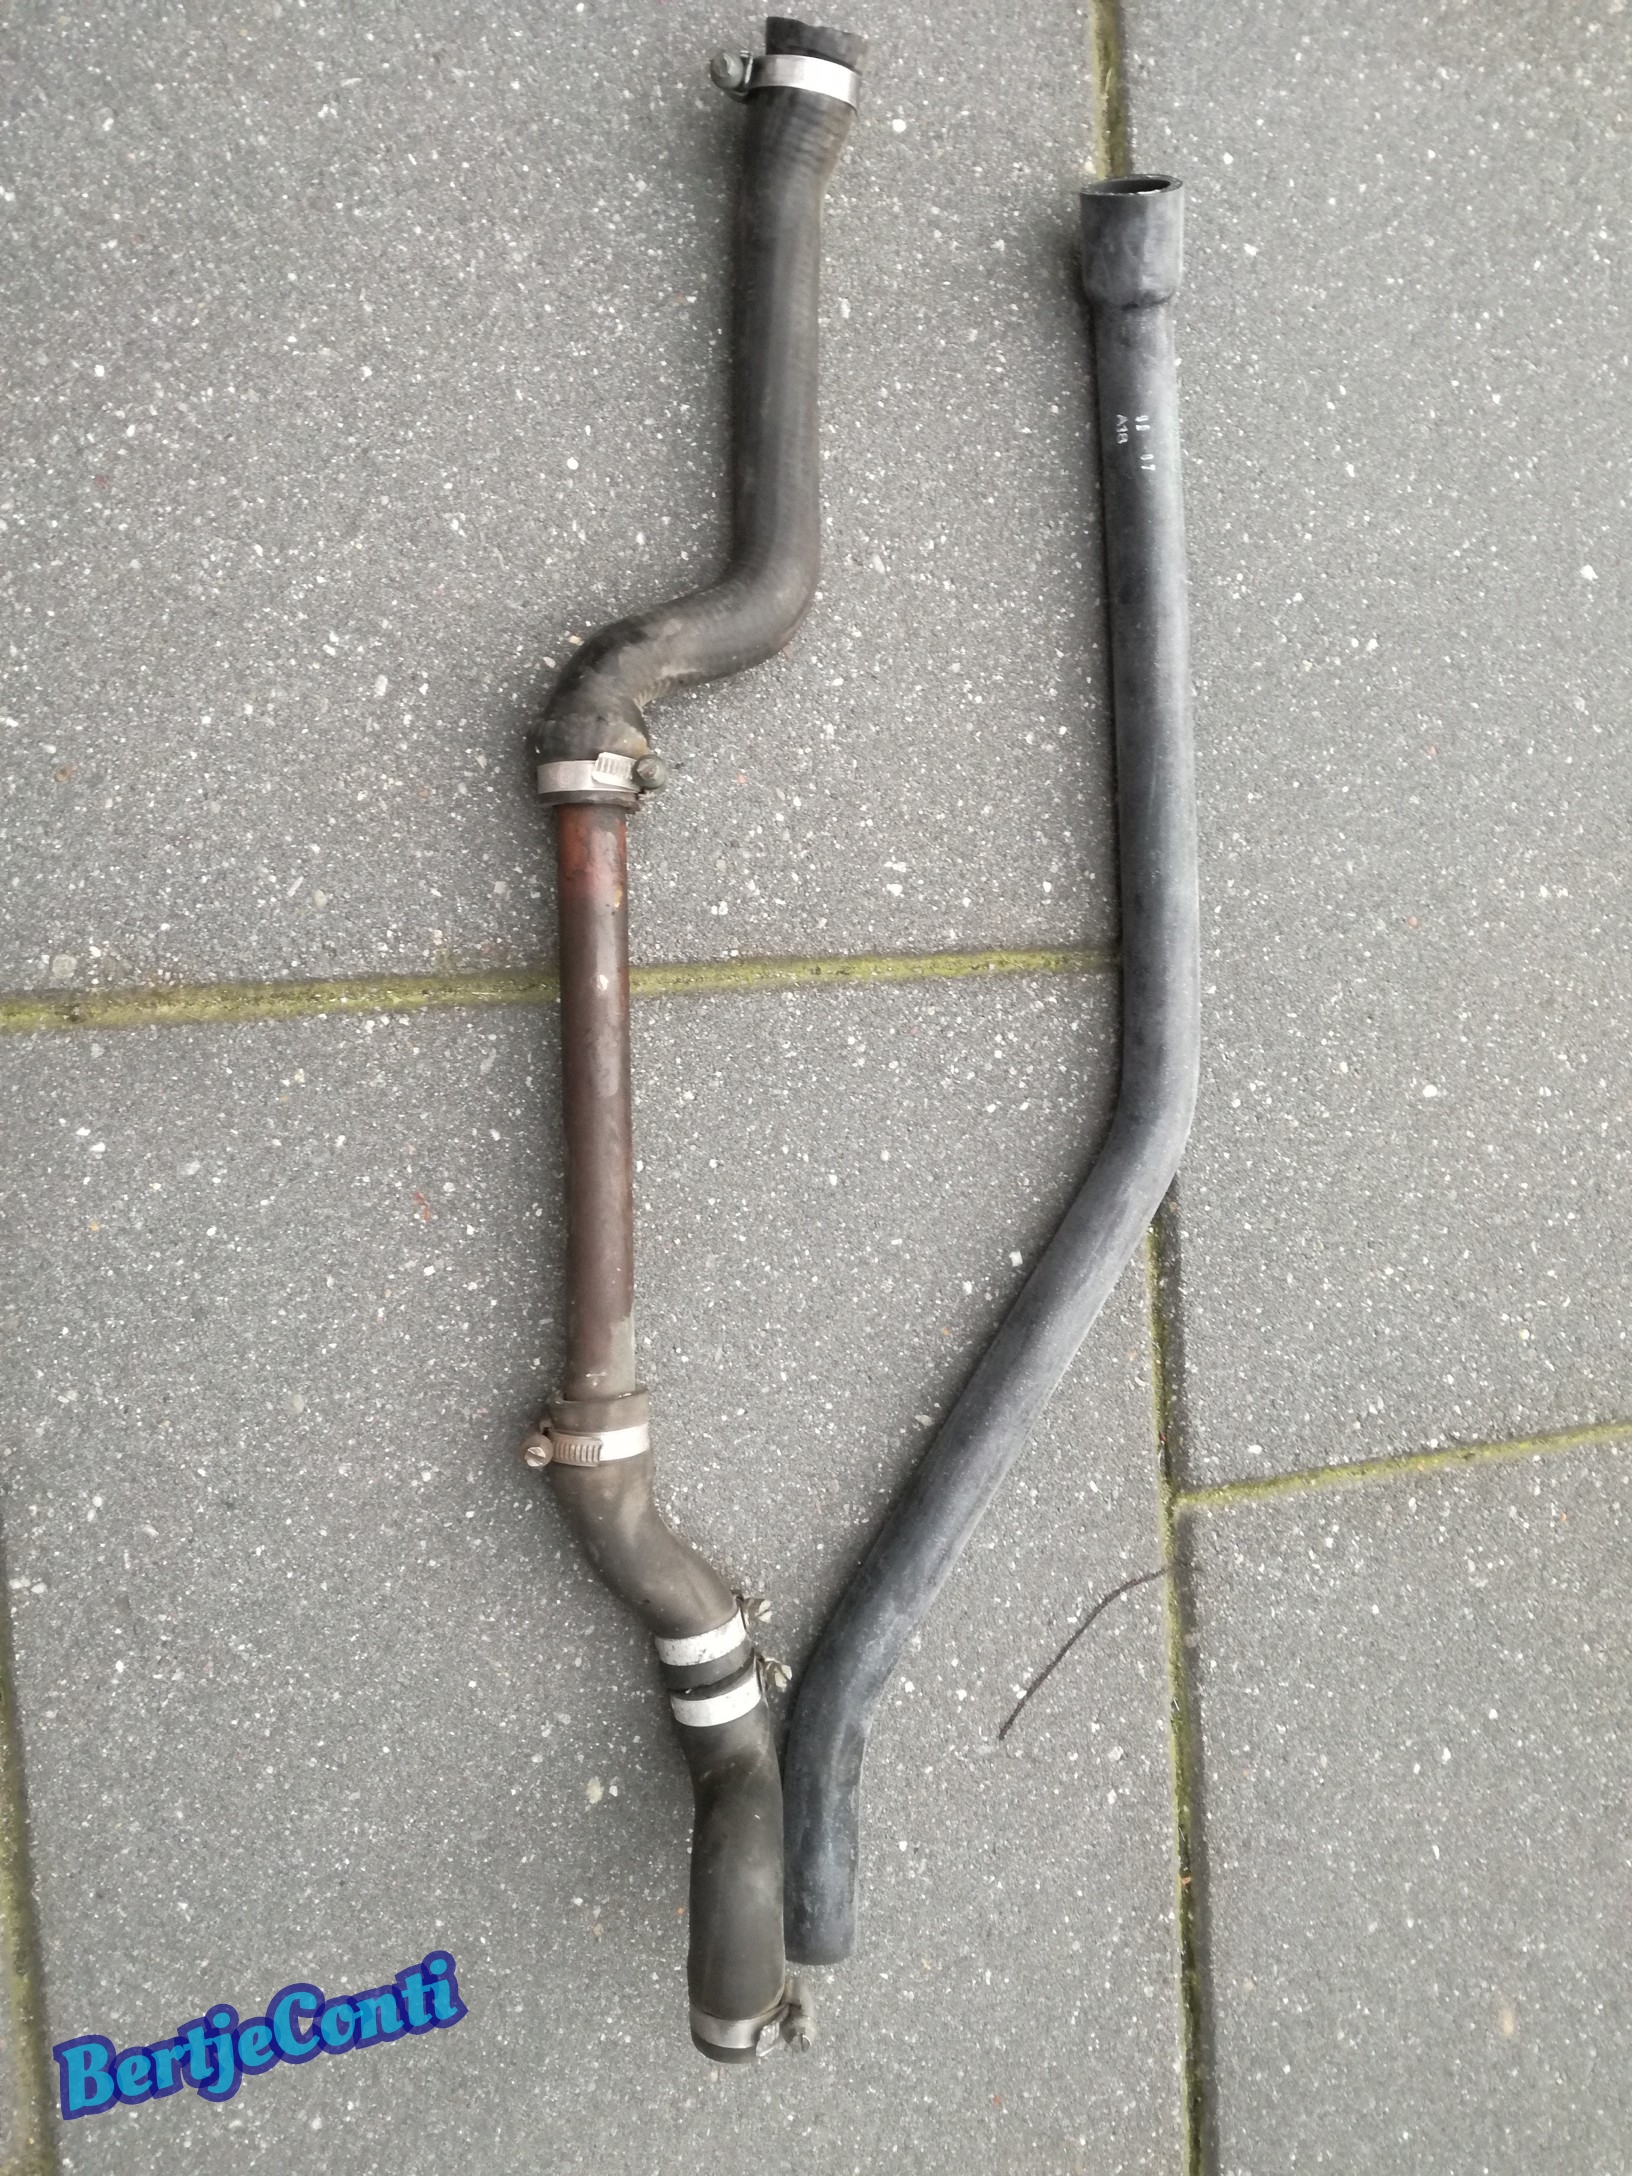
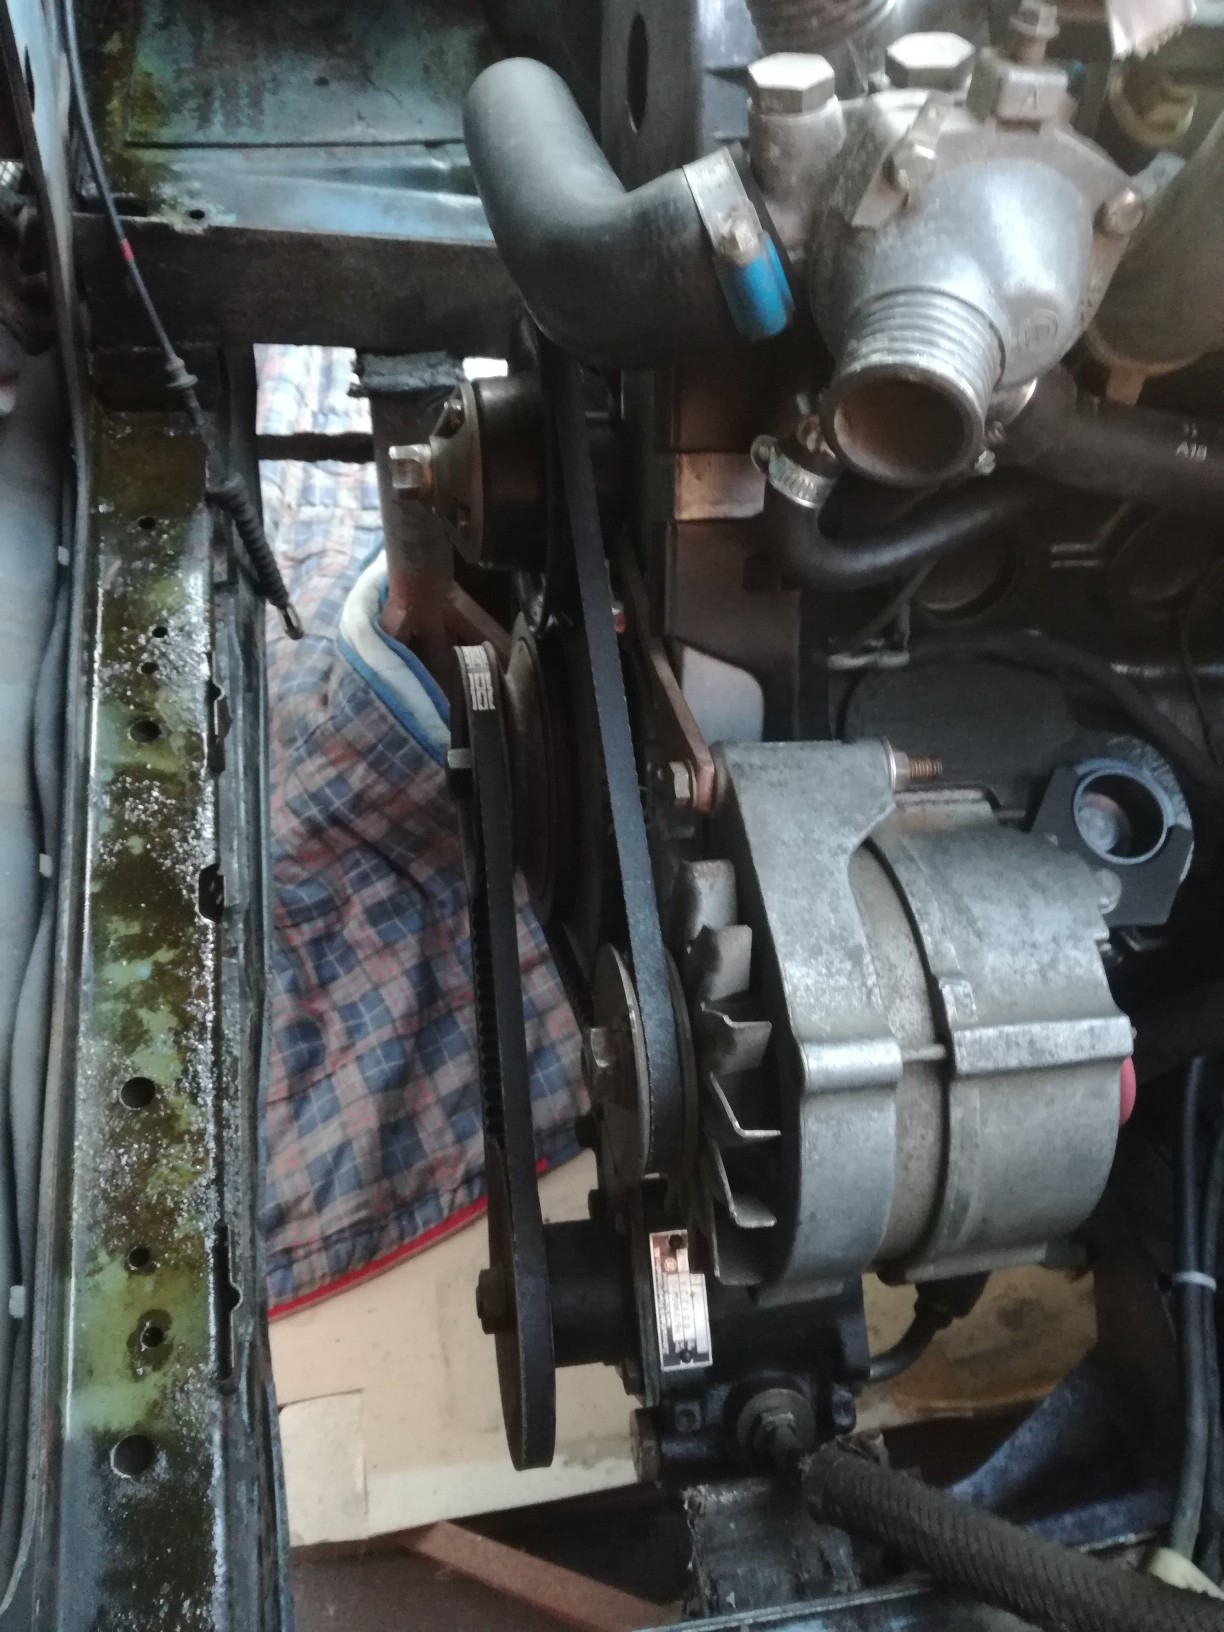
The hose from thermostat to heater will be replaced, the old hose is an ugly patchwork, the new hose is a 323i part and fits perfect:
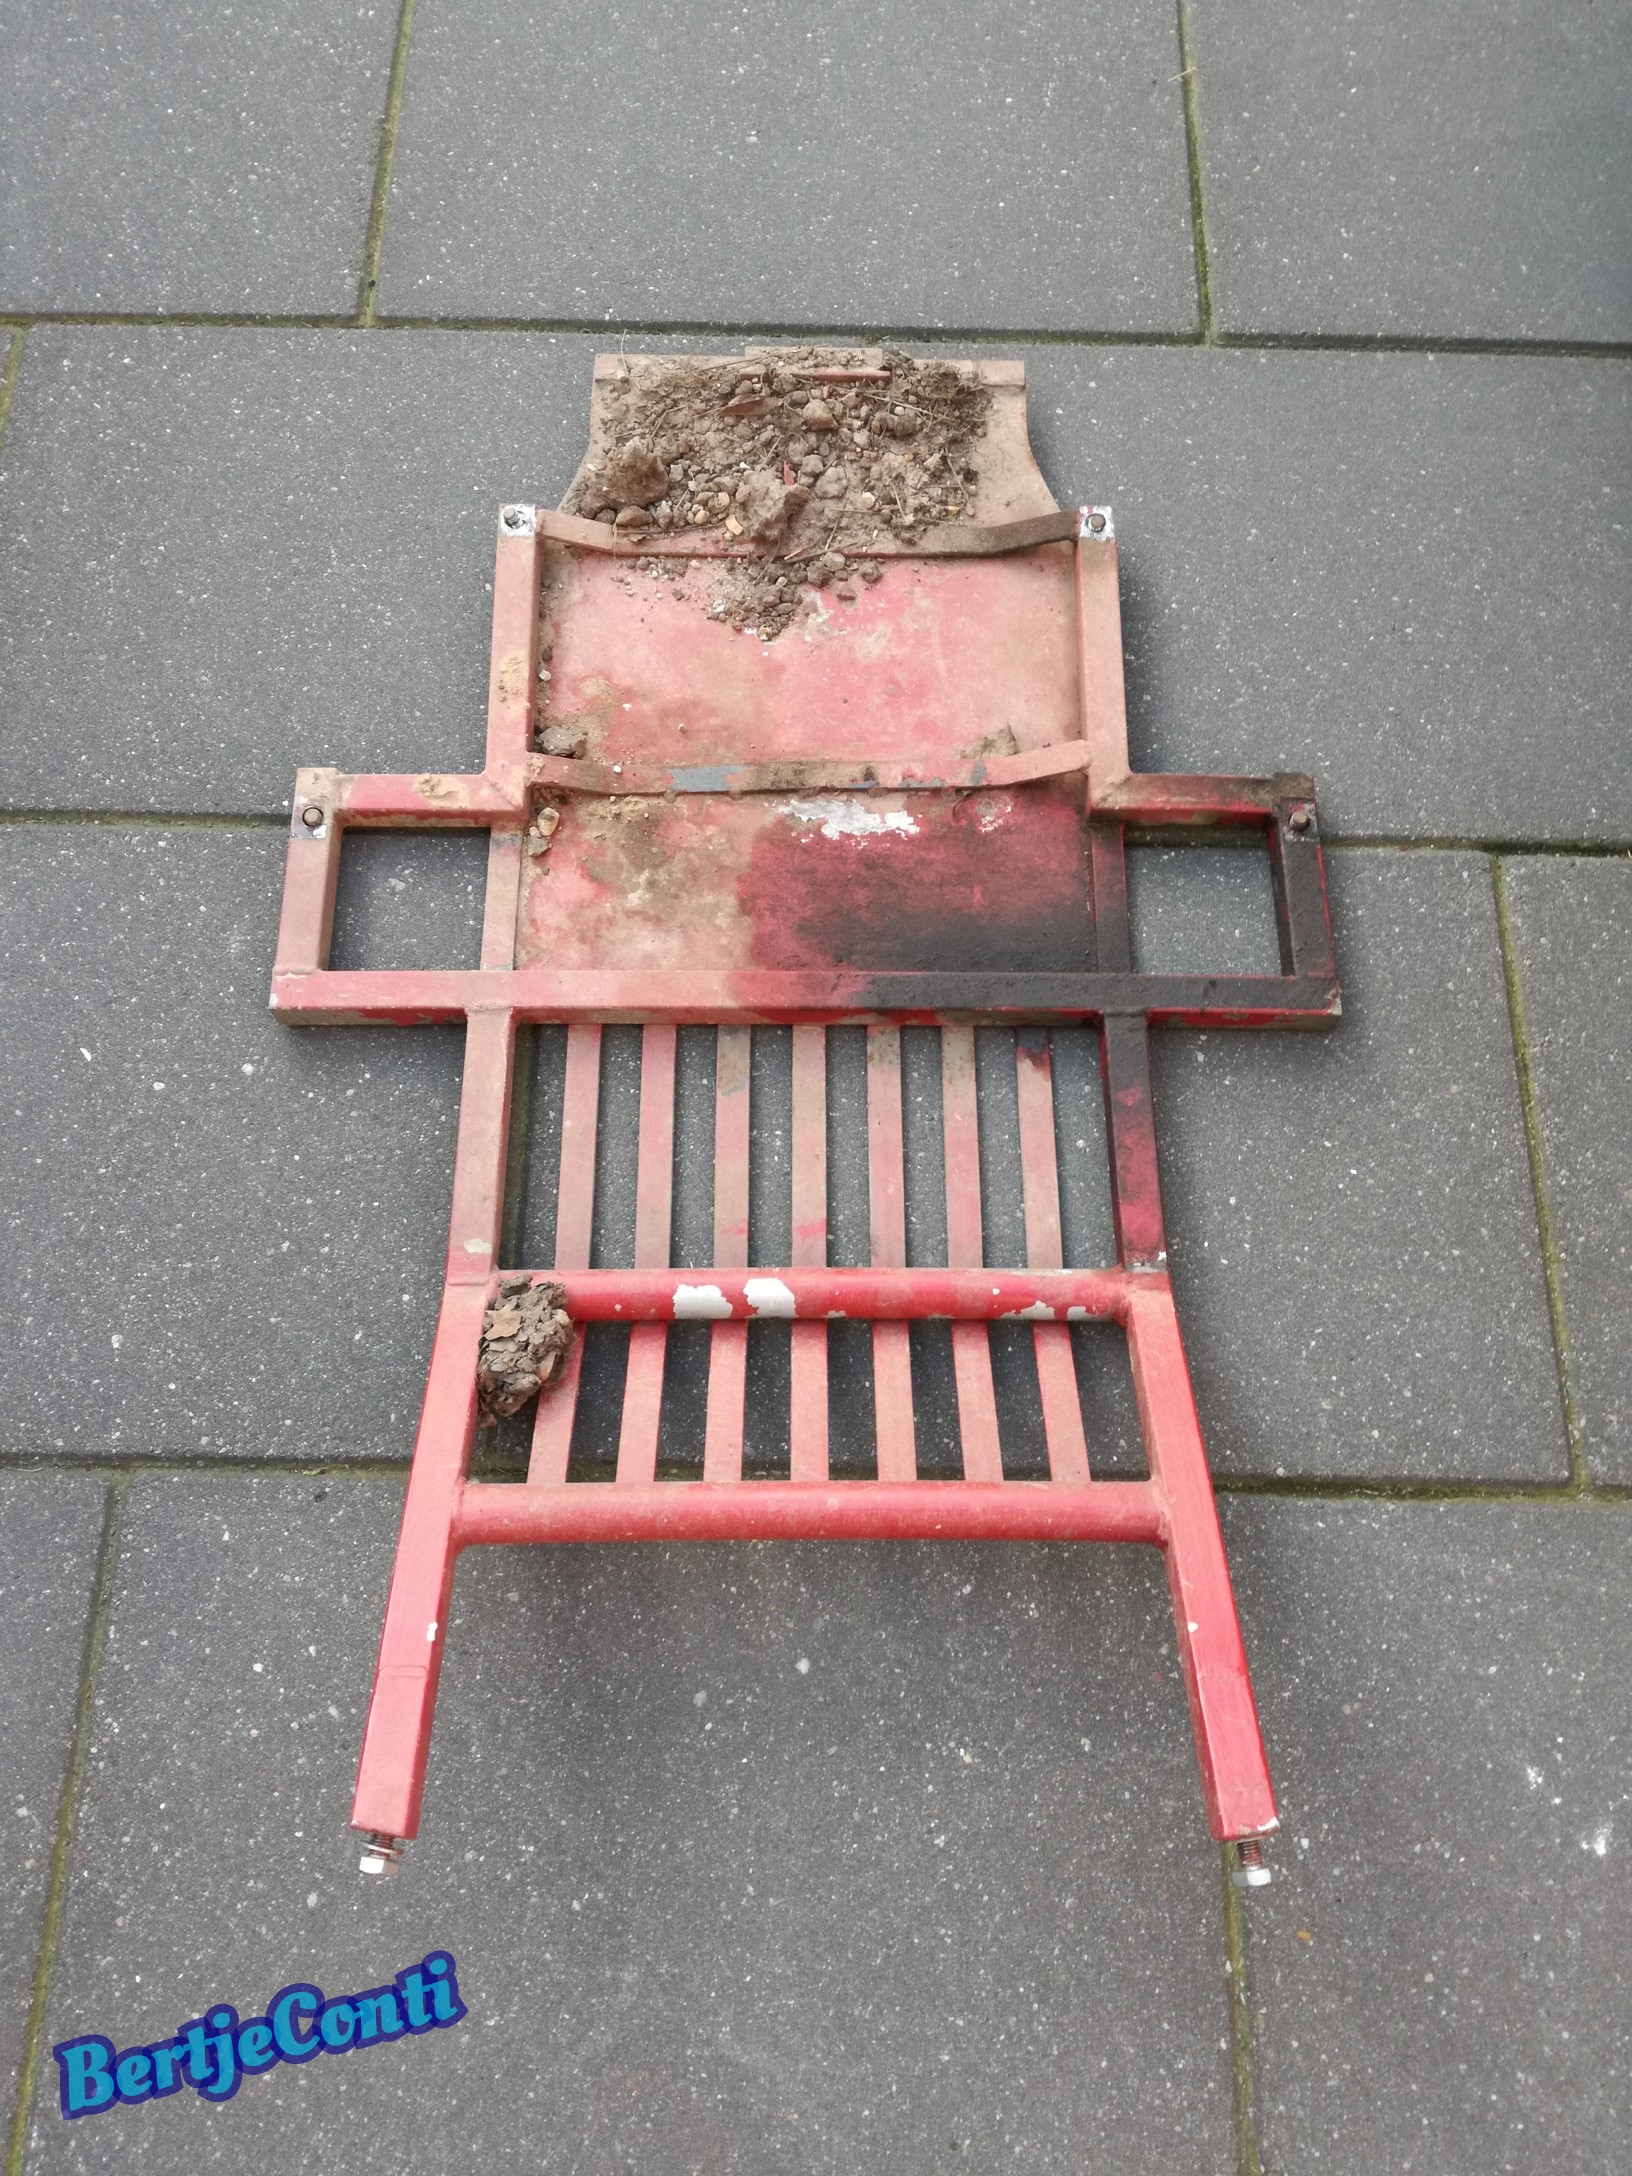
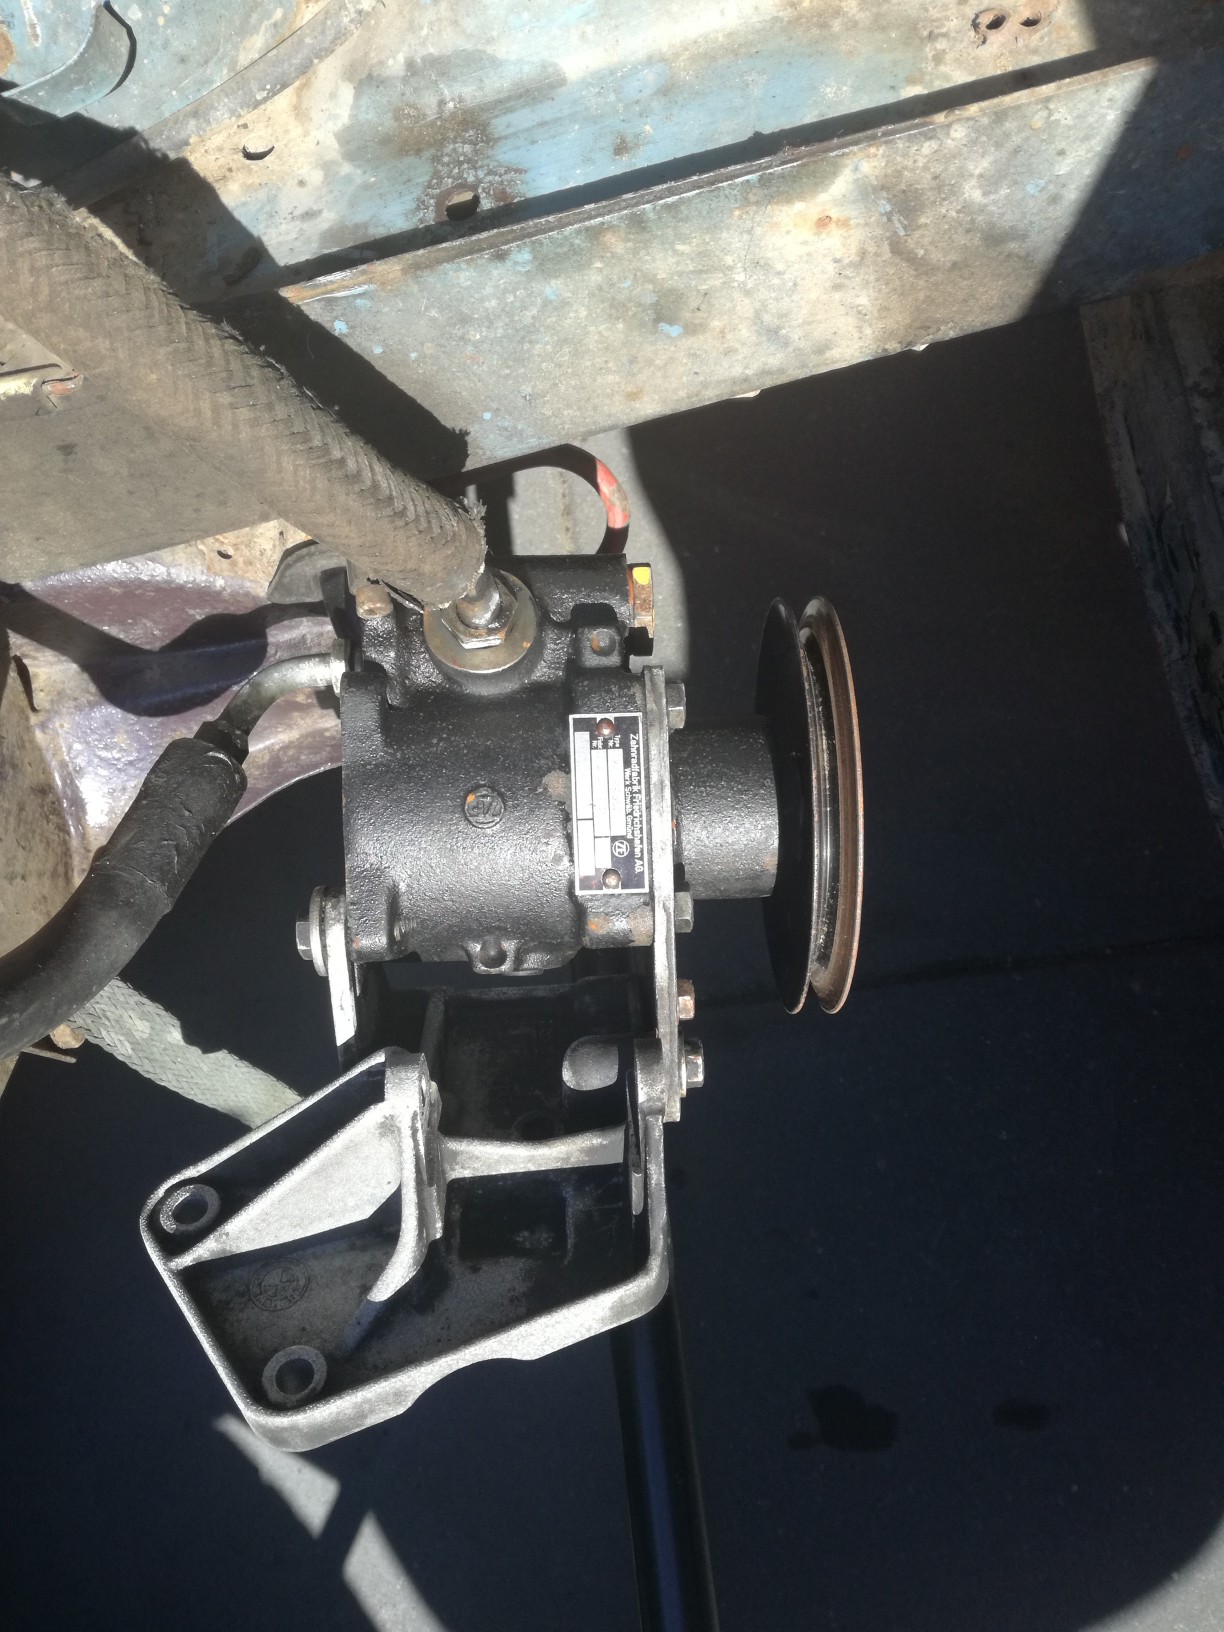
I also took of the sump protector, which was loaded with sand and mud and a oil stain which is from the leaky steering pump. The engine is covered in grease and oil but doesn't leak that much so it's not dripping:
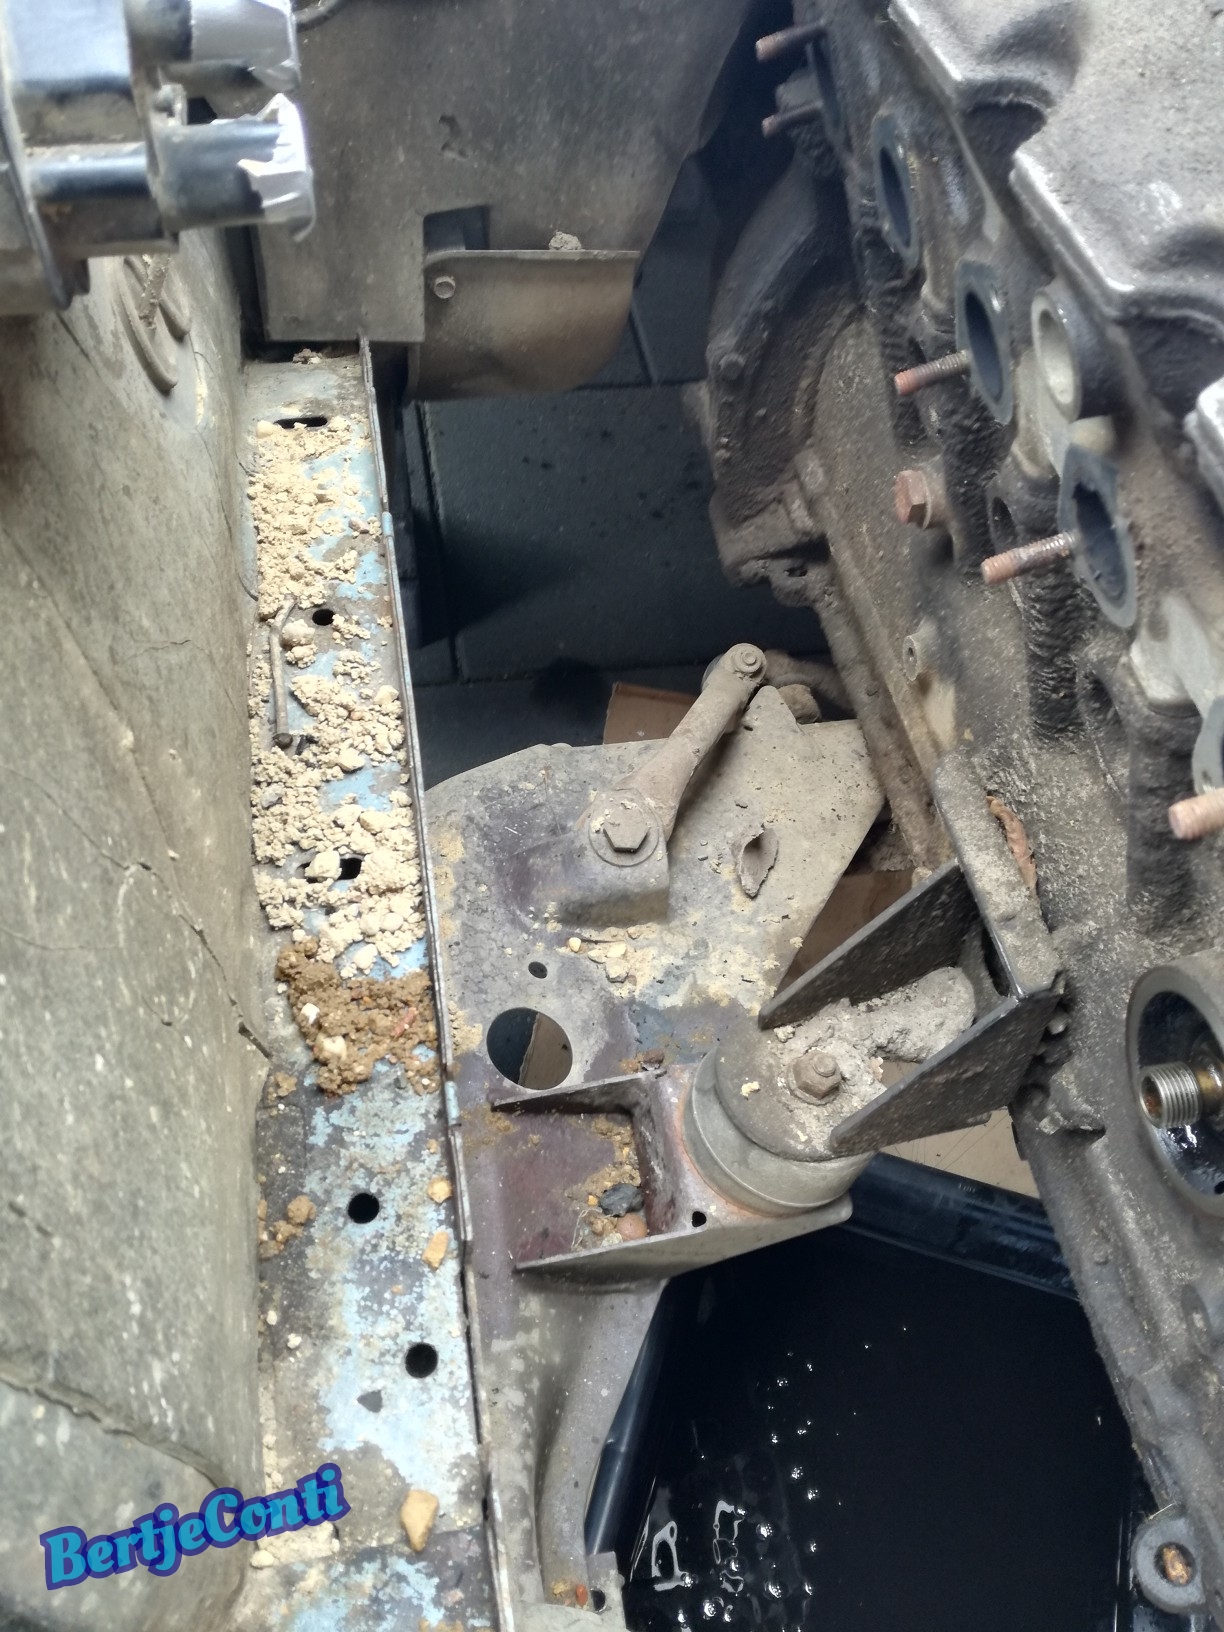
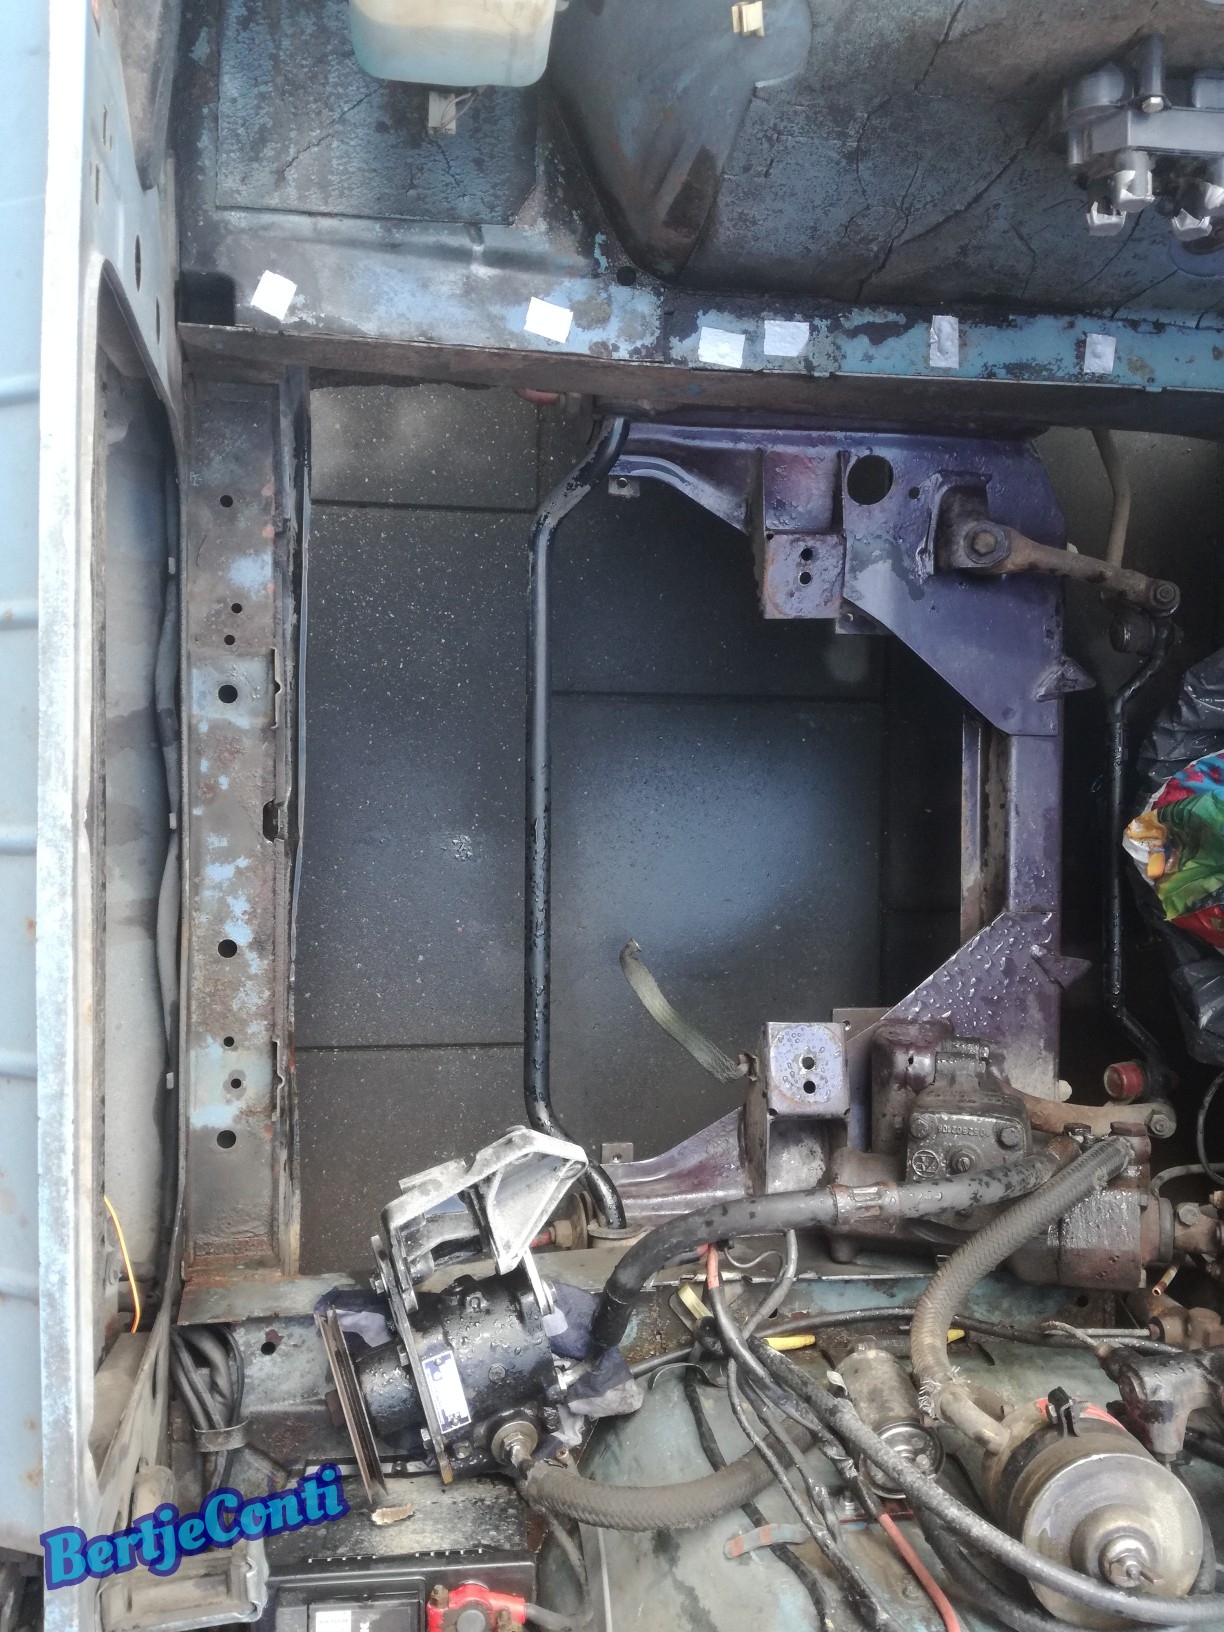
Also lots of mud in the engine compartment, now i'll clean it out:
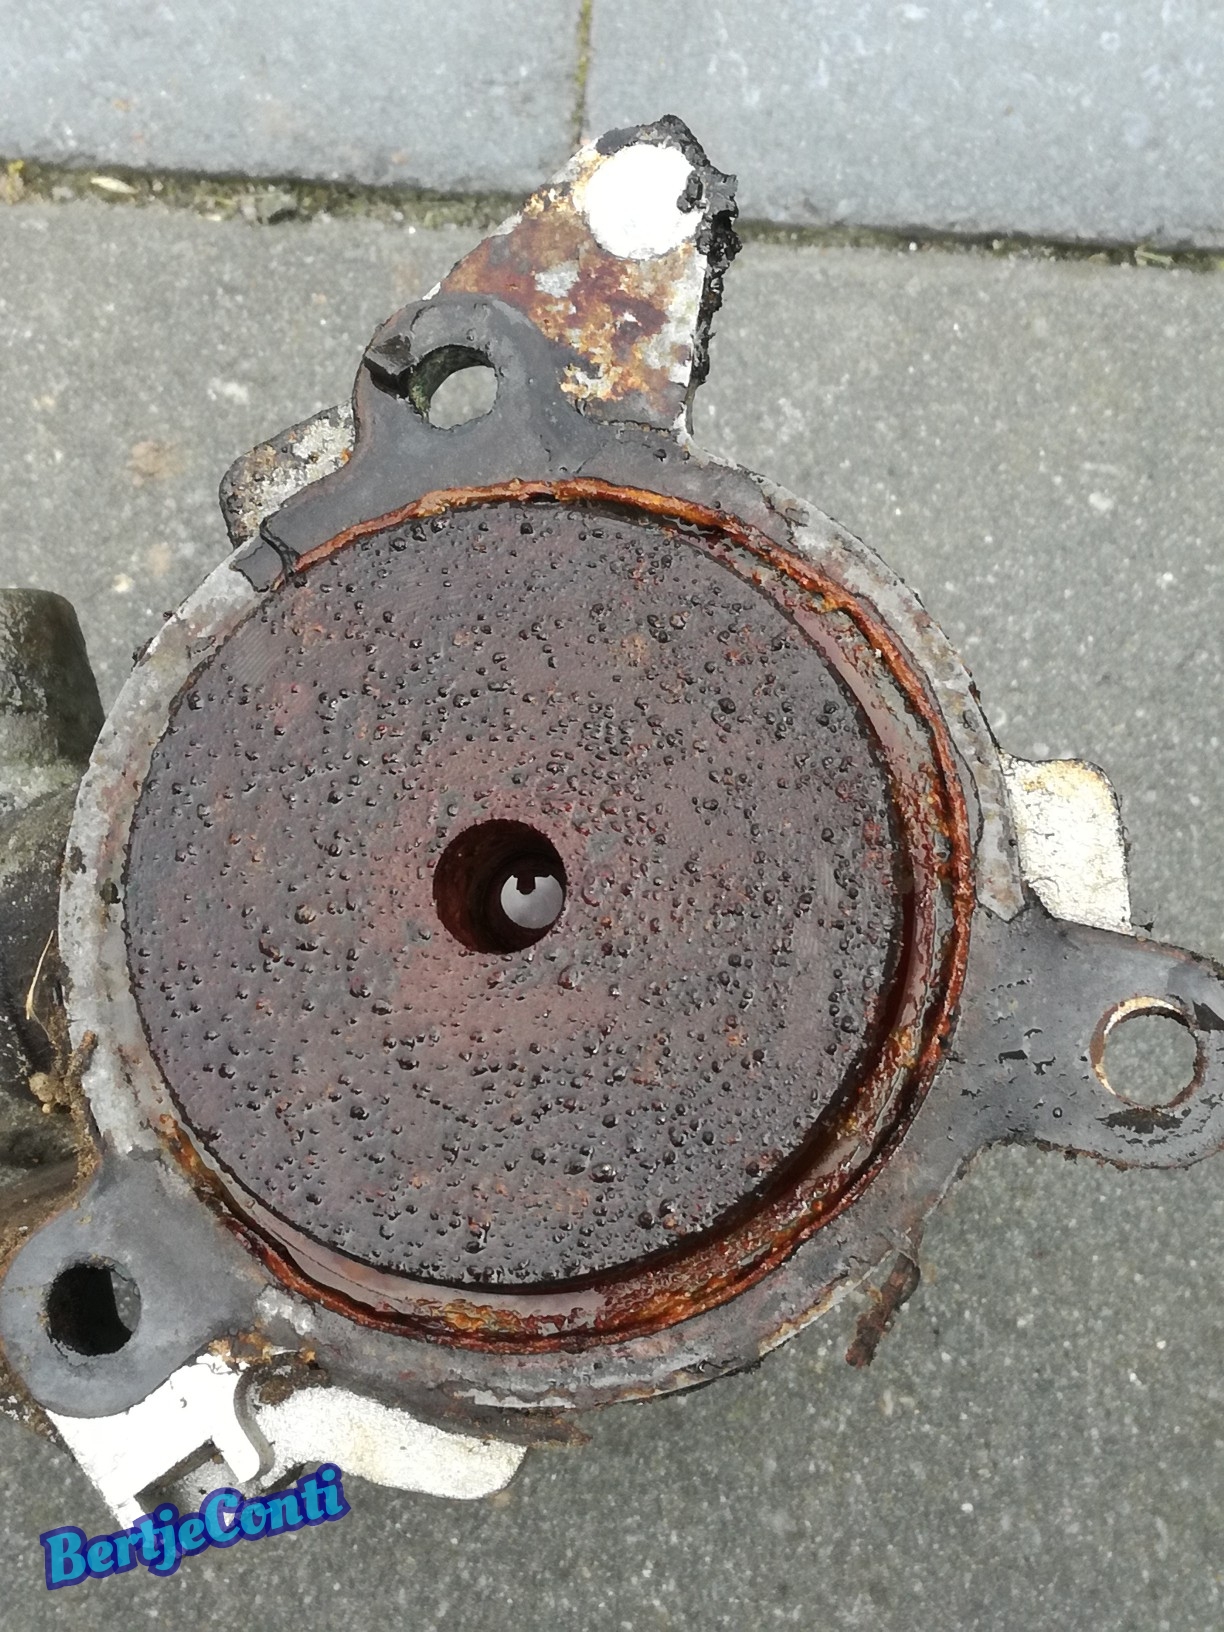
Waterpump gasked needs to be renewed i think, a wonder this one didn't leak already:
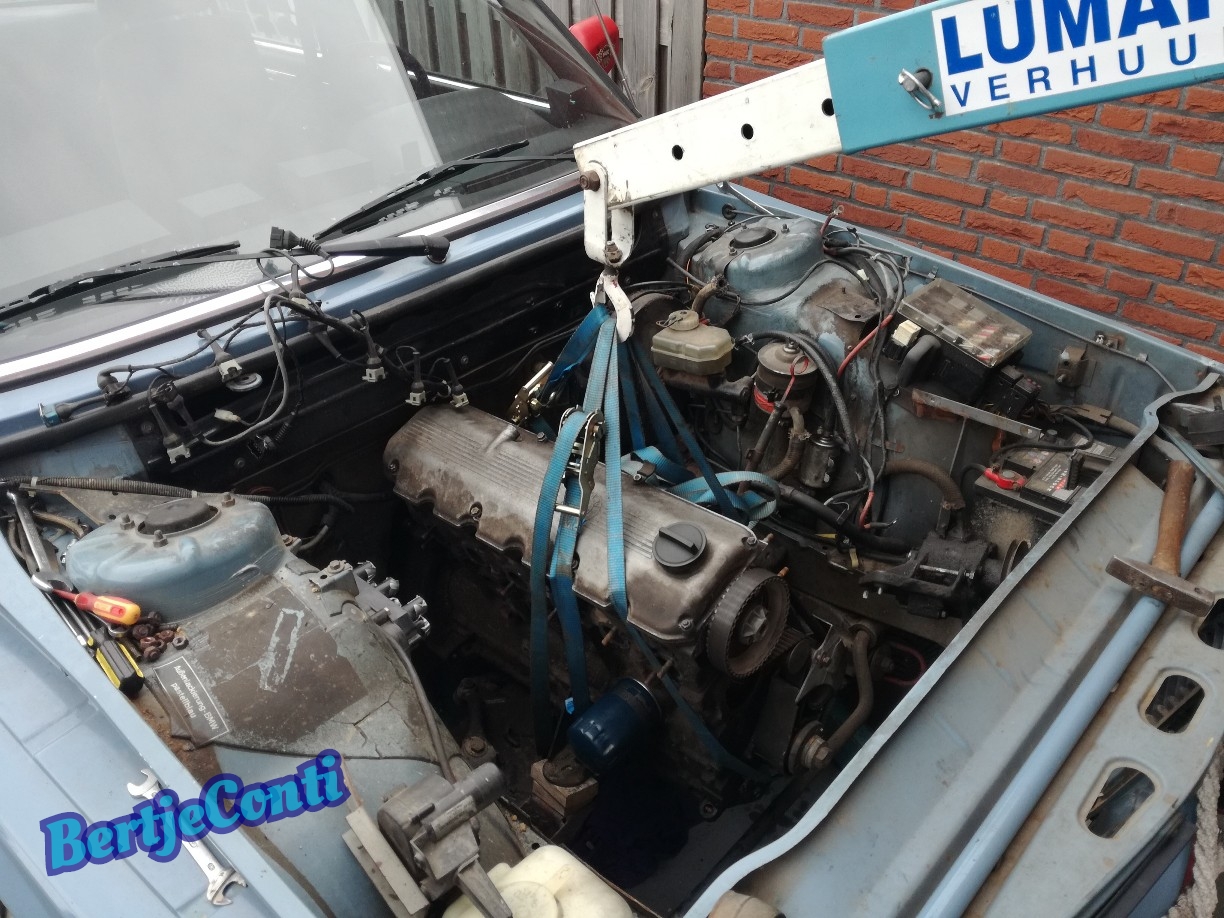
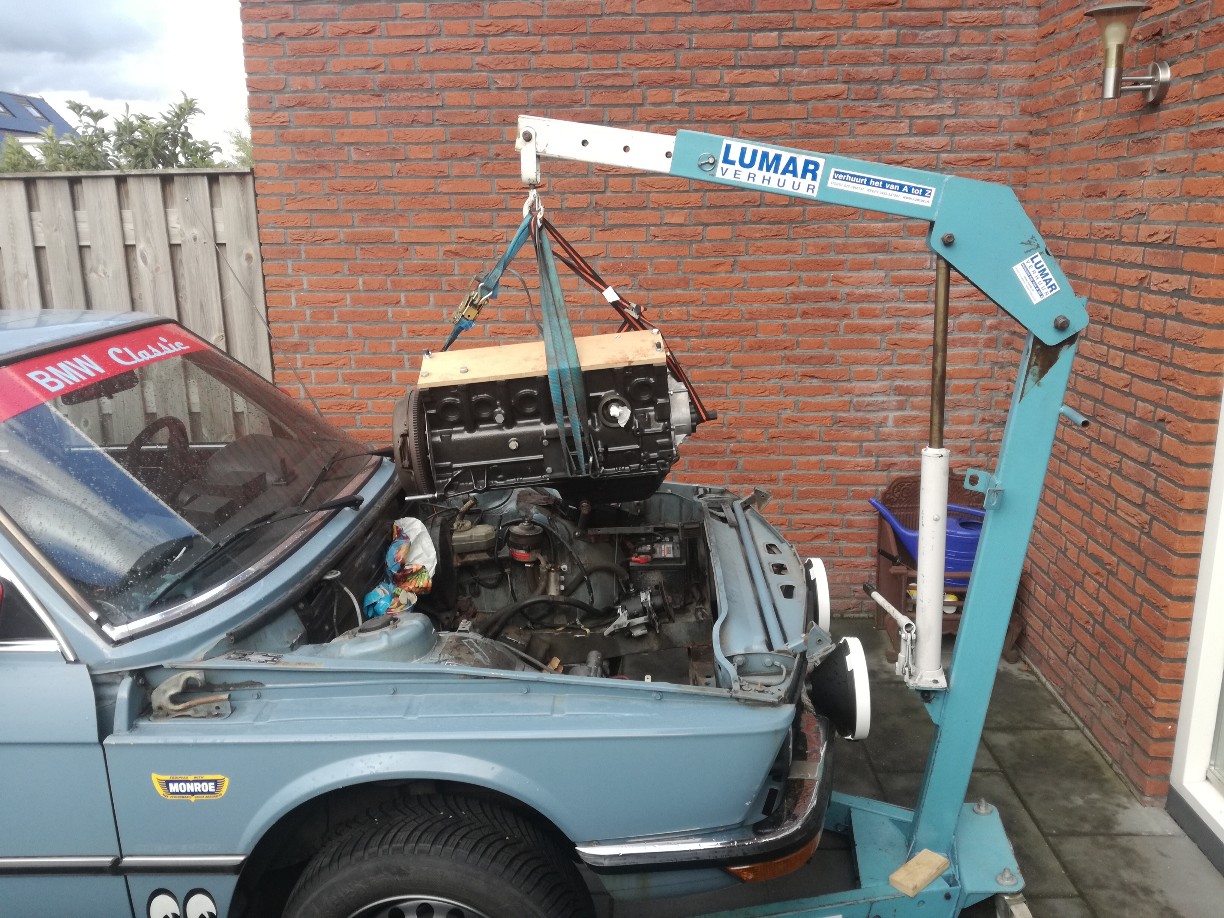
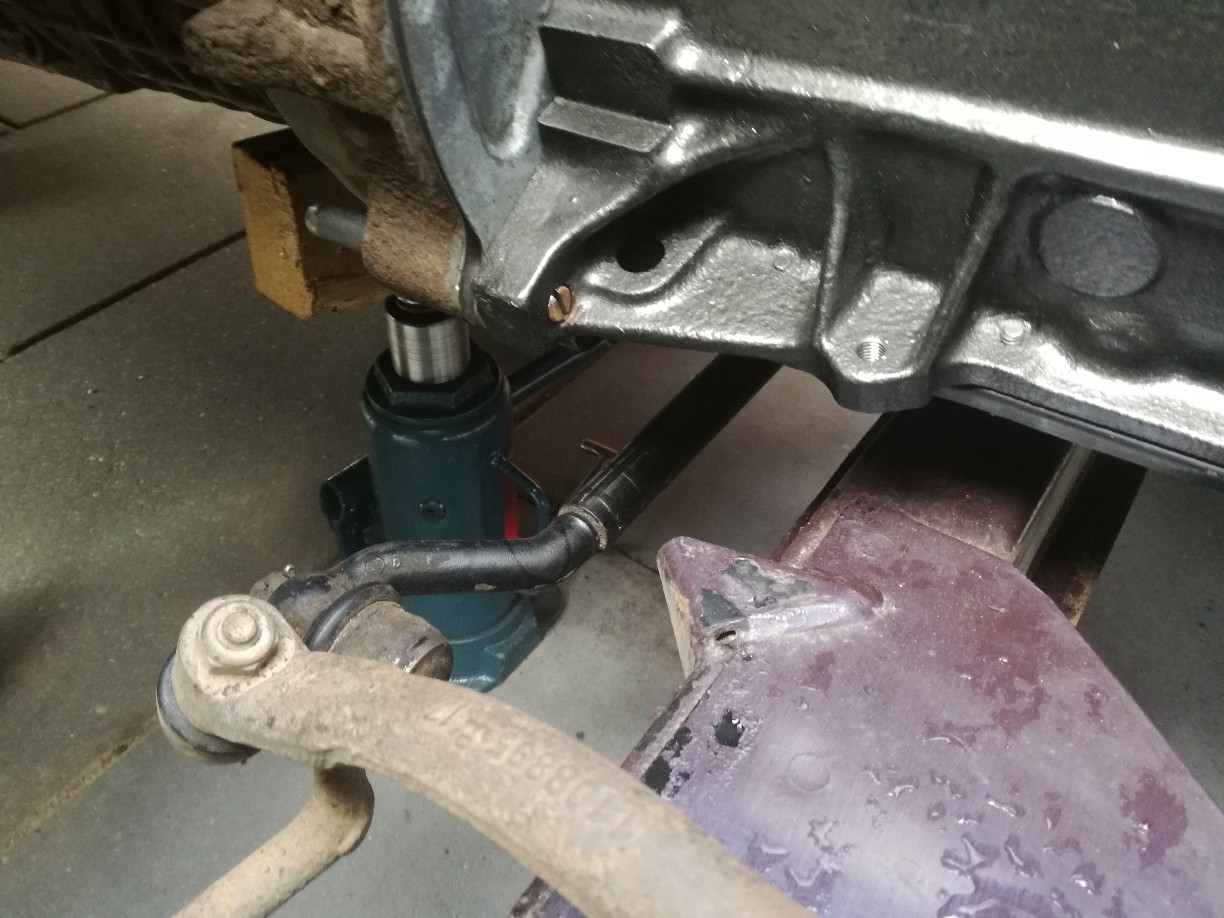
Then it's time lifting the bare engine, because the gearbox stays in, the engine needs to slide forward first, and thar means removing the engine mount silent blocks first.
Trick here is hanging the engine to the hoist it won't tilt ans stays in the right angle.
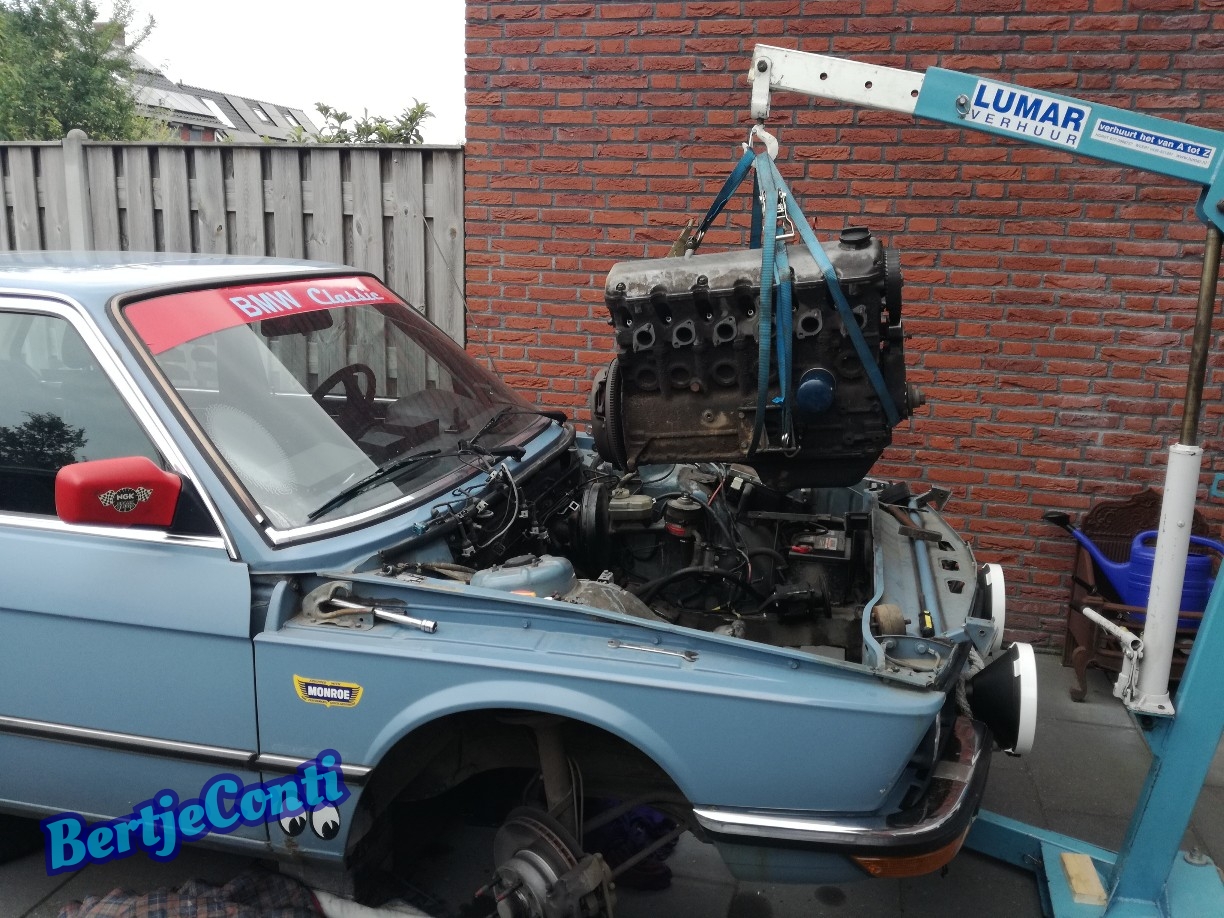
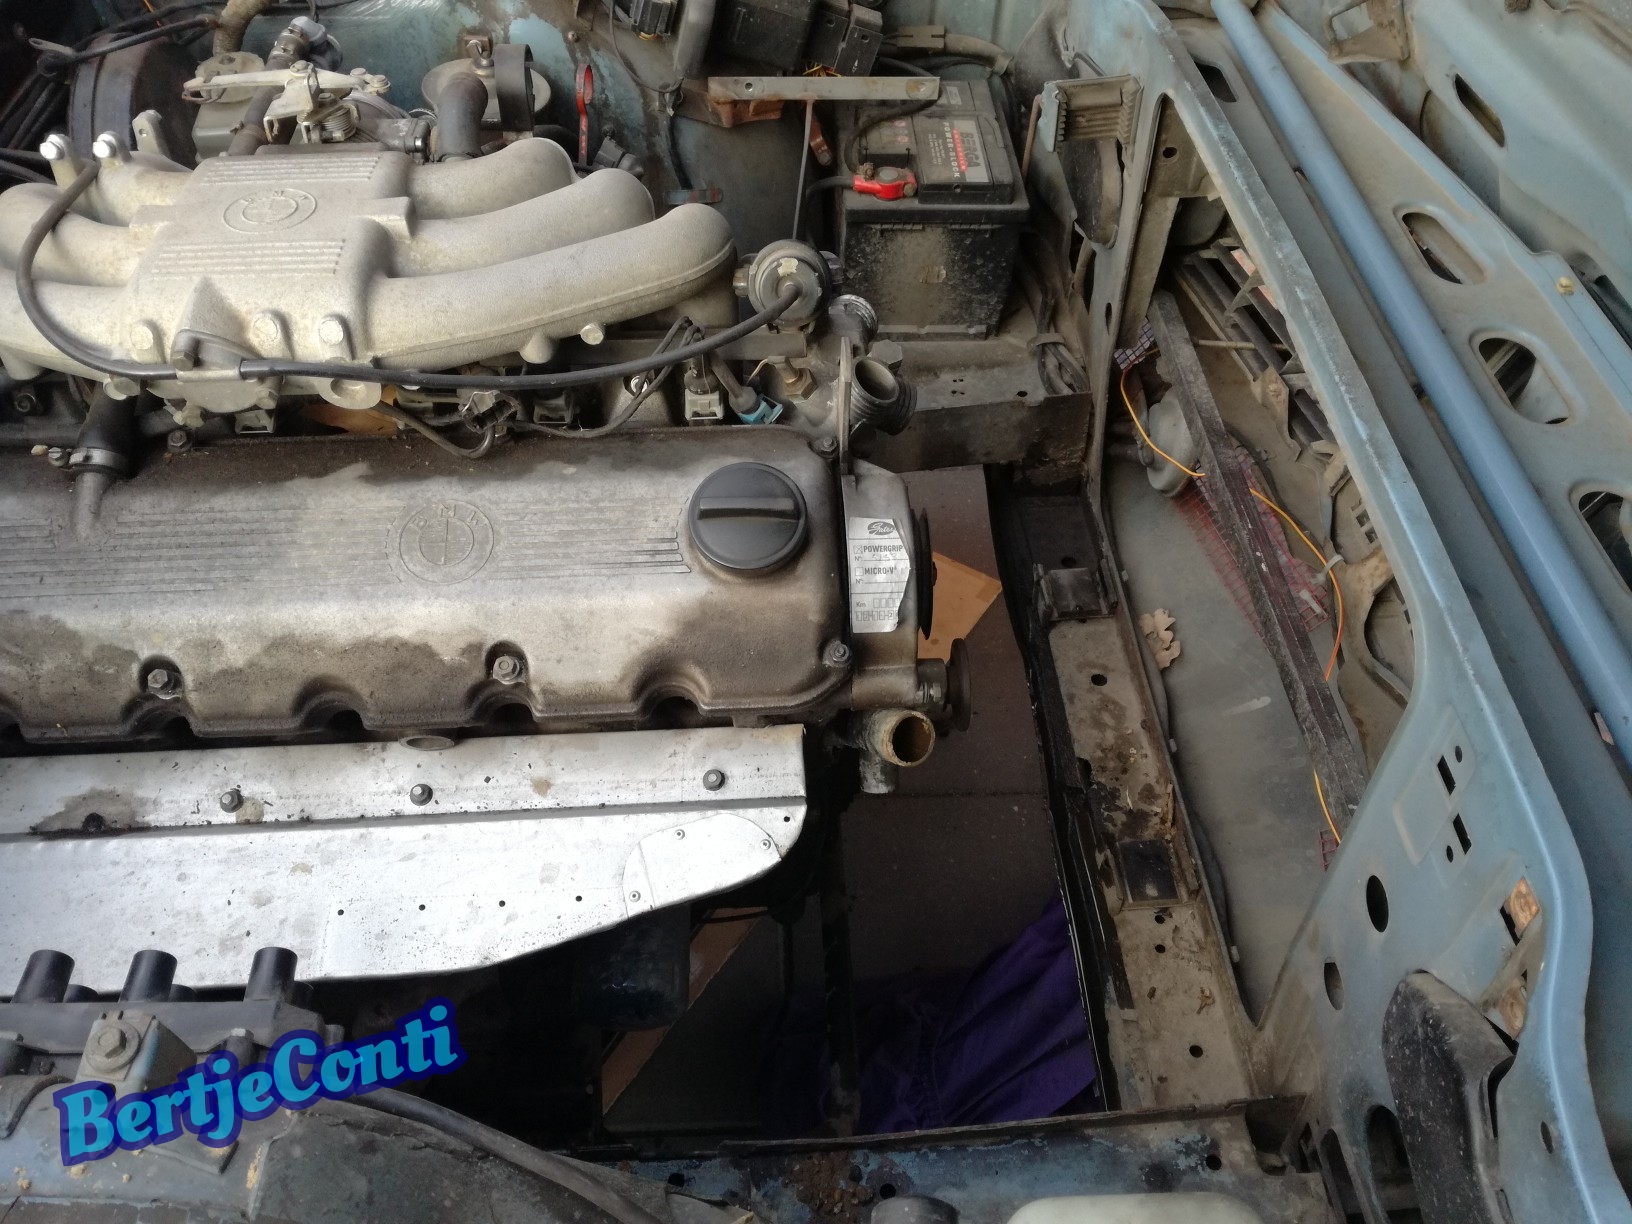
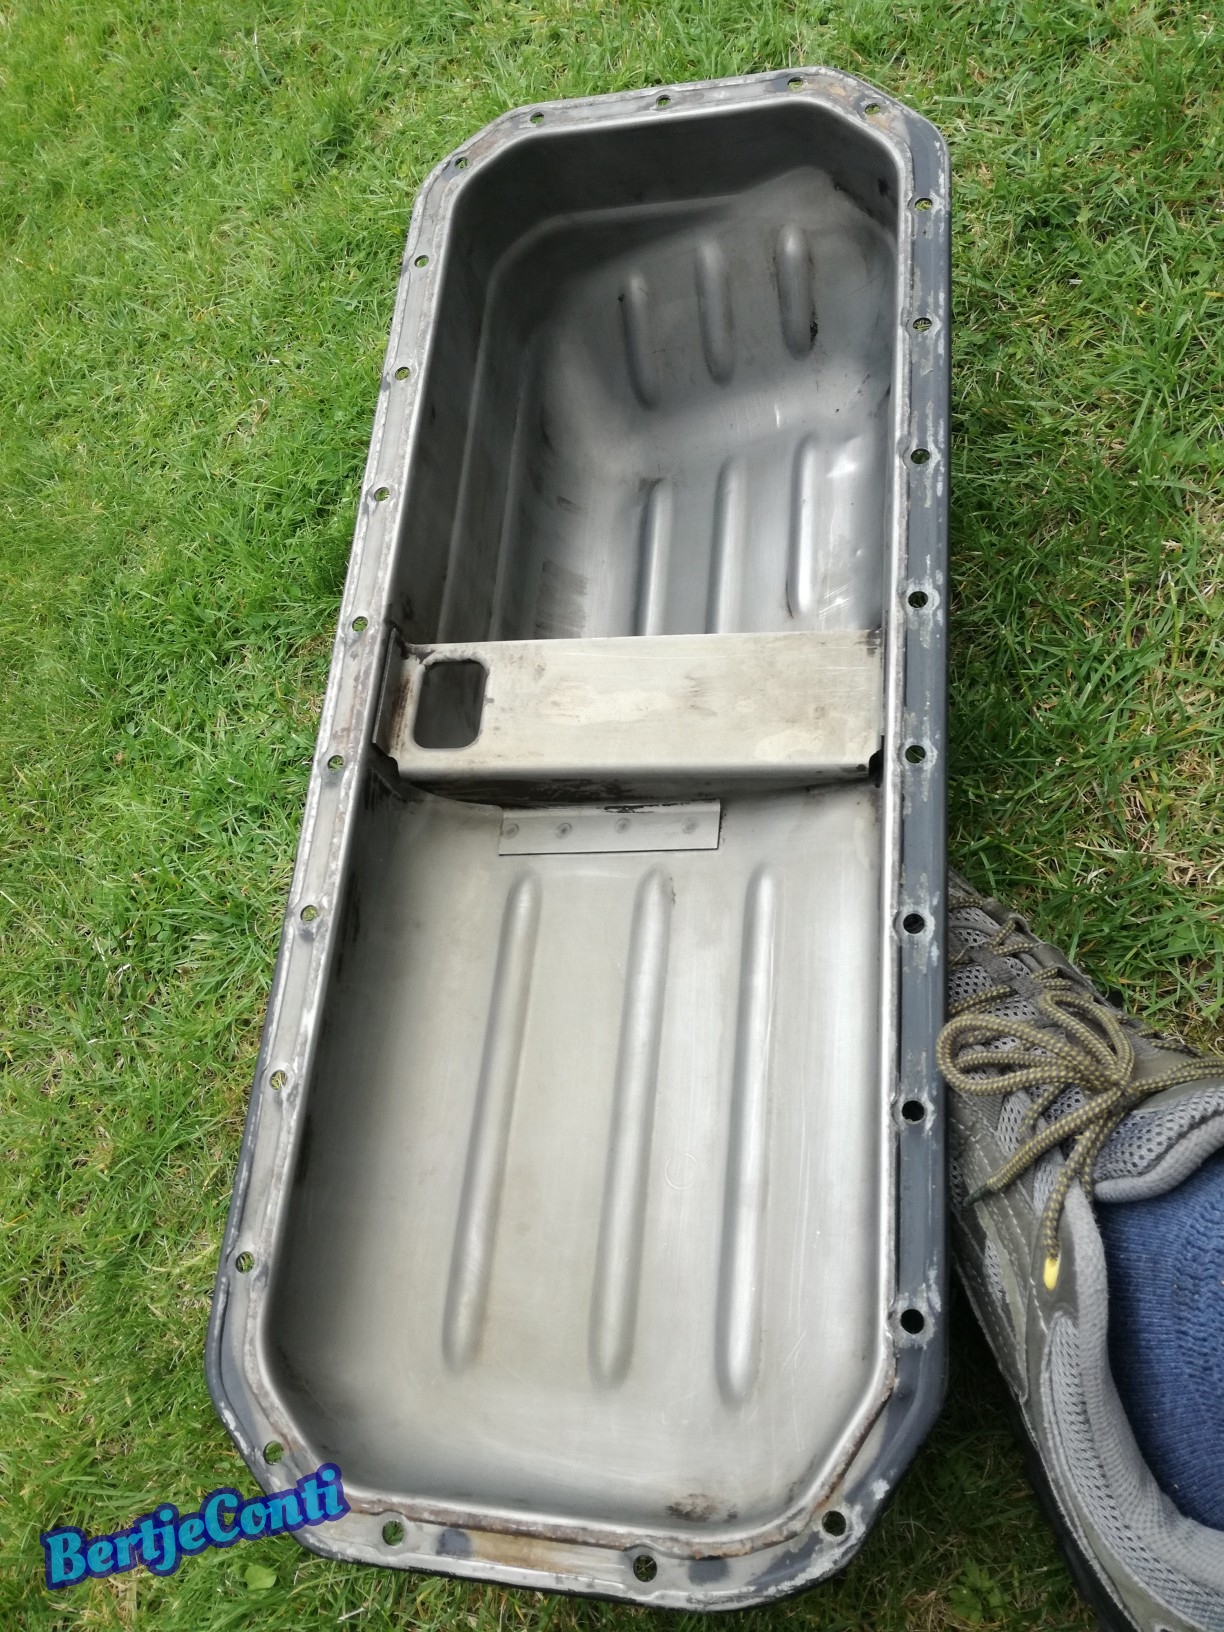
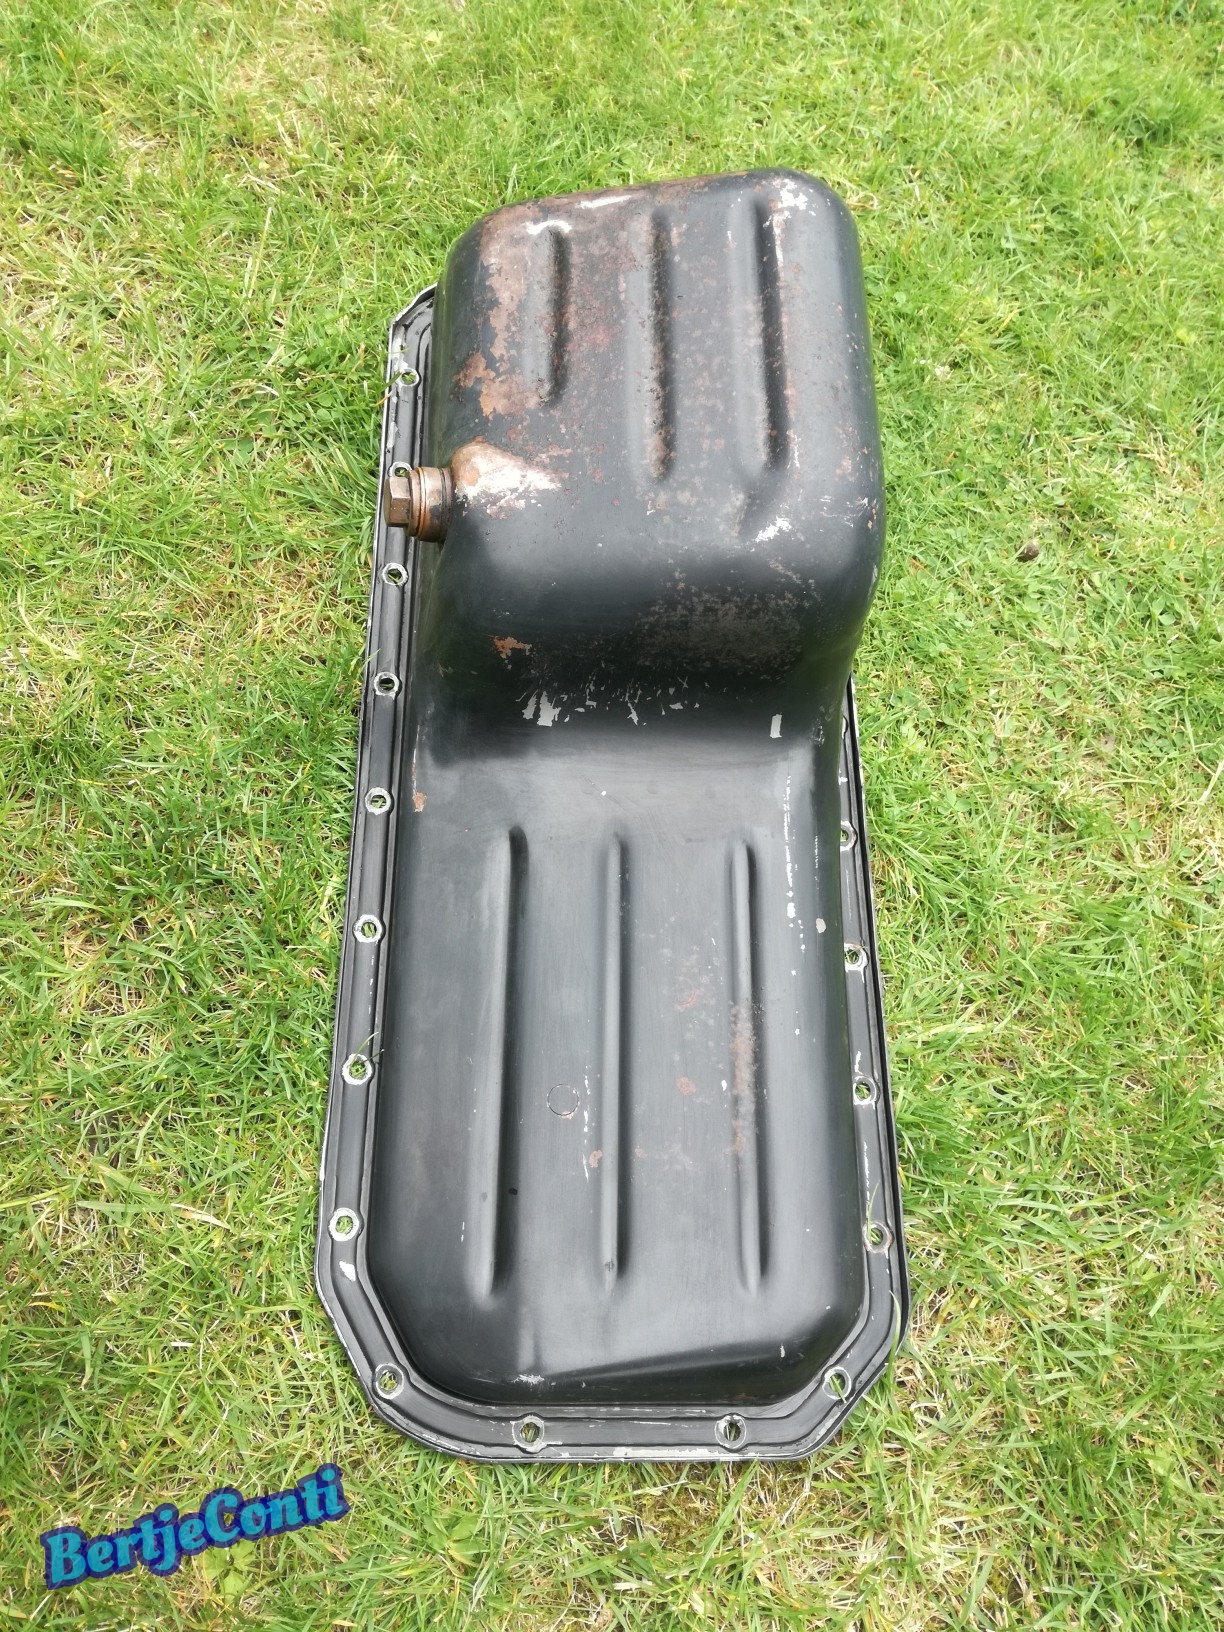
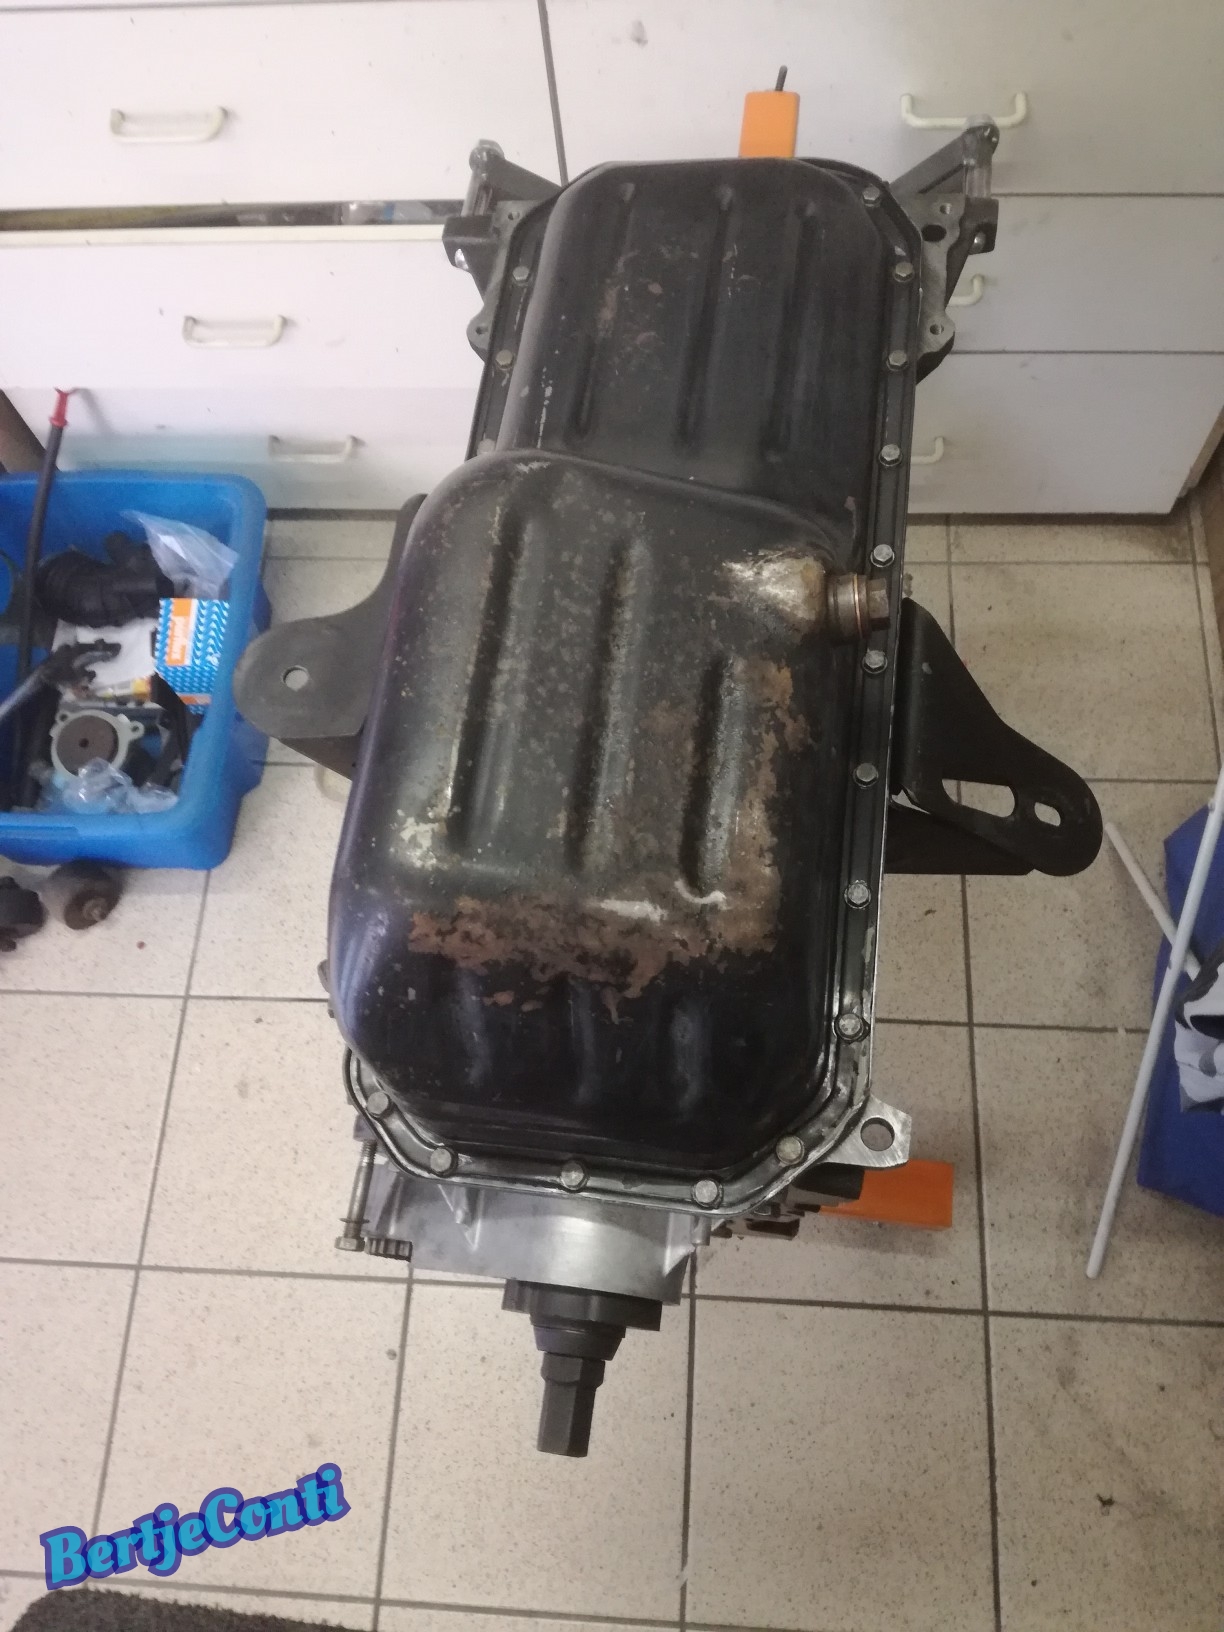
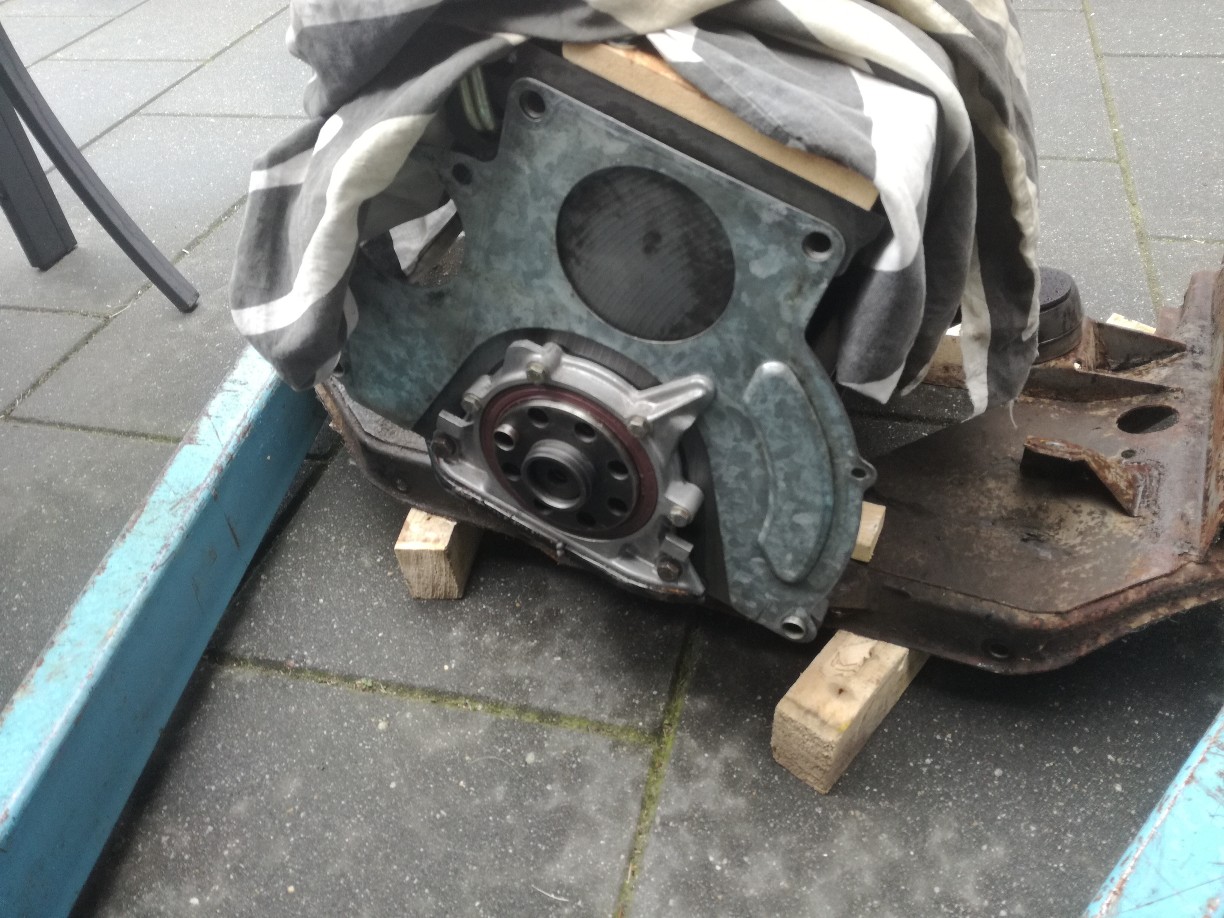
And out the is, the oilpan from the old engine also needs to be swapped, because the E30 oilpan, which is on the new engine, won't fit between the E12 subframe, more cleaning work ahead:
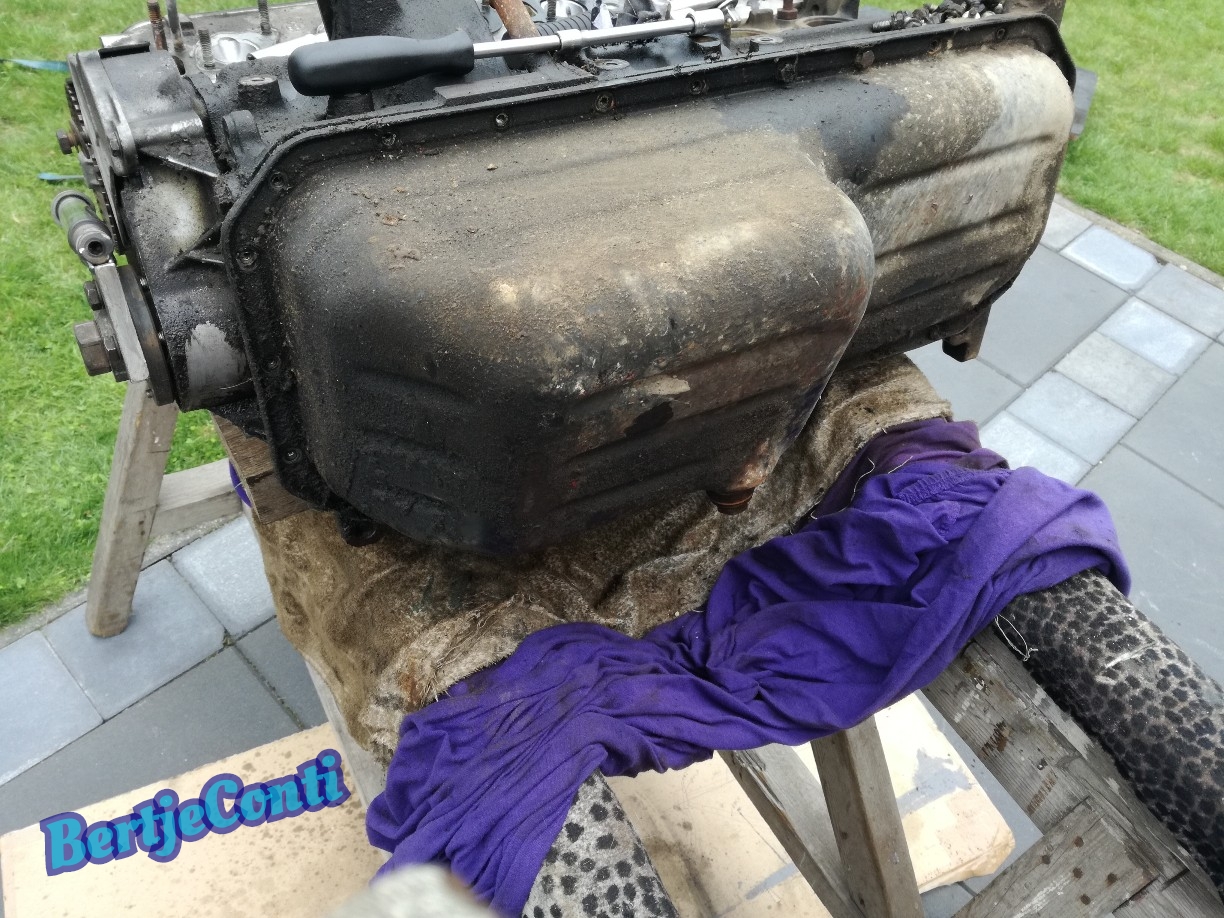
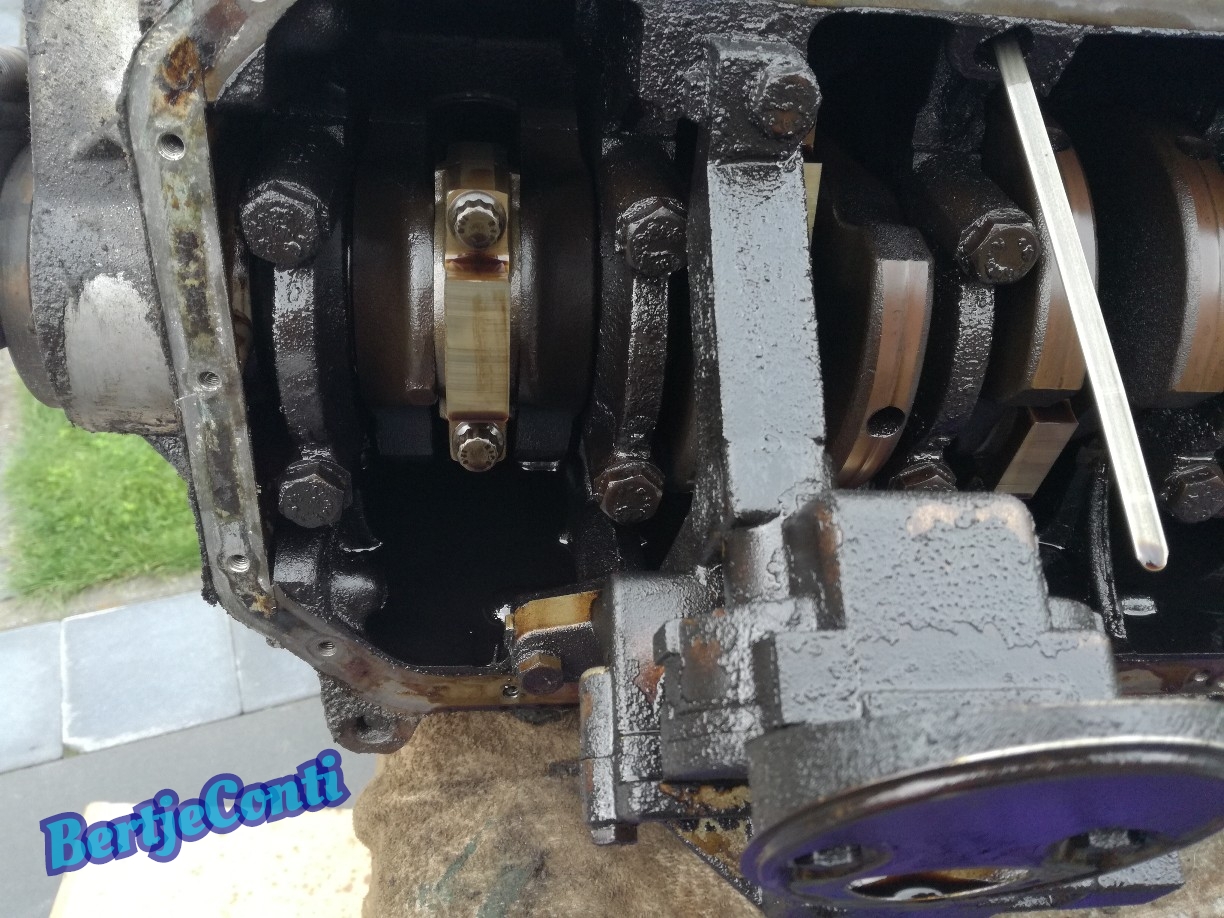
a sneak peek into the old engine, much of carbon and other muck there:
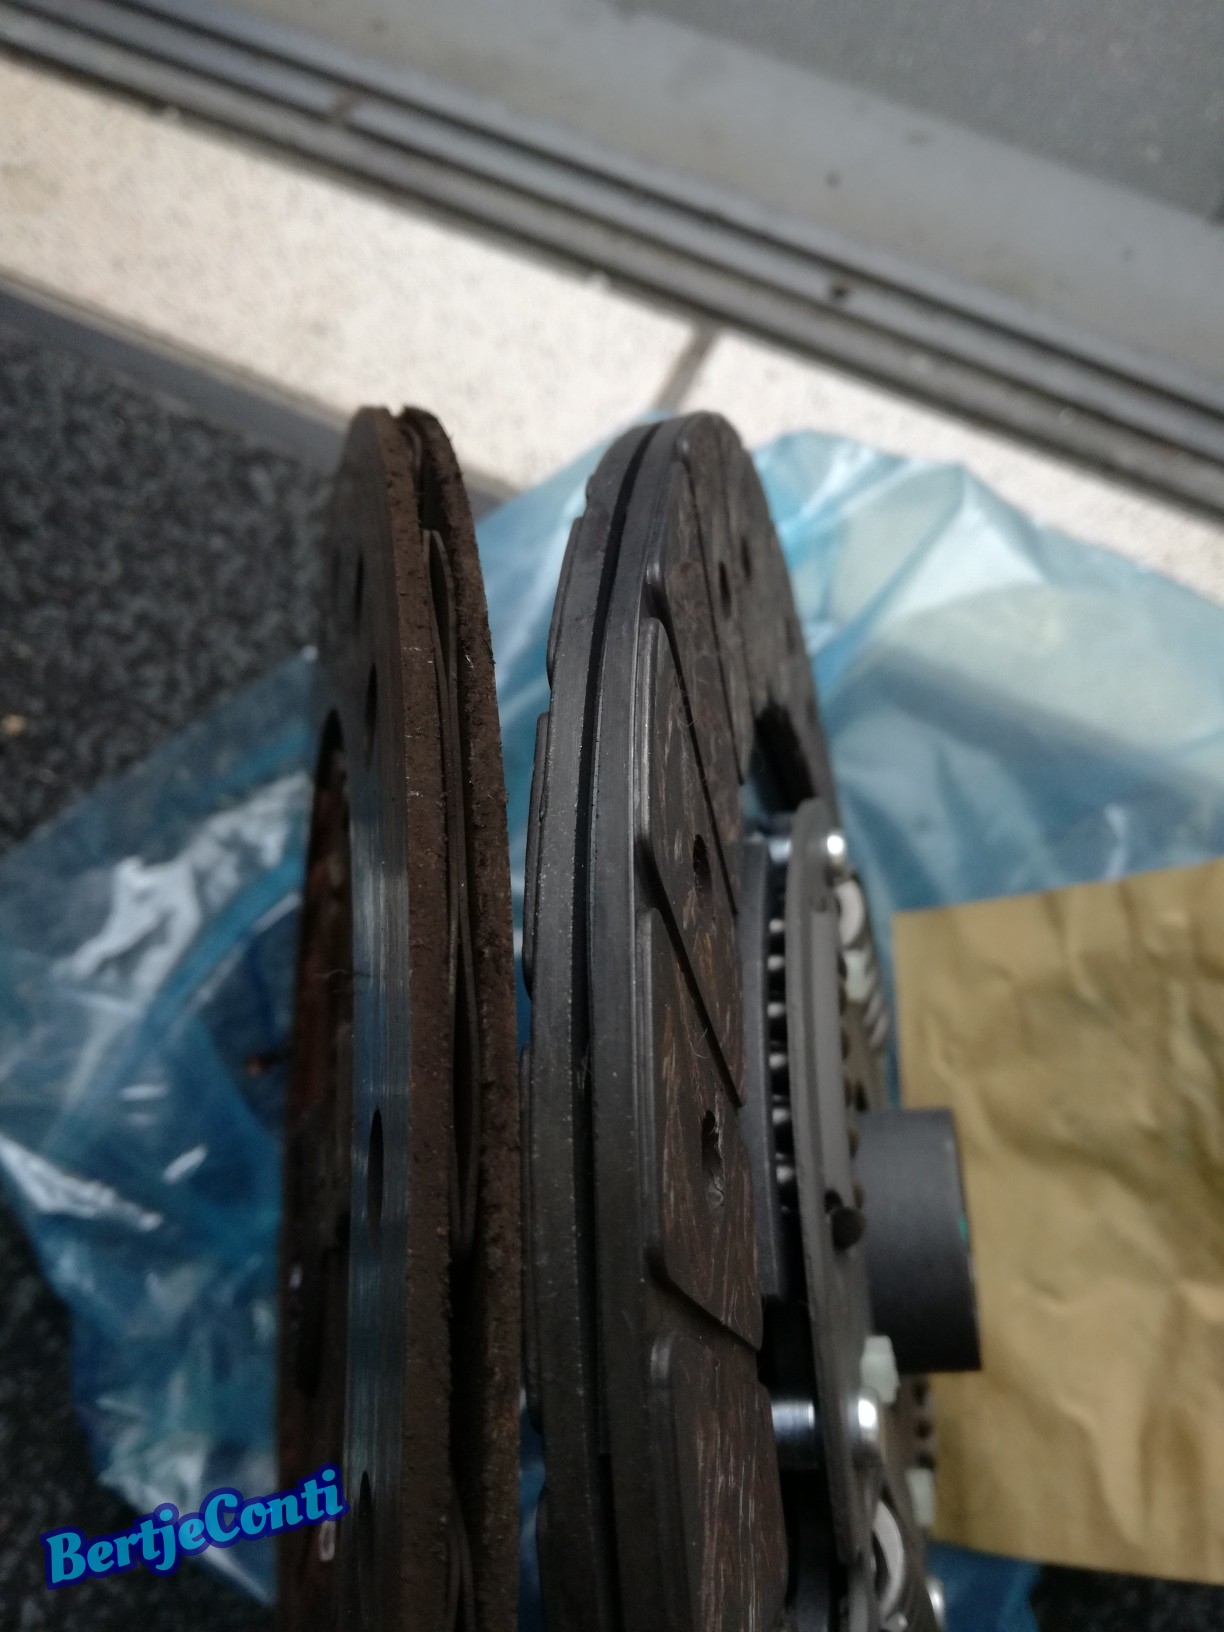
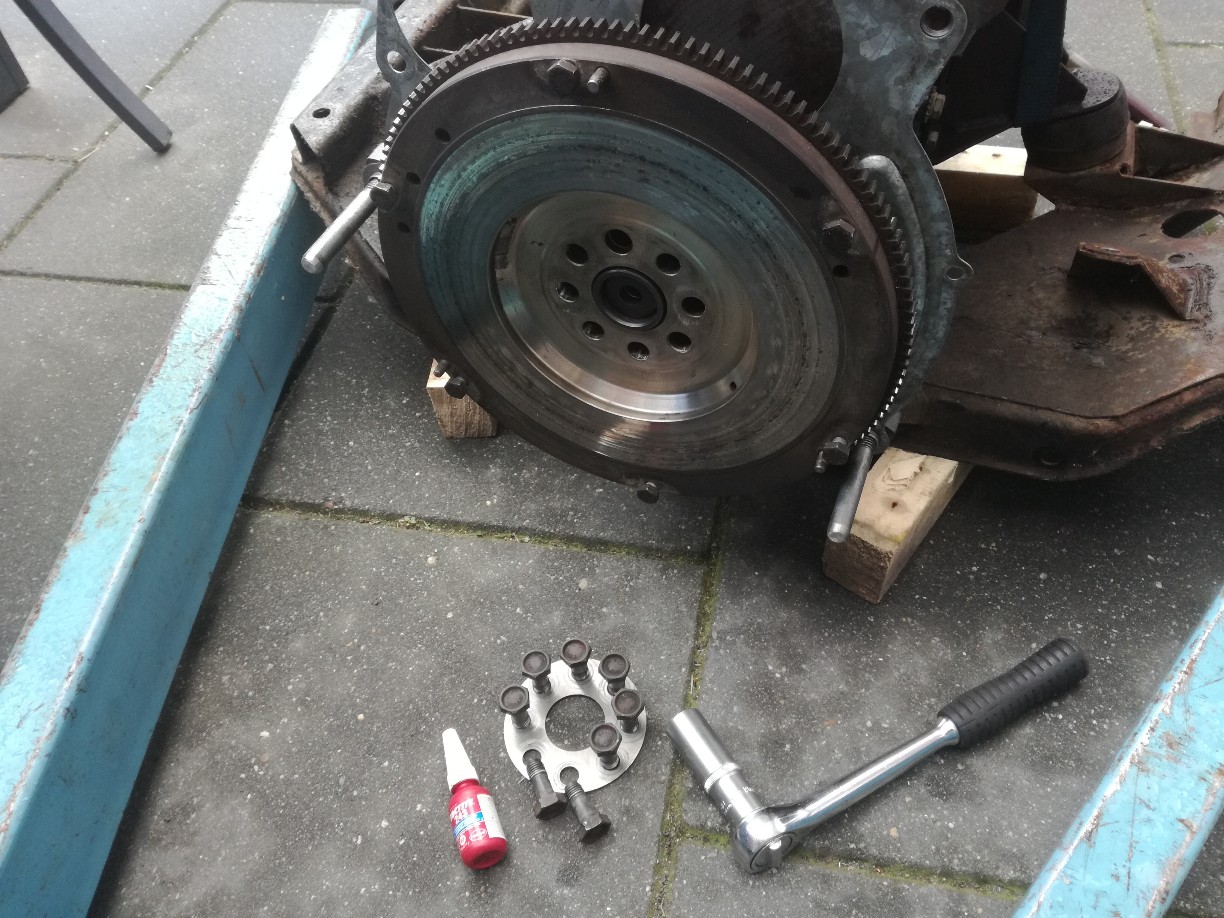
Flywheel also needs to be swapped, and (ofcourse) i'll install a new clutch, as seen on the picture below the old clutch was verry worn, and if i didn't swap the engine now it wouldn't be long until a clutch failure:
Cleaned the oilpan which isn't in a bad shape:
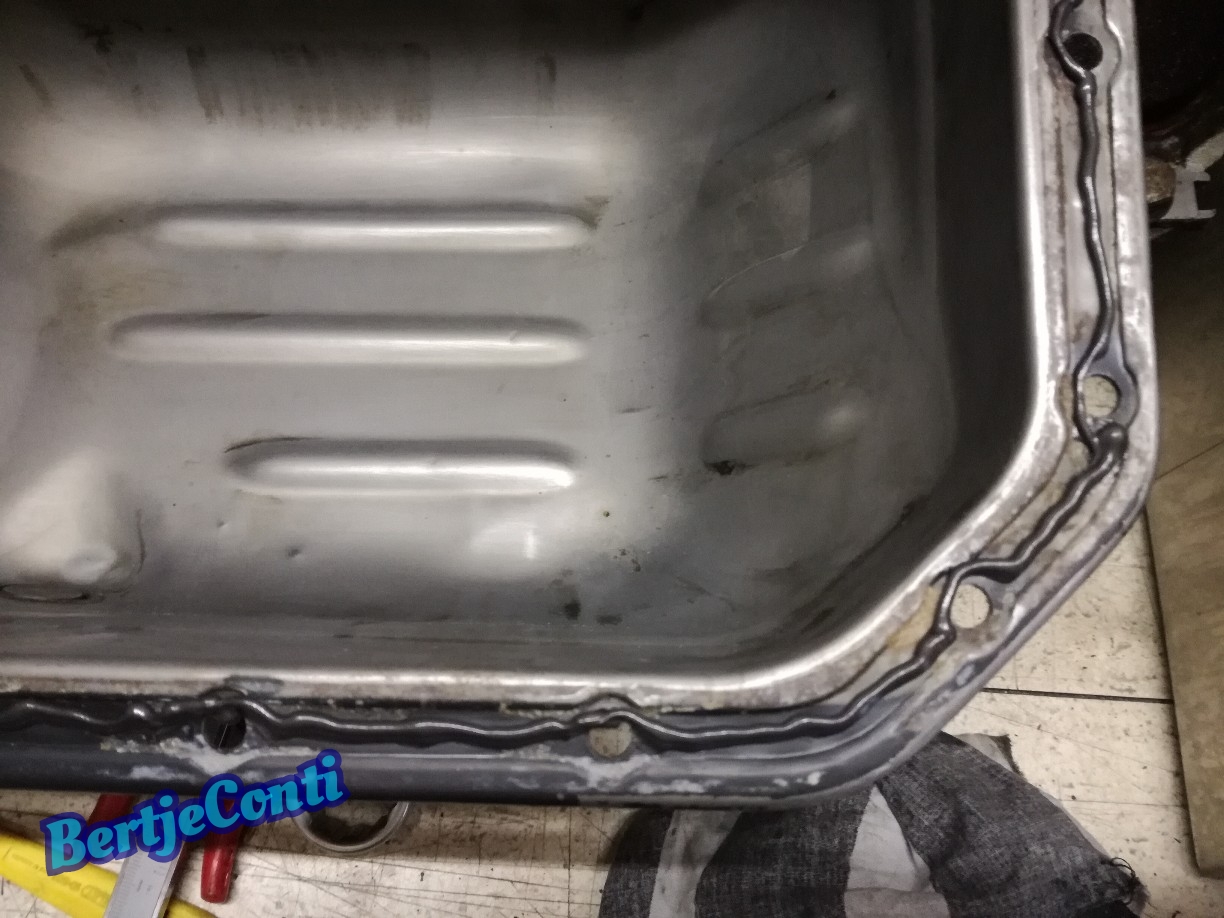
Mounted the oilpan to the new engine with a dot Curil-T sealing compound as the manual discribes:
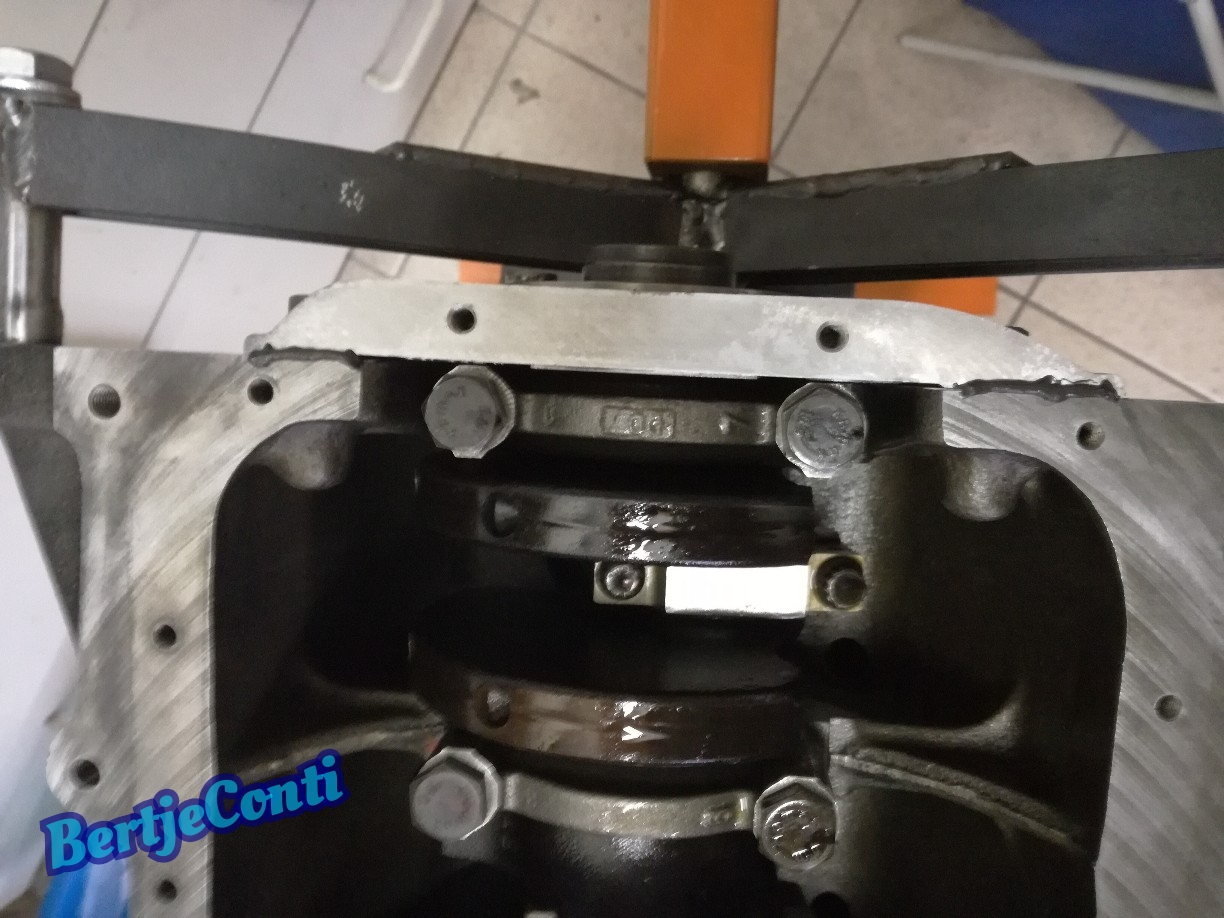
I also used this sealing compound on the oilpan-gasket mating surface because this surface isn't flat al all, this pan is made of sheet metal.
and torqued all M6 bolts to spec:
Cleaned the engine bay, and drilled out a broken M6 bolt in the bell housing:
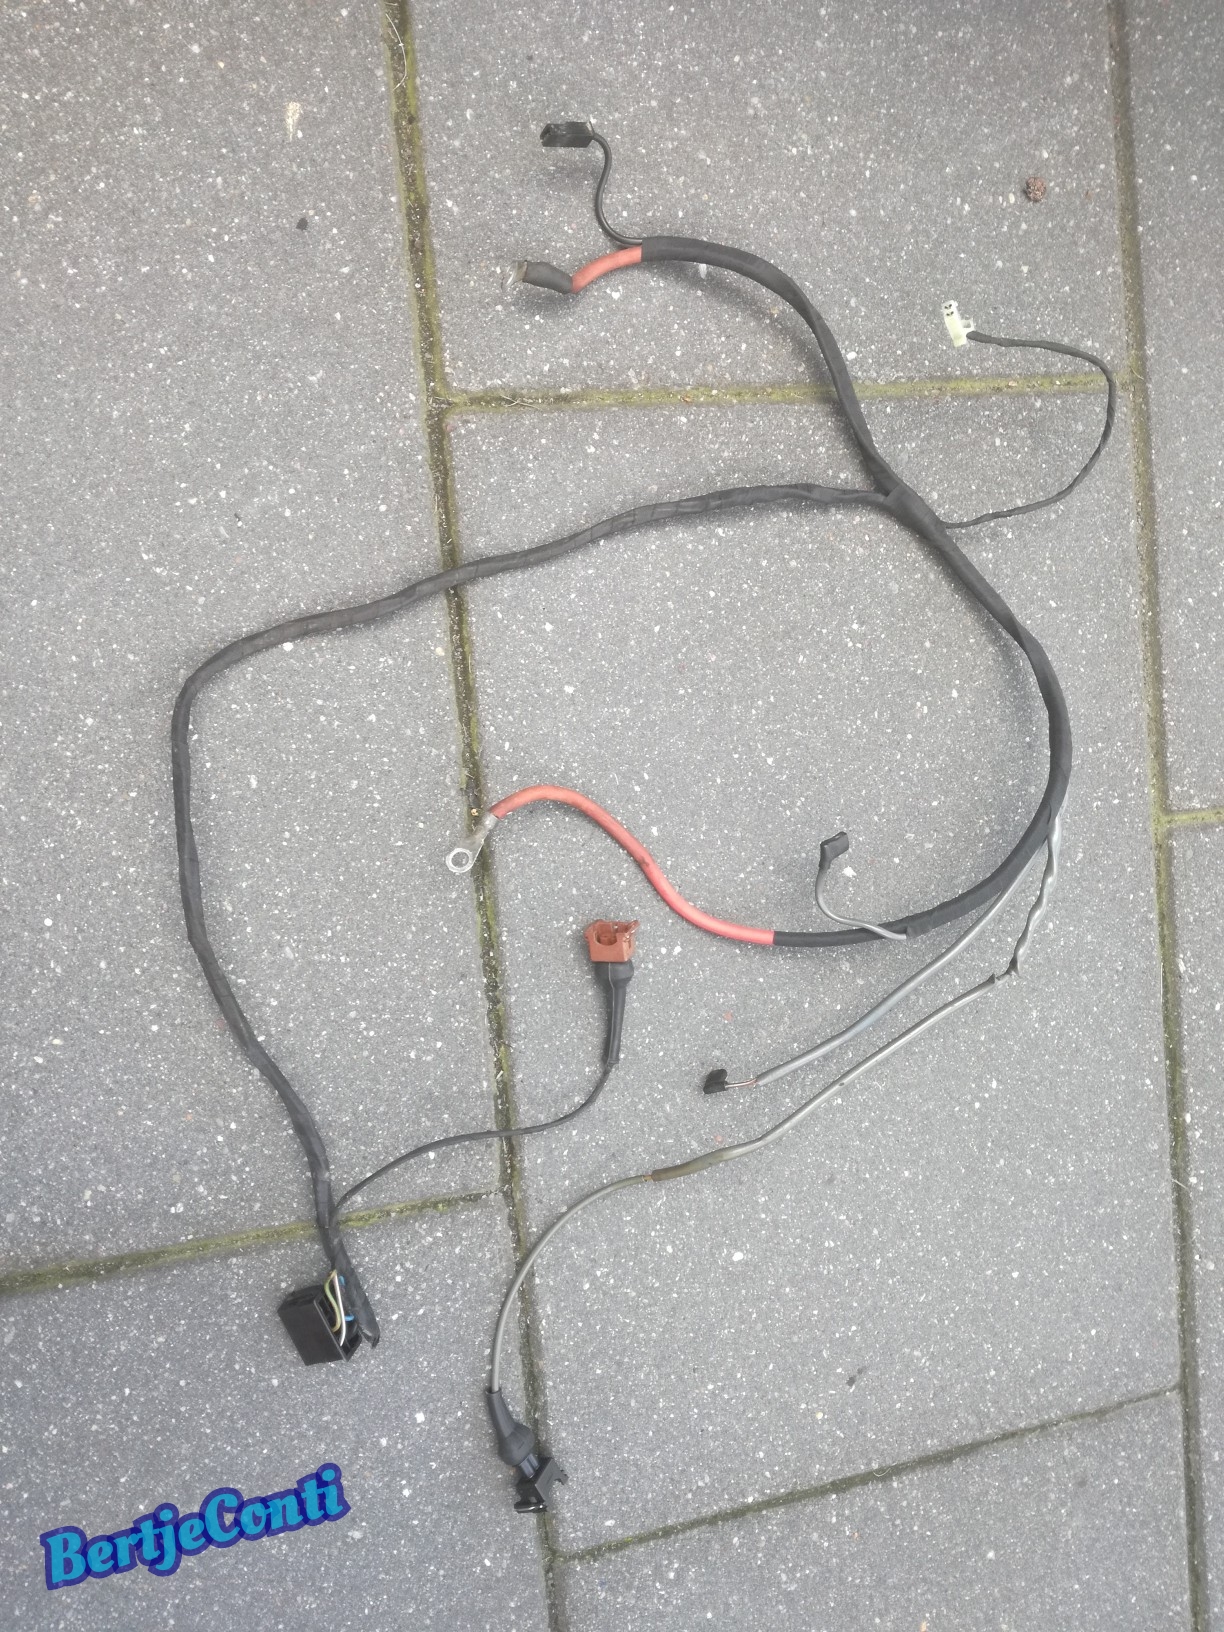
Cleaned the steering pump and did some rework to the engine wiring loom, like swapping the oil pressure switch from spade to JPT and wire in a bigger alternator cable:
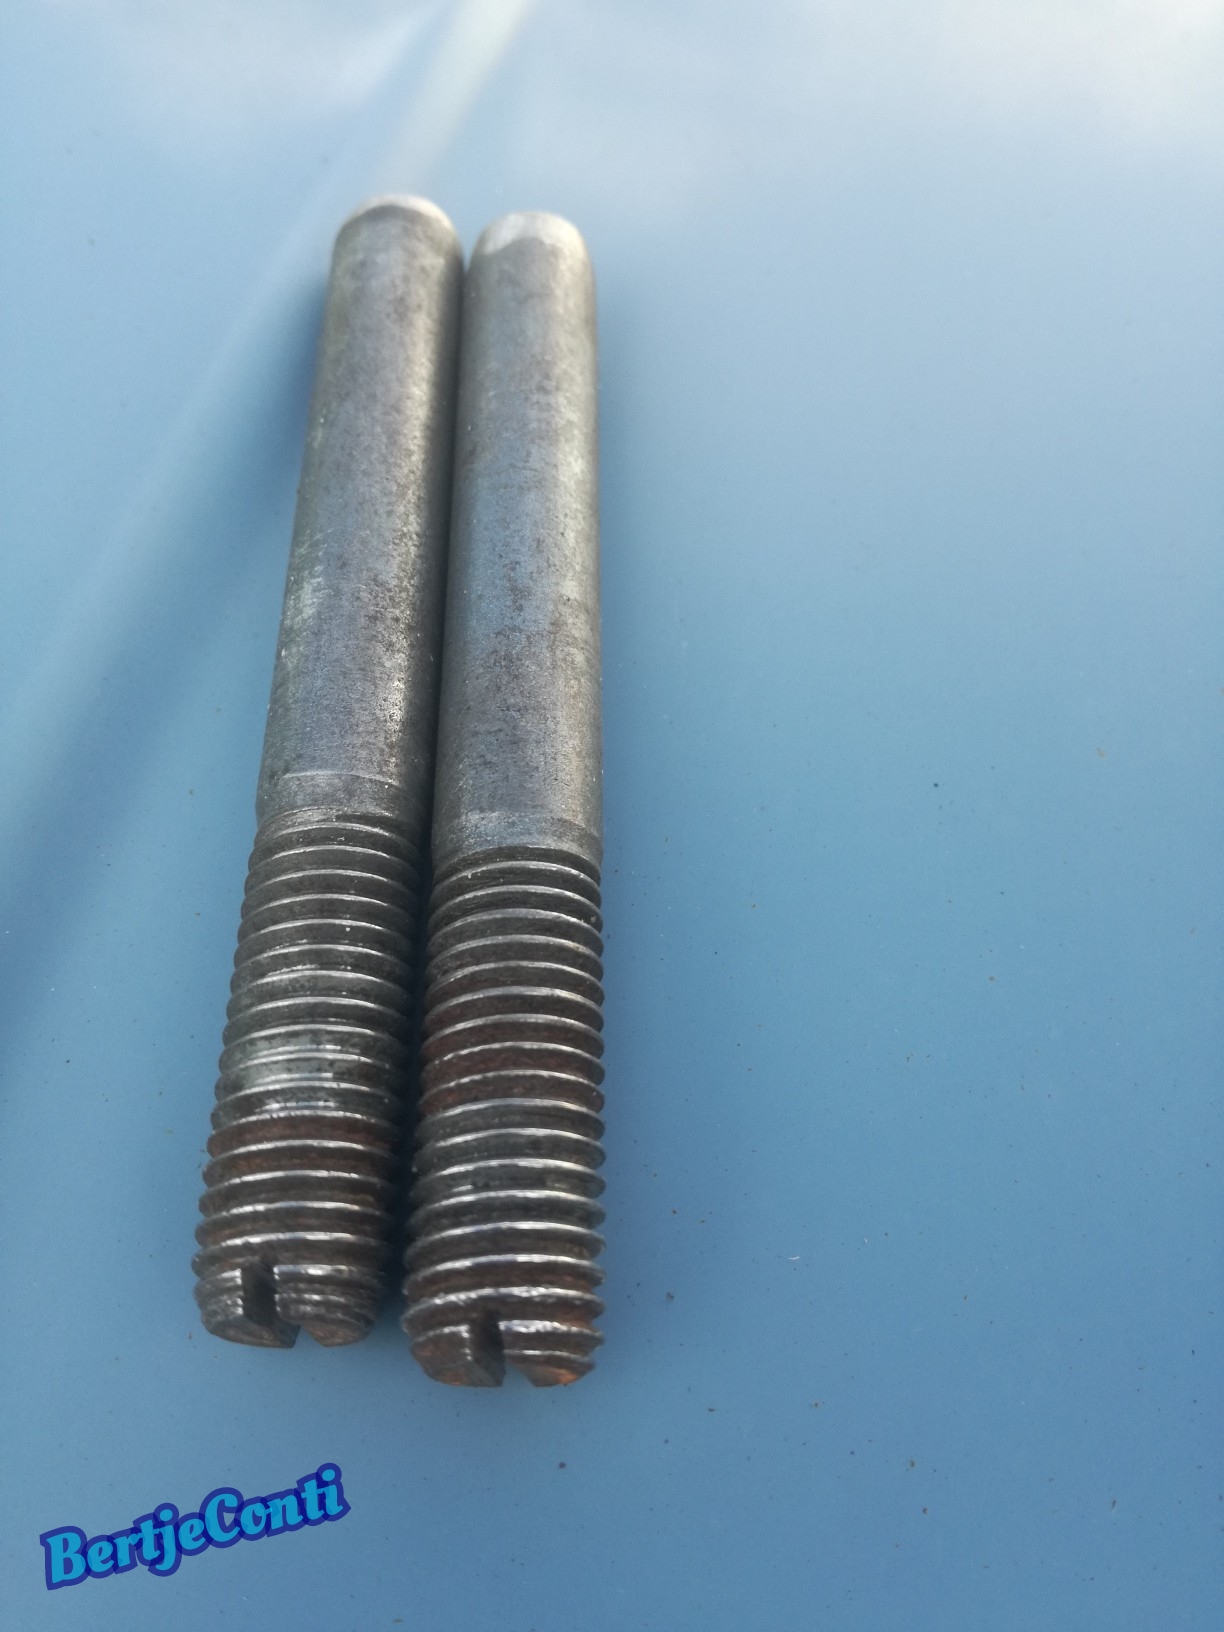
And made a set of dowel pins which will help sliding in the engine to the bell housing:

I did a 0 to 100 km/hour sprint test, did it several times and noted the best time i could get out of this engine which was exactly 11.0 seconds.
Did the test with my tripmaster rally computer which has a special function for this test and is verry accurate.
I had also done a dry compression test a time ago, resulting in 155psi up to 170psi, which wasn't bad at all.
The engine setup will stay the same all over and all external engine parts will be swapped from the old to the new engine block, so in essence only the shortblock and head will be swapped.
So time to drain coolant and oil and disassemble as many parts as possible before lifting the engine.
I'll lift the engine without gearbox.
intake manifolt is drained in oil, due worn piston rings of this engine.
The hose from thermostat to heater will be replaced, the old hose is an ugly patchwork, the new hose is a 323i part and fits perfect:
I also took of the sump protector, which was loaded with sand and mud and a oil stain which is from the leaky steering pump. The engine is covered in grease and oil but doesn't leak that much so it's not dripping:
Also lots of mud in the engine compartment, now i'll clean it out:
Waterpump gasked needs to be renewed i think, a wonder this one didn't leak already:
Then it's time lifting the bare engine, because the gearbox stays in, the engine needs to slide forward first, and thar means removing the engine mount silent blocks first.
Trick here is hanging the engine to the hoist it won't tilt ans stays in the right angle.
And out the is, the oilpan from the old engine also needs to be swapped, because the E30 oilpan, which is on the new engine, won't fit between the E12 subframe, more cleaning work ahead:
a sneak peek into the old engine, much of carbon and other muck there:
Flywheel also needs to be swapped, and (ofcourse) i'll install a new clutch, as seen on the picture below the old clutch was verry worn, and if i didn't swap the engine now it wouldn't be long until a clutch failure:
Cleaned the oilpan which isn't in a bad shape:
Mounted the oilpan to the new engine with a dot Curil-T sealing compound as the manual discribes:
I also used this sealing compound on the oilpan-gasket mating surface because this surface isn't flat al all, this pan is made of sheet metal.
and torqued all M6 bolts to spec:
Cleaned the engine bay, and drilled out a broken M6 bolt in the bell housing:
Cleaned the steering pump and did some rework to the engine wiring loom, like swapping the oil pressure switch from spade to JPT and wire in a bigger alternator cable:
And made a set of dowel pins which will help sliding in the engine to the bell housing:
Last edited by BertjeConti on Tue Nov 22, 2022 7:45 pm, edited 1 time in total.
Megasquirted '77 E12 520-6
Aspen Silver '96 E39 523i
-
BertjeConti
- E21 Mad
- Posts: 3012
- Joined: Mon Nov 04, 2013 9:49 pm
- My E21(s): E12 520-6
- Location: nederland , Weert
Re: Pastelblau 520/6
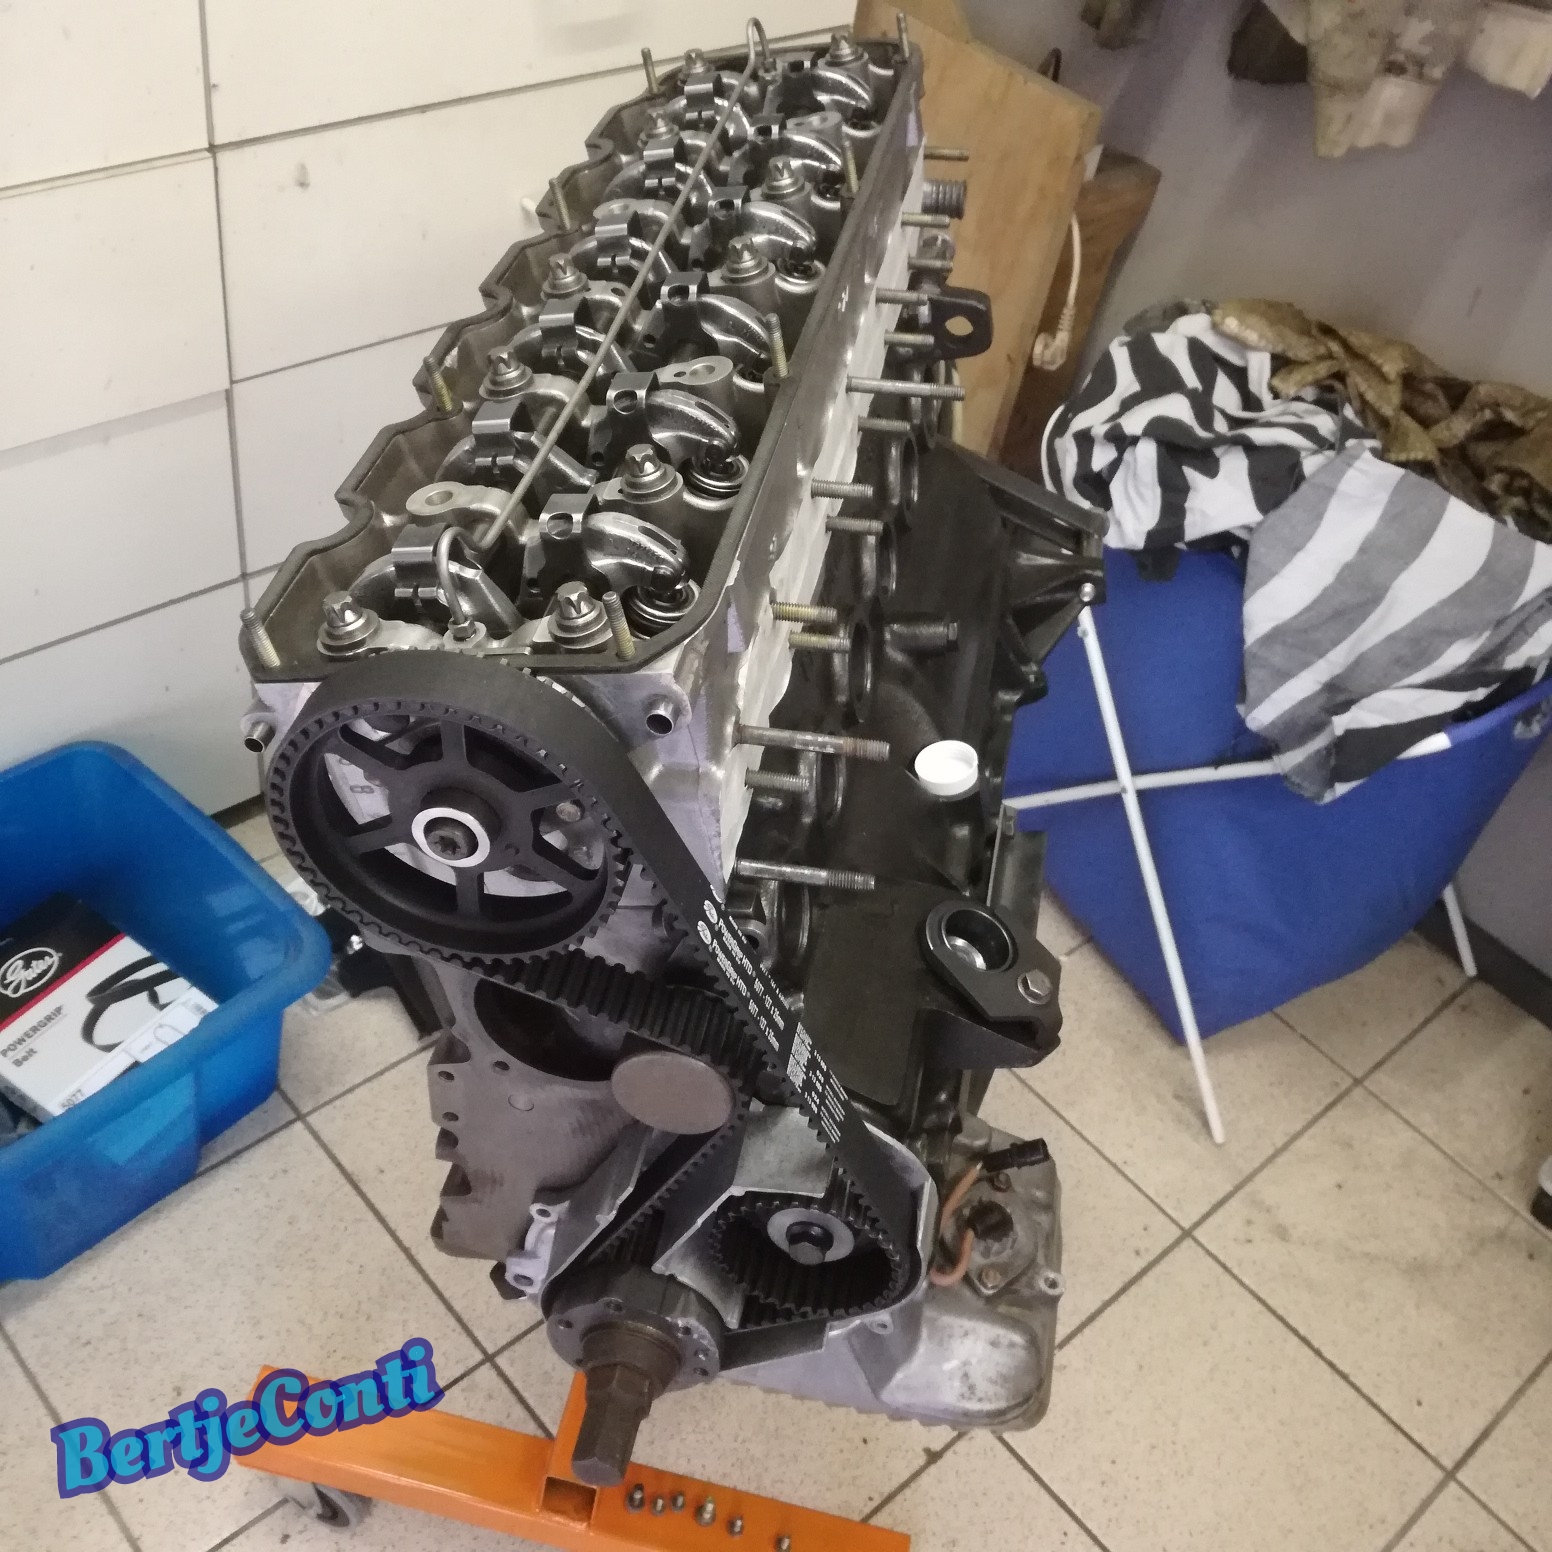
Next step was building up the new engine.
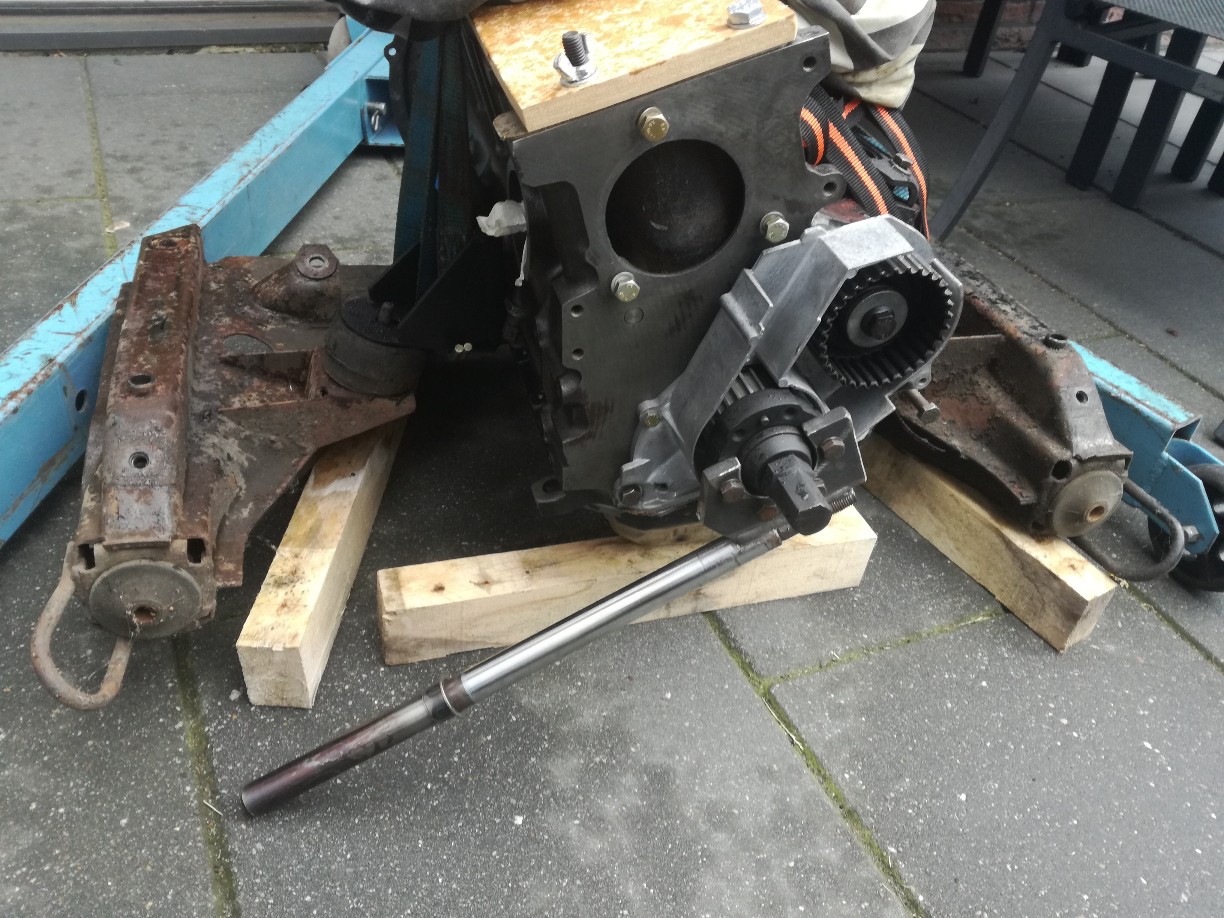
For mounting the flywheel the engine has to come of the engine stand, and i hoisted the engine onto a old subframe i had laying around, with the engine attached to the subframe it won't tilt when tightening the flywheel bolts to spec
Also attached a blocking tool to the front hub of the crankshaft.
I used locktite onto the flywheel bolts and toqued them to 110Nm.
Then i gave the clutch splines a smear of special sachs clutch grease and assebled the clutch using a suitable dowel pin.
This way i could safely mount the flywheel, clutch and pressure plate assembly.
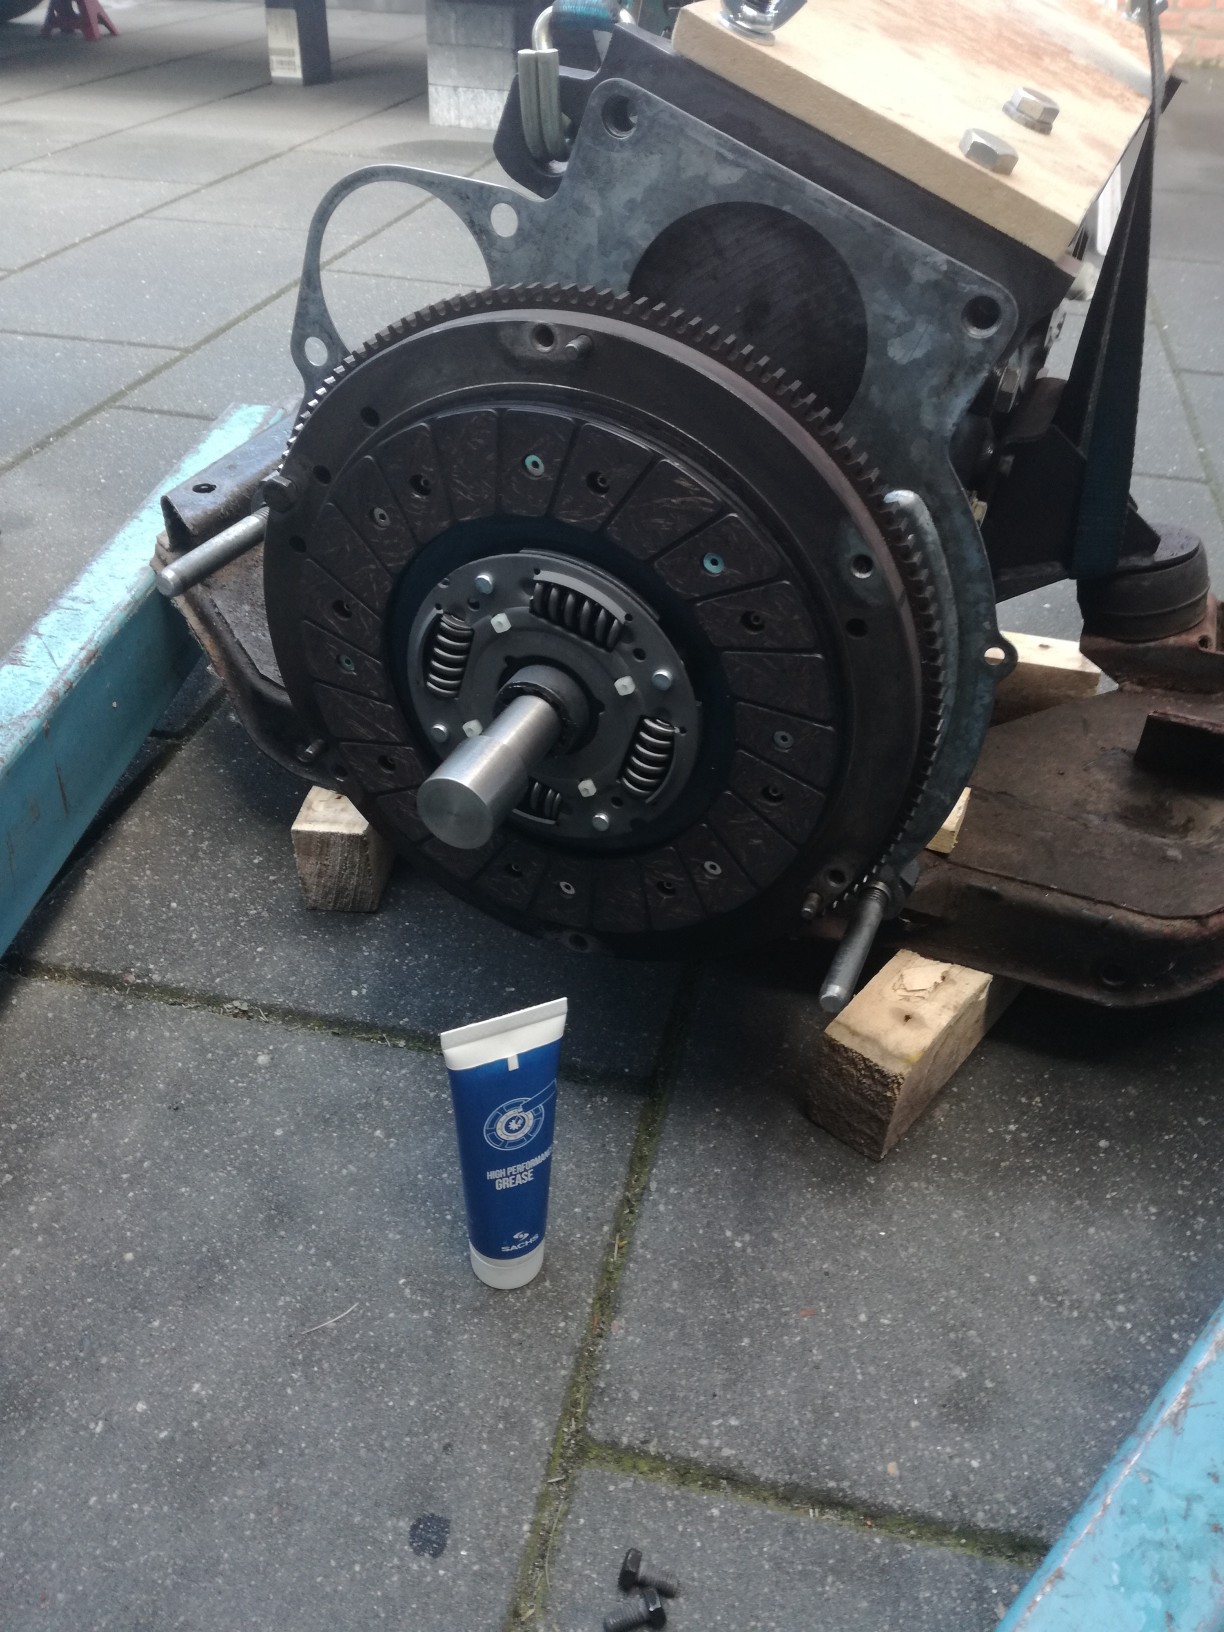
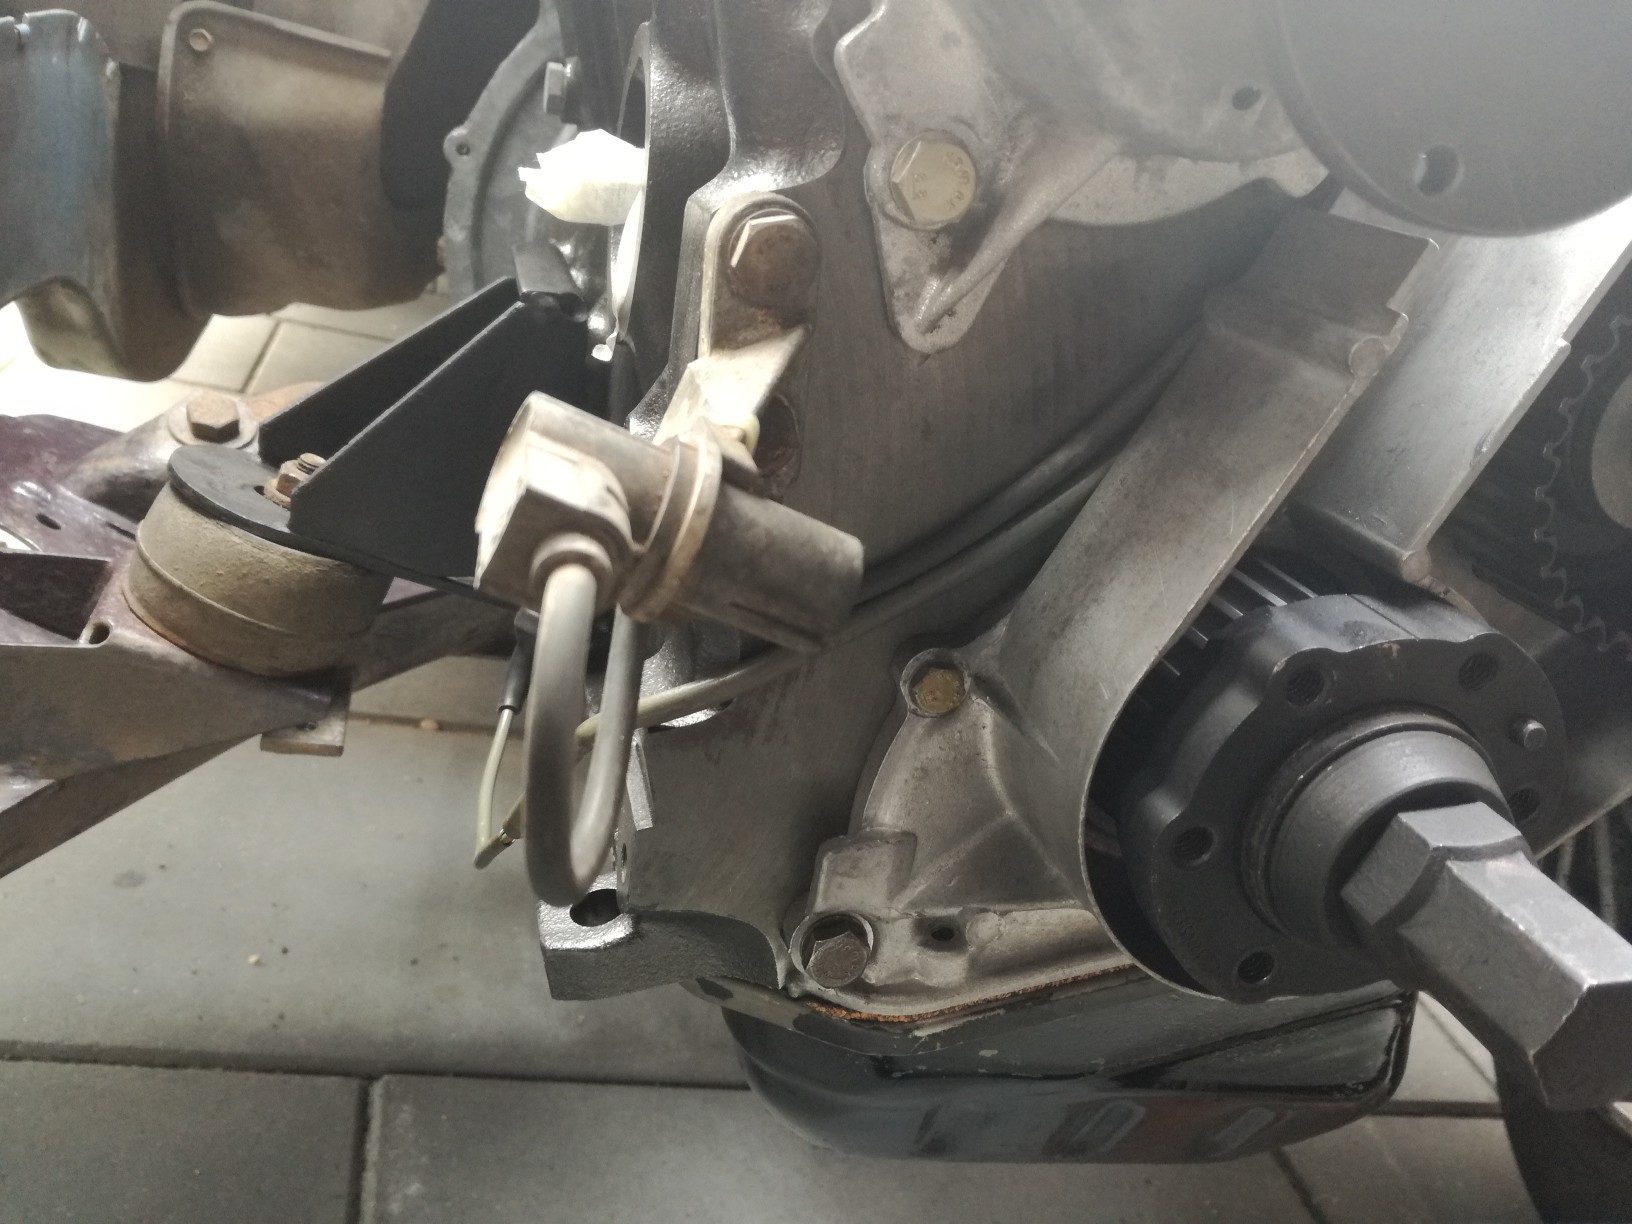
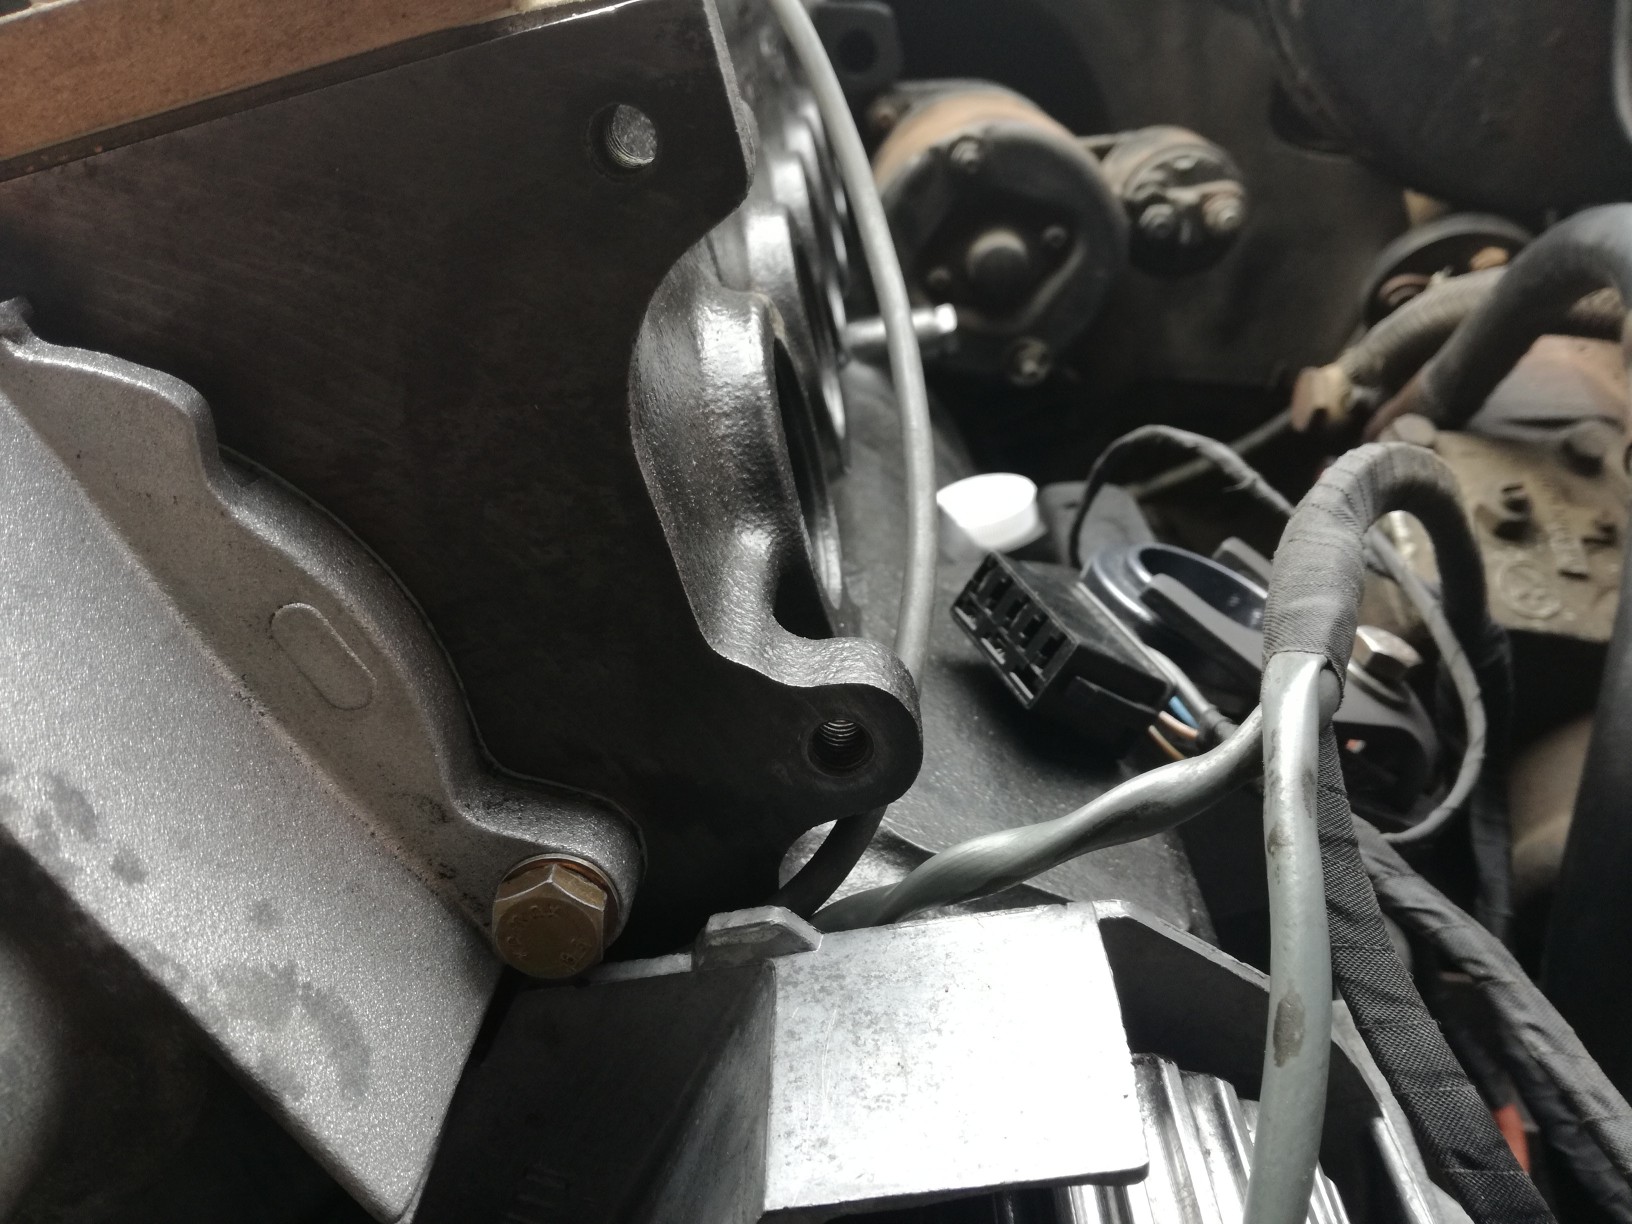
The engine goes into the bay without any ancillaries mounted, even the head isn't on yet. This makes it very easy manoeuvring the engine in place, and thanks to the dowel pins the clutch slides over the prise axle without any hassle, jeej
Dowel pin closeup:
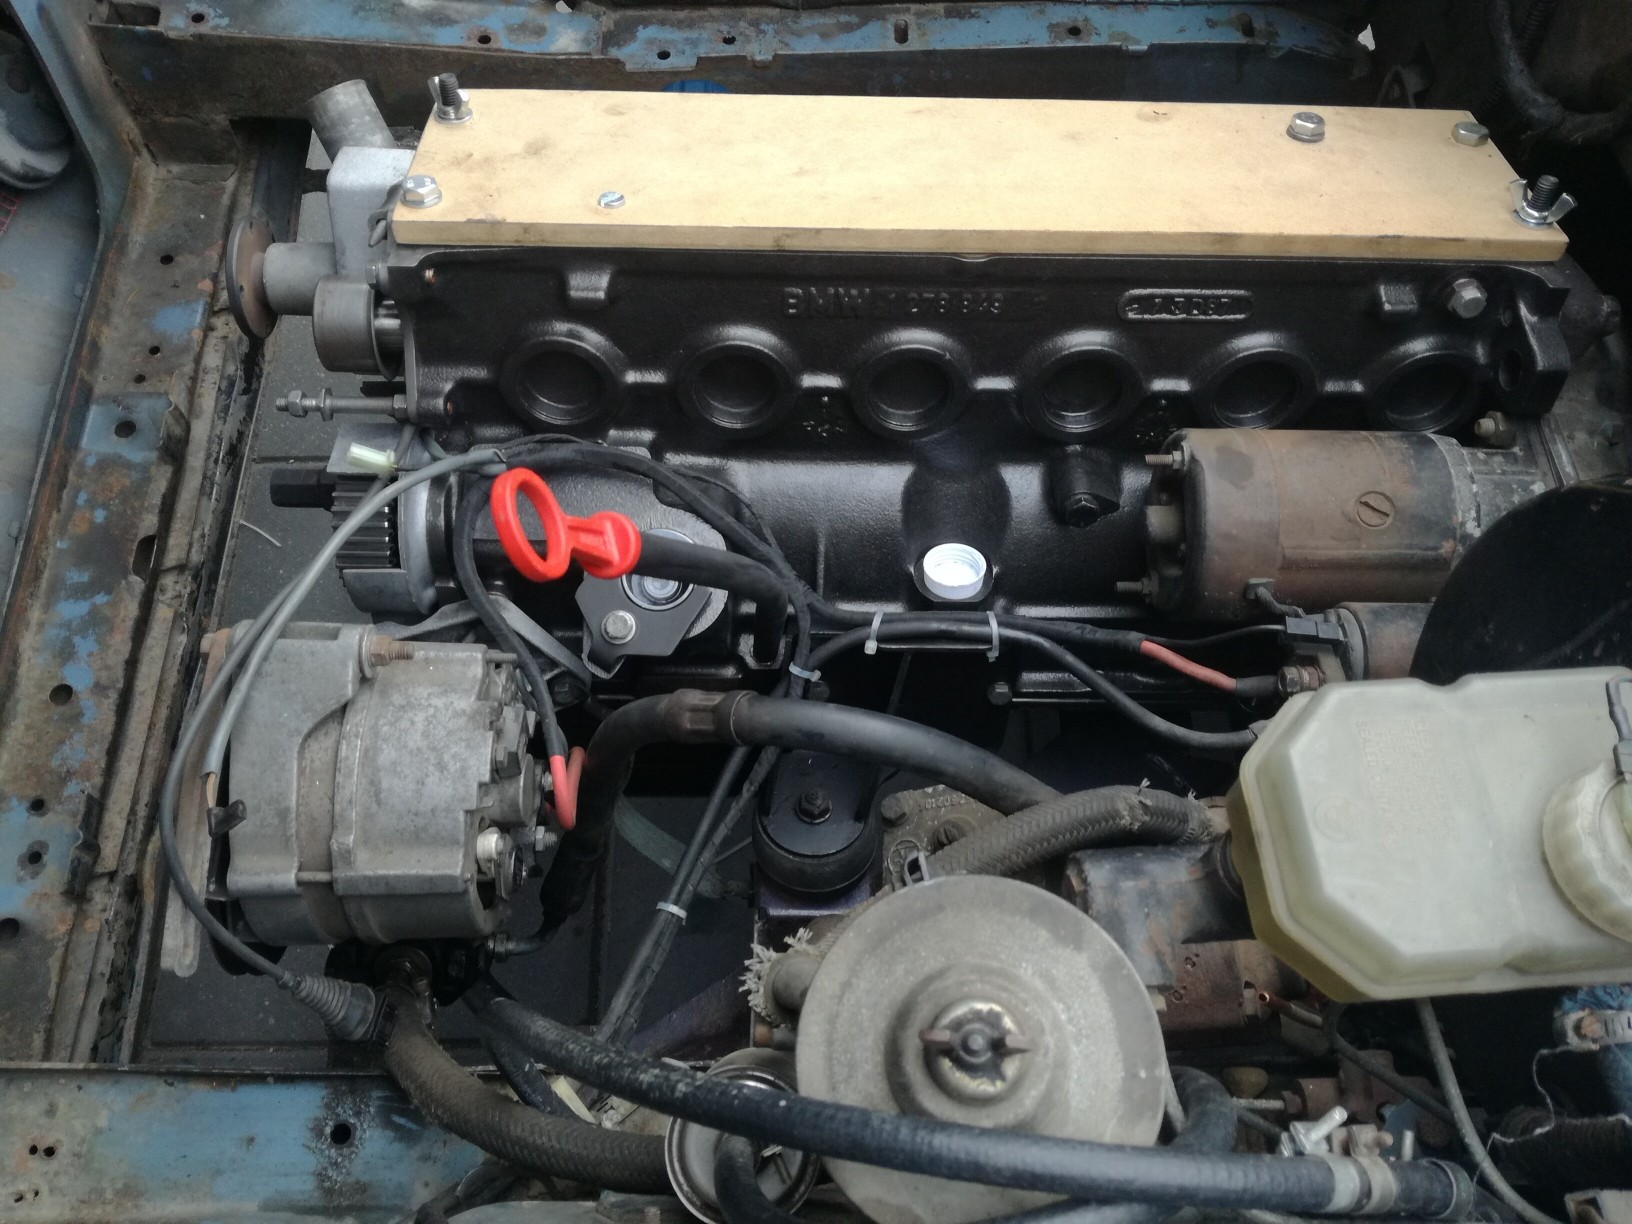
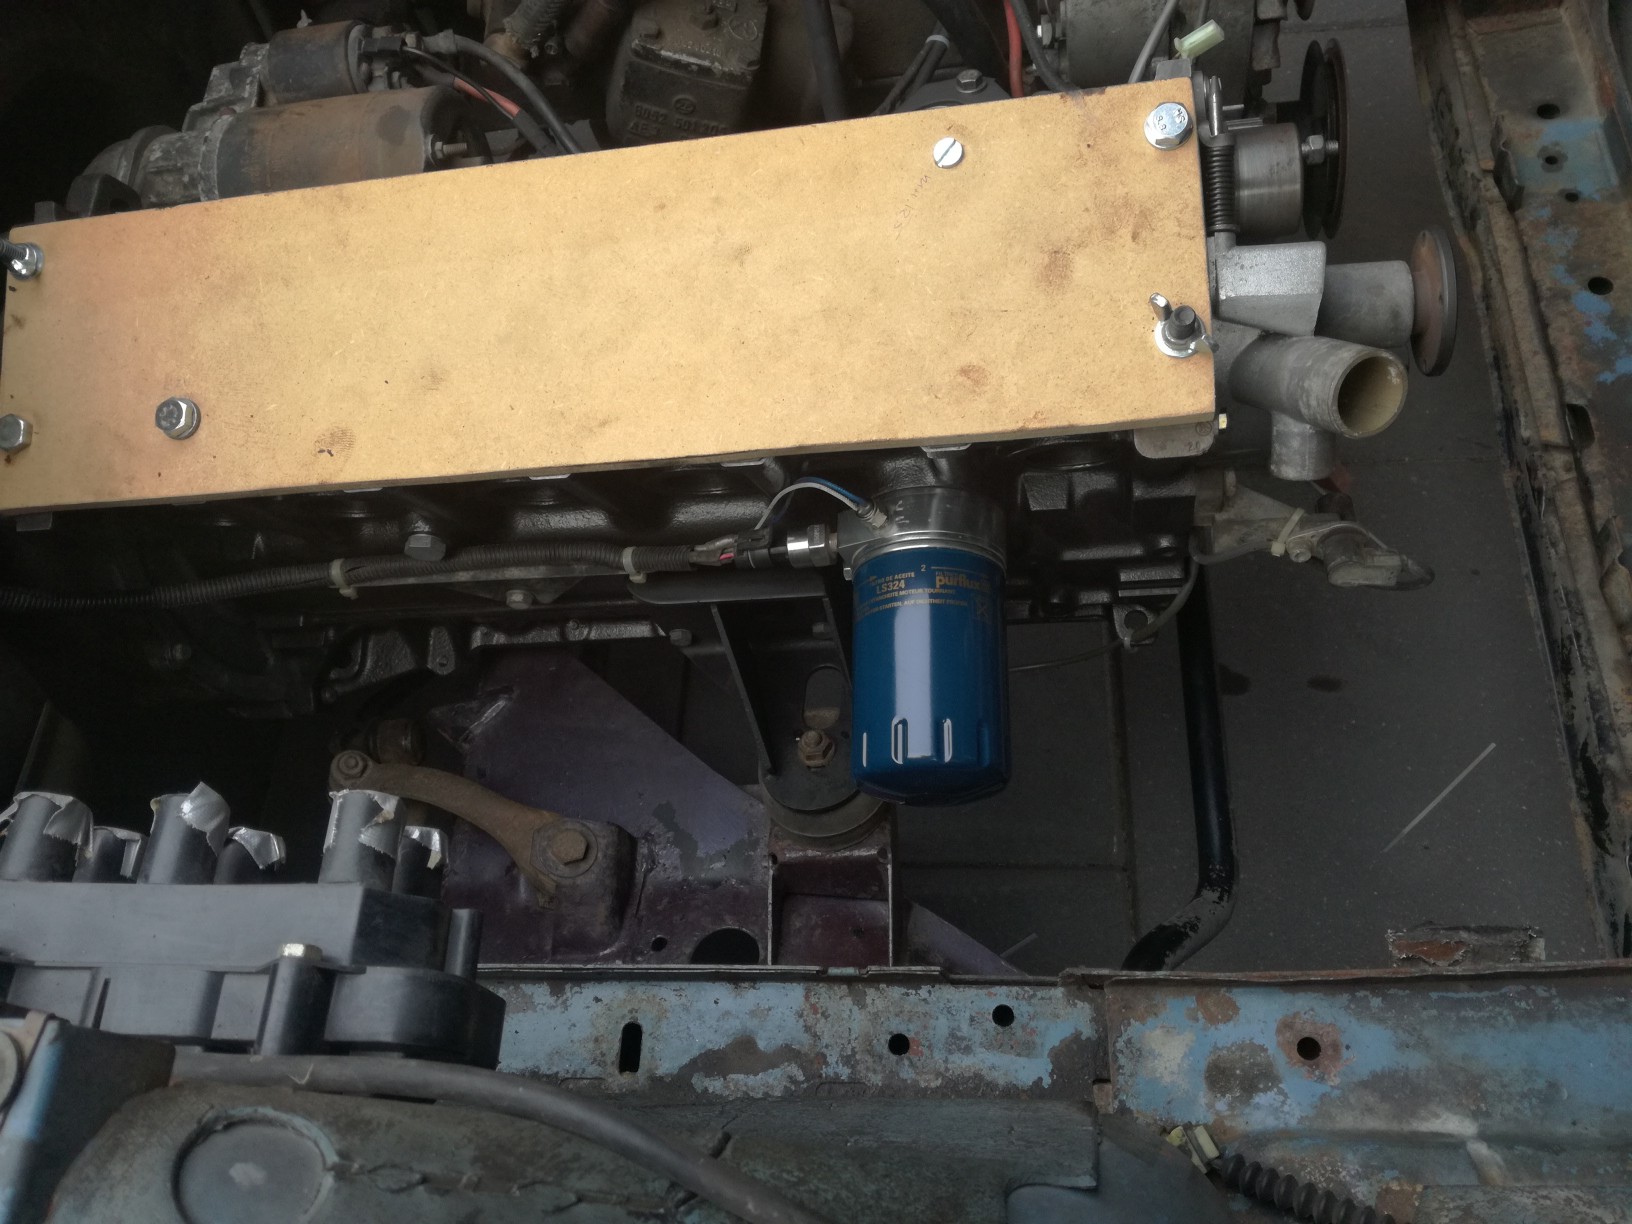
With the engine in place i could build it up again, nice working with clean parts. Oil pressure and crankshaft sensor cables have to be routed first before mounting the waterpump:
I attached as much as possible to the shortblock before the head comes onto the block, easy working this way:
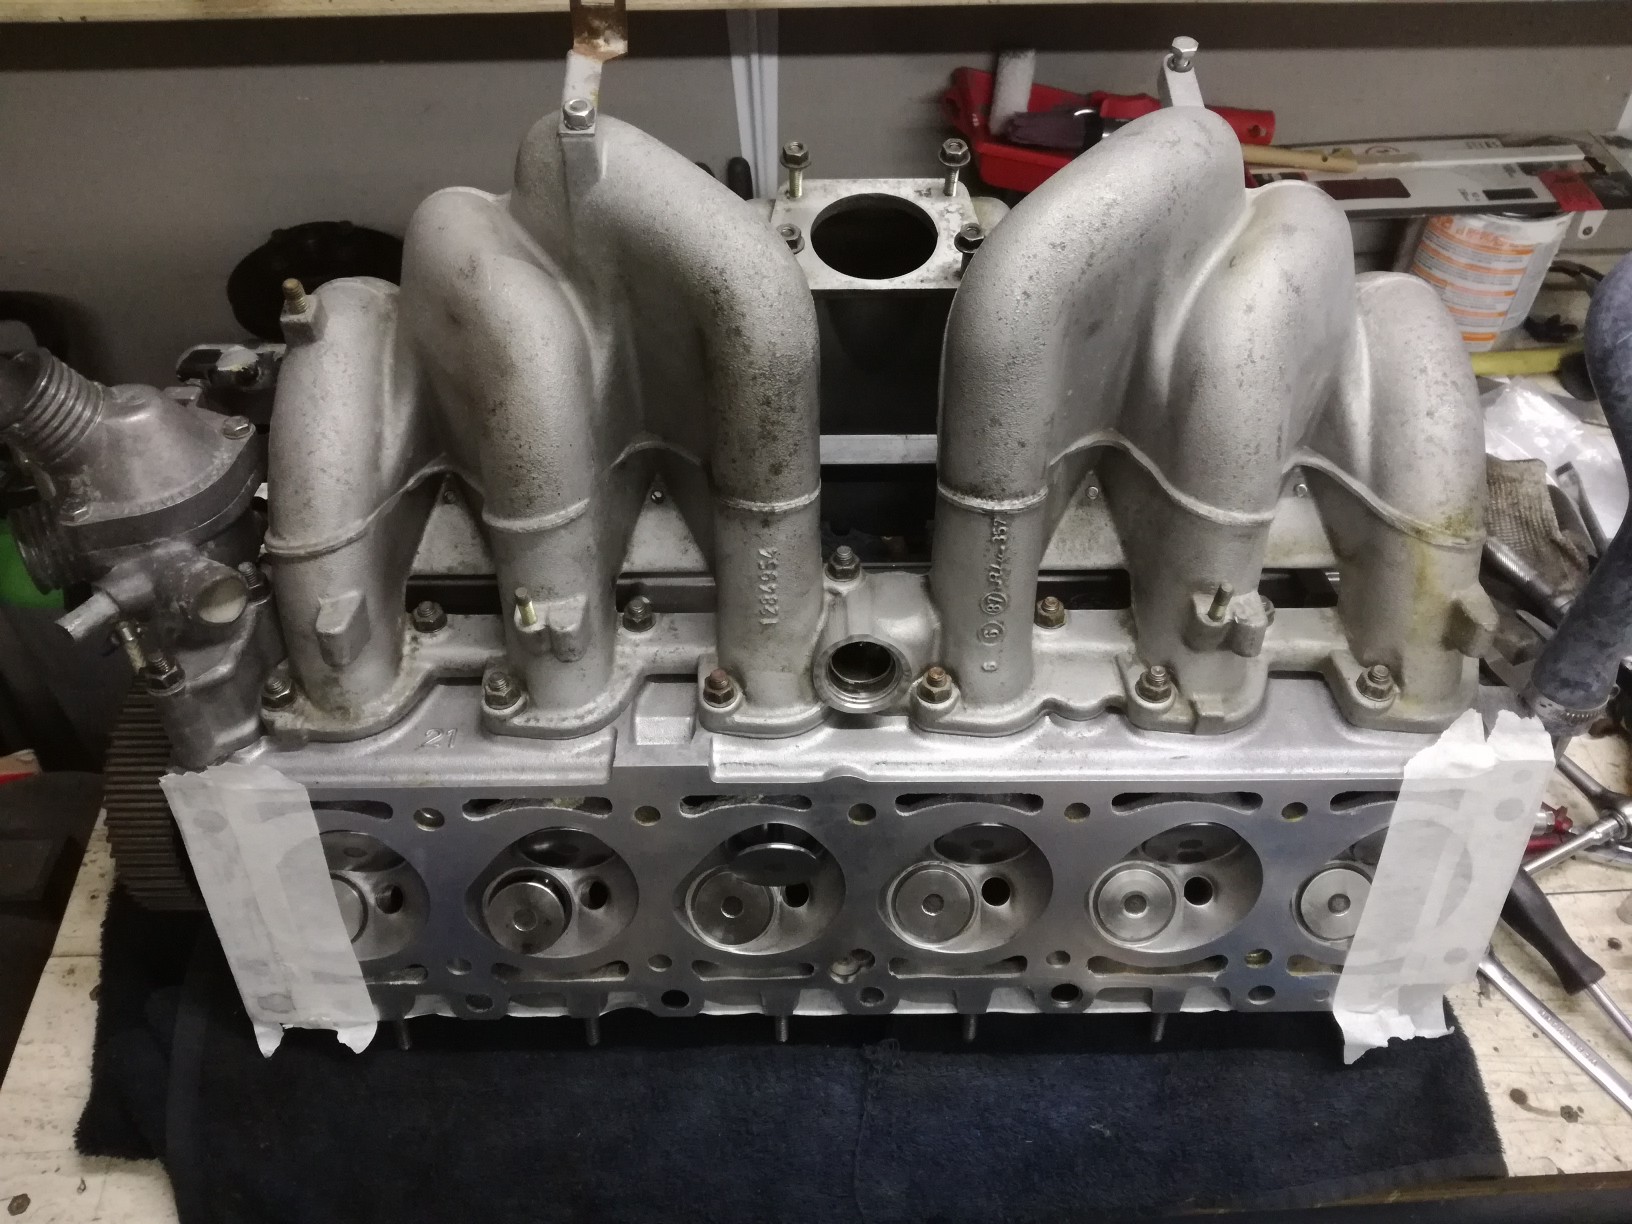
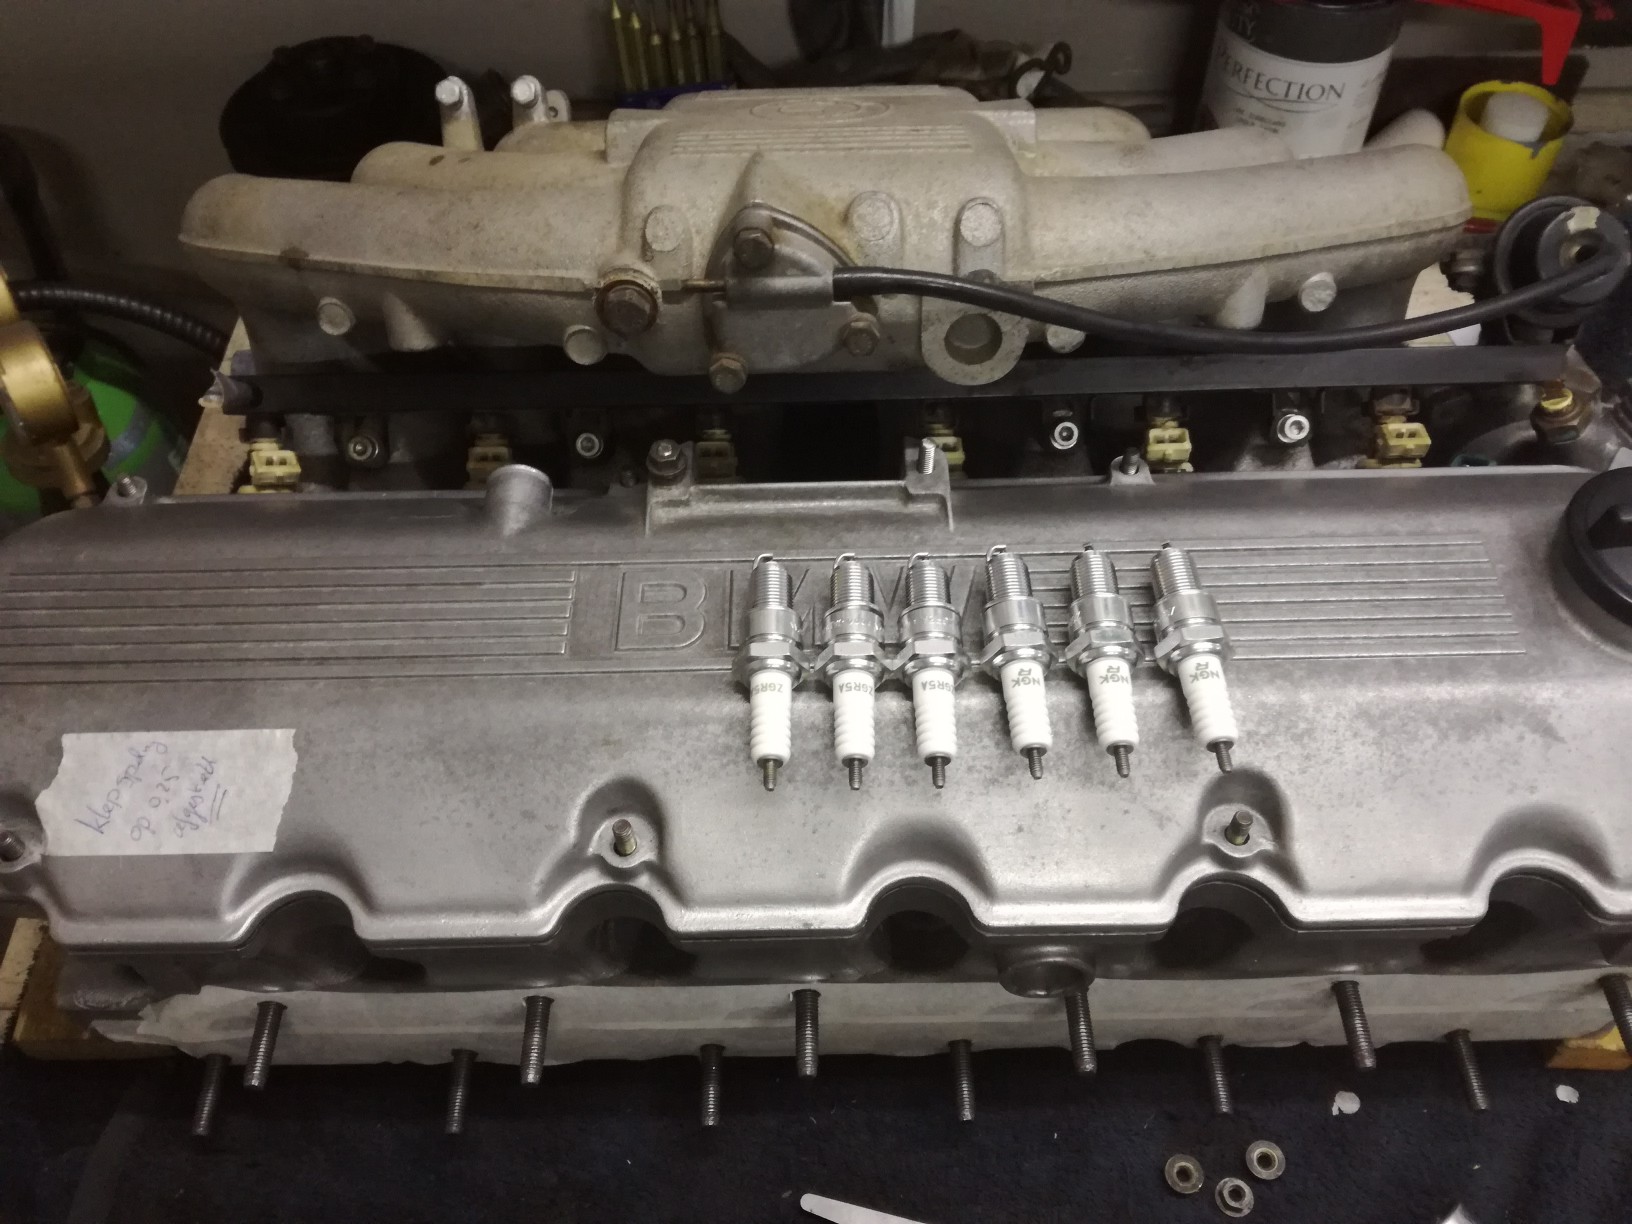
Then on the workbench i attached the intake manifold to the head inlcuding new spark plugs:
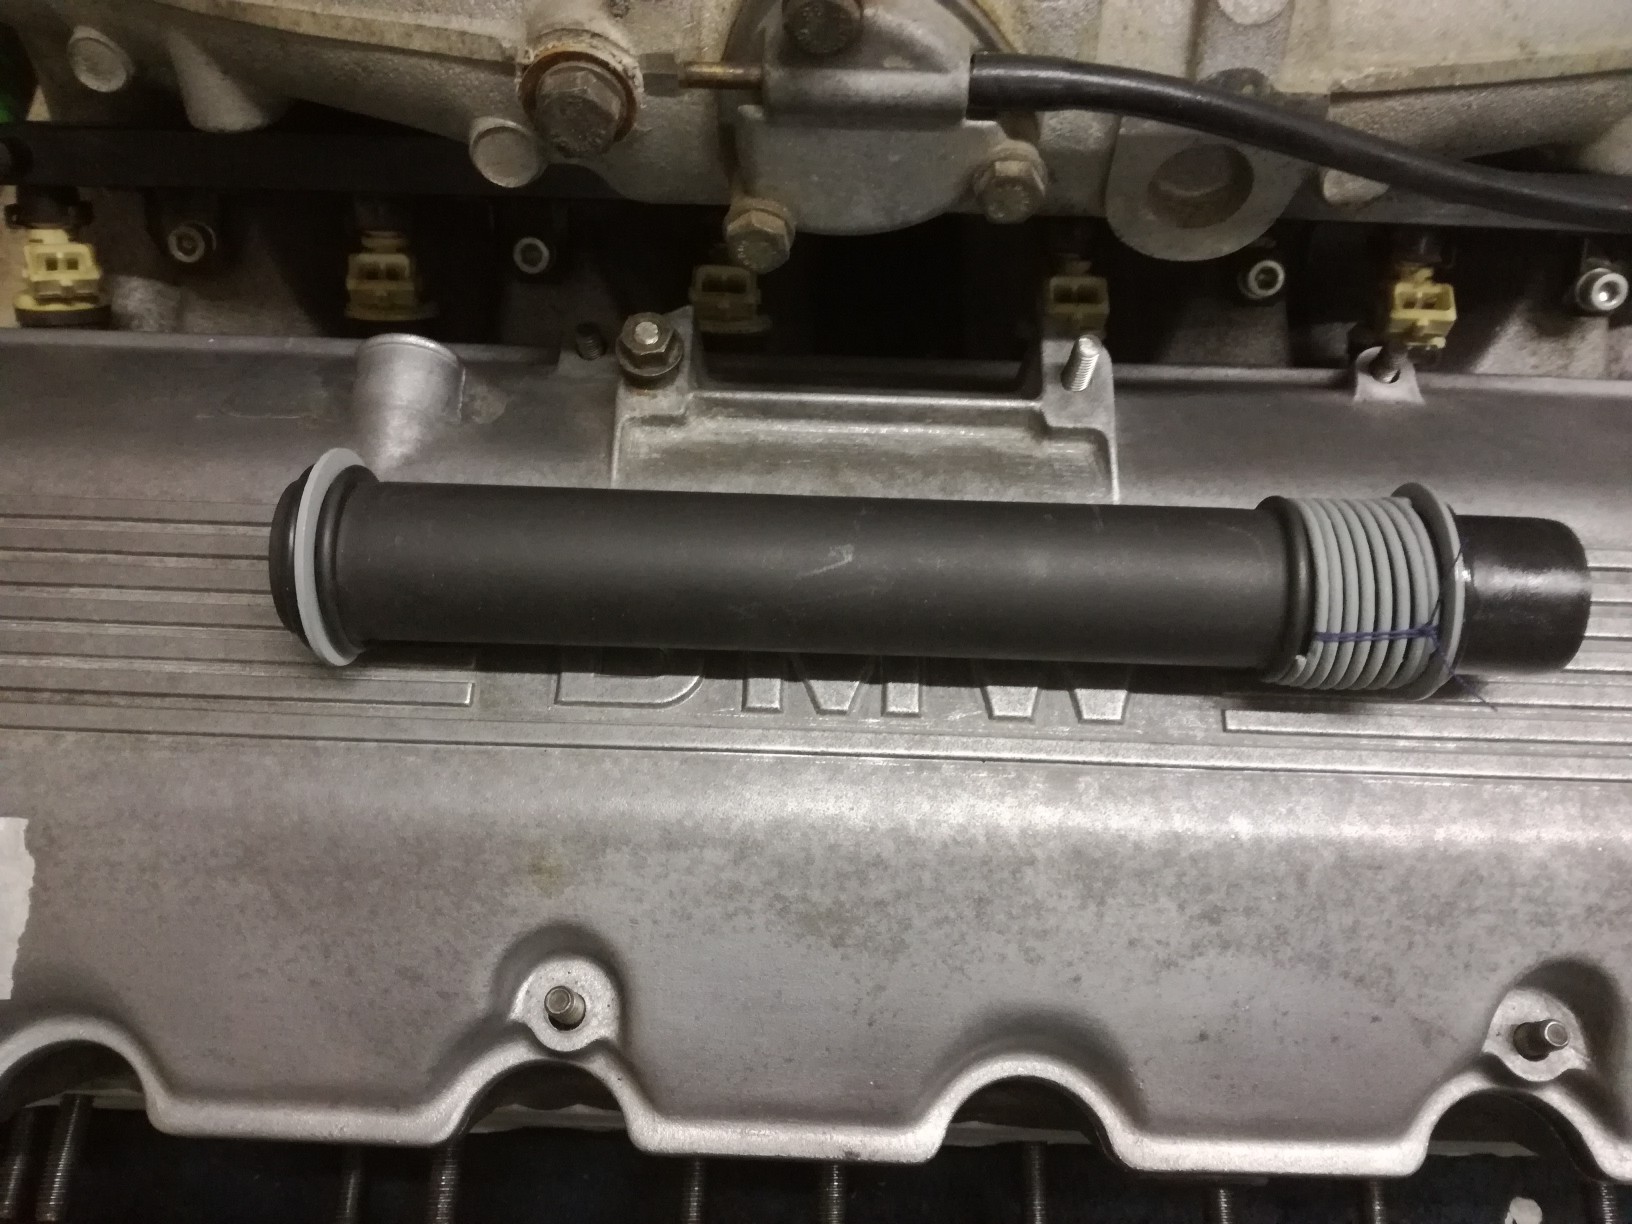
Compressed the spring onto the engine venting pipe, making assembly easier:
Then degreasing gasket surface for a last time and sliding the head onto the engine block:
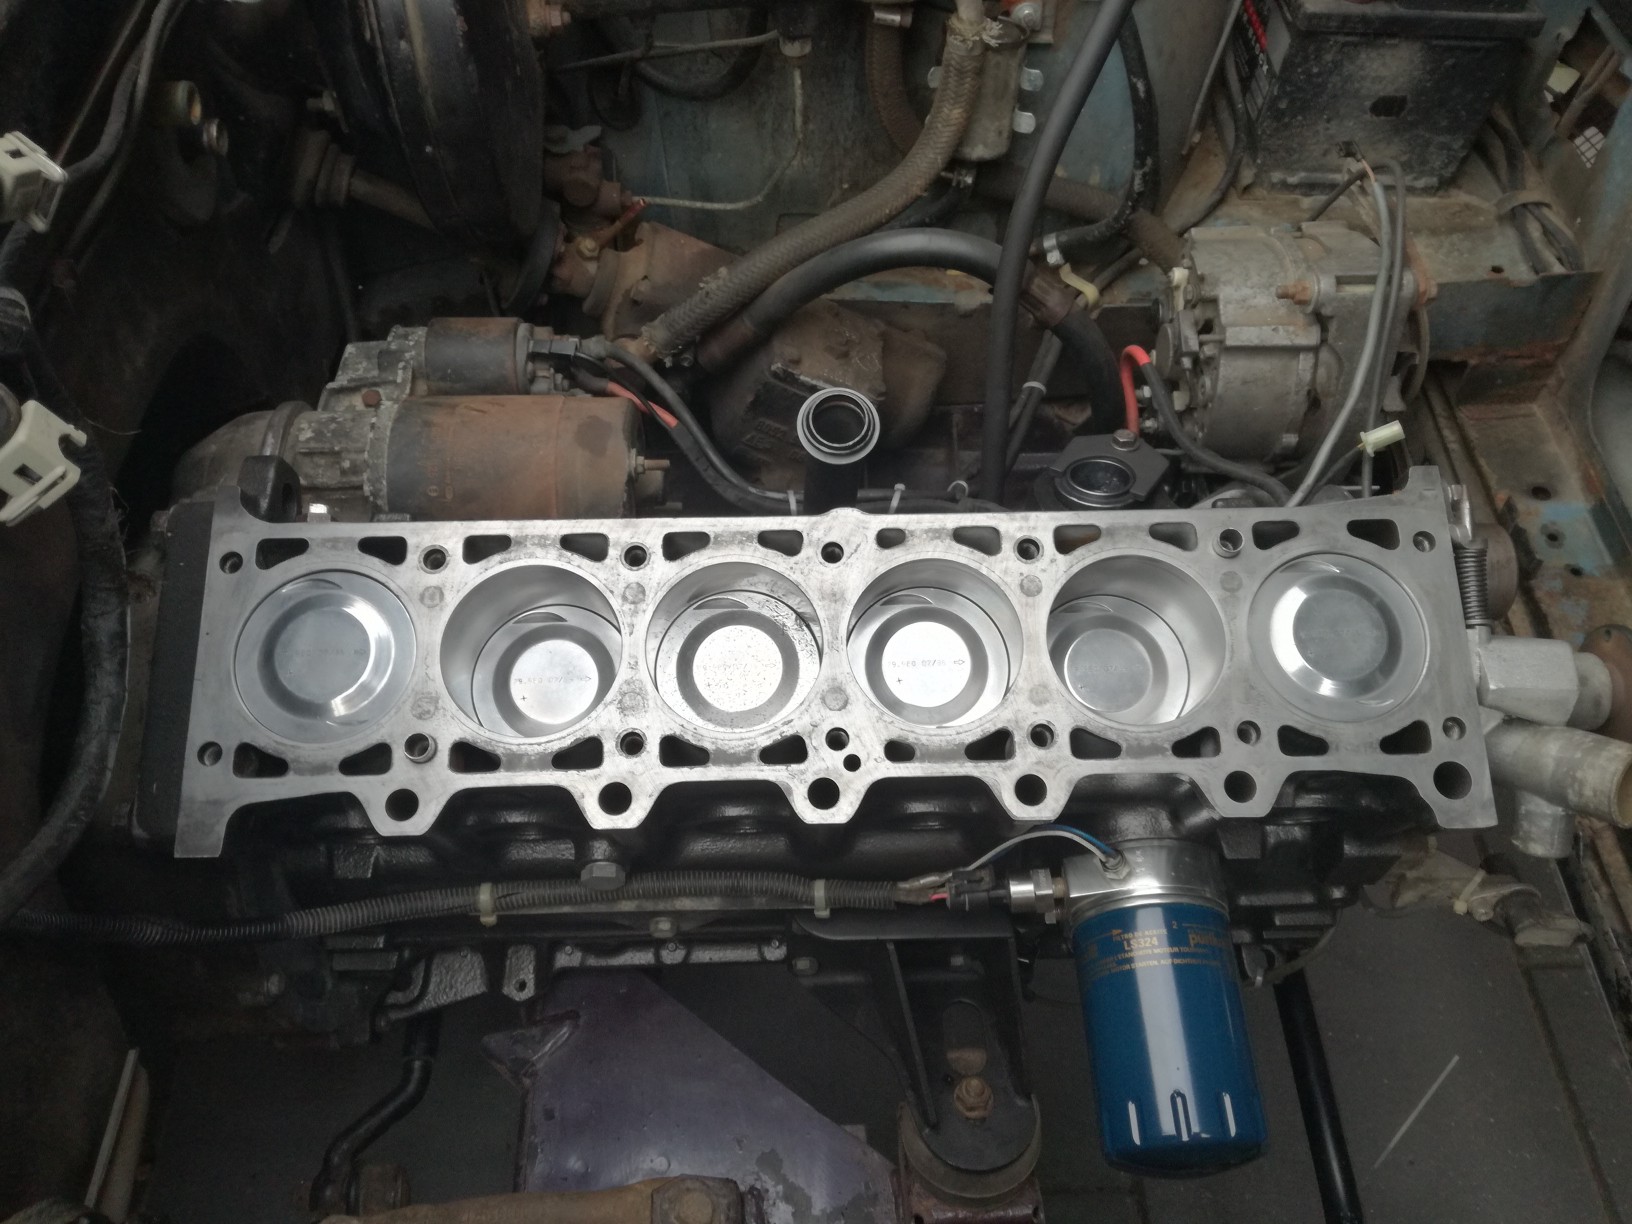
Using a elring gasket:
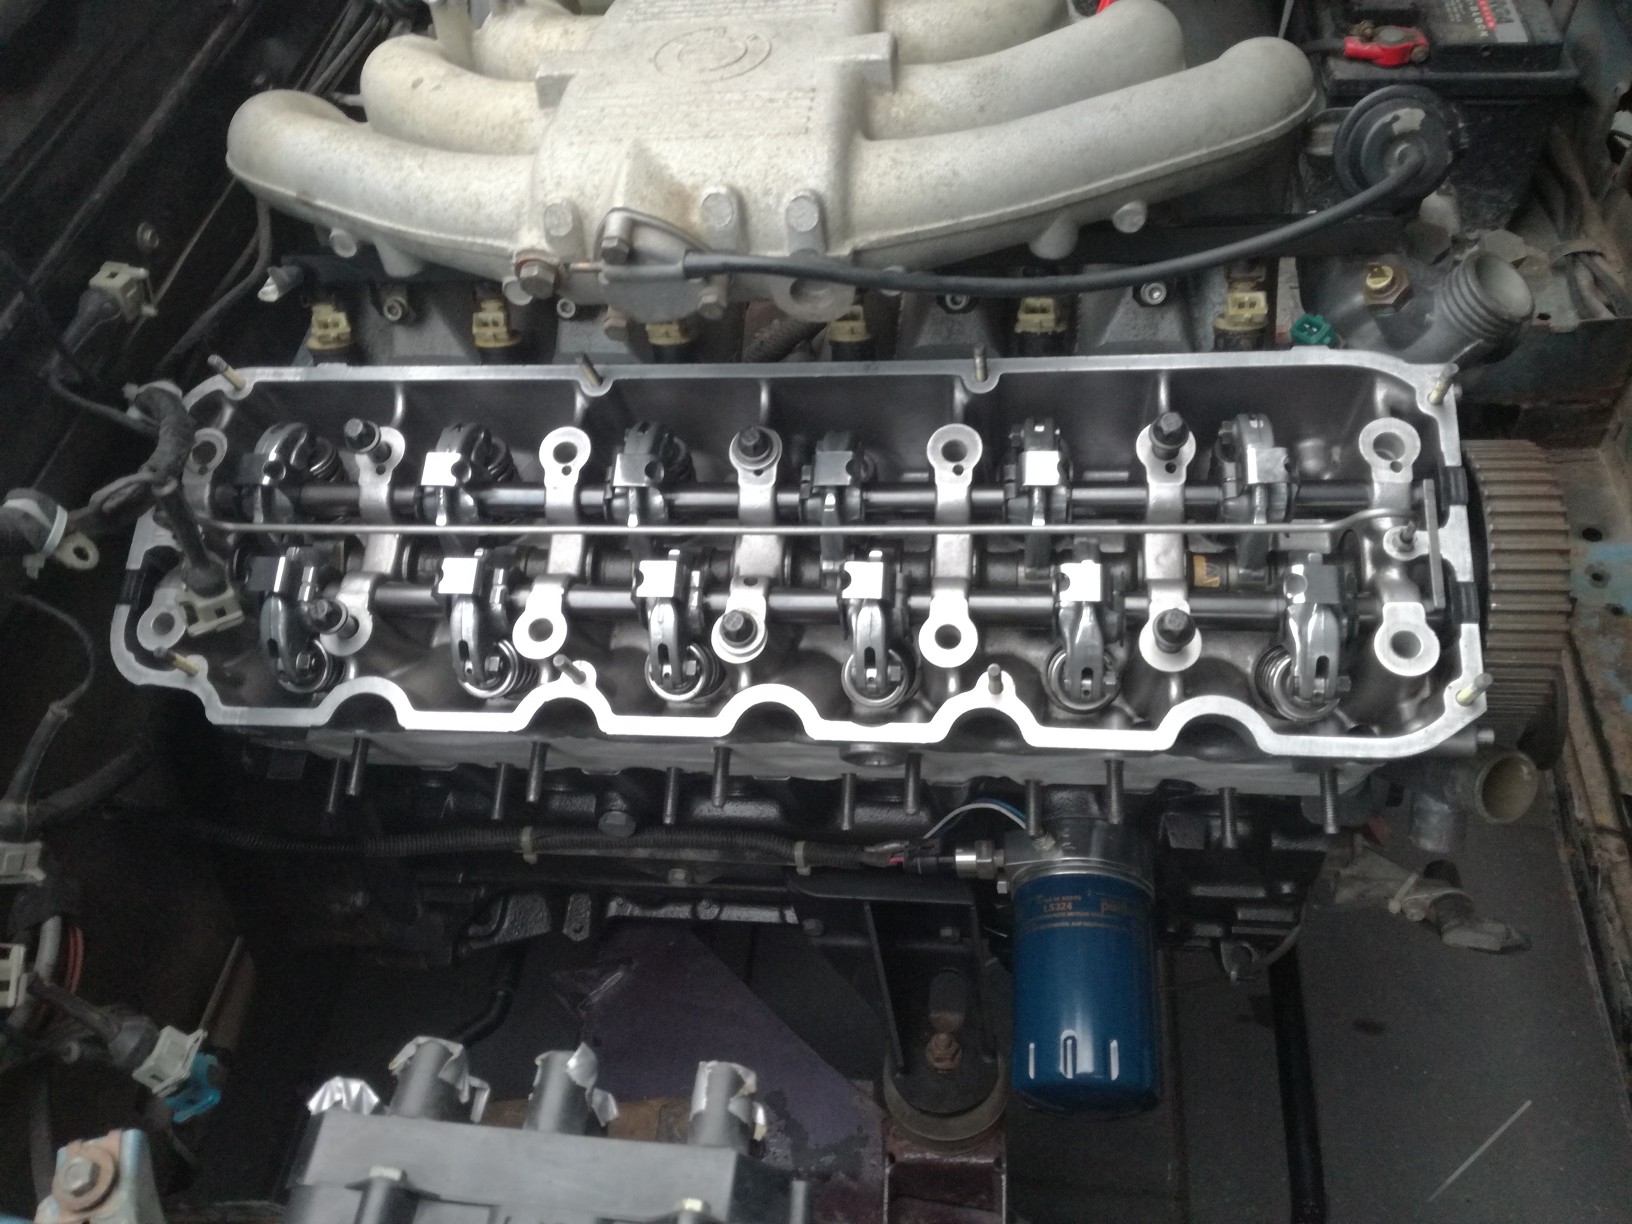
And toqued the new head bolts to spec, poured 5L oil into the engine.
Without timing belt and the radiator still out it is possible to drive the oilpump via the intermediate shaft with a electric drill and this way i could pump fresh oil through the engine without running the engine and pumping out all the air from the oil gallery.
I made a youtube of this process:
And ofcourse i would like to know the oil pressure, so i made another youtube showing the pessure onto the display in the car:
After the oil pressure check the timing belt was next
Also did a valve clearence check, valve clearence changes when head bolts are torqued, so the clearence has te be set all over again.
And continuing building up the engine further:
and almost ready to start the engine for the first time:

For mounting the flywheel the engine has to come of the engine stand, and i hoisted the engine onto a old subframe i had laying around, with the engine attached to the subframe it won't tilt when tightening the flywheel bolts to spec
Also attached a blocking tool to the front hub of the crankshaft.
I used locktite onto the flywheel bolts and toqued them to 110Nm.
Then i gave the clutch splines a smear of special sachs clutch grease and assebled the clutch using a suitable dowel pin.
This way i could safely mount the flywheel, clutch and pressure plate assembly.
The engine goes into the bay without any ancillaries mounted, even the head isn't on yet. This makes it very easy manoeuvring the engine in place, and thanks to the dowel pins the clutch slides over the prise axle without any hassle, jeej
Dowel pin closeup:
With the engine in place i could build it up again, nice working with clean parts. Oil pressure and crankshaft sensor cables have to be routed first before mounting the waterpump:
I attached as much as possible to the shortblock before the head comes onto the block, easy working this way:
Then on the workbench i attached the intake manifold to the head inlcuding new spark plugs:
Compressed the spring onto the engine venting pipe, making assembly easier:
Then degreasing gasket surface for a last time and sliding the head onto the engine block:
Using a elring gasket:
And toqued the new head bolts to spec, poured 5L oil into the engine.
Without timing belt and the radiator still out it is possible to drive the oilpump via the intermediate shaft with a electric drill and this way i could pump fresh oil through the engine without running the engine and pumping out all the air from the oil gallery.
I made a youtube of this process:
And ofcourse i would like to know the oil pressure, so i made another youtube showing the pessure onto the display in the car:
After the oil pressure check the timing belt was next
Also did a valve clearence check, valve clearence changes when head bolts are torqued, so the clearence has te be set all over again.
And continuing building up the engine further:
and almost ready to start the engine for the first time:
Last edited by BertjeConti on Tue Nov 22, 2022 7:43 pm, edited 1 time in total.
Megasquirted '77 E12 520-6
Aspen Silver '96 E39 523i
-
BertjeConti
- E21 Mad
- Posts: 3012
- Joined: Mon Nov 04, 2013 9:49 pm
- My E21(s): E12 520-6
- Location: nederland , Weert
Re: Pastelblau 520/6
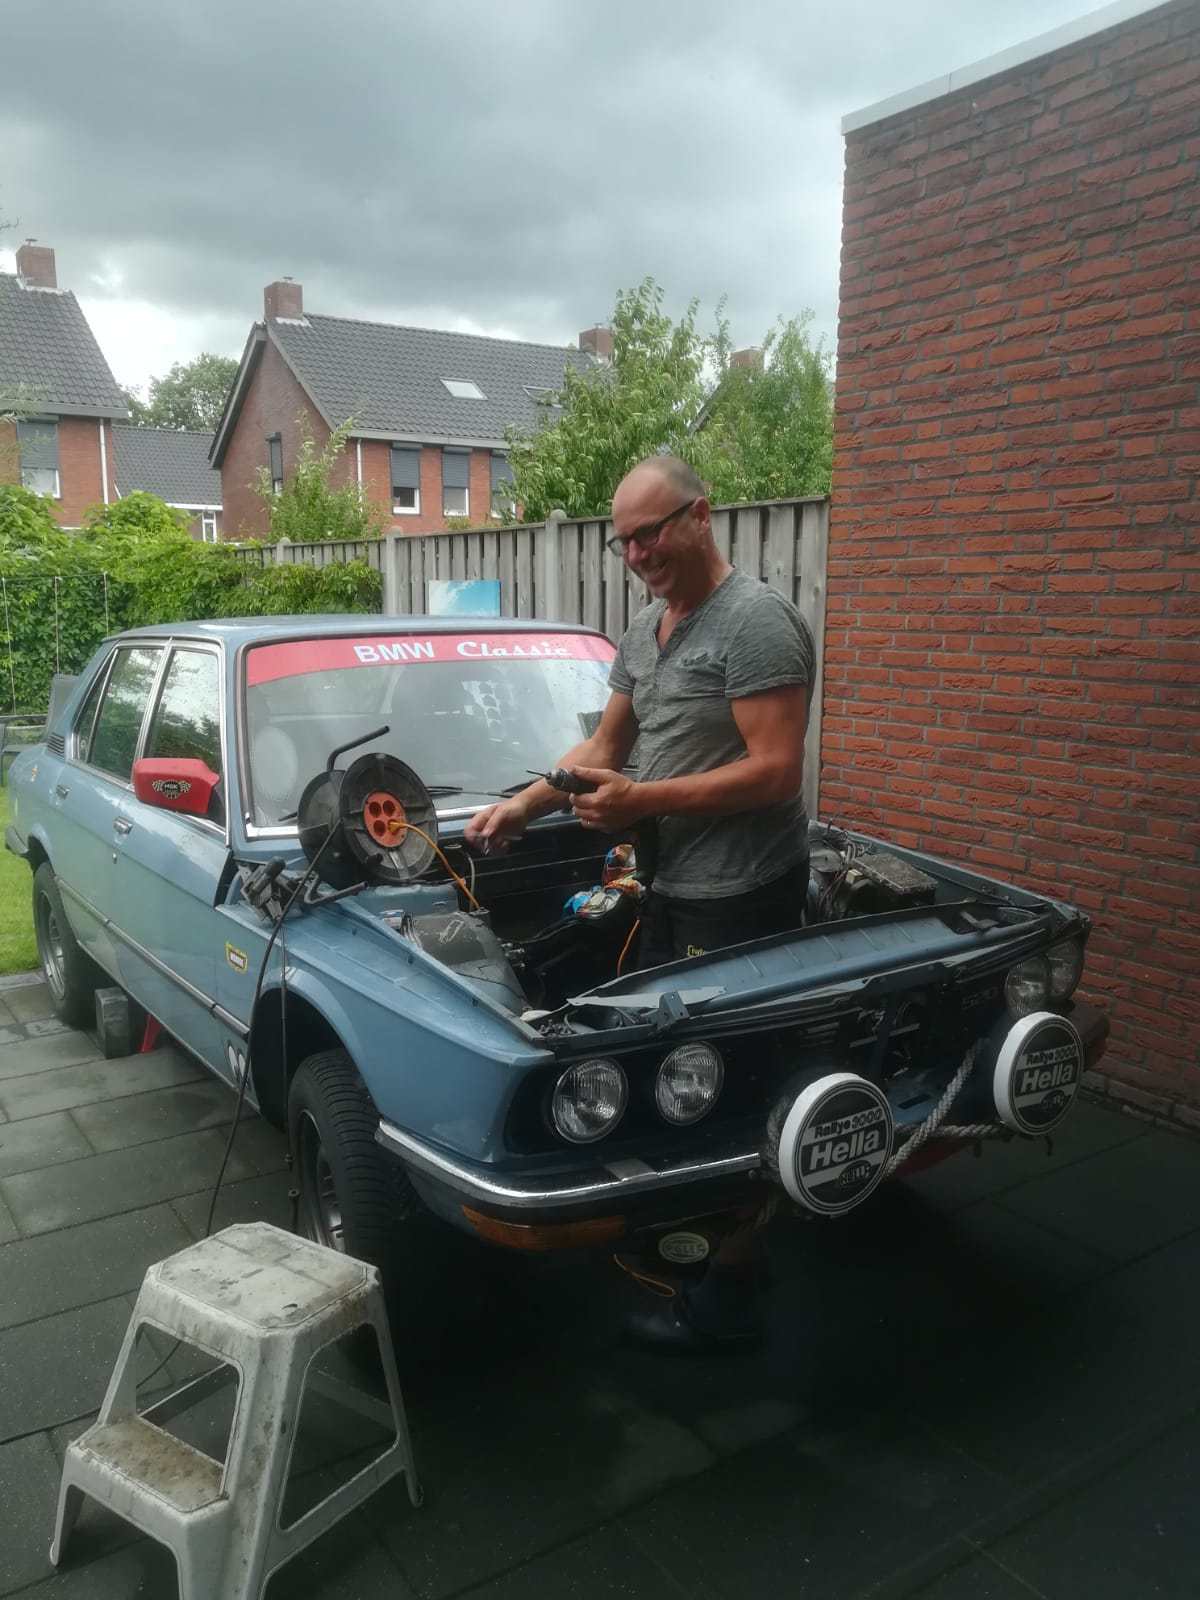
And then it was time to start the engine for the first time, i filmed the event, but ofcourse something went wrong.
In the beginning of the video the startermotor didn't work, i made a wrong wire connection, the startermotor has two spade connectors, one for starting and a second for shorting the bobine resistors, which i don't have.
After fixing this at 2 minutes the engine starts without hassle and i'm a very happy guy, enjoy:

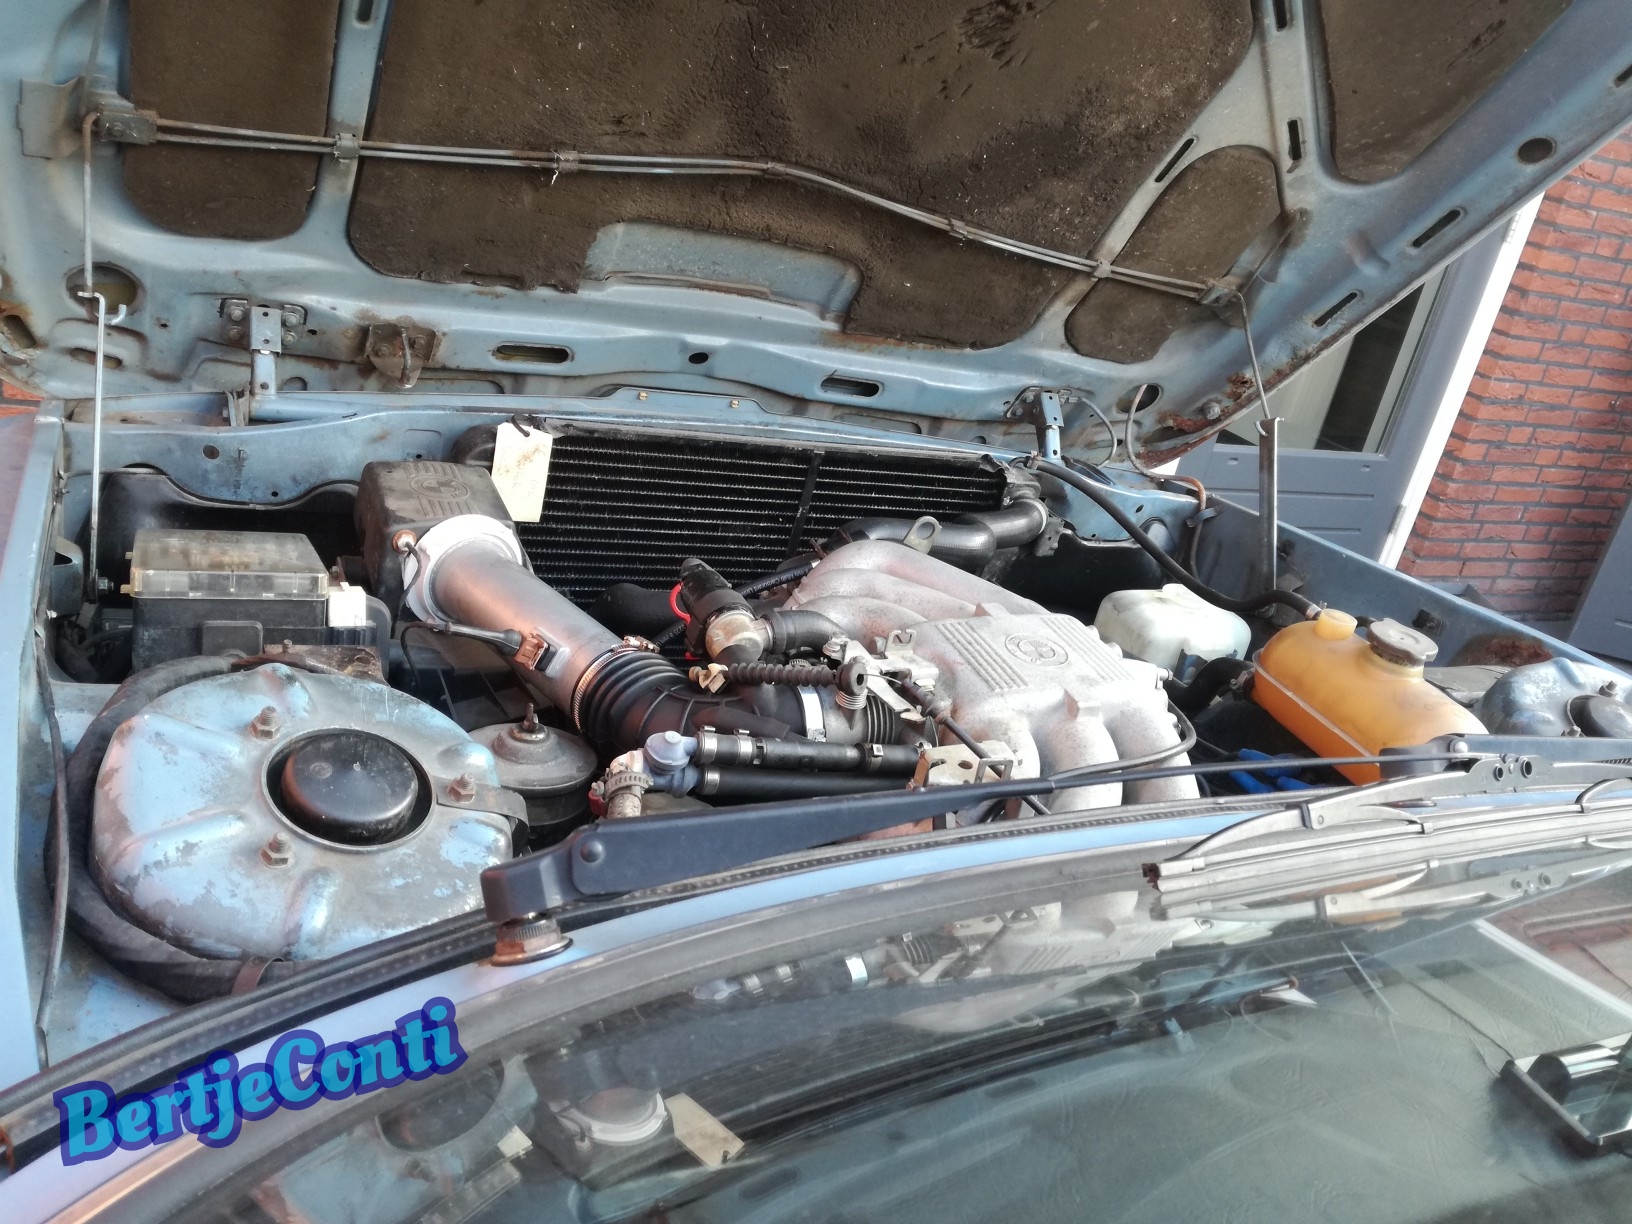
Next day after filling the cooling system and fixing a minor coolant leak (bad clamp) i started the engine again and did a walk around,
ticking noise are the injector valves:
When the engine is fully warmed up the oil pressure is 1.5~2 Bar when idling, which is excelent.
I did a short drive, clutch works very light compared to before, engine runs like a dream. can't wait to push it a little more, but first the engine needs a running in period of 500kms, after that i'll change the oil (and filter) for Mobil 5W50.
In the beginning of the video the startermotor didn't work, i made a wrong wire connection, the startermotor has two spade connectors, one for starting and a second for shorting the bobine resistors, which i don't have.
After fixing this at 2 minutes the engine starts without hassle and i'm a very happy guy, enjoy:
Next day after filling the cooling system and fixing a minor coolant leak (bad clamp) i started the engine again and did a walk around,
ticking noise are the injector valves:
When the engine is fully warmed up the oil pressure is 1.5~2 Bar when idling, which is excelent.
I did a short drive, clutch works very light compared to before, engine runs like a dream. can't wait to push it a little more, but first the engine needs a running in period of 500kms, after that i'll change the oil (and filter) for Mobil 5W50.
Last edited by BertjeConti on Mon Nov 21, 2022 10:25 pm, edited 2 times in total.
Megasquirted '77 E12 520-6
Aspen Silver '96 E39 523i
-
BertjeConti
- E21 Mad
- Posts: 3012
- Joined: Mon Nov 04, 2013 9:49 pm
- My E21(s): E12 520-6
- Location: nederland , Weert
Re: Pastelblau 520/6
Did the overhauled engine bring something?
Oh, yes.....the engine revves very happy, the old engine didn't like revving above 5000 RPM, you can feel it, this one does, it pulls right up till the limiter kicks in.
After running in time i changed the oil for Mobil 5W50, and did some acceleration test, to see if this engine has some more horses as the old one.
Best accelleration run from 0 to 100kmh i accomplished was 9.7 seconds, compared to the old one which was exactly 11 seconds, keep in mind this is a fully stock (except Megasquirt) M20B20 engine, stock camshaft, stock exhaust.
I measured the acceleration with my tripmaster, which has a function for this purpose.

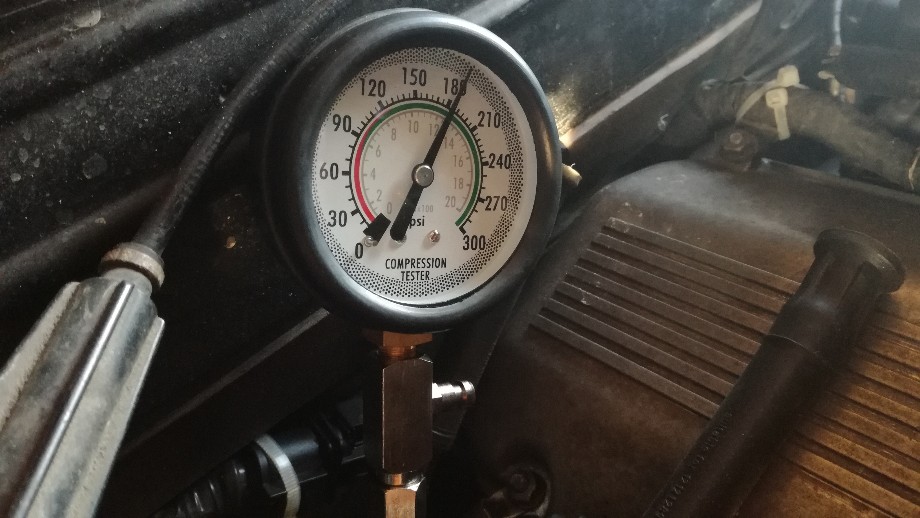
After 1500km i did a compression test, cold and dry, all cilinders gave exactly the same, 185PSI /12.5BAR which is good.
all spark plugs have the same color, also good:
And as a last test i did a max speed test on the "deutche autobahn", nice to do legal speeding. The car accelerates to 183km/h in 4th till the rev limiter kicks in, then its nice to have a 5th gear, acceleration continued up to 198km/hour
Oh, yes.....the engine revves very happy, the old engine didn't like revving above 5000 RPM, you can feel it, this one does, it pulls right up till the limiter kicks in.
After running in time i changed the oil for Mobil 5W50, and did some acceleration test, to see if this engine has some more horses as the old one.
Best accelleration run from 0 to 100kmh i accomplished was 9.7 seconds, compared to the old one which was exactly 11 seconds, keep in mind this is a fully stock (except Megasquirt) M20B20 engine, stock camshaft, stock exhaust.
I measured the acceleration with my tripmaster, which has a function for this purpose.
After 1500km i did a compression test, cold and dry, all cilinders gave exactly the same, 185PSI /12.5BAR which is good.
all spark plugs have the same color, also good:
And as a last test i did a max speed test on the "deutche autobahn", nice to do legal speeding. The car accelerates to 183km/h in 4th till the rev limiter kicks in, then its nice to have a 5th gear, acceleration continued up to 198km/hour
Last edited by BertjeConti on Tue Nov 22, 2022 7:39 pm, edited 2 times in total.
Megasquirted '77 E12 520-6
Aspen Silver '96 E39 523i
-
uwbuurman
- E21 VIP
- Posts: 18664
- Joined: Fri Jun 12, 2009 4:49 pm
- My E21(s): 1978 type 1 323i 5speed dogleg Polaris
- Location: Ljouwert
Re: Pastelblau 520/6
And with a lump that started as an 2.0 liter carb engine in a rather heavy e12, that is very impressive!! Well dine, great job.